How to Refinish a Table {without sanding or stripping}
Last Updated on August 10, 2021
Learn how to refinish a table without sanding or stripping. It is so easy and the results are stunning. It'll save you money in the long run too!

This post is sponsored by Mohawk. All opinions are 100% my own based on my experience using these AMAZING products. This post contains some affiliate links for your convenience. Click here to read my full disclosure policy.
How to Refinish a Table (Without Sanding or Stripping)
Hello friends! Oh boy, I am EXCITED about sharing this project with you! I am about to teach you how to refinish a table without sanding or stripping. You're welcome :)
We purchased our dining room table off of Craig's List almost 5 years ago. It's a high quality, Pottery Barn table. We scored the table AND the 6 chairs for only $400. The table was already in pretty worn when we purchased it and we figured we would refinish it, eventually. Well, after years of imposing our own wear and tear on the table, we FINALLY got around to it because we found some amazing Mohawk products that allowed us to do it without stripping and very, very limited sanding (only to sand off the tiny spots of fingernail polish I had gotten on the table–#oops). YAY! The project took me about 3 hours, start to finish. If I had known it was going to be that easy, I would have done it a long time ago.
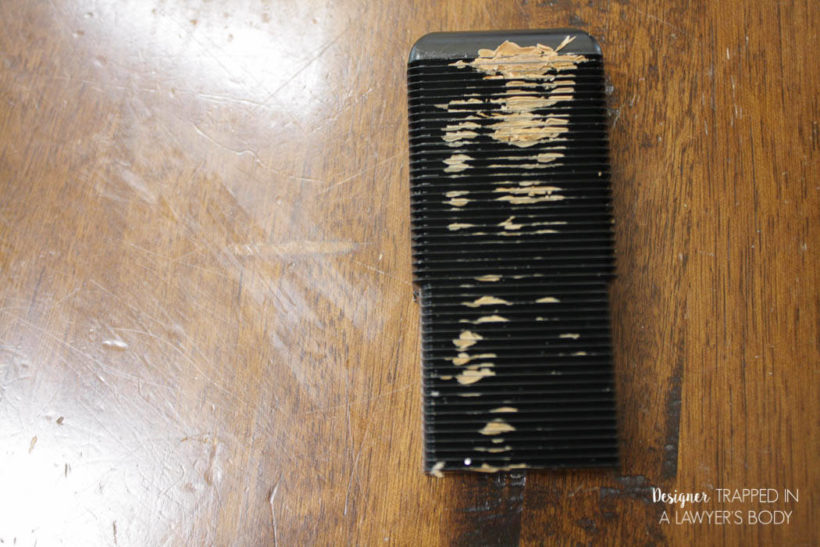
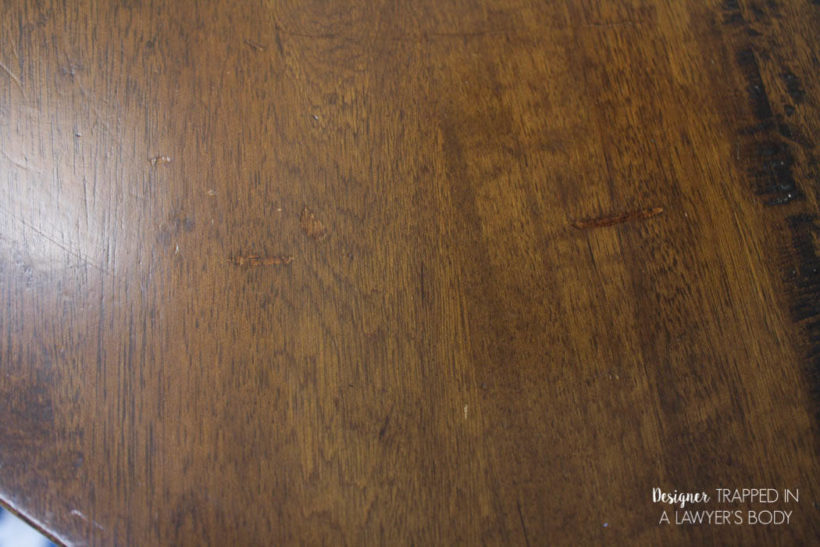
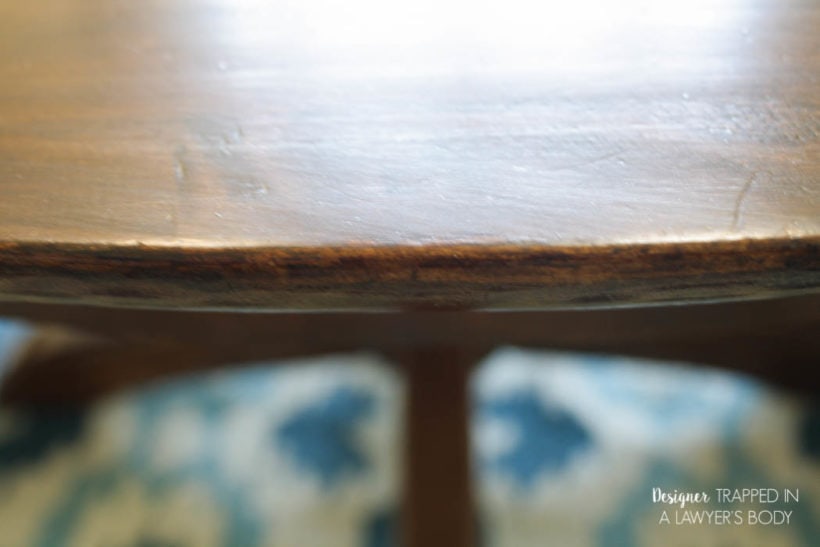
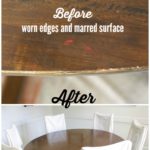
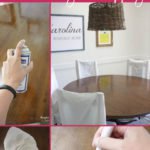
First, let me show you how our table looked before I refinished it.
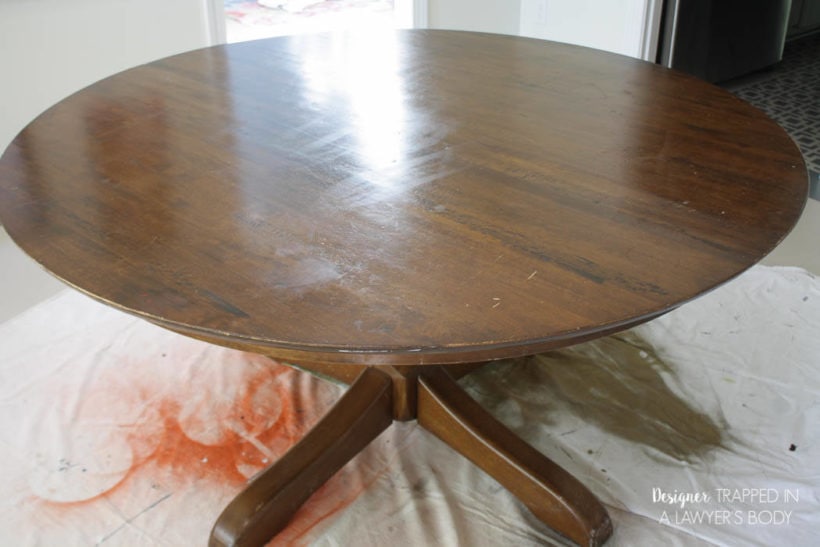
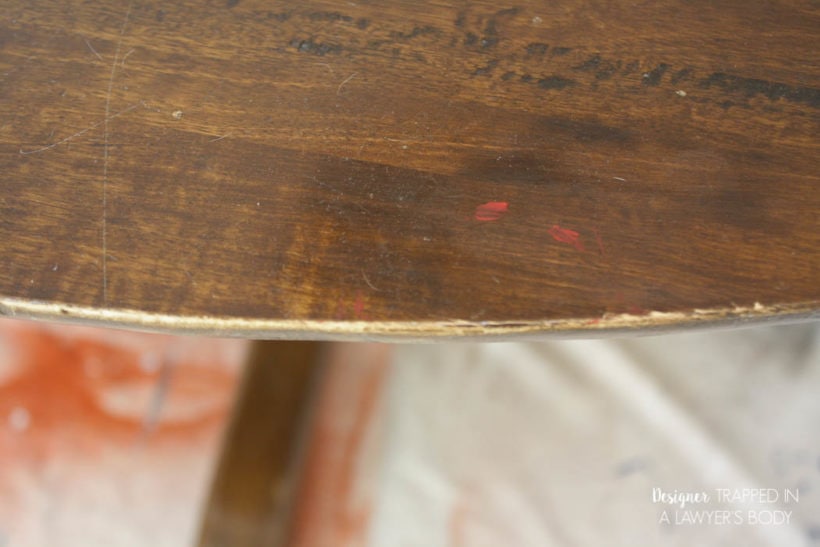
The edges were beyond “worn,” the wax finish was splotchy and the surfaces were just plain beat up!
Materials Needed
I was super lucky to get to try out these professional Mohawk products (it's a perk of being a blogger)! But, the good news is that Mohawk is launching a consumer line of all the products I used. You can shop all of the consumer products Mohawk offers here.
- Ultra touch-up marker
- Wax Wash Remover
- Wiping Wood Stain
- Quick fill burn in stick – This tool melts the burn in stick, as you will see later in the post–you can now buy this Permafill set which makes it even easier to use)
- Satin polyurethane
- Paper towels
- Latex gloves
Steps to Refinish a Table
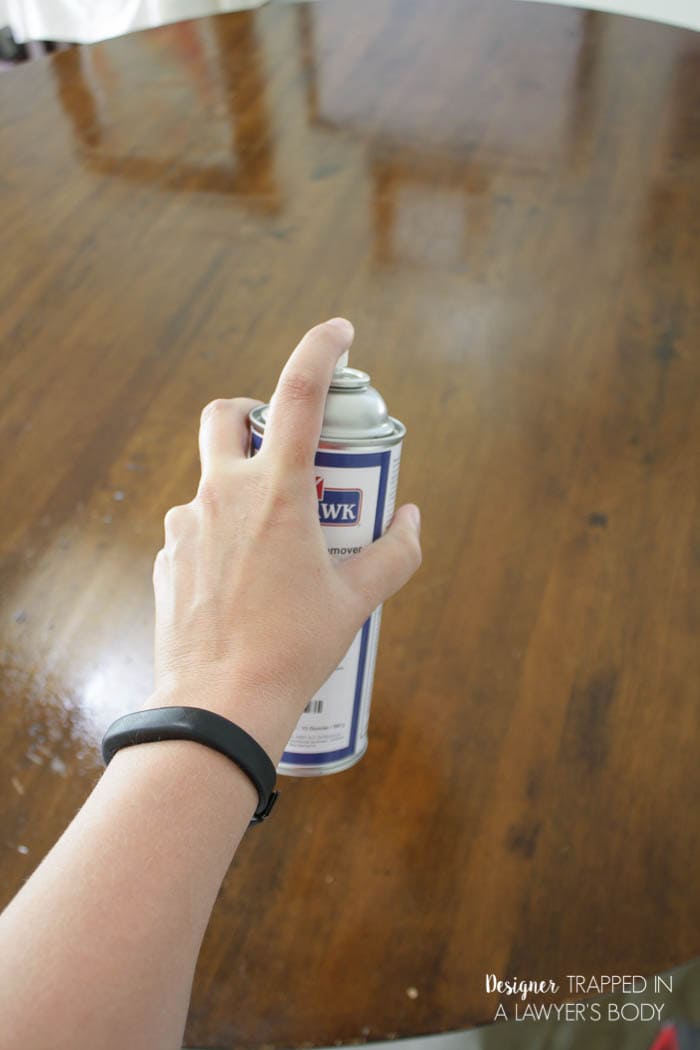
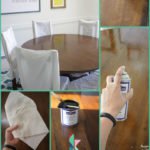
1) Our table had an existing wax finish, so we had to remove it first by using Mohawk's Wax Wash Remover. I simply sprayed it on and wiped it off. It took about 4 minutes to clean the entire table. Easy, peasy! The spray does let off some fumes, so open some windows if you are working inside like I was.
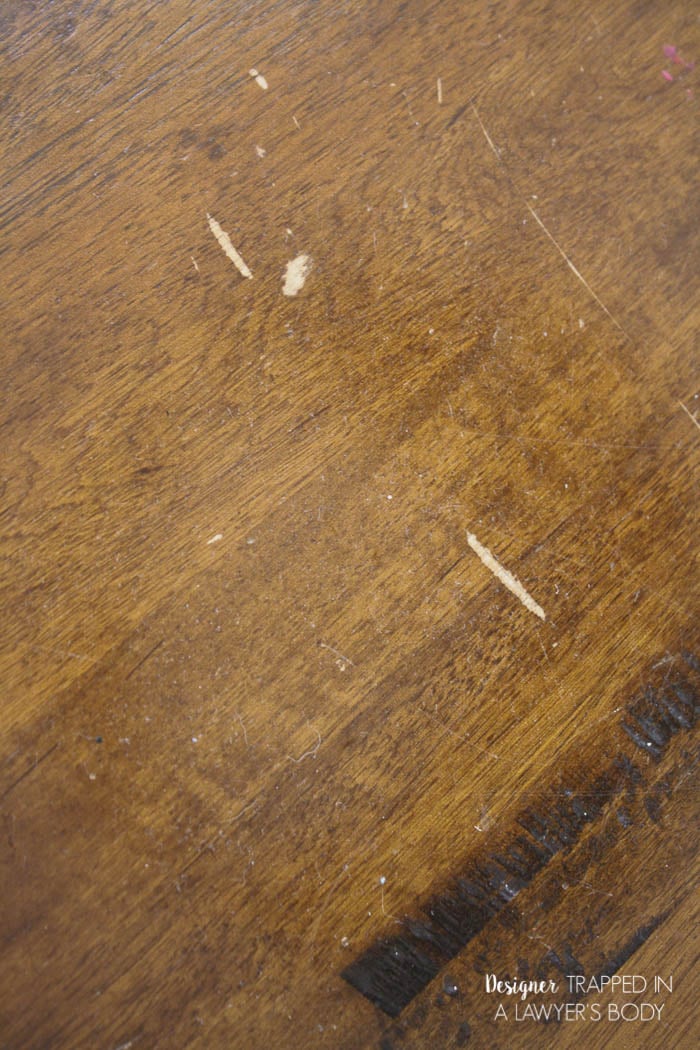
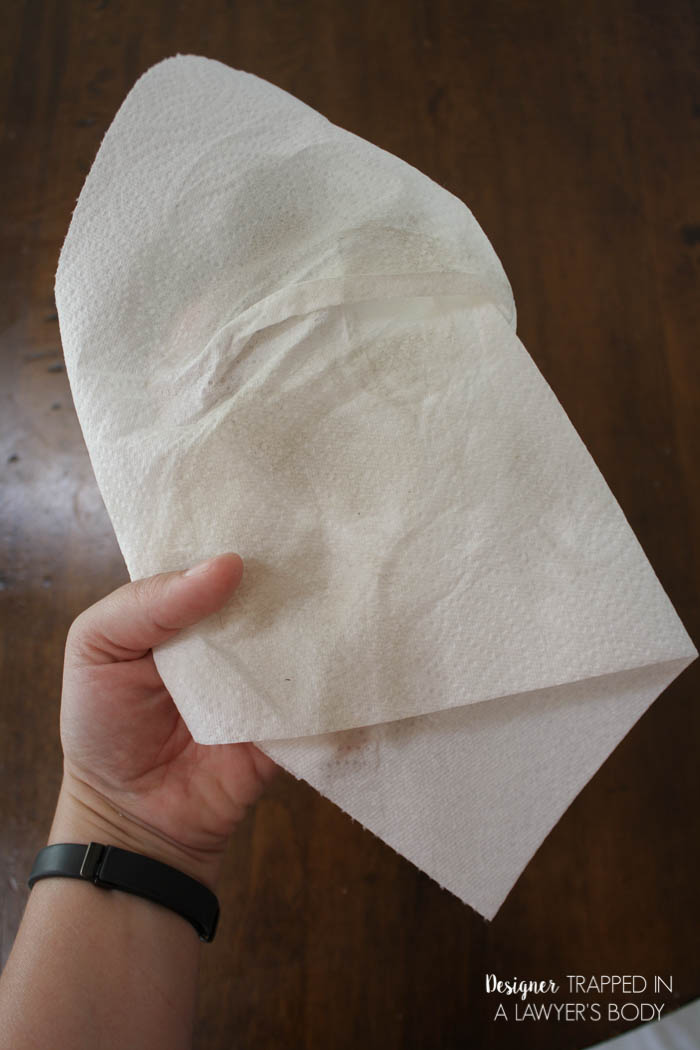
Apparently we are filthy animals because check out what I cleaned off our table. #donotjudgemeplease
2) Next, I spot sanded the tiny splotches of fingernail polish off the table. Let me be clear that you ABSOLUTELY DO NOT NEED TO SAND unless you are like me and have little bits of paint on your table. Most people probably protect their table better than I do :)
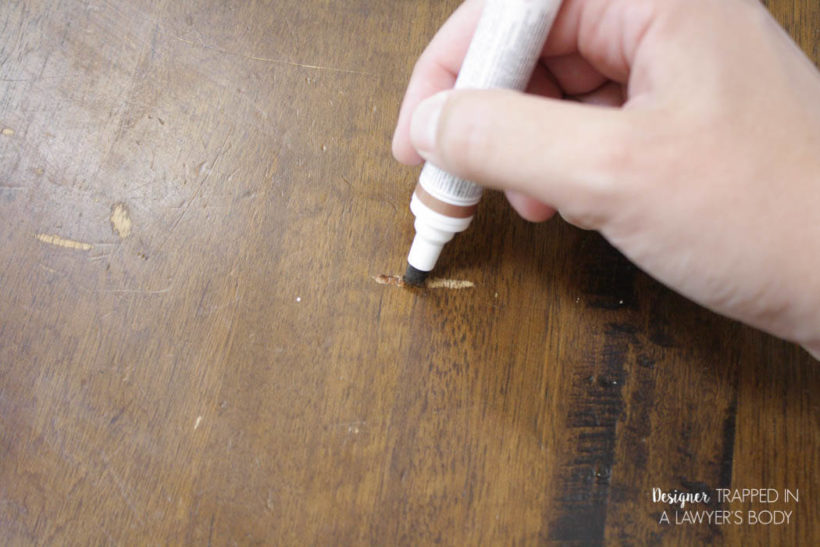
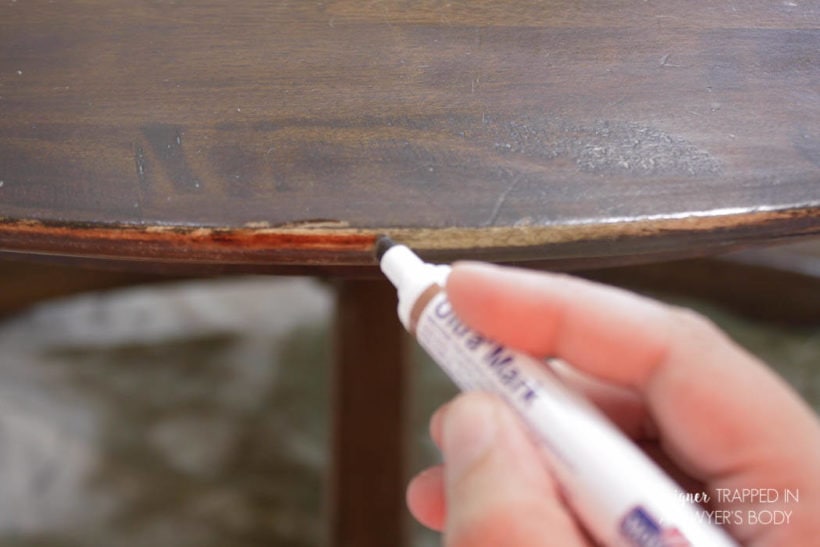
3) Then I touched up the scratches and worn edges with the Mohawk Ultra Touch-Up Marker. This part is easy! If you can color with a marker, you can do this!
4) The next step was my FAVORITE! I used the Mohawk Quick fill burn in stick to fill the deep gouges in the table. UPDATE: Mohawk released this Permafill set, which makes this process even easier.
Be sure that you have already completed step 3–you want your gouge to be as close to the color of your table as possible before you use the Quick fill burn in stick. Here is a link to an instruction video tutorial. Let me tell you, I think it's even easier than the video makes it look. You just use your wood-burning tool to heat up the burn in stick, so that little melted drops drip off. Then use the tip of your hot tool to make sure the melted liquid is in the gouge, making sure to tap it with your tool to get rid of any air bubbles. Allow it to dry for at least 30 seconds. Do not worry about any extra drips on your table–they will come right off!
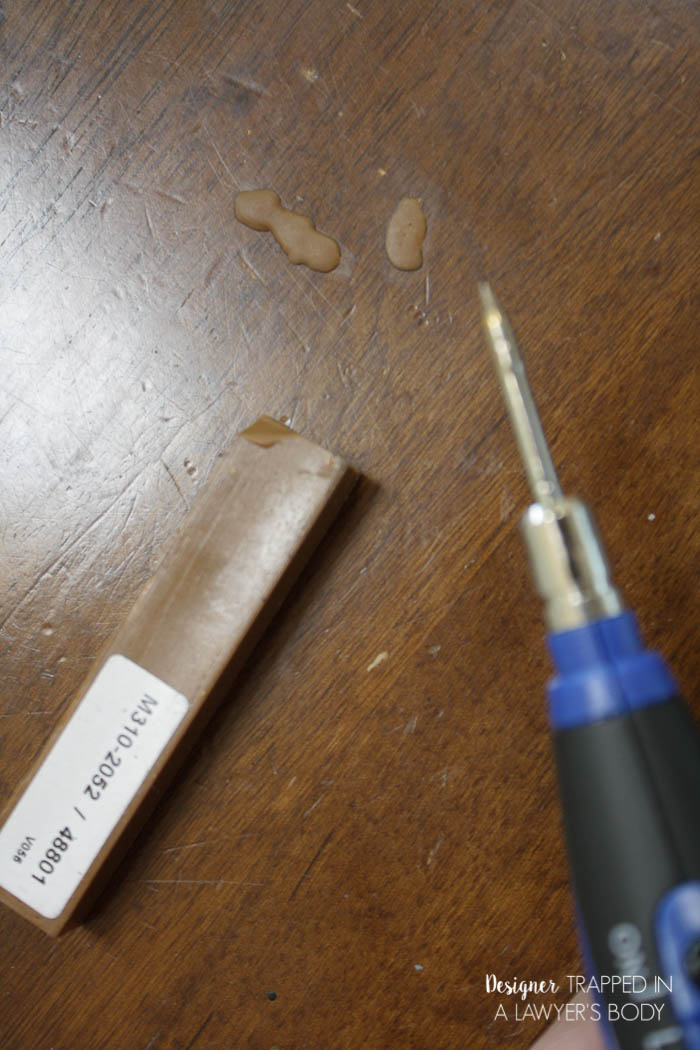
Next, use the plastic leveling tool that comes with the stick to remove the excess fill. You simply place the side with the horizontal ridges on top of the fill and gently rub it back and forth until the filled gouge is completely level with the surface of your table.
5) I used the Wax Wash Remover to clean the table one more time before I moved on to staining.
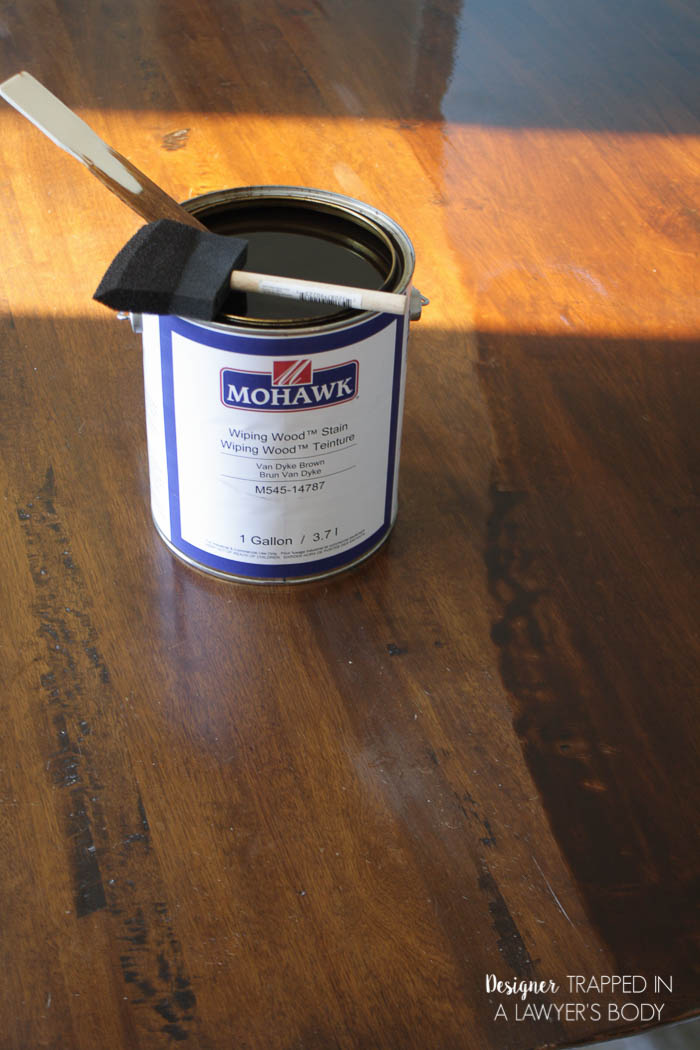
6) Finally, it was time to stain! Y'all, this Mohawk Wiping Wood Stain is AH-MAZING. It's very, very thin, so take care when working with it, because it does splatter easily. I painted mine on with a foam brush and wiped it off almost immediately with paper towels. I applied one coat. This stain also lets off a lot of fumes, so again, be sure to work in a well-ventilated area!
7) Finally, I applied 2 coats of a tung oil finish, which was too glossy for my taste, so I followed it with two coats of satin, wipe-on polyurethane.
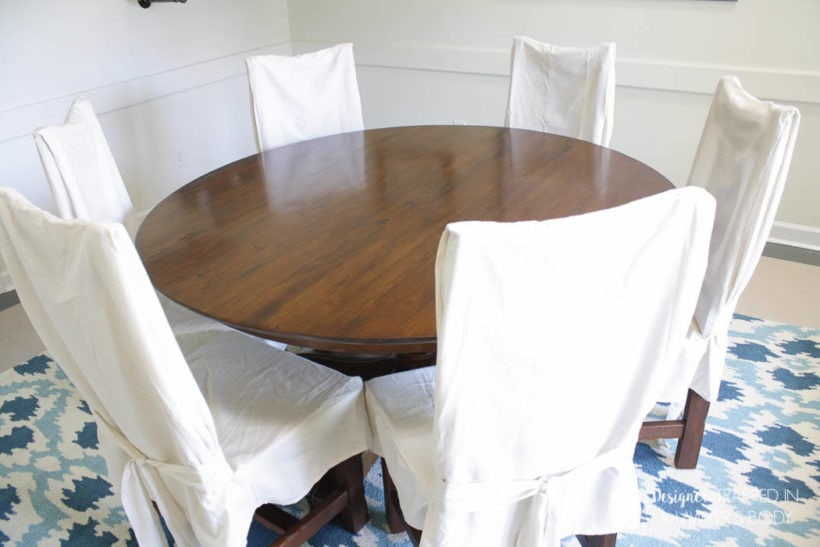
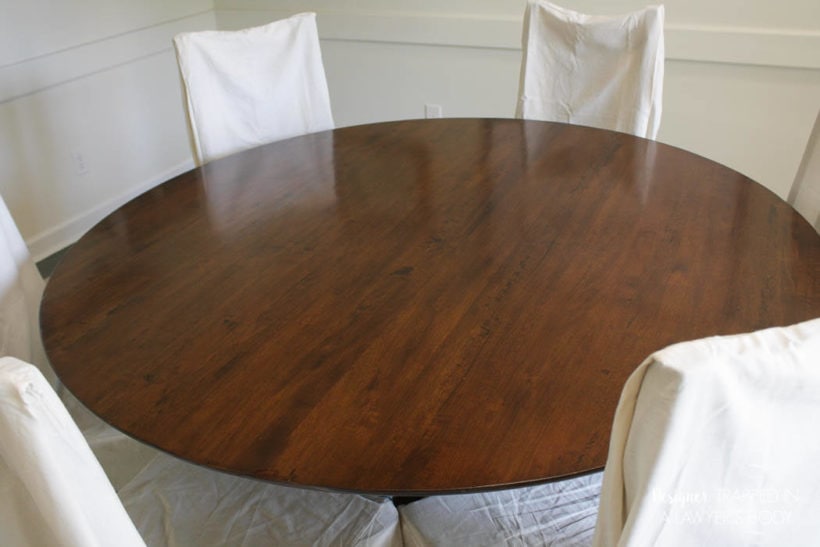
Ready to see the results?! I am SO THRILLED with how it turned out!
Check out how great those old gouges look now! You can barely see them.
The worn edges are gone!
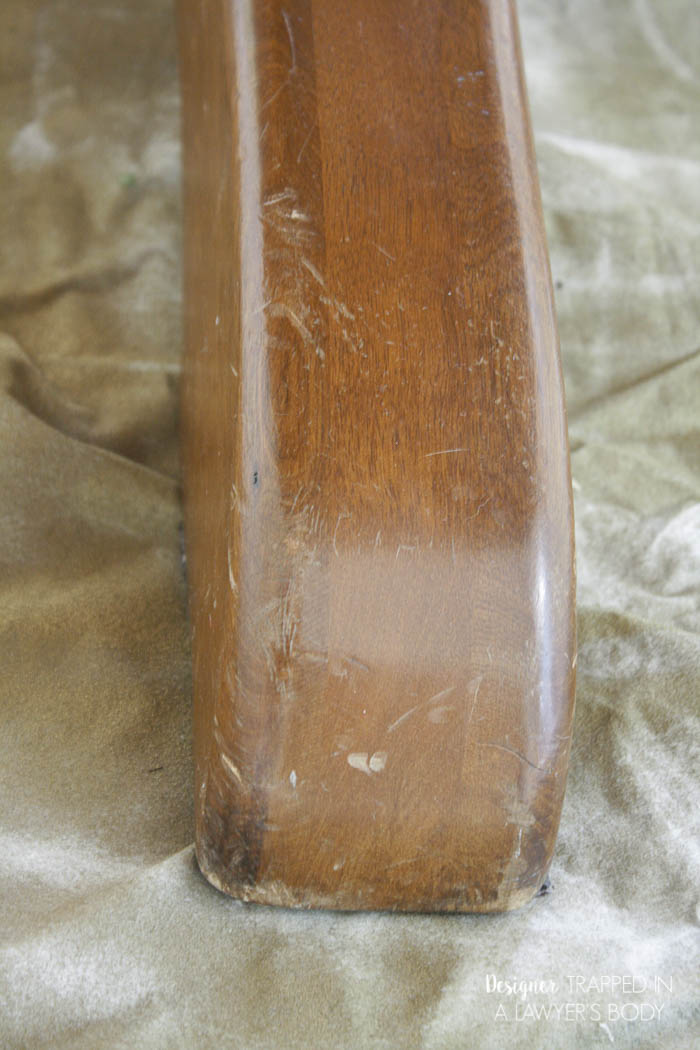
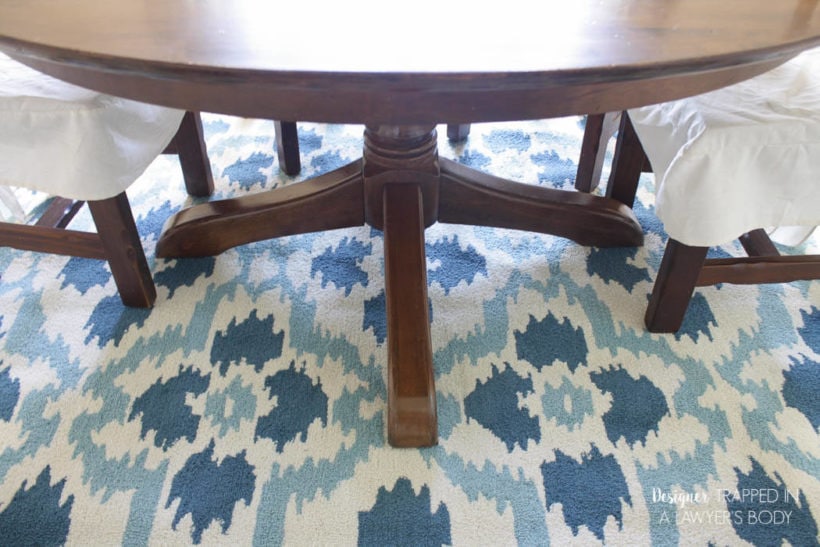
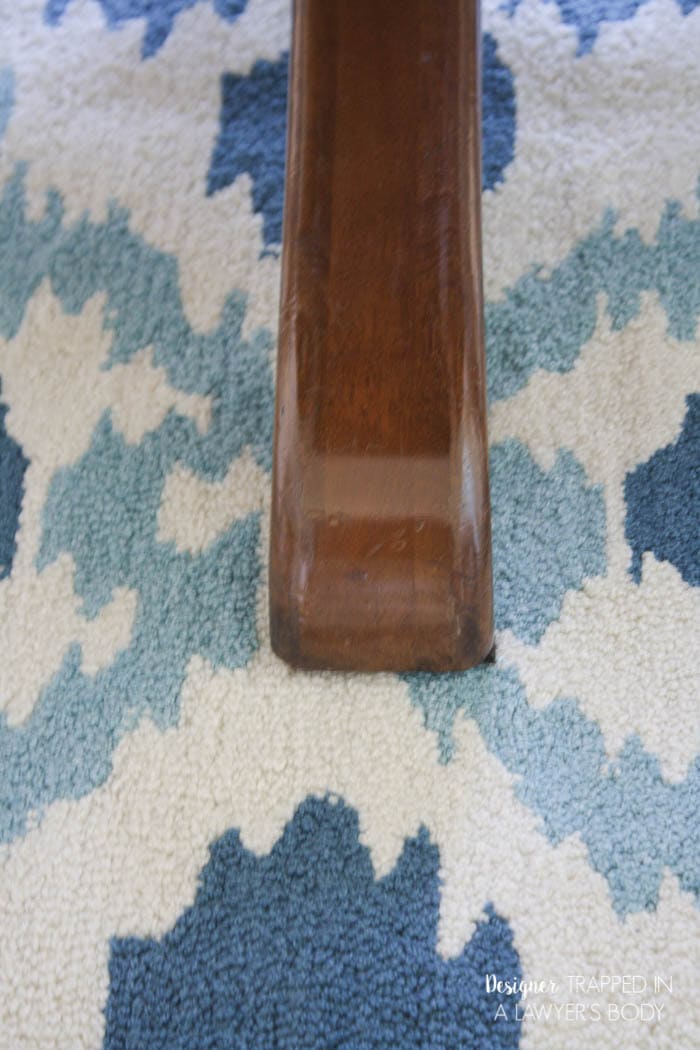
And I cannot get over how amazing the pedestal base looks now. I thought it was beyond repair!
Want to see the full dining reveal? Click here to see all the details! But here's a sneak peek for now :)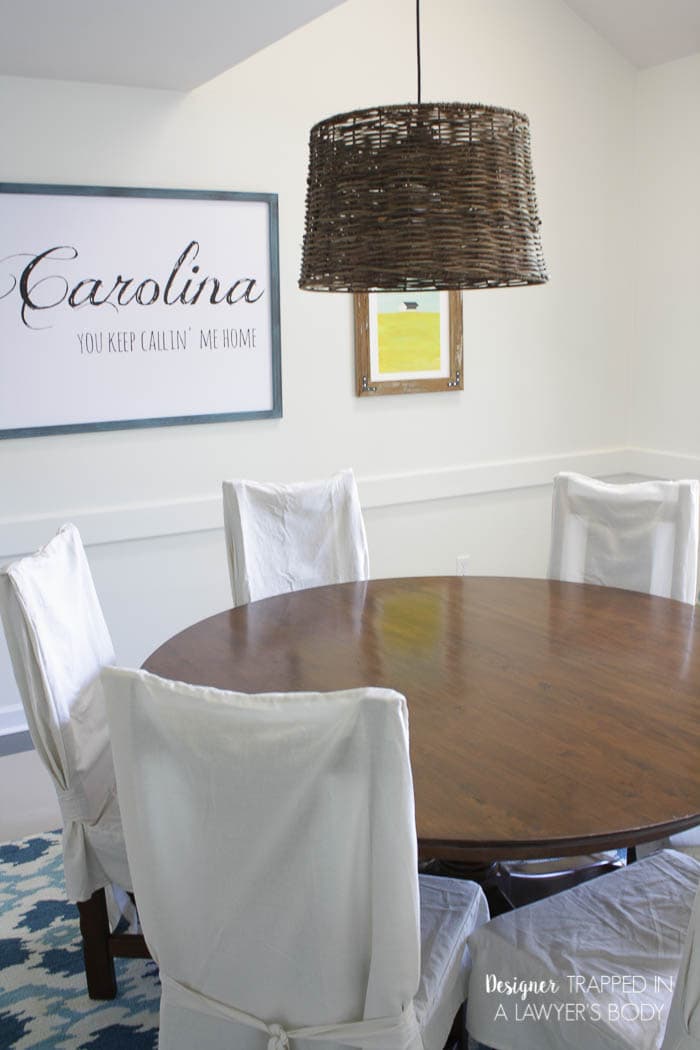
And one last look at the beautifully refreshed table!
What do you think? Are you a little less intimated about refinishing a piece of furniture now? I hope so! Want to learn more about DIY furniture treatments? We rejuvenated two beautiful chairs with crazy simple this tutorial. I have also painted lots of furniture to give it a completely new look! Check out these awesome tutorials: How to Paint Furniture With Chalk Decorative Paint: A Step-by-Step Guide and DIY Furniture Restoration Tutorial.
Before you head out and get started, be sure to check out all the free guides, info, printable, and more that my VIPs get! Subscribe today and get access to all of them in one convenient digital library.


[mv_create key=”1″ type=”list” title=”Most Popular Projects” thumbnail=”<a href=”]


Awesome tutorial! I ordered some Mohawk products recently and I’m anxious to try them. I’m especially excited to try the burn sticks.
Oh I hope you love them! They can really work miracles when it comes to repairing wood!
I posted the question about the light and furniture…I just wanted to say that I found you through pinterest and 2 hours later I am still “looking around” on your blog! Love it! It’s 2:00 am and I am ready to start some projects!
Where did you find your hanging light over the dining room table and where did you find your living room/family room furniture?
Hi Leesa! Welcome and glad you are spending time perusing the blog ;)! The light is one of DIY’d. Check out the tutorial here: https://designertrapped.com/easiest-diy-light-ever/ The furniture in our den is from IKEA. Thanks for reading!
Should this work on any wood no matter what it has previously been treated with? I cleaned with the wax washer, but when I applied the stain it literally all wiped off without staining the wood at all.
This is not meant to restain it, it is meant to fill in any imperfections. It only makes the color richer.
Hi Tasha,
Loved the way you have stained the table. I didn’t know that the wax can come off so easily from wood. Mohawk does seem to do great work. And it is definitely looking great without you sanding it before staining:)
Awesome! Thanks for reading!
Great article. My wife and I will be doing this ASAP! Couple of questions…It does not look like the products are available yet via Amazon. Do you have to get them direct from Mohawk? Also, did you use a specific satin polyurethane, or will any one do the trick? Let me know when you can. Thanks much!
I just received my items and started washing my grandmas table that is over 100 yrs. old. I purchased all my stuff online except for the polyurethane at this website. Very fast delivery!
http://www.shopwoodrepairproducts.com/mohawkcleanersandsurfaceprep.aspx
Hi! Your project popped up in my Pinterest feed with the best timing ever. This is my next home project. Just curious, how big is your table?
It seats six. Good luck and thanks for reading!
I have an old Ethan Allen wooden sofa and chairs. I have just about decided to paint them, mostly because the finish is so worn and dull and there no way I can strip/sand it all. The arms are badly worn, almost no color at all, like your table edges. My question is, do I need to exactly match this product line to the current shade or can I go a shade or two darker? Ideally, if I am going to keep the wood, I’d like it closer to the floor color, which is dark walnut. I’m not looking for an exact match, but just a little closer. It’s currently more medium. If o used these products in a darker shade, would they still cover and work well?
How to purchase burn in tool scraper and basic color’s. Is there a kit?
Hi Beverly! The kit isn’t available on Amazon yet, but you can call 1-800-545-0047 ext 6915 to purchase it directly for now. Otherwise, it should be for sale on Amazon this month sometime!
I love the way your table turned out. It is perfection.
Just purchased a round table and 4 chairs for $40! The table is not solid wood. Sooo…by chance do you think these products would work on my table?
Thank you Joyce! Unfortunately, I don’t think these products will penetrate non-wood items.
I can relate to having some quality furniture that’s beat up like this. We have a bookcase that is worn around the sides. It never occurred to me that a marker, even a specialized one, would be able to fix our scratches. This does seem faster than sanding and stuff. I just want to have my bookcase look nice again, whether I have to do it myself to take it to a professional.
We have a table with heat stains…someone forgot to put a placemat down with some hot soup! Do you think Mohawk has a product for this? I love our 2nd hand pottery barn table, but I have to cover it because it looks so bad!
Oh no, Christine! I am not aware of any Mohawk Consumer Products to remove heat stains. Sorry!
I left a comment a few weeks ago with a pretty straightforward question. So you post a tutorial, then when I asked if you removed the tung oil prior to applying the poly, and if you did, what did you use, and you not only chose not to answer my question, but you didn’t even post my comment, not even thinking that perhaps someone with some knowledge about refinishing furniture could possibly answer my question.
Goodness. I have honestly never received such a rude comment. I have a full-time job and am raising 4-year-old twins, so it sometimes takes me a while to respond to the hundreds of comments I receive a week. To answer your question, I did not remove the tung oil finish before applying the poly. If I had taken that step, the tutorial would have stated that.
You go girl! Love your blog. ??? It’s still so amazing to me what people will say on the internet that they would never say to your face. My golden rule, ‘If you don’t have anything nice to say…’
I was going to ask the same question about applying poly over tung oil. Hopefully I’ll get a response. :)
Hi Kim. I applied 2 coats of a tung oil finish and allowed it to cure per the manufacturers instructions. Then I followed it with two coats of satin, wipe-on polyurethane. I did not remove the tung oil finish before applying the poly. If I had, the tutorial would have included that information :)
Table looks great. One question, did you remove the Tung Oil prior to applying the wipe on poly? If so, what did you use to get it of? Guess that’s two questions. Love Mohawk products, I’ve been using them for years.
I just responded to your more recent comment.
Beautiful! Great job and I love that Carolina wall art!!
Thanks so much, Janie!
This looks GREAT. Pinned and I will try it….I have the perfect side table to attempt this on!
I totally need this! Our table has been through a lot! I have been dreading the pain staking process of sanding and refinishing it! I am definitely going to check out this stuff! Thanks
-Shonee
http://www.hawthorneandmain.com
Looks so good! Love the table, but also really love your lighting fixture and that Carolina sign! :)
Thank you so much, Tania!
Very, very nice and impressive! A beautiful result :) -Bev
Wow, the table looks amazing! I’m also loving that rug and DIY light fixture. Great job on the makeover and I can’t wait to see the full dining room reveal.