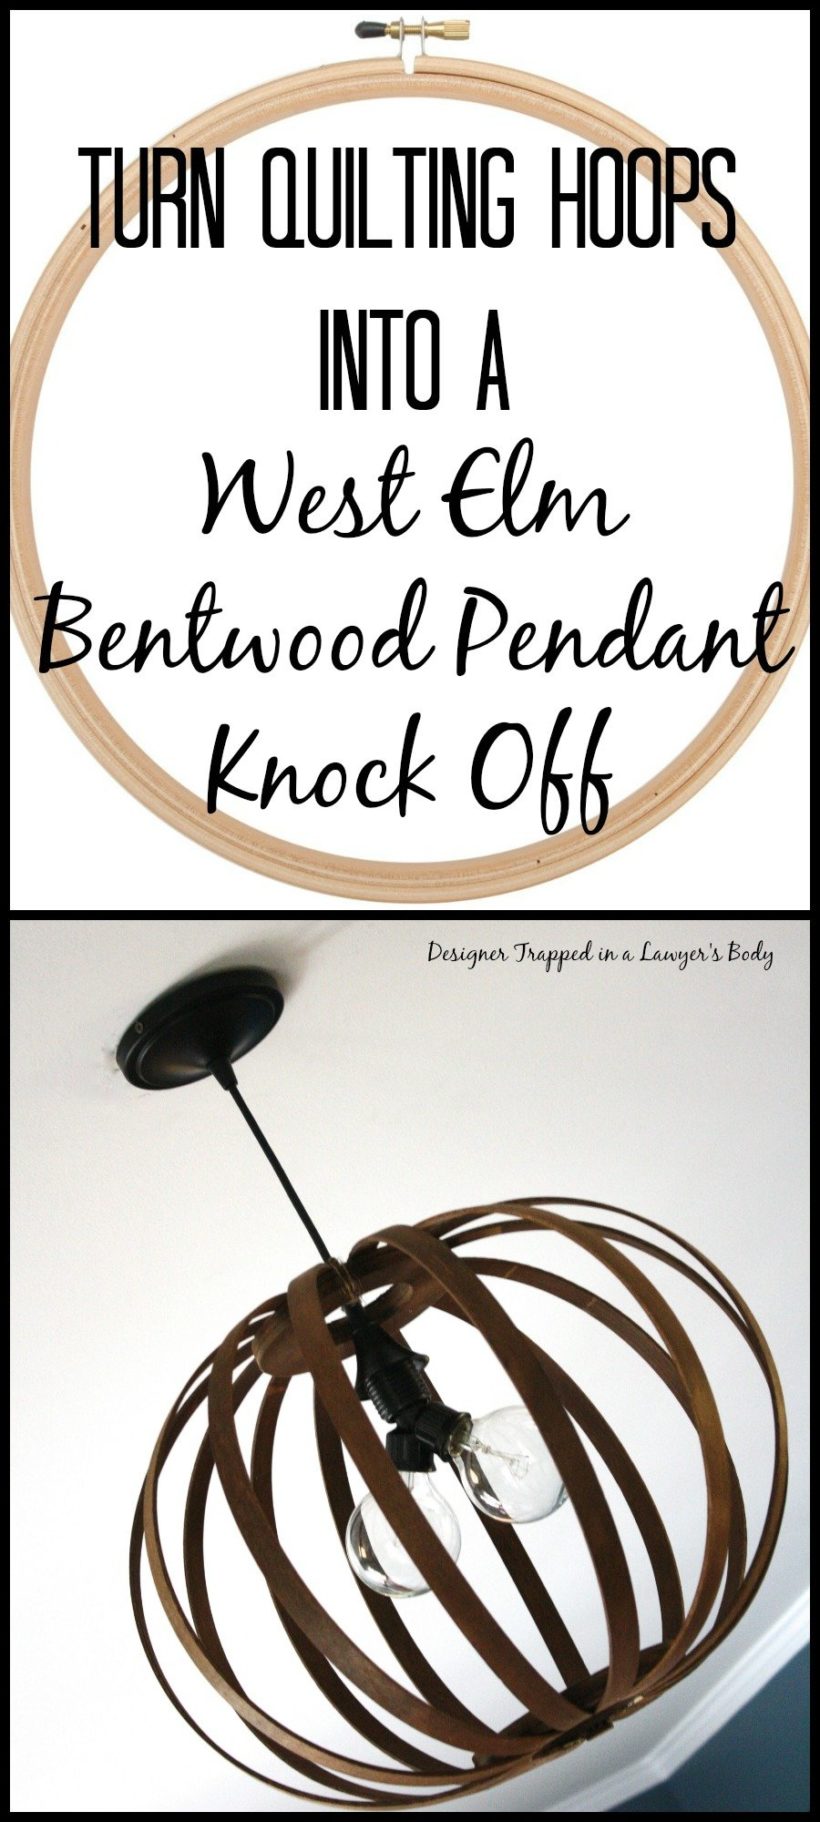
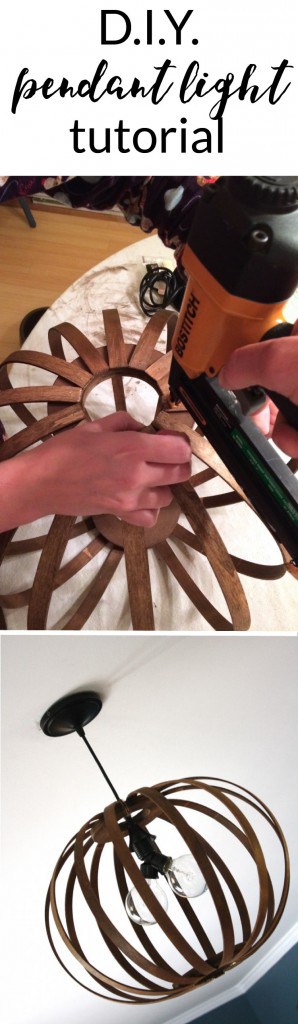
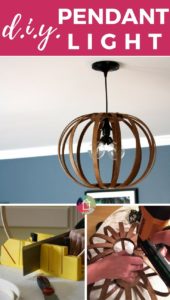
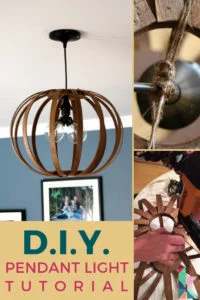
West Elm Knock Off ~ DIY Bentwood Pendant Tutorial
Learn how to make a DIY bentwood pendant for a fraction of the price of the designer inspiration version!
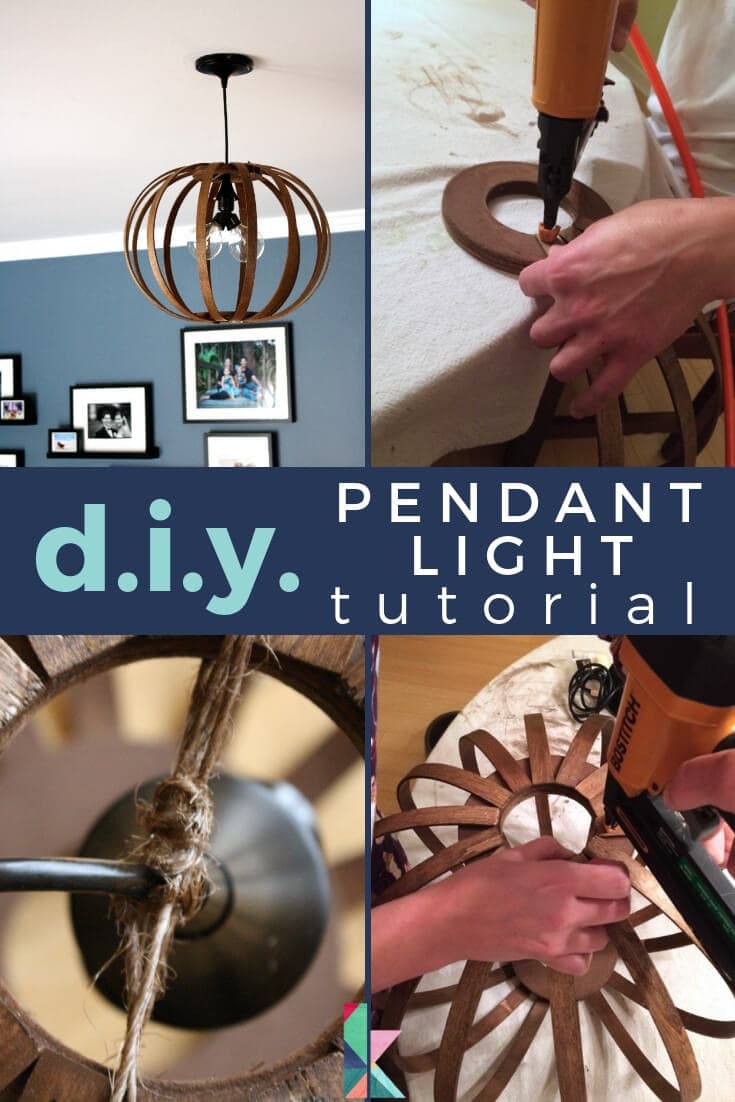
Hello there! I am so excited to show you how to make your very own West Elm knock off Bentwood Pendant today! I had been swooning over West Elm's Bentwood Pendant Lights for months, but I just could not bring myself to spend $189 on one for our family room. I had to figure out a way to make one for myself. After A LOT of head scratching, I finally figured it out and LOVE the results.
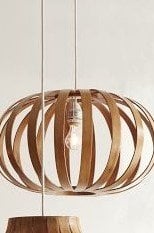
First, let's review what West Elm's version looks like. Beautiful right? But the $199 price tag did not work for my wallet. Now, read on to learn how to make your very West Elm knock off Bentwood Pendant. This post contains some affiliate links for your convenience. Click here to read my full disclosure policy.

Materials Needed to Make a West Elm Knock Off Bentwood Pendant:
- 1 pendant light kit. This is the exact kit that we used, in the oil-rubbed bronze finish.
- 4 wooden quilting hoops. These are the exact quilting hoops that I used: Darice Quilting Hoops, 14-Inch

- 1 Y light socket adapter (if you wish to use two bulbs, like we did). This is the exact adapter that we used.
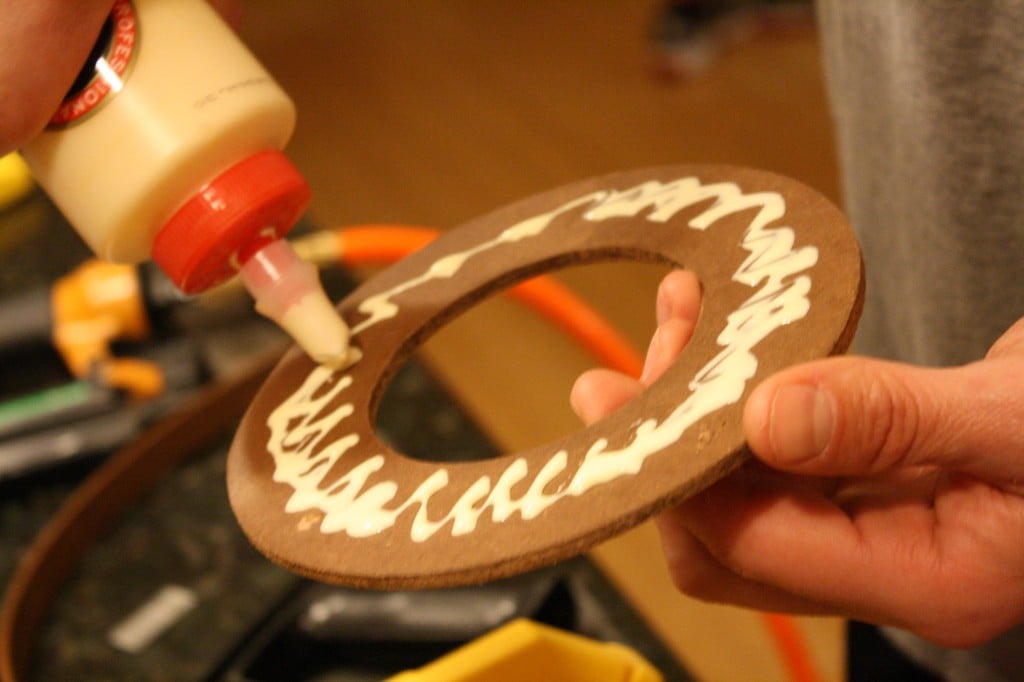
- 6 floral rings. These are the rings we used.
- Wood glue
- Twine
- Wood stain, in a color of your choice
- A hand saw
- A pneumatic nail gun with 5/8 inch nails {if you don't have a nail gun, you could use wood glue and a lot of patience!}

All of the materials are available at craft and/or home improvement stores, as well. We purchased most of our items in person and frankly, I spent less in person than I would have on Amazon because of coupons and in-store sales. But if you get busy like us and don't have time to shop for the materials in person, rest assured that Amazon sells almost everything you need for this project and it can be delivered right to your doorstep!
Steps:
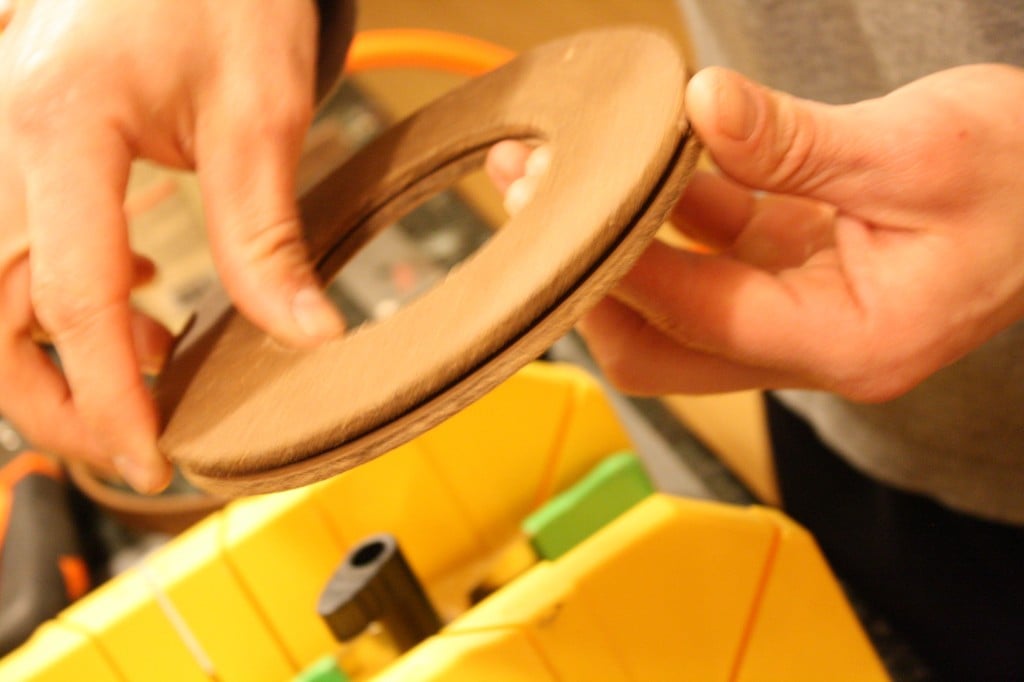
1) Glue your floral rings together, into two sets of 3. Once the glue is dry, stain them with your wood stain. Note that we chose a wood stain darker than that used on the West Elm version. That was our personal preference, but you could certainly choose a different stain to more closely mirror the West Elm version.

2) Remove the inner quilting hoops from the outer hoops. You will use both the inner and outer hoops, for a total of 8 hoops.
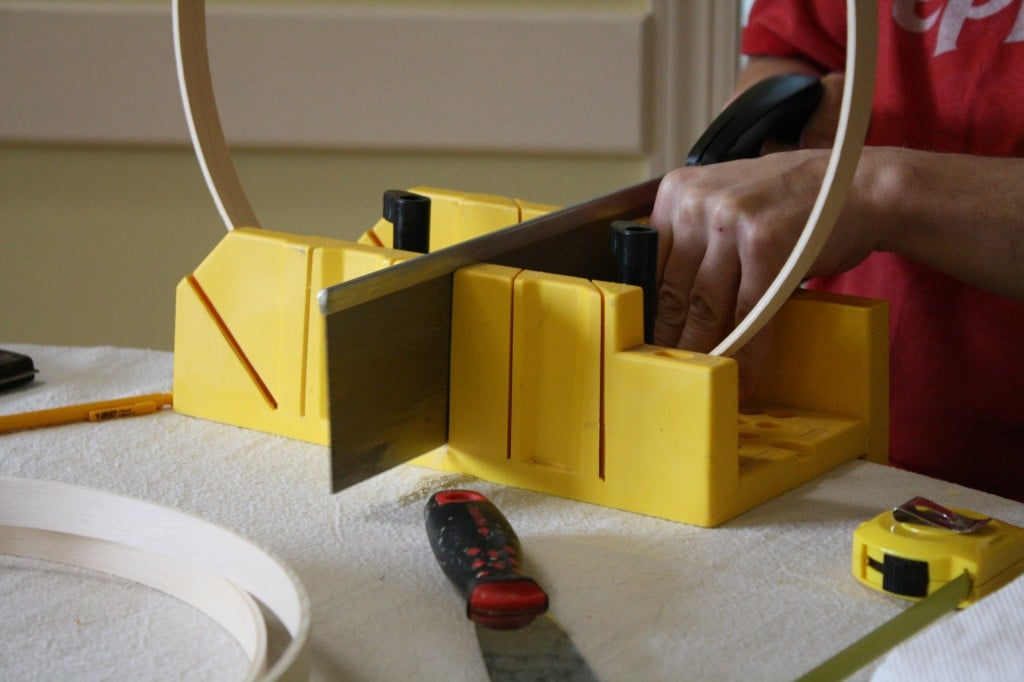
3) Cut each hoop in half with your hand saw. This will give you a total of 16 pieces.
4) Once they are cut in half, you will need to remove the wood blocks from the outer hoops. I used a butter knife to pry them off as gently as possible. If the wood gets damaged in the process, DON'T panic! Just be sure to position any damaged portions on the top of the light fixture so they won't be seen.
5) Once the hoops are cut, stain each piece.
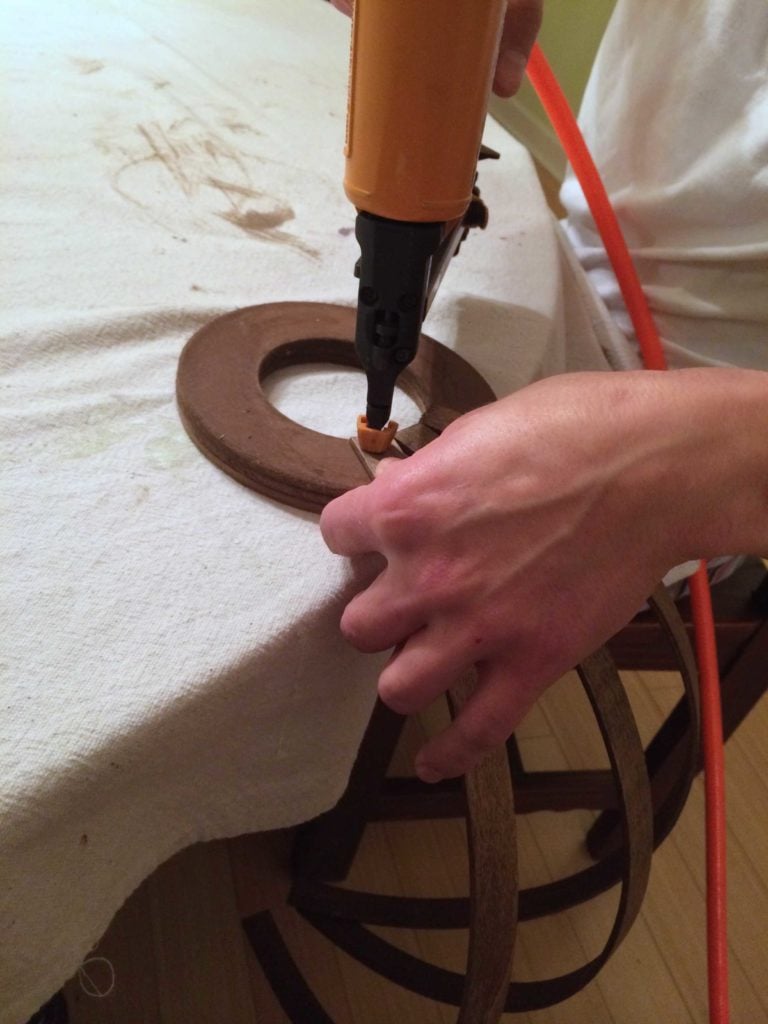
6) Next attach the wood pieces to the outside of the first set stacked floral rings, one at a time, using your nail gun. You may also apply glue if you want extra adhesion. Work your way all around the circle. We used a total of 14 pieces of wood.
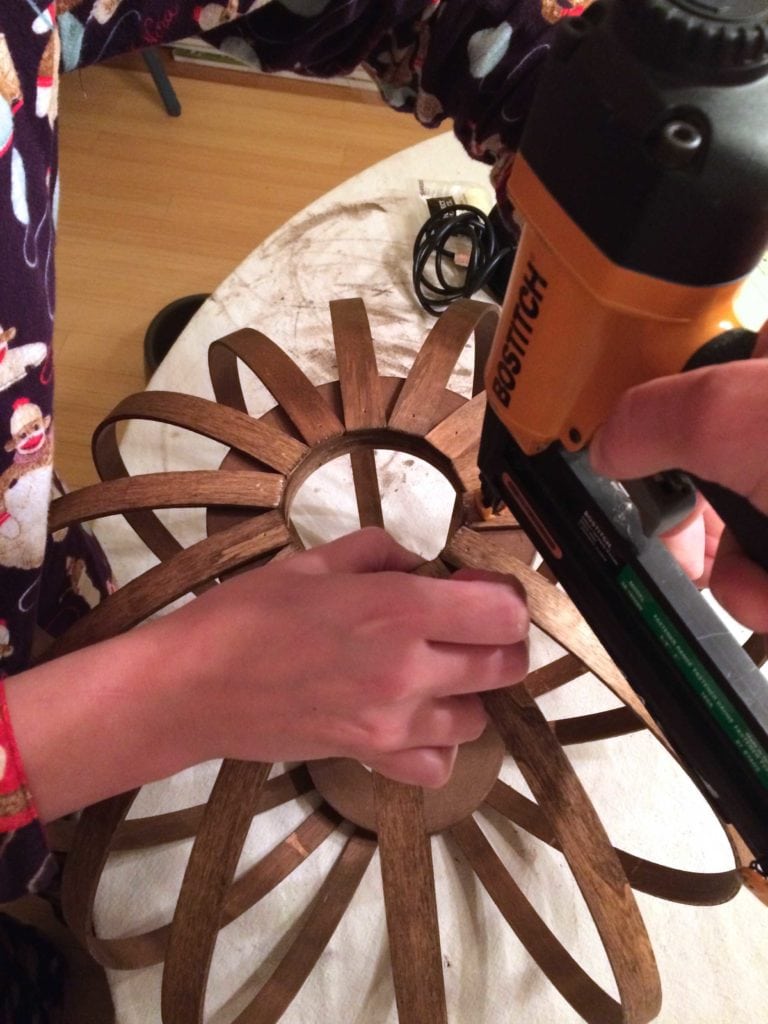
7) Next, attach the opposite ends of the wood pieces to the outside of the second set of stacked floral rings.
8) If you choose to use a Y socket adapter to allow for two light bulbs, you will want to spray paint it to match the finish of your pendant light kit. In our case, we opted for an oil rubbed bronze finish. We wanted two light bulbs because our family room is large and we wanted this fixture to produce as much light as possible.
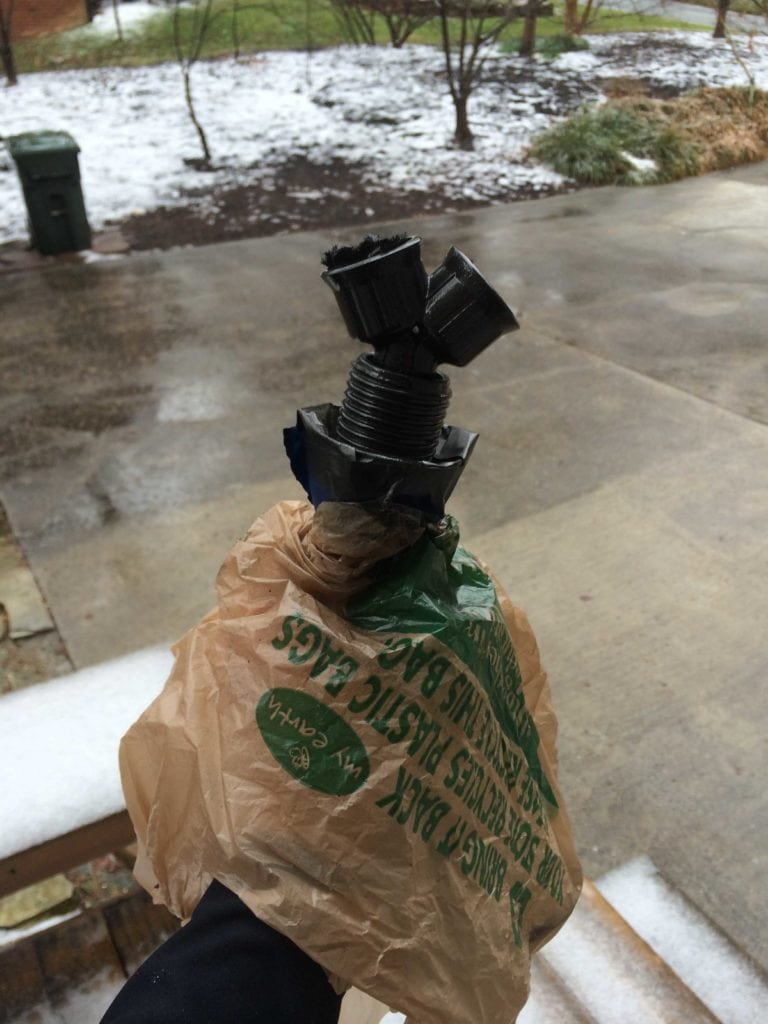
9) Now you need to attach your pendant light to the bentwood frame. Because our pendant light kit was much smaller in diameter than the floral rings, we tied twine across the top of the light fixture to hold the pendant light in place. I stained the twine to match the wood.

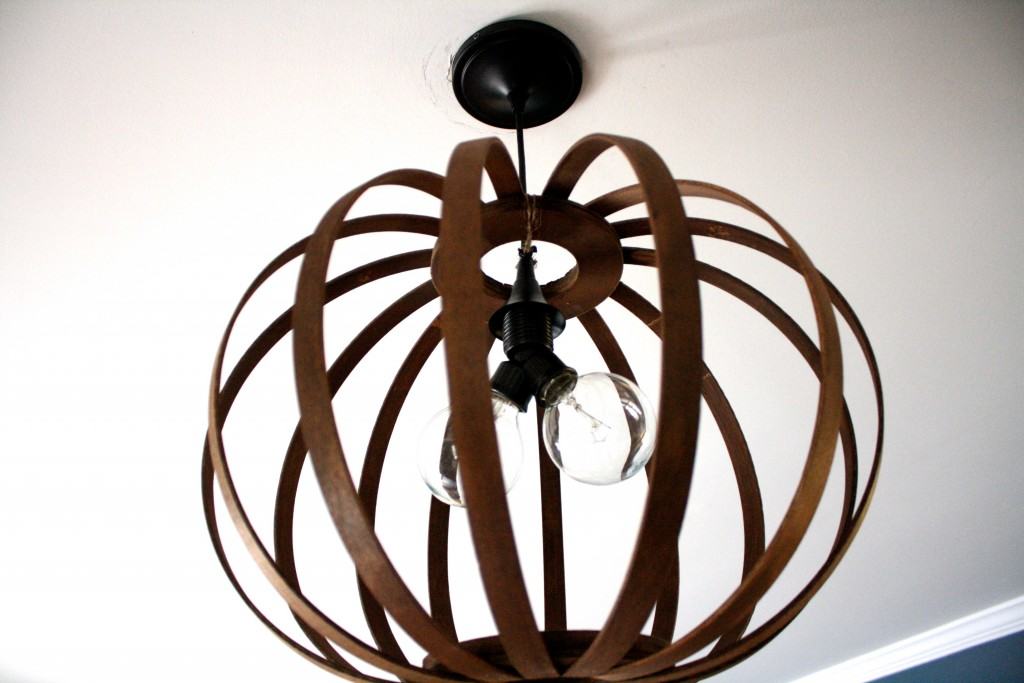
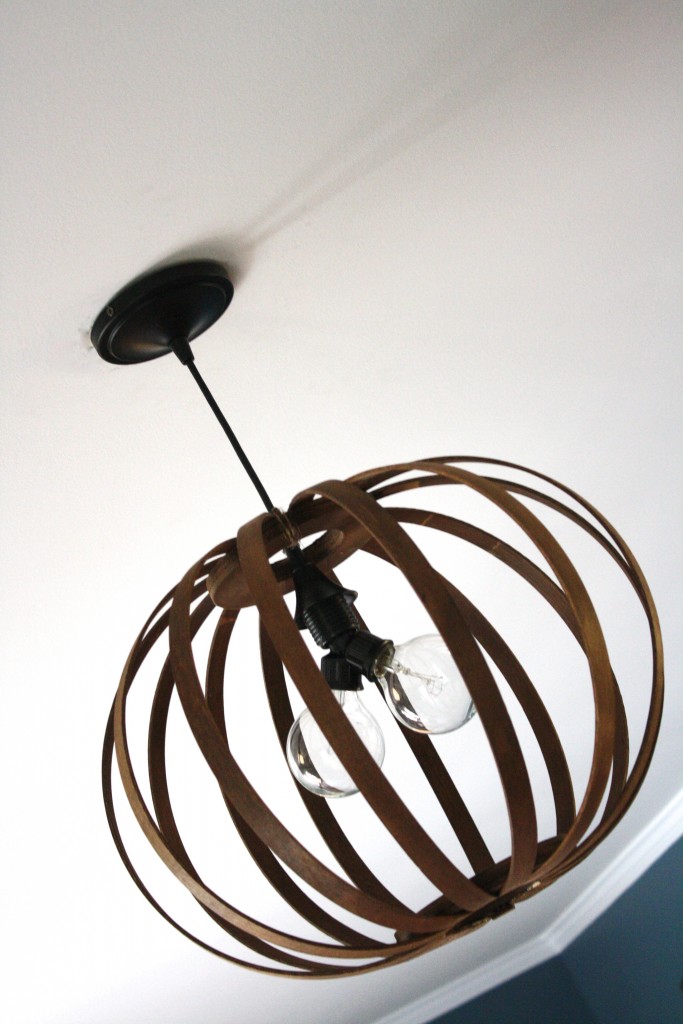
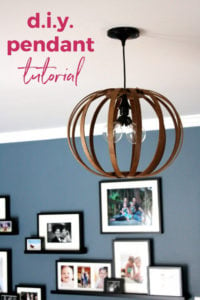
10) Now hang your beautiful light fixture and admire your work!
Cost:
- Quilting Hoops- $5 each x 4
- Pendant Light Kit- $10
- Y bulb socket adapter- $2.00
- Floral rings- $.99 each x 6
- Stain and Spray Paint- $0 (we had some on hand from other projects)
Total cost: $38.00
Our light fixture was modeled after the oblong Bentwood Pendant light by West Elm, which is $189. That means I saved $150! And I LOVE, LOVE, LOVE the finished product hanging in our family room {you can check out our family room renovation here}. Check it out!

 Are you going to make one of these beauties for yourself? What room will you put it in? Will you go for a darker or lighter stain? One or two light bulbs? I will tell you, it was a FUN and relatively easy project. I think you should go for it :) Be sure to pin it so that you can find it later.
And before you head out, be sure to grab my free guide on how to design a room you love so that you can love the rest of your room as much as your soon-to-be new light fixture :)
[mv_create 1 11 200 2016 key=”1″ type=”list” title=”Most Popular Projects” thumbnail=”<a href=” https designertrapped com wp content uploads diy home decor projects blog jpg a]


Last Updated on March 3, 2022
You mentioned 6 flower hoops, but I only saw that 4 were used (2 glued together) – 2 at the top and 2 at the bottom. I don’t see where the other 2 are used.
Hi Lina! The tutorial specifies that we they should be glued together in two sets of 3 :)
Thank you Tasha!
One word: brilliant!!! (Maybe two: Beautiful!) :)
Thanks Lidia!
How wide are the hoops you used to make this? I went to Michael’s to get supplies to make this and the hoops were only 3/8″ wide and just didn’t look right.
Absolute genius and I fully intend to copy it!
Thanks Sandy!
Could you mention where you got your light bulbs? I’ve made this light fixture and love it, but can’t find bulbs that look as good as yours. Thanks for posting this–it’s genius!
Thanks Jana! I cannot remember where I got them. Try some online specialty lightbulb shops!
Tasha
This is brilliant!!! I just discovered your site. LOVE it!
Thanks for the directions and supply lists. This really helps.
Maureen
Thanks so much for reading Maureen!
Thank you so much! Am gathering the supplies to make this. The instructions are superb.
Thanks so much! Good luck.
I love what you have done. Makes my heart sing!
Thanks so much MaryLou!
I love it when someone out smarts the high dollar stores. This is beautiful.
Thanks!
I love this! I am about to move into a house where all of the lighting will need to be replaced which could end up costing me a pretty penny. May I ask how you measured the hoops to ensure they were the same size? Thanks
The hoops are premade so they are all the same size. You cut them all in half exactly! Hope that helps!
This is absolutely amazing! I was looking for a way to make some wooden orbs like this for a two-light fixture that hangs over my dining table that has super ugly frosted shades now. My question is, because I have to make two and don’t want them to be so big that they touch each other once they’re on the fixture, could you tell me the finished diameter of yours? I assume if it’s too big I could just make them smaller by using smaller quilter’s rings? Thank you so much!
I would advise you to definitely buy smaller hoops. I don’t know the exact diameter but it is a good size and I think would be too big for a double fixture. Hope this helps!
How did you stain the hoops? Was it difficult?
It is not difficult at all. If you need more instruction, check out the directions in the post! <https://designertrapped.com/2014/04/west-elm-bentwood-pendant-light-knockoff.html
This is awesome! Thank you so much for this! I have a bunch of long thin strips of scrap wood I need to find a use for and a foyer light to replace. This project kills two birds with one stone!
Awesome! Good luck!
Just found your site. Love the name of your site…what a hoot! I had to laugh and then I had to look! Its a great site and very informative. I’ll be back. :)
Thanks so much JoAnn! I love new readers :)
I’ve been wanting to solve the boob light explosion in my home. This would look great in my hall way. Thanks for the easy to follow tutorial and the supply list.
My pleasure Kelli!
This is beautiful – and such a great tutorial! I have been scouring the land of pinterest for diy pendant light ideas and this one is my favorite!! Love your blog :)
Thanks so much, Megan!
Wow this is amazing! SO fun and creative. Any ideas how to DIY an urchin lamp??
I think there are some tutorials out there, but I have never made one :)
What a genius idea!! I’ve been looking for a cheap pendant for our living room and I think this fits the bill. I will be trying this soon! Last year I made a chandelier out of a hanging plant basket — there are so many great pendant hack ideas!
amandakatherine.com
I just finished making this and I love it! However when i turn the light on I get stripped shadows all over my walls and ceiling. Did you run into this problem?
Hi Samantha. Yes, any light that has a pattern of positive and negative space will cast shadows. I hope that helps.
I really love this fixture and am close to completing it. All the parts are ready for assembly but I am struggling with how I am going to change bulbs. Once the double bulbs are screwed in and put thru the hoop, i’ll nail the rings on the glued floral hoops and it will be virtually imposssable to change out bulbs in the future…any suggestions?
Hi Lara! Hmmmmm, I’m not sure. We are able to get ours in between the hoops pretty easily. Maybe yours are closer together than ours???
get a child to help you … their little hand should fit.
I love this! What an amazing job you did! I would love to try it!
THIS WAS ABSOLUTELY BRILLIANT AND WHILE THE AESTHETIC DOESN’T FIT IN WITH MY DECOR, YOU GAVE ME INSPIRATION TO USE THIS BASIC DESIGN IN A DIFFERENT WAY, SO THANKS
So glad to hear it!
Wow turned out great! Awesome DIY :)
Thanks so much!
This came out great! I didn’t know about the Y socket adapters…I have a light fixture project to start soon, and that will come in handy! Pinned!
Absolutely love this post! I really want to try and make it for our basement! I like yours better than West Elms!
Thanks so much, Ruthie!
Completely gorgeous! I am seriously thinking of trying this out. Does the light shine well through the wooden hoops or do you find there are shadows everywhere?
Thank you, Lisa! There are shadows above the light, but they aren’t bothersome at all!
Yours looks better than the original!! Very creative and it looks fantastic!
I LOVE this! I totally want to make one now. Im thinking in my dining room. You got the wheels turning. ;) Thanks
Thank you, Aurie!
Hi, I love this project and want to make it. I’m wondering what your finished width is so I can get the right size hoops for my space.
Thanks!
Hi Anna! I haven’t measured it, but I believe it is around 20 inches at the widest point. Hope that helps!
That is GORGEOUS! Pinning this for future use. :) Great job!!
Thank you, MJ!
This is probably a dumb question… But is using the wooden hoopes and cardboard garden circles a fire hazard? I feel like they could/woukd burn more easily….
Not a stupid question at all, Stacy! I asked my husband, who is a firefighter, the same thing. The light bulbs sit far enough away from all the wood pieces and there is so much ventilation between the wood pieces that they never seem to get warm from the light. I hope that helps!
I would also use LED bulbs. They don’t even get hot!!
Love this project!! I might do in light stain for my craft room.
Thank you, Stacey!
Hi Tasha, I have a quick question. I don’t have a nail gun, do you think nails and a hammer would also work?
Hi Mary! It should work, it will just be more time consuming and will definitely require two sets of hands. I hope that helps!
So excited to have found your site. Great ideas!
Thanks so much, Amy! Happy new year!
I love this! I think your’s is way cuter, too!! Will definitely be asking the hubs to help make this!
Hi! I made this a few months ago and have the supplies to make a second. I’ve been holding off on making the 2nd and hanging the first because I’m a little confused on how you got the light to stay on using the twine. Would you mind sharing some tips on how you did that? Or an update on the staying power of attaching it?
Thanks!
Hi Hannah! We just tied the twine really tightly around the cord. Since the space in between the twine is much more narrow than the collar of the light, the twine stays on the cord and it stays put. I hope that helps. PLEASE let me know if you have any other questions. I am happy to try to help! So excited to hear that you have already made one!
….and a year later, we finally hung them up. Looks great! Thanks again for the tutorial. I get so many compliments on these!!
Yay! So glad to hear it Hannah!
Love this tutorial! Can you tell me what stain color you used?
Oh gosh, Annette! I wish I remembered! I am thinking it was a dark walnut, but I cannot remember the name. I’m so sorry!
Love Love Love it!!! So excited to have found your site. I’m definitely going to do the light and the fabric chair… and probably more since those are the only two projects of yours I’ve seen. I love your tag, “Designer Trapped in a Lawyer’s Body.” So true for many of us! Thanks… keep blogging :)
Thanks so much, Nancy! I love new readers!!! Let me know how your light and chair turn out!
LOVE your blog! I found you via Pinterest. I have to say I like the looks of your light better than the West Elm one. Thank you for the instructions and most of all, I love that you share where you bought items next to them. It saves followers so much time in the search and I know it took a lot of your time to find, make & then to share, so thanks!
Thanks so much, Lindsay! Your sweet comment made my night! So happy you found my post useful!
Wow and Wow! This is just wonderful! I’m going to have to make myself one!
I found your post on Pinterest.
So glad you like it Laurie! Let me know how your turns out!
I just died! This is beautiful! Thank you so much for sharing!
Swinging by from SITS!
Thank you, Erin! I am so glad you stopped by from SITS!
Yours looks incredible! Stopping by from SITSgirls!
Thanks so much for visiting, Nichole! And thanks for the compliment on our light. We love it!
This is so simple, but looks so elegant and expensive! I’ll have to have my dad help me give it a whirl next time he’s in town!! He’s my DIY lighting guru :)
Thank you, Mary!
Oh wow – you are creative GENIUS – I would have never been able to think through that project the way you did – the finished product is stunning… and dare I say, better than the original! Way to go.
Thank you, Tove! So happy you stopped by from SITS!
That looks absolutely amazing! Now I wish I had a room to put one in!!
Thank you, Rabia! So happy you stopped by from SITS!
Very clever–love it! Visiting from SITS…
Thank you, Nicole!
Awesome job! I love seeing things that can look like the expensive store version made on the cheap!
Thank you, Sondra!
I like your version better. It looks fabulous and I really like the dark color.
Traci
Thank you, Traci! That makes me happy :)
Just found your blog, over from Thrifty Decor Chick. Absolutely love this. Want a new light fixture for office/craft room and this would be great. Totally inspiring. Can’t wait to check out the rest of your blog. Thanx for posting!
Hi Lisa! Thank you so much for coming over from Thrifty Decor Chick! I hope you do make one of these for yourself. It was such a fun project. Let me know how it turns out if you make your own!
I LOVE this pendant. Thinking about giving a similar version a go with a chandelier inside. Will post here if it actually happens and I blog about it ;)
p.s. Also a decorator trapped in a lawyer’s body…
Thank you so much, Melissa! So nice to meet another decorator trapped in a lawyer’s body! Glad I am not the only one :) I would love to see what you come up with for your pendant. Just checked out your fabulous blog. Love your new bathroom vanity. I do love the look of pedestal sinks, but having had them in the past, I would much rather have some storage :)
This is gorgeous! Fantastic job! I just clicked over from Apartment Therapy and I would love to link to this if you didn’t mind.
Thank you, Rachel! I really appreciate you popping over from AT and would be THRILLED for you to link to my project. Thank you!
This looks great! I am wondering if your version has the same “light effect” and reflects lines on the ceiling like in these pictures?
http://www.houzz.com/photos/9507911/Deerfield-Lane-Remodel-modern-dining-room-other-metro
http://www.houzz.com/photos/7150132/east-32nd-ave-contemporary-staircase-vancouver
Thank you, Mel! Yes, the light does have the same “light effect” like in this links you included. Hope that helps!
Just stumbled across your blog and so glad I did! I’ve been looking for something to replace the awful light over our dining room table and this would be perfect – it’s gorgeous. I’m not super-crafty so I’m not sure how well this will go, but figure it might be work a try. Thanks for the inspiration! :)
Hi Kelly! I love new readers! So happy to hear that you like our light and are thinking of making your own. Go for it! Don’t hesitate to ask me any questions along the way. Have a fabulous weekend!
This is so smart!! I absolutely love how this turned out!! You’re totally inspiring me to rethink our light fixtures and how we can jazz them up on the cheap! :)
Awww, thanks so much Christina! I would love to see what you decide to do with your light fixtures!
I looooove this light…we just switched out our master bedroom light however if I would have seen this tutorial I would have chosen this instead (I’ve even thought of switching it out however I think I will wait a bit as I believe my husband would not be a happy camper;)). I am trying to figure out where I could put it….curious to know just how much light it throws off? Would it be enough for a dining room or a foyer? Do you know if you can get a light socket that holds more than two bulbs?
Hi Tammy! I didn’t see anything that would hold more than 2 lights, but I didn’t look very hard either. Our family room is pretty large (28 x 16 feet) and it lights up the room WAY more than we thought it would. In fact, we are thinking of putting it on a dimmer because it’s almost too bright. I can’t recall the wattage/lumens of the light bulb, but I think it would be more than enough for a dining room and probably a foyer (unless it was a HUGE foyer with really tall ceilings). I hope that helps!
I love this! Great job at making it look spot on!
I’m trying to find a place in my home for this light now… hmmm…
Thank you for your inspiration!
Coming over from Thrifty Decor Chick’s May B&A Party
-Lindsey
Hi Lindsey! Thanks so much for stopping by. I hope you can find a spot for it :) Bear in mind you could make it bigger or smaller depending on the size of quilting hoops that you use. Have fun!
This is gorgeous! We just bought a house and have this 60’s style Tiffany lamp hanging above our table. I’ve been looking for something similar but also didn’t want to spend close to $200 on a lamp. Thanks so much…can’t wait to make it!
Awww, thank you so much, Kori! I am so glad you like it well enough to make it. I would LOVE to see how yours turns out.
Crazy awesome! Great job girl and I hope you will share at Get Schooled Saturday tomorrow:)
You are so sweet, Kim! Thank you! We have been so busy working on our kitchen makeover that I have not had any time to link up to parties. I hope to be back on a normal schedule by next week and will link it up then :)
oh wow i love this so much! i have got to make it – but need to figure out what room to put it in! great job :)
Thanks so much, Kelli! You could make it smaller or larger and could even paint it a color! I am sure you will find some place for it :)
What a fabulous project. I love how much impact it makes!
I’ve seen your projects several times and I’m always amazed by what you’re able to accomplish! When do you sleep? ;-)
But seriously, I love the light!
LOL! Thanks so much, Kim. I don’t sleep as much as I should, that’s for sure!
You did such an awesome job on this Tasha! Pinning! :)
Thanks so much, Brandi!
That is pretty cool! Nice work!
Thank you, Amelia! It was a fun project.
I LOVE this light, and I can see it being a great summer project. One question though, how tall are your ceilings? And how long is the pendent from ceiling to bottom? I’d love to put in in my foyer, but I just don’t know if it will work!
Hi Lindsay! Thank so much! Our ceilings are 9 feet tall in that room. The bentwood pendant itself is roughly 14 inches from top to bottom (the diameter of the quilting hoops). The drop of the pendant light itself can be totally adjusted depending on how low you want yours to hang. And, you could use smaller or larger quilting hoops. Hope that helps!
That is amazing! I want one maybe two. Thanks for the inspiration!!
Thanks so much, Tammy! And thanks again for sharing on FB!
I just finished mine last night and I LOVE it! Thanks so much for this great tutorial and the inspiration!
I saw your photo in your tweet! It looks AMAZING! So glad you made one for yourself!
Love it.Totally pin-worthy. Quick question though, how did you arrange the hoops since inner ring is smaller than the outer ring?
Hi Marife! Great question. Once we started placing them on, we couldn’t tell a bit of difference even though you are correct that the diameters of the inner and outer rings are different. So, to answer your question, we did use both the inner and outer rings, but did not arrange them in any particular manner since we couldn’t detect a difference once they were attached to the rings. Hope that helps!
It looks SO good in your family room! Great job Tasha!
Thanks so much, Corinna! LOVE your fish bowl lights. SO CREATIVE!
Loving this so much! It looks like the real deal. Great job.
Thank you so much Stephanie! LOVE the name of your blog. Heading over to check it out now!
I’m seriously in love! now if I can just convince my husband, I really want to make one for over our dining table. Thanks for sharing.
Hi Havalah! So glad you like it! Fingers crossed your husband does, too :)
This is so amazing Tasha!! Beautiful!! Totally pinned!
Thanks so much, Mindi! We are so happy with how it turned out. I appreciate the pin!
Awesome Tasha! Pinned!
Thanks so much, Krista! I hope you had a fabulous weekend with your family!
I love yours! Very nice. :)
Thanks so much, Megan!
That’s amazing and I’m totally speechless. It looks like the very expensive version. Pinned.
Thank you so much, Erlene!