DIY Closet System REVEAL ~ I’m in love!
Y'all, I am so friggin' excited. Earlier this month, I shared that we were busy getting ready to install our DIY closet system from EasyClosets. Well, I am happy to report that the installation went smoothly and my master closet is now a MASTERPIECE! Pun intended. But, before I show you the glorious after, let me walk you through what we started with and the installation process.
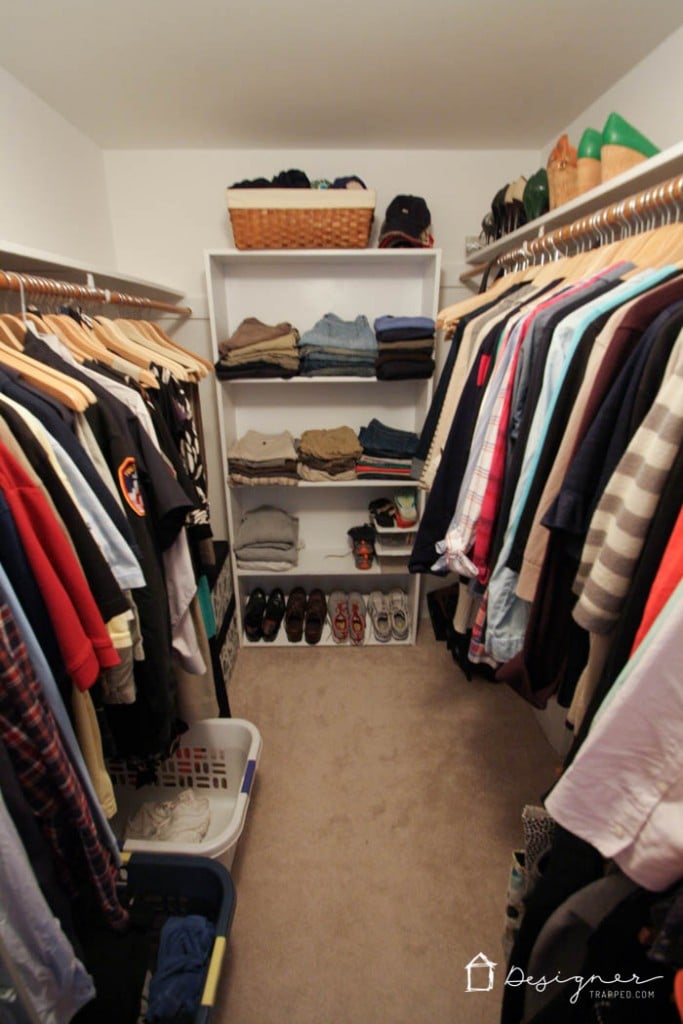
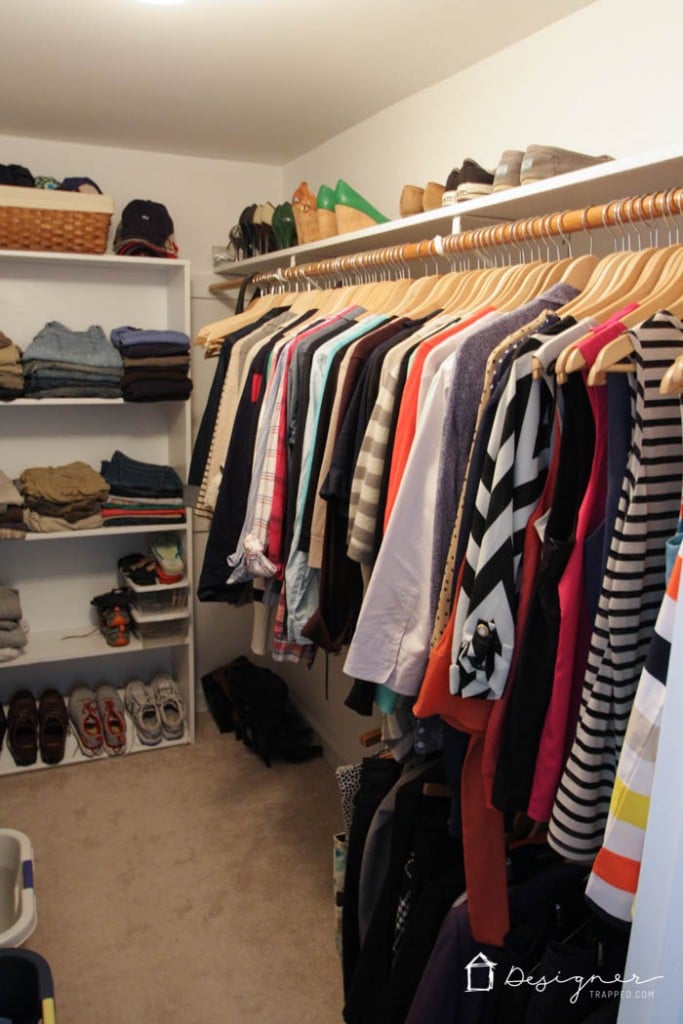
This is how our closet has looked for the past 3 years. We knew we weren't utilizing it to its full potential, but we weren't really sure how to transform it because we didn't want to build everything from scratch. Yes, we are DIYers, but with so many other DIY renovations on our plate, we just didn't have time to custom build a closet from scratch. So, we started looking into DIY closet system options.
After a lot of research and hunting, we decided to install an EasyClosets system. You can read all about the design process and our specific closet plans in this post.
DIY Closet System Installation Details
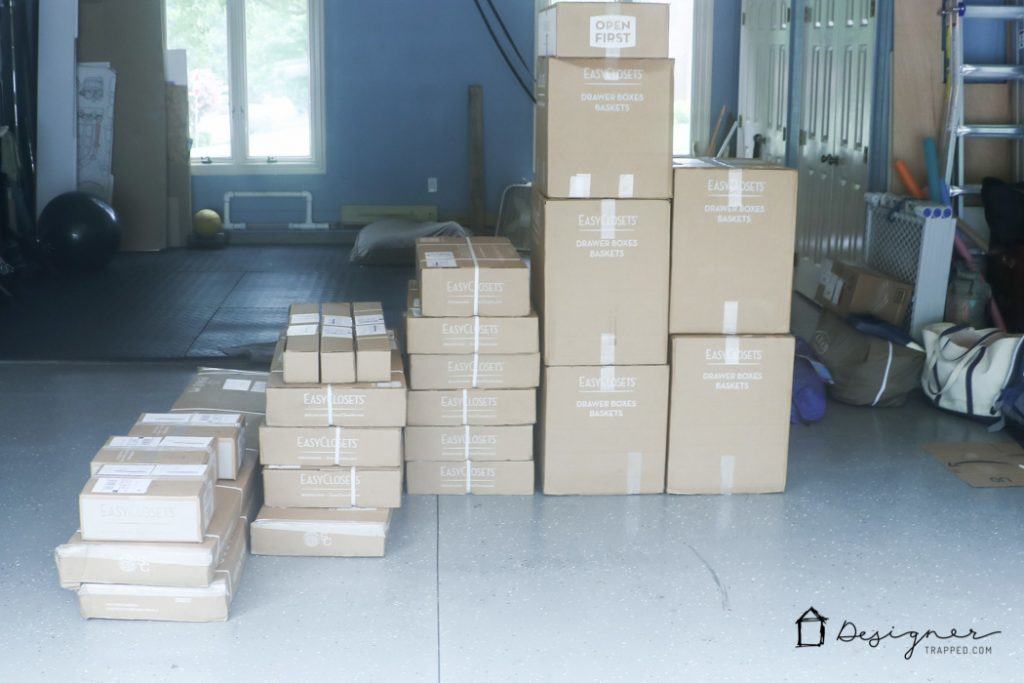
We started by ripping out our old closet storage, which left a lot of patching and painting to do. We also replaced the carpeting with the amazing laminate flooring we installed in our master bedroom and installed new can lights in the ceiling. The prep work was messy and time consuming, so we were worried about how long it would take to install the new EasyClosets system, especially when we saw the number of boxes coming off the UPS truck. Gulp.
Despite feeling somewhat panicky, we read the EasyClosets installation instructions and started unpacking boxes. Unlike other instructions we have seen for ready to assemble systems and furniture (some of which only have stick-figure drawings), I was VERY pleasantly surprised by the level of detail in the EasyClosets instructions. They give you every bit of guidance you could possibly need in a clear manner. Talk about refreshing.
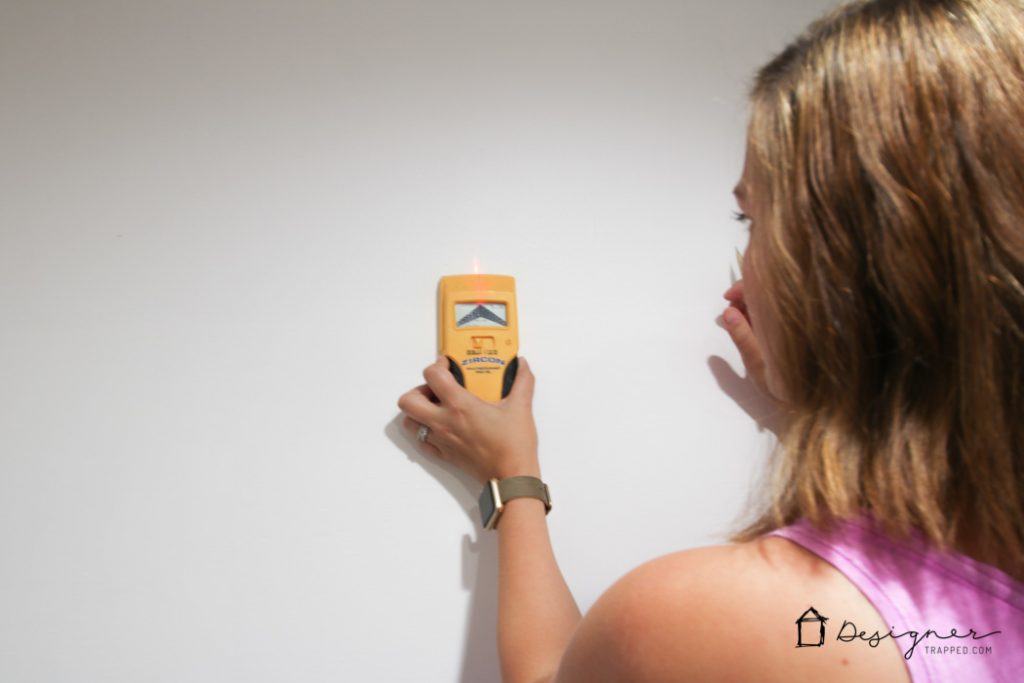
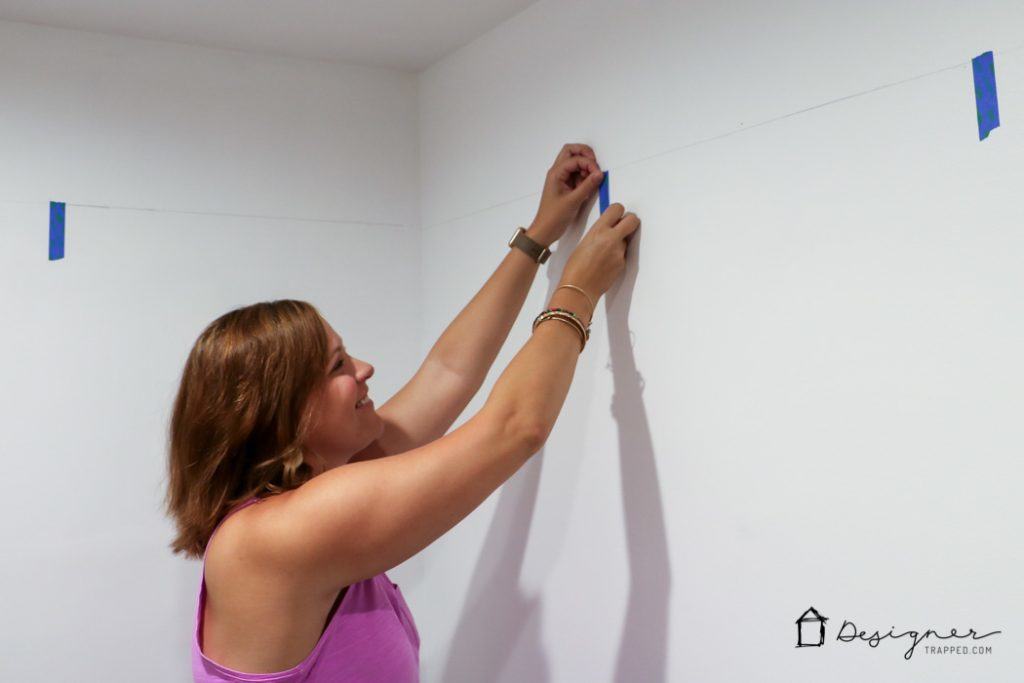
The DIY closet system installation process went more quickly than we ever could have dreamed! The entire system relies on a steel rail that you install at the proper height. Attaching the rail was easy. We followed the instructions and started by marking the studs in our closet.
We then measured the appropriate height and drew a level line where the rail would attach to the wall. 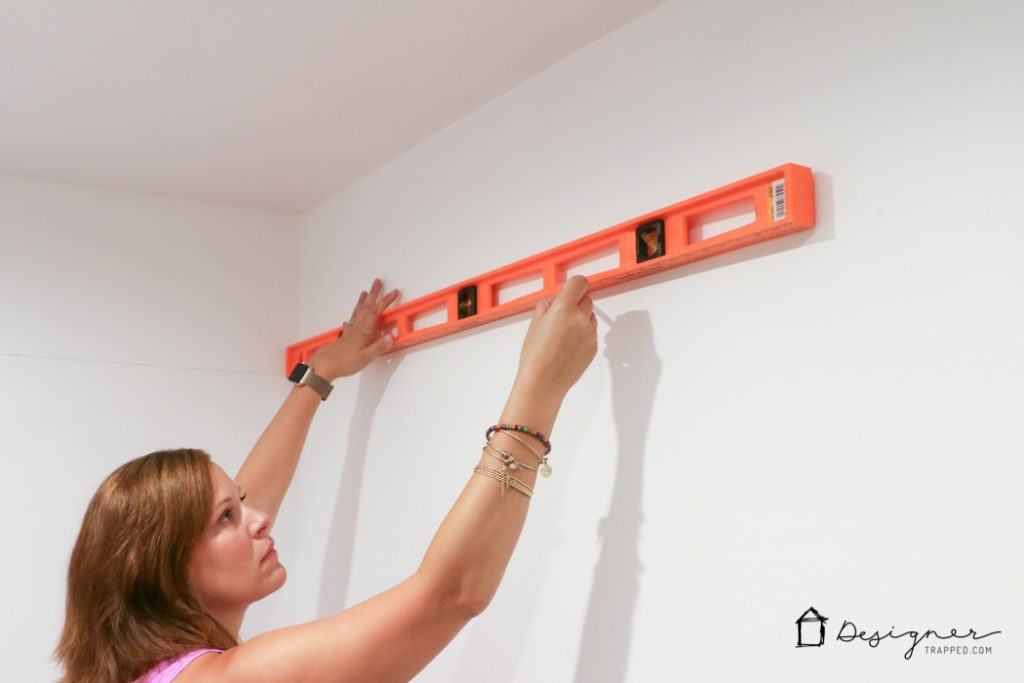
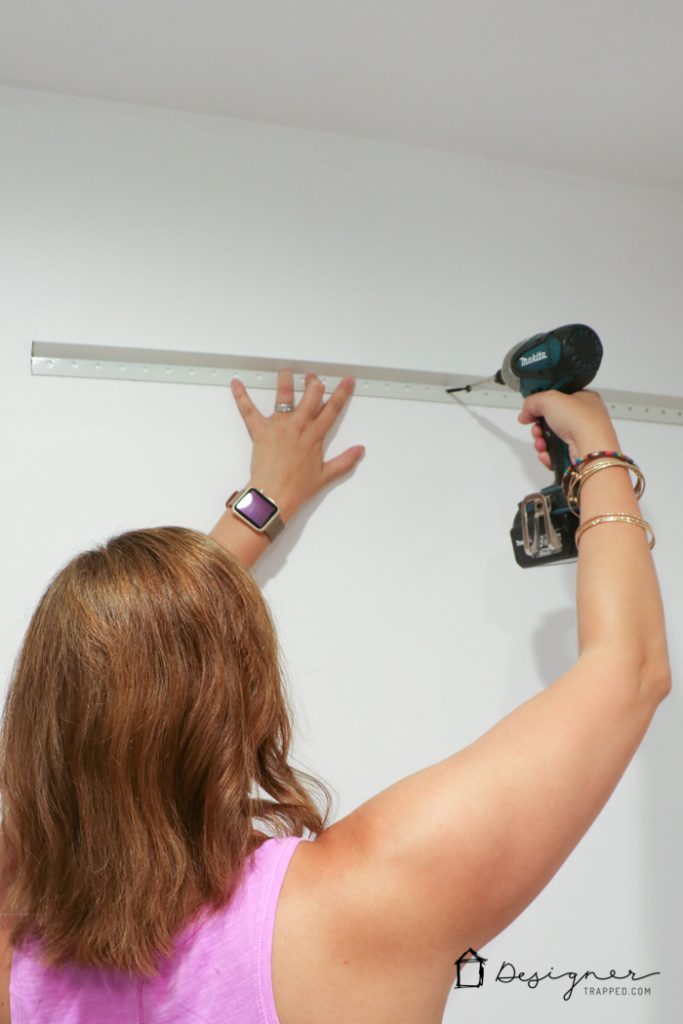
Then we marked where our vertical panels would hang with painters tape. This is important because if your vertical panels are too far from a stud, you need to use E-Z Toggle bolts (that are provided by EasyClosets) to ensure the rail is adequately supported.
After we inserted the necessary E-Z Toggle bolts, we cut our rails to length and secured them in place.
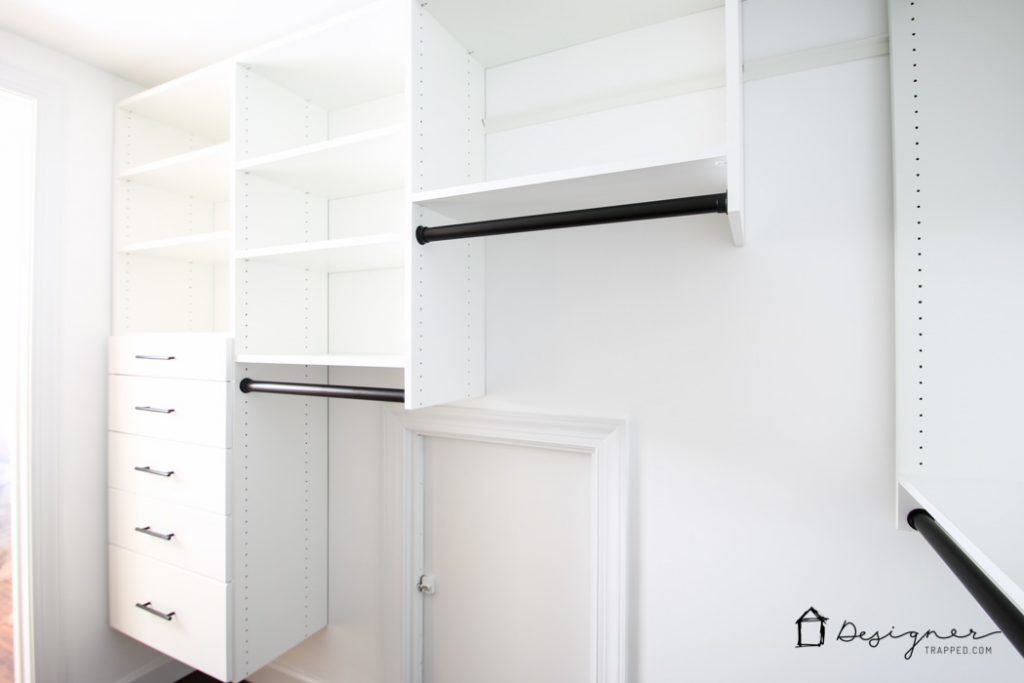
After that, things moved very quickly! The drawers come assembled, which is so nice. Overall, the EasyClosets installation process took us about 6 to 7 hours, including hauling all the boxes upstairs. It's the most worthwhile time we have spent on a project in a long time. FINALLY we have a totally organized and beautiful closet that functions perfectly for us.
DIY Closet System Reveal
Don't worry, I'm going to share all the pretty pictures of our DIY closet system reveal with you, but first take my video tour (it will play after a short ad)!
For those of you that prefer still photos to video, feast your eyes on our brand new closet. This is what the system looked like after the installation was complete, but before we moved all of our stuff back in. Given how reasonably priced EasyClosets is, I wasn't sure what to expect in terms of quality. Well let me tell you, the quality is amazing and does not disappoint! I can't believe the value.

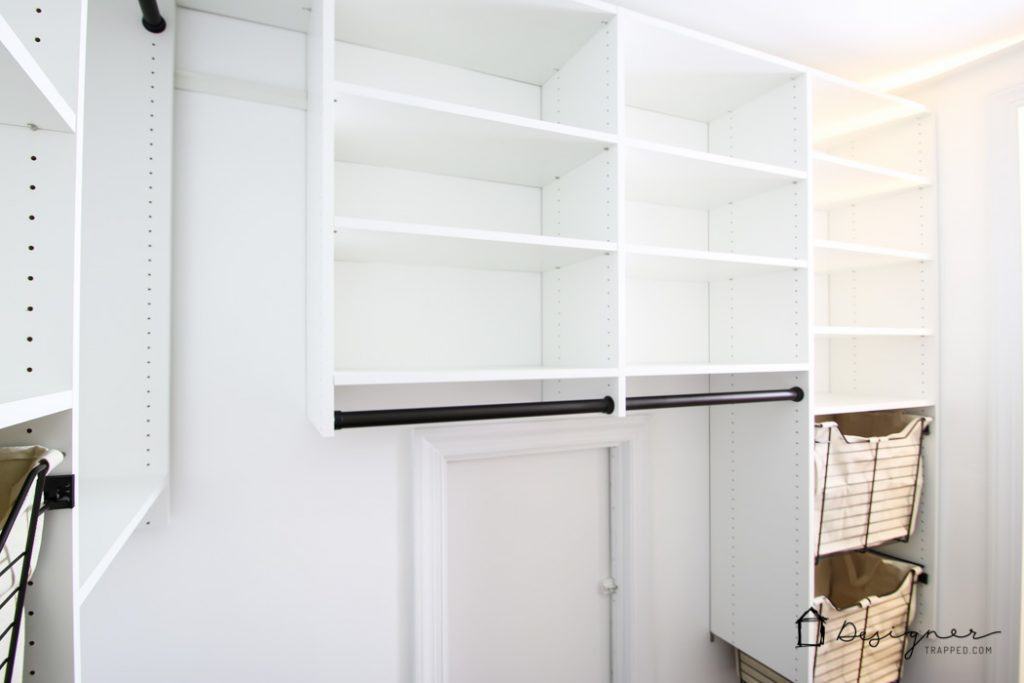
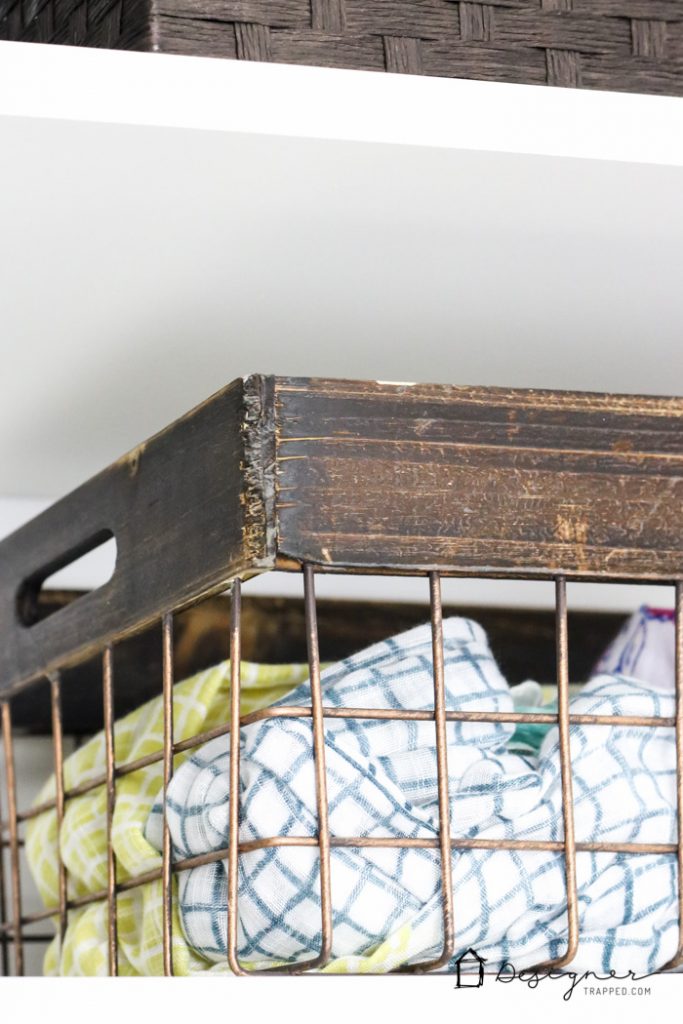
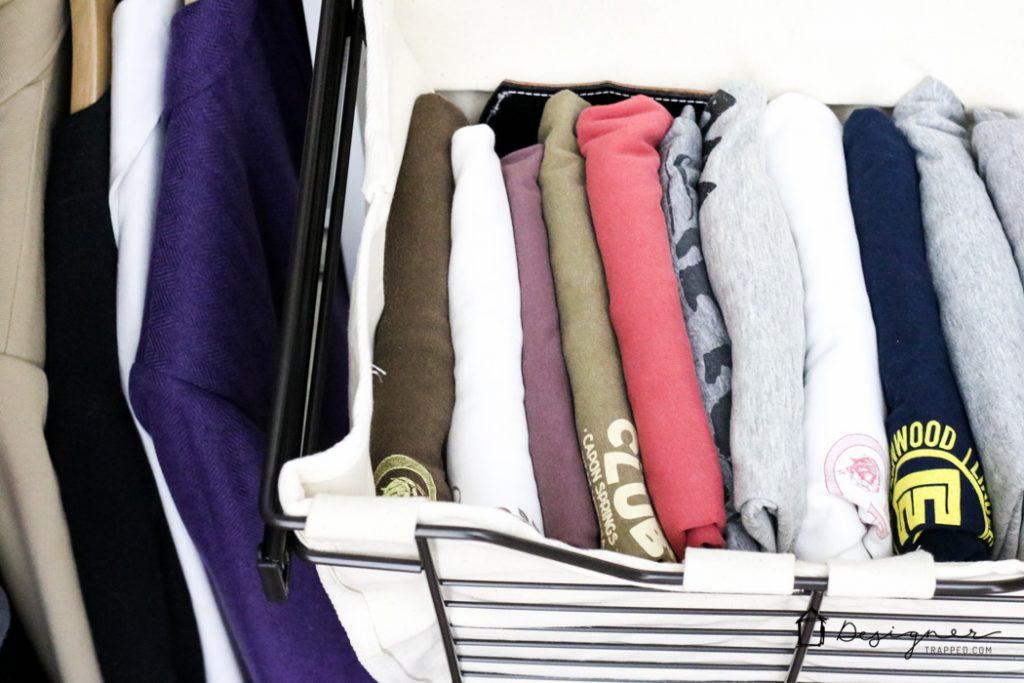
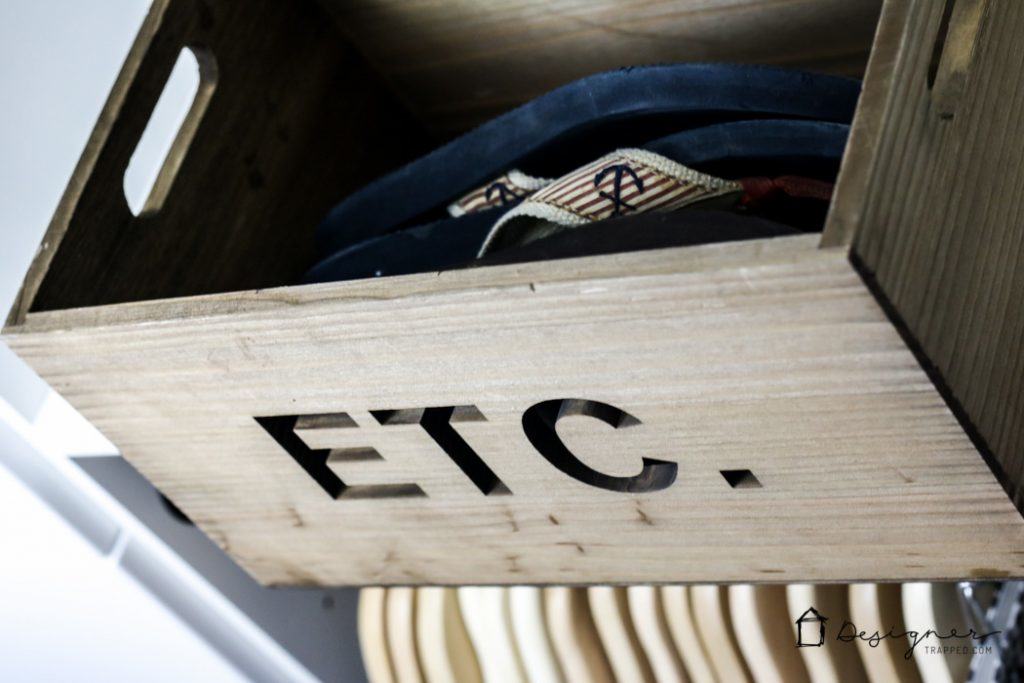
We moved EVERY SINGLE piece of clothing and shoes back into our closet (some bloggers edit their items down for photos, but I didn't do that–what you see really is our closet as we use it every single day–it's not staged for photos). All of our shoes, belts and scarves are stored in baskets or sit directly on the ample shelving.
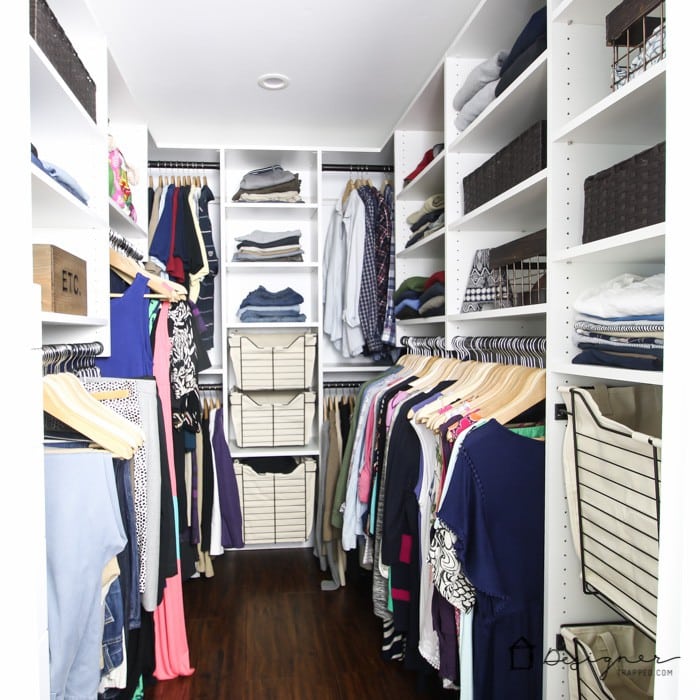
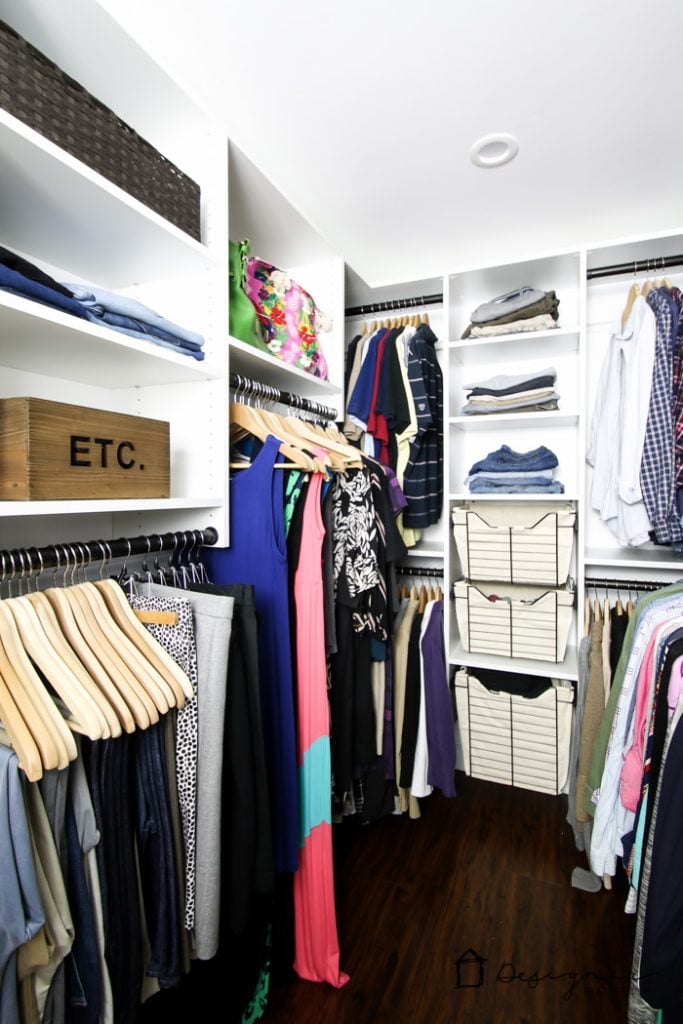
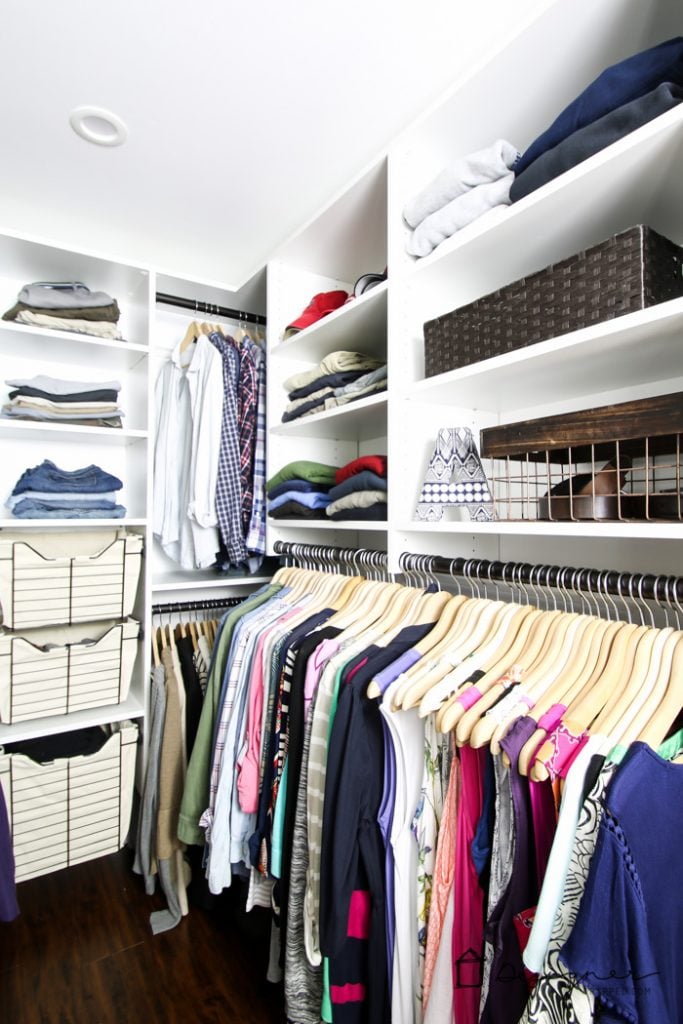
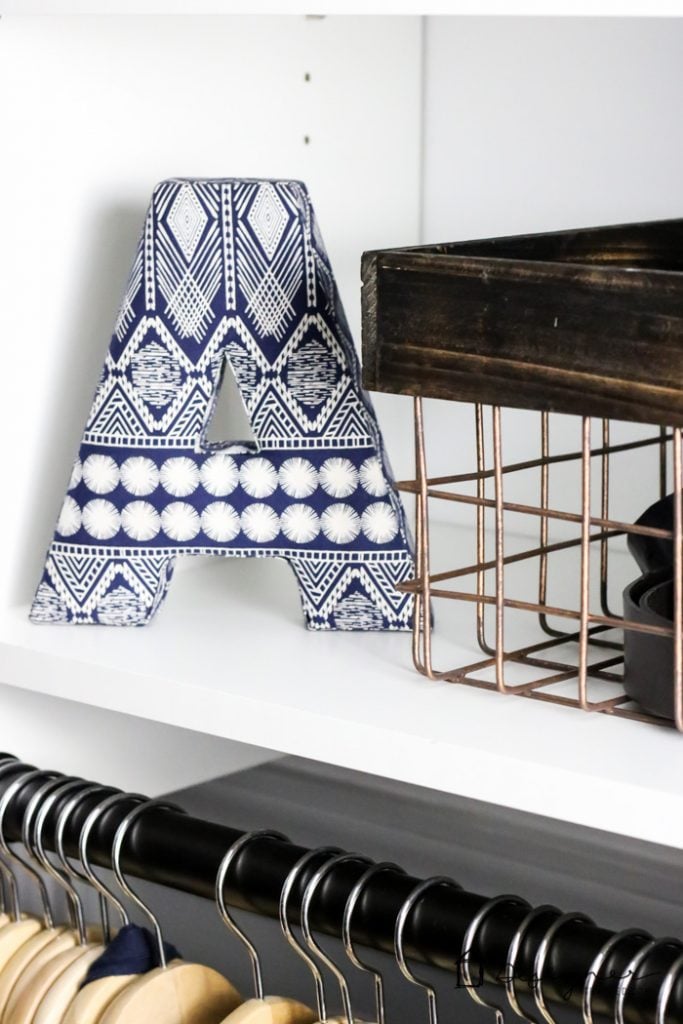
Of course, I had fun adding some decorative items to make it even prettier.
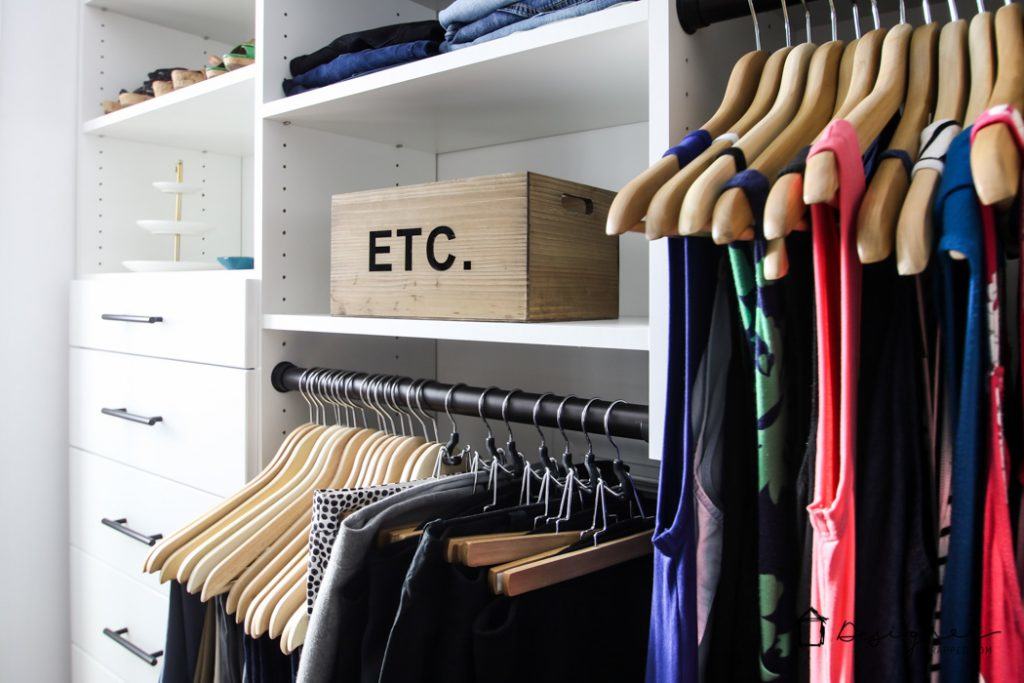
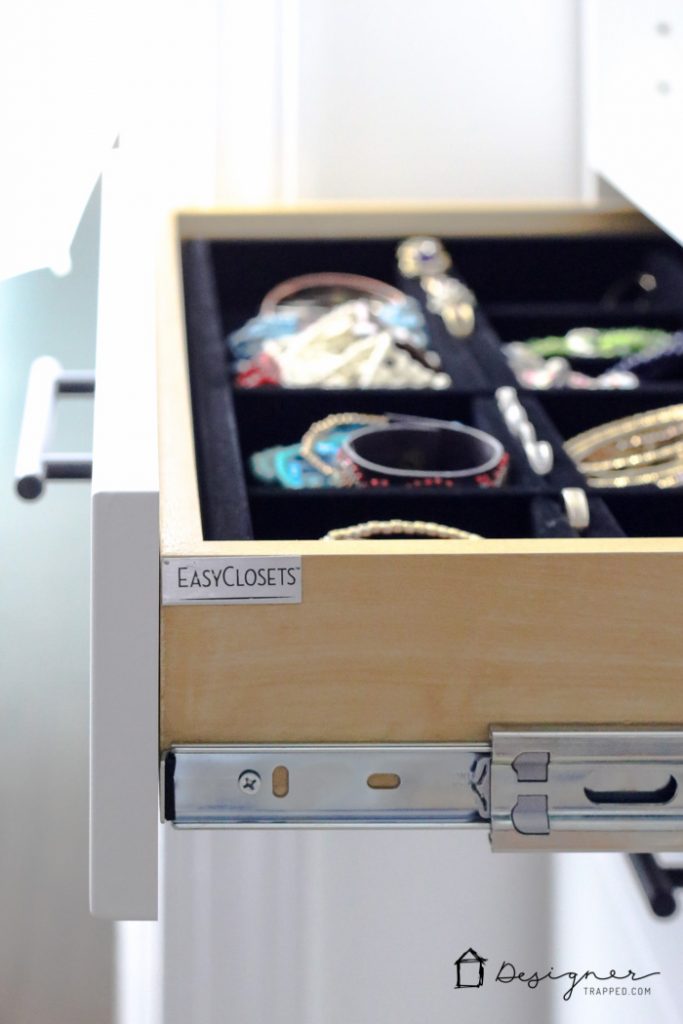
The velvet lined jewelry organizer and soft-close drawers are two of my favorite features.
And the built-in laundry hampers are my new best friends. I was not sad to dispose of our cheap, plastic laundry baskets that we have had since college :)

Enough talking. Check out the rest of our DIY closet system reveal.

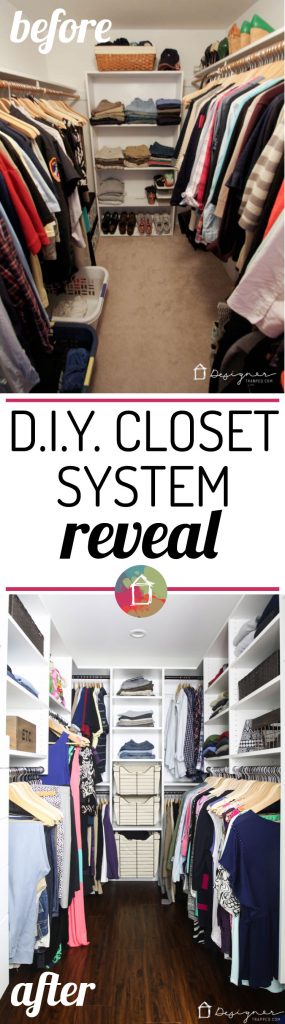
Now, I can't share a reveal with you without giving you a side-by-side comparisons of before and after we installed our DIY closet system, so here you go!
| |
 | |
We were fortunate to be provided with free product from EasyClosets for this post. We did not receive any financial compensation and as always, my opinions are 100% my own! I would never recommend something I do not truly love!
[mv_create 1 11 200 2016 key=”1″ type=”list” title=”Most Popular Projects” thumbnail=”<a href=” https designertrapped com wp content uploads diy home decor projects blog jpg a]

Last Updated on August 10, 2021
Hello Natasha! This is great! I think I am going to do the Easy Closets now. That helps me decide from all of the companies out there…but I wondered if you knew which company would be of good quality and not terribly expensive for the build-in closet? My mom has a wall that she would like a closet on (preferably floor to ceiling). Then she would turn her existing closet into just a shoe/misc closet.
It sounds like you want to add another closet to the room. I would look for a local contractor to help you and then outfit it with the Easy Closet system. Hope that helps!
Geez, this looks like something you would see in a luxurious model home or on a home tour! Awesome job you guys and what a gorgeous system!!
It’s AMAZING!!!!
It looks amazing!
Thanks Erin! I hear angels singing every time I open the door to our closet. I’ve been organizing all of our other closets now, too!
Love how it turned out! Beautiful.
-Shonee
http://www.hawthorneandmain.com
Thank you Shonee! I am so, so happy with how it turned out! I will NEVER live without a closet system again. So basically, we are never moving :)
That’s a fantastic result for just 7 hours work to install. You don’t mention the price of the easy install components: could you give an idea of the cost?
Our total system was around $2,100 (during a promotion–it would have been $2,500 full price). It’s an investment, but it’s a large closet and we got a lot of bells and whistles. which is so much less than other systems out there. And if you have a reach in closet, you can get a nice system for closer to $600 or $700. Hope that helps!
Seems like good value for all you got! Wish we had something similar in Australia.