DIY Large Wall Art On a Budget!
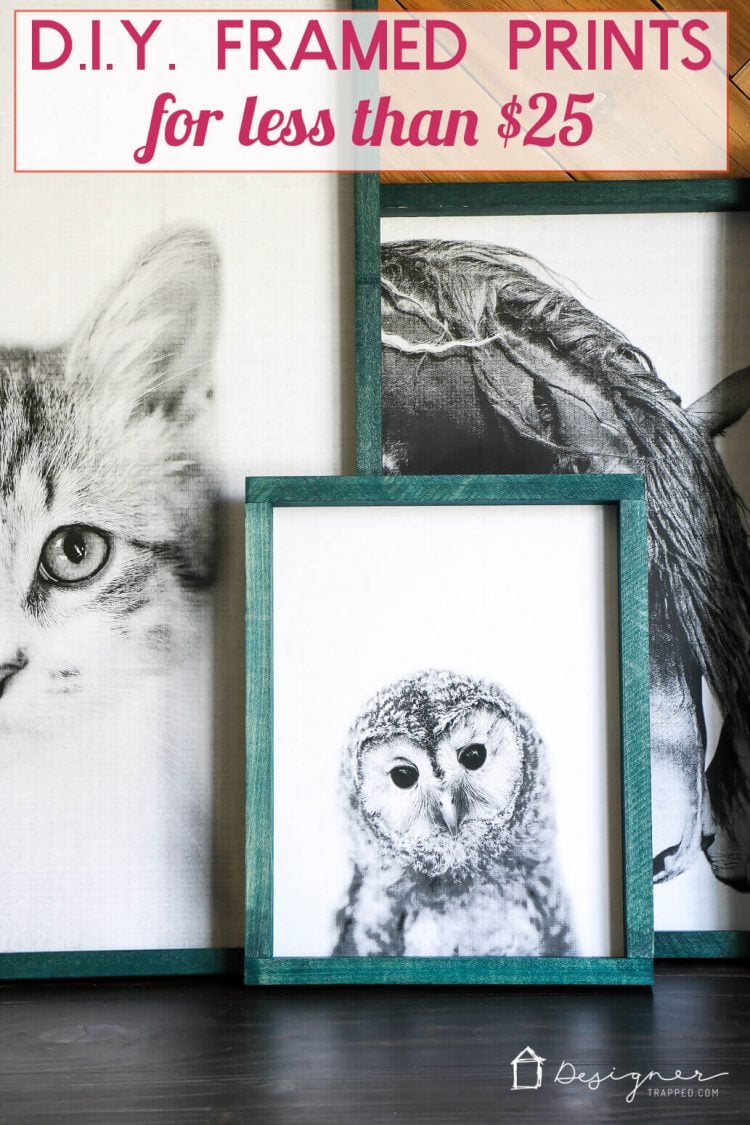
Hello friends! I have SUCH a cool tutorial for you today! I have found that as I try to decorate our home on a budget, large wall art can be a challenge because it can get really expensive, really fast! We've come up with some solutions in the past, like our DIY half frames hanging from pipe and this large scale print in our dining room, but I didn't want to use any of those methods when creating large wall art for Avery's soon-to-be new bedroom (in case you are new here, we are in the process of separating our twin girls' bedrooms). So, we came up with a new way to create large wall art ourselves to create a BIG impact on a very small budget (it cost me about $21 per print–there's a cost breakdown at the end of this post)! This post is sponsored by Mohawk Consumer Products and contains some affiliate links. Click here to read my full disclosure policy.
DIY Large Wall Art Tutorial
Materials and tools needed:
Note: Below I list what we used to complete the project. We used power tools because we have them, but you can ABSOLUTELY make this DIY art without power tools! If you have a hand saw, a utility knife, a hammer & nails and a hand-held staple gun, you would be good to go!
- Wood (we used three, 8 foot 1 x 3 poplar boards and ripped them in half with our table saw to get more bang for our buck–the amount you need depends upon how many prints you are making and their size)
- Scrap cardboard or foam core board
- Spray adhesive
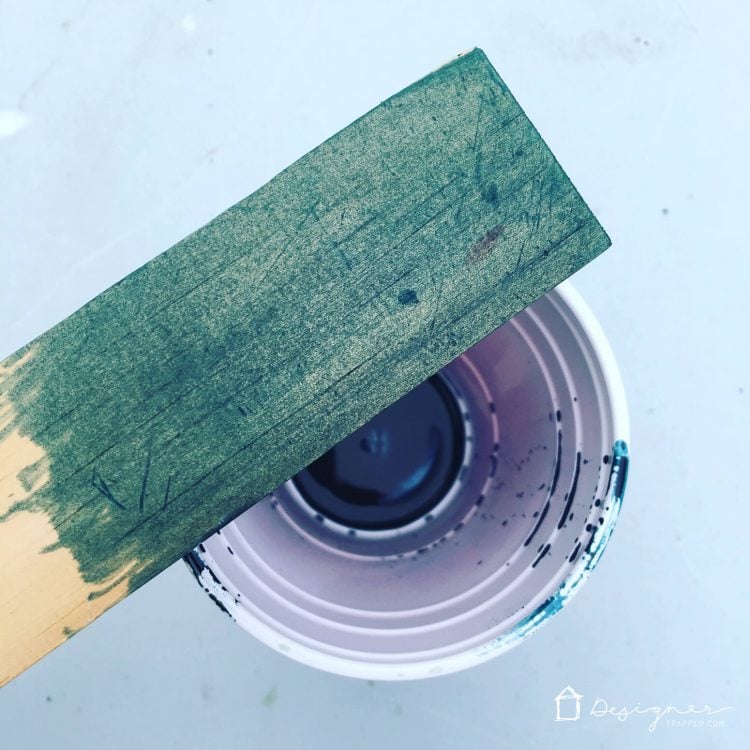
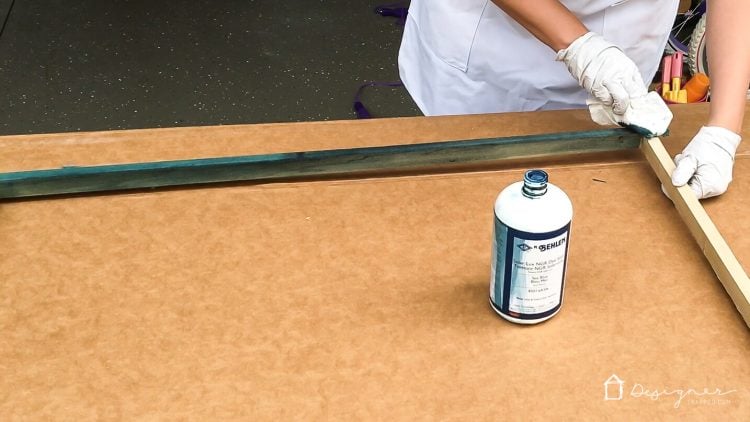
- Behlen Solar Lux stain (I used Sea Blue for this project)
- Solar Lux stain is a dye based stain, so it helps gives your projects a vibrant color finish. Plus, it is fade resistant and dries SUPER fast! You can also mix the stains to create custom colors. We originally planned to mix red and blue to make purple, but then Avery fell in love with the Sea Blue, so we rolled with that :)
- Nail gun (this is the one we use—we love it because it doesn't require an air compressor!)
- Staple gun (this is the one we use–again, no air compressor required)
- Right angle clamps
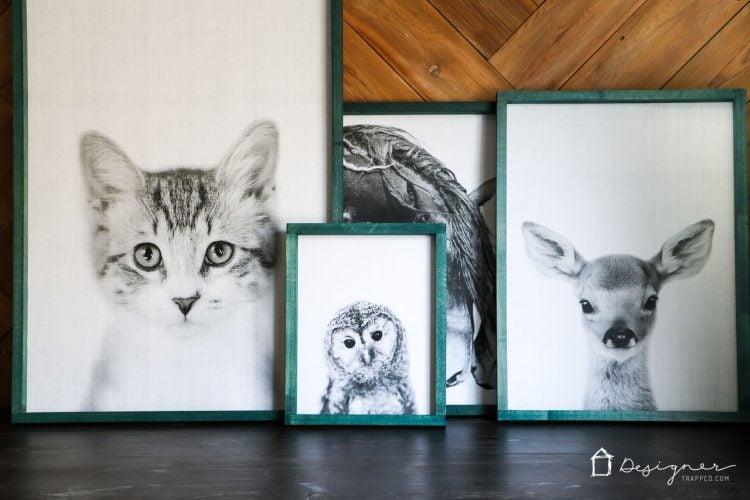
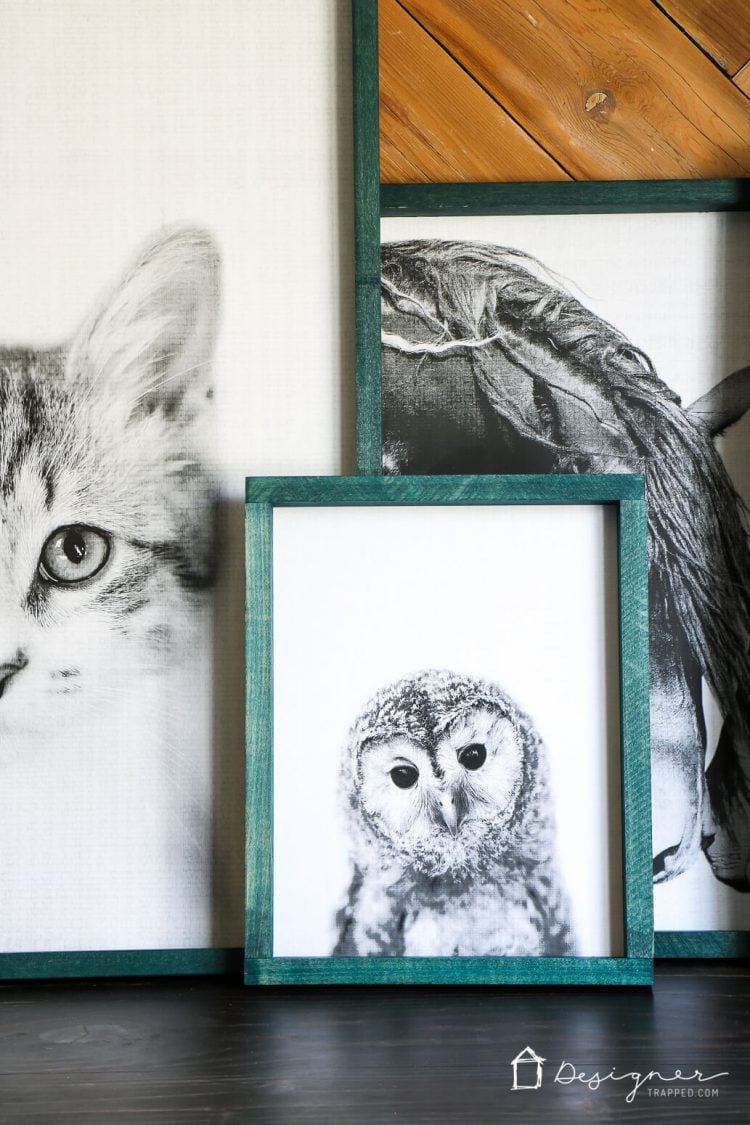
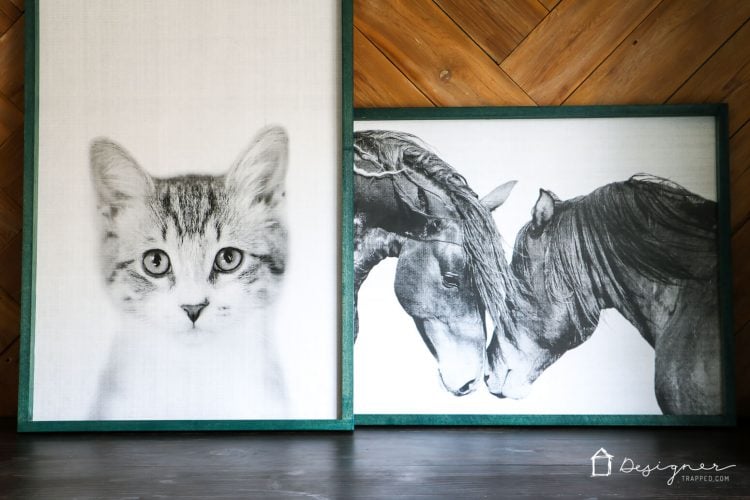
- I purchased all of the peekabo animal prints for Avery's room from an AWESOME Etsy shop called Lila + Lola. I highly recommend this shop! The digital prints are affordable and you can download them immediately after you complete your purchase.
- For large prints, you need to have them printed as “engineering prints.”
- I had mine printed via Staples.com. In the past, I used to get engineering prints made in person at Staples or Office Depot, but lately, they have been charging me differently (like $25 for a 2 x 3 print) than they used to (under $5) for color engineering prints and some readers say their local stores won't do it at all. Sooo, I figured out that if you order them online, that's a non-issue! You can order your large wall art prints online here. It worked like a charm. I paid a total of $9.14 for the prints used for this project. The video below shows you exactly how to upload and order the type of prints you want (it's not entirely self-explanatory on their website).
Steps:
I recommend watching the short video below first, because it gives a great overview of this project start to finish, including how to spray mount your prints. Below the video I go into more detail about how to make the actual frames.
Large Wall Art Frames Tutorial
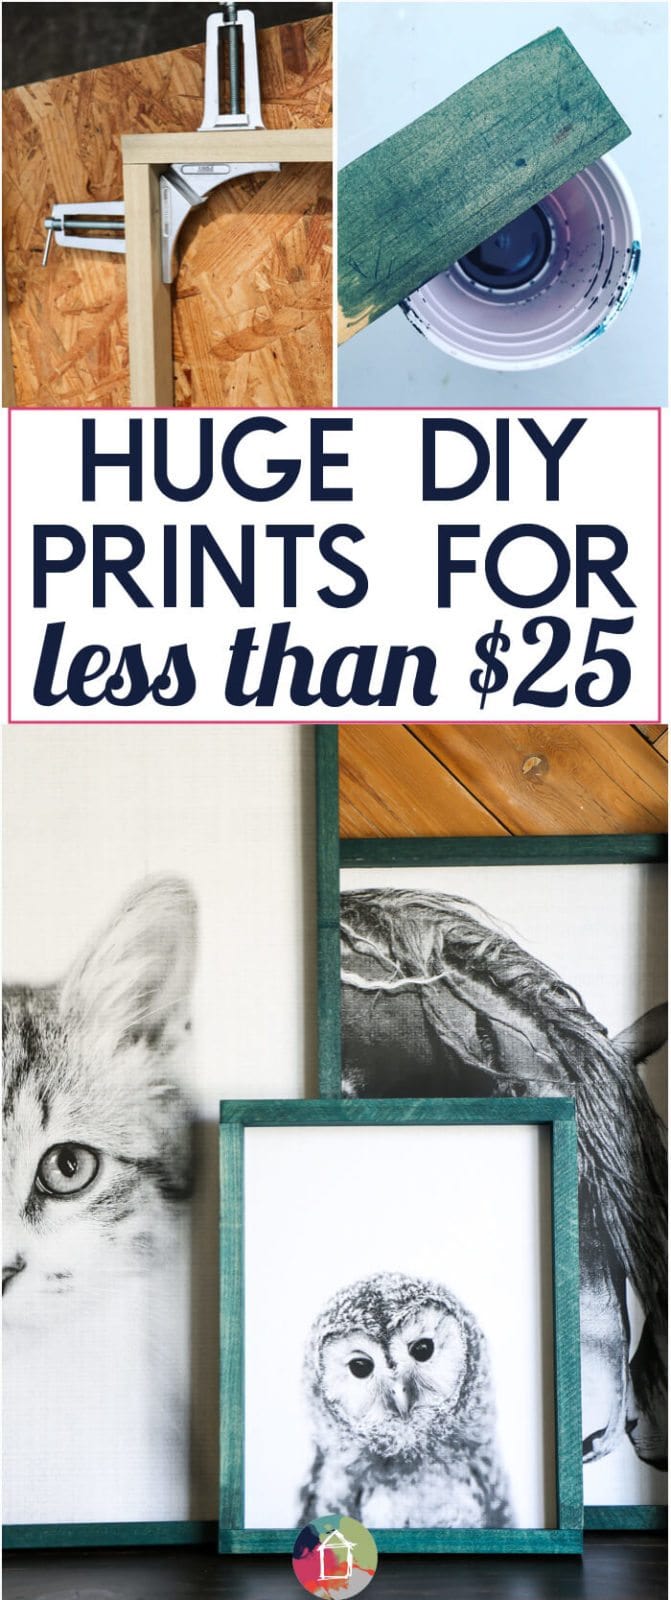
We made the frames for our large wall art using butt joints. Butt joints are simply two pieces of wood attached perpendicularly to each other. They are great to use when you want a more rough or rustic look, which is precisely what I wanted for these frames!
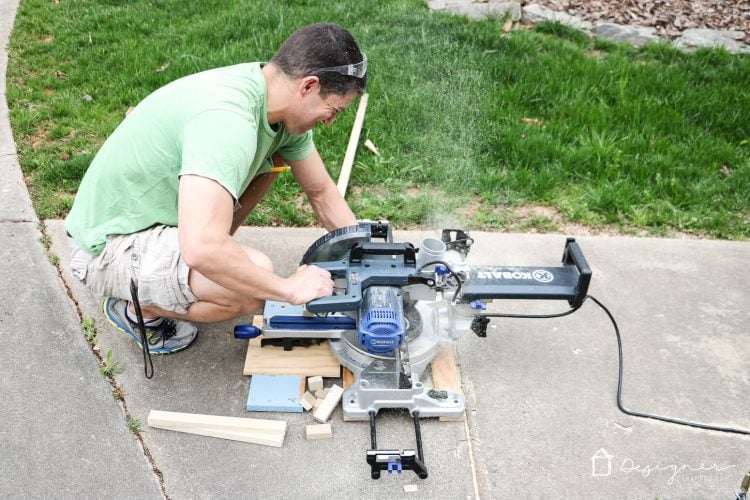
1) Cut the horizontal (top and bottom) pieces of your frame to the same width as your print. We used our compound miter saw, but again, you could easily make these cuts with a hand saw and miter box.
2) Cut the vertical (side) pieces to the same height as your print minus twice the width of your wood.
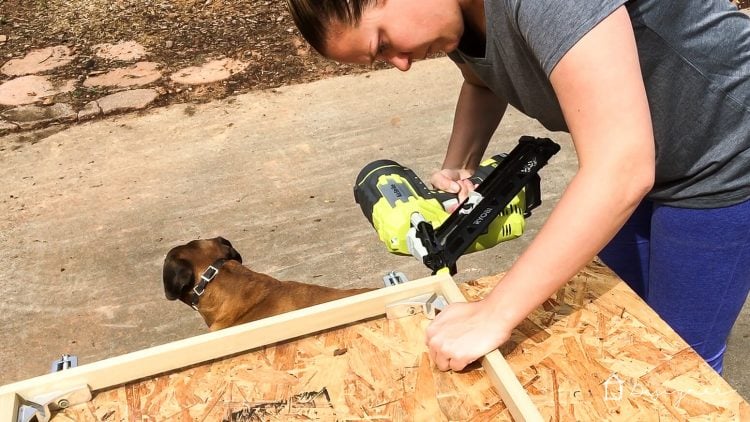
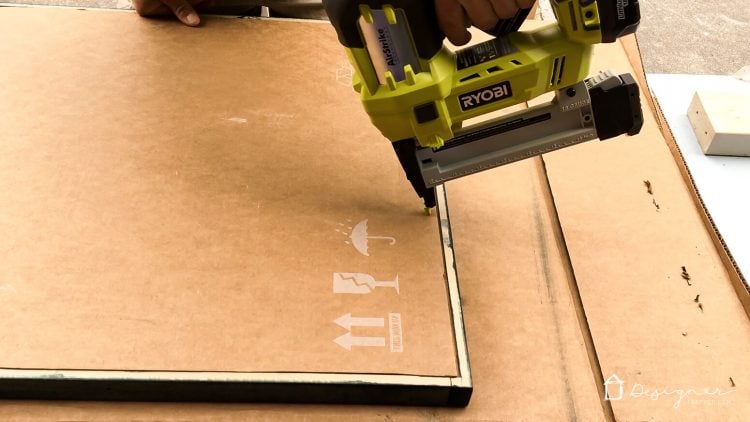
3) Butt your joints together, as shown below, making sure that the horizontal pieces sit on top of the vertical pieces. We like to use right-angle clamps to hold our joints tightly together until we nail them in place.
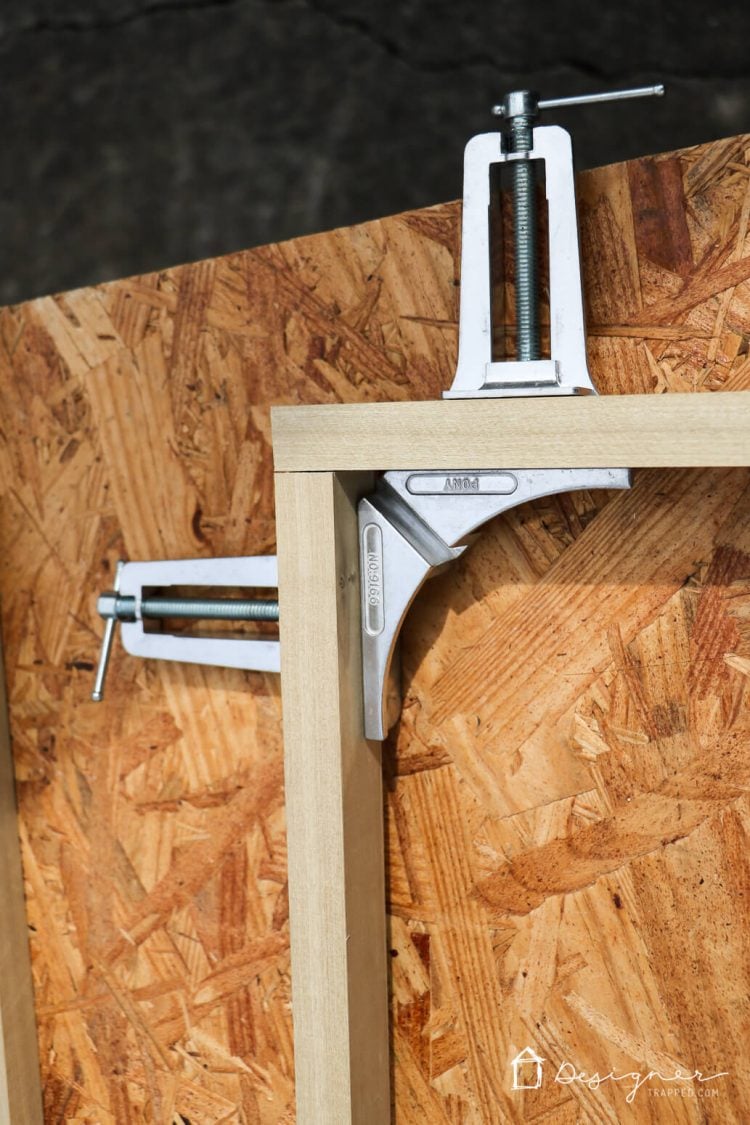
4) Nail your joints together by driving nails through the horizontal pieces into the vertical pieces.
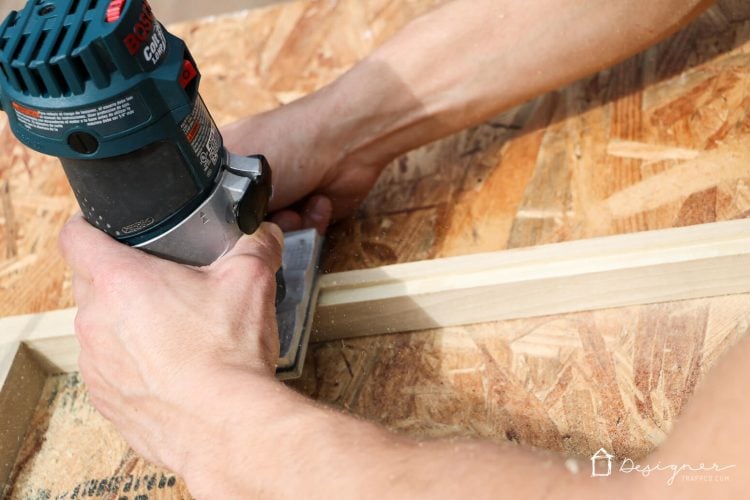
5) If you want your oversized photo print to sit flush with the wood frame, you can use a router to create a small channel on the back of your frame that is the same depth as your mounted print. This is totally optional! If you don't have a router, you can staple your print right onto your frame (after staining it). You just may be able to see the mounted print if you look at it from the side.
6) Fill your nail holes with wood putty. Once it has dried, sand the surface smooth.
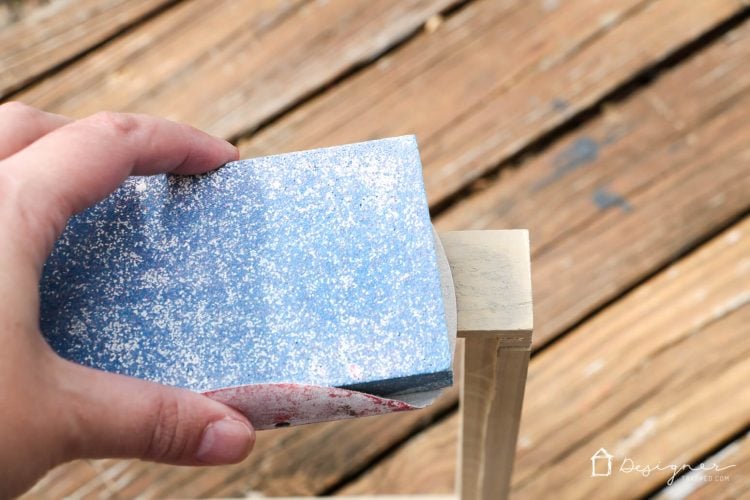
7) Stain the frame for your large wall art. Since we wanted a pop of color around these black and white prints, we chose Behlen Solar Lux stain, which is the most vibrant color stain I have ever seen. I used Sea Blue and gently wiped it on with a paper towel, being sure to rub with the grain of the wood. You can see how gorgeous the color is on this scrap piece of wood that I tested it on.
8) Once your stain is dry, staple your mounted print into your frame and attach hanging hardware to hang it up! These are really light weight, so they are perfect for hanging in kids' rooms.
That's it! We are THRILLED with how Avery's large wall art turned out! It took us an afternoon to make all four and we did it while our kids and dog enjoyed playing outside as we worked. Easy, peasy! And this is an extremely affordable art option. Here's a breakdown of the cost:
- Three 8 foot 1″ x 3″ poplar boards: $36
- 4 digital prints: $24 (you can save this cost of if you use your own images)
- Printing costs: $9.14
- Scrap cardboard and foam core board: FREE
- Spray adhesive: $3
- Stain: $15
- TOTAL COST FOR 4 FRAMED PRINTS: $87.14 (roughly $21 per print)
[mv_create 1 11 200 2016 key=”1″ type=”list” title=”Most Popular Projects” thumbnail=”</span><a href=” https designertrapped com wp content uploads diy home decor projects blog jpg target=”_blank” a span]

Last Updated on March 3, 2022