How to Repair Wood With Epoxy Wood Filler
Giving old furniture new life is so fun, but dealing with large areas of wood rot and damaged wood can be tricky. Learn how to use epoxy wood filler for perfect repairs that are quick and easy.

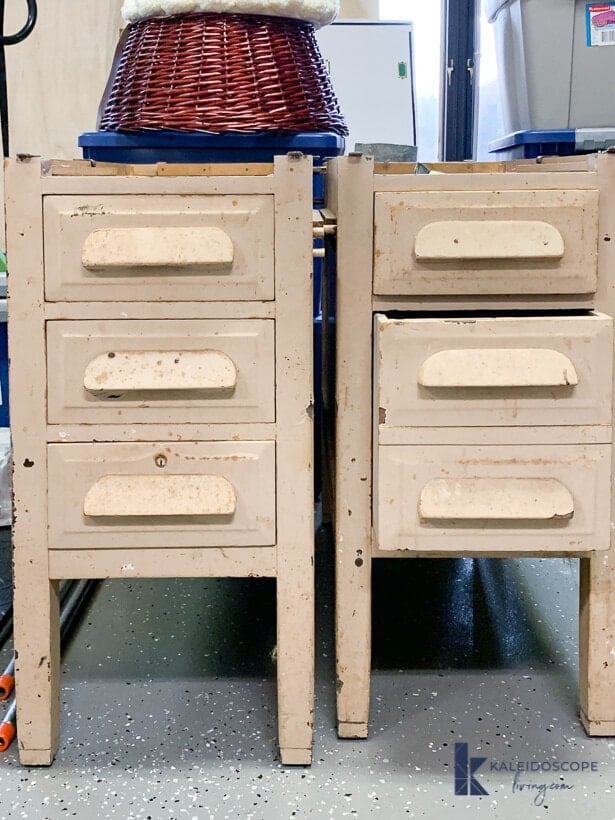
Hey, hey! If you follow me over on Instagram, you know that I've been working on creating storage in the “playroom” area of our family room. We love the DIY pipe table that we made, and we thought the open storage for pens, markers, etc. on top of the art table wouldn't bother us. But after living with it for a couple of years, we have decided we need some closed storage.

We wanted something with character, but we didn't want to spend a fortune since we now have the HUGE expense of our upcoming kitchen renovation. So, I hunted around thrift shops and the Facebook Marketplace and ultimately found these beauties. They are sturdy and in great shape structurally. But they needed some serious TLC.
I'm never afraid of a challenge! Read on to learn exactly how I tackled the repair with epoxy wood filler. No skill or prior experience required. Pinky promise.
Thank you to Mohawk Consumer Products for sponsoring this post. As always, all opinions are 100% my own based on my experience with the products used. This post also contains some affiliate links for your convenience. Click here to read my full disclosure policy.
How to Repair Wood with Epoxy Wood Filler
First, I have to mention that I am demonstrating this method on wood drawer bases. However, epoxy wood filler can be useful in many different ways! You can see how we've used it to fill in a large hole left by old hardware on our front door (we also completely updated our front door and added a DIY door kick plate to it). And here you can see how we have used it to fill old screw holes that are no longer holding the screw in place. You can also use it to repair areas where wood rot is common, like on exterior trim and on exterior doors. The possibilities are endless.
Materials needed:
- Mohawk Epoxy Putty Stick (I used a putty color, but it comes in a variety of colors–if you are working on stained wood, choose a color that is as close to your wood color as possible)
- A leveler card or old credit card
- A small dish of soapy water
- A sharp knife
- Sandpaper
Steps for Repairing Wood with Epoxy Wood Filler
1) Mix a small amount of liquid soap into about 2 ounces of water.
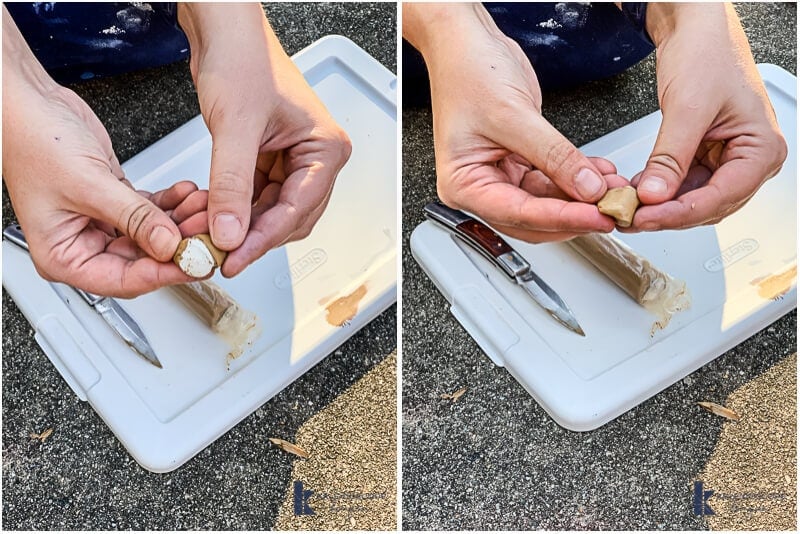
2) Cut a small piece of your Epoxy Putty Stick off and knead it with your fingers until the color is totally uniform. You will feel it getting warm in your fingers. If it starts sticking to your fingers, dip your fingers in the soapy water and continue to knead. Know that the working life of the epoxy is short–it's only about 6 minutes after mixing.
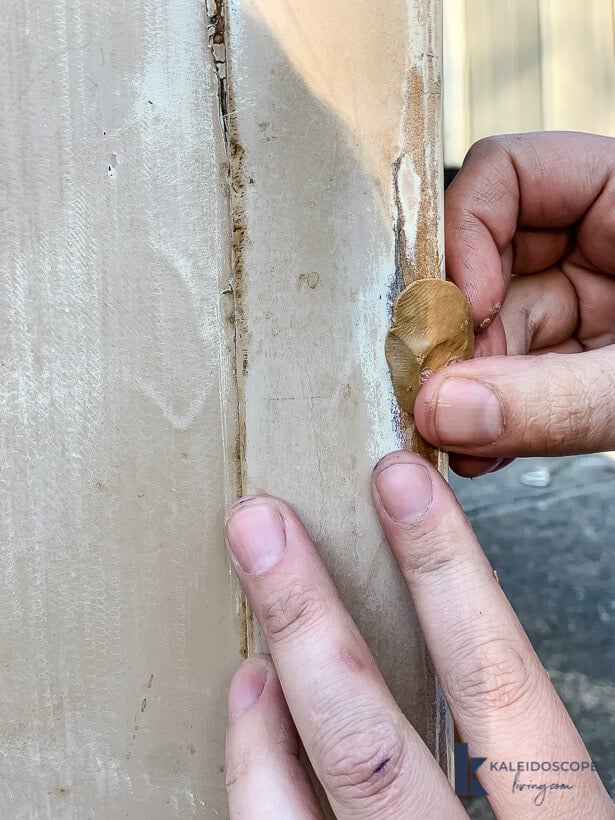
3) Once the color is totally uniform, push the epoxy putty into the area you are repairing with your fingers. If needed, use a leveler card or old credit card to remove any part of the epoxy putty that protrudes higher than the surface of the wood. If the epoxy begins sticking to the card or your fingers, just rub the epoxy lightly with the soapy water mixture.
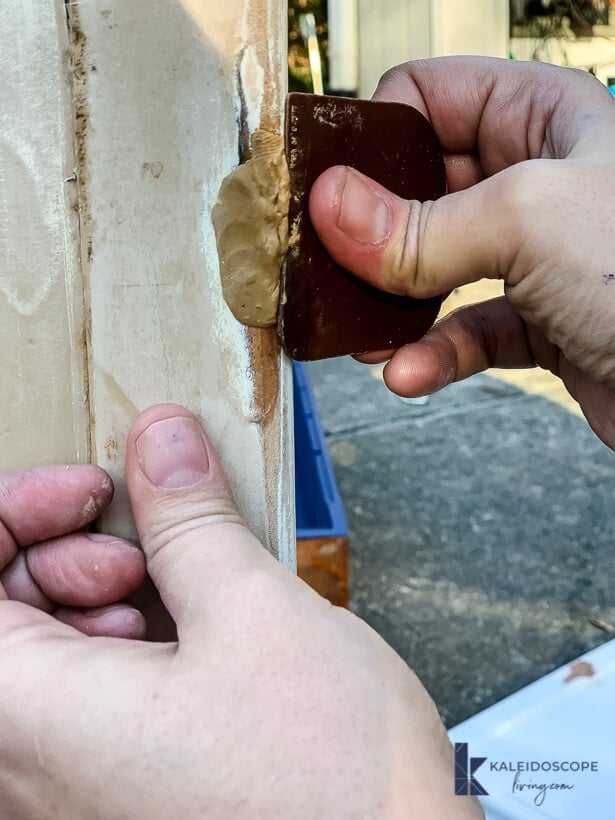
4) Allow the filled area to cure for at least 20 minutes. Here's the cool part–the epoxy putty is made from a RESIN and HARDENER, making it the perfect moldable putty for filling large holes, rotted areas and things like broken molding. Surfaces may be sanded, drilled, stained or painted after application. And the epoxy putty surface is even harder than the original wood!
5) After the epoxy putty cures, sand it until it is level with the surface of your door.
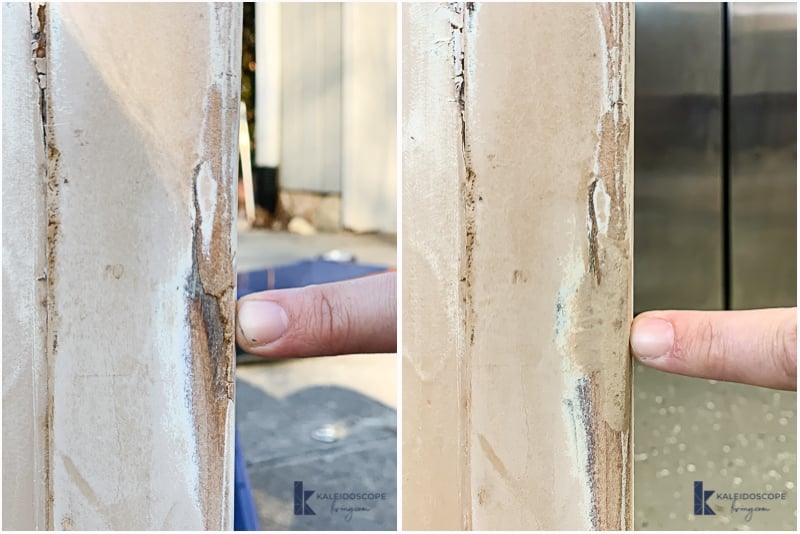
Check out the before and after of the damaged area. BIG difference. And it was quick and easy to repair.
That's it! Soon I'll share with you my best general tips for prepping furniture to paint and show you how these drawer bases turned out :) I sure hope this tutorial has shown you how easy it can be to repair even large areas of damage in wood. There's nothing to be afraid of!
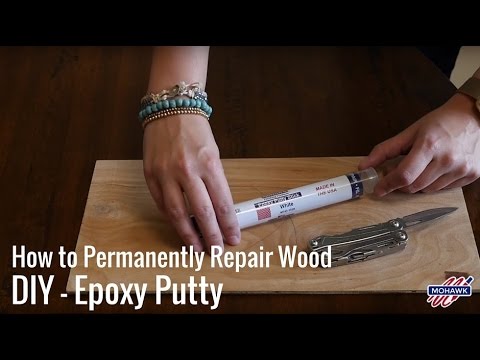
If you prefer to watch video demonstrations, you can see yours truly demonstrating this method on a piece of scrap wood in the video below.

[mv_create 1 11 200 2016 key=”1″ type=”list” title=”Most Popular Projects” thumbnail=”<a href=” https designertrapped com wp content uploads diy home decor projects blog jpg a]
Last Updated on May 20, 2019