Easy DIY Floating Shelves & Desk for an Awkward Nook
Last Updated on May 21, 2019
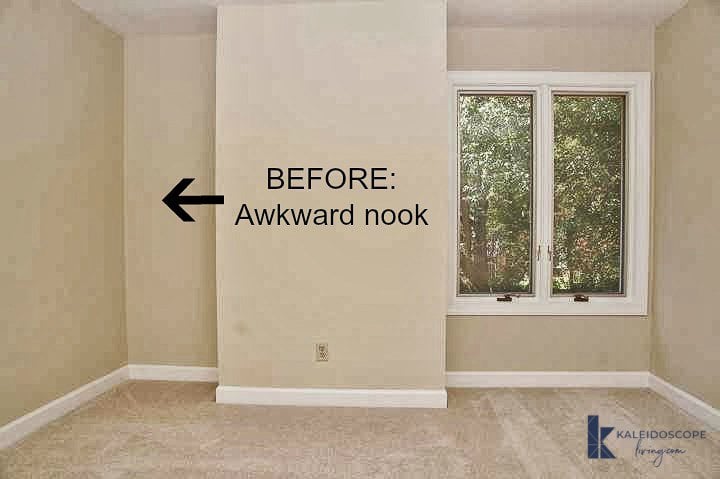
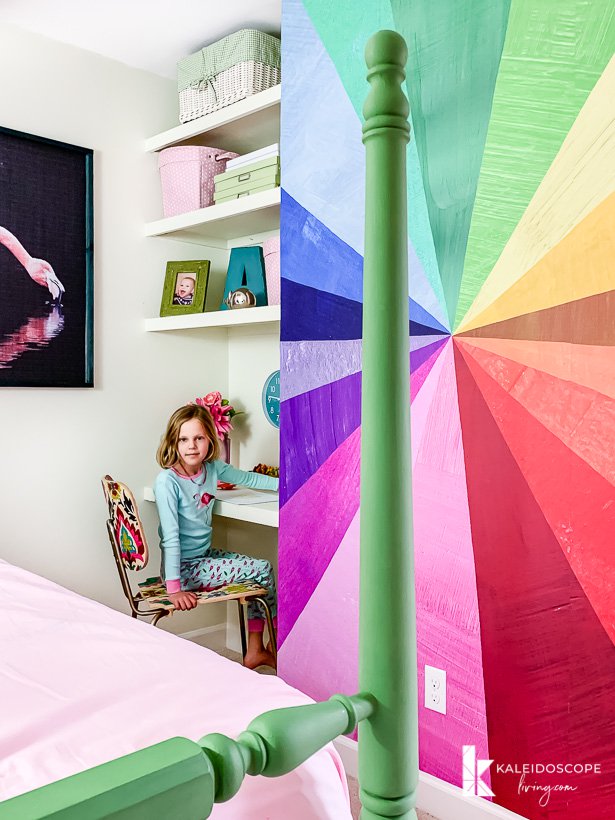
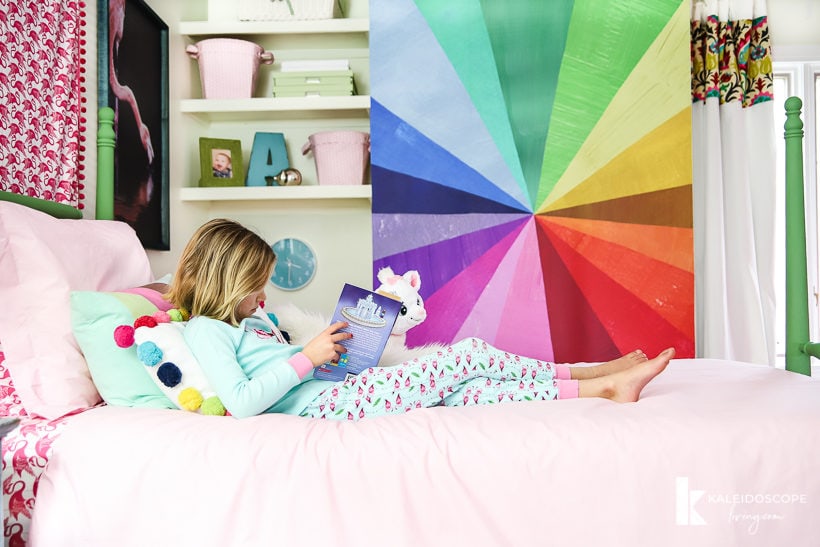
DIY floating shelves are one of the easiest projects you can tackle, even with limited DIY skills. We totally transformed this awkward nook in our daughter's room by adding floating shelves and a floating desk. Learn how you can make your own with this step-by-step tutorial.

Does anyone else out there have any weird nooks in their homes? I feel like most homes have at least one weird nook or corner in them that leave you scratching your head about what to do with them. Well, you may be surprised to learn that the answer to some of the most awkward nooks is to add floating shelves. Floating shelves are not only easy to make and install, but they look great and add storage. They are a big win all the way around.
For those of you that are here for the first time or don't remember what Attley's room looked like when we first moved in, let's take a look back. This room had this very awkward nook, created by the fact that the chimney runs up through the room.
After brainstorming some ideas, we decided to create floating shelves to fill the nook and now it is absolutely one of the highlights of the room. This project is proof that you just never know when a room problem can become a highlight of the design. This post contains some affiliate links for your convenience. Click here to read my full disclosure policy.

How to Build and Install Floating Shelves
Materials needed:
- Plywood
- 1×6 pine board
- Stud Finder

- Straight edge
- Level
- Table saw
- Brad Nailer
- Nails
- Stud Finder
- Paint or stain


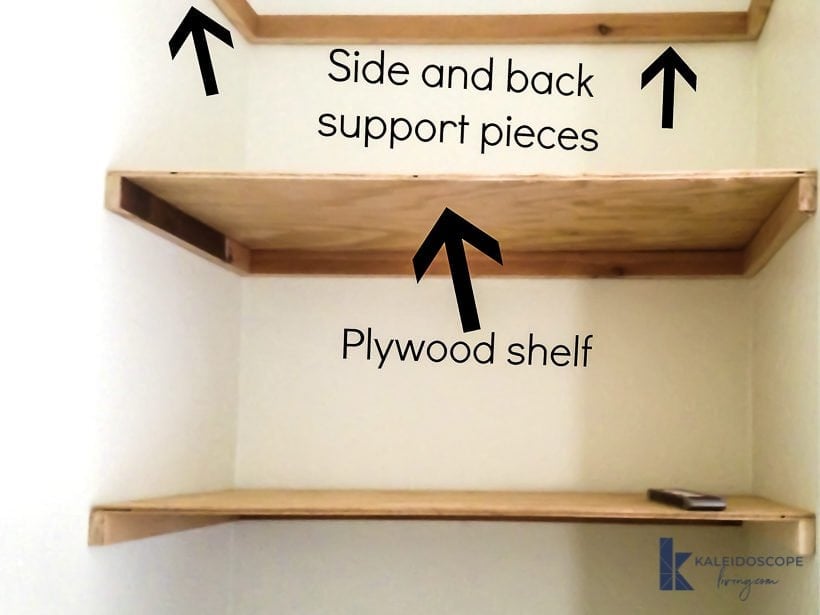
Anatomy of Floating Shelves
Before we get started, here is a little diagram of the “anatomy” of the floating shelves, which will ensure we are on the same page as you read through the tutorial.
Steps to build DIY Floating Shelves:
Step 1:
The first step is to measure the area where your DIY floating shelves will hang. The nook we were dealing with was 33” x 15”.
Step 2:
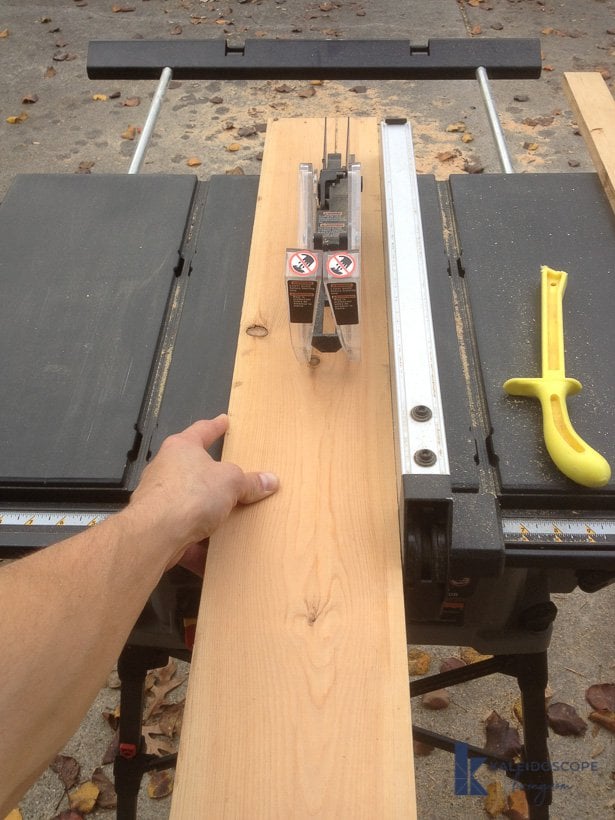
Once you have your measurements, you are ready to cut your support pieces. We had some old 1”x6” pine boards left over from and old bed frame, so we decided to use it to make the side and back support pieces. We used the table saw to rip the boards to an equal width of 1 1/2” each. But you could certainly buy 1 x 2s to use as your support pieces and save yourself some work.
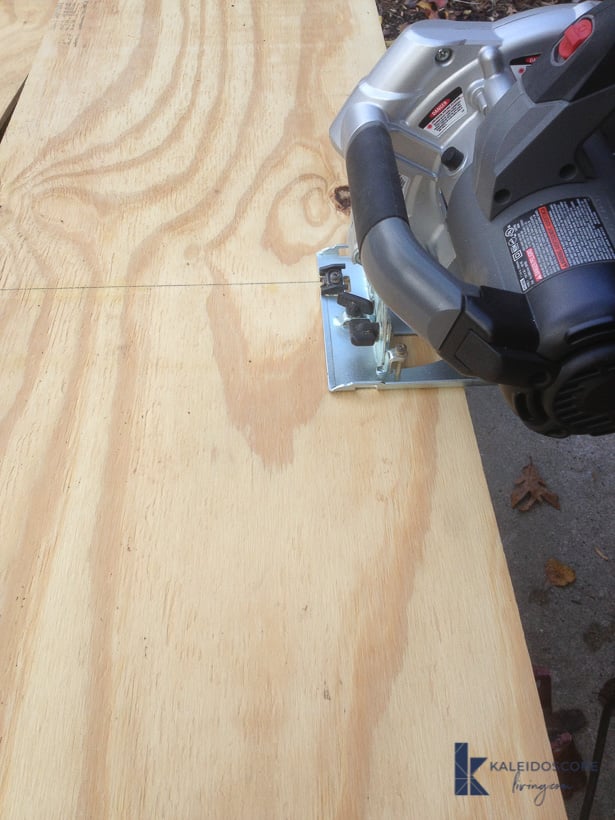
No matter what, you will need to cut your support pieces to the correct length. We cut ours to length with a circular saw. There were some irregularities in the nook which required us to measure for each shelf separately. Each back support piece was between 32 1/2” and 33 1/4” and each side support was between 13 3/4” and 14 1/4”.
Because we were dealing with irregular wall measurements, we marked where each shelf would hang on the wall with painters tape and labeled each support piece accordingly. Since this room was upstairs, I wanted to make sure I had each piece measured and cut correctly so I would not have to keep going up and down the stairs to fine tune each piece. Our mantra is measure twice, cut once. Labeling each piece allowed us to cut the material for all the shelves at one time.
NOTE: if you plan to stain your shelves, we recommend staining the support pieces before moving on to the next step.
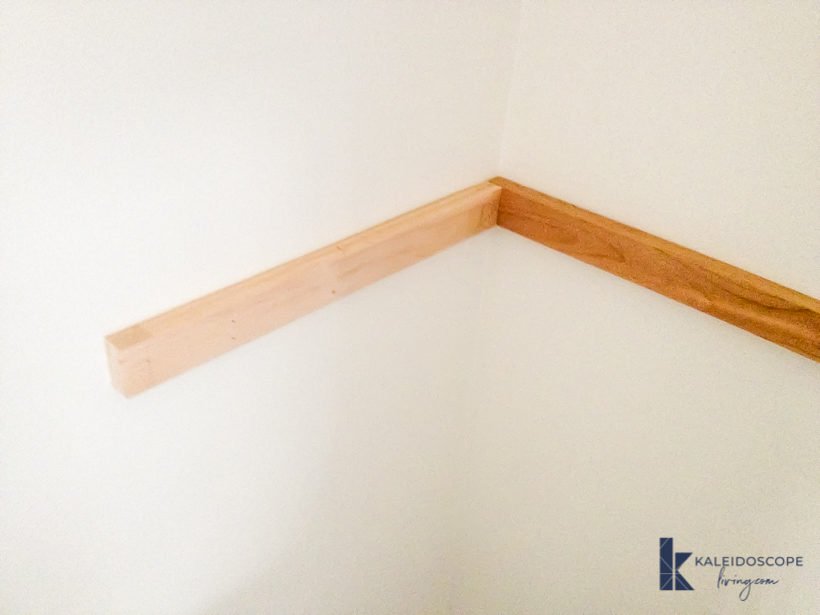
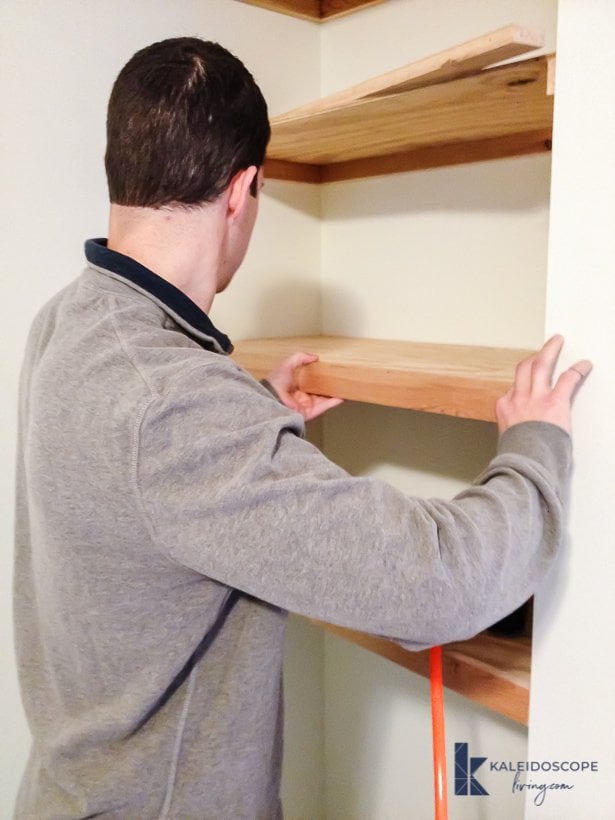
Step 3:
Next, you are ready to install your support pieces. To do that, grab your stud finder and level. After finding the studs with a stud finder, we used a brad nailer with 2” brad nails to install each side and back support piece on the wall. Make sure to level each support piece before securing it to the wall. Our shelves were not going to be holding anything heavy so we knew simply nailing them to the studs would provide enough support, but if your shelves are going to be longer or hold anything heavy you should use screws or a larger nail and make sure to hit the studs.
We installed the desk supports at desk height and spaced the upper shelves 14 inches apart.
Step 4:
Now you are ready to cut the plywood for the shelves. Again, each of our shelves had slightly different dimensions because of the irregular walls (fun, fun) so we carefully measured each one before we started cutting. We used our circular saw and straight edge to cut the plywood. Note: our plywood was only 3/8” thick which worked for this area because it was so small and would not hold anything heavy. For longer shelves, we would recommend using a thicker plywood.
NOTE: if you plan to stain your shelves, we recommend staining the plywood shelves you just cut before moving on to the next step.
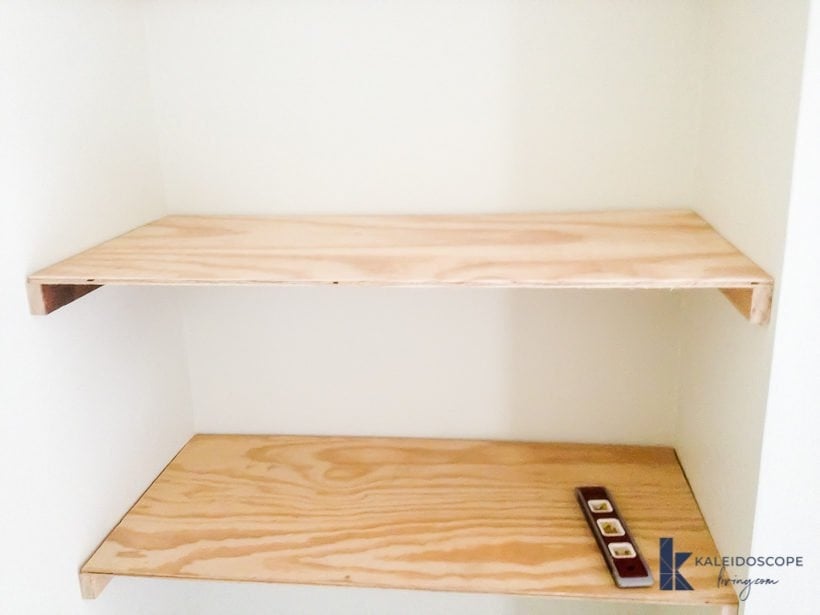
Step 5:
Next, attach the plywood shelves to the support pieces you already installed. We used our nailer to tac down the plywood shelves onto the support pieces using 1” nails.
NOTE: if you plan to stain your shelves, we recommend staining the front support pieces before moving on to the next step.
Step 6:
For the front support pieces (which also serve double duty since they give the shelves a more substantial and finished look), you will install something wider than your side and support back pieces–this is so the other support pieces and the edge of the plywood are fully covered hidden). We ripped the pine boards to a width of 1 7/8”. But if you've used 1″ x 2″ wood for your support pieces, you could probably use a 1″ x 3″ material for the front piece, depending on the thickness of the plywood that you used.
Step 7:
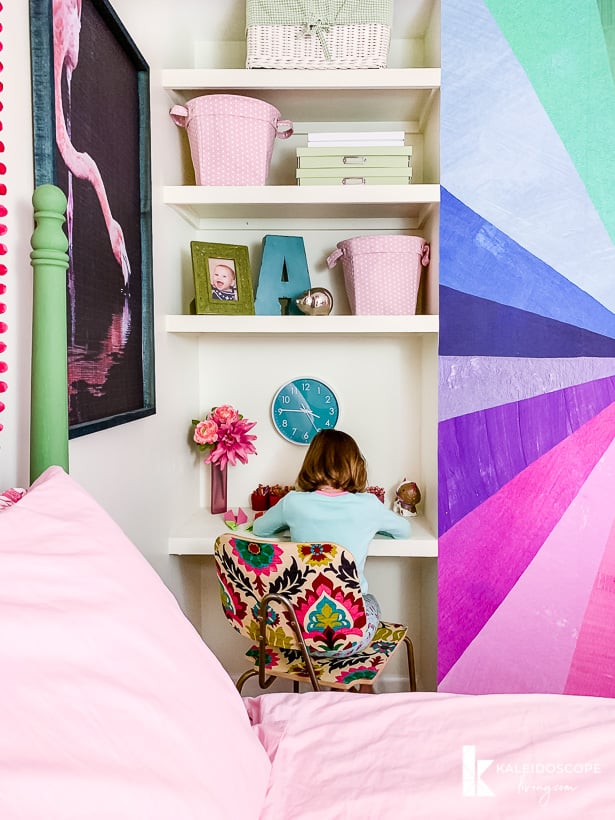
Once all your shelves are installed, fill the nail holes with spackle and lightly sand everything. After you have sanding and wiped all the dust away, caulk any gaps between your shelves and the walls. Once the caulk has dried, you are ready to paint your shelves. We painted ours the same colors as the walls in the room. Note that if you don't have leftover paint and want to do the same thing, you can use these tips to match a paint color that is already on your walls.
This project only took an afternoon to complete and we are so happy with how it all turned out. What used to be an awkward nook is now one of our favorite features in Attley's room. Plus, it gives her additional storage AND a small desk.
I hope you are feeling inspired to tackle some DIY floating shelves for yourself. Before you head out, be sure to subscribe to unlock my vault full of printable instructions for a variety of DIY projects (we add new projects regularly)!
[mv_create 1 11 200 2016 key=”1″ type=”list” title=”Most Popular Projects” thumbnail=”<a href=” https designertrapped com wp content uploads diy home decor projects blog jpg a]

These shelves look fantastic. I’m been trying to do something like this for a similar space I have. It is a bit wider – maybe 4 Ft. I want to put up shelves for children’s books, so it would need to support more weight. Another obstacle is that the walls are concrete. So I can’t use studs for support. Any suggestions would be greatly appreciated. Thanks.
Great Job!. I have a space that’s 6ft wide that i’d like to try this in. and suggestions?
Hi Ryan. Thank you! As long as you don’t plan to put anything very heavy on the shelves, you should be able to use a thicker plywood for the shelves and follow the same steps in your space. I hope that helps.
Hi Tasha,
These look great! Adding the fronts and painting them to match the walls makes them look built in. Nice work!
Val
p.s. – The table saw scares the heck out of me, too!
Thanks, Val! Glad to hear I am not the only one afraid of the table saw :)
This idea is fabulous for a spot on my upstairs hall where we have the exact same problem for the exact same reason. :)
So glad you like it, Amanda! It was a fairly quick and easy project and we love the results. You will, too!
Thank you so much for linking up at Thursday STYLE and for supporting our party! I am dying to try these…we’re house hunting now and I have so many fabulous ideas I’m antsy to work on thanks to your wonderful blog :)
Thank you, Angela! It’s my pleasure to link up at your fabulous party! Ooooh, I can’t wait to see what you come up with when you buy a house. Good luck with your hunt!
Such a great step by step tutorial Tasha!! I want a nook like that, so that I can have awesome shelves too!
Awww, thank you, Christine! They really do fit the space perfectly. I am relieved I was able to come up with a solution that I love! We almost didn’t use that room for our girls’ bedroom because of that nook and now I love it!
These shelves look great and are SO EASY! Awesome tutorial. I hope you plan on sharing at link it or lump it! http://www.sohosonnet.com/link-it-or-lump-it/link-it-or-lump-it-link-party-28/
I absolutely will link it up to your fabulous party. Thanks, Sonnet!
Thanks for sharing Joe’s awesome tutorial, Tasha, at this week’s Project Inspire{d} ~ pinned!
Thank you, Mary Beth!
What a great idea!! We have a similar nook in our bathroom…I just might have to do this! Thanks!
Thanks, Suzie! It totally changes awkward nooks and makes them useable. Go for it! You will love the result!
The shelves look awesome! Great job Joe! :) What a perfect use of space!
Thanks, Kelly! I am so happy with how they turned out. It’s funny because we ALMOST didn’t use that room for their big girl room because of the awkward nook and now it’s one of my favorite features of the room.
I think these shelves are awesome they make that awkward nook look amazing! Great tutorial!! Still love this room too!
Thanks, Mindi! I will pass on your compliment to Joe for the tutorial–I think he was nervous about his first blog post :)
Wow! Joe makes building the shelves sound easy. I have a spare bedroom closet that I’m thinking about trying this on. I’ll let you know how it goes. lol
Hi Glenna! Joe does make it sound easy, doesn’t he?! Good luck! Let me know how it goes and share photos when you are done!
Great job looks beautiful thanks for share :)
Thanks so much, Mari!
Great job Joe! It’s always nice to share your talents with others.
Thanks, Kathy!