DIY Christmas Art Display That Makes a BIG Impact
This huge Christmas canvas is an easy DIY that will make a huge impact in any space in your home for the holidays!
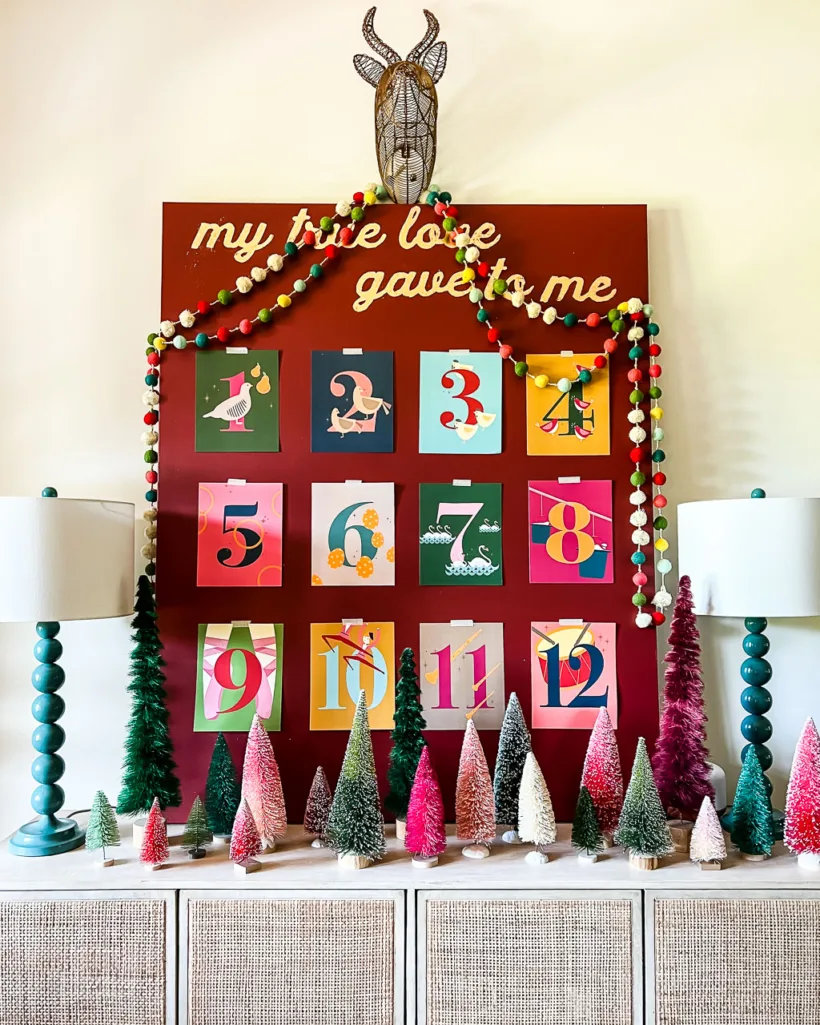
If you follow me on Instagram, you know created a huge DIY Christmas canvas to display my 12 Days of Christmas art prints a couple of years ago. I thought this would be a fun alternative to framing them since I don't have 12 8″ x 10″ frames to put them in. And I knew this would make a bigger impact in our entryway than frames would anyway!
Read on to learn how to make your own!
This post contains affiliate links for your convenience. Click here for my full disclosure policy.
DIY Christmas Art Canvas Tutorial
Materials Needed
- A 40 x 60-inch canvas. I bought mine at a local art supply store for 50% off, so I got it for less than $50. You might also be able to find a large canvas at Goodwill or another thrift shop. Since you'll be painting over it, it doesn't matter what it looks like!
- Paint- I used the color Highlander from Fusion Mineral Paint (save 10% with the code AFFMP10 at checkout)
- Paint roller and/or brush
- 12 Days of Christmas Art prints
- Washi tape
- Quake Hold or Poster Hanging Strips (if needed–some washi tape is strong enough on its own)
- Carbon paper
- Gilding adhesive
- Gold leaf (this is the exact imitation gold leaf I used)
- Bristle brush (for removing the gold leaf–not for painting)
Steps
You can watch a short video to see the process below. I've also typed out instructions for you below the video.
1) Paint your canvas until you get full coverage.
2) Type out whatever phrase you want to gold leaf on your canvas and print it out on printer paper. I chose “my true love gave to me” and used a script font set to around 400 pt.
3) Decide on the placement of your lettering and tape your printed phrase onto your canvas. I used gentle painter's tape–washi tape would work as well.
4) Use carbon paper and a pen or embossing tool to trace your lettering onto your canvas.
5) Use a small artist's brush to paint your lettering with the gilding adhesive. As soon as it becomes tacky (which is pretty quick), apply your gold leaf. I did one letter at a time so that the adhesive didn't get too dry.
6) Use a dry bristle brush to gently “buff” the gold leaf off the areas where there was no adhesive. If you miss any spots, just apply more gilding adhesive and a bit more gold leaf to fill in the spots.
7) Use washi tape (and quake hold or poster hanging strips, if needed) to hang your 12 Days of Christmas Art prints to your canvas.
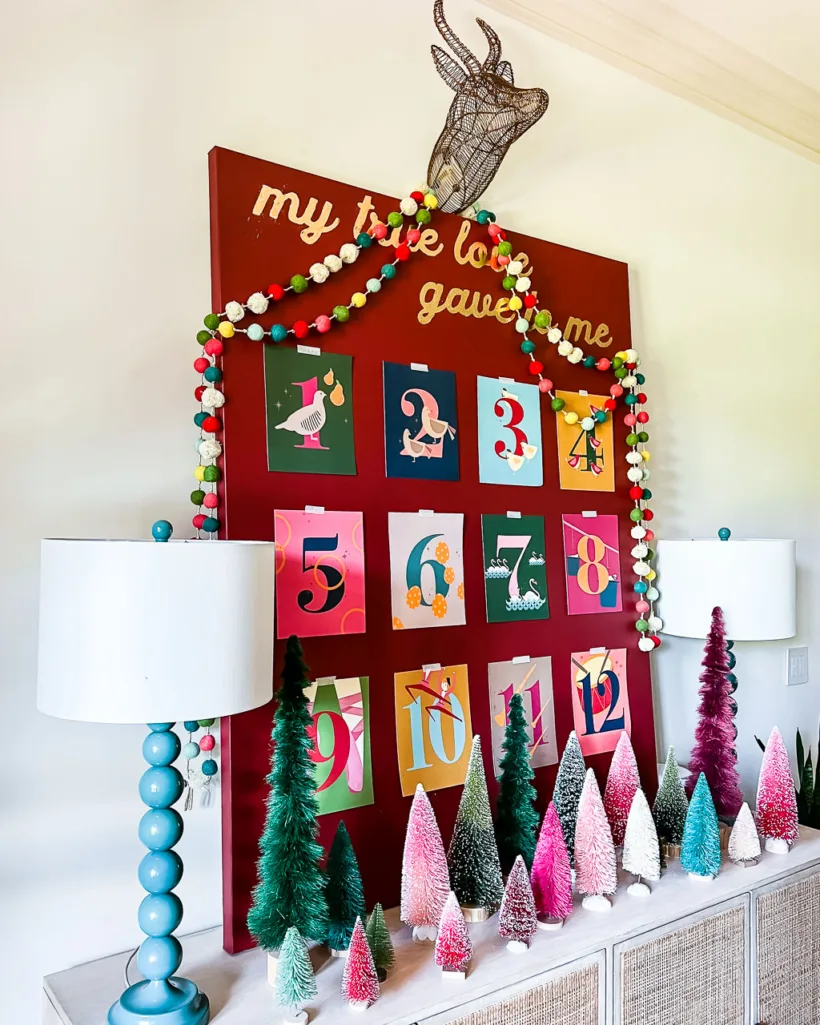
That's it! Then style your DIY Christmas art however you want. I used a colorful garland that we've had for many years and a copper stag head (that is also old–sorry, I don't have links for you) to ours and love how it turned out.
What do you think?!
More Seasonal Posts
Wondering how I approach transforming rooms and spaces in our home? Check out Designer in a Binder®.
And if you want exclusive content and behind-the-scenes sneak peeks, be sure to subscribe before you head out!

