How to Remove Caulk and Replace It
Thank you to DAP Products for sponsoring this post. As always, the opinions and text are all mine.
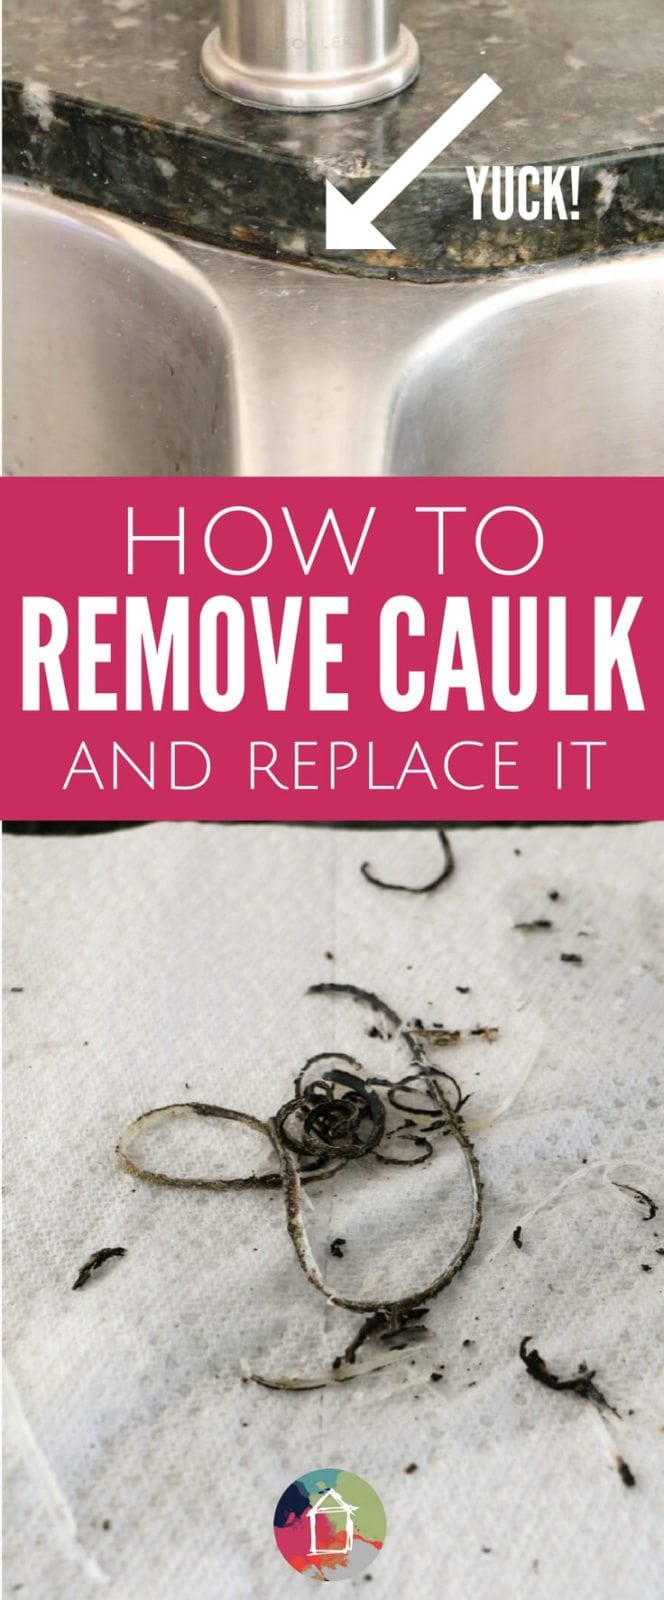
So…. this is kind of embarrassing. You see, we consider ourselves to be clean and tidy people, but the fact is if you looked closely around the edges of our under-mount sinks, you might gag a little. Because our caulk was a moldy, disgusting mess. So, we decided to give it a refresh, which meant we first had to remove the caulk and then replace it. And today I'm going to teach you how to remove caulk. It's actually MUCH easier than I expected. It's all about the tool!
Before I jump into the tutorial, let me show you a couple of “before” photos of the two kitchens in our sink (we have a main sink and a small prep sink in our island–I'm sad to say that both had gross caulk).
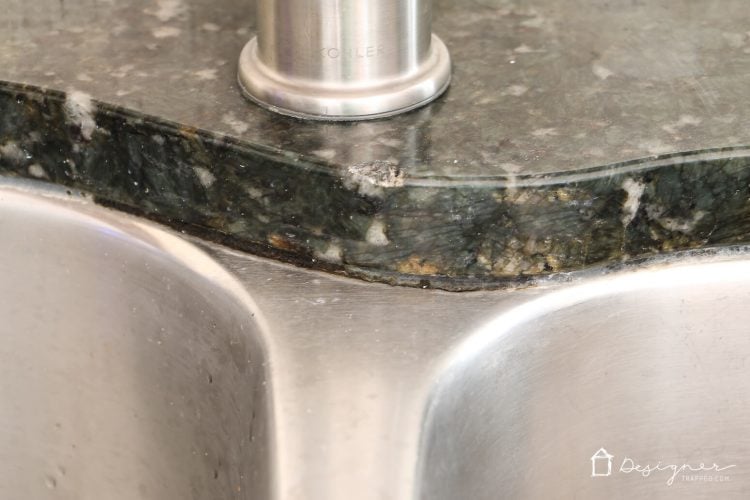

Now do you see why I'm embarrassed to broadcast those gross photos all over the internet?! But it's necessary because I know we can't be the only ones with this issue. Now, read on to learn how to remove caulk and refresh it yourself.
This post contains some affiliate links for your convenience (which means if you make a purchase after clicking a link I will earn a small commission which helps keep my blog up and running but it won't cost you a penny more)! Click here to read my full disclosure policy.
How to Remove Caulk and Replace It
Materials needed:
- Caulk removal tool (we used this tool that we've had about 15 years)
- Paper towels
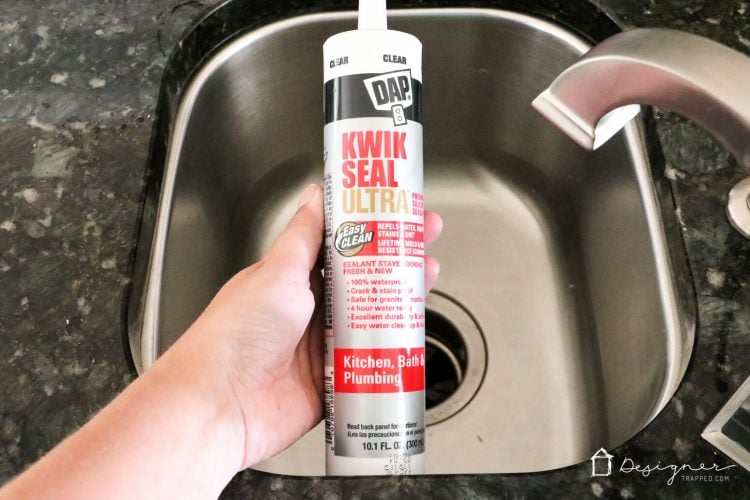
- DAP Kwik Seal Ultra (THIS is the caulk you should use in kitchens and bathrooms–you can read all about the mistake I made when caulking our bathroom shower here)
- Rubbing alcohol
- Bleach
- Cleaning brush or toothbrush
Steps to remove caulk:
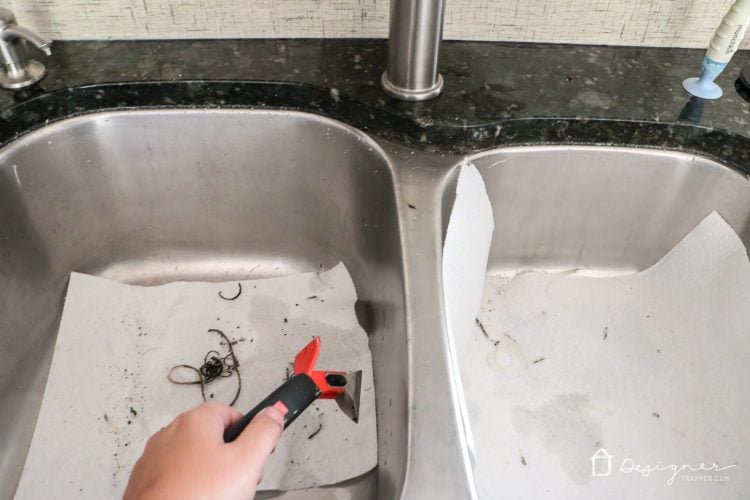
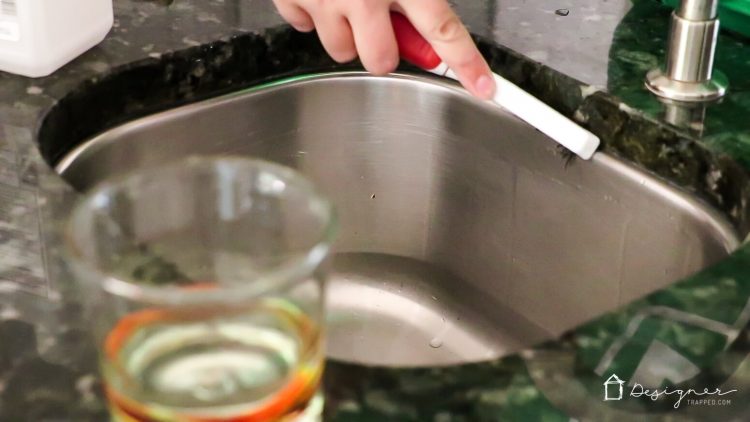
1) Use your caulk removal tool to scrape the caulk out of the joint. We place drain stoppers and paper towels in the bottom of our sinks so that the old caulk didn't go down the drains.

2) Scrub away any bits of caulk that remain in the joint.
3) Clean the surface of the joint with a bit of rubbing alcohol on a paper towel.
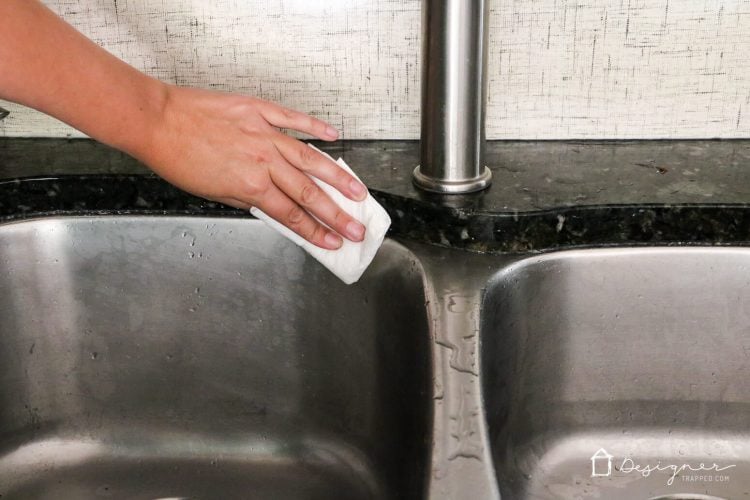
4) Clean the surface with a diluted bleach mixture to kill any mildew or mold.
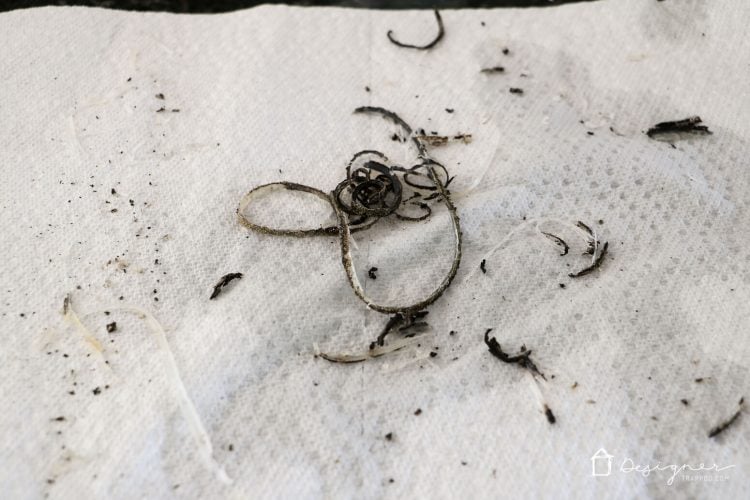
And before we move on, just take a look at the GROSSNESS (that's a word, right?!) that I removed from our sinks!
Steps to replace caulk:
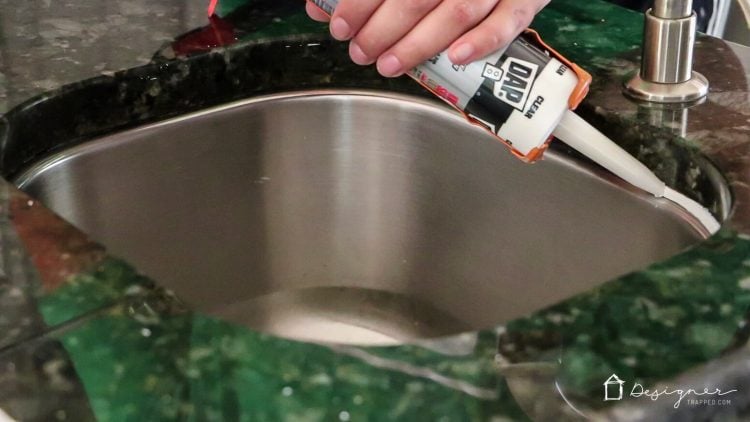
5) The most important step is to allow the joint that you will be caulking to completely air dry before applying your new caulk. Once it is dry, use a caulk gun to apply your DAP Kwik Seal Ultra in an even bead around the entire joint you are working on. My favorite thing about the DAP Kwik Seal Ultra is that it goes on white and dries clear, so you can easily see it as you apply it.
6) Wait the recommended amount of drying time before exposing the joint to moisture. DAP Kwik Seal Ultra is water ready in only 4 hours. It also repels dirt and soap scum, resists stains and has a lifetime mold and mildew resistance guarantee.
It takes a few days for the caulk to turn completely clear. It looks SO much better and I definitely feel like we have a better seal now as well. The old caulk was cracking a bit, which is a sign that you need to replace it (whether it's moldy or not).
So there you have it! Now you know how to remove caulk AND how to replace it!
[mv_create 1 11 200 2016 key=”1″ type=”list” title=”Most Popular Projects” thumbnail=”<a href=” https designertrapped com wp content uploads diy home decor projects blog jpg a]

Last Updated on August 10, 2021
Oh my goodness! So glad to see I am not the only one with “grossness” around their sink! I was just looking at my kitchen sink this weekend thinking, now how can I do this! Your post here was “meant to be”! Thank you. This looks relatively easy and I plan to tackle this job between Christmas and New Year’s when I have the week off! This sounds like something that will make my “New Year! shine!
So glad you found it helpful, Sharon! It’s an oddly satisfying project to tackle!
the kwik seal caulk had completely dried……how to i get it off….a razor blade and caulk removal tool does nothing. is there a solvent that will remove it
Hi Cindy. I would recommend calling the DAP customer support number to see if they can help you!
The caulk in my shower was looking the same nasty way! This article was very helpful, b/c I lost most the caulk trying to scrub off the mold. Oops! I’ve just been nervous about re-doing it myself in a rental, but reading this removes much of that intimidation.
Oh yay! I’m so happy to hear that Jill! You can definitely do it yourself!