DIY “Swurfer” Swing Your Kids Will Love
This DIY swing made from a skateboard is a perfect addition to any family's backyard. It's easy to make and can be used as a standing swing or a sitting swing. All you need is a tree to attach it to! Make one for your kids with this easy tutorial.
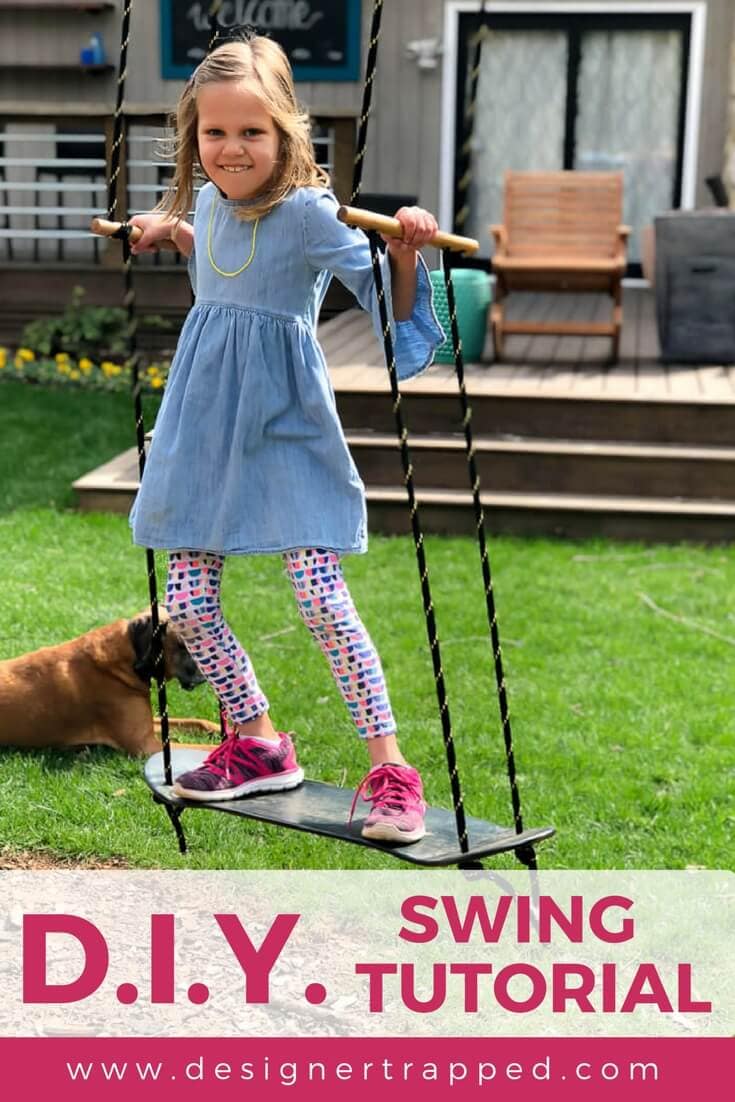
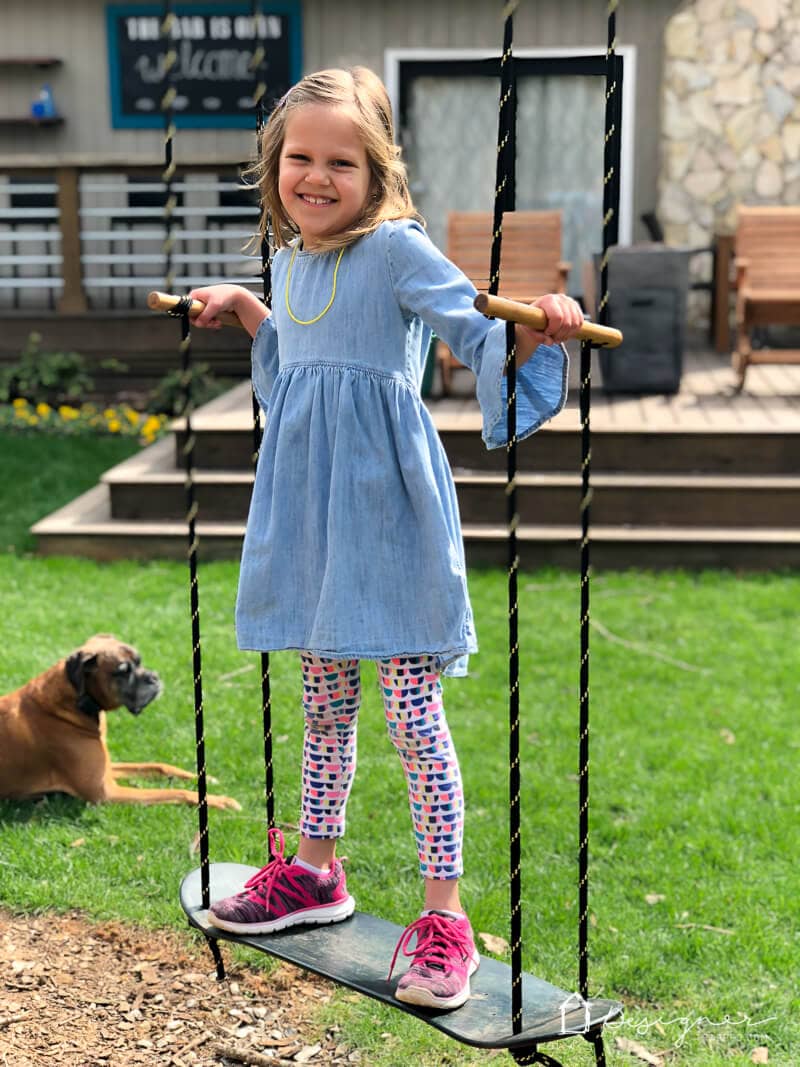
Hey friends! Spring has nearly sprung here in North Carolina, thank goodness! We've had a few nice days where our girls have played outside alllllll day long, which as a parent is the best thing ever. They get fresh air, Vitamin D and exercise all at the same time! And maybe another tiny benefit is that I can relax in a rocking chair while I watch them ;) One of the reasons our girls love to spend so much time outside is because of this DIY swing we made for them. They mostly use it to stand and swing, but they can also sit on it and push each other, which is cool as well.
This post contains affiliate links for your convenience. Click here for my full disclosure policy.
The idea for this DIY swing came after our girls had been begging for a Swurfer. Swurfers are super cool and are a bit easier to get momentum on because the platform is much more curved, so if you love the idea of this DIY swing but would rather buy it than make it, then definitely check out the Swurfer. That said, our DIY swing version cost us significantly less and it's still a total hit with our kiddos. Read on to learn how to make your own DIY swing for a fraction of the price of a store-bought version.
How to Make a DIY “Swufer” Style Swing
Materials needed
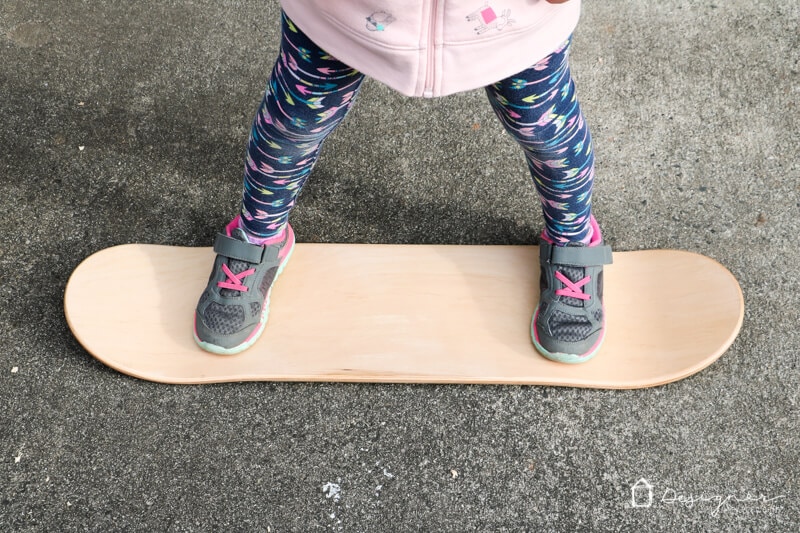
- A wooden skateboard deck
- Rope
- Be sure to choose a rope that will withstand the elements, some friction AND that will support the load that your swing will carry. I'm not comfortable making a specific rope recommendation to you because there are too many variables to consider (the weight of your kids, height of your tree, etc.), but I will tell you that we found a quality rope that fit our needs for only $14.00.
- Drill bit that is slightly larger than the diameter of your rope
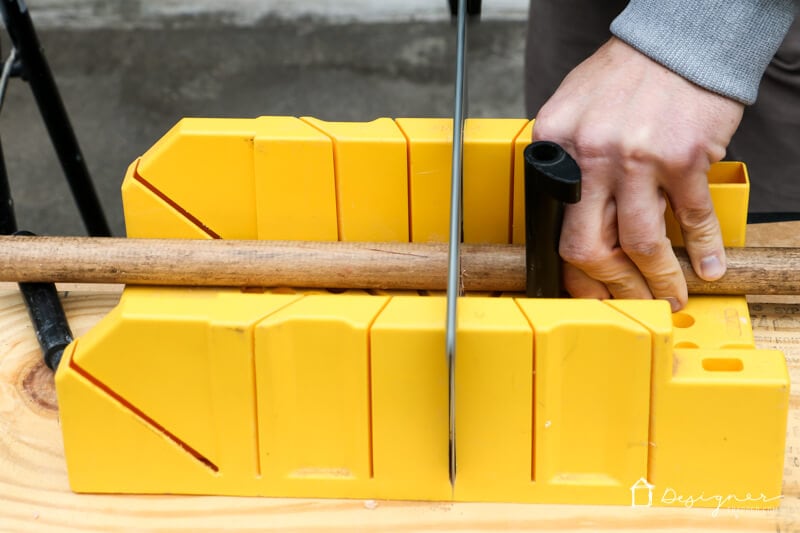
- 1-inch dowel rods
- Hand saw
- Wood stain (optional)
- Polyurethane
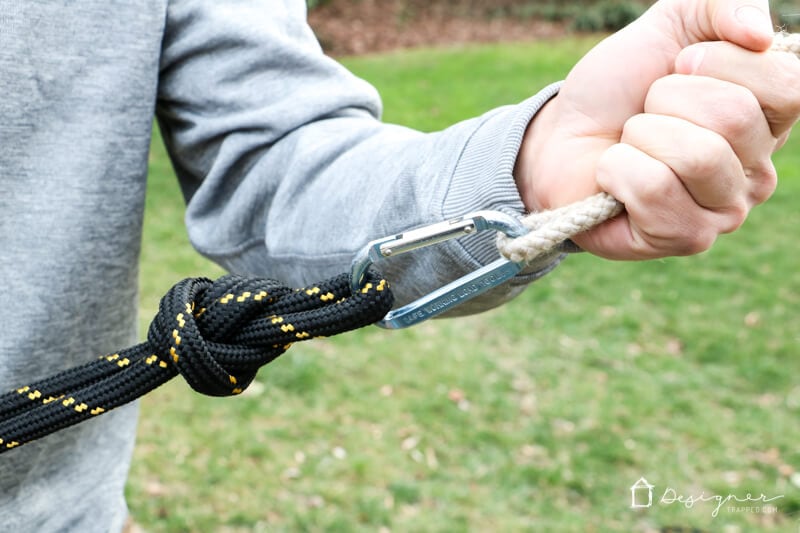
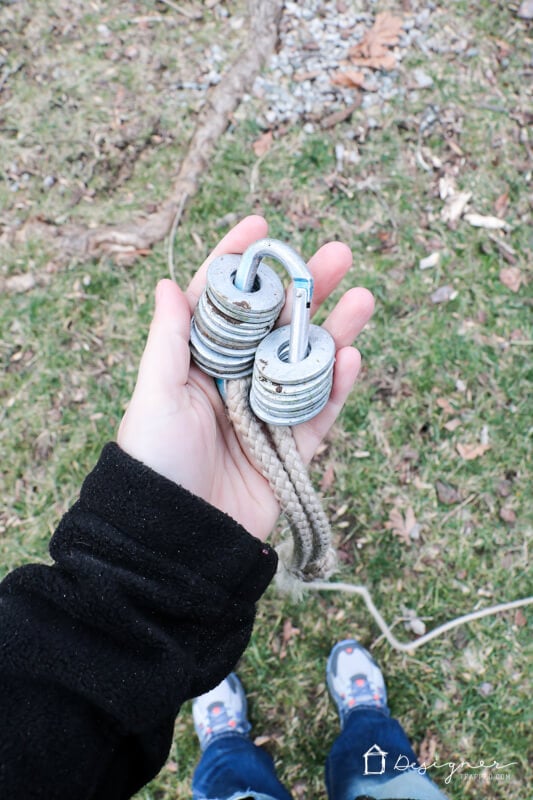
- If your tree branch is really high, like ours, then you may also need some carabiners and some washers to use as weights (you'll see what I mean in the tutorial)
- Knife that will cut rope
- Duct tape or electrical tape
- Lighter
Steps
1) First, have your kid(s) stand on the skateboard with a wide stance and mark the outer part of their feet. This will help determine where you want to drill the holes for your rope to go through.
2) Next, drill two holes that are parallel to each other on each end of your skateboard using your markings from step 1 as your guide. Our girls helped with this step :)
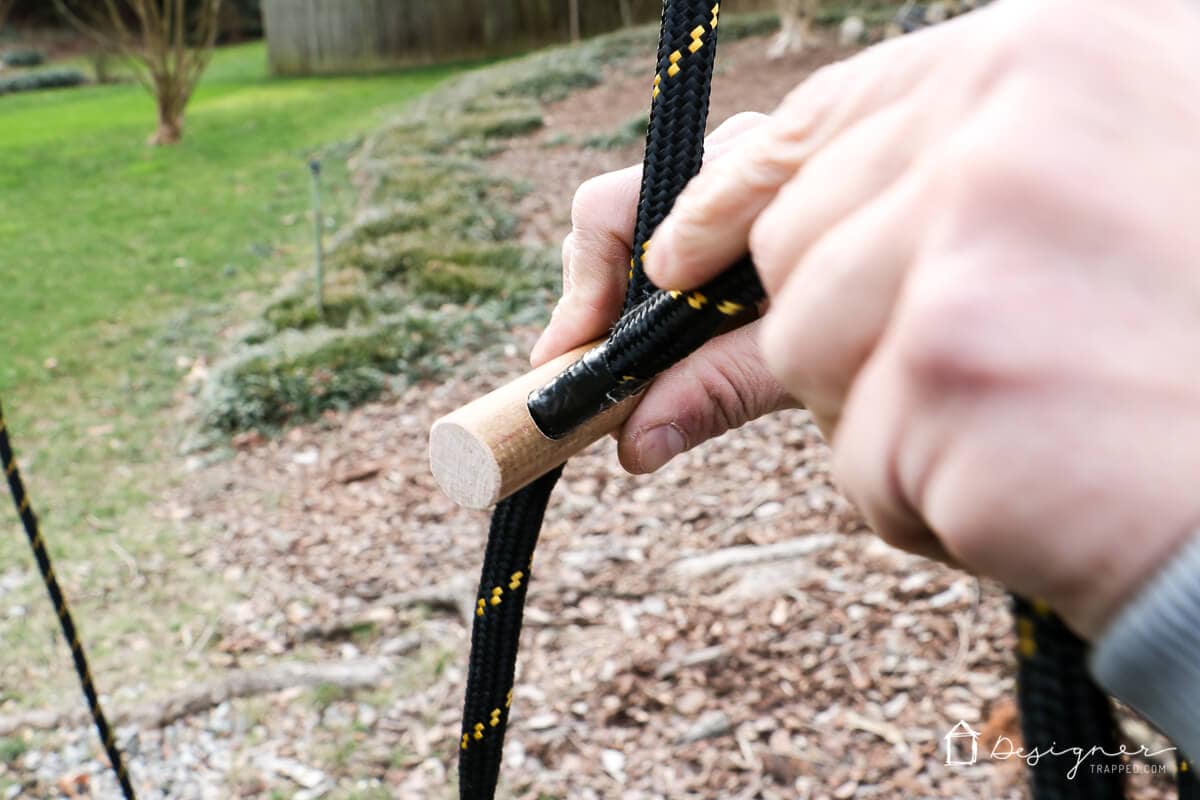
3) Use a handsaw to cut your 1-inch dowel rods to form your handles. We cut ours to match the depth of our skateboard.
4) Drill two holes at the end of each handle (for a total of 4 holes per handle). Make the first hole close to the edge of your handle and the second hole approximately 1/2 inch away from the first hole. Repeat on each end of each handle.

5) If you want to stain your skateboard platform to make it pretty, now is the time to do it. Avery wanted the whole thing to be blue. Attley wanted it to be red. So we compromised with red on the bottom and blue on the top :) We used Behlen Solar Lux Stain (in Sea Blue and Blood Red) because it's fade and UV resistant and the colors are so vibrant and pretty. We coated it with an outdoor-rated polyurethane for extra protection.
6) Cut two lengths of rope long enough to wrap around whatever tree branch you are hanging your swing from. Be sure to leave enough rope to run through your handles and to knot as needed (more on that below).
7) We could not reach our tree branch with a ladder, so we tied a loop knot at the end of each length of rope and hooked a carabiner that held a piece of old scrap rope on it. The scrap rope had another carabiner at the other end of it with washers attached to it (to act as weights). Then we threw the carabiner over the tree branch. We were then able to pull the carabiner down toward the ground, threading the rope over the tree branch as we did. We repeated this step for each length of rope.
8) After we looped the rope over the tree branch, it was time to attach it FIRST to the handles, and then to the skateboard platform itself. We taped the ends of the rope with duct tape to make them easier to thread through the holes. To attach the rope to the handles, you thread the rope down through the inside hole. Next, loop the rope over the handle and then down through the outside hole. Doing it this way will allow you to adjust the height of the handles as your kids grow without having to take the whole swing down to do it.
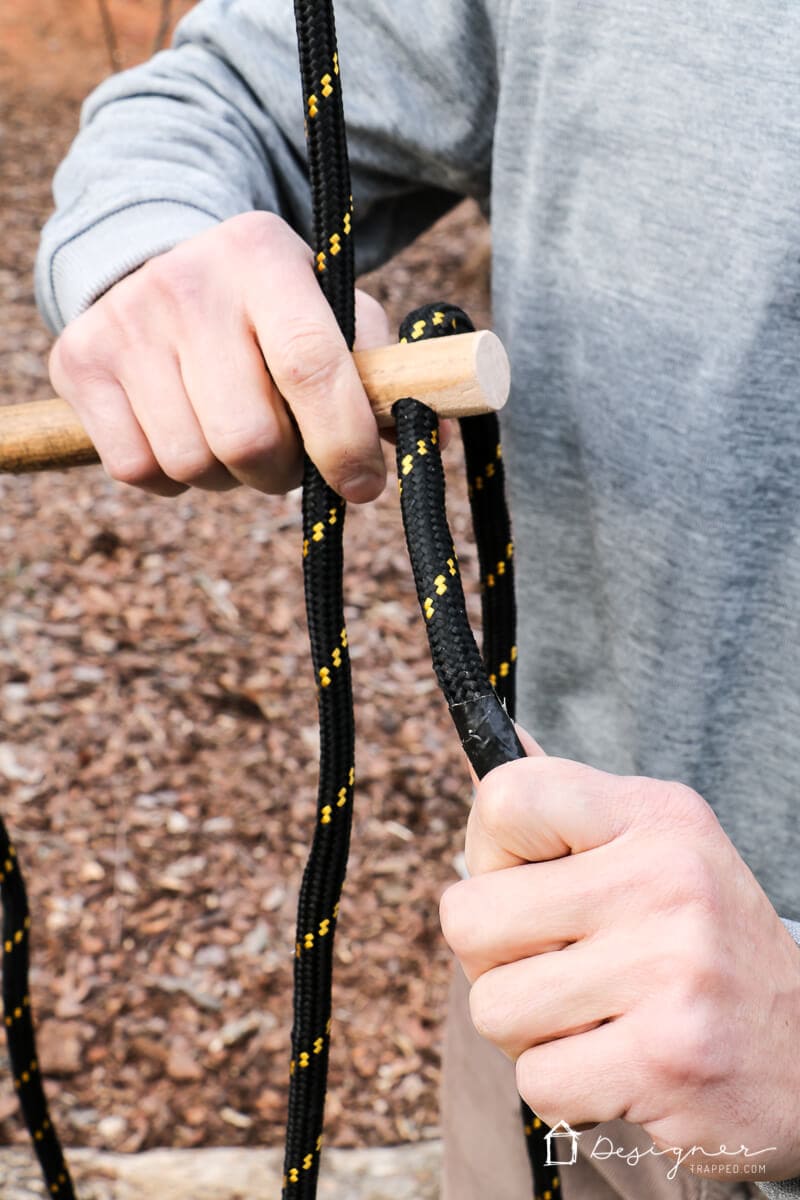
9) Once the handles are attached, all you have to do it thread the rope through the holes on your skateboard platform, making sure to adjust it to the height that you want it AND making it level as you tie the knots. We tied simple overhand knots underneath the skateboard platform to secure it. We then removed the duct tape from the rope and used a lighter to burn the ends so they would not fray.
We've had our DIY swing up for over a year, and it's holding up perfectly so far! Joe and I even use it from time to time (it's harder than it looks, lol)! Take a look at how it turned out.
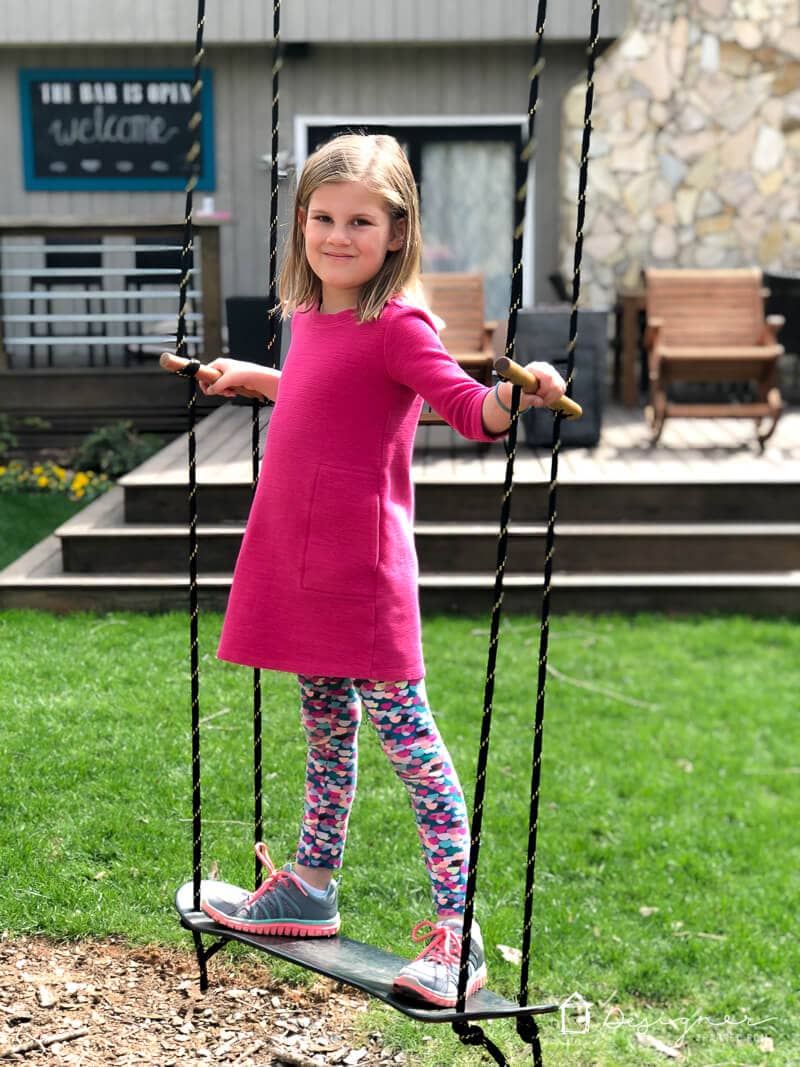
What do you think?! I hope some of you make one for your kiddos!
Wondering how I approach transforming rooms and spaces in our home? Check out Designer in a Binder®.

And if you want exclusive content and behind-the-scenes sneak peeks, be sure to subscribe before you head out!

Last Updated on May 7, 2024