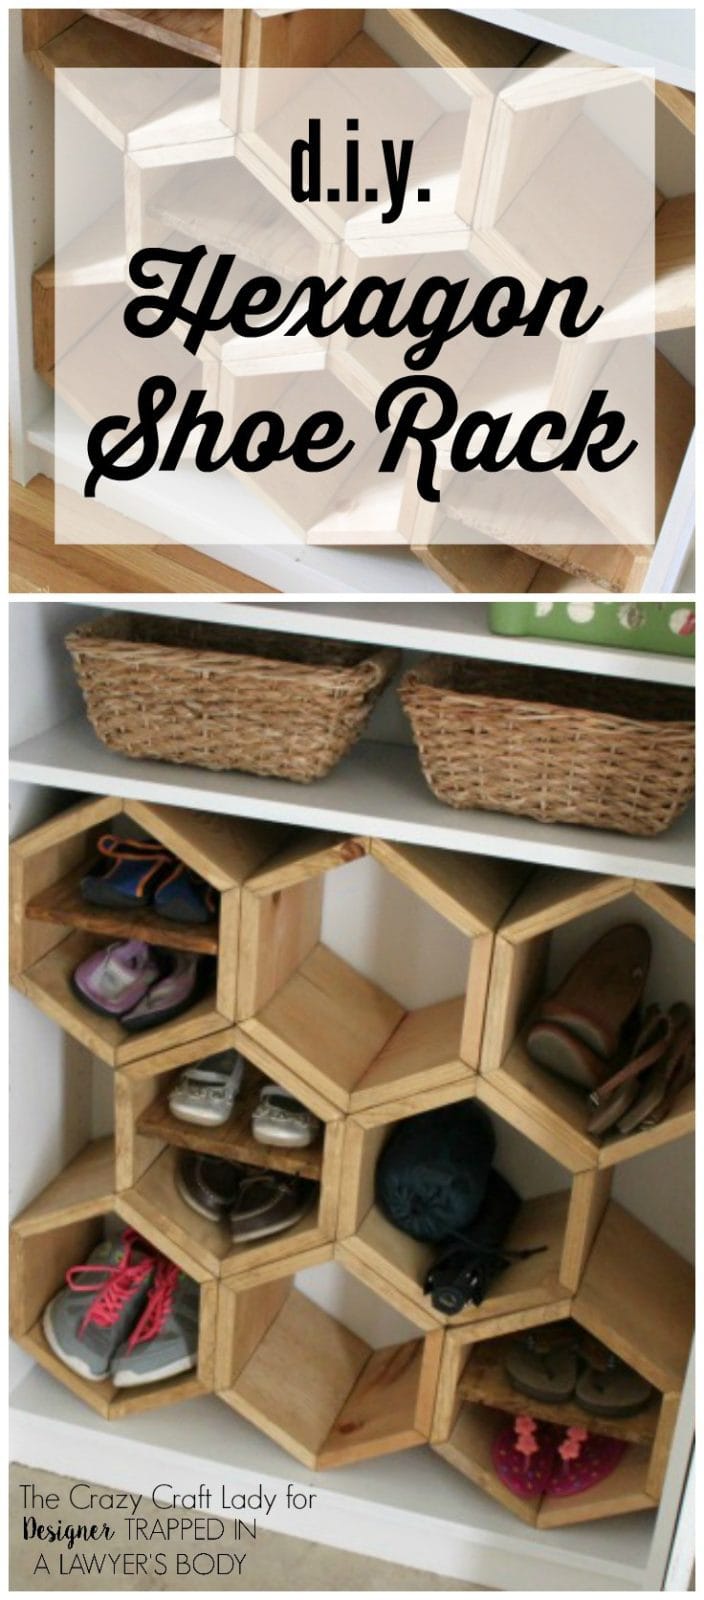
Hexagon DIY Shoe Rack
Hey there, I’m Aimee, and I blog about crafts, DIY decor, and life as a twin mommy over at The Crazy Craft Lady.

A few months ago, I shared a scrap wood stencil wall art project with you. I'm so excited to be back here sharing another DIY decor project.
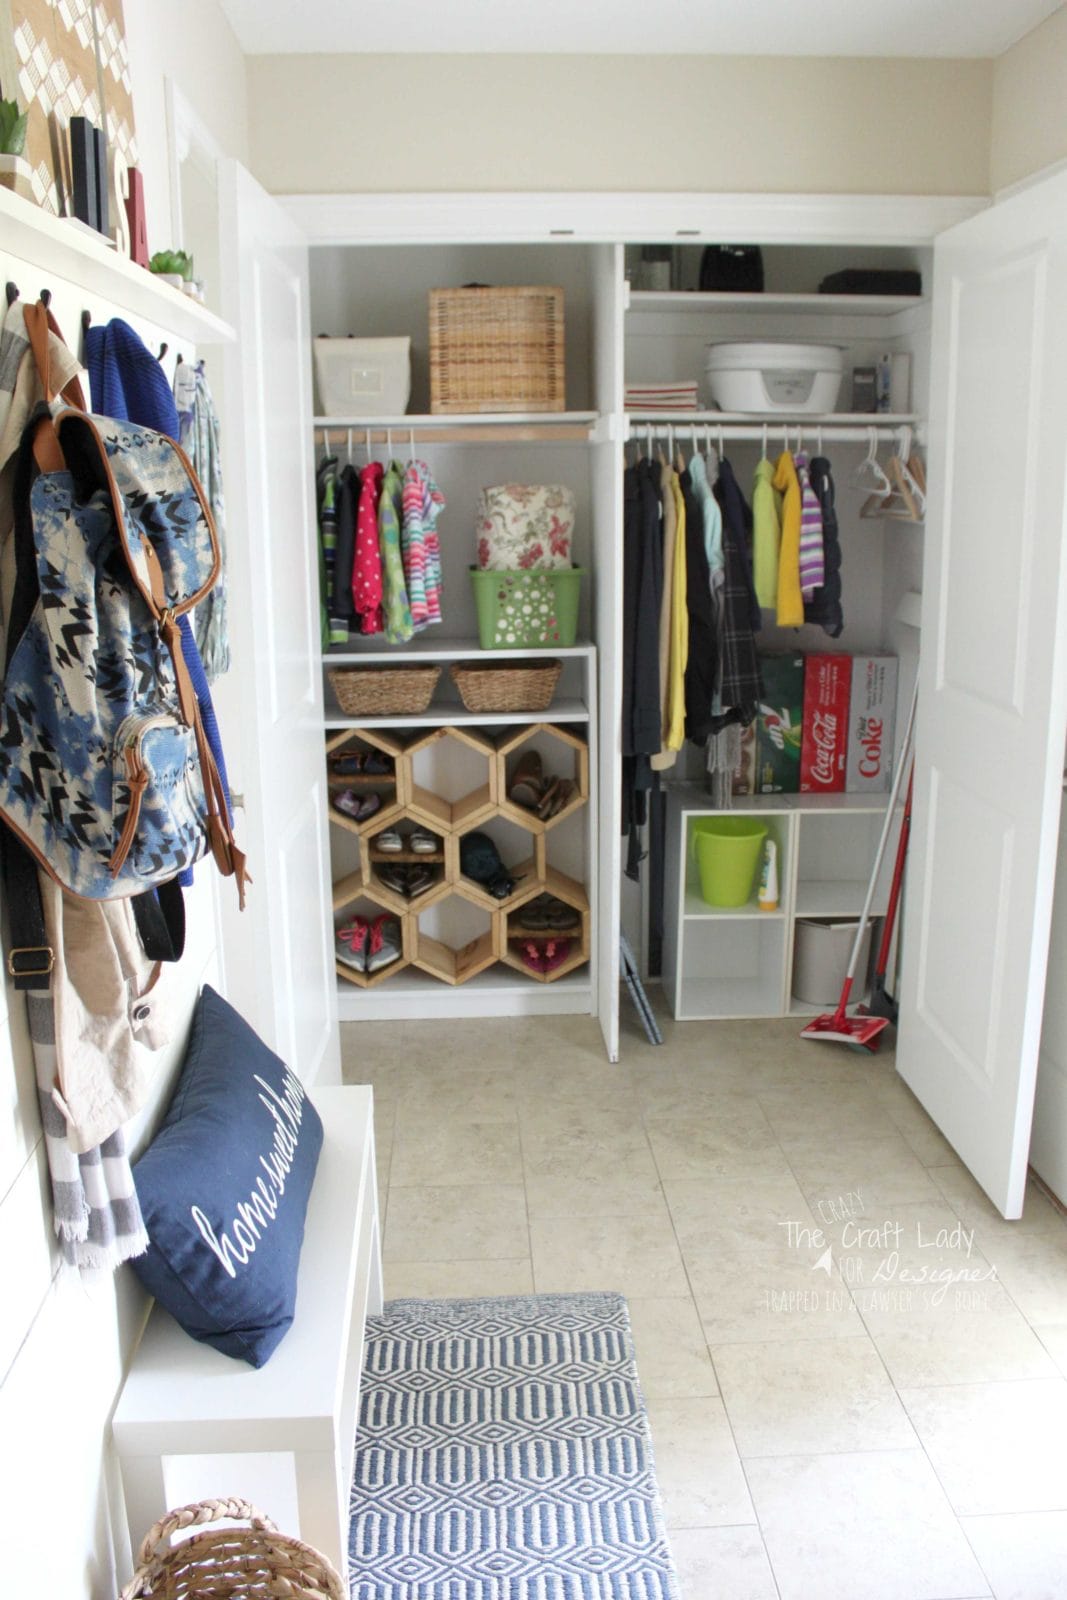
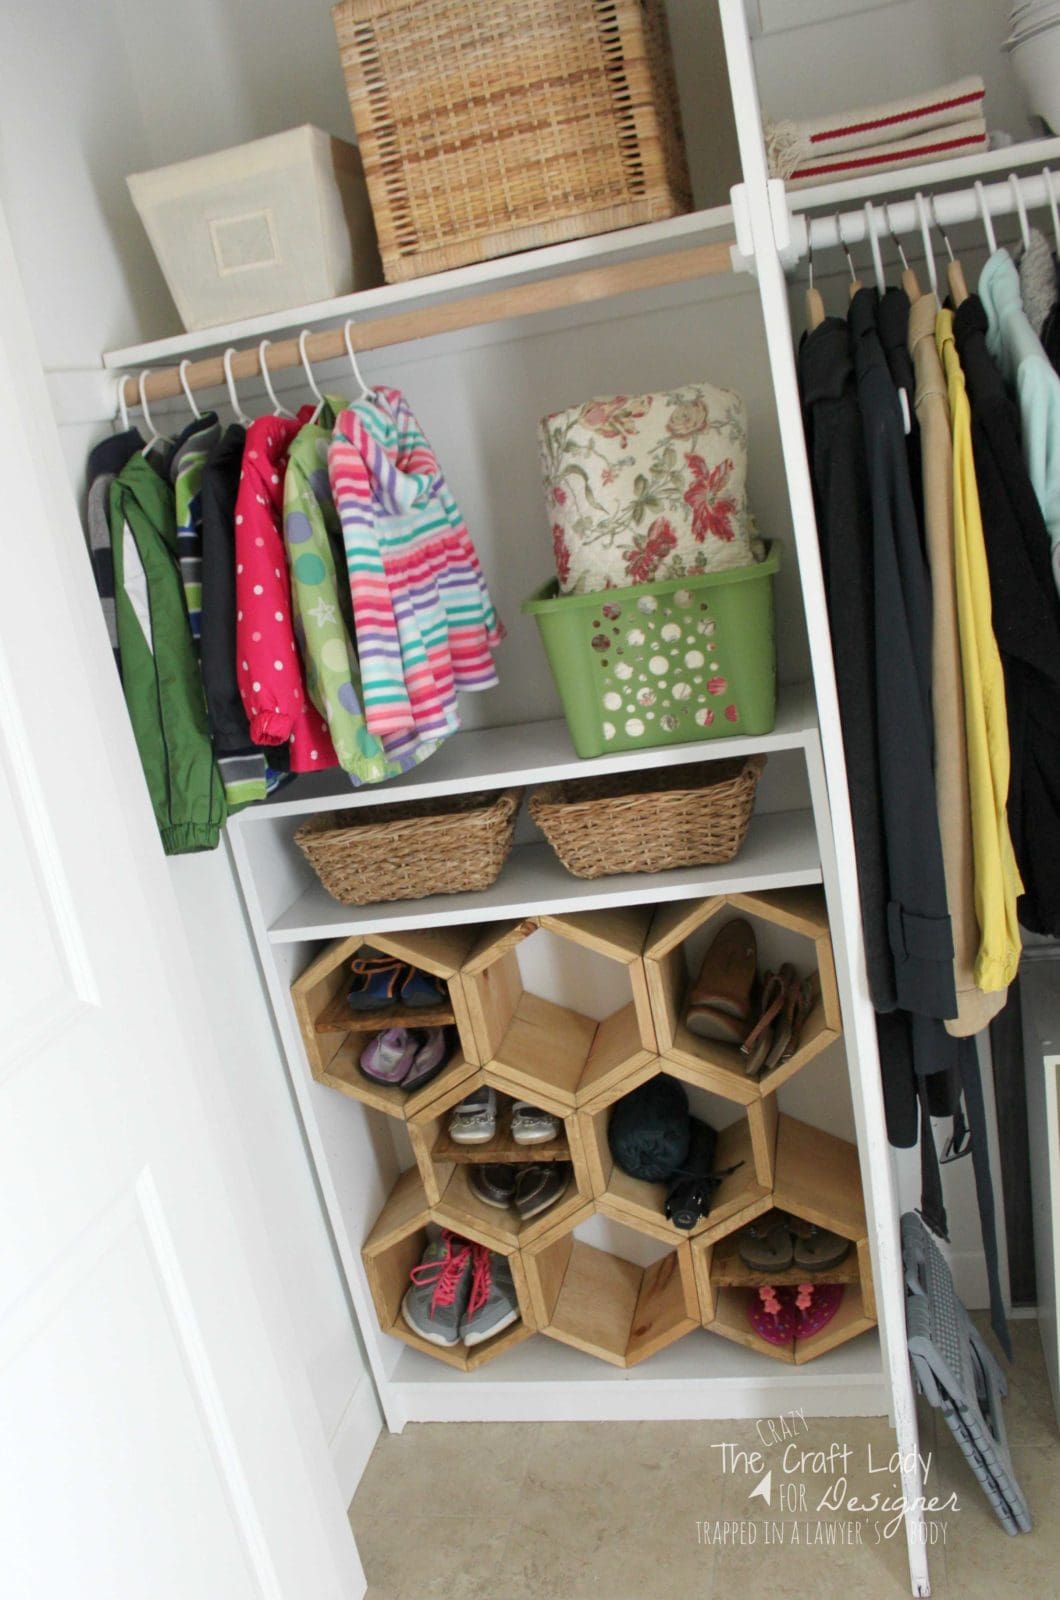
This project really started out of necessity. See Exhibit A, my front entry closet:

It wasn't particularly horrible, but it wasn't spectacular either. The shoe situation with the kiddos was slowly spiraling out of control. The pile of shoes kept creeping further into the entry, causing a major tripping hazard and eyesore. I knew a cubby shelf of some sort was the answer. Not wanting to settle for a generic assemble-it-yourself white shelf, I put on my DIY Thinking Cap.
I had this Ikea Billy Bookcase that wasn't really working anywhere in the house:
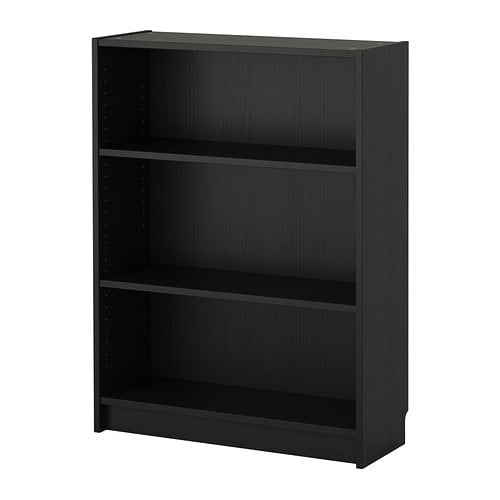
This bookcase happened to be the perfect size to fit in the left half of my entry closet. It was fate! I've also seen some really fun tutorials in the blogosphere for hexagon wall shelves. I figured that if people can make hexagon wall shelves, I can make hexagon shoe shelves.
Off to The Home Depot I went… This post contains some affiliate links. Click here to read my full disclosure policy.
DIY Shoe Rack – Supplies
Your supply list is relatively simple and straightforward. You can make as many cubbies as you like, and arrange them however you want. These instructions will yield eight cubbies that will fit perfectly inside an Ikea Billy Bookcase.
- 1 x 10s – I bought 5, 6-foot lengths, to make hauling supplies home easier
- wood glue
- finishing nails
- wood stain – I used Minwax Golden Oak
- drop cloth
- sandpaper
- brush
- rags for staining
Also note that a 1×10 isn't really 10 inches. It's more like 9 1/4-inches. This means that your shoe cubbies will be 9 1/4-inches deep. This is the perfect size for kids and mommy (my size 7.5) shoes. If you live with a giant who wears size 14 shoes, you may want to make deeper cubbies.
DIY Shoe Rack – Tutorial
Step 1 (optional)
Prep your shelf. My original bookcase was black stain. I quickly primed and painted it white, using leftover paint from other projects. If you have a white shelf already, or want to use a black shelf, go for it!
Step 2
Do math. Try to remember high school trig. Google “how to calculate the dimensions of a hexagon.” Cry. Pour a glass of wine.
OR
You can use the math that I already did for you! Since the opening to my bookcase was 30-inches wide, I needed each cubby to be 10-inches (or just shy of) wide.
Step 3
Make friends with someone who owns power tools.
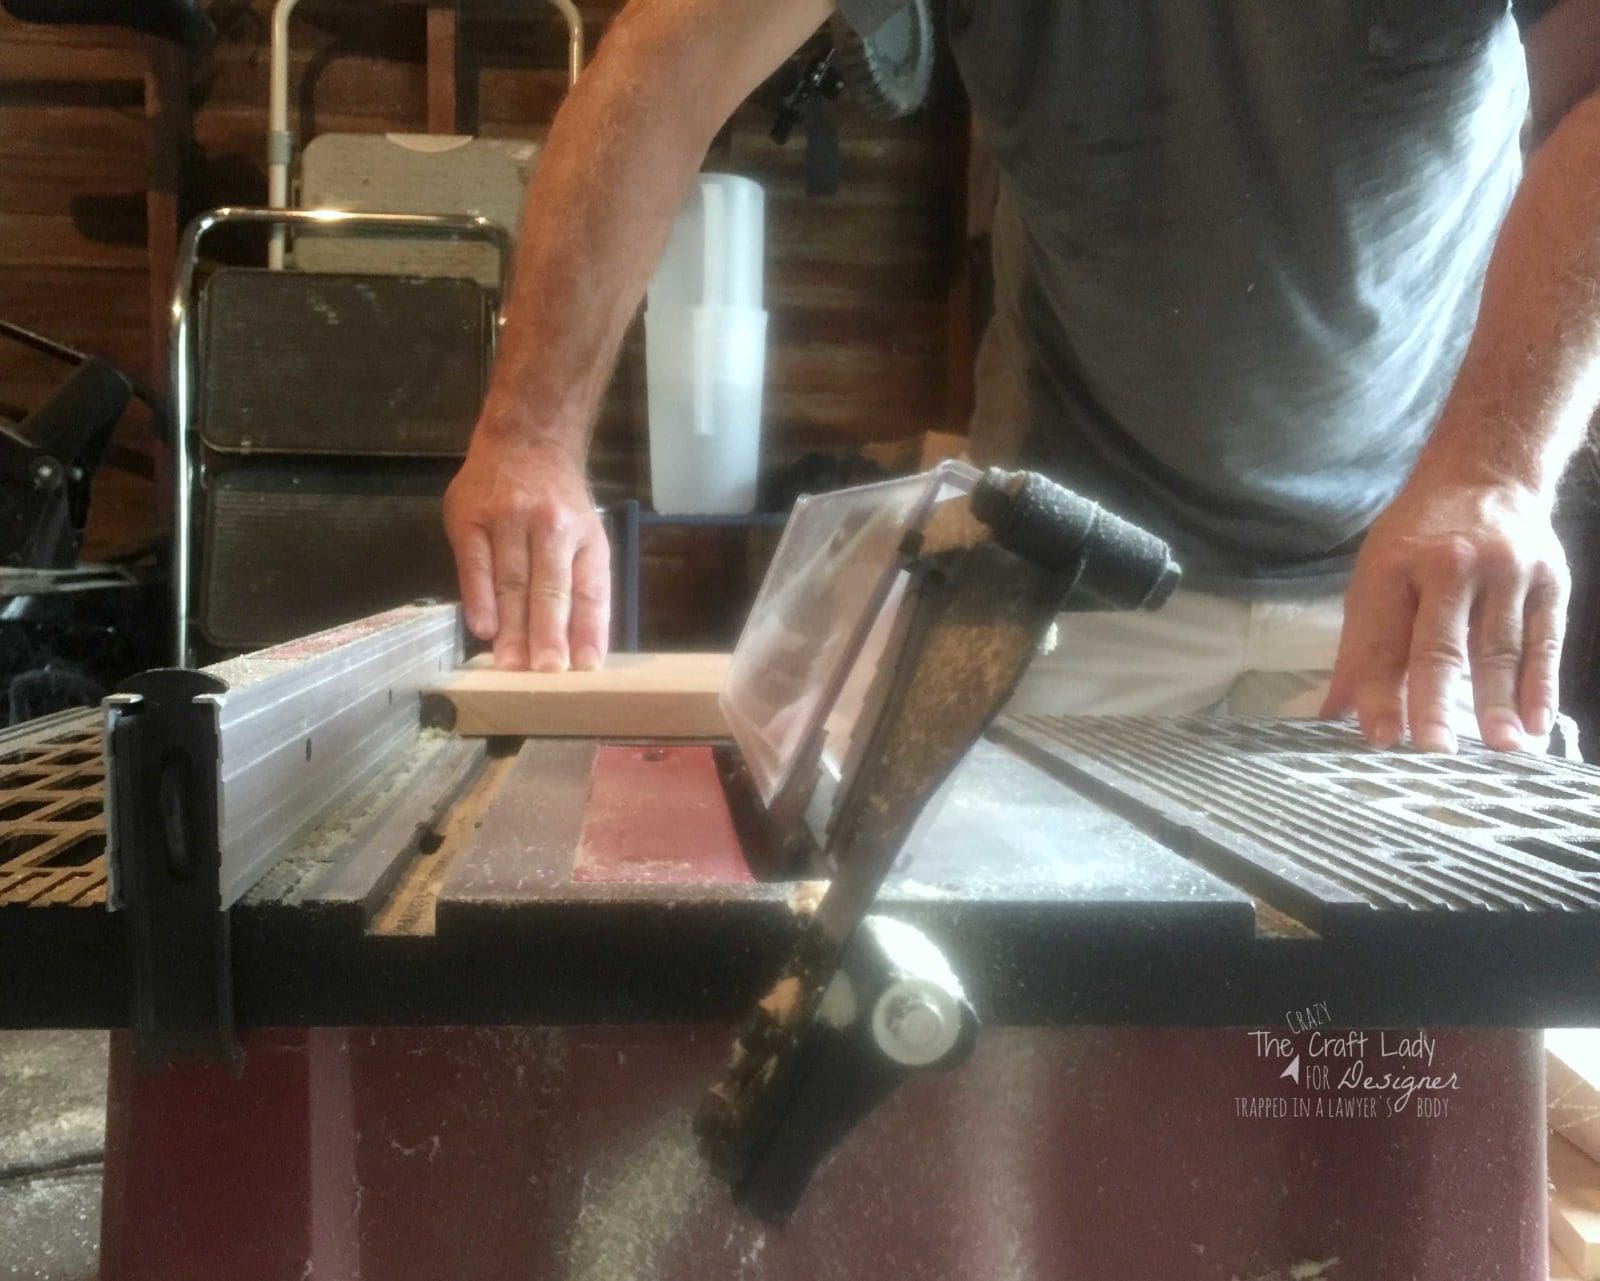
The cutting involved in this project was a tad outside my range of comfort when it comes to using electric devices that have the ability to permanently remove appendages. So, I enlisted the help of my good friend Patrick. We did this step together. He did this step while I took pictures with my iPhone.
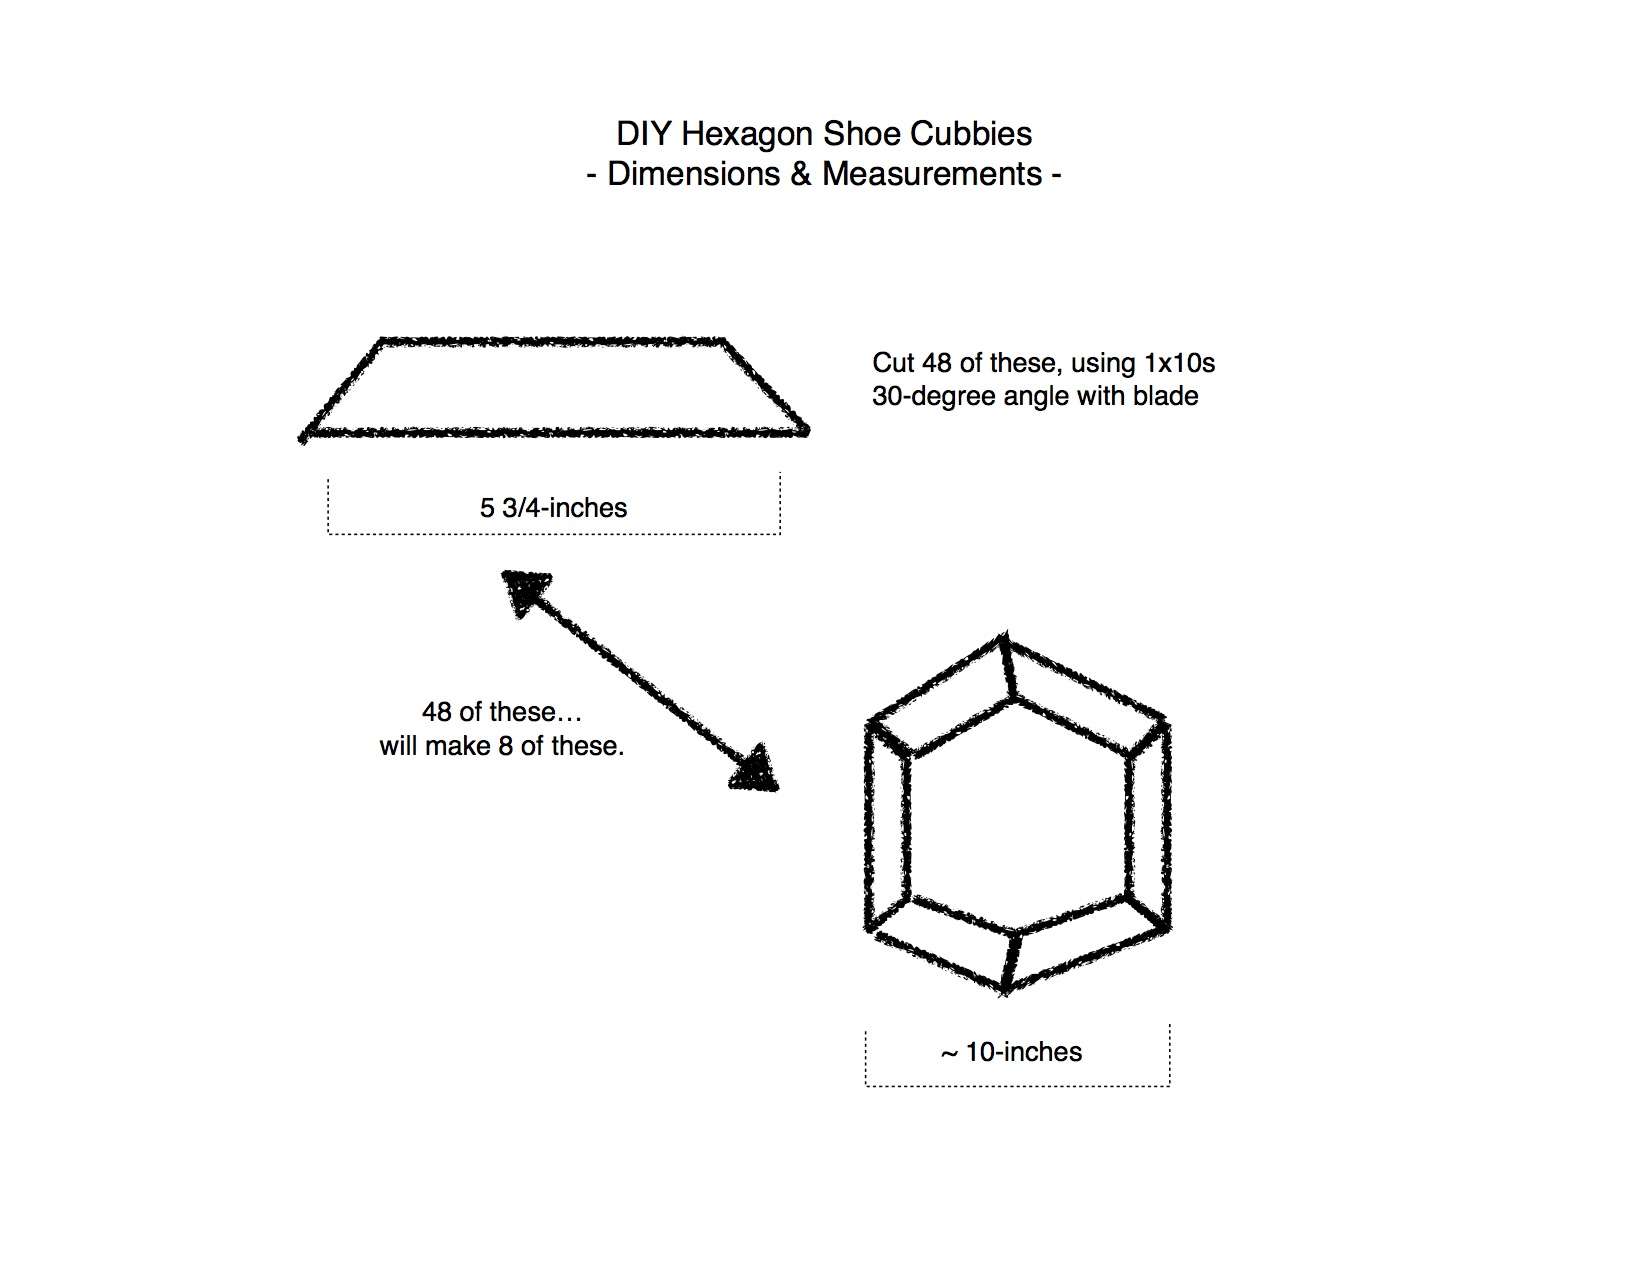
To get this exact shelf, you need 48 – 5 3/4-inch cuts of 1×10 wood.
We started by doing 48 straight cuts at 5 3/4-inch. You may want to make a few extra, just in case.
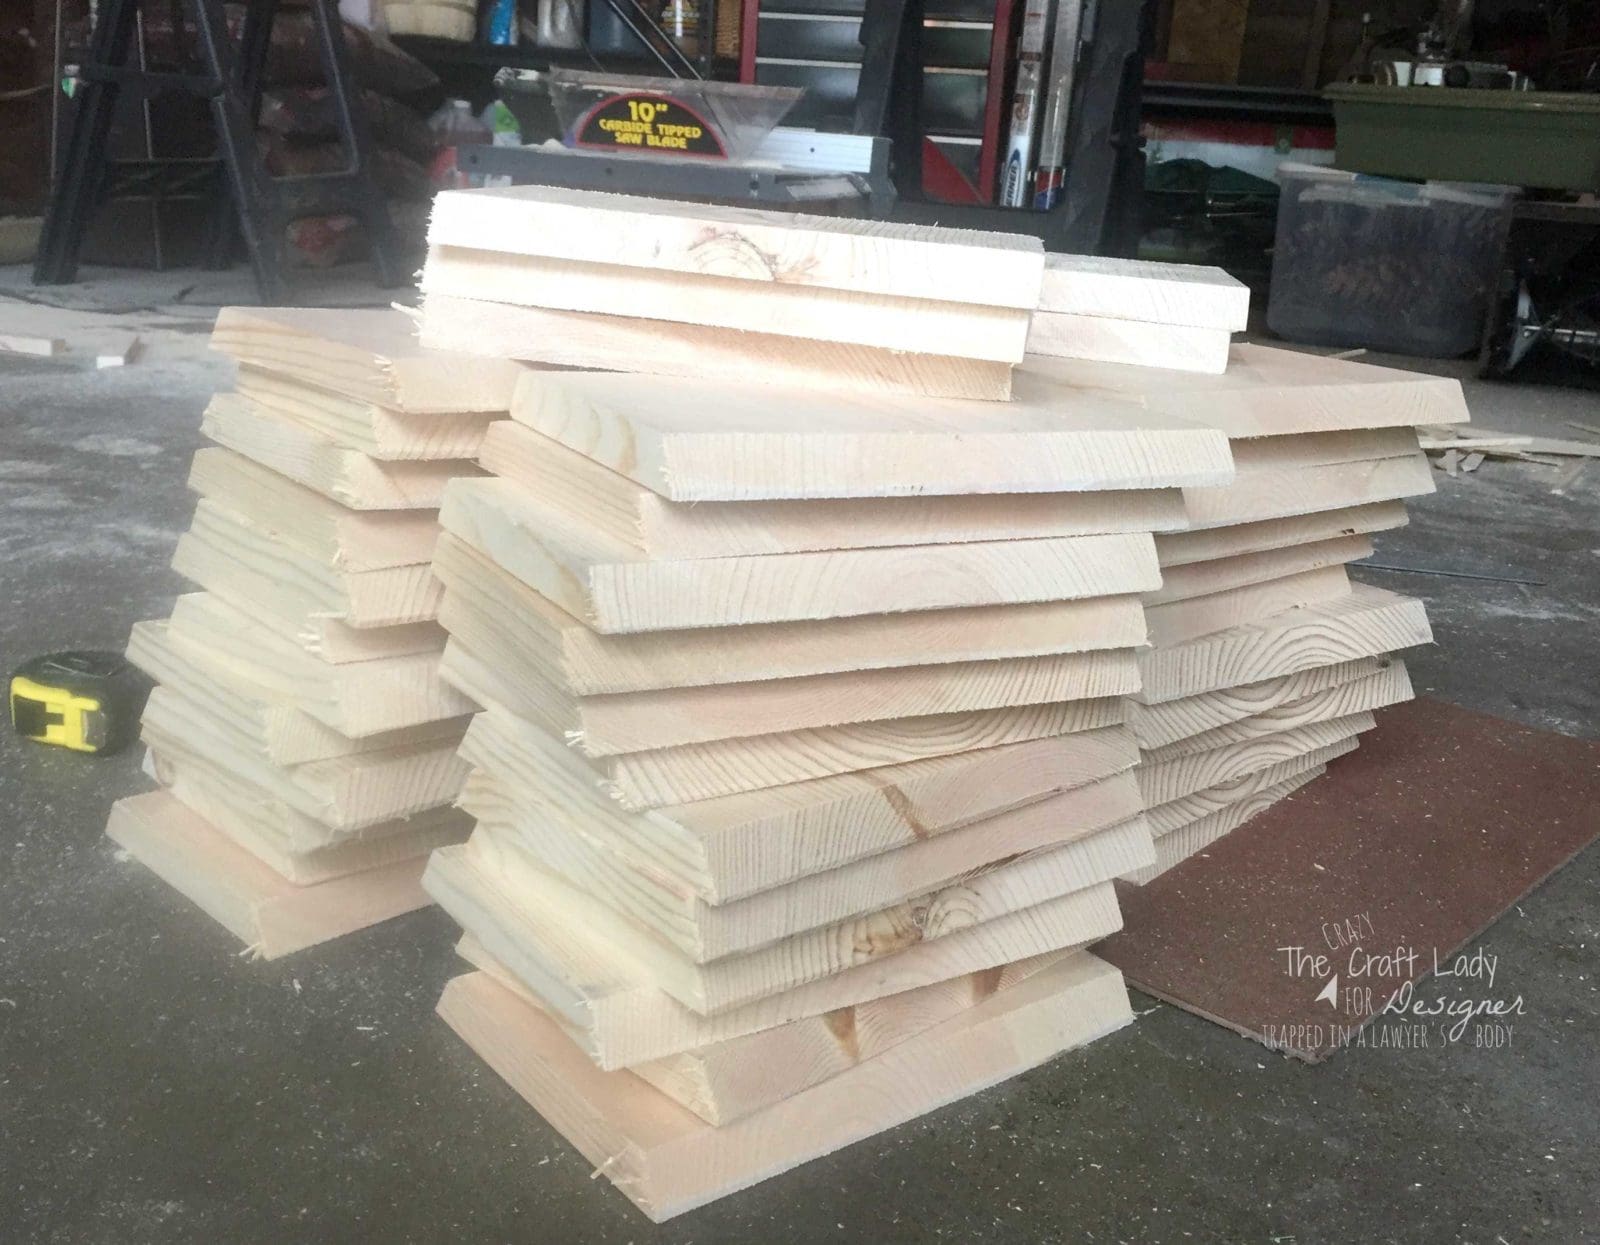
Then we set the blade at 30 degrees and cut each end again.
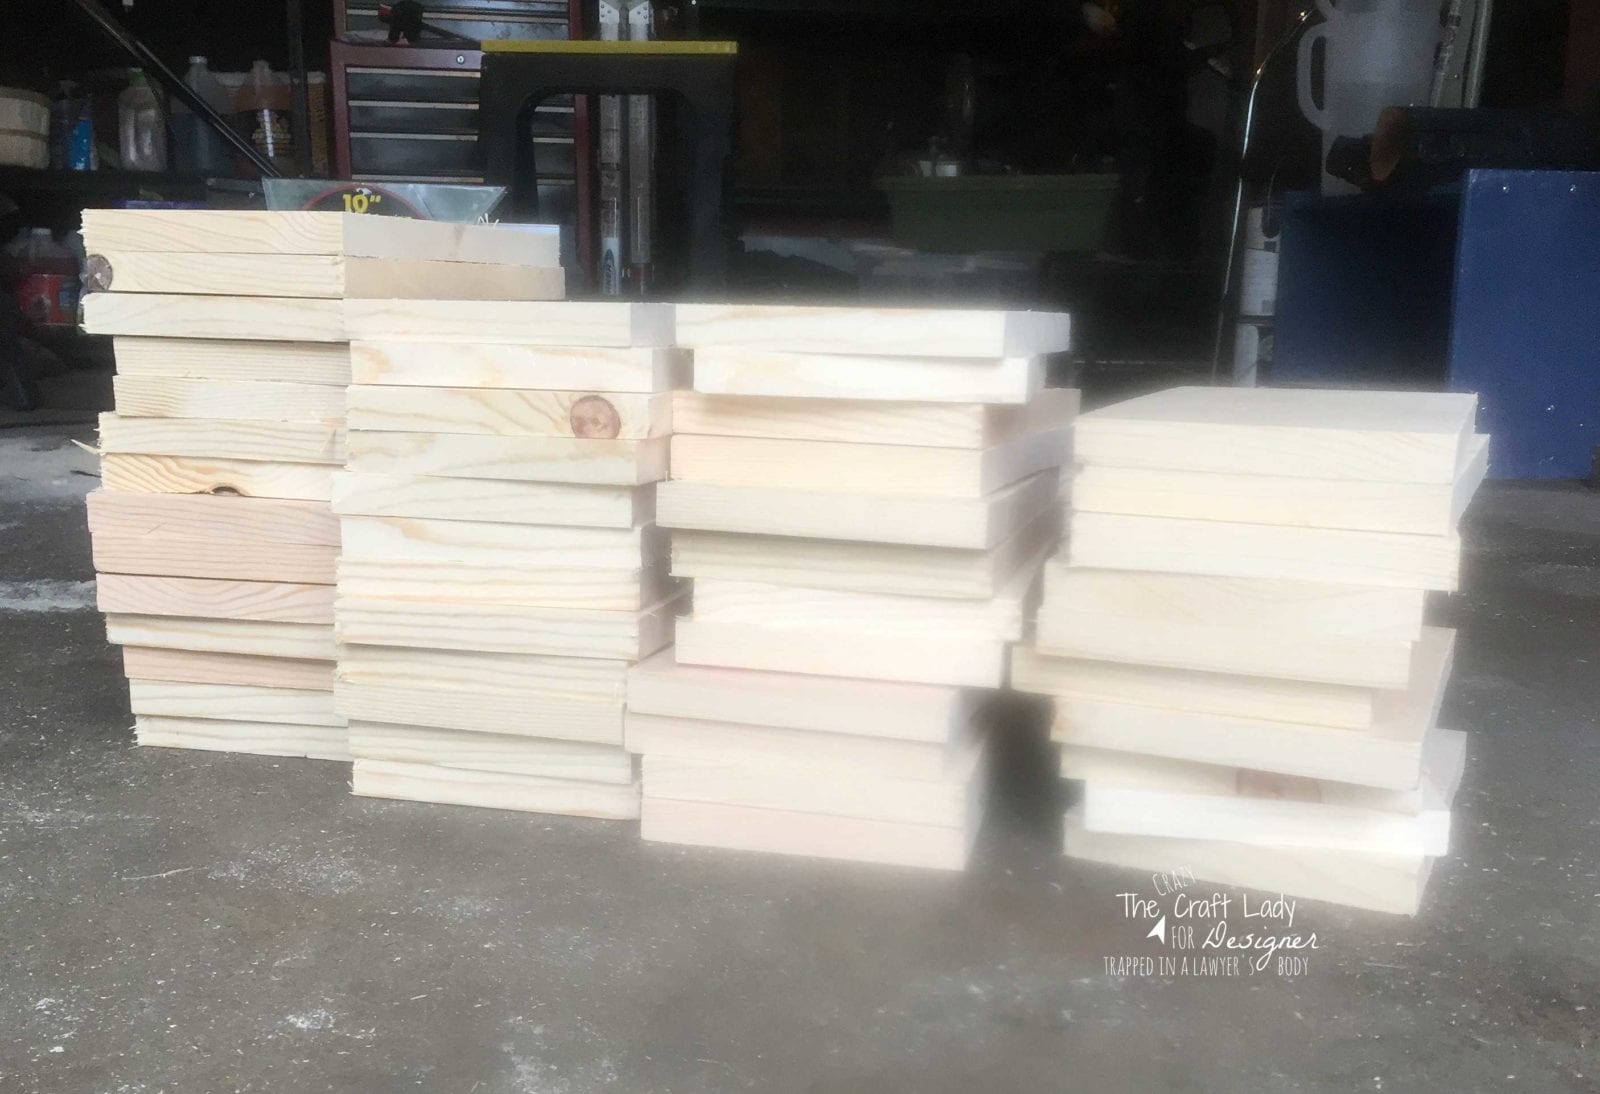
The end result was a pile of wood that looked like this:
Step 4
Assemble your cubbies – phone a friend or brush off your yoga skills.
Since I was home alone when I assembled the cubbies, there is a chance I got a bit creative. By creative, I mean stabilizing the pieces of wood with my feet while I hammered the nails in place. Like I said. Yoga.
Start the nails along one edge of each cut of wood:

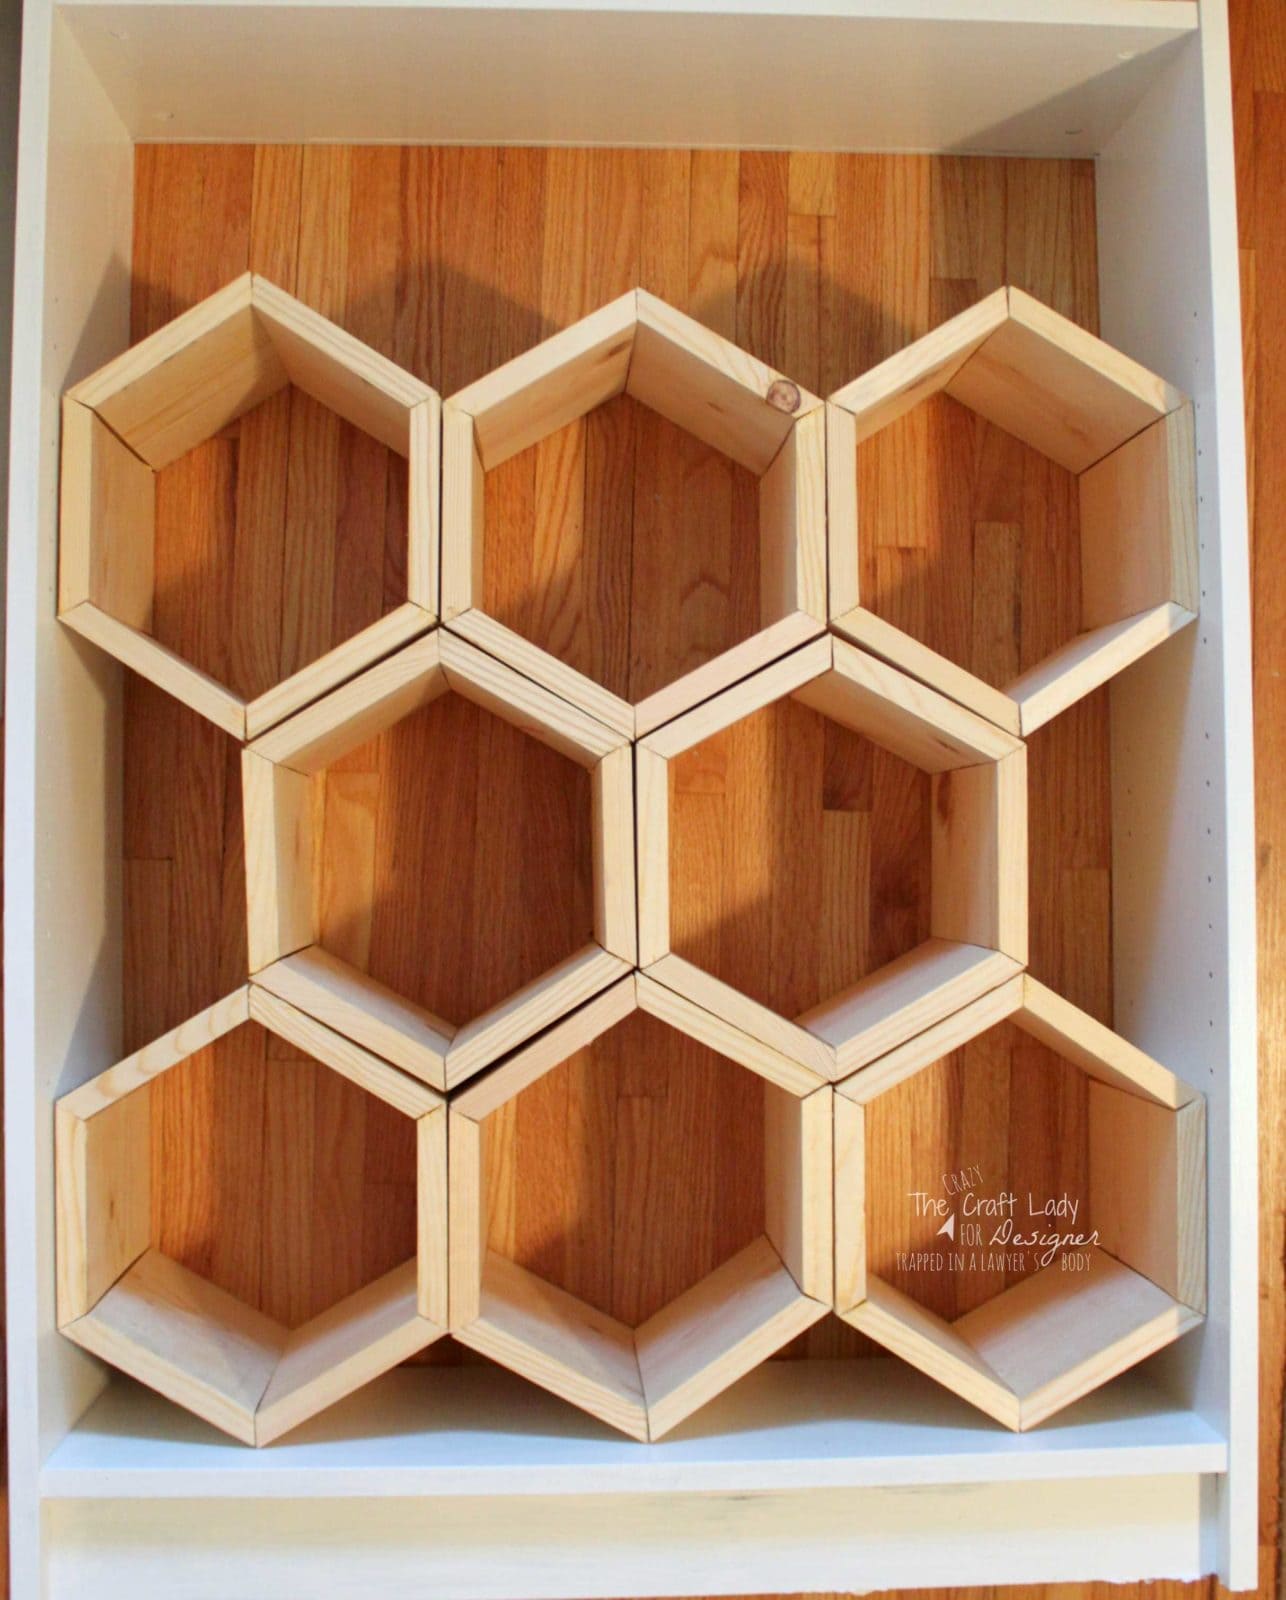
Then run wood glue (not pictured) along the seam before nailing the pieces together. The end result should look something like this:
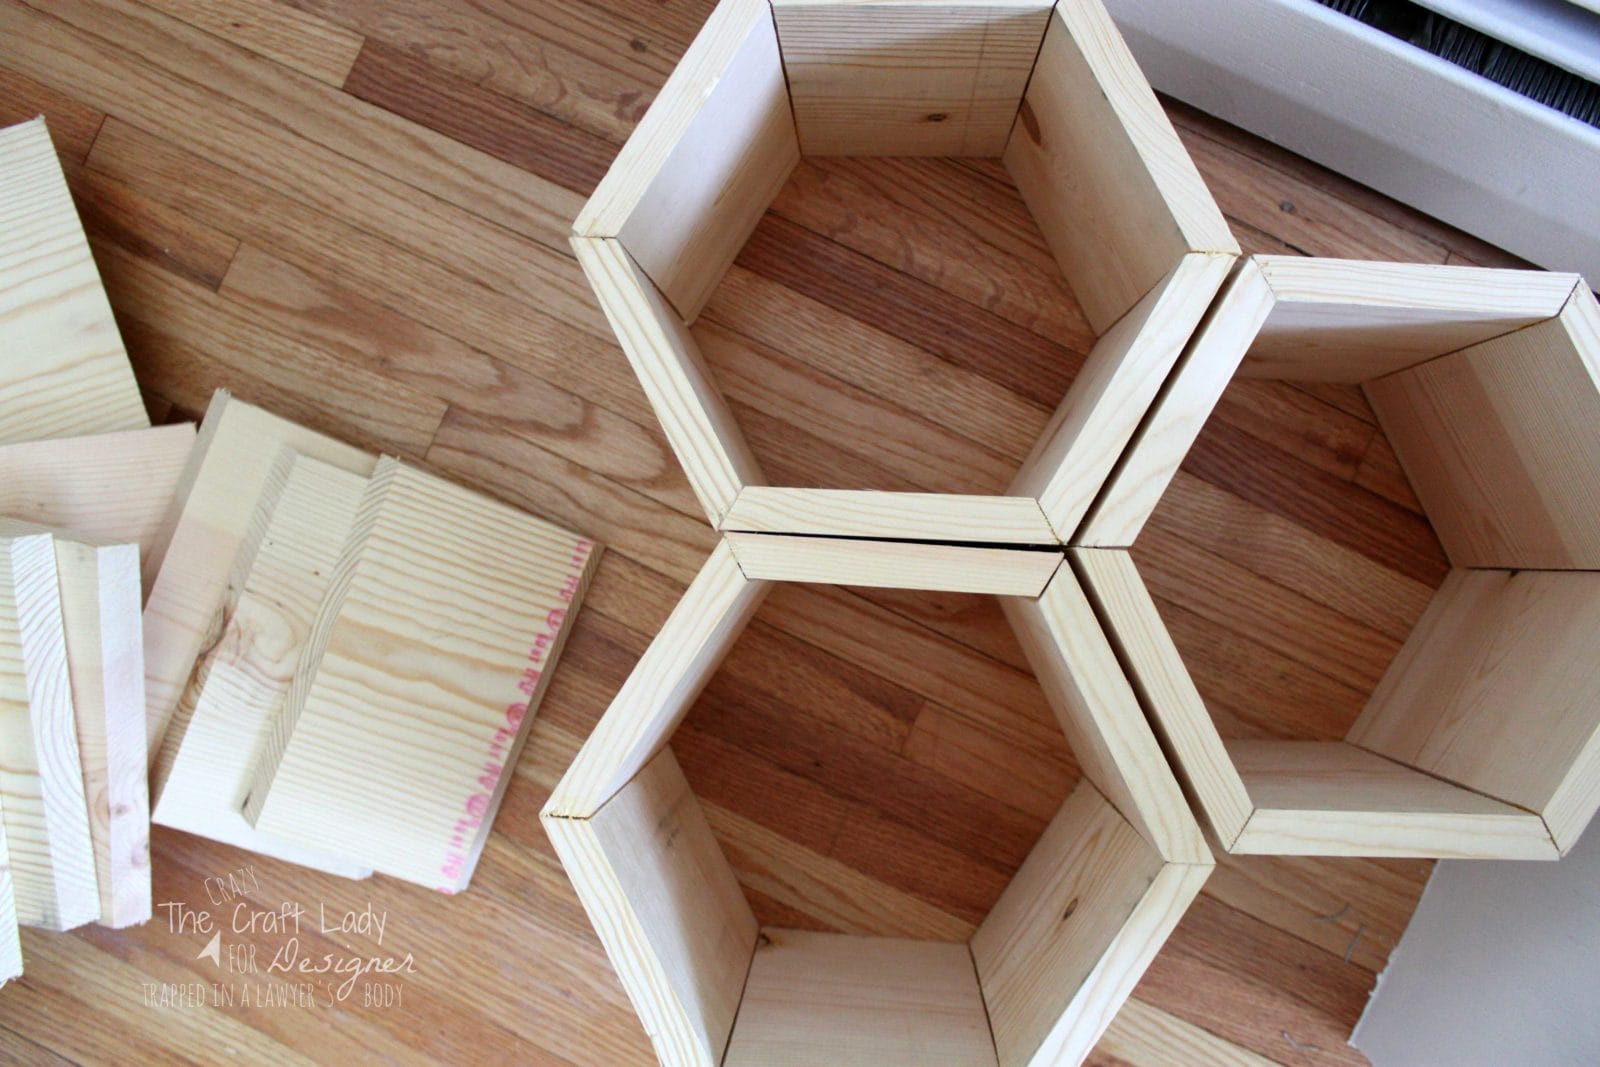
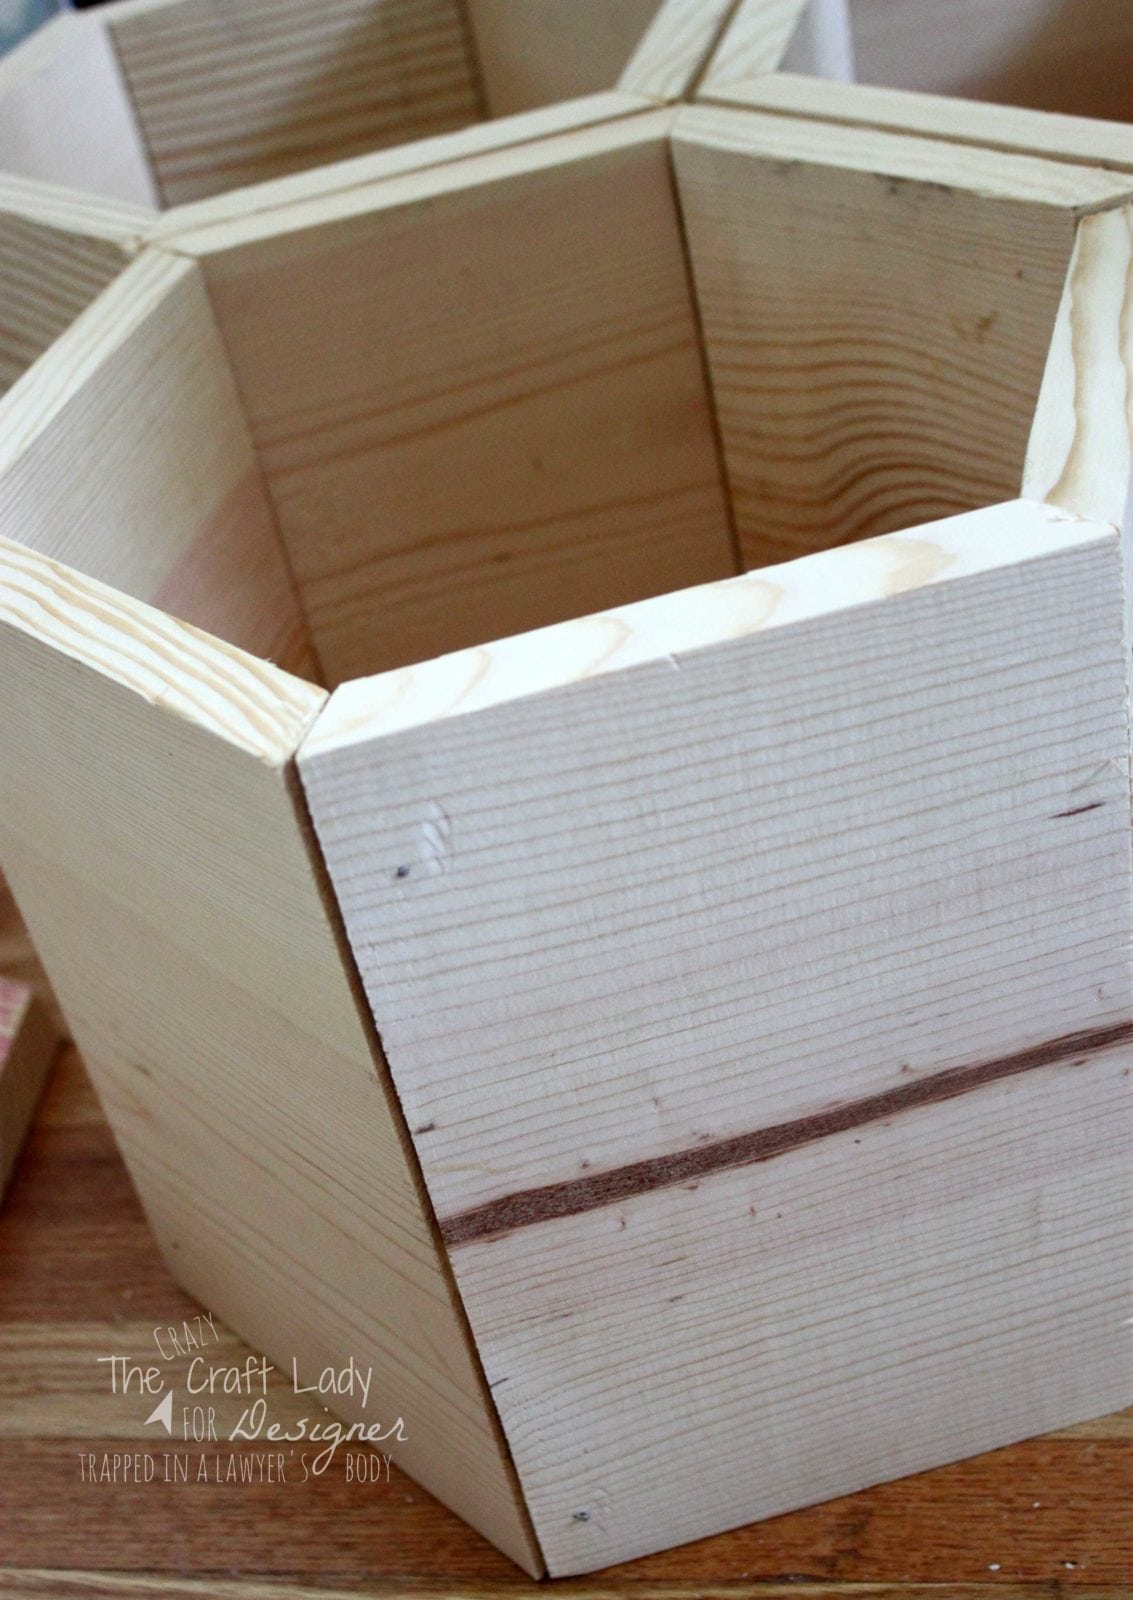
Each hexagon cubby will be a bit flimsy until the wood glue dries. I actually set all of the cubbies in place while the glue dried (overnight), so that all of my angles were just right.
Step 5
It's time to get staining!
It's always a good idea to pre-treat wood before staining. A nice guy at The Home Depot once told me that I can cheat and just get the wood wet with a cloth and water, instead of buying a special product. I've used this method on a couple of projects now, and have been happy with the results.

I let the stain sit for about 5 minutes.

Step 6
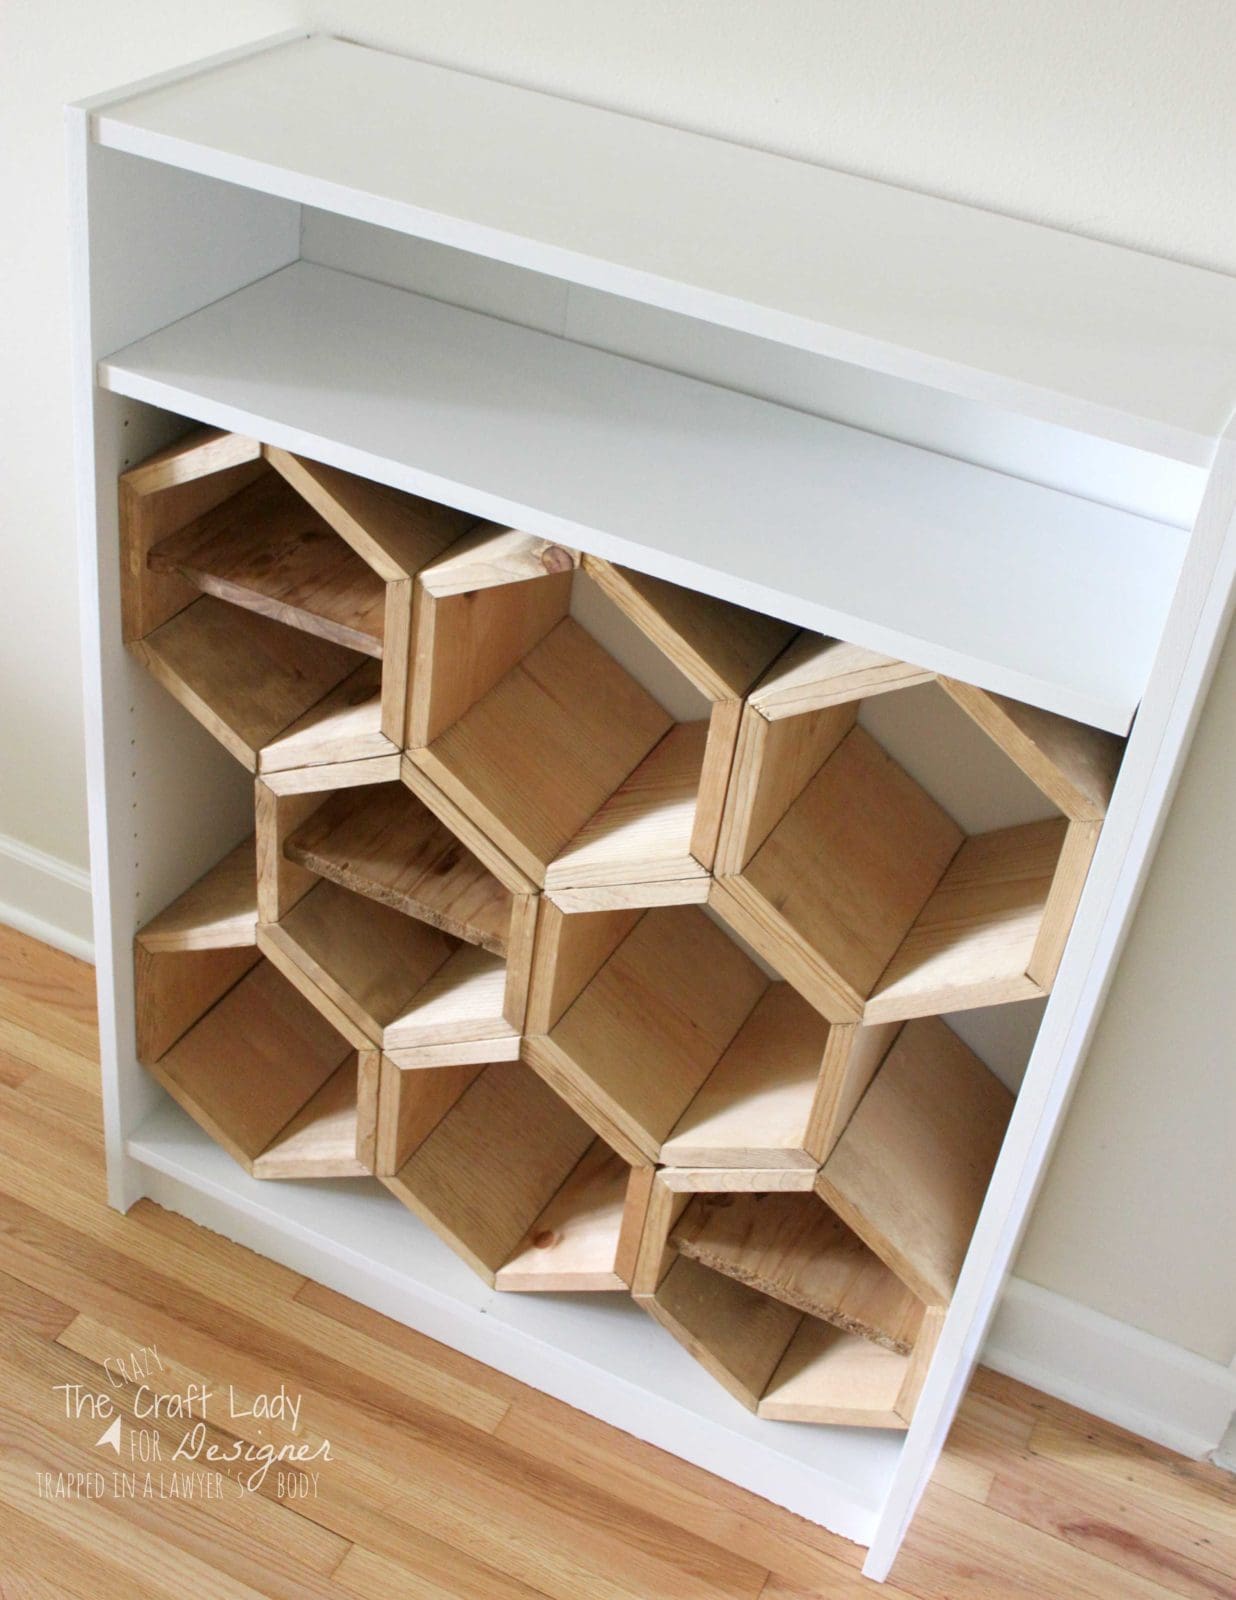
Assembly. It was a breeze.
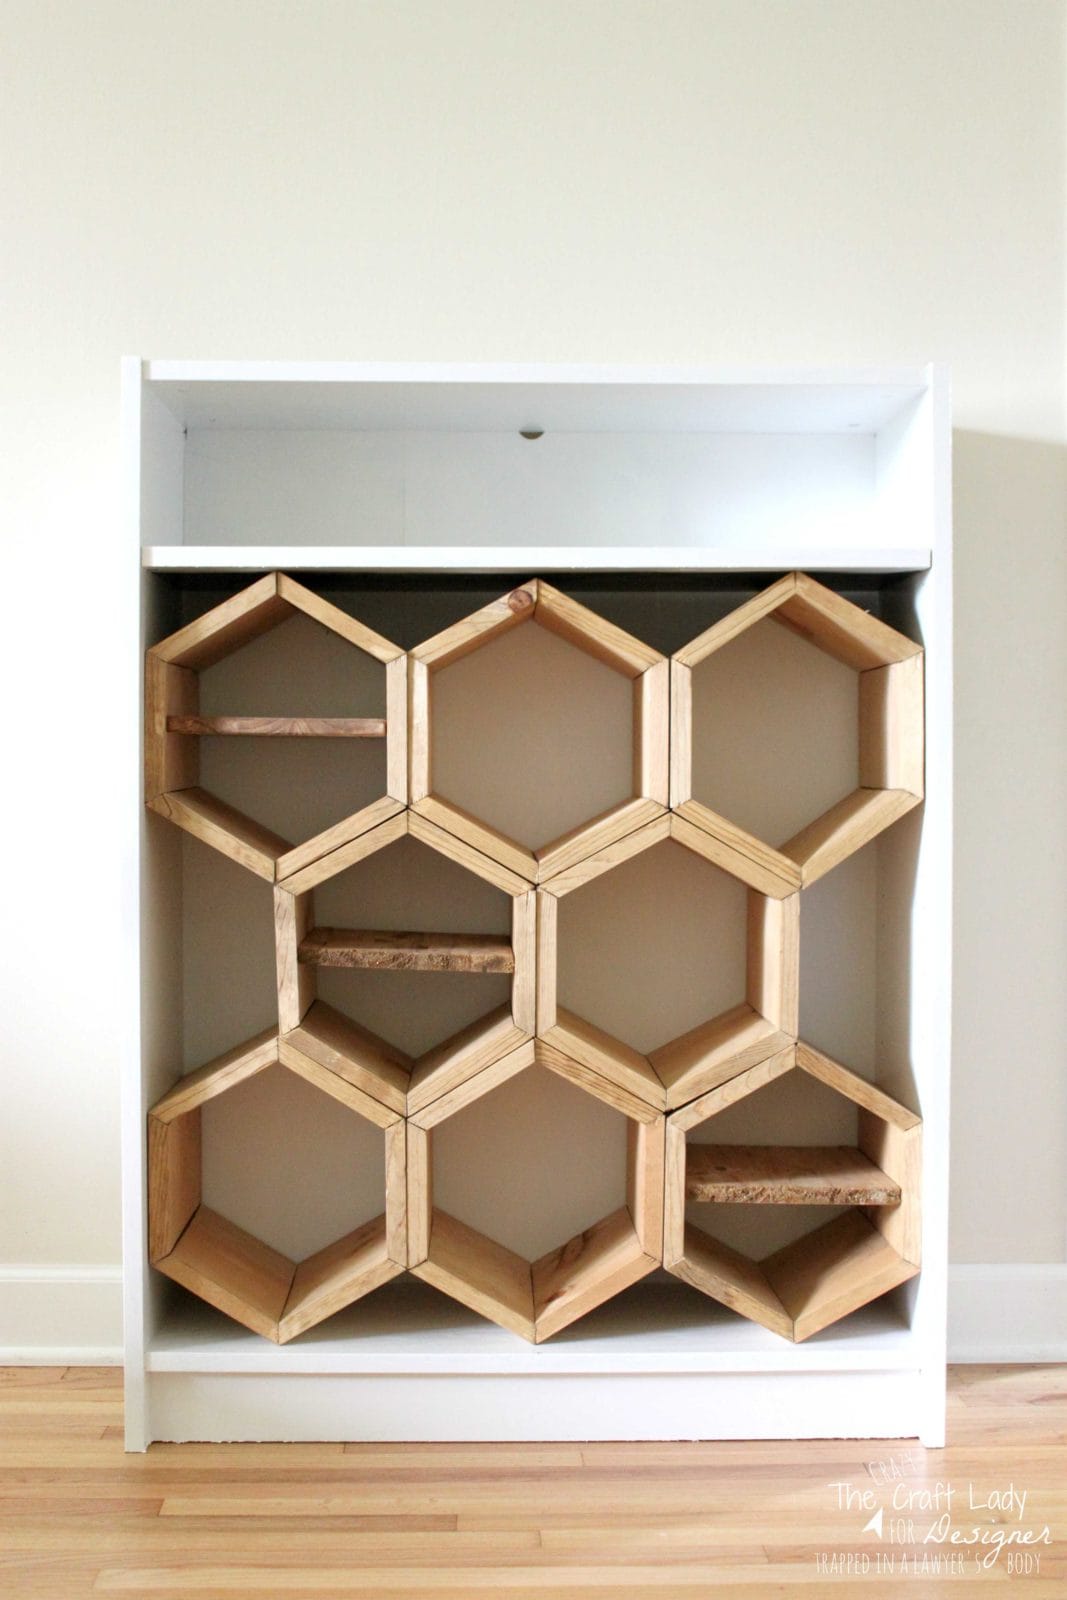
Since I am now a math expert when it comes to calculating the dimensions of a hexagon, these shelves fit perfectly into my shelf. Seriously. They just slid in, and the tension between each cubby holds everything in place.
Regarding the shelves: I cut and stained some scrap wood to make divider shelves in 3 of the cubbies. I also used one of the original bookshelves at the top to create storage for baskets and smaller items.
I'm so happy with the way that my new shoe shelf turned out! But, I do have one regret: Why did I make such a beautiful shelf that will now be hidden away behind closed doors?!?! I think I will keep my closet door open for a while, so I can admire my work and wait for the novelty to wear off!
If you enjoyed this tutorial and are looking for more crazy craft and DIY inspiration, you may enjoy these projects:
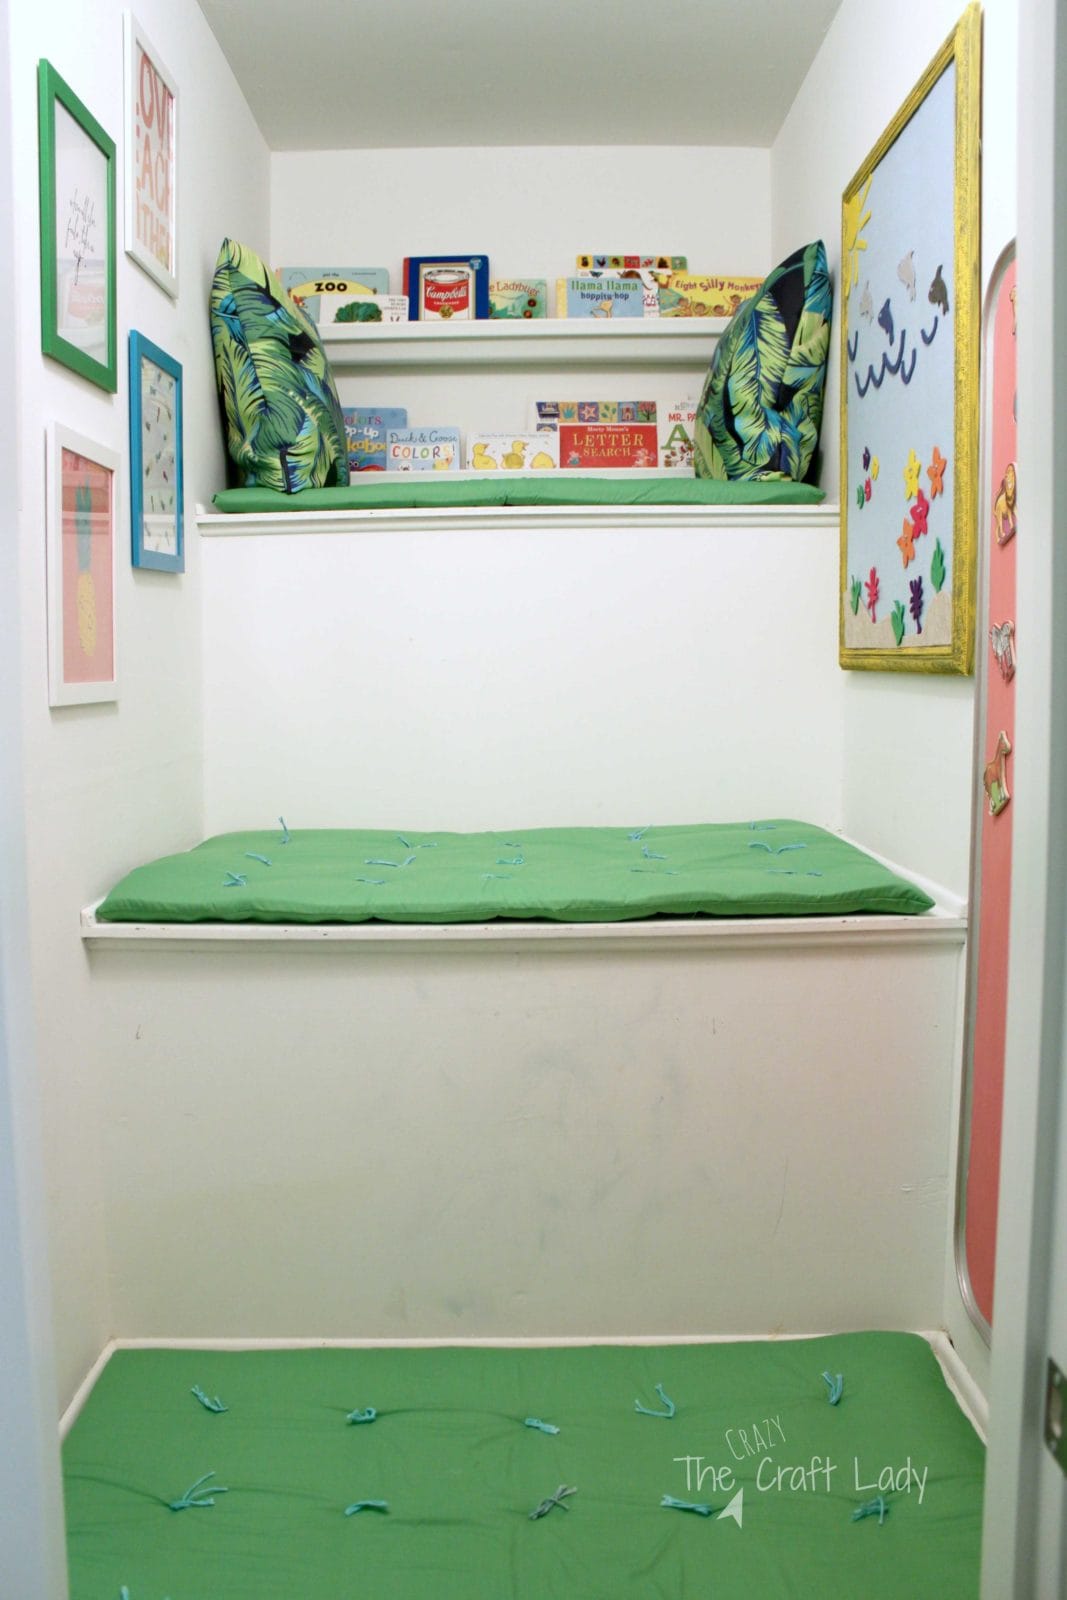
- Never again will I feel bad about telling my twins to “go play in the closet.” See how I transformed an odd-shaped storage closet into a play space for the kids.
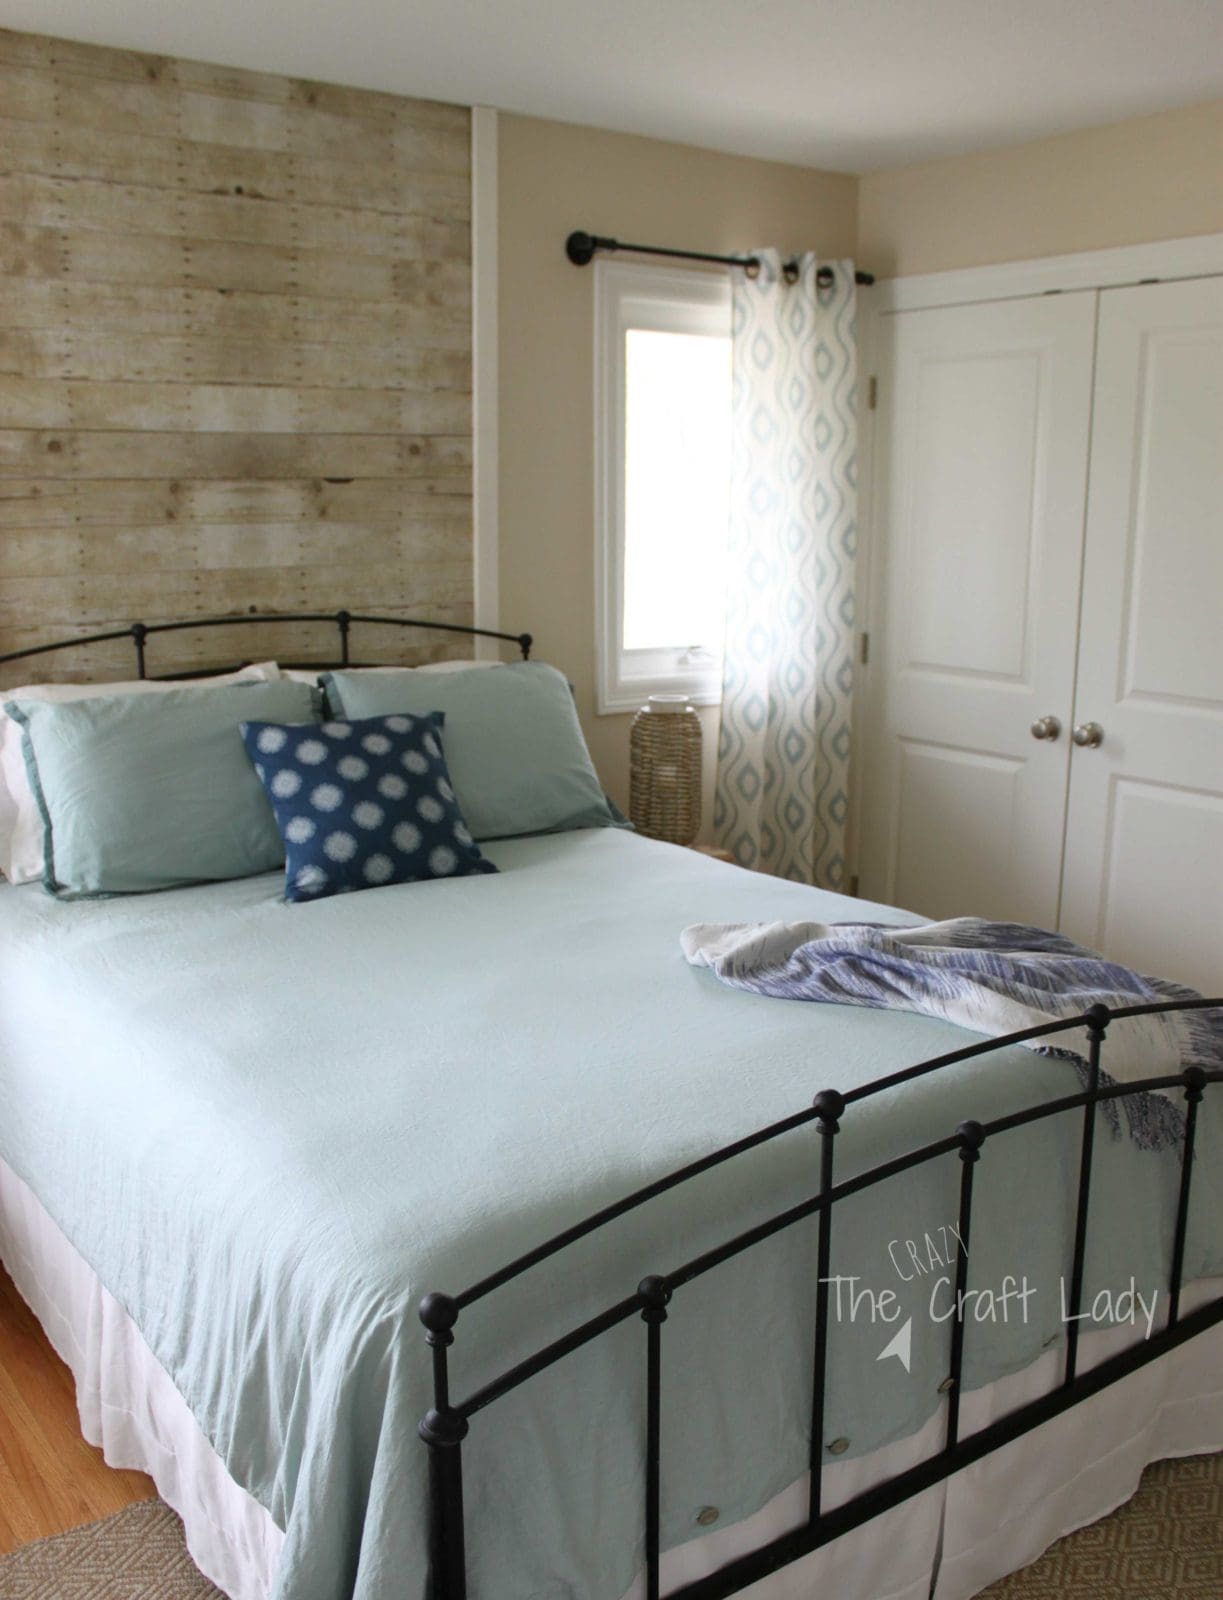
- Just because you rent, doesn't mean you have to miss out on the plank wall decor trend. See my $8 rental-friendly plank wall solution.
A big shout out and thanks to Tasha for letting me share my project and hang out with you all today. I will be back in a few months for another guest post. In the meantime, feel free to follow along with me on my blog at The Crazy Craft Lady.
[mv_create 1 11 200 2016 key=”1″ type=”list” title=”Most Popular Projects” thumbnail=”<a href=” https designertrapped com wp content uploads diy home decor projects blog jpg a]
Last Updated on May 20, 2019
Love it
This was such a good idea. I love how it looks. Sign me up for wine and woodworking.(my son in law will be making.eting all the cuts so I can drink wine)
LOL I love it!
These. are. brilliant!!! I’m in love with the look of a good hex, anything! Such a great alternative to the usual boring shoe rack.
Thanks Jen!!! I seriously want to make more of these… wine racks, toy storage :)