How to Make Vinyl Wall Quotes Yourself
Do you want to add a personal touch a wall in your home by adding a large wall quote? Have you ever wondered how to make your own custom wall quote? Vinyl wall quotes are surprisingly easy to make. And when you make them yourself, you can choose any font, size, quote and color to get exactly the look that you want! Read on to learn how to make vinyl wall quotes with a cutting machine.
This post contains affiliate links for your convenience. Click here for my full disclosure policy.
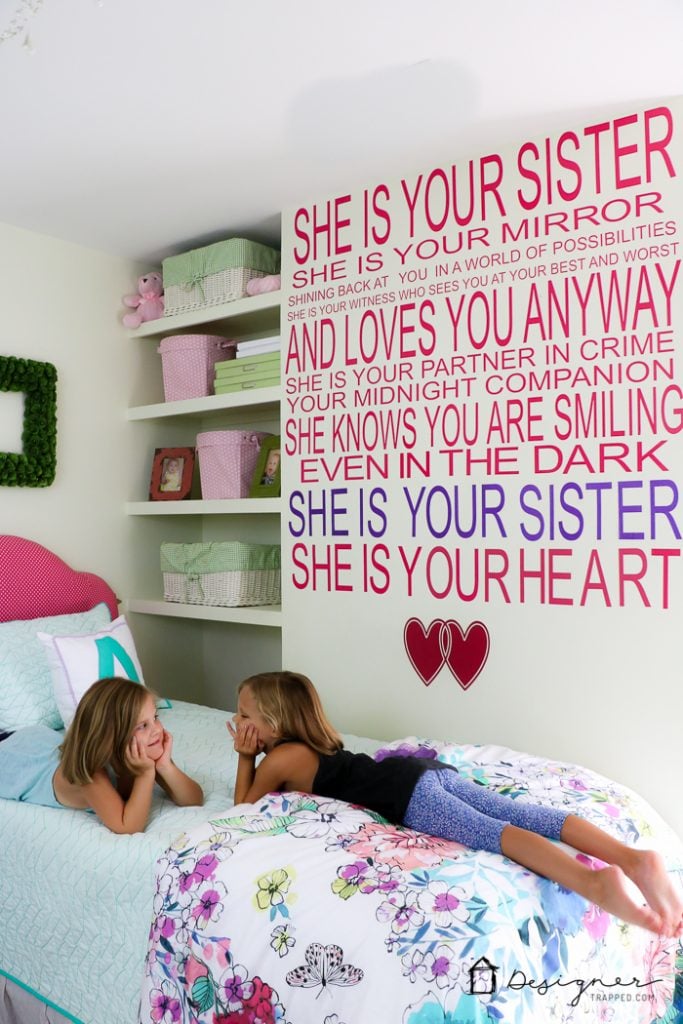
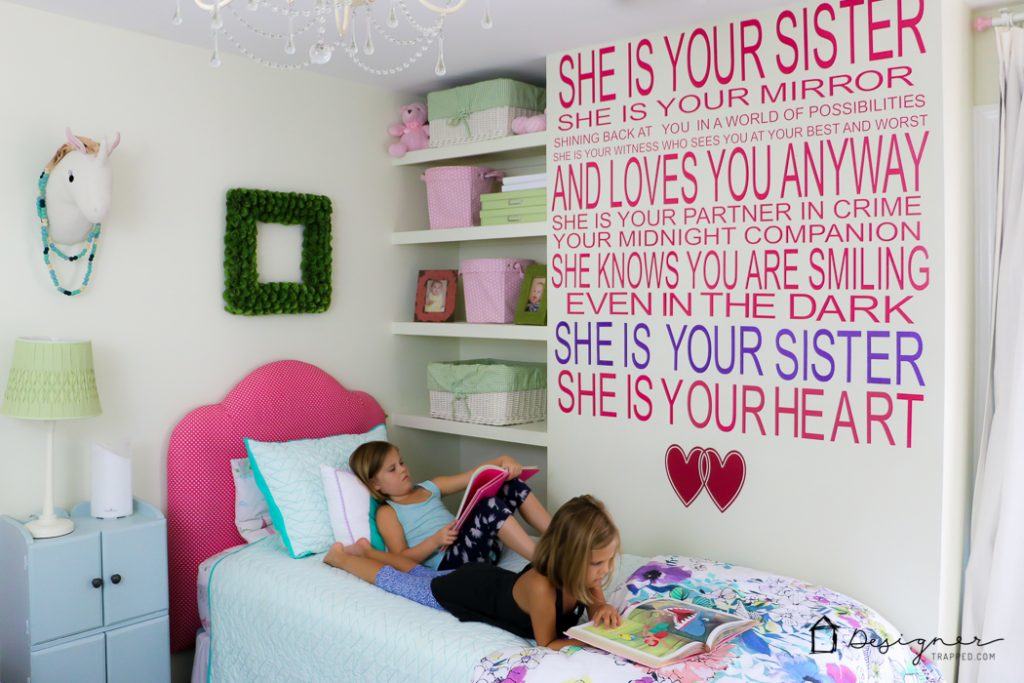
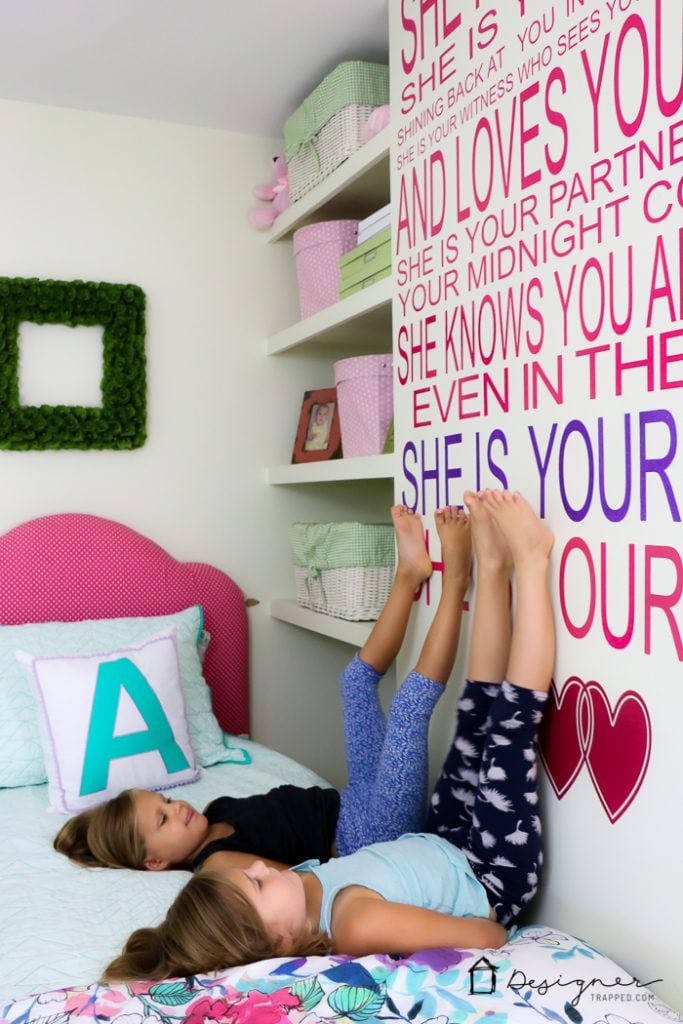
After seeing a hand-painted sign on Etsy a while back, I fell in love with the sweet quote about sisters on it. Having grown up with a sister who I love and adore (she really is my best friend), it gave me ALL THE FEELS. So, I decided it would make a perfect wall quote in our twin girls' shared bedroom. Read on to learn how to make vinyl wall quotes to create any quote in any color and size you want!
Materials needed
- Adhesive vinyl in colors of your choosing—I used this pink vinyl and this purple glitter vinyl.
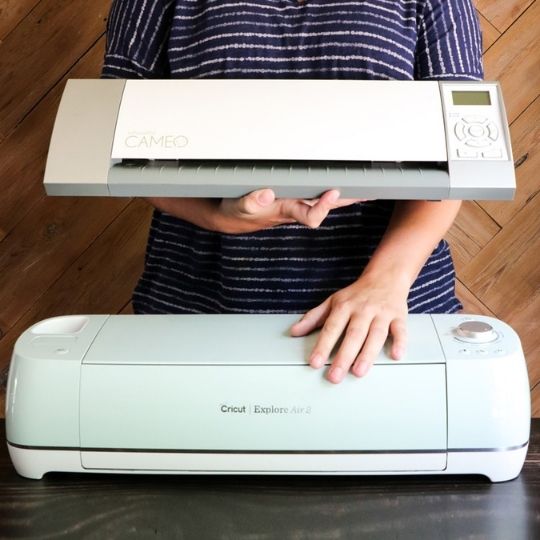
- A cutting machine (I use the Silhouette CAMEO for this project)
- Transfer paper (the Silhouette brand is great, but I purchased this huge roll about a year ago because it’s so much less expensive and it works perfectly)
DIY Vinyl Wall Quote Tutorial
Time needed: 4 hours
How long this project takes you will depend a lot on how large it is. It took me about 4 hours start to finish.
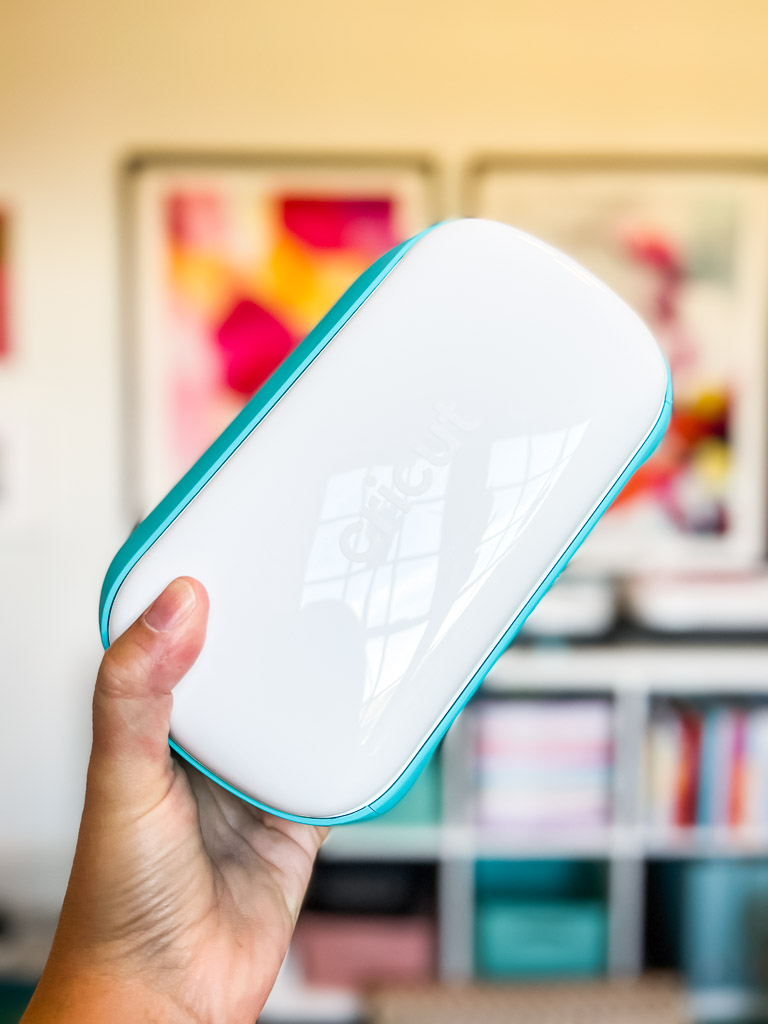
- Get a cutting machine if you don't have one already.
First, you need to get a good cutting machine. A good cutting machine is a must for making your own wall quotes. They are an investment, but I think order this custom wall quote from a company would have cost me more than a cutting machine!
There are several types of cutting machines available in the market, each with its own specifications. The two most popular types are Silhouette and Cricut. As I mentioned above, I used the Silhouette CAMEO for this project, but have since become a fan of Cricut machines and only use them now. You can read my unbiased review of Silhouette vs. Cricut if you want help deciding which brand is right for you. - Design your wall quote in your cutting machine software.
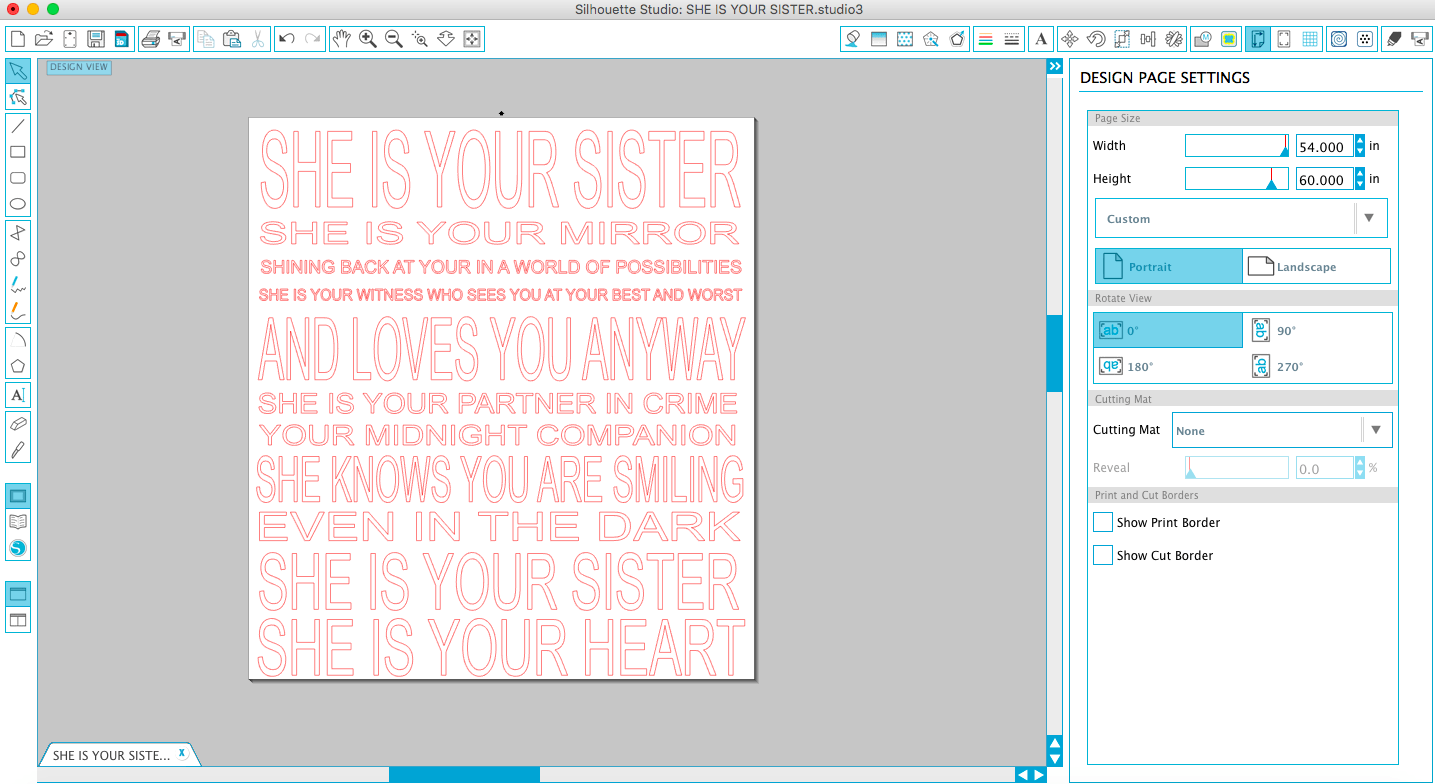
I used Silhouette Studio and started by specifying the dimensions of the wall I was working with. The I typed out the entire quote to be sure it fit and to play around with making the lines different sizes.

- Adjust your design for cutting.
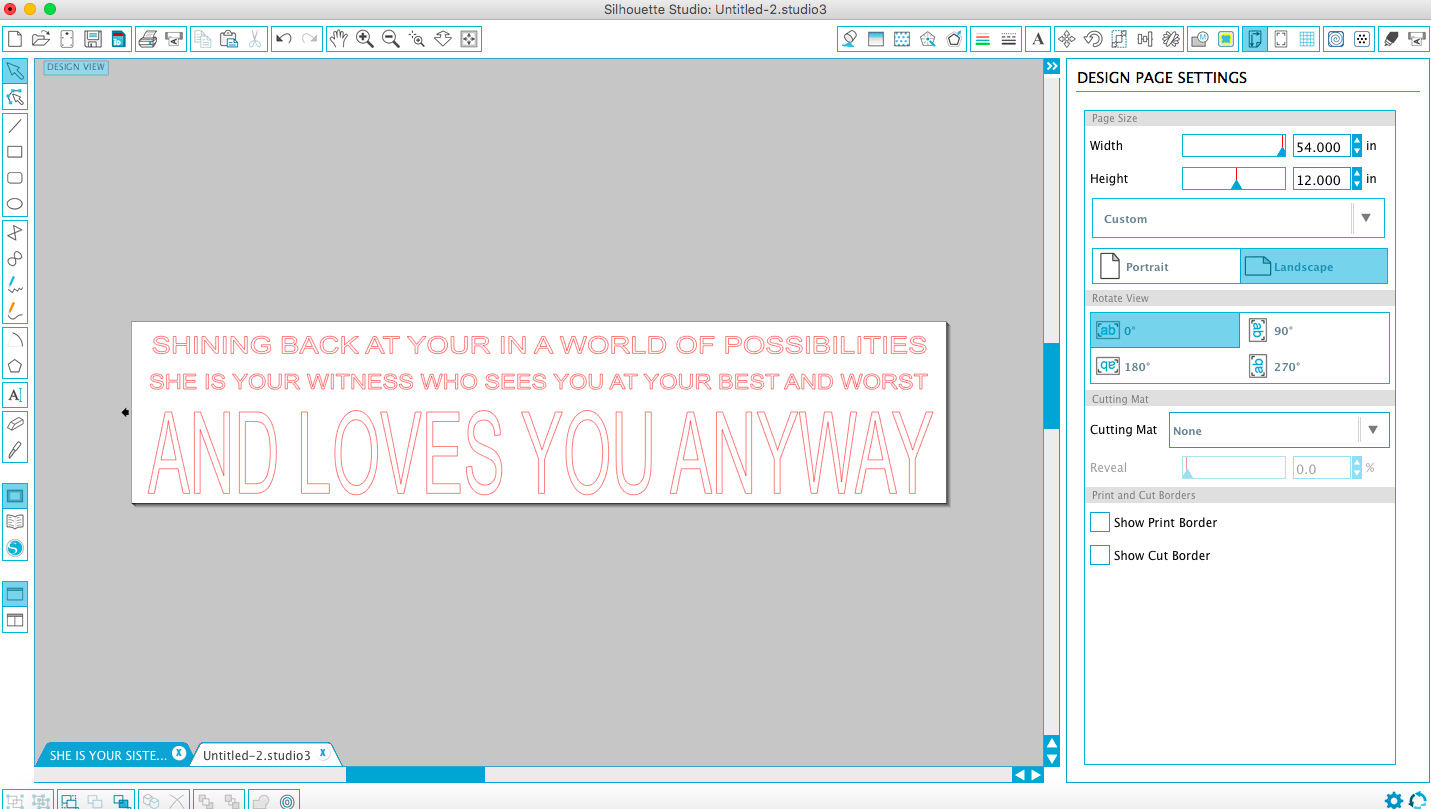
After I had everything looking the way I wanted it, I copied and pasted the lines onto a new file that was set to fit my 12” vinyl. I cut 54” lengths of vinyl at a time because that was the width of the wall I was working with. This method definitely wastes a lot more vinyl than you would use if you simply cut out the letters that you needed and fit as many onto each strip of vinyl that you could. But, it makes transferring the design a lot easier and all told, I only used 4 rolls of vinyl for this project, all of which I purchased on sale for $9.00, so that made the total cost only $36.00. Note: If I made this project now using Cricut Design Space, I would use the splice feature to break the cut file into cuttable sizes, which likely would save time and money.
I did find that when working with such long pieces of vinyl, it was important for me to help support the weight of the roll to avoid the vinyl from going off track. I learned that the hard way after ruining a few feet of vinyl.
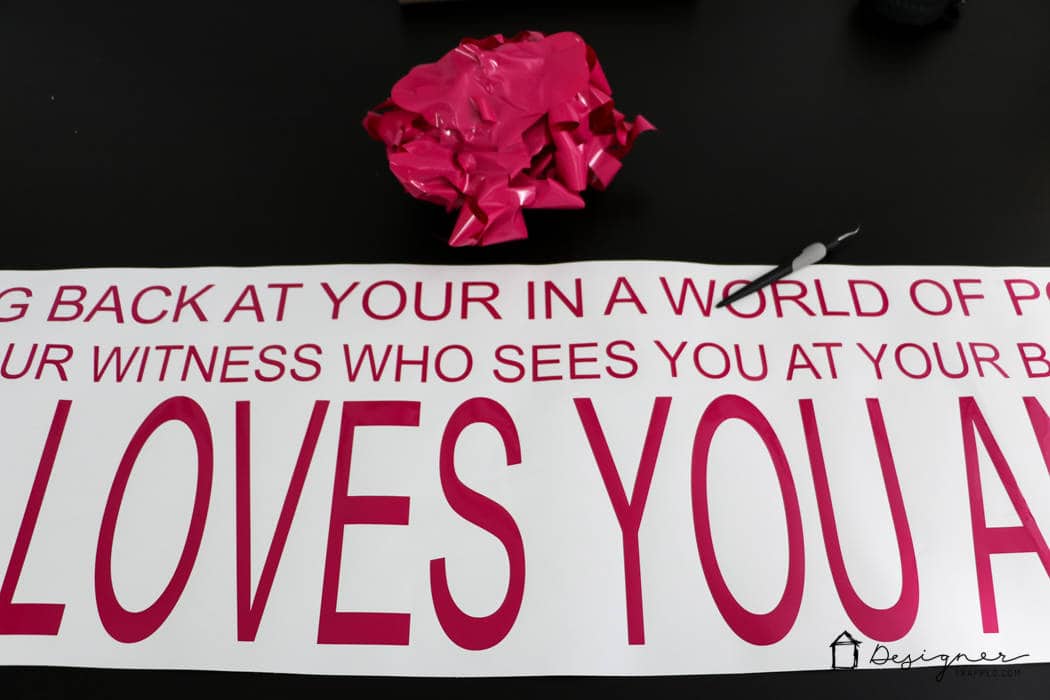
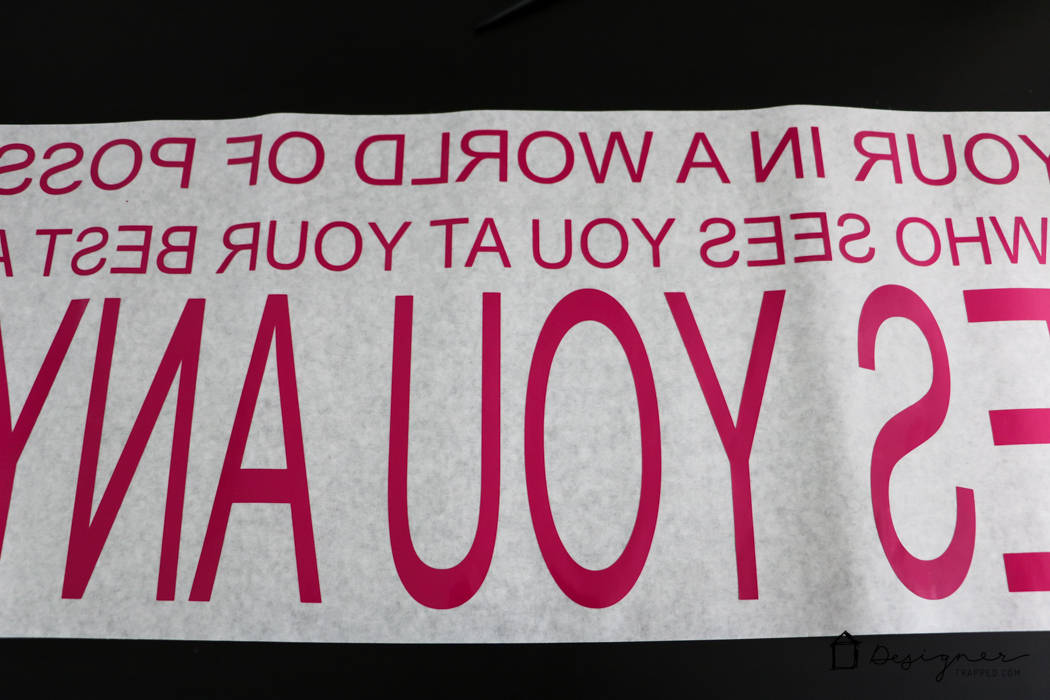
- Cut out your entire design and weed it.
Once a section of your quote is cut out, you need to “weed” your design. That means you remove all of the excess vinyl from around the quote so you are left with just your design, as shown below.

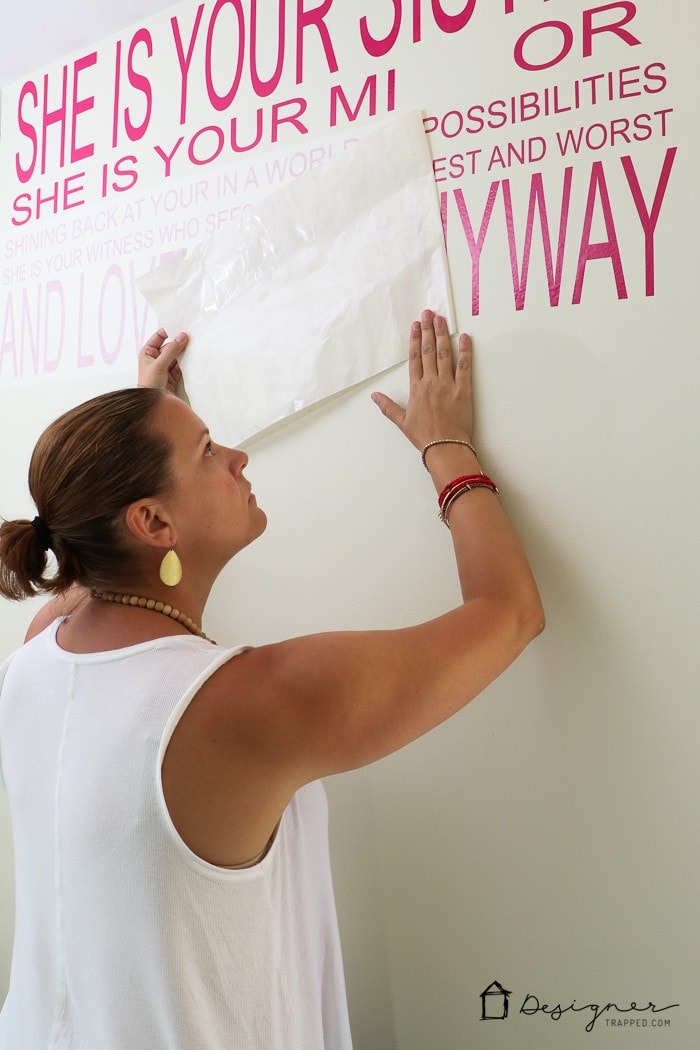
- Transfer your vinyl wall quote onto transfer paper.
Clean the wall first to remove any dust and debris. Then, use transfer tape to apply the vinyl on the wall keeping it as straight as possible. Use a scraper tool or something rigid to firmly rub over the back of the transfer tape–this will help ensure your vinyl really sticks to the wall well.
- Transfer your vinyl wall quote onto your wall.
Position the transfer paper on your wall and then use your scraper again to firmly press the vinyl letters on your wall. (Don't worry, I added the missing letters at the top later).

- Peel off the transfer paper.
The last step to make your own decals is to slowly peel the transfer paper off the wall. If you reach any spots where the letter is not sticking to the wall, just use your scraper to improve the adhesion and keep peeling.

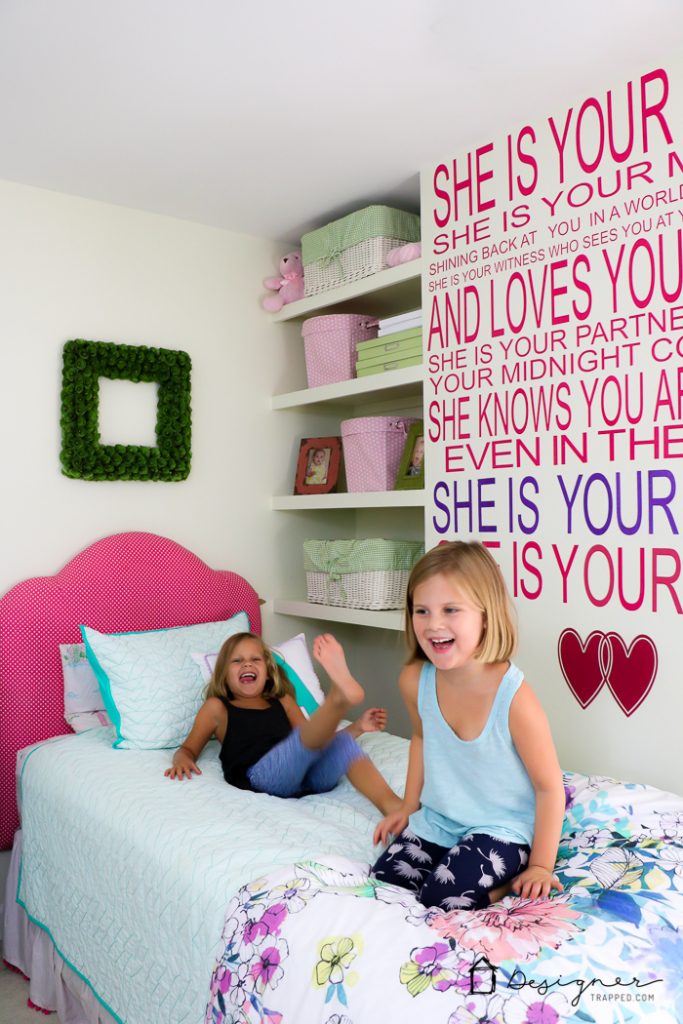
Repeat all steps until your wall is complete. Check out the finished project. WE LOVE IT!
One of absolute favorite things about vinyl lettering is that you can make mistakes without stressing out about it! If I had hand painted this, it would be a mess. But when you use vinyl, if the spacing of something looked off or crooked, all you have to do is slowly peel it off and reposition it. Vinyl adheres incredibly well, but it also peels off without damaging your walls at all.
In just a few hours, this project was complete. My girls, who are reading now, love the quote on their wall almost as much as I do, though I’m sure they don’t totally comprehend the significance of it…yet. Though they absolutely drive each other crazy sometimes, they really are best friends and I am so, so grateful for that.
As you can see, creating your own vinyl wall quotes with a cutting machine is fun and easy! And it's cost-effective way to get exactly what you want. All you need is a good cutting machine, vinyl, and your imagination!
You may Also enjoy

Wondering how I approach transforming rooms and spaces in our home? Check out Designer in a Binder®.

And if you want exclusive content and behind-the-scenes sneak peeks, be sure to subscribe before you head out!

Last Updated on March 3, 2022
I love this project so much Tasha!
Thanks Kathy! We LOVE how it turned out!
The girls have gotten huge! Looks like you’ve updated their room. Are you going to post pictures of the updates?
I know :( Yes, I am going to post about all their room updates eventually. I need to survive the bathroom remodel first :) We need to catch up!!!!!
Tasha this is so ADORABLE! I’m putting my two girls together in the coming months! I don’t have the Cameo but I may have to be getting one soon!!! GREAT JOB!
Thanks so much Tori! Good luck and I hope you get your cameo soon!!!! (you won’t believe you ever lived without it!)