How’s It Holding Up? DIY Concrete Vanity Update
Last Updated on February 27, 2022
Wondering how our DIY concrete vanity is holding up? Well, we have all that info for you PLUS info on a small tweak we made!
Hey friends! I FREQUENTLY get asked about how certain DIY home decor projects we have tackled are holding up. So, I thought it would be fun to run a “How's It Holding Up?” series on the blog for the next couple of weeks. Kind of fun, huh? First up we are going to talk about our DIY concrete vanity, a project that we completed when we updated our powder room and how it has held up since we originally completed the project about 18 months ago (in August, 2014).
As a reminder, THIS is what we started with in our old powder room.
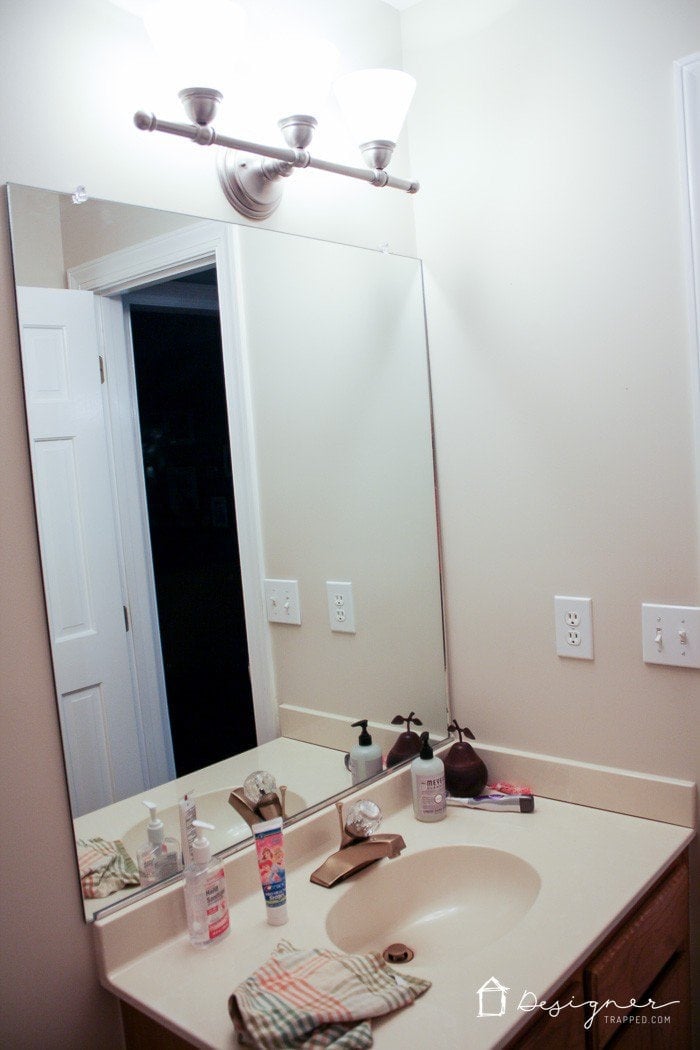
Oh yeah! See that super sexy cultured marble vanity and builder-grade mirror?! Not to mention the super orangey oak cabinet base?! Well, as usual, we were on a budget when we updated our powder room, so we needed a really economical solution to update the vanity. We had great success when we created our DIY concrete fireplace, so we thought we'd give it a try on our vanity. We LOVE concrete :) But y'all, I had NO IDEA if it would work. I mean seriously… Who smears concrete all over their sink? This girl.
It TOTALLY worked. This is what we ended up with!
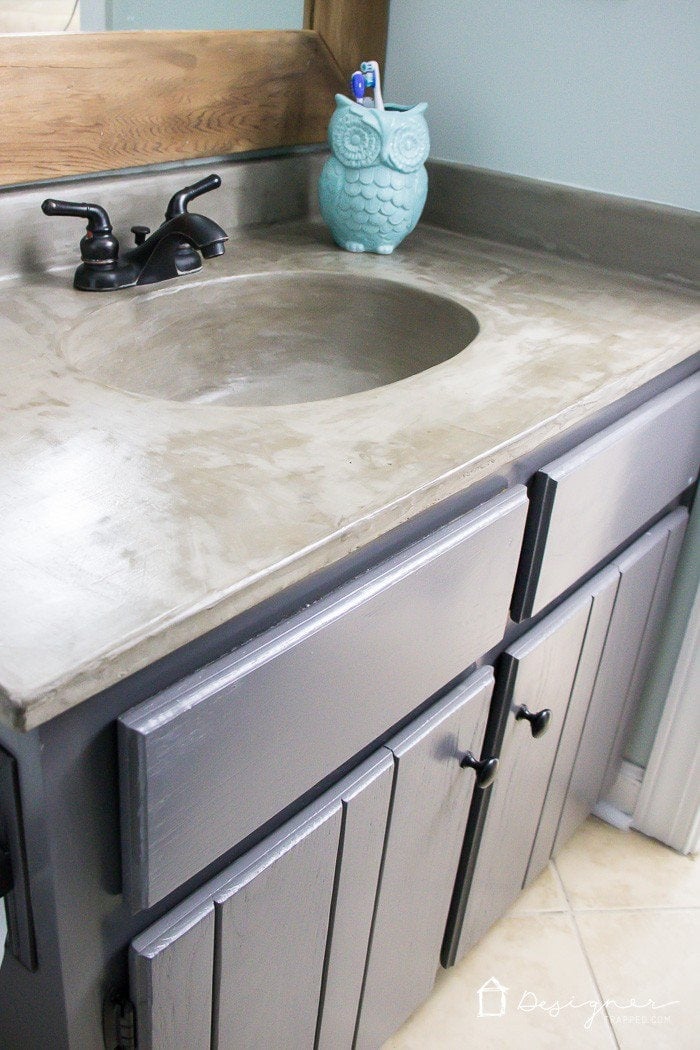
It's hard to believe that's the same powder room, isn't it?!
***** Looking for the full tutorial for the DIY concrete vanity overlay? Click HERE. *****
DIY Concrete Vanity Update
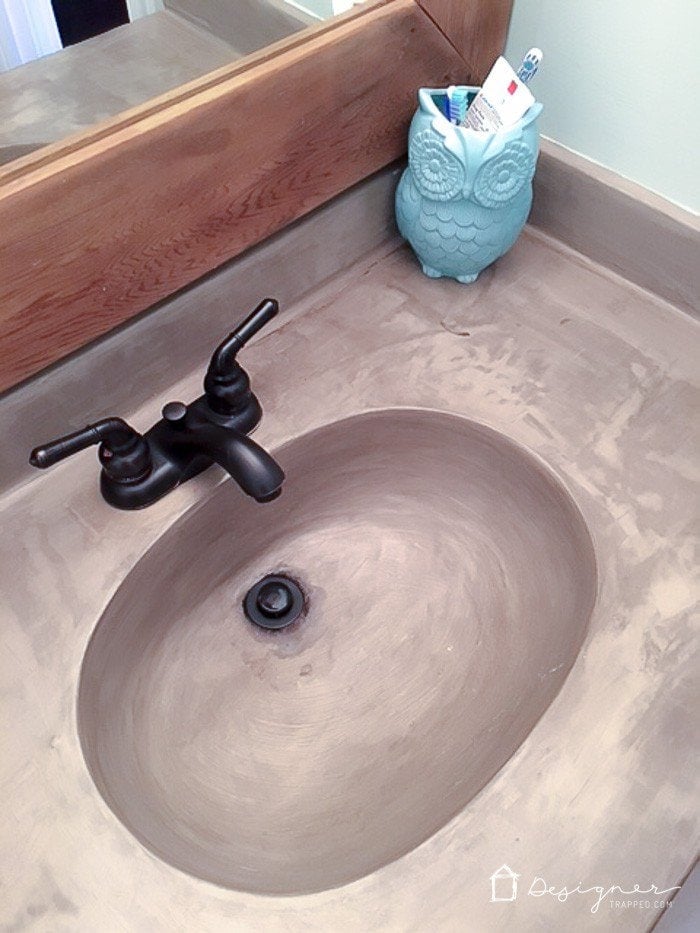
Long story short, the DIY concrete vanity has held up phenomenally well! But there is one tweak that I need to share with you. If we had to do it all over again, we would have left the drain IN PLACE and applied the concrete around it. Why? Because we did ultimately get some discoloration around the drain, presumably from water seeping in under it and darkening the concrete. You can see what I mean in this photo–look closely around the drain (sorry for the terrible photo quality–the photo below and the tutorial photos were shot with a phone camera at night)! The good news is that if you have already completed this project, it's a pretty easy fix! Just follow the instructions below.
How to Correct Any Darkening Around the Drain of Your DIY Concrete Sink Overlay
1) Use a utility knife to score the concrete overlay around the rim of the drain.
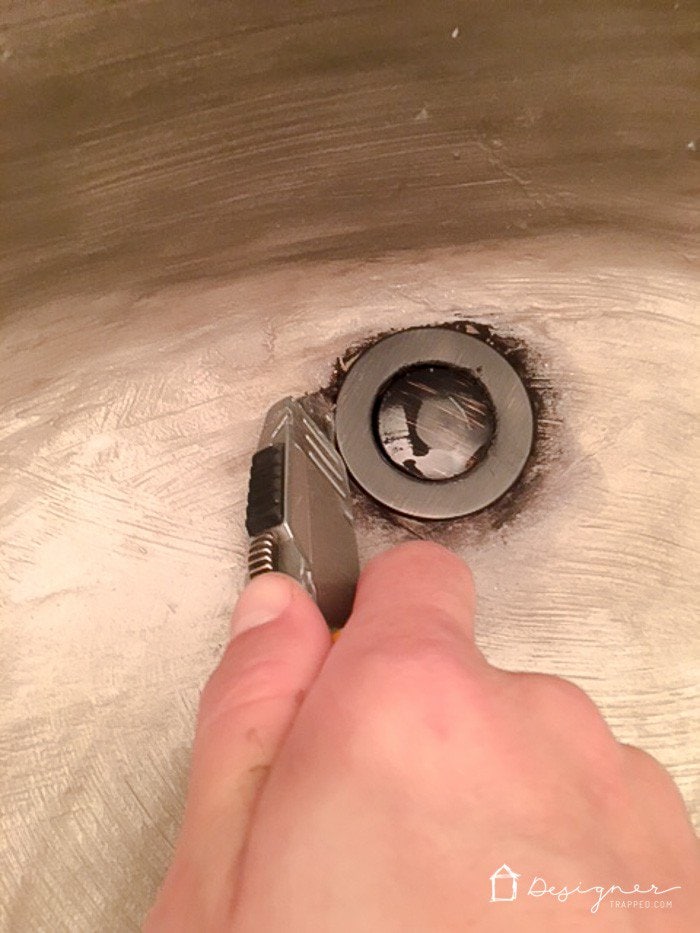
2) Remove the drain and continue scoring along the circle that you made around the drain with your utility knife until you are able to break away the concrete that was sitting under your drain. Don't worry–the circle doesn't have to be perfect, but it does need to be slightly larger than the drain itself.
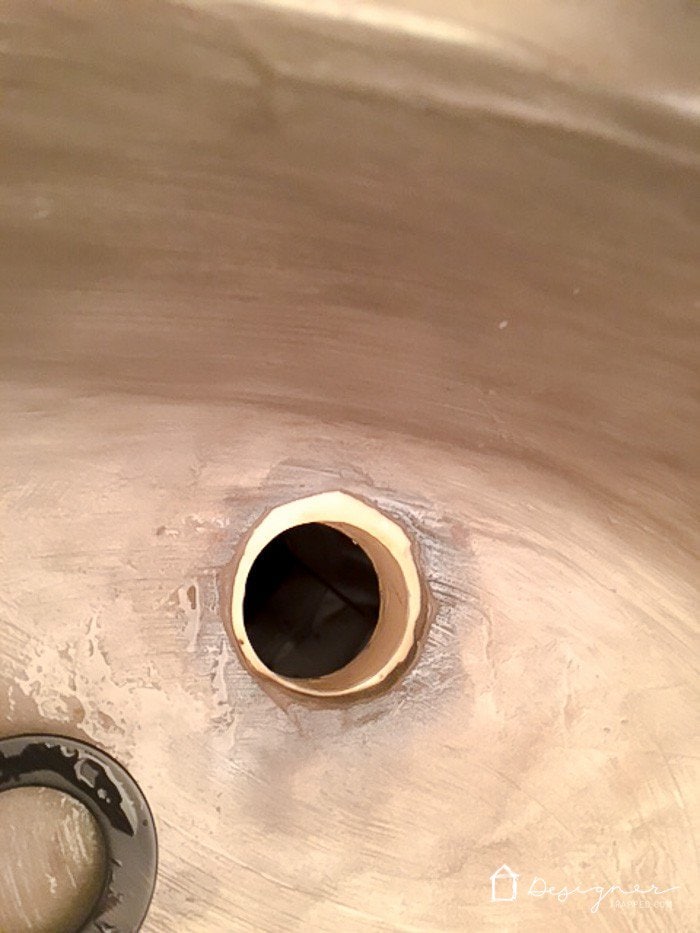
3) Re-install your drain.
4) Mix up your Ardex Feather Finish to a pudding-like consistency.
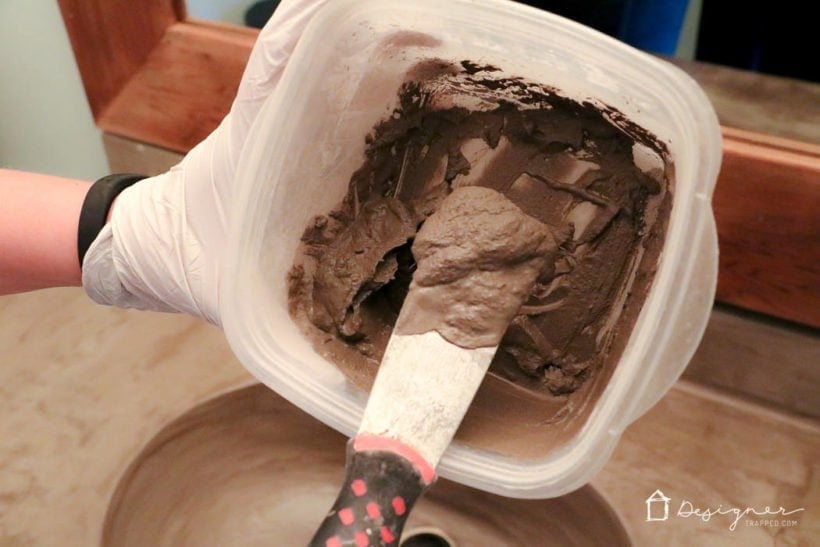
4) Use your finger to apply the concrete around your drain, being sure to overlap it on the surface of the drain ring slightly. Don't worry about making a mess. You can easily wipe any excess off the drain!
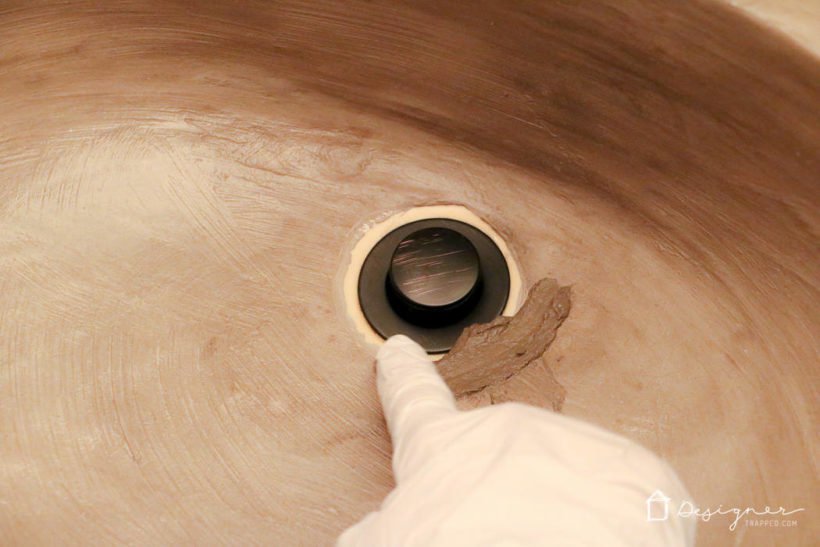
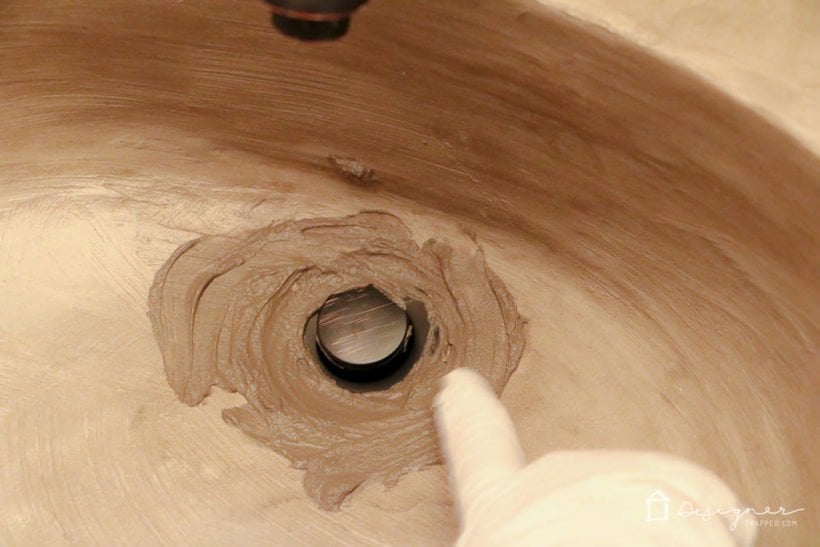
5) Use a damp paper towel to remove any excess concrete from the drain and to make the “circle” of concrete as smooth and even as possible.
6) Use your hand to wipe a small amount of concrete all over the sink basin. This will simply help even out any color differences that may result from adding new concrete to old.
7) Allow it to dry (overnight, if possible). Repeat steps 4-7 at least once. You really want to be sure that you have enough concrete around the drain–this may take 2 or 3 very thin layers. Allow the final coat to dry overnight.
8) Apply your Quickcrete sealer. This is the FIRST time we have had to re-seal the vanity and we only re-sealed the sink basin. I recommend following the directions on the package. We added 3 coats of sealer, be sure to get great coverage around the drain.
That's it! We “tweaked” ours about 2 months ago and it's PERFECT! No more discoloration around the drain. Wooo hooo! Here is what it looks like present-day after we tweaked the drain issue.
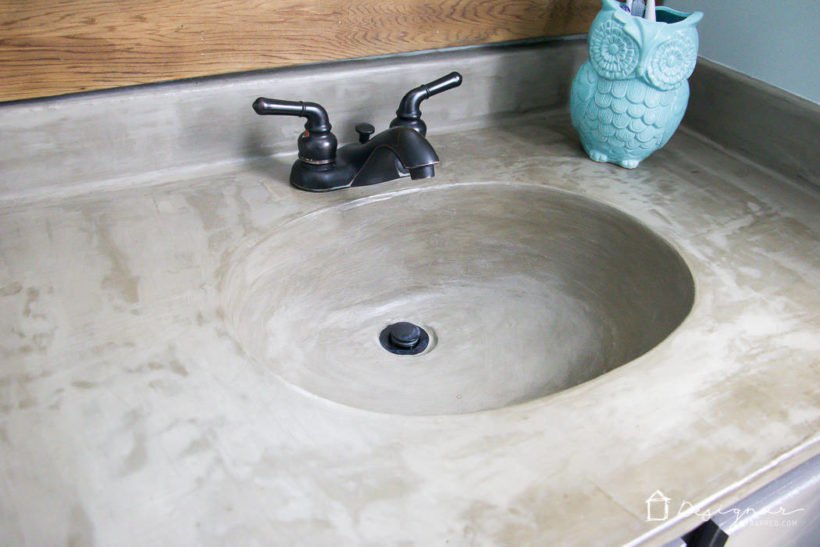
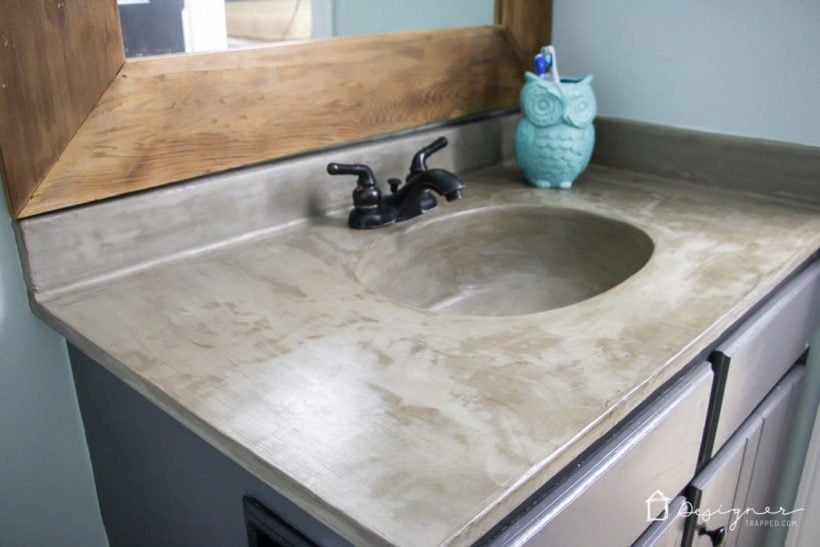
Would we do it again?
A million, zillion times YES! Y'all, this cost us around $20 and we love it! Even if we hadn't tweaked it, the slight discoloration around the drain would NOT prevent me from doing this again! But it is 100% perfect with the tweak. So, so happy with this project!
I've put together another video for you about this project–it includes an answer to the very popular question of “how do you clean it?” Enjoy!
Other posts you may enjoy:
- How to Paint Countertops to Look Like Marble
- The Easy Way to Update Bathroom Tile Without Replacing It!
- Gorgeous But Cheap Flooring Ideas
- DIY Concrete Fireplace For Less than $100!
- 15 Affordable DIY Countertops That Will Blow Your Mind
- 18+ Budget Friendly DIY Backsplash Ideas
- Affordable Master Bathroom Remodel REVEAL
Wondering how I approach transforming rooms and spaces in our home? Check out Designer in a Binder®.
And if you want exclusive content and behind-the-scenes sneak peeks, be sure to subscribe before you head out!


Thanks so much for this! Question – we have a similar outdated SHOWER – do you think this might work in there?
I have never tried this in shower or tub, but I really don’t recommend it. I am not sure how the water pressure would effect it day after day and any rough spots would be super uncomfortable! IF you do try it and it works, let me know! I get this question a lot! Thanks for reading.
Will the counter stand up to some heat like a straightening iron or a curling iron? I really want to do this in our bathroom but it’s the only working surface.
I can’t see any reason why it would not! Thanks for reading.
I love this look, but I wonder how it would look stained? Do you have any experience staining concrete?
I actually prefer the grey, but I have heard of people that stain or mix in the colored powder. Good luck!
Looks great! I have an old formica countertop in my bathroom, do you think the concrete would work ok on that surface?
Yes, it works wonderfully on laminate counters. We used this over the laminate counters in our laundry room. You can check it out here: https://designertrapped.com/2013/10/the-laundry-room-reveal.html
Im starting our bathroom vanity,but im doing it my self and have question regarding the drain. Do I disconect the drain underneath?
The top portion is brass, plan on changing out to oil rubbed bronze. I dont know were to start.
You have to put the drain want to use first. So if you are switching it out, switch it first. Hope that helps!
I have a question about the “tweak”… How did you seal it without getting a bunch of sealer on the drain ring? Im trying to recover from doing it the first way as i didnt see the link for this until after i had done it and discovered we had a “pooling” problem… But i am curious how you got a nice seal on it without jacking up the drain ring? Thanks for your input!
Also: did u sand the sink before doing another light coat of concrete and sealing?
Yes we sanded between.
It does get on the drain ring. Just use your finger or a q-tip to wipe it off!
Thank you so much for sharing this awesome technique! I’ve read through the comments and haven’t seen this question asked yet. Have you heard of this finish working over corian kitchen counters after scuffing them up a bit?
As long as it is stable with no cracks you should be fine!
I am so impressed, love your blog! I would like to do my kitchen counters with this, but not the sink. How well do you think it would stand up under daily cooking/spills? Thanks!
Yes! Following the same guidelines of the integrity of the counter top (stable, no cracks, etc) it should be fine!
I would like to do this in my shower as well as the counters in my bathroom – the shower will obviously have more water on a daily basis – how do you think it will hold up? We have a glass enclosure directly across from the shower head that the water hits but what I was wondering is how the walls and the floor of the shower would hold up. Any ideas?
I do not recommend this for a shower (for the record I have never tried it!) The amount of water that hits directly on it is hwat makes me nervous. If you do try it, let me know how it turns out!
I could only find a high shine sealer and plain sealer. Which one should I get.
The one I used was satin finish. The link to the product I used is in this post: https://designertrapped.com/diy-vanity-concrete-overlay/
I’m definitely going to do this! But if I plan to replace the drain as well, what do you recommend? Do the concrete with old drain in place? Then replace it when I’m finished?
Put the new drain in first, then concrete it. Good luck!
I was thinking of doing laminate kitchen counter do you think it will hold up?
Yes, it works wonderfully on laminate counters. We use this over the laminate counters in our laundry room. You can check it out here: https://designertrapped.com/2013/10/the-laundry-room-reveal.html
Can I add concrete color product so it’s not so dark? BTW , love the project, the pictures, the tips!!! Now I just have to get my “brave” on. This is a definite want!!!!!
I have never tried to do this but I have heard of people adding powder color to concrete. Good luck!
could you do this if your cabinet is formica?
Yes, it works wonderfully on laminate counters. We use this over the laminate counters in our laundry room. You can check it out here: https://designertrapped.com/2013/10/the-laundry-room-reveal.html
Do you think this would work on a shower suround. It is lab created marble like my sink which I plan to do. I would love for them to match.
I am not sure exactly the part you are talking about in the shower? If it is a part that doesn’t actually get wet I think it would be fine. I have concerns over using it in a shower proper because of the water pressure over time. Good luck!
I’m motivated to try this! Do you think it would work on shower walls? Going over the ugly ceramic tiles with the feather finish?
I really can’t recommend it for a shower. It would be a whole lot of work and I am not sure how that much water pressure over an extended time would treat it.
I wish I could post pics of mine I just did because for some reason the concrete turns dark around the drain its not leaking but I dont know why its doing that, I have a two sink counter I did the forst one like you did and the second one I left the drain in but either way the concrete turned dark as soon as I ran water on it it also has spots that turn dark is it the sealer I didnt go over enough or what?
I am really not sure? That has not happened to ours since I did it the second way. The only guess is that you need more sealer because the water is penetrating it. Good luck!
Thoughts on staining the concrete surface before sealing? This is such a great idea but I don’t believe the modern look will work in my home. But staining it would make it work.
I have never stained concrete because I love the grey. That is certainly not to say you couldn’t try it, but I have no expertise about it!
Do you think this would work on a tub? I have a cast iron tub that is chipping and don’t want to refinish with porcelain or replace. I think it would look great in concrete, but worry about it holding up. Any suggestions or ideas?
I do not recommend doing this on any tubs, ever. Sorry!
So I just did one side of my sink I have a double sink I needed a working faucet in my house so I did one side and going to do the other so are you saying to install the new drain and then concrete around it?
That’s right! Thanks for reading!
Do you think I could get a porcelain sink scruffed up enough for the concrete to adhere? I’ve been looking for instructions to do this- thanks so much! I love the way yours looks- hope I can do half as well :-)
I have never messed with porcelain, but I suppose you could! Good luck!
Would you try this on a mauve pink cast iron bath tub?
I would not do this to a bathtub. It would be extremely hard to smooth and I am not sure how it would handle that much water pressure!
Thank you so much for your follow up post. I have often wondered how these hold up!
This is amazing!! So thankful I found this before going out a buying a new counter top! Thank you!
You are welcome! Happy concreting, LOL. Thanks for reading!
We have a Formica countertop with a ceramic sink and a metal rim. Have you heard of anyone successfully covering all of that? Thanks for the great work from a fellow lawyer!
I am concerned about the metal rim. It needs to be a completely stable surface and if there is any movement with the rim it can crack.
I love the countertop! I really want to do it in our downstairs bathroom but we have grouted tile there now. Would that still work?
I haven’t personally done it on tile, but it can be done if the tile and grout are in good shape and aren’t cracked, chipping, etc. It would probably take more coats to get full coverage, but it should work! Good luck!
Hi Tasha,
This project is so amazingly beautiful, and I’m pleased to read that the sink is holding up. I am considering doing this on my kitchen counters, and was wondering if you thought it could be used on a kitchen sink.
Thanks for any input you can offer
,
I would be nervous to use it in the kitchen because that sink is used so much and it could crack it you drop something really heavy (like a cast iron skillet or crockpot.) Good luck!
I have a seashell shaped sink. Do you think I could get it a smooth shape like yours and hide the seashell ridges? Any suggestions would be great ?
I don’t recommend that. I don’t think it would work. Thanks for reading!
I was wondering if I could add a stain to the concrete either after it’s set or in the mixing process. I would love to hear your thoughts on that.
thanks,
Laura.
I have no idea if you can add stain during the mixing process, I have only heard of people using the powder pigment and I don’t know what process they follow. I know people stain concrete, I just have never personally done it. Good luck!
There is a pigment you can add to brick mortar, don’t know why it wouldn’t work.
Can you do this over laminate?
Yes, it works wonderfully on laminate counters. We use this over the laminate counters in our laundry room. You can check it out here: https://designertrapped.com/2013/10/the-laundry-room-reveal.html
Have you used cosmetics or any anti-aging products with this sink? I’ve been considering it for my master bath. We just spent $9K on it and I cannot cough up the $2K that a quartz counter & new sink bowls will cost – this doesn’t include a new vanity, we’re reusing it! I like the look of the concrete, it’ll go with the style of the bathroom & the vanity. But I use some chemical peels, hair color, etc. and I’m wondering how the surface holds up to the wear and tear of a woman?
Hi Brooke! Great question. I use chemical peels and hair color in my master bathroom, but not in this powder room, so I’m afraid I don’t know! Sorry!
I often see the concrete counters on Fixer Upper and wonder how they held up. Super interesting!
amandakatherine.com