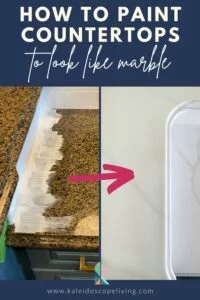
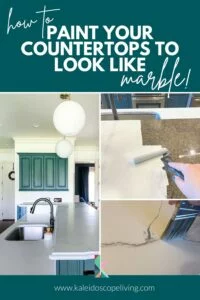
How to Paint Countertops & What You NEED to Know First
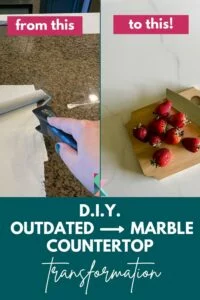
If you have countertops that just aren't your style, but you don't have the budget to replace them, you can paint them! I know… It sounds a bit weird. But I painted our old, brown granite countertops nearly two years ago and have zero regrets. But there are some things I wish I had known before we tackled this project. So I'm sharing everything you need to know about countertop paint with you in this post!

It's no secret that I wasn't a fan of our kitchen when we moved into this house a couple of years ago. We tackled a very budget-friendly kitchen makeover that included painting our kitchen cabinets and painting our tile backsplash. And it looked 1000% more like our style when we finished!
But the brown, speckled granite countertops remained and they were dragging down the whole look of our kitchen. We didn't like the color or the pattern. But replacing the countertops was not even remotely in our budget at the time. So I started looking for affordable DIY countertop options. And I quickly decided I wanted to use countertop paint to mimic the look of marble countertops.
We successfully used a countertop paint kit to get the EXACT look we wanted. I love how our kitchen counters turned out so much that I have since used the same method to paint the countertops in both of our daughter's bathrooms and our colorful, modern laundry room.
In this post, I'm sharing my unbiased review, tips & tricks as well as the full tutorial for how to do it yourself.
SEE THE UPDATE
We heavily used our painted countertops for several years before our kitchen was demoed to prepare for our kitchen renovation. Learn the one thing I would do differently and see a video + photos of how they looked after 3 1/2 years by clicking the button below!

Is Painting Countertops a Good Idea?
Yes! If replacing countertops you don't like is out of your budget, I think painting your countertops is absolutely the way to go. I used a peel-and-stick countertop wrap on a countertop in our built-in-office nook and it was much harder to work with than paint. Plus, it didn't look nearly as realistic as our painted kitchen countertops.
Benefits of Painting Countertops
First, let's cover the benefits of painting your countertops. The biggest pro is that it's an incredibly cost-effective way to give an entirely new look to your counters. You do need to purchase quality primer, paint, and sealer, but you can do so for around $200.
There are several different countertop paint kits available that are surface-specific and already include all the supplies you need. The cost of painting your countertops is a tiny fraction of the thousands of dollars it would cost to replace them.
Painting countertops is also a really doable DIY project even for beginners. My daughters who were only 10-years-old at the time helped paint the veining on our counters. I promise, it's not hard and it's kind of fun.
Finally, if you use a high-quality countertop paint kit, your countertops will hold up beautifully!
Cons of Painting Countertops
In my experience, there are only 2 downsides of using countertop paint to transform your counters. The first is that it is time-consuming and you will have a period of time when you cannot use your kitchen. Again, it isn't hard, but it will take a fair amount of time. The second downside is that you will not be able to put hot pots or pans directly on your painted counters. The latter wasn't a big concern for us since we didn't do that anyway, but I can see that many people would consider that a drawback.
This post contains affiliate links for your convenience. Click here for my full disclosure policy.
What Kind of Paint Do You Use On Countertops?
I highly recommend purchasing a kit that is specifically formulated for painting countertops. Based on my research and after reading hundreds of reviews, we decided to use a Giani countertop paint kit. My conclusion was that the Giani countertop paint kits were the best combination of durability, price and ease of use. There are lots of different styles and colors available.
In addition to my online research, I also chatted with people who have actually painted their cabinets. I learned 2 things… The people that used the Rustoleum Countertop Paint kit did NOT recommend it. They wound up with peeling and chipping countertops. But every single person I heard from that had used the Giani countertop kit loved their results and hadn't had any issues.
Can you Paint Laminate Countertops? What Kinds of Countertops Can Be Painted?
The Giani countertop paint kit I used allows you to paint nearly every kind of material. We painted our granite counters, but you can also use the kit to paint Formica, laminate, Corian, ceramic tile, butcher block, and cultured marble. Just note that different countertop surfaces require different prep as specified in the manufacturer's instructions.
How to Paint Countertops to Look Like Marble: A Tutorial
Now I'm going to share exactly how to paint countertops using the same countertop paint kit that we used. I'm also going to answer allllllllll the questions that have come in since we finished this project. So this post may be long, but it will be worth your while to read the whole thing if you are considering tackling this project yourself.
Do yourself a favor and grab the FREE “How to Paint Countertops” printable instructions for this project by filling out the form below :)
Thank you to DAP Products for sponsoring this post. As always, all opinions are 100% my own. This post contains some affiliate links for your convenience. Click here to read my full disclosure policy.
Materials Needed
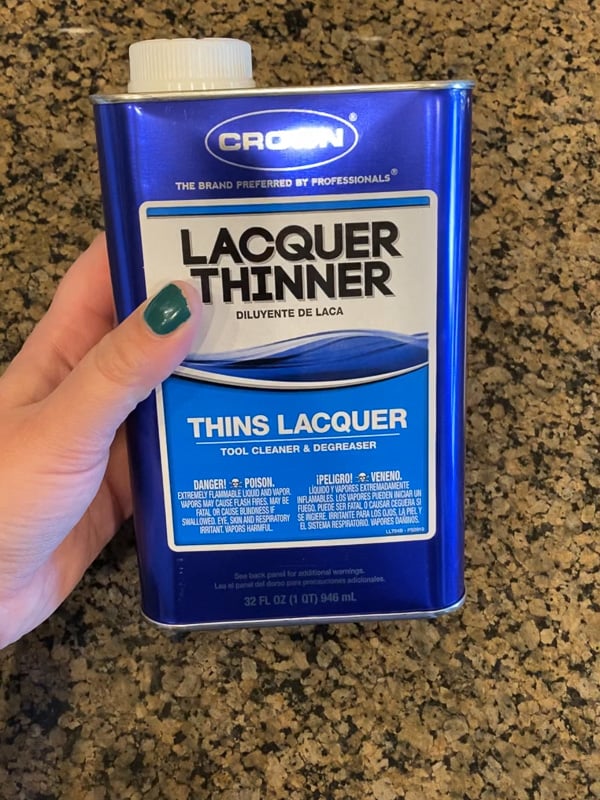
- Lacquer thinner (if you are painting granite countertops)
- This countertop paint kit
- This kit comes with EVERYTHING you need, including the brushes, rollers, plastic sheeting to protect your cabinets, etc.
- Giani says that each kit covers 35 square feet of countertop. We have just under 100 square feet of countertop and had PLENTY of paint with a single kit. And we almost had enough of the epoxy topcoat with one kit. We did have to use 1 set of the epoxy topcoat from a second kit. If I had it to do over again, I would have ordered 1 full kit and 1 extra set of the epoxy topcoat (that can be ordered separately).
- Brown paper flooring protection (this isn't included in the kit, but I highly recommend it to protect your floors)
- Tweezers
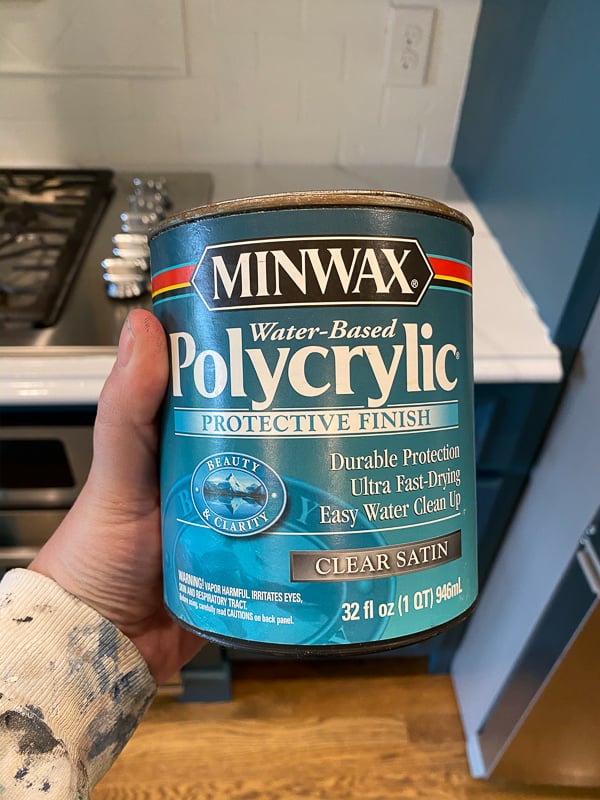
- Polycrylic topcoat in satin finish (this is OPTIONAL and only if you want to achieve honed look)
- Caulk removal tool
- Paper towels
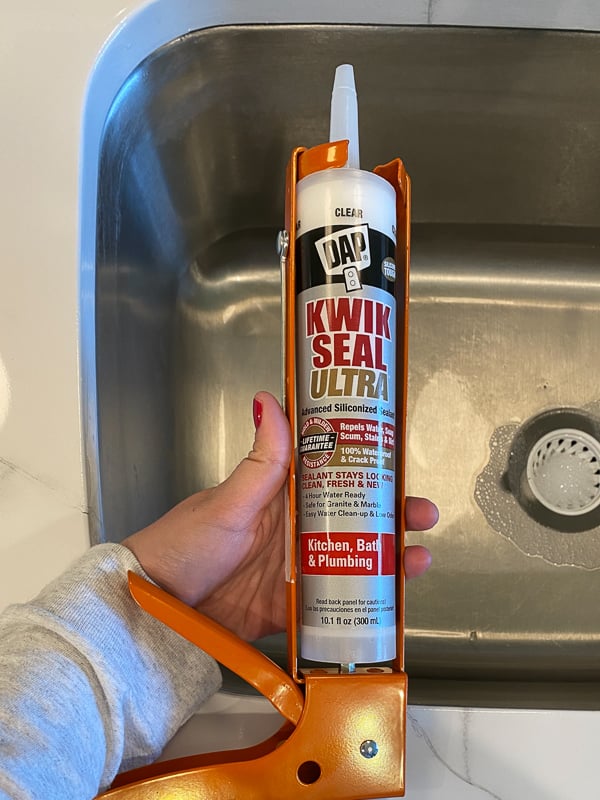
- DAP Kwik Seal Ultra
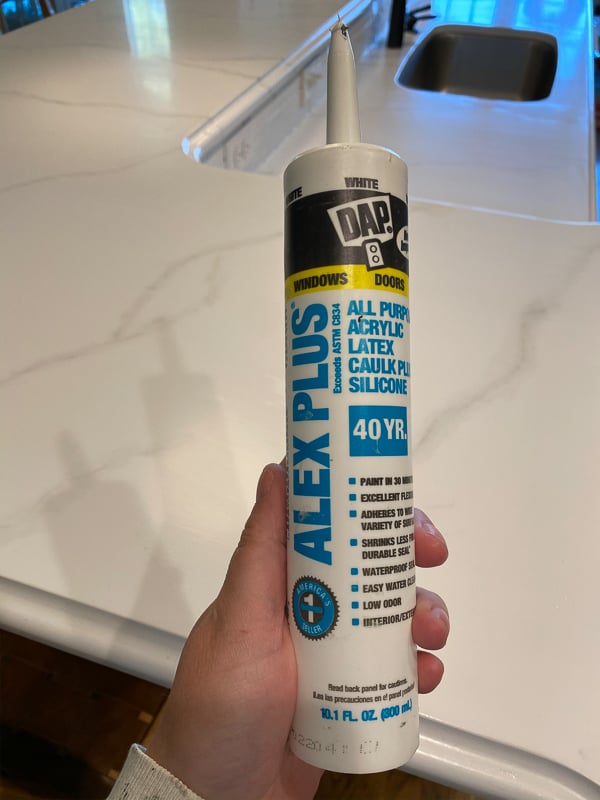
- DAP Alex Plus caulk
Steps
You can watch the short video below for an overview of this process before reading the step-by-step instructions :)
Phase 1: Prepping and Cleaning
Step 1: Remove any silicone caulking and clean up any caulking residue with rubbing alcohol.
Step 2: Clean and prep your surface. Every type of surface should be cleaned with a scouring pad to remove any grease and dirt. Different surfaces require different prep after this–see the chart below from Giani.

If you are painting granite counters like we did, you also need to clean your counters with Laquer Thinner and then wipe them down with rubbing alcohol. Don't worry–it's quick and easy.
Step 3: If you have any deep gouges, seams or other imperfections in your counters, fill them with wood filler and sand the filled areas once they are dry. Clean the dust off with a damp cloth.
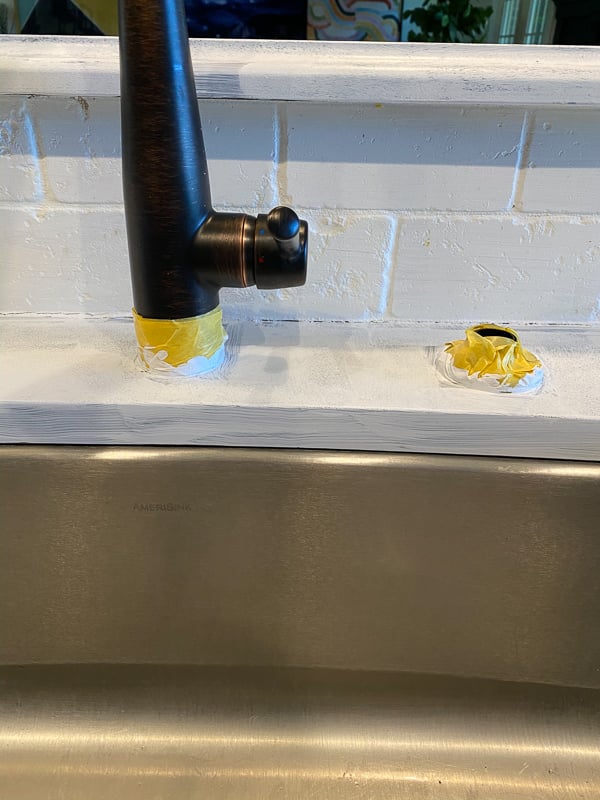
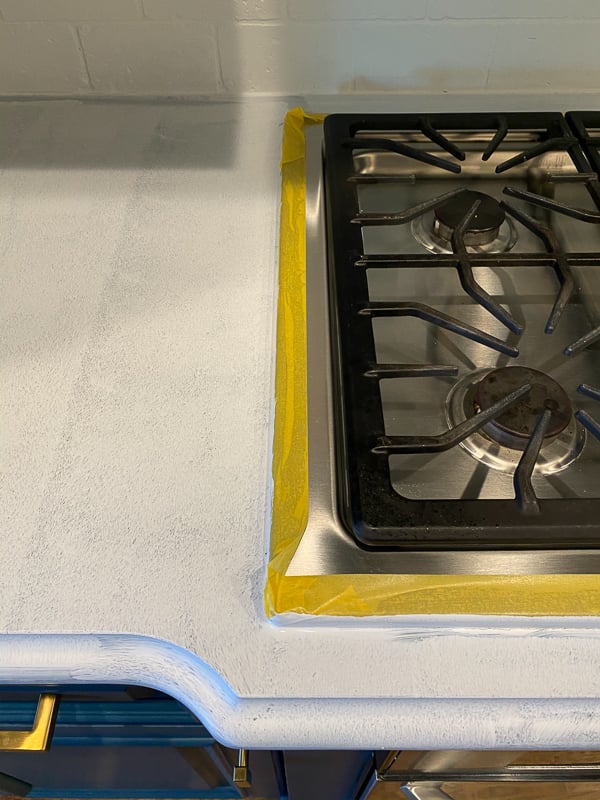
Step 4: Tape off any obstacles and borders that you do not want to get paint on, such as your stovetop, the edge of your cabinets, etc.
Phase 2: Painting and Veining
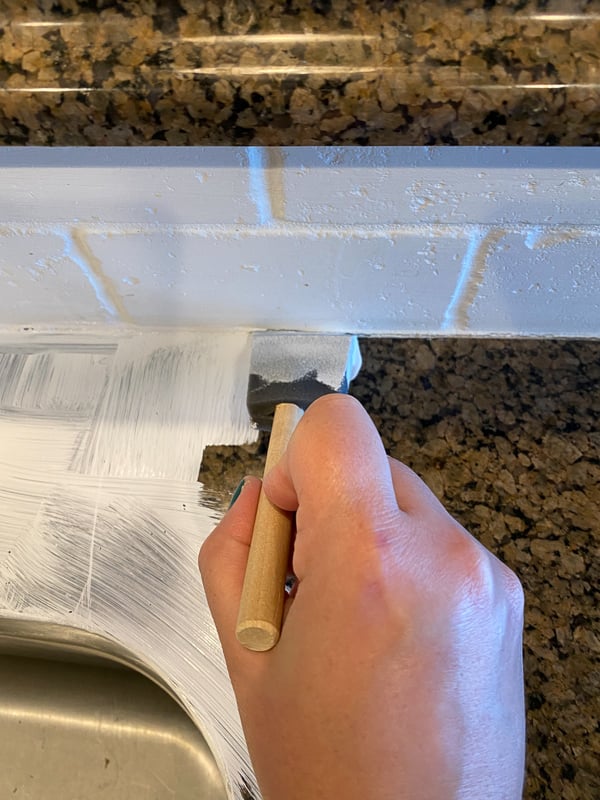
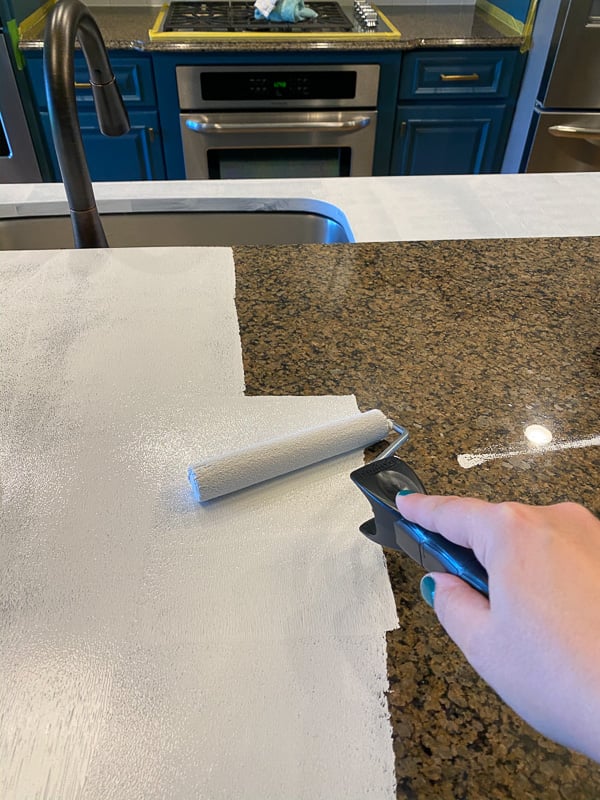
Step 5: Now it's time to start painting! After shaking and stirring the primer can well, use the foam brush that's included to cut in around the edges of your countertops (and any backsplash that is made of the same material). Then use your roller to apply the primer to the larger, flat surfaces. You want to use a THIN coat. Work as quickly as you can so the painted sections blend as well as possible. Wait 4 hours for your primer to dry before applying a second THIN coat. Our granite countertops were so dark that I wound up applying a third coat. Even with 3 coats and nearly 100 SF of counters, we had plenty of the white primer in a single can (and quite a bit leftover). Make sure to let your final coat dry for 4 hours.
Step 6: Look up photos of marble patterns that you like and practice your veining on the practice board that's included in the kit. I knew I didn't want much veining at all, so I found a photo of a marble slab without a ton of veining and looked at it while our primer was drying.
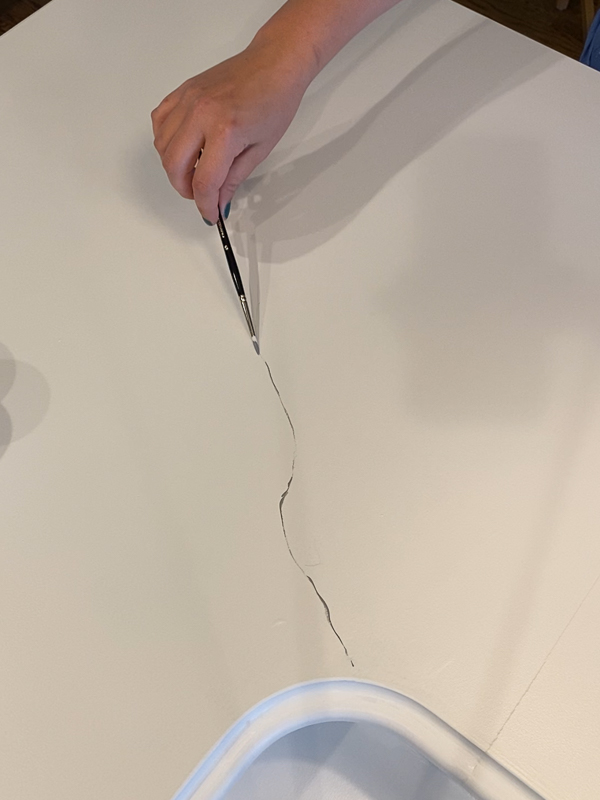
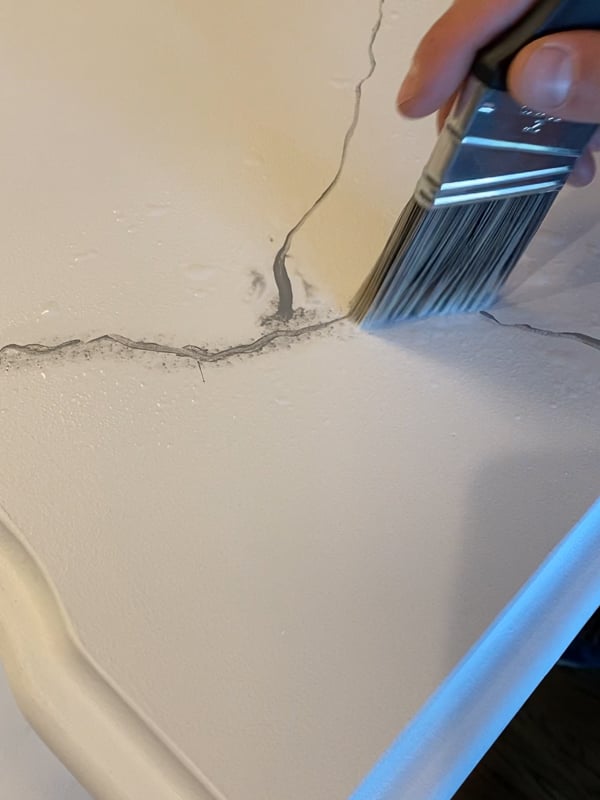
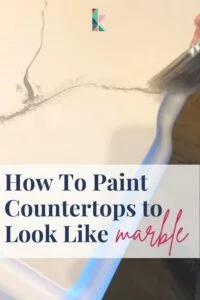
Step 7: Once your primer is fully dry, you can start painting your veins. If there is one thing I cannot stress enough it's that PAINTING THE VEINS IS SUPER, SUPER EASY. Do not let it intimidate you! I even let my 10-year-old girls paint some of the veins. Seriously, it's nearly impossible to mess up and if you do, you can just mist it with more water and easily wipe it off and try again. You use the gray mineral paint that is included to paint your veins.
Begin by gently holding the end of the included artist's brush to drag the grey veining paint across your countertop. You want to create THIN veins to keep it as realistic as possible. This is what Giani says to do and it worked for me! “For the most organic shape, we recommend dragging your brush and moving it loosely to create more natural waves and flows. Tip: You can slightly wiggle or twist your brush as you drag it along the surface. Work in small, about 1 foot, sections as you build your veins. For longer veins, split up the length that you want to cover into 1-foot sections rather than connecting it all the way across at once. Also, you’ll paint on your major veins over the entire countertop prior to painting the edges or backsplash. However, you can paint those areas as you move along if you wish. Be sure to attach those veins at angles rather than straight up and down; like a real slab of marble!”
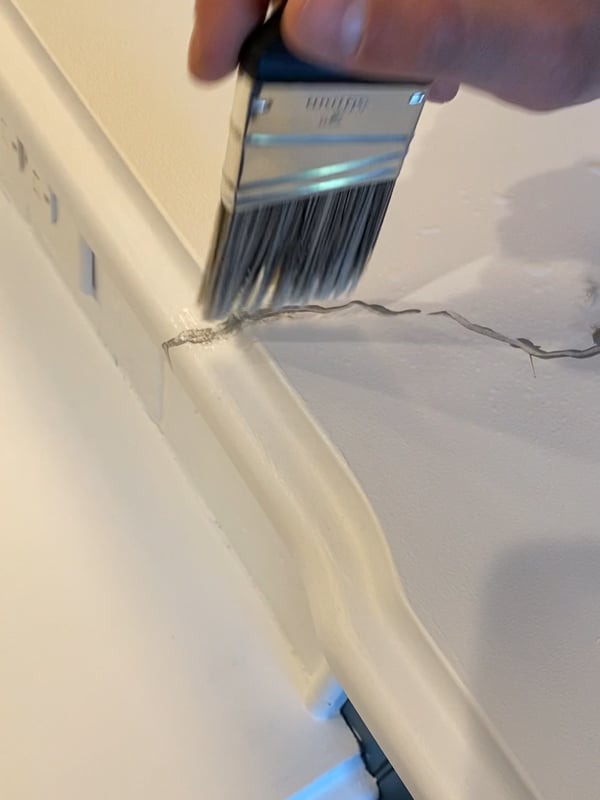
After you use the gray mineral paint to create a vein, mist it with water using the included bottle. You want to apply enough water so that the paint starts to bleed. Then use your larger bristle brush that's included to dab the entire length of the vein. This is what makes it look super real! You can wipe off excess water with a paper towel, but be careful not to accidentally wipe your veining off.
Giani suggests sanding with 600 grit sandpaper after you complete your veining, but I didn't notice that instruction so we didn't do it and everything turned out fine.
Phase 3: Applying the Top Coat
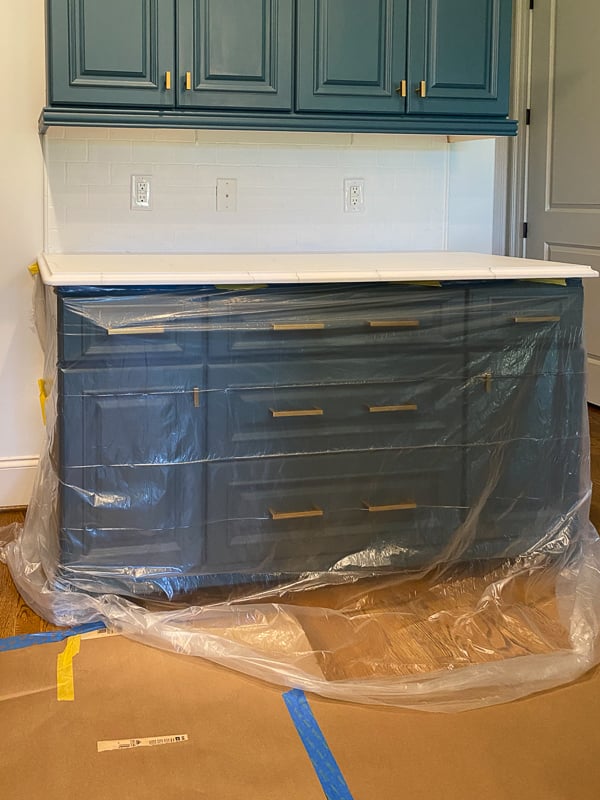
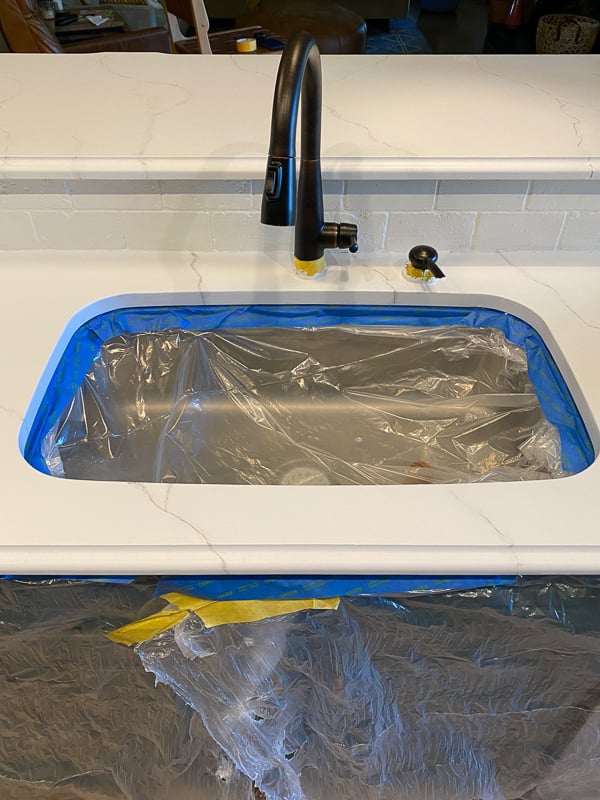
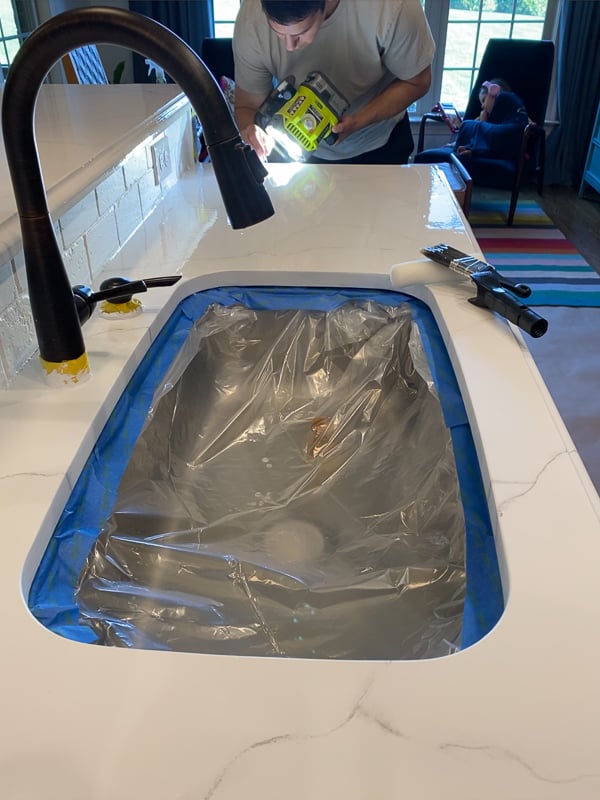
Step 8: Use painter's tape to tape plastic sheeting to the underside of your countertops and allow the sheeting to drape all the way to the floor to protect your cabinets. We also used brown paper flooring protection to cover our wood floors. You will also want to protect your sink with plastic sheeting if it's an undermount style like ours.
Step 9: Now it's time to mix your epoxy. Each kit comes with THREE sets of resin and activator cans–BE SURE TO MIX THEM ONE AT A TIME AND ONLY AS YOU NEED THEM BECAUSE AFTER MIXING THE EPOXY, YOU HAVE ABOUT 30 MINUTES TO COMPLETELY COAT THE SECTION before it stops flowing adequately.
Pour 1 entire can of Epoxy Activator into one Ultra Epoxy Resin can. Stir the mixture for EXACTLY 3 minutes and 15 seconds. Seriously… set a timer. Giani says if you don't mix it for the proper amount of time, you may have “performance issues.” No one wants those.
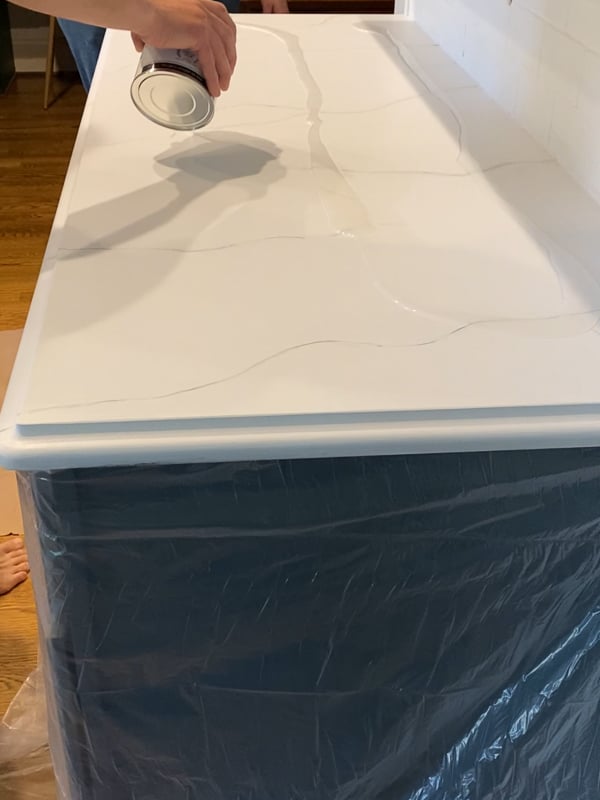
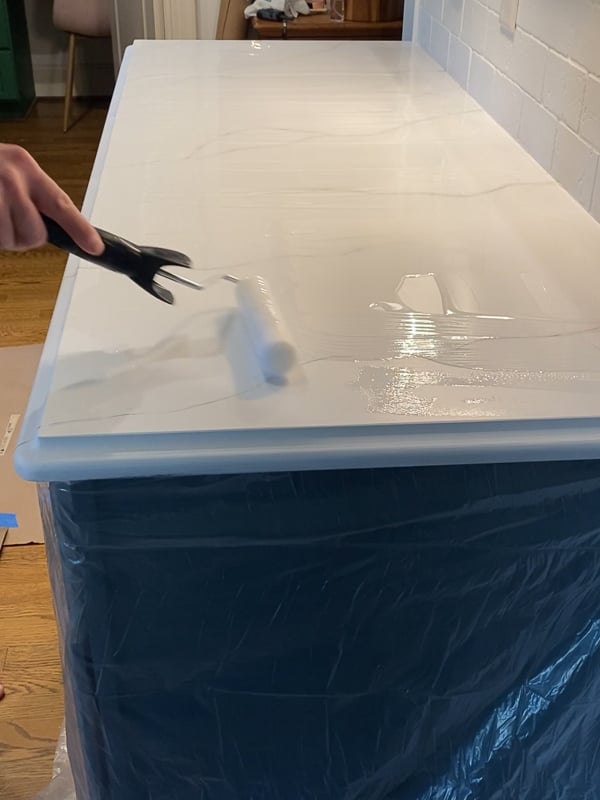
Step 10: Work in 6-foot sections. Pour about 2/3 of the topcoat in streams onto the section you are working on. Use the angled brush included to coat your backsplash (if it matches your countertop) and to cut in along the perimeter of the section you are working on. Then use your roller to spread the rest of the epoxy over the section you are working on. THIS IS IMPORTANT–the topcoat self-levels so don't overwork it. All you need to do is make sure that the entire surface is coated and there aren't any bare spots. If you need more, pour more on your countertop. If you have excess, either spread it toward the next section or brush it back into your can.
After you've coated most of your 6-foot area, pour a small stream of epoxy close to the edge of your countertops. Then use your roller to spread the topcoat on the edge of your counters. The epoxy WILL run onto the plastic sheeting you've hung. Don't freak out and don't let it make you hesitant to put plenty of the topcoat on the edges. You want them well-coated since edges tend to get banged and bumped a lot. The topcoat will continue to drip off the front edges of your counters for about 30 minutes to an hour while the epoxy self-levels. Totally normal–again, don't freak out.
If you have a section longer than 6 feet (like we did), mix your next batch of topcoat right after finishing your first batch and start applying it to your next section ASAP. You want the epoxy topcoats to flow together where your two sections meet.
Continue applying the topcoat in 6-foot sections until all of your countertops are covered.
Step 11: As soon as possible after you finish, use a bright light to look for bare spots. If you find any, fill it in ASAP. You also want to look for lint, air bubbles, pet hair, etc. in the topcoat. If you find any, use tweezers to pull it out (or pop air bubbles). Don't worry about disrupting the topcoat–the area will continue to self-level and will fill back in. You have about an hour to remove any debris or fill in bare spots before the epoxy starts to harden. Do NOT remove anything from the epoxy after one hour or the epoxy will not fill it back in.
Even though we kept our dog outside while we applied the topcoat, we had to tweeze dog hair out of the epoxy. And there was other lint, too. It's shocking what's just floating through the air in your home on a regular basis. And we didn't get them all, lol. We have 2 dog hairs permanently cemented in our topcoat, but they aren't super noticeable.
That said, if we hadn't left our house pretty much immediately after completing this step, I'm certain we would have had a lot more lint and dog hair stuck in our counters, so be sure to read my suggestion in step 13 about how to minimize this!
Step 12: THIS IS IMPORTANT–you need to remove your painter's tape between 1 to 2 hours after you have finished applying the epoxy topcoat. If you do it too early, the epoxy may run where you don't want it to. If you wait too long, the tape could become cemented in the epoxy. We left some of our tape on a bit too long and though we were able to get the tape off, it took some of the white paint off with it. Ooops. Fear not, I was able to fix it with caulk (more on that later).
Phase 4: Curing
Step 13: Now you wait! You need to let your countertops cure. They will be “tack-free” in about 8 hours, but that doesn't mean you can use them. You need to wait a full 24 hours before using your dishwasher and a full 2 days before using the counters. Wait the full cure-time of 7 days before placing anything heavy like a mixer or blender on your counters.
This is the hardest part! I highly recommend planning this project around a time when you can get out of your house for at least 24 hours while your counters cure. We left our house immediately after Step 12. We took our kids and our dog and got the heck out of town for 2 nights and it worked out perfectly. We weren't inconvenienced by having to stay out of our kitchen AND our counter wasn't full of Bernese Mountain Dog hair, lol.
Phase 5: The Finishing Details
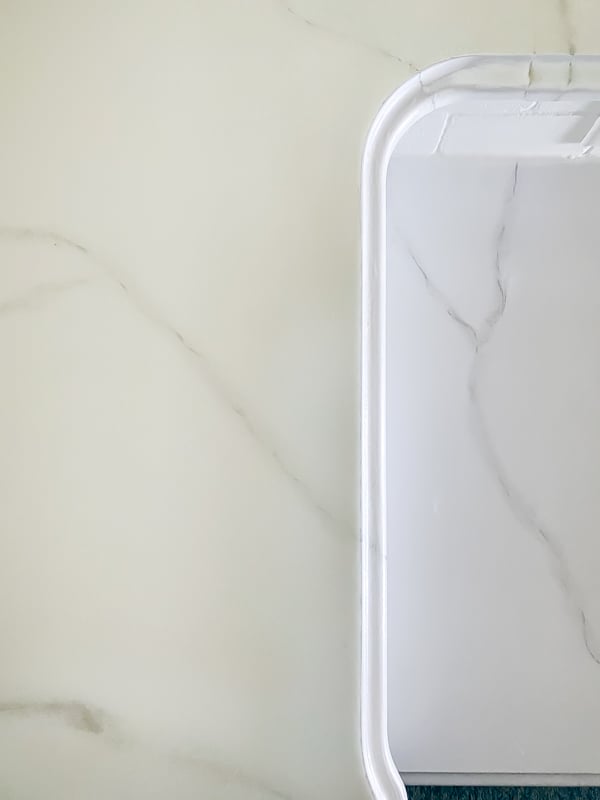
Step 14 OPTIONAL: The Giani epoxy resin topcoat is VERY SHINY. And while the countertops were beautiful as they were, I really wanted the look of honed marble. So after the full 7-day cure time passed, I applied 2 coats of this Polycrylic topcoat to knock off the high shine. I used a bristle brush to apply it because in my experience, rolling it on causes air bubbles. I used a satin finish so there is a slight sheen, just like you would see on a honed marble countertop. I can see some brush strokes when the light hits them a certain way, but that doesn't bother me. For us, having some barely visible brush strokes is definitely worth the trade-off of getting the honed look.
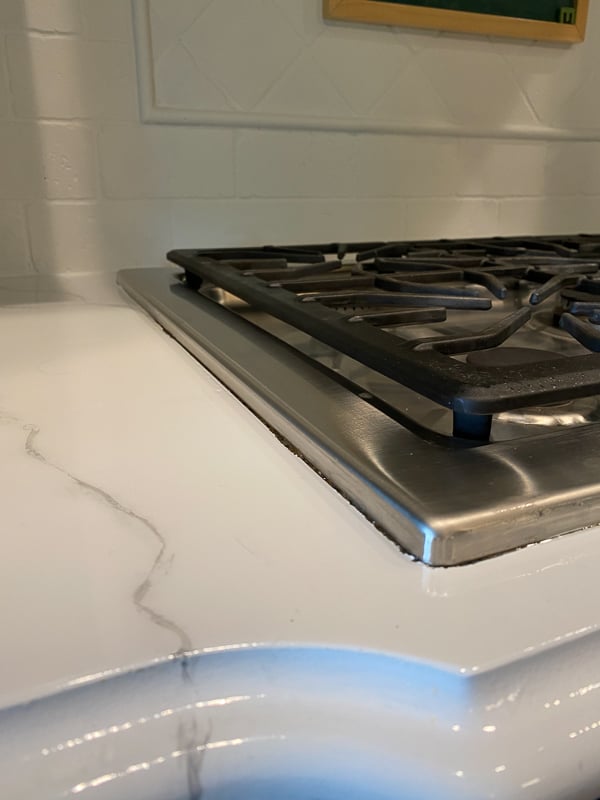
Step 15: After the full 7-day cure time has passed, you ABSOLUTELY need to caulk to give your countertops a fully finished look. If you have followed me for a while, you know that I only use DAP caulk because it's the best–plain and simple. I recommend caulking along any built-in appliances/fixtures (such as our stovetop and sink faucet) and along the edges of cabinets and your backsplash.
I cannot tell you what a tremendous difference this will make in how your countertops look! Just take a look at how unfinished the edges along our stovetop and cabinets looked before I caulked. If you are new to caulking check out this post on How to Caulk: A Step-by-Step Guide for Beginners.
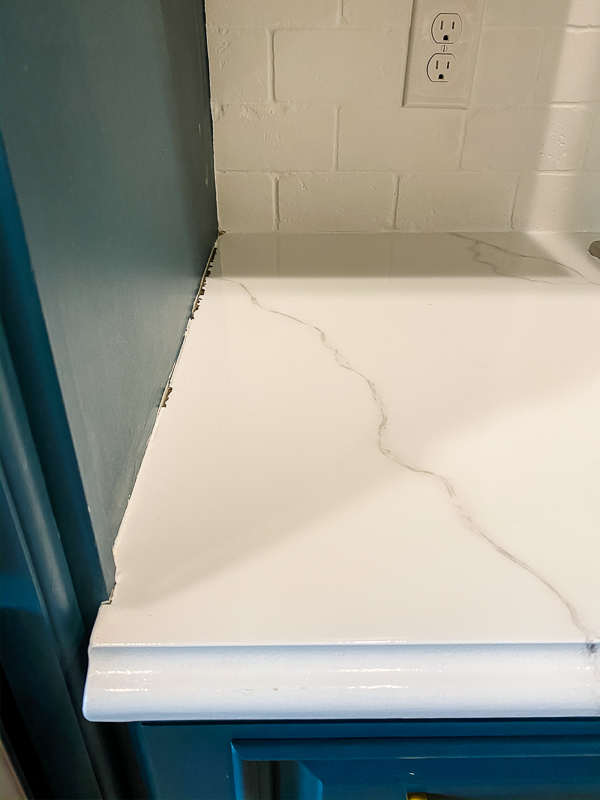
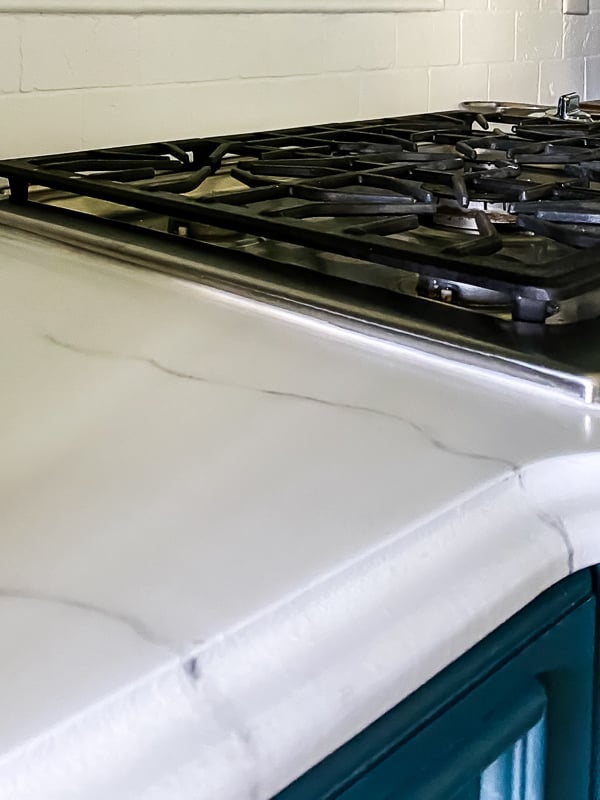
And look at how polished and perfect they look AFTER caulking. It's worth the extra effort, I promise.
We first removed the old caulk from the gap between the sink and the countertop. Then I used Alex Plus caulk everywhere except where the countertop meets our undermount sink. For that gap, I used DAP Kwik Seal Ultra.
SEE THE UPDATE
We heavily used our painted countertops for several years before our kitchen was demoed to prepare for our kitchen renovation. Learn the one thing I would do differently and see a video + photos of how they looked after 3 1/2 years by clicking the button below!
Frequently Asked Questions About Countertop Paint
Giani says that with the proper care, Giani will last as long as any conventional countertop. I don't entirely agree with that. We painted ours roughly 2 years ago and though they have held up incredibly well overall, we do have some small chips around the edge of our undermount sink.
I think it is likely because that was an area that was very difficult to cover with the epoxy topcoat, so I think it was just too thin around that heavily used area. But it would be easy to touch up those areas and coat with more Polycrylic. But since we will be replacing our countertops eventually, I'm not bothered enough by the chips to touch them up.
To see how our painted countertops looked after 3 1/2 years of daily use, check out my painted countertops update.
The kit I used allows you to paint nearly every kind of material. We painted our granite counters, but you can also use it to paint Formica, laminate, Corian, ceramic tile, butcher block, and cultured marble. The prep that is necessary varies a little bit depending on what type of countertop you are painting. See the chart from Giani below for reference.
Nope! Giani’s Epoxy does not require a blow torch or heat gun to release any excess air because it has been formulated with u0022air release agents.u0022 We didn't have any issues with air bubbles.
Giani's product is designed to not yellow and Giani stresses that any potential epoxy UV effect will be minimal. We have not had any yellowing over the nearly 2 years since we painted our kitchen countertops.
The primary cause for epoxy coatings turning a yellow color is exposure to U.V. light. When exposed to direct sunlight or strong indirect sunlight over a period of time, epoxy will experience a photochemical reaction known as u0022polymer degradation.u0022
Our countertops don't receive direct sunlight. If you have countertops that receive direct sunlight, it may be something you want to consider as you will have a greater chance of yellowing over time.
Polycrylic CAN react with white paints to cause a yellowing effect. You minimize the risk with a water-based poly as I used. Usually, the effect can be seen pretty quickly if it's going to happen. I haven't seen any yellowing on our counters at all and I think it may be because the epoxy serves as a buffer between the epoxy topcoat and the white paint.
Giani says to only use mild dish soap and water or a gentle window cleaner. You can remove stubborn stains with rubbing alcohol or nail polish remover (acetone) and a paper towel. Giani's instructions also state, “Never use harsh chemicals such as bleach, household cleaners, Magic Eraser, Pine-Sol, disinfectant wipes, or any abrasives such as Comet or Soft Scrub. Do not use polishes or granite cleaners. Even diluted solutions of a cleaner and water will wear down the durability of the topcoat over time. Never use harsh natural cleaners such as vinegar, rubbing alcohol, hand sanitizers, air freshener oils, or essential oils. Never use scratch pads.”
No. Just like granite and Formica, it is not recommended to cut or chop directly on your countertops after using this kit. We never cut on our granite either (bad for your knives!) so this didn't change anything for us. But we were used to placing hot pots on our granite, and we can no longer do that. Although Giani is heat resistant up to 150° F, it recommends always using a hot pad or trivet for items directly from the stove or oven. That has been a bit of an adjustment, but we've had wood countertops in a past house and had to do the same thing, so we are finding it pretty easy to remember and adapt.
If you are painting kitchen countertops, I would NOT skip the epoxy topcoat! I read that the epoxy resin topcoat is equivalent to 50 layers of poly. So it's really necessary if you want your counters to be super durable. We aren't easy on our counters and cook alllllll the time, so we needed maximum protection. If you want the honed look, I would apply the polycrylic on top of the epoxy after the 7-day cure period.
If you are painting less heavily used bathroom countertops or laundry room countertops, I think you CAN skip the epoxy topcoat. I used only polyacrylic after painting the countertops in our girls' bathrooms and our laundry room and they are holding up beautifully. And it was much quicker, easier and less expensive! But I would absolutely use the epoxy topcoat in any kitchen and/or other room that gets heavy, daily use.
PHEW, this was a LONG post but I like a lot of detail and info before I tackle a project, so I hope this has been helpful for you!
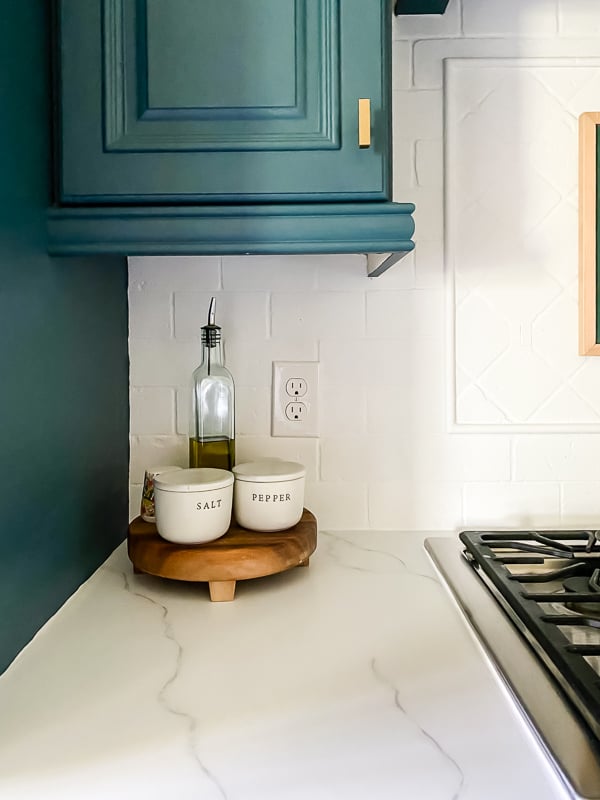
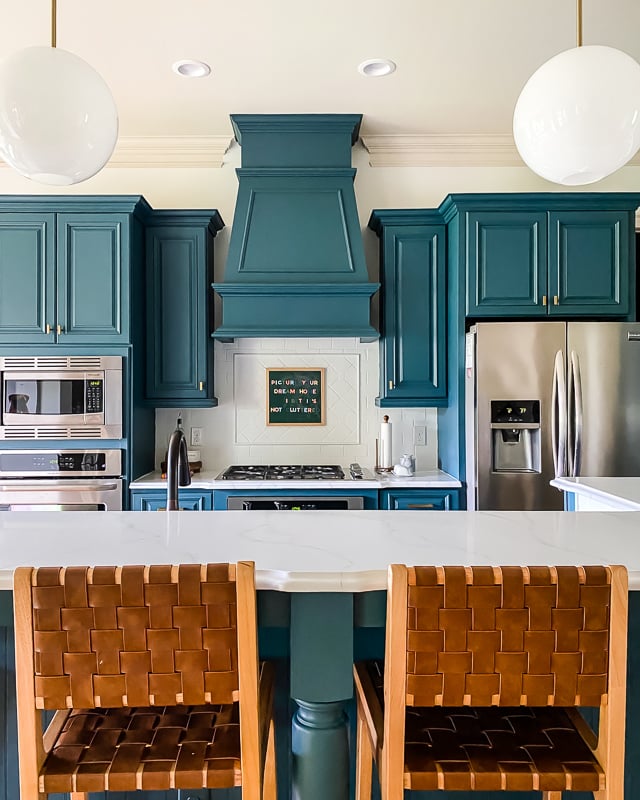
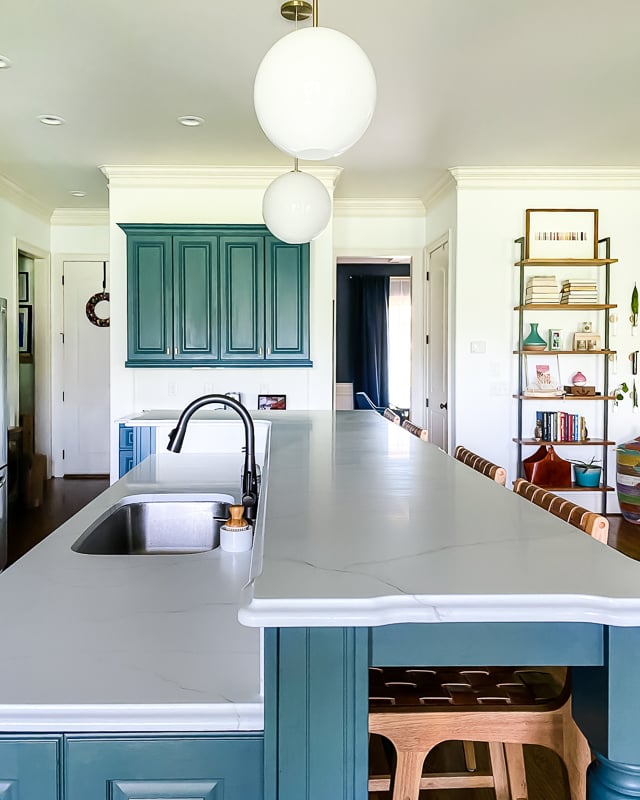
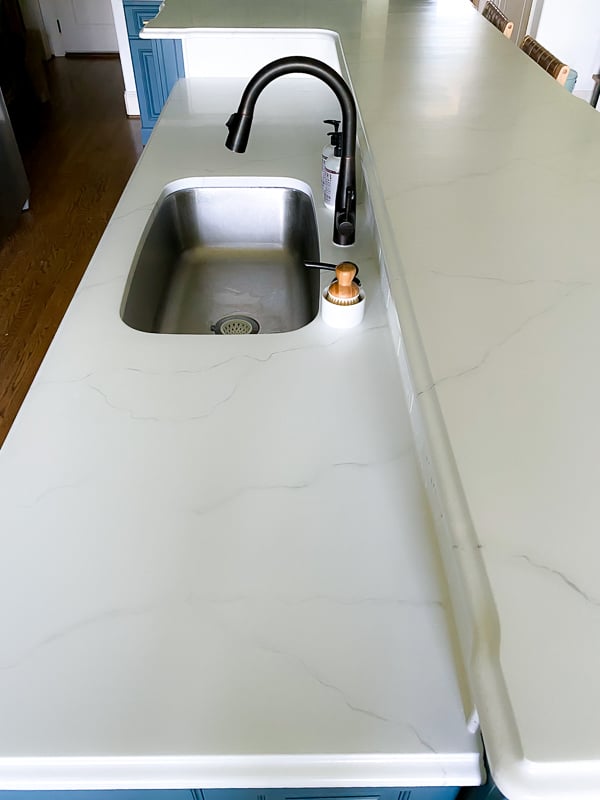
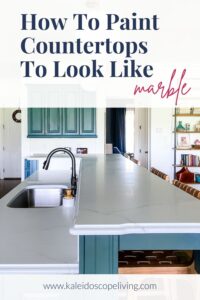
Photos of the Finished Countertops
That was a lot of reading, so give your brain a break and just enjoy these photos of the finished countertops!
You may also enjoy these posts:
- How to Paint Kitchen Cabinets Without Sanding or Priming!
- How to Paint Your Tile Backsplash in 5 Simple Steps
- How to Paint IKEA Furniture and Mistakes to Avoid
- Gorgeous But Cheap Flooring Ideas
- The Easy Way to Update Bathroom Tile Without Replacing It!
Wondering how I approach transforming rooms and spaces in our home? Check out Designer in a Binder®.

And if you want exclusive content and behind-the-scenes sneak peeks, be sure to subscribe before you head out!

Our daughter bought a house that has painted counters. Not sure if it was done correctly, but there are some deep scratches in the paint. Any recommendations on minimizing the scratches until she can afford replacing cabinets and counters?
Hi GJ! It sound like maybe someone cut directly on the counters. We never cut directly on our painted countertops (it’s so bad for knives anyway), so maybe that’s why we avoided deep scratches. I hope that helps!
I’m so glad I found your post. I’ve completed my epoxy, and am also wanting to do the poly finish. Did you sand the epoxy before applying the poly? How has it held up over time?
Hi Lisa! No, I didn’t sand the coated epoxy countertops before applying the poly, but if I could do it over I would have because I *think* a light sanding would have dulled the shiny finish enough that I wouldn’t have even added the poly. I hope that makes sense :)
Thank you for a great review and tutorial. The company says the marble kit is $200 and covers 35 square feet. Is that what you found? If so, you had to buy 3 kits to cover your 100 square feet of countertop?
Hi Donna! No, we didn’t even use 2 full kits. As I mention in the post, we have just under 100 square feet of countertop and had PLENTY of paint with a single kit. And we almost had enough of the epoxy topcoat with one kit. We did have to use 1 set of the epoxy topcoat from a second kit. If I had it to do over again, I would have ordered 1 full kit and 1 extra set of the epoxy topcoat (that can be ordered separately). I hope that helps.
Hi! What color is your backsplash painted?
Hi Jordyn! Our backsplash is painted Sherwin Williams Pure White :)
Your counters look beautiful! I am using your blog post and TikTok as my Bible/instruction guide to completing my own counter. So you had enough white primer paint to apply 3 coats to nearly 100sq ft of counter? Or are you saying that your counter 3 times over totals to 100sq ft (so like you have 33sq ft of counter). I am just not seeing how that small container would cover 100sq ft x3.
Thanks for the clarification!
Hi Carrie! We have nearly 100 SF of counter and the single can was enough to apply 3 coats of paint to all of our countertops :)
Bonjour Tasha A. Wow! Your counters are absolutely beautiful! Well done! And thank you for the detailed information, it’s very valuable and very kind of you! Questions: 1-My kitchen countertop is made of large porcelain tiles, can this material be painted without problem with Giani countertop paint kits? 2- If yes, is this the same process as a ceramic countertop?
Hi Nicole! Thank you :) If your tiles are grouted, the process might be a little different–I’m not sure. I would suggest reaching out to Giani directly. I’m sure someone there will be able to assist you. Best of luck with painting your countertops!
This is so inspiring, and I am definitely going to tackle this in my home. Would you mind sharing the paint color you used for your cabinets and island?
Thank you Karen! The cabinetry color is Seaside by Fusion Mineral Paint :)
Love this! We want to use the product however our sink built into our counter. Can this product be used in a sink? Would it hold up?
It depends. I don’t think I would recommend painting a kitchen sink that get’s stuff banged around it in every single day, but a sink in a powder room with light use….maybe!
These look beautiful! How did you make sure the epoxy didn’t drip from the upper countertop to the lower countertop? That’s what I’m worried about.
Thank you Ana! You have to keep your eye on the epoxy for the first hour or so after pouring to wipe away any drips. After that, it’s firm enough not to drip. Hope that helps!
The countertops look wonderful!! I’m about to tackle this project in my own kitchen & I also have a bar top above my sink like you do. How did you tape off the edge so the epoxy didn’t drip down onto the lower countertop?? I can’t think of anything other than just doing them at separate times so I could cover the lower countertop with plastic. Thanks!
Thank you Megan! We didn’t tape off the edge of the bar top portion. After you apply the epoxy, you just watch for any drips forming and smooth them out with a paintbrush if you see any. It doesn’t take too long for the epoxy to firm up enough that the threat of drips passes :) I hope that helps!
Hi there. Congrats on your projects! All look great! Where did you buy your high chairs? Love them!
Thank you Ana! You can find the kitchen counter stools here: https://rstyle.me/+0i8aJ8VWx-0mCRwY8R5ALw Have a great day!
OMG! nice & detailed article on paint. Its really awesome.
Did you paint the underside part of your countertops that hangs over the edge? I’m afraid I would notice the color change from certain angles.
I painted enough of the underside that you can’t see the color change :)
Wow, this is incredible. I can’t believe you painted them! I was nervous when I read the headline in your newsletter and definitely had to click through to see if you really in fact painted your granite!! How crazy but brilliant. It came out GORGEOUS!!! Now I’m wondering why I spent so much on remodeling our lake house! Also, FUSION paint is the BEST. I’ve been using as well for updating old furniture. I love it!
Oh thank you so much, Lori! I’m so happy with how they turned out. And yes, Fusion Mineral Paint is WONDERFUL!
I have granite tops and granite back splash i want to do a make over on both to have the marble look what do you recommend i do on the back splash? since epoxy self level can i use a foam roller to apply the epoxy? what do you think is the best way to do it’ i thought of applying self adhesive thin glass tiles but not sure if the heat from the oven would loosen them specifically when the self cleaning oven is on the granite gets hot. please help
I think the company that makes the kit I used gives tips in the instructions for applying the epoxy to vertical surfaces, but I don’t recall what those were since we didn’t apply it to a backsplash. But you should be able to look it up. I hope that helps!