How to Make Leather Drawer Pulls
Looking to give your furniture a fresh, custom look without spending a fortune? DIY leather drawer pulls might just be the stylish upgrade you didn’t know you needed. Whether you're working with an old dresser, a basic chest of drawers, or a boring credenza, swapping out standard hardware for these easy-to-make leather pulls can instantly elevate the whole piece. In this step-by-step tutorial, I’ll show you exactly how to make your own leather drawer pulls. And trust me, even if you’re not super handy, you can totally pull this off. (See what I did there?)
*Note: This post was contributed by the very talented Leigh Anne Watts, who used to blog at Houseologie.com (no longer an active site).*
If you peruse this site for any length of time, you will notice that I love a good DIY furniture makeover! In fact, my post on how to paint a dresser is still one of my most popular because it's so easy to give a furniture piece a brand new look with a good coat of paint. If you want to update a piece of furniture with paint yourself, be sure to check out my recommendations for the best paint for furniture of every type.
But paint isn't the only way to give an outdated or neglected piece of furniture a new look. Changing out the knobs or drawer pulls can make a BIG impact. But sometimes you just can't find exactly what you are looking for. That's how these DIY leather drawer pulls came about! So let me show you exactly how to make them yourself.
This post contains affiliate links for your convenience. Click here for my full disclosure policy.
DIY Leather Drawer Pulls Tutorial
Supplies Needed
Note: Make sure all of your brass pieces are compatible with each other!
- 3/4 inch leather strip (you could also use a different width leather if you prefer)
- Ruler
- #8 1 inch Brass Round Head Machine Screws
- #8 Brass Finishing Washers
- #8 Flat Machine Washers
- #8 Brass Machine Screw Nuts
- Drill
- Drill bit
Steps
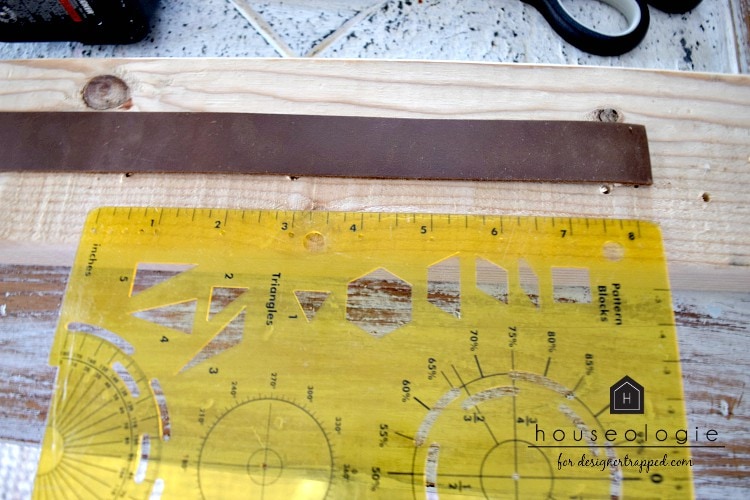
1) The holes in my drawers were already 6 inches apart from the previous handles so I stuck with those holes so I wouldn't have to fill them and drill new ones. In order for the leather to curve out and create a handle shape, I added 2 inches in length and cut my leather strips into 8 inch pieces.
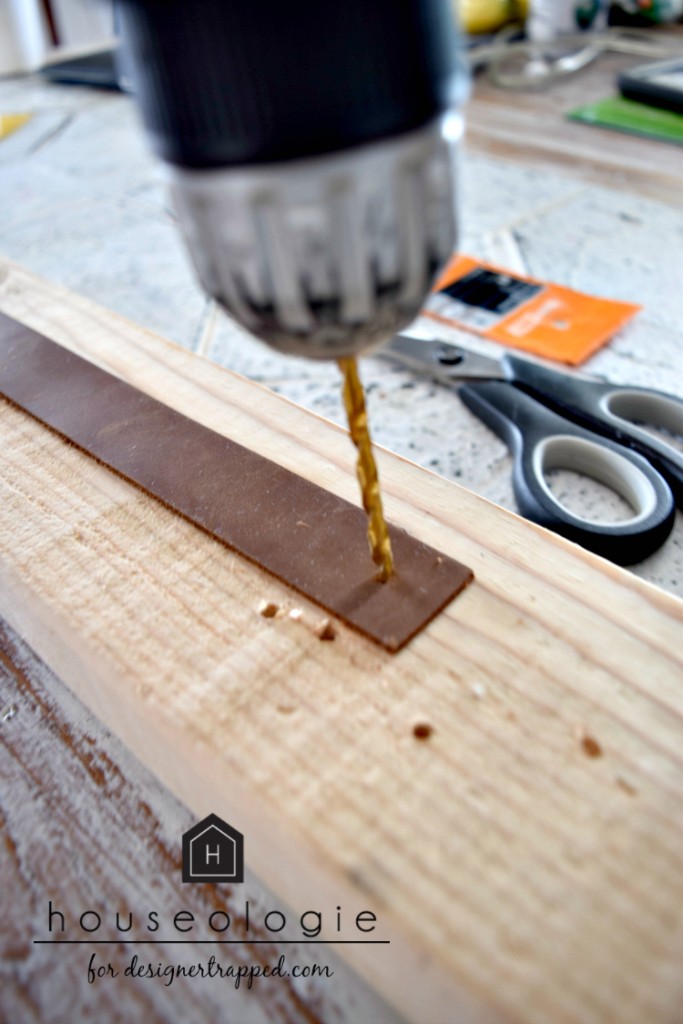
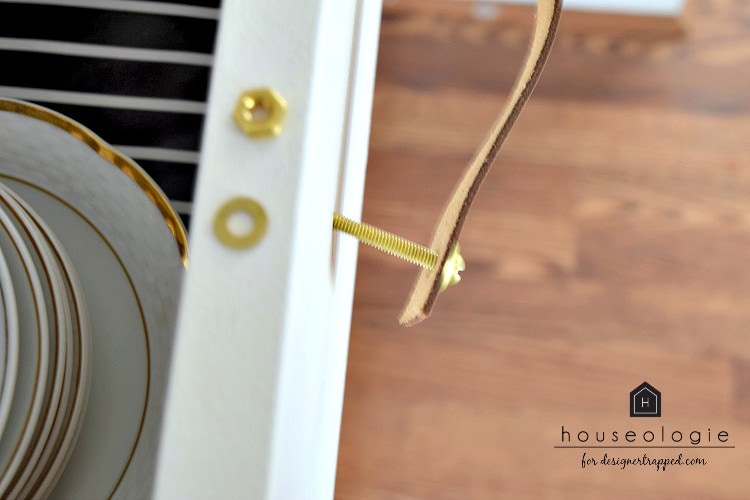
2) I used my drill and predrill bit to put the holes through the leather, this was so much easier than trying to cut the hole. I just folded the leather strip in half on top of a scrap piece of wood, marked where I wanted my hole and drilled through. Test your hole with your machine screw to make sure it goes through, If not just go up a size in your bit and drill through again.
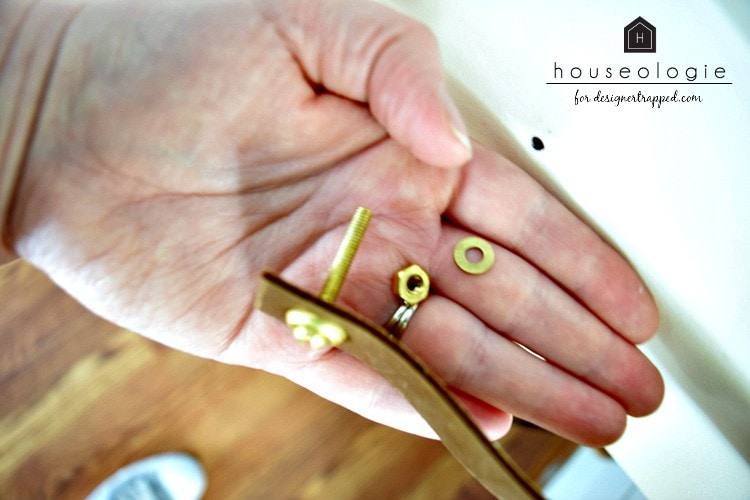
3) Now that you have your holes drilled through your leather, put your machine screw through your finishing washers, then put that through the hole in your leather. Then put both screws through the holes on your drawers. Screw a washer and a nut onto the back of the screw. Before you tighten all the way, make sure your leather is straight on the front of your drawer.
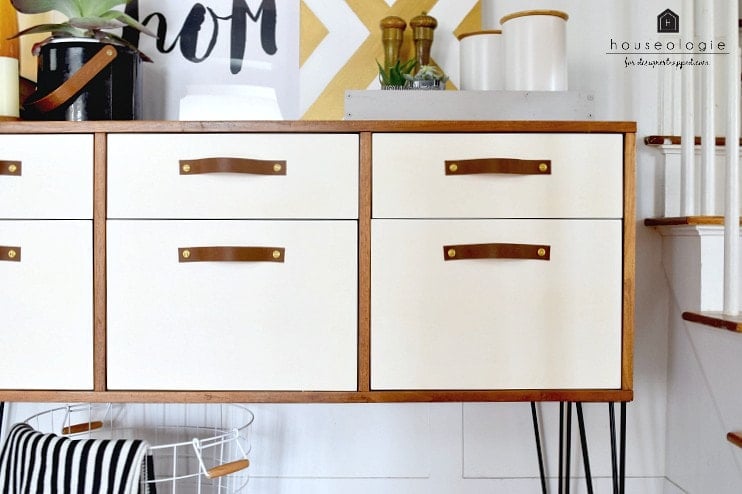
That's it. Take a look at how they turned out! I love them! They are beautiful, modern. And they are so much sturdier than premade leather drawer pulls you can find in stores (which often aren't even made of real leather).
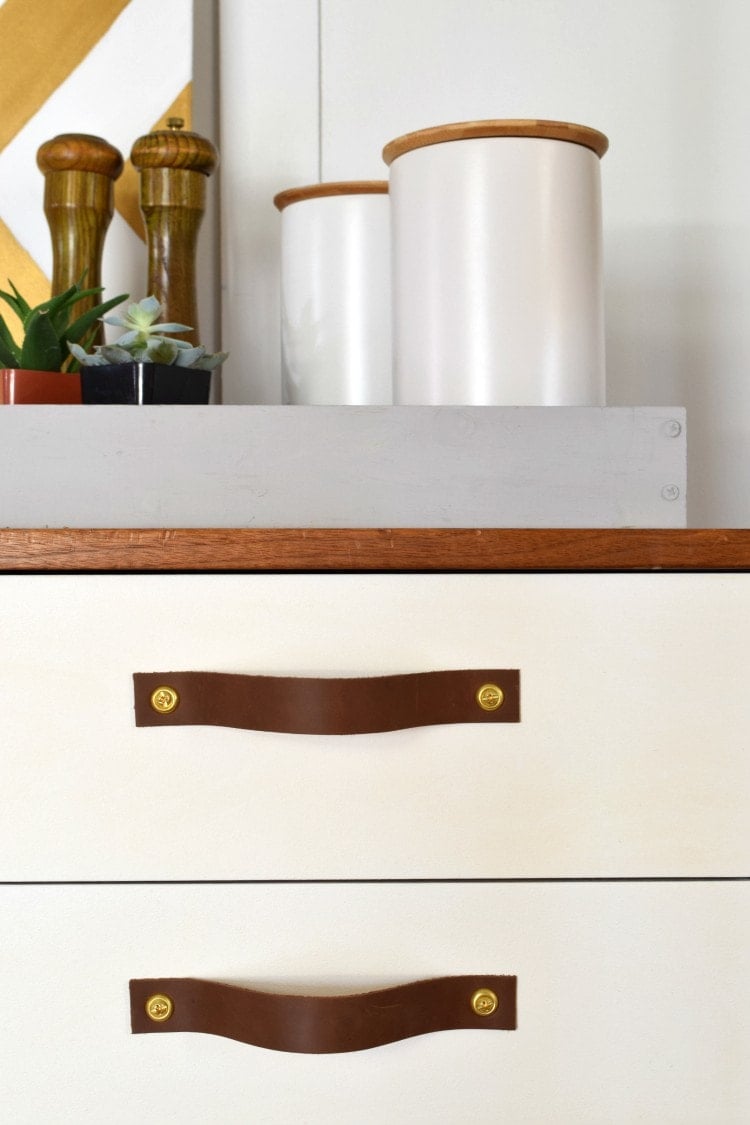
Just like that, you’ve got yourself a set of custom leather drawer pulls that add serious style with minimal effort. It’s amazing how such a simple DIY can completely transform the look of a dresser, cabinet, or credenza. Whether you’re going for modern, rustic, or somewhere in between, this project is proof that small details make a big impact. So go ahead—grab some leather, a few basic tools, and start upgrading your furniture one pull at a time!
More DIY Furniture Posts
Wondering how I approach transforming rooms and spaces in our home? Check out Designer in a Binder®.

And if you want exclusive content and behind-the-scenes sneak peeks, be sure to subscribe before you head out!

Love this, so simple and so effective!
Thanks Hannah!