IKEA Lack Hack – A High-End Look on a Dime!
This fabulous IKEA Lack hack project will leave you beaming with pride and your guests in awe! You can transform an ordinary IKEA sofa table into what looks like a custom, high-end piece of furniture! This IKEA hack is not only simple but also incredibly affordable! So roll up your sleeves and dive into this exciting DIY project!
A big thank you to DAP for sponsoring this Ikea Lack hack project. As always, all opinions are 100% my own based on my experience. This post contains some affiliate links for your convenience. Click here to read my full disclosure policy.
Before we dive into the tutorial, let's review what the Ikea lack sofa table looks like and its cost.
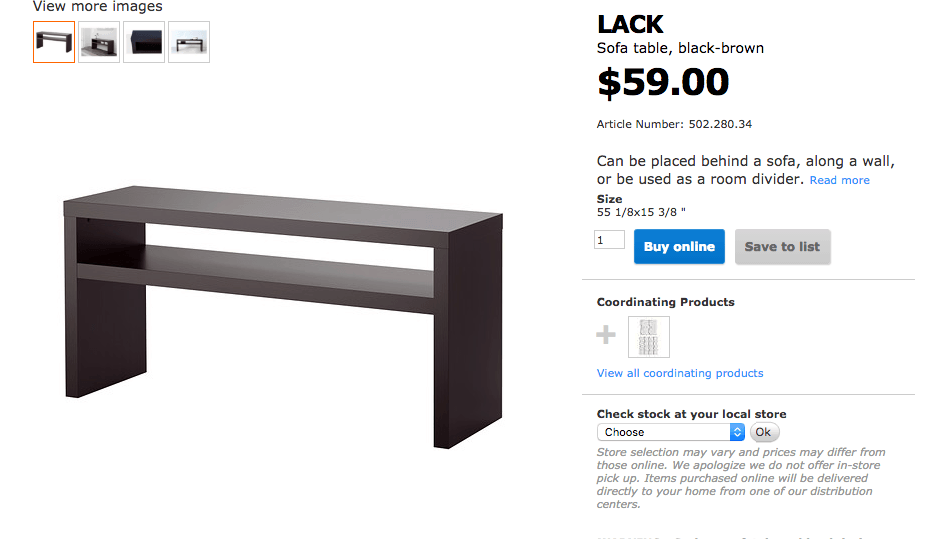
We purchased our IKEA Lack sofa table in 2016 and I was getting sick of the very basic look of it. That said, we have been pleasantly surprised by the quality and durability of it, as is our typical experience with Ikea products.
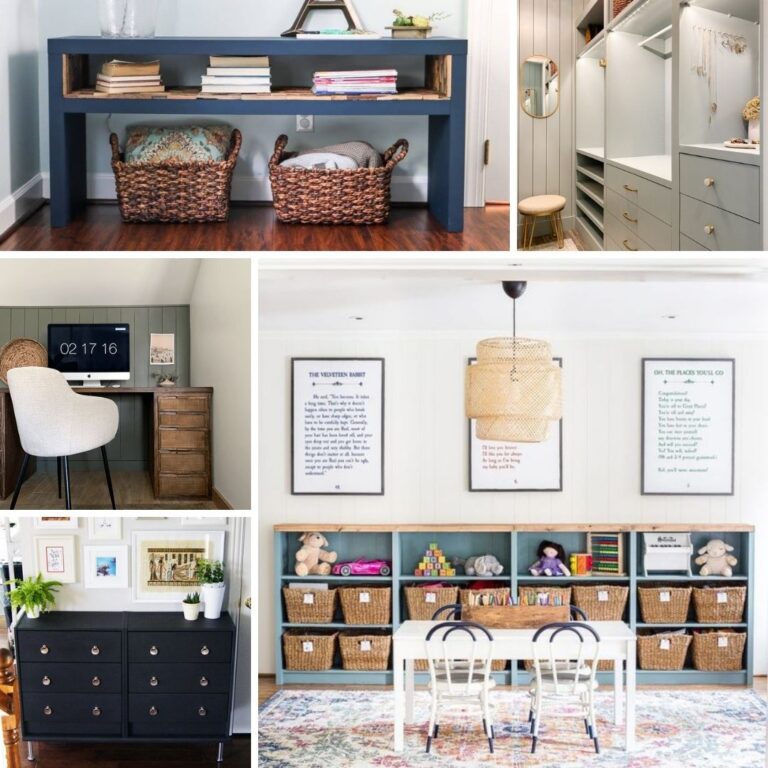
I was inspired by this expensive but stunning bookshelf. The pieces of wood on the inside of the shelves had me swooning.
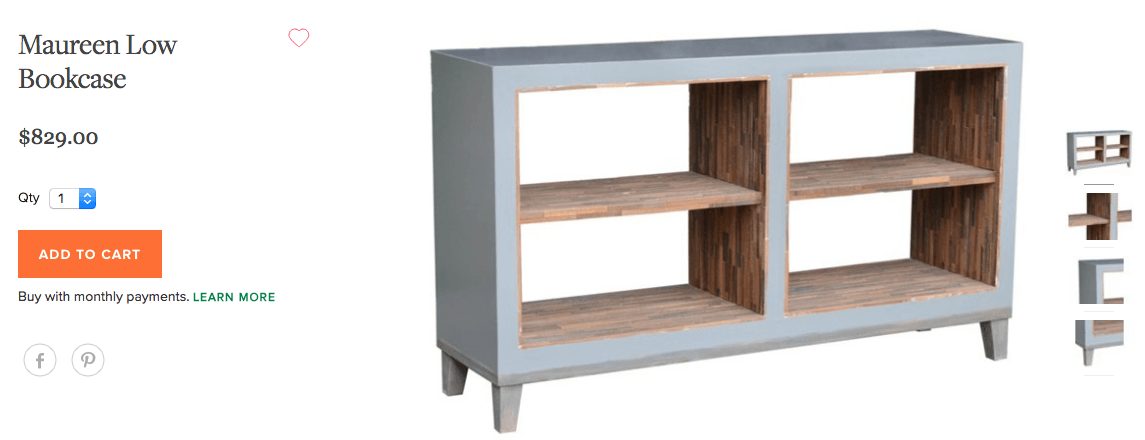
Read on to learn how my Ikea Lack hack transformed the basic sofa table into my affordable version of that stunning bookcase!
Ikea Lack Hack Tutorial
Materials and Tools Needed
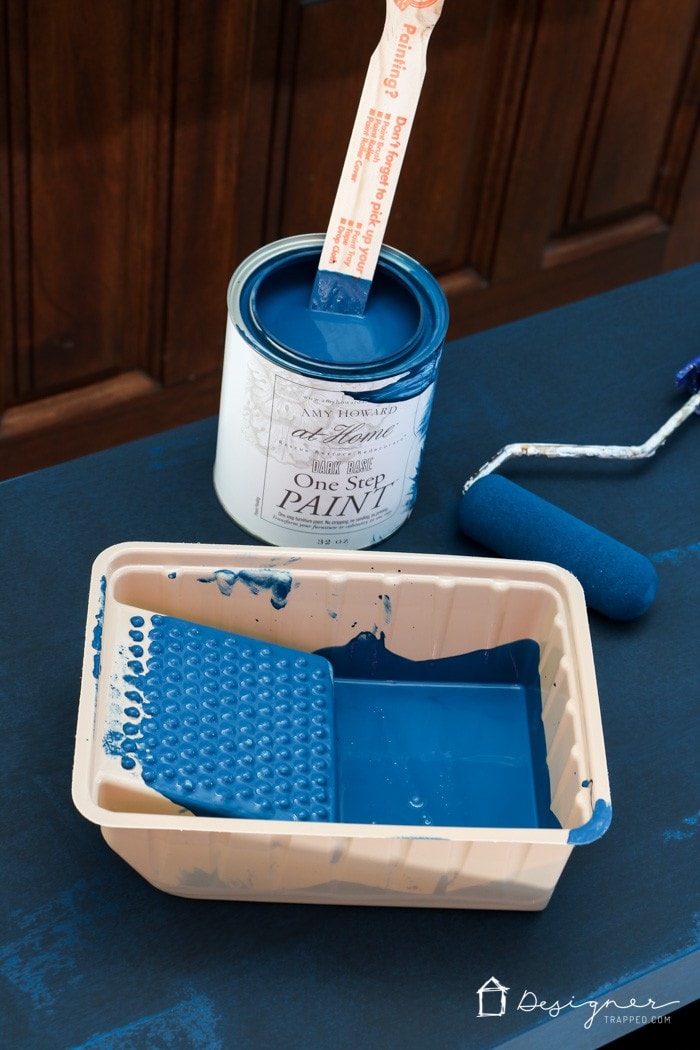
- Paint of your choice
- I recommend a chalk-based paint to avoid the need to prime or sand. I used Lady Singing the Blues One-Step Paint by Amy Howard At Home.
- DAP Rapid Fuse Wood Adhesive
- You can't attach the wood using nails because it would look like a hot mess, so a good quality wood adhesive is crucial!
- Wood mosaic tiles
- I purchased mine at a local store, but these from Home Depot are very similar and are even less expensive than the ones I used! I used just over 6 square feet for this project and probably could have used exactly 6 square feet if I had planned a bit more carefully. The wood pieces come adhered to a mesh backing, making installation fast and easy!
- Clamps
- Clamping Miter Box with Saw
- Table saw or circular saw and straight edge
- Utility knife
Step-by-Step Tutorial
Time needed: 3 hours
This Lack hack shouldn't take you more than a few hours to tackle (excluding the time it takes for primer/paint to dry)!
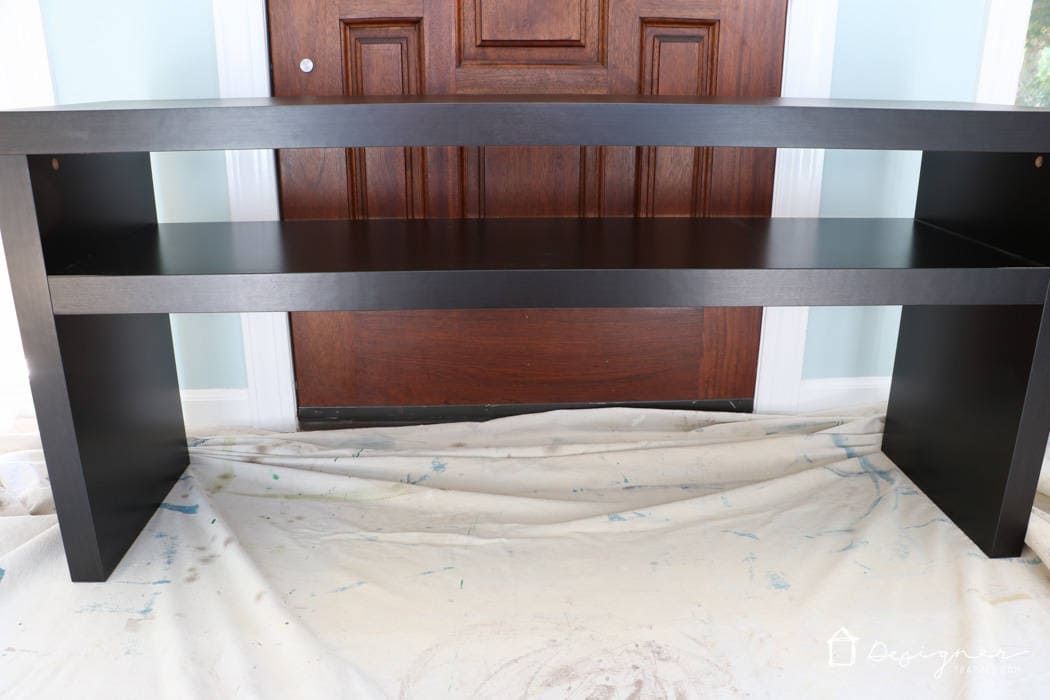
- Paint your table.
Begin by painting your Lack table. You can see my important tips on how to paint laminate furniture here.

- Prepare your first wood mosaic tile.
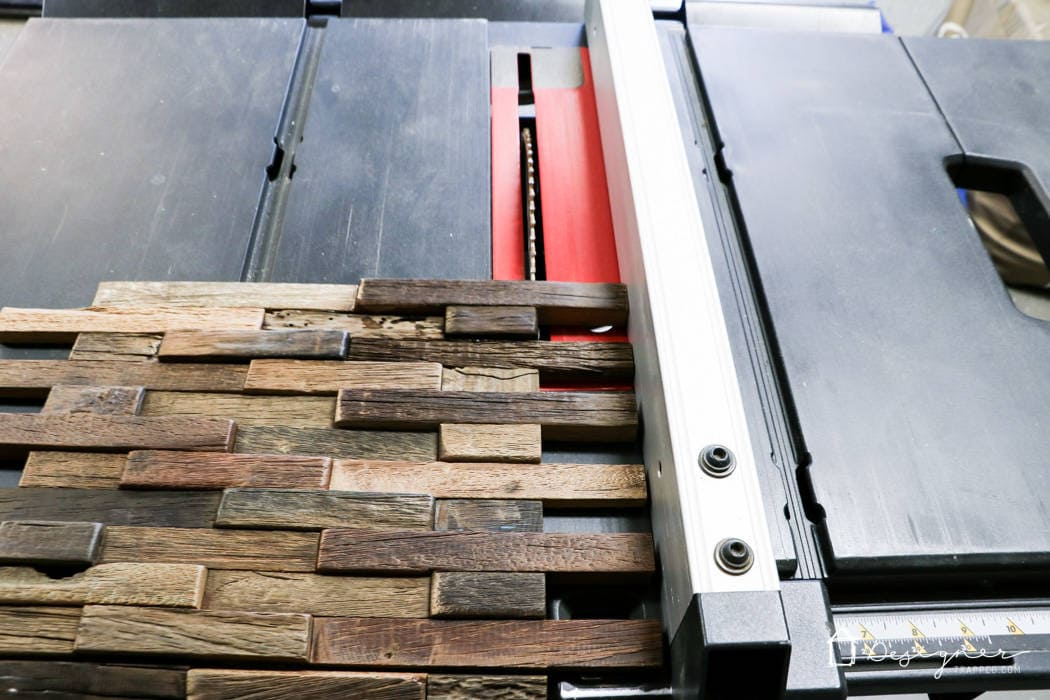
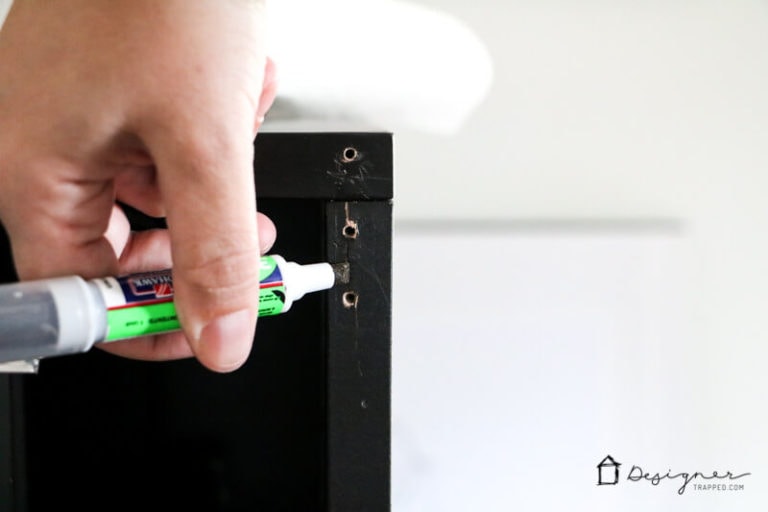
Cut the left edge of one piece of your wood mosaic tile so that it will sit flush to the inside edge of the left side of your table using a table saw. If you don't have a table saw, you could also do this with a circular saw and straight edge, or even a hand saw. Note that Joe was gone when I did this, so I tackled the table saw all by myself–a rare occurrence. Note that I also forgot the protective guard on top of the blade–ooops. Do as I say, not as I do; always use the protective guard!!!!

- Dry fit your tiles, starting with the bottom of the shelf.
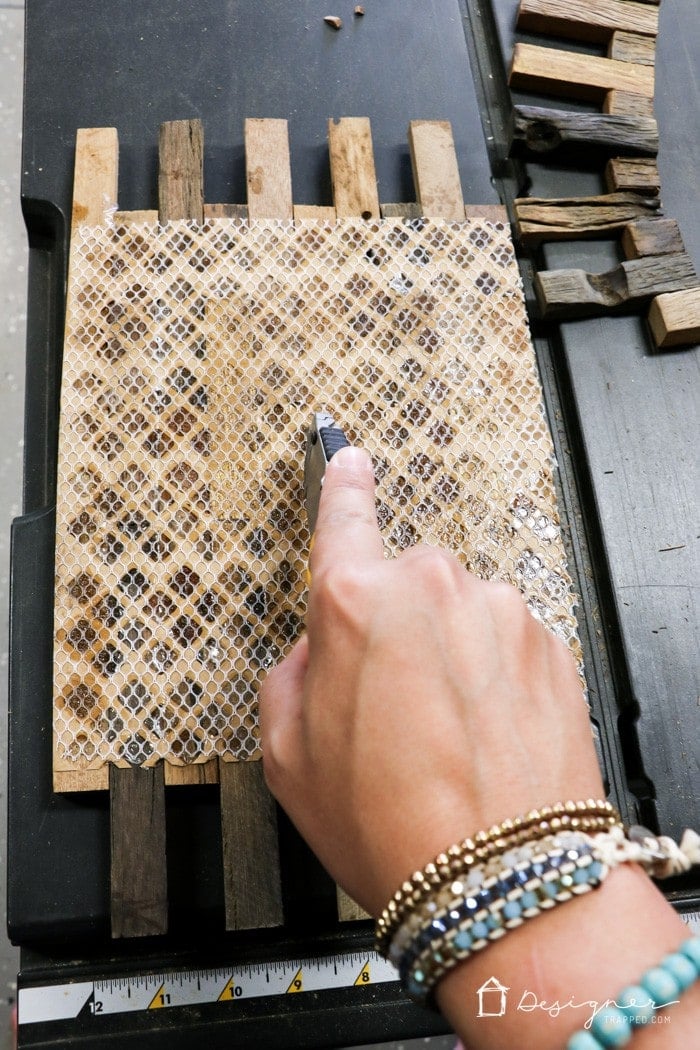
Begin dry-fitting the large wood tile squares for the bottom of the table shelf, working left to right. As you reach the right edge, measure the length that the final piece has to be and trim it to size as you did above. You will have to repeat this process again because the depth of the table is greater than the size of the tiles. Don't worry, it's easy to cut the tiles to fit the depth of your table by using a utility knife to cut the mesh webbing on the back of the tiles. Continue until the entire bottom shelf is covered with wood tiles. Don't glue anything into place yet!
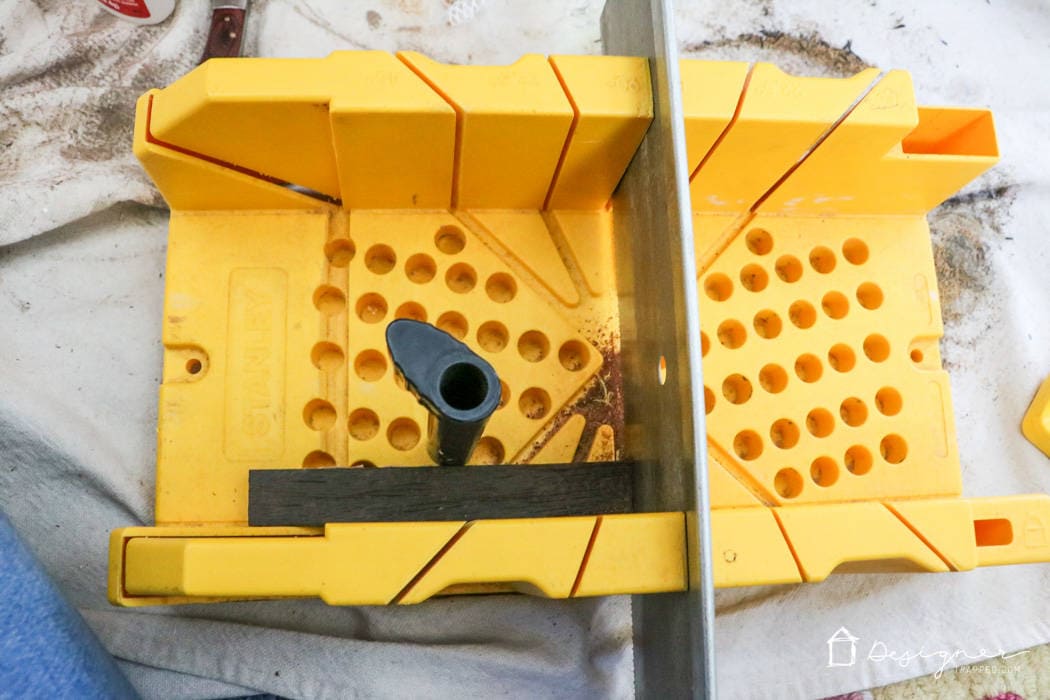
- Dry fit the pieces for the sides of the shelf.
With the bottom of your piece dry-fitted with the wood tiles, you are ready to begin working on the sides. You can easily peel individual pieces of wood off the webbed backing. I'm not going to lie, this step is definitely more time-consuming than covering the bottom shelf. But if you like playing Tetris, you are in luck :) See, you can't just trim the side pieces with your table saw because each piece needs to be a different length so that it fits into/fingers into the wood tiles on the bottom perfectly; remember, the bottom tiles are not a uniform size. I put on an awesome audiobook and powered through this step.
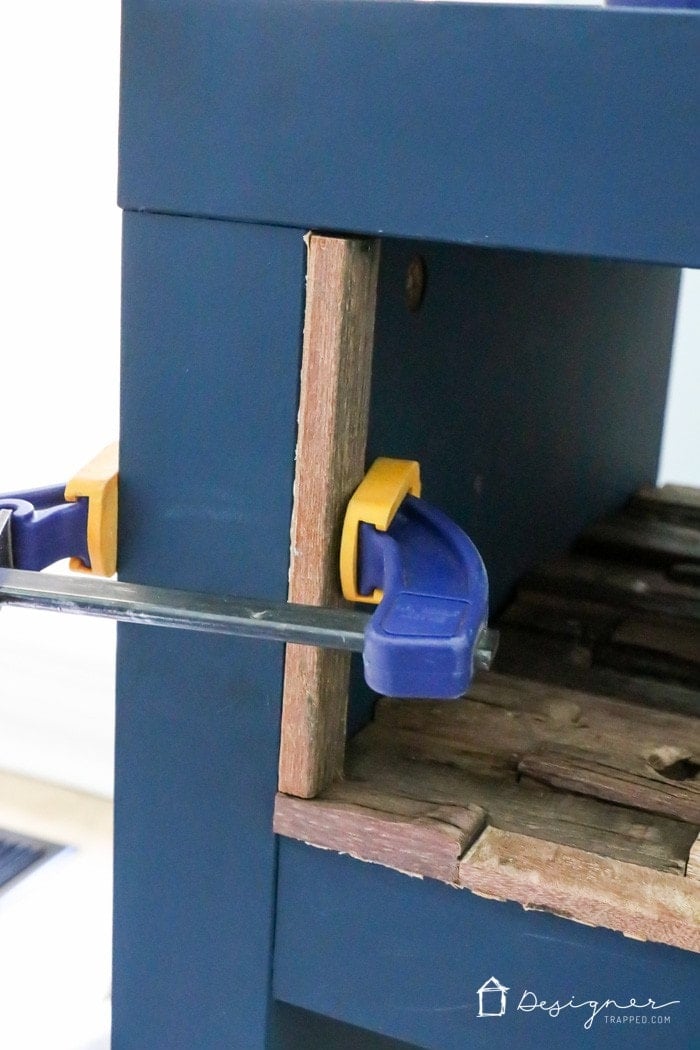
- Glue the side pieces into place.
Place a wood tile on the bottom of the shelf for spacing purposes only–do not glue it in place yet!
Then begin attaching the side pieces by applying a small amount of Dap Rapid Fuse Wood Adhesive to each strip of wood to the sides. Use a clamp to hold the first piece of each side in place before gluing the others. Allow the first piece to fully cure before attaching the additional pieces. You won't be able to use clamps for each and every piece as you work your way inside the shelf area–that's okay! I found that holding the pieces in place with a little bit of pressure for about 10 seconds was sufficient. Continue cutting and gluing the side pieces in place until you finish both sides. - Glue the bottom tiles in place.
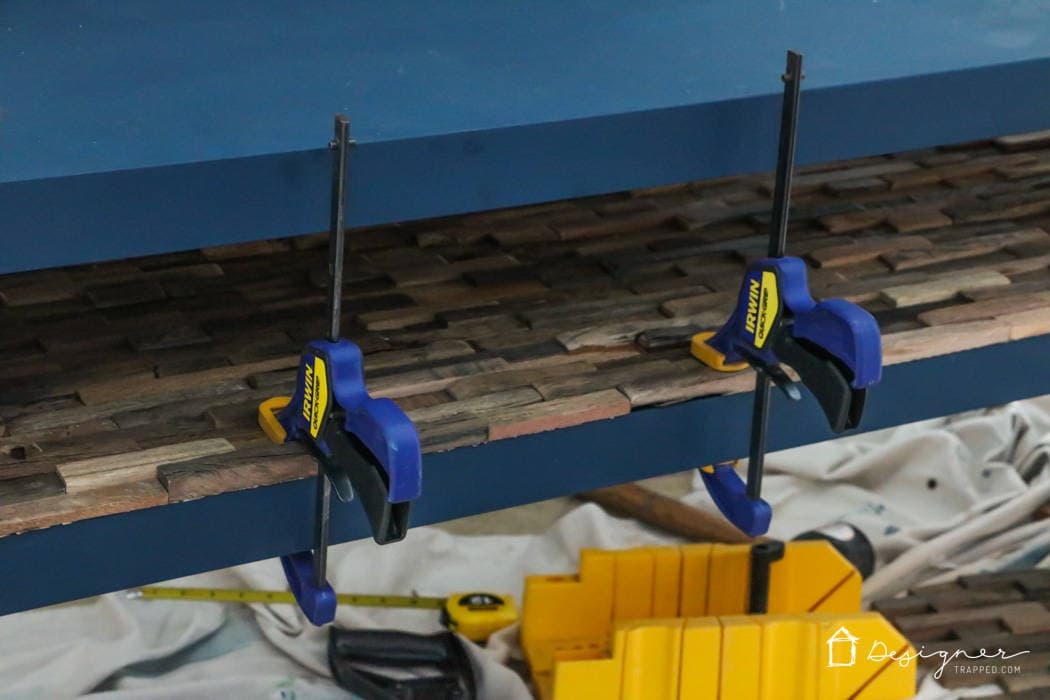
Now you are ready to glue the bottom pieces into place. Note that the side pieces will keep the bottom sheets of wood from shifting forward and backward, so you only need to glue down the edges. Simply lift up the edges and apply a small amount of Dap Rapid Fuse Wood Adhesive along the bottom edges of the shelf and then clamp them into place while they cure.
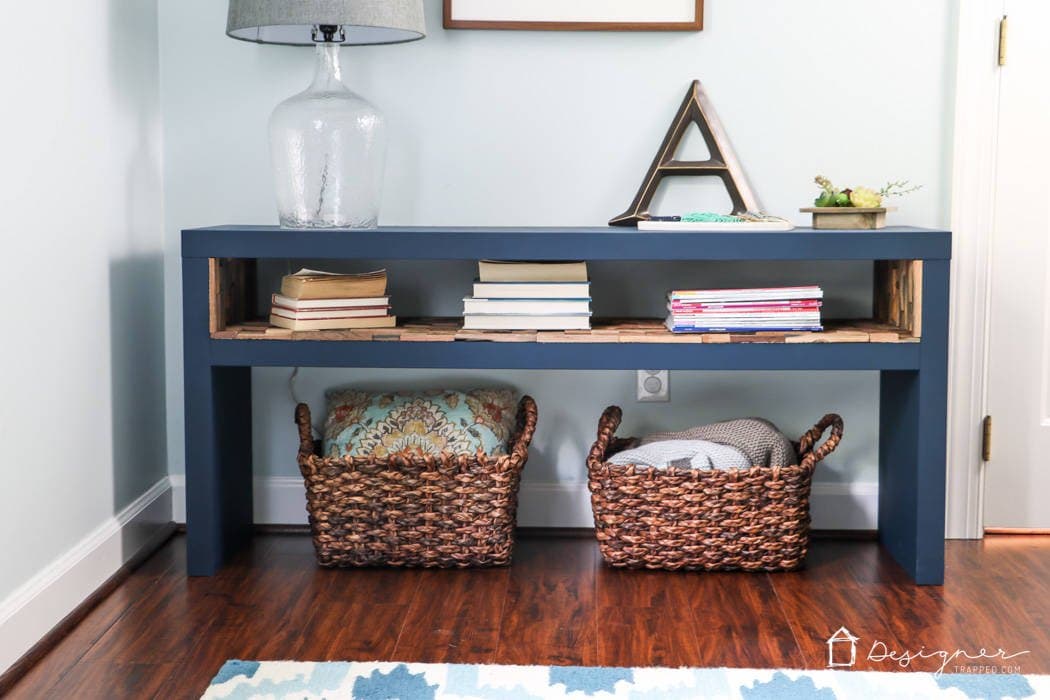
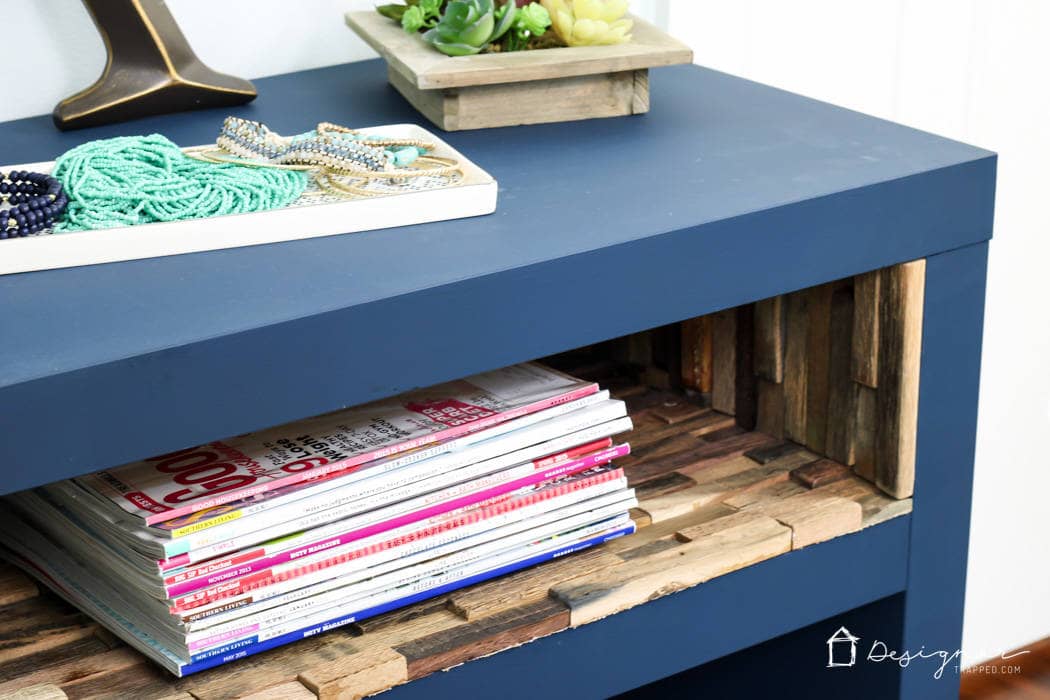
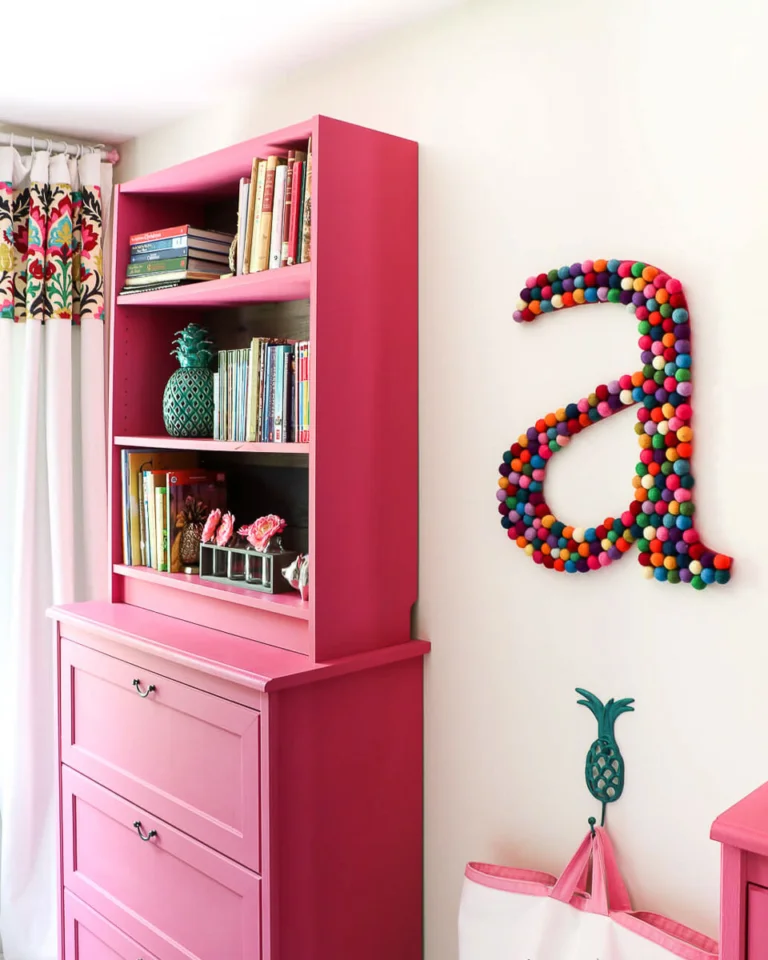
That's it! Check out this IKEA Lack hack in all its glory now that it's finished. I am totally head over heels in love with it! What do you think? This project took about 3 hours total and cost me $157 (including the cost of the table)- not bad for a high-end designer look! Here's a closer look…
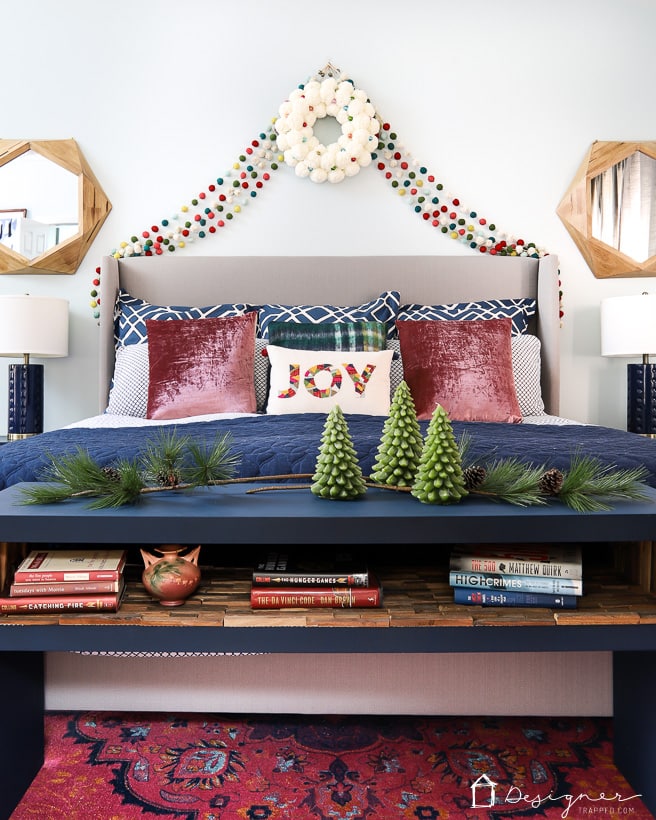
We eventually moved it to the foot of our bed!
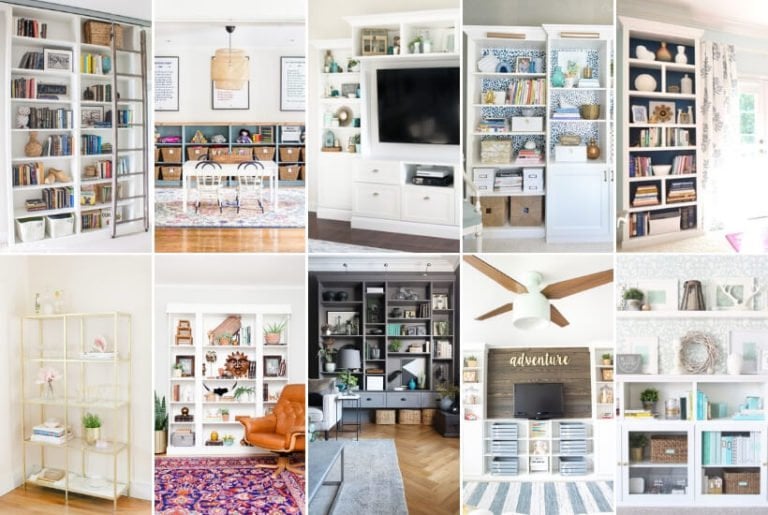
More IKEA HACK Posts
Wondering how I approach transforming rooms and spaces in our home? Check out Designer in a Binder®.

And if you want exclusive content and behind-the-scenes sneak peeks, be sure to subscribe before you head out!

Last Updated on April 7, 2025
Gorgeous! I just love how this project turned out. I am so inspired. Thanks for sharing. :)
Thanks so much and thanks for reading!
This is such a great hack! I love the finished look. Thanks for submitting your diy to the Best of the Blogosphere link up! We’d love to have you back this week for another post!
This is amazing!! I had no idea you could buy the wood strips in tiles like that. When I first saw the picture I immediately thought “Who has time do lay out each piece of wood like that?!!” but now I know! Awesome!
OMG isn’t it amazing!!! I was SO EXCITED when I found it! Thanks for reading!
I have the media stand version of your sofa table, and I love the clean lines of it, but it’s a bit boring. Thanks for the inspiration to kick it up a notch!
Awesome! I felt the same way and this is exactly the change up it needed. Thanks for reading!
Love love love!! This turned out amazing! Great work
-Shonee
I was just at IKEA on Monday.. We have to travel 3 hrs. to get there so we spend the day.. Got lots of goodies.. I have lots of ideas with things I saw.. Will have to make another trip when I make my plans.. Gorgeous color that you picked.
Thanks so much Gail! Isn’t Ikea THE BEST?!
I’m missing something. (That’s ok, I’m old). So do the sides consist of separate strips of wood butted up vertically against the underside of the top with space left to accommodate the thickness of each separate bottom piece (front to back)? Yes, I’m confusing myself too. Any pics of the finished sides before the bottom was put down?
Hi Terry! The bottom was put down BEFORE the sides so the sides are separate strips of wood butted up vertically against the wood strips on the bottom. I just waited to glue the bottom down until after the sides were in glued on, but the bottom was dry-fitted in place as I glued the sides on. Hope that helps!