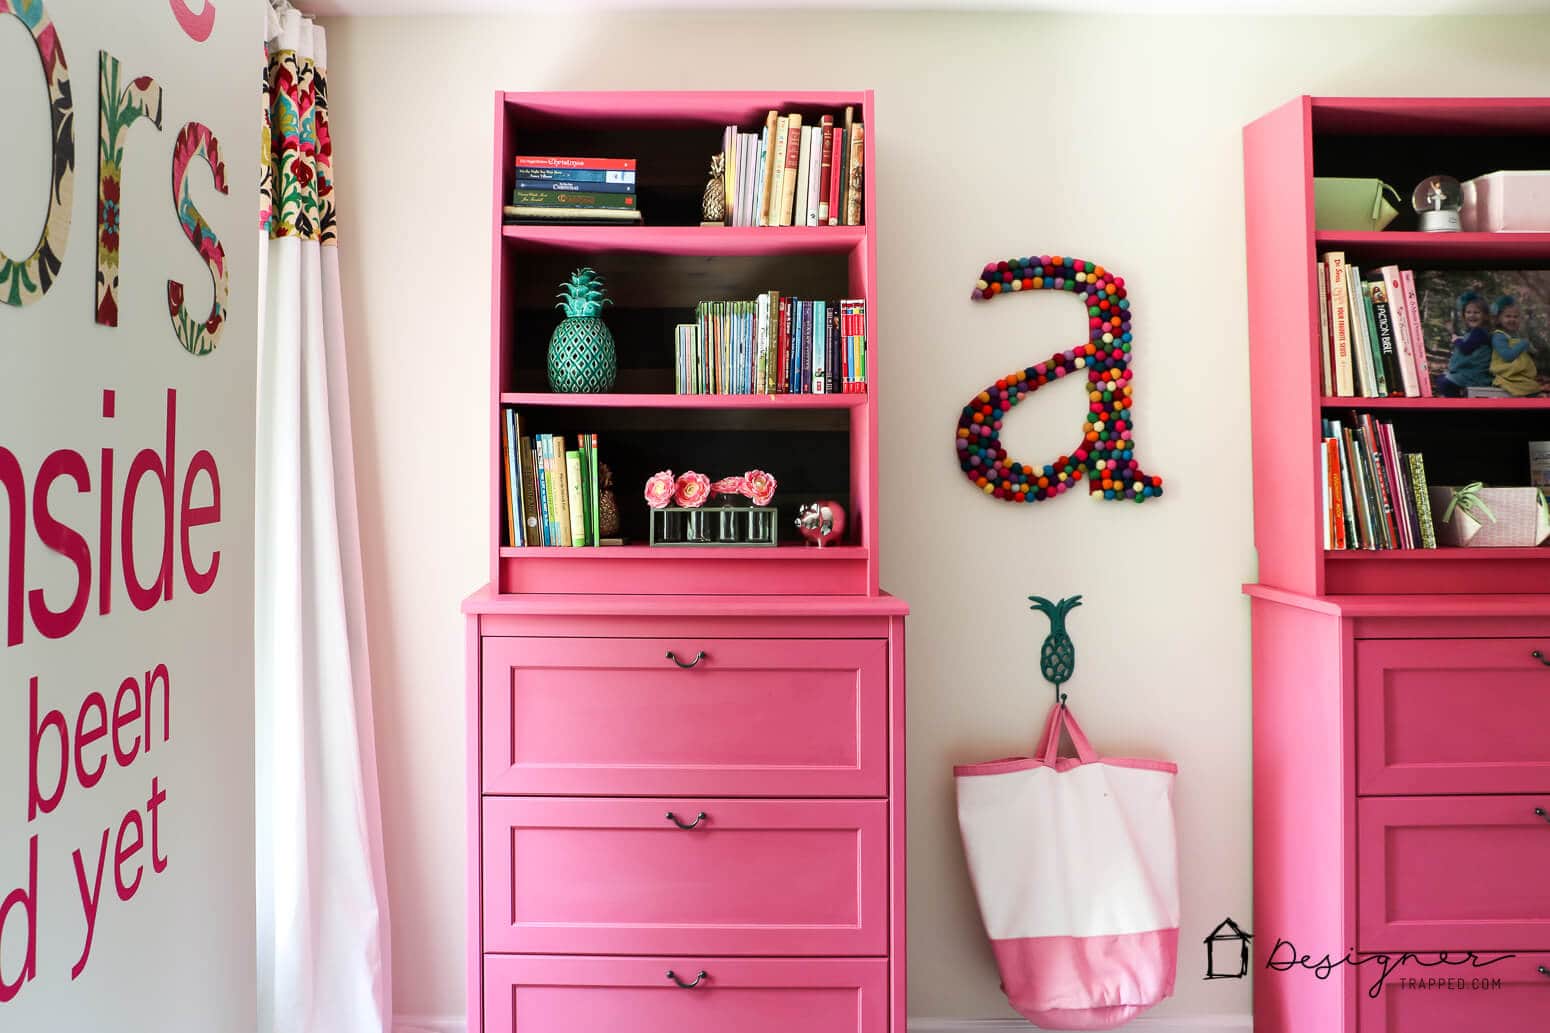
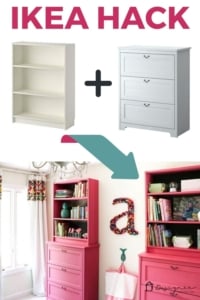
IKEA Billy Bookcase Hack for Loads of Storage
This IKEA Billy bookcase hack is simple, pretty and functional! Learn how to use basic IKEA pieces to create the look of custom built-ins with loads of storage and style.

Do you love the look of high-end furniture but don't have a big budget? Yeah, me too!
When we found out we were pregnant with twins almost 7 years ago, the thought of having to buy two cribs plus two of sooooo many other things completely freaked me out. I mean, that's a lot of money! And I like to keep things neat and organized, so I knew good storage would be crucial for our girls' nursery and bedrooms down the road. So, not surprisingly, we headed to IKEA and started brainstorming how we could use affordable IKEA pieces to create the look we wanted on a budget.
Why We Chose an IKEA Hack
Essentially, we wanted to create the look of custom built-ins in an easy and affordable way! IKEA pieces are a great solution for keeping down the total cost of furniture and home updates while still getting a stylish, unique look. Most of their pieces are already easy to work with—featuring adjustable shelves, nail holes, and basic designs with a modern touch.
Revamping IKEA pieces often means new hardware, glass doors, or a new paint job (more on that below). The great thing about the pieces is that they're built well enough to last, but they're affordable enough that you don't feel bad altering and DIY-ing them.
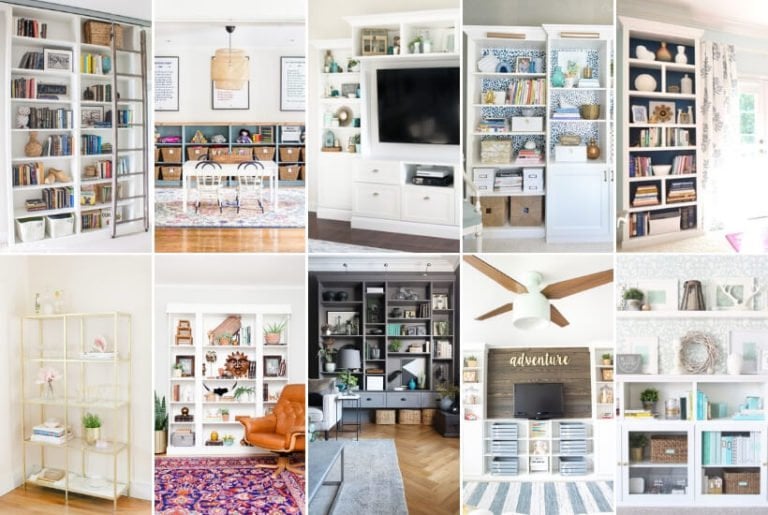
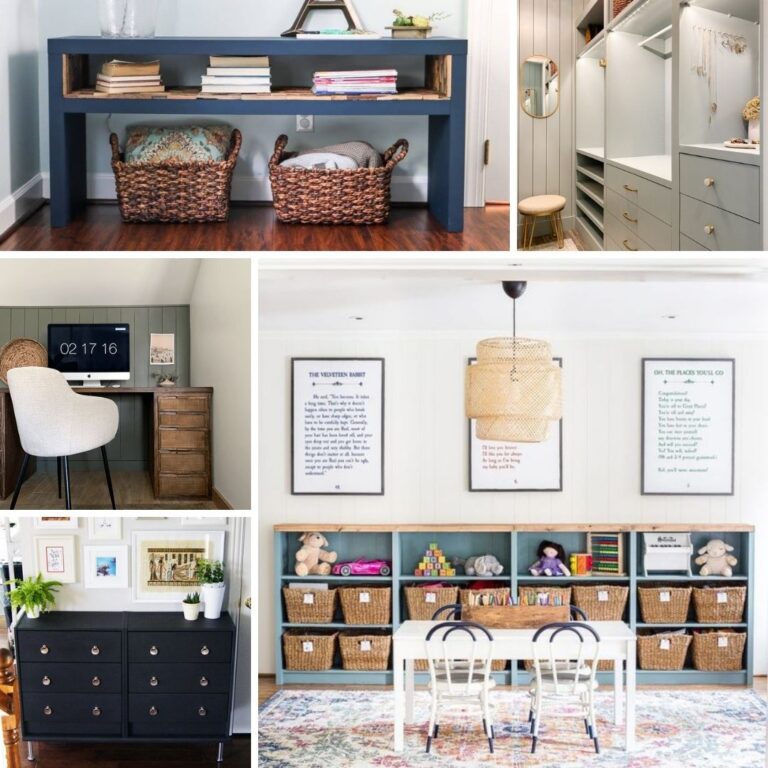
Great IKEA Hacks
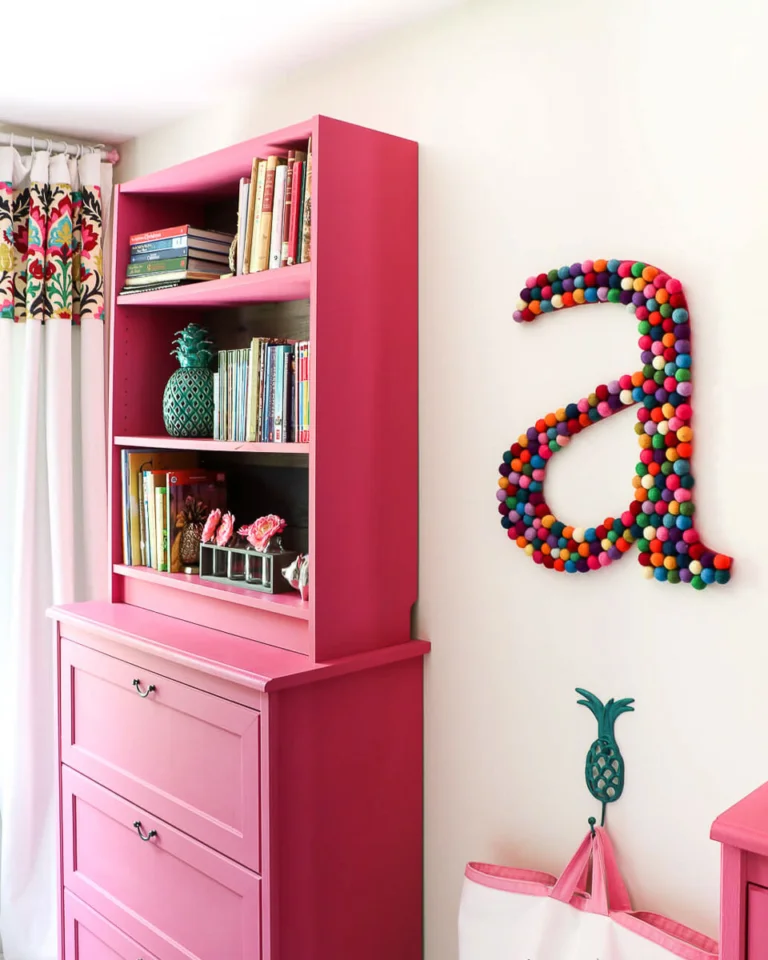
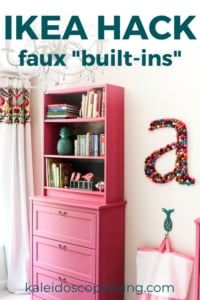
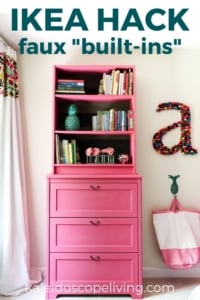
There are so many great IKEA built-in hacks out there, but I'd never seen this particular IKEA Billy bookcase hack before! We got creative and created our own hack for a fantastic solution that looks great and adds TONS of storage to any room. Read on to learn how we did it.
This post contains some affiliate links for your convenience. Click here to read my full disclosure policy.
IKEA Billy Bookcase Hack Tutorial
Materials Needed
- Amy Howard at Home One Step Paint (I used the color Drama Queen)
- Two IKEA Billy Bookcases (41 3/4 inch height)
- Two dressers or chest of drawers of your choosing from IKEA. We used the Aspelund chest of drawers, which is no longer sold, but it is very similar to the Songesand. I have included a list of other IKEA dressers/chest of drawers that could work well below.
- Staple gun (this is the one we use–no air compressor required)
- Compound miter saw or hand saw and miter box
- Palm router (optional)
- Pallet wood (optional)
- Amy Howard at Home Vintage Wood wood treatment (optional)
Suggested Chest of Drawers/Dressers to Use for this IKEA Billy Bookcase Hack
As noted above, the exact chest of drawers we used is no longer sold. But any chest of drawers that is at least as wide as the Billy bookcases you are using will work! Billy bookcases are generally 31 1/2 inches wide. Ideally, your chest of drawers will be around 32 inches wide and at least 40 inches tall so that it will balance well with the proportions of the Billy bookcase. Here are some IKEA dressers that are wide enough to use for this project.
- IKEA Songesand 4-drawer chest– This is very similar to the discontinued dresser that we used. It is the same height. The biggest difference is that ours had 3 deep drawers. This has 4 smaller drawers, which I would have actually preferred.
- IKEA Gullaberg 8-drawer chest– This is taller than the chest of drawers we used, but it is a great option if you have high ceilings. Our ceilings were only 8-feet high.
- IKEA Gullaberg 6-drawer chest– Again, this is taller than the chest of drawers we used, but it could work well if you have high ceilings.
Steps
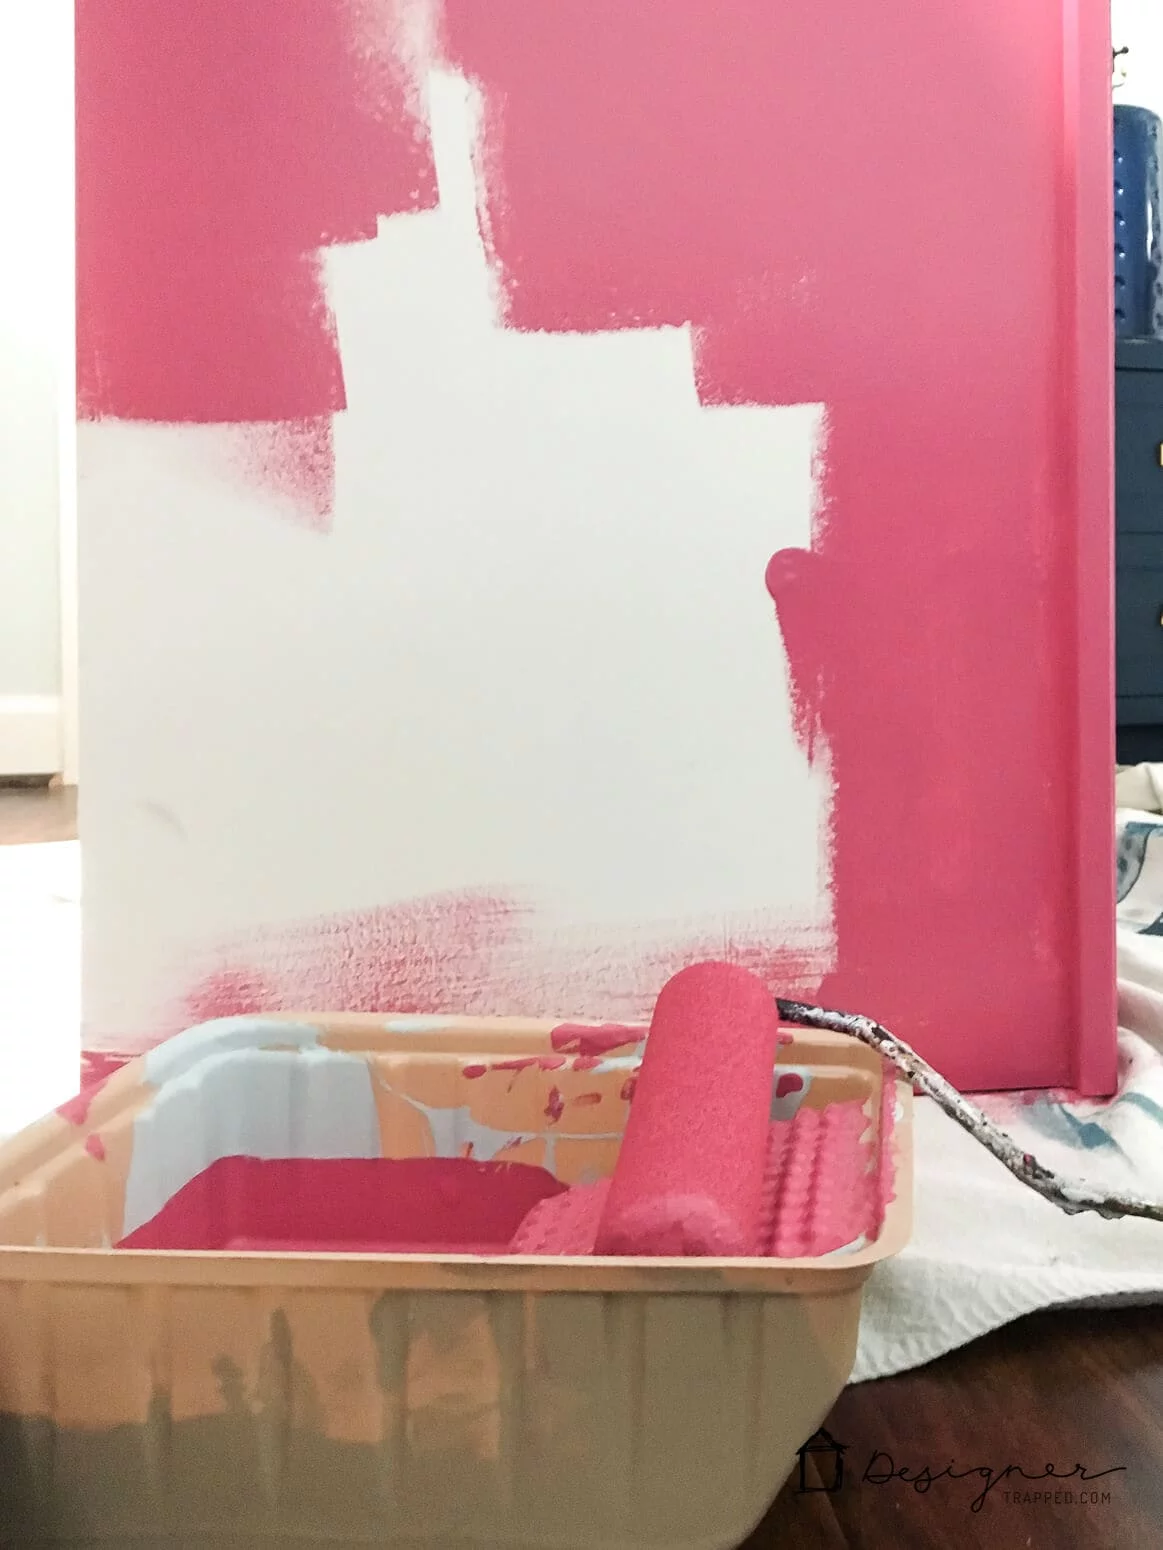
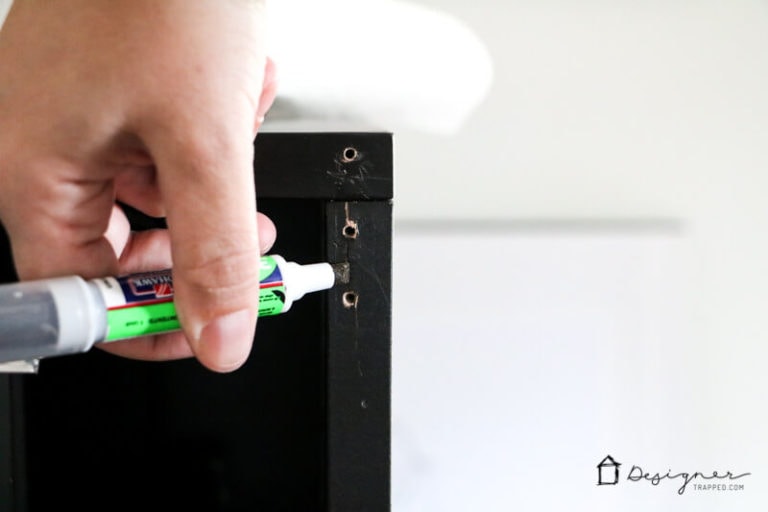
1) Start by painting your furniture pieces. You will need to paint your entire dresser and bookcase, including the backer board, unless you plan to replace the backer board with pallet wood or something else like we did.
IMPORTANT NOTE ABOUT PAINTING IKEA FURNITURE
IKEA LAMINATE FURNITURE MUST BE PAINTED IN A CERTAIN WAY, OR THE PAINT WILL NOT ADHERE PROPERLY AND IT WILL PEEL AND/OR CHIP OFF. This detailed post teaches you exactly how to paint IKEA furniture and mistakes to avoid. I promise it is easy! You'll get a great, smooth finish requiring only two paint coats.
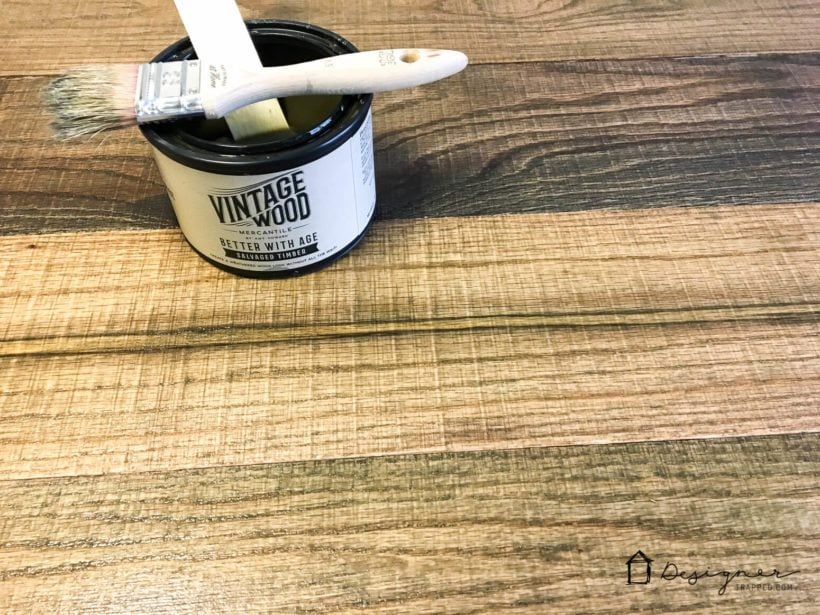
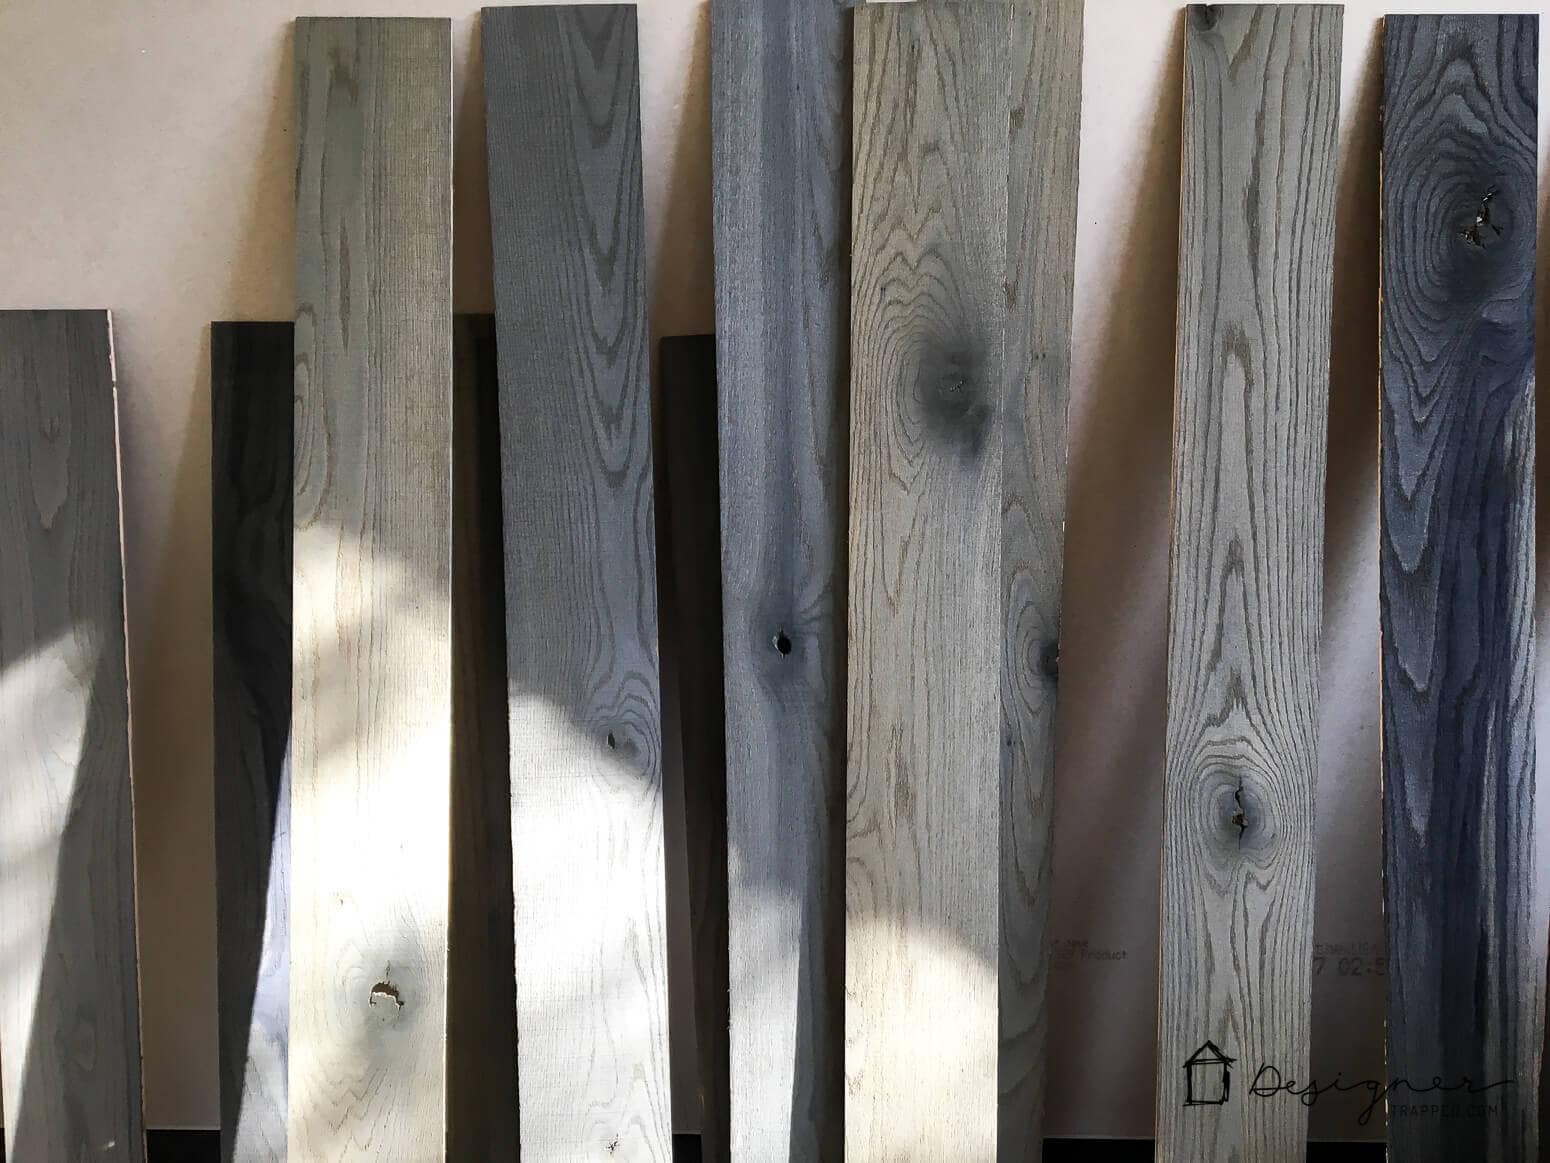
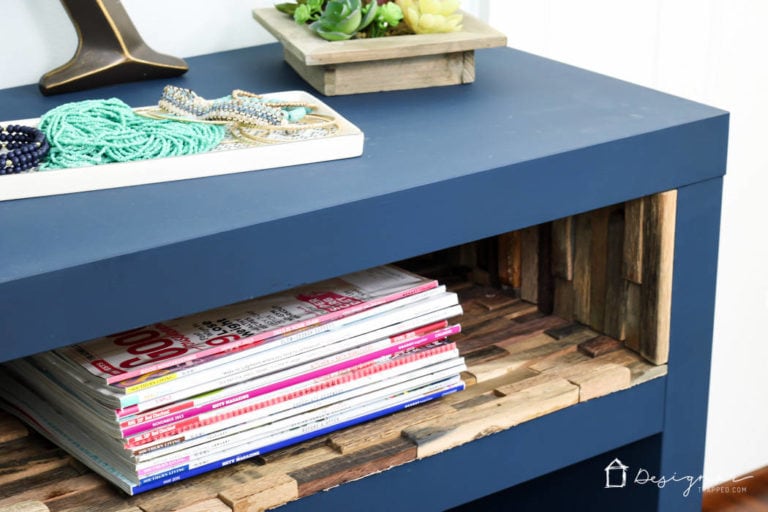
2) Use your Amy Howard at Home Vintage Wood to treat your pallet wood, if you choose to use it on the back of your bookcases. I used seven pieces of wood per bookcase. I used an inexpensive boar's hair brush to apply it—just be sure to go with the grain of the wood. This stuff is SO COOL! With it, you can give an ordinary piece of raw wood a weathered wood look without waiting years and years. When you first put it on, it just darkens the wood a bit, but as it reacts and dries, you get a gorgeous gray patina. Each piece of wood turns out differently.
Here's a photo of mine as they were drying. You can already tell how much the color has changed between photos!
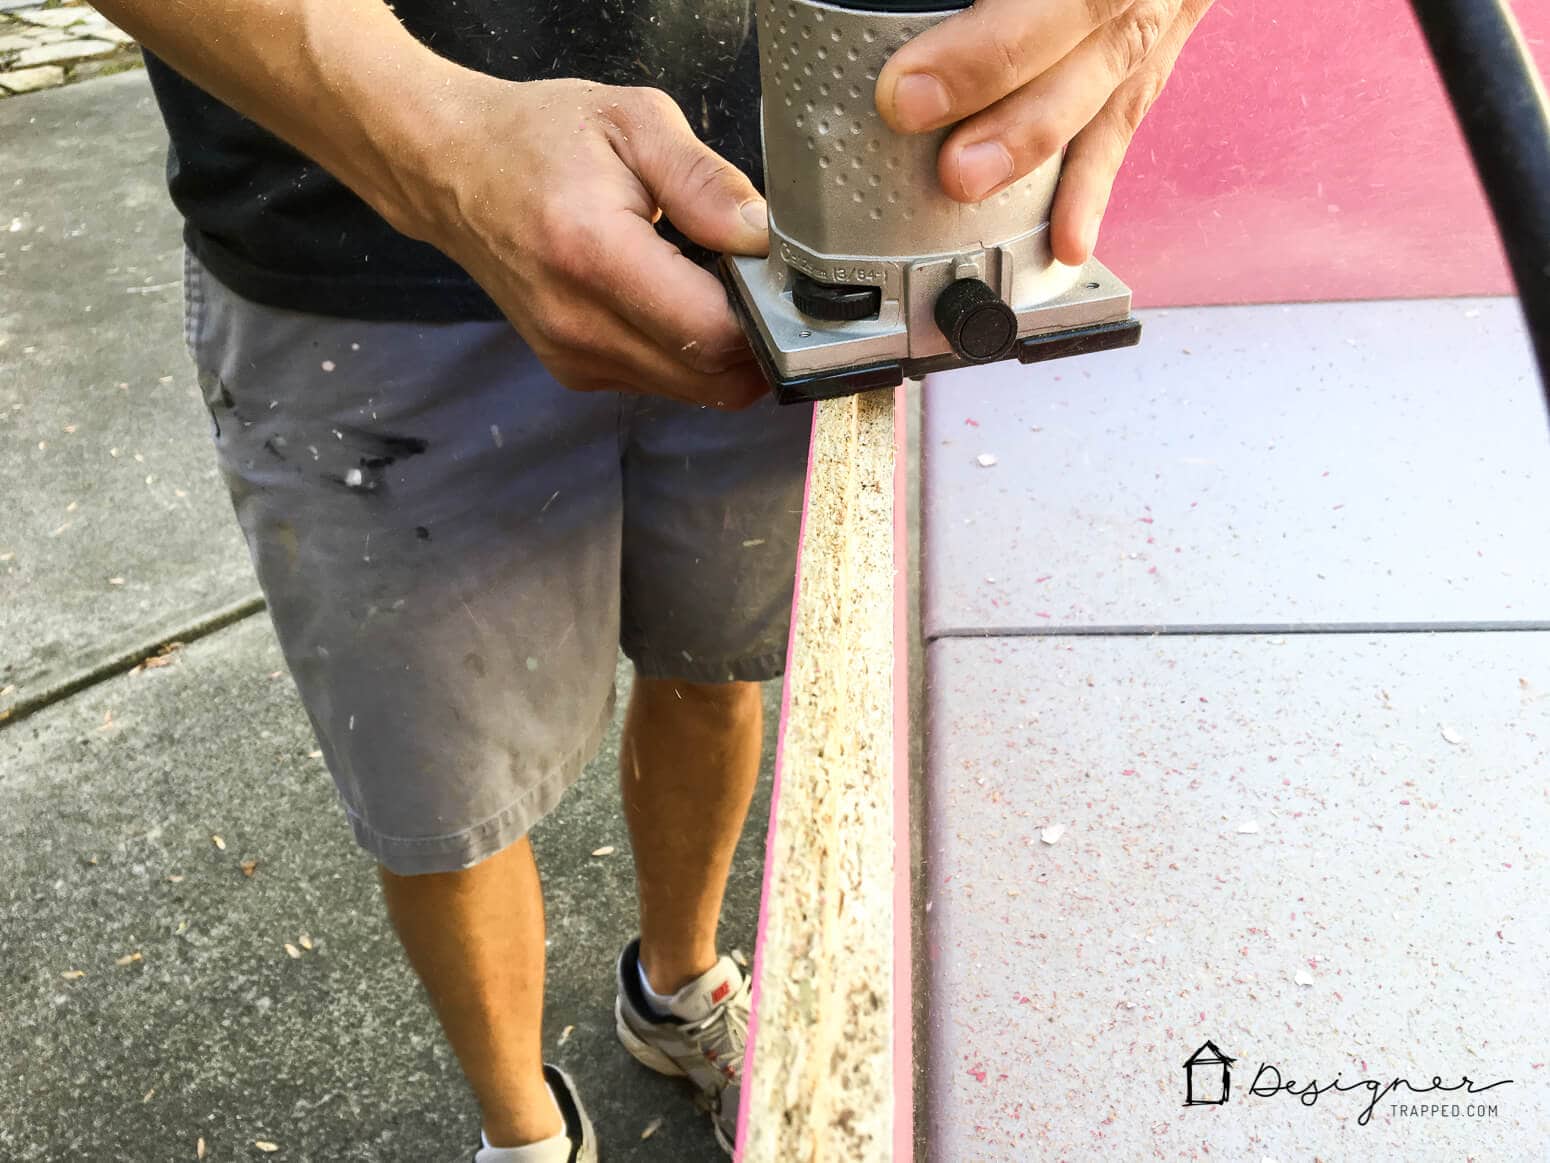
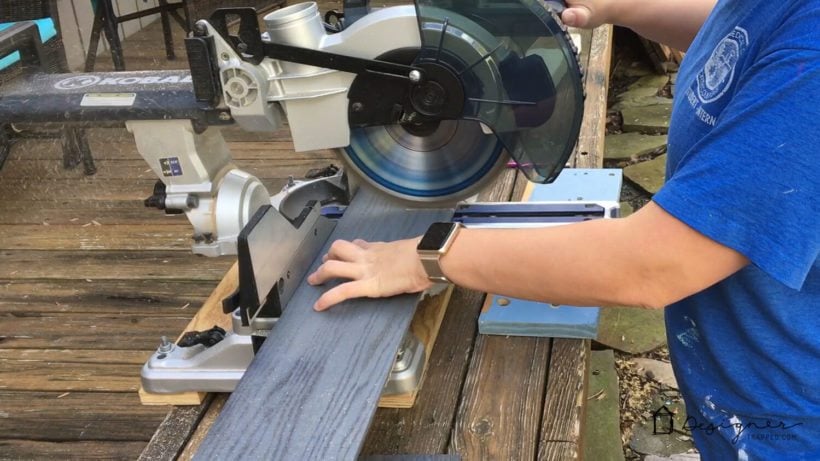
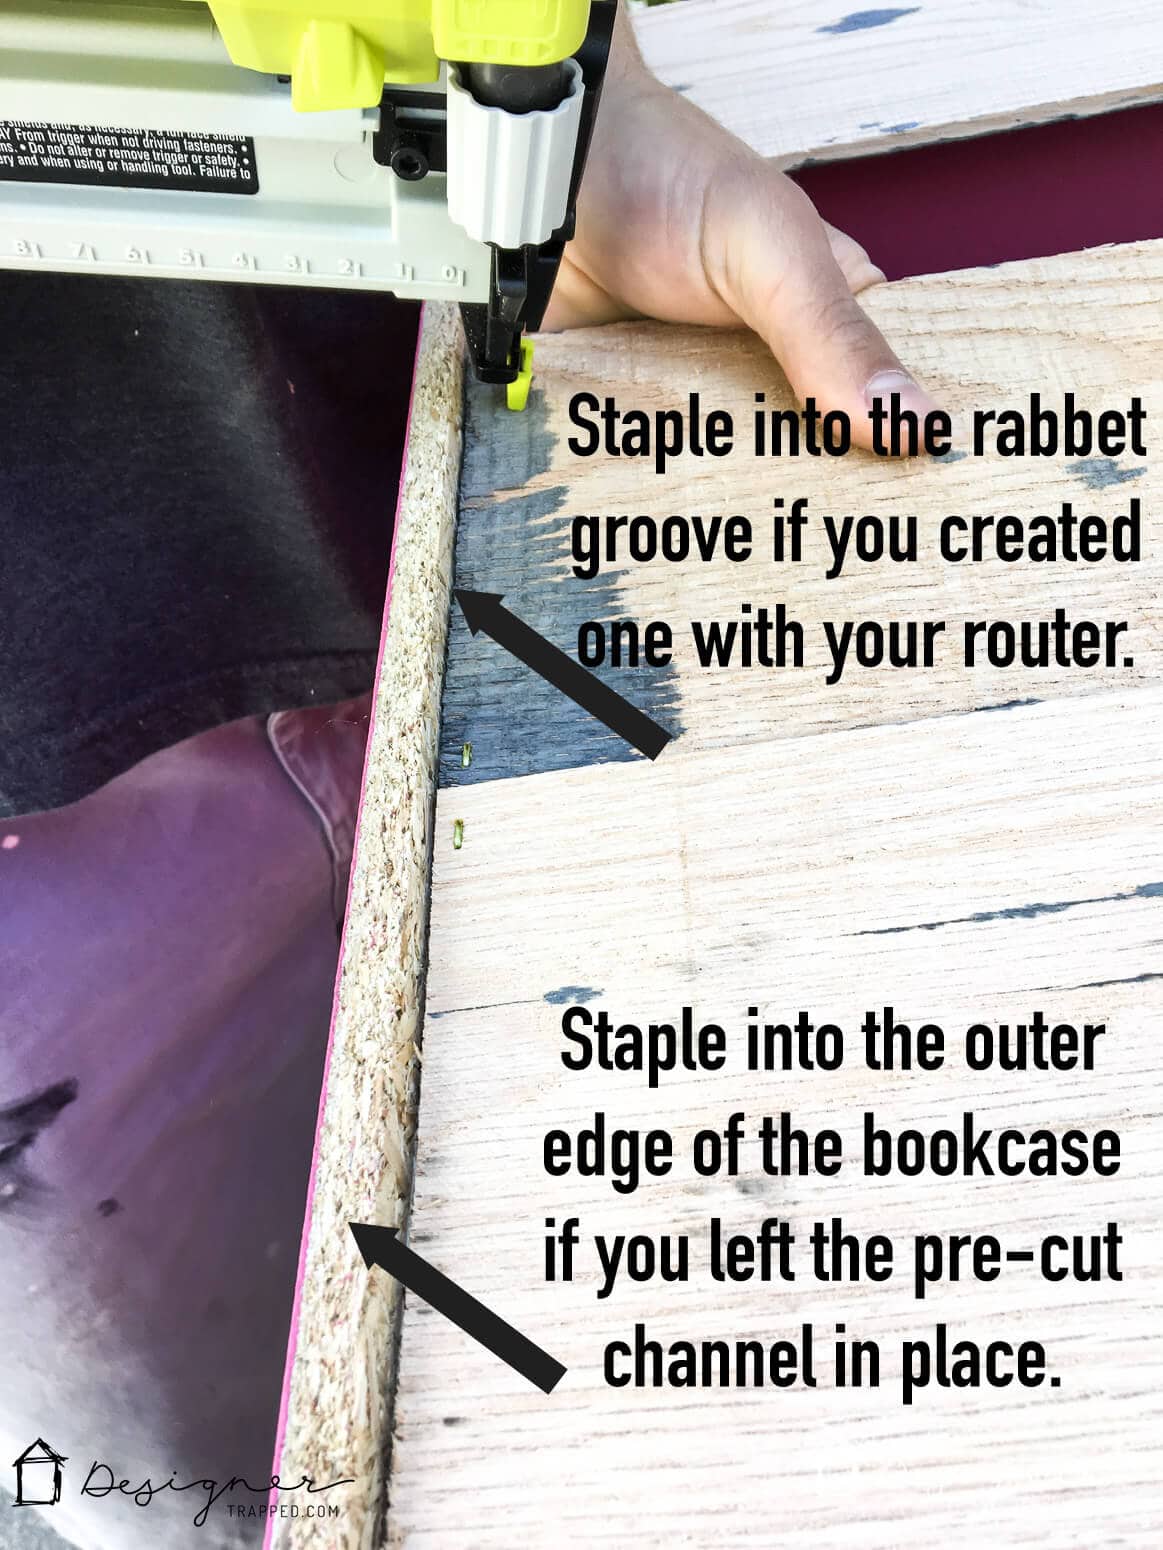
3) If you want to replace the backer board with pallet wood, use a palm router and bit to remove the channel in the back of your Billy bookcase that is meant to hold the backer board. Then measure the distance of your bookcase opening to determine the length that your pallet wood pieces should be cut to. Cut them to length with a compound miter saw or hand saw.
5) Staple your pallet wood OR backer board in place.
6) Install your dressers (be sure to secure them to the wall with anti-tipping hardware). Then stack your Billy bookcases on top of dressers and secure them to the wall with anti-tipping hardware as well. Make sure the bottom of the bookcases line up with the dresser.
That's it! How upscale does this IKEA Billy bookcase hack look? And can you believe how well this furniture is holding up after 7 years of constant use? I'm super impressed!
You could add crown molding at the top of the bookcase and base molding or skirting board where the Billy bookcase sits on top of the dresser for an even more custom look. Trim pieces could also go along the sides of the bookcase (but it still looks great without the extra decorative items). Use caulk to fill any seams for an extra polished finish.
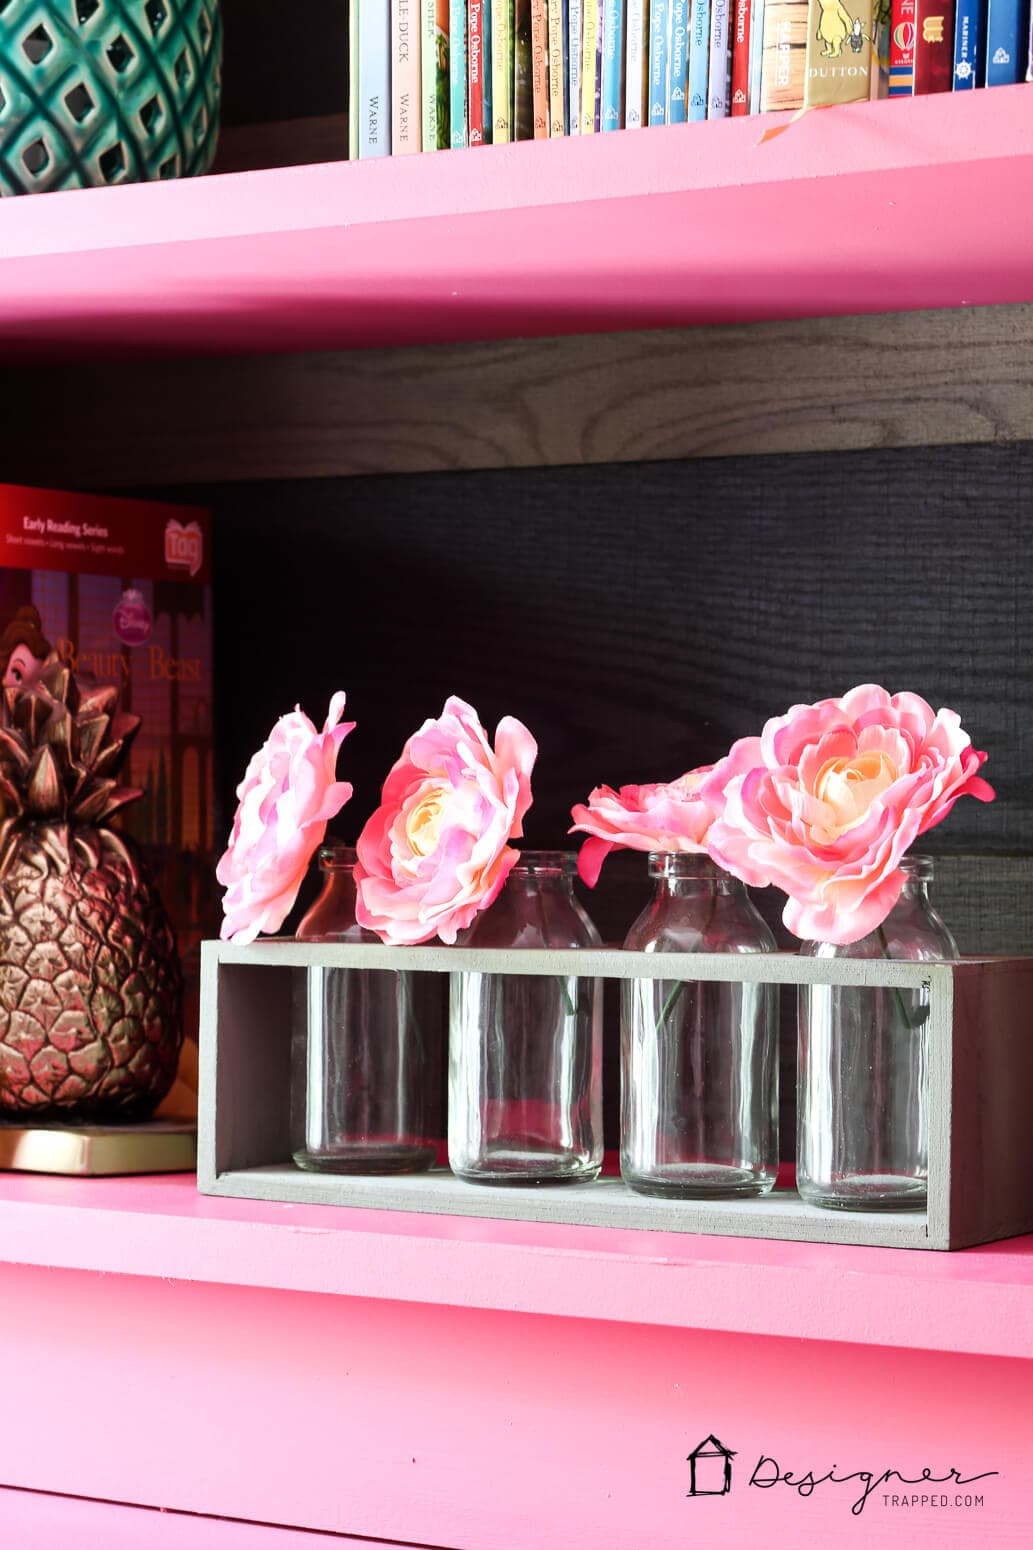
I think what really makes this IKEA Billy bookcase hack special and sets it apart is the pine boards of the pallet wood on the back! That tri-fold backer board from IKEA just doesn't cut it and makes it look like cheap furniture.
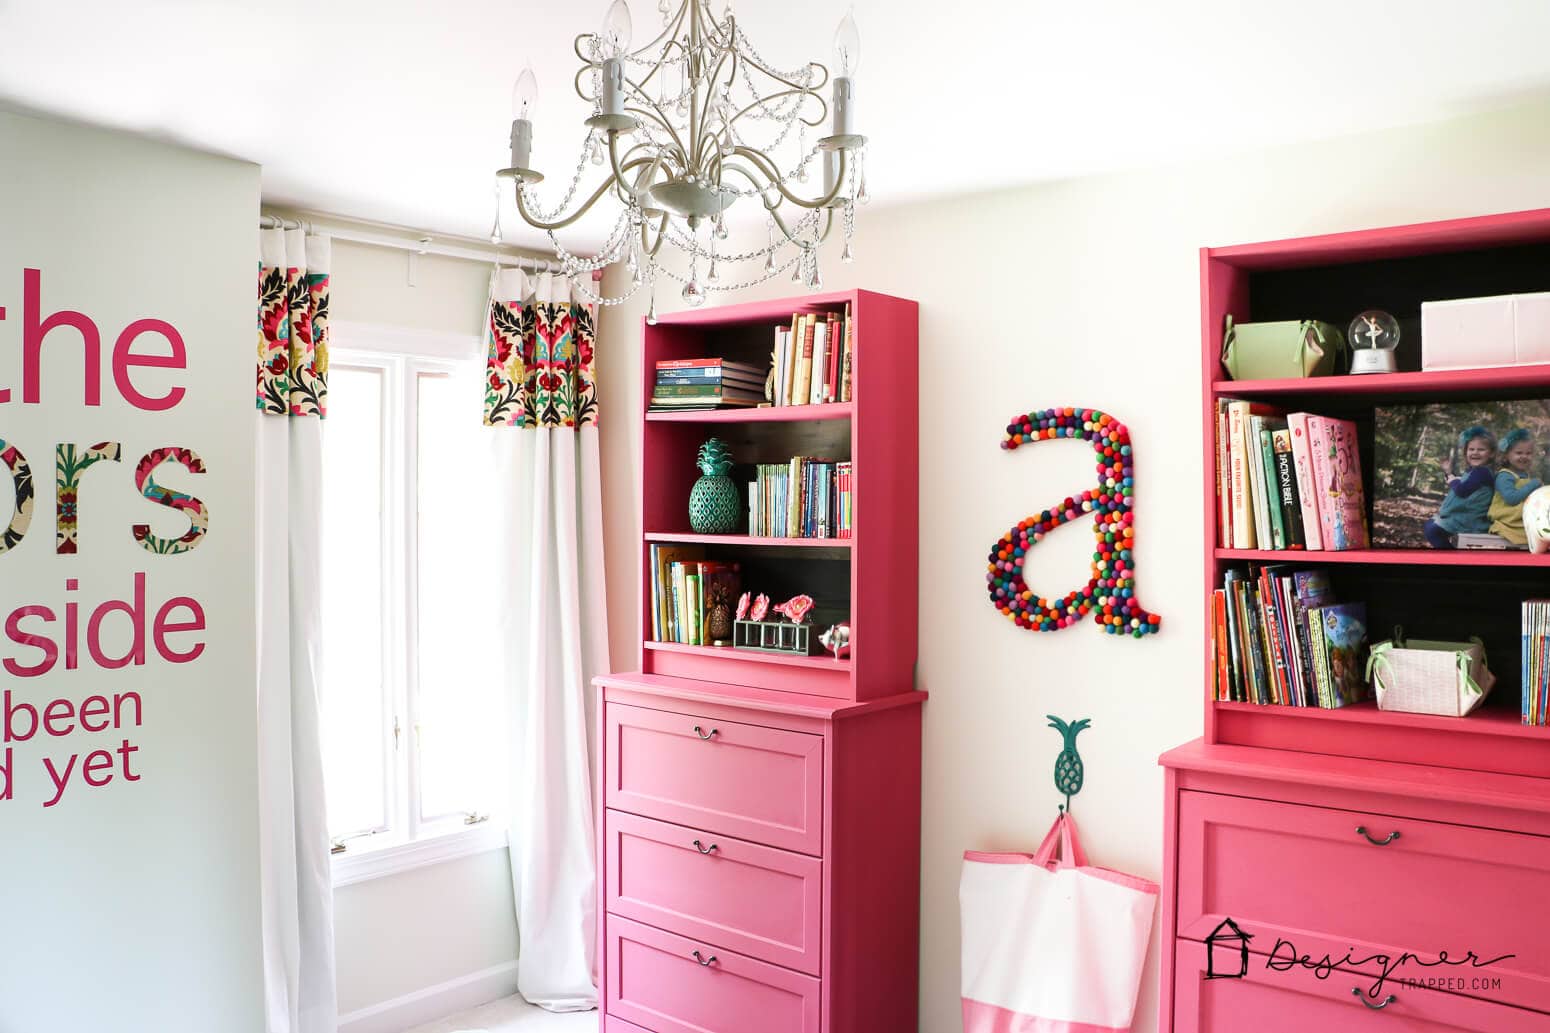
If you love this idea, be sure to pin it so you can find it again later. You can find the tutorial for that adorable felt ball letter hanging on the wall between the IKEA pieces here.
More IKEA HACK Posts
Other Posts You Will Enjoy:
- 16 Cool DIY Bunk Beds
- Avery’s Built-in Bunk Beds and Room Reveal!
- 16 Teen Bedroom Ideas for Boys + Girls
- Stylish Dressers We Love (That Don’t Break the Budget!)
Wondering how I approach transforming rooms and spaces in our home? Check out Designer in a Binder®.

And if you want exclusive content and behind-the-scenes sneak peeks, be sure to subscribe before you head out!

Could you please tell me, how the Letter in the Wall is Made? Or where you got it from? Thanks
Hi! You can find the tutorial for the letter on the wall here: https://designertrapped.com/how-to-make-large-diy-wall-letters/