DIY Range Hood Finish With Wood and White Concrete
Custom range hoods can be EXPENSIVE, but you can do it yourself pretty easily! Our custom DIY range hood with a super cool concrete finish and wood detail is a simple and inexpensive DIY that will bring style to any modern kitchen. Read on to learn how to create your own!
Hey friends! So many of you have been asking about our DIY range hood since we revealed our colorful kitchen renovation a while back. I'm so excited so many of you love it–we sure do!

When we made plans for the kitchen, we did look into a custom range hood finish that was fabricated by our cabinet maker, but it was EXPENSIVE and it felt a bit too traditional for the look we wanted. So, we decided to DIY it. And in this post, I'm going to walk you through exactly how we did it.
Now, let me clarify. This post is not going to teach you how to tackle range hood installation–our contractor installed our Broan range hood. What this post is meant to teach you is how we DIYed the exposed portion of our range hood. Make sense? Good!
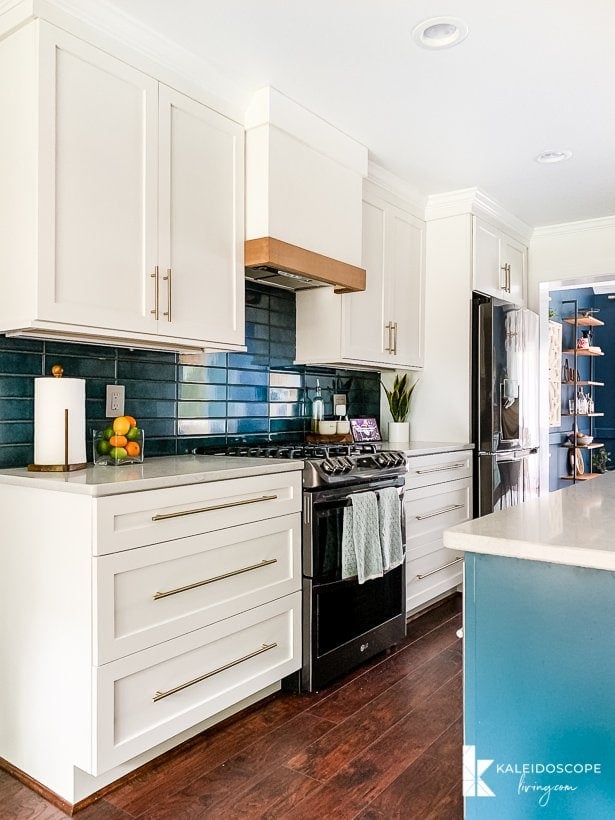
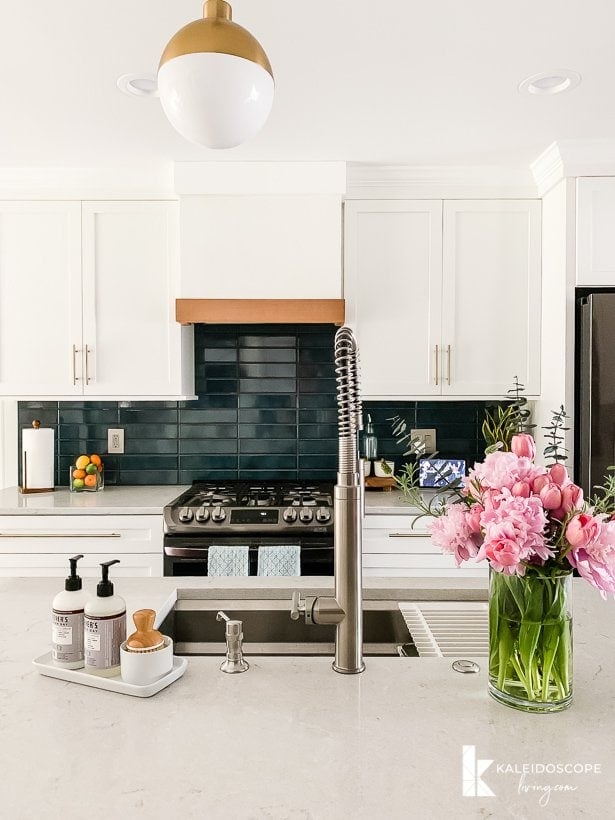
It isn't easy to tell in the photos, but we finished our vent hood with white concrete and added a simple band of cedar wood at the bottom. The finished look is sleek and modern. It could even work in a farmhouse style kitchen. We love it, and it cost us next to nothing to do!
This post contains some affiliate links for your convenience. Click here to read my full disclosure policy.
DIY Range Hood With Concrete and Wood
Materials needed:
- Accent wood of your choosing for the band around the bottom of the vent hood (we used cedar from our old fence–FREE!)
- Dap Rapid Fuse Wood Adhesive (one bottle is more than enough for this project)
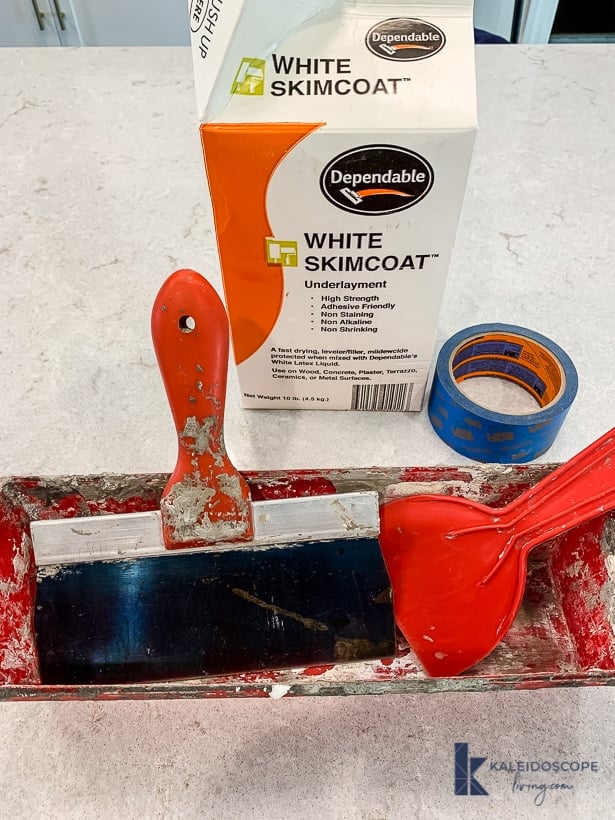
- White Skimcoat
- Painter's tape
- Sandpaper
- Table saw
- Miter saw (optional)
- Drywall mud pan
- 8 to 10-inch drywall taping knife
Steps:
Step 1:
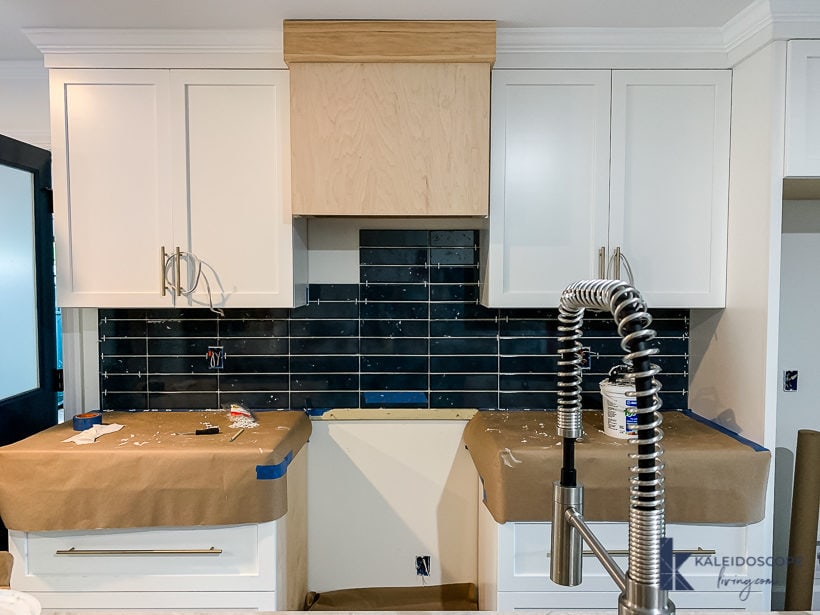
Install your range hood. As I mentioned, we had our contractor actually install our Broan range hood that we got from Build.com. This is the exact Broan range hood we selected. The installation of our hood also included them boxing around it with plain plywood. There was nothing fancy about this process and we could have done it ourselves, but because the venting involves inspections, etc., our contractor would not let us DIY this first part of the job.
Because we wanted a very streamlined design, we did not want crown molding at the top of the vent hood. Instead, we finished the top with 1 x 6 wood that I caulked and painted.
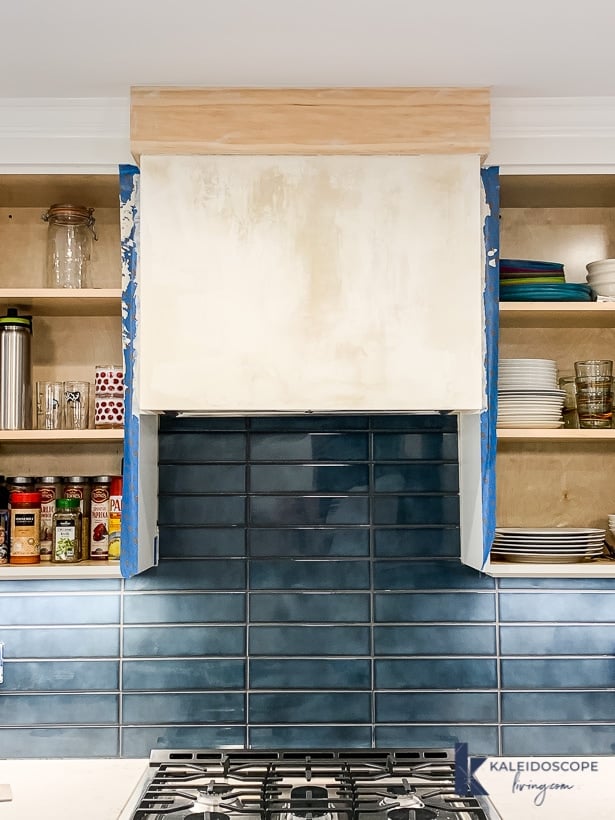
This is the point that we stepped into DIY the finish of the vent hood. This is what it looked like before we got started (I took this photo when we were in the middle of tiling the backsplash–forgive the mess).
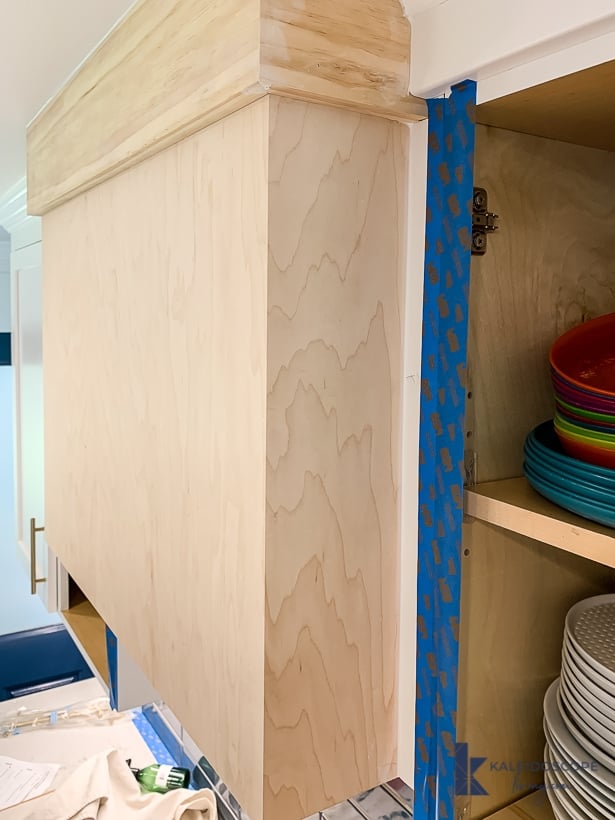
And this is what it looked like underneath.
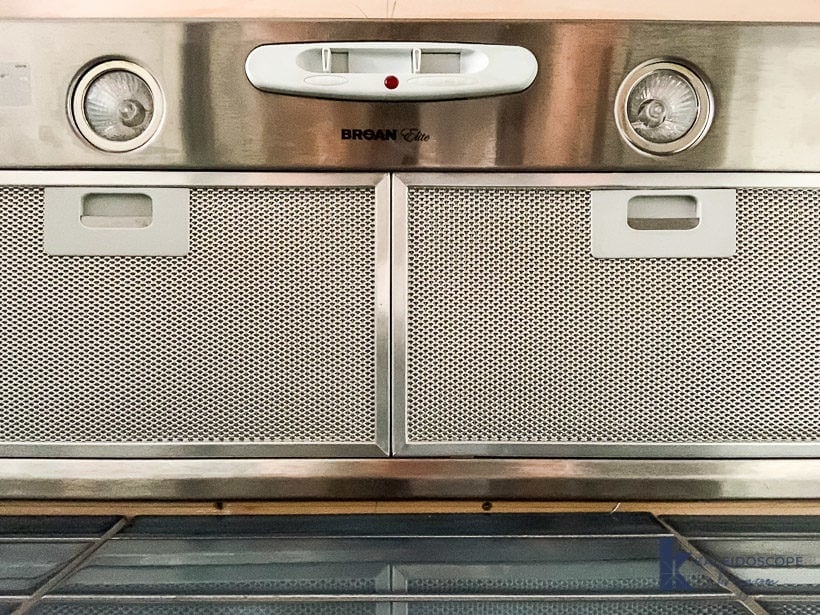
Side note: We LOOOOOOVE our Broan range hood from Build.com. Our contractor recommended Broan over any other brand and it does work incredibly well. It is kind of loud when it's on high, but it REALLY moves the air out of the kitchen, which is what we wanted.
Step 2:
Use painter's tape to protect any surrounding cabinetry–you don't want to get the white concrete on your cabinets accidentally.
 Step 3:
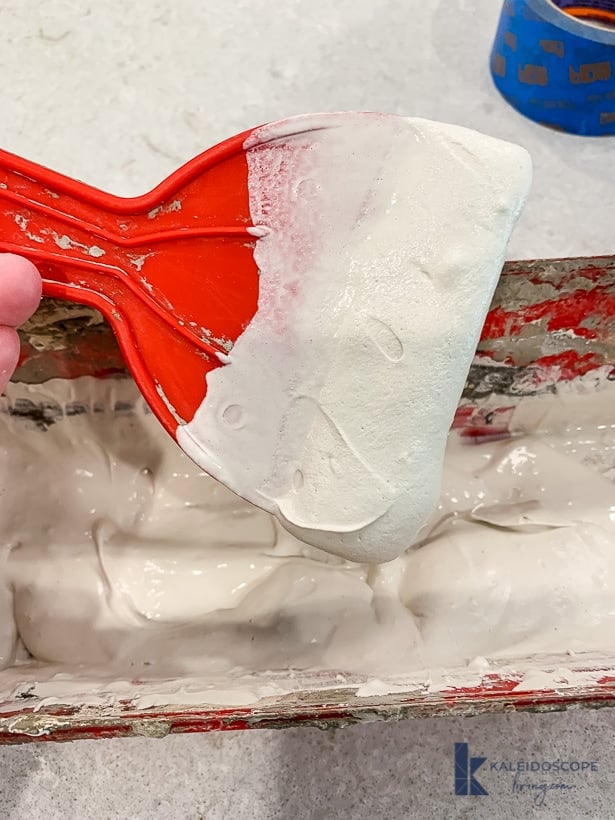
Next, you are ready to mix your white concrete skimcoat. This is a product we've used before. We used this exact white concrete skimcoat on these DIY wooden step stools. And we've used the natural gray version on our DIY concrete fireplace and our DIY concrete vanity overlay. It's super inexpensive and really is easy to use! We are big fans.
To mix your skimcoat, pour a small amount of the dry mix into your drywall tray, add water and mix it with a small putty knife. You want to mix it to the consistency of thick pancake batter. After mixing it, let it sit for a few minutes and then mix it again. Now it is ready to work with. It will remain workable for around 5 minutes, so only mix up small batches at a time! When it starts to get too thick to work with, dump any mixture that remains and start with a new batch.
Step 4:
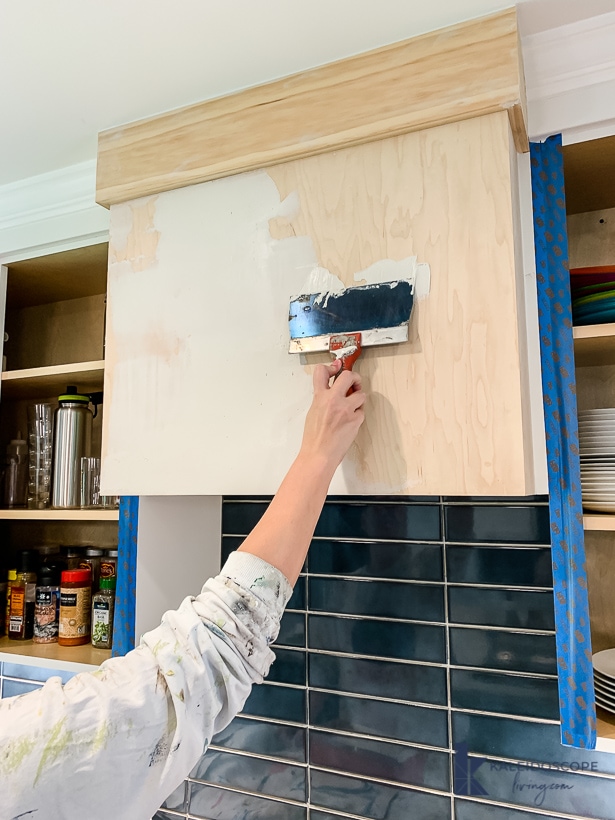
Now you can apply your first layer of skimcoat. Use long, even strokes to apply a THIN layer of the concrete mixture with your drywall knife. You want to apply a THIN coat–do not strive for full coverage on the first coat. It will look like a hot mess, but don't get nervous. I used my large drywall knife to apply it to most of the range hood surface. I used my fingers to apply it to the corners.
Step 5:
Allow your first coat to dry completely. It dries fairly quickly, but if you want to be absolutely safe, I would allow the first coat to dry overnight. Once it is dry, give it a light hand sanding. NOTE: If you applied your first coat too thickly and there are significant bumps or imperfections, you may be better off using an electric sander.
Step 6:
Repeat steps 4 & 5 until you achieve the coverage you want. I was happy after 3 coats, but I am fairly experienced using this product since we used it on our DIY concrete fireplace and am able to apply it fairly smoothly. If you have more imperfections, you will probably require more coats to get it nice and smooth. The photo below shows you what the second coat looks like drying–a splotchy mess! DON'T PANIC!
Step 7:
Once you are happy with the coverage, you will want to do a final hand-sanding of the entire surface and apply a sealer. I recommend using a water based acrylic concrete sealer in satin finish such as Quikrete 873002 Concrete Cure And Seal Satin Finish![]() . It gives your concrete a nice, smooth finish with a slight sheen. When you apply the sealer, it will have a milky appearance. Don't worry, it dries clear. Follow the directions carefully–do not apply the sealer too thick and/or leave puddles and follow the drying and recoating instructions carefully.
. It gives your concrete a nice, smooth finish with a slight sheen. When you apply the sealer, it will have a milky appearance. Don't worry, it dries clear. Follow the directions carefully–do not apply the sealer too thick and/or leave puddles and follow the drying and recoating instructions carefully.
Step 8:
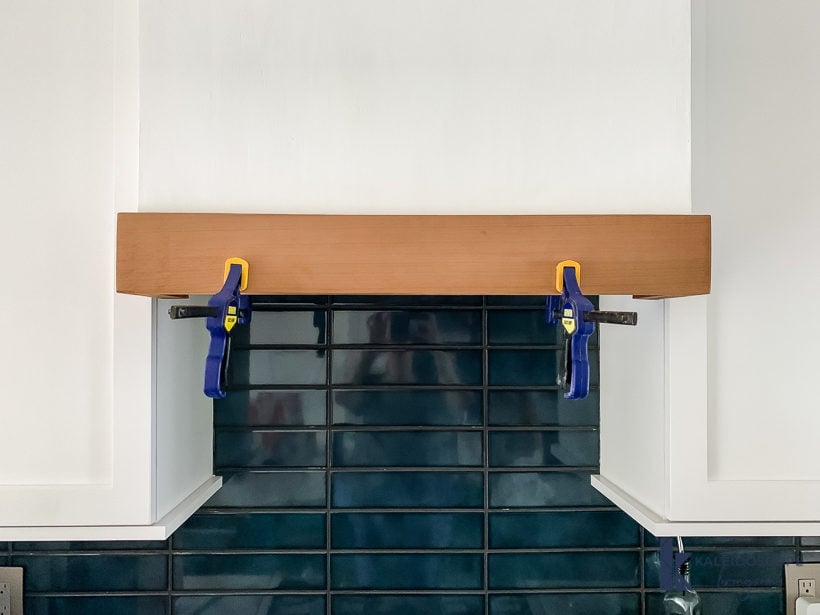
Finally, you can apply your wood accent at the bottom of your range hood. As I mentioned, we used cedar from an old fence we took down (the same wood we used for our DIY herringbone plank wall). But you can use anything you want! The EASY way to do this would be to miter the corners of and simply apply it to the surface of your range hood using Dap Rapid Fuse Wood Adhesive. That's what I would recommend.
Joe wanted to get a bit more “fancy” and have it wrap around the bottom of our range hood for a more finished look (in case someone stuck their head under our vent hood?!). Since I don't think many people will want to do this, I'm going to spare you all the details. But here's what the construction of ours looked like if you are curious.
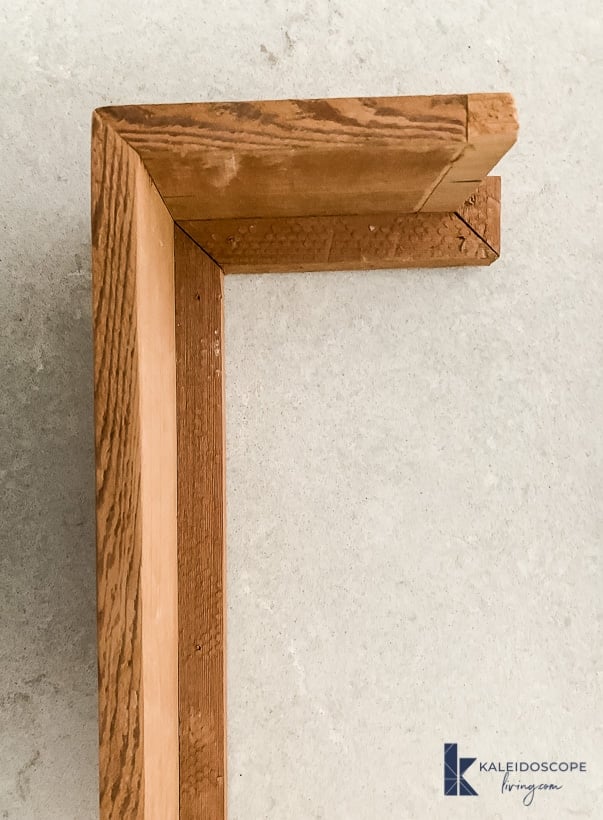
We applied our Dap Rapid Fuse Wood Adhesive and then used clamps to hold the cedar in place while the adhesive cured.
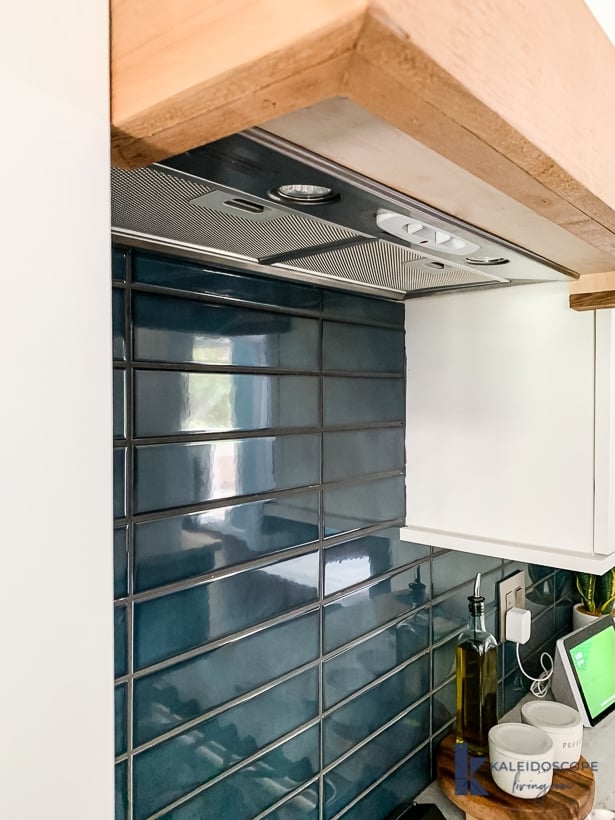
Here's the finished product, from a variety of angles!
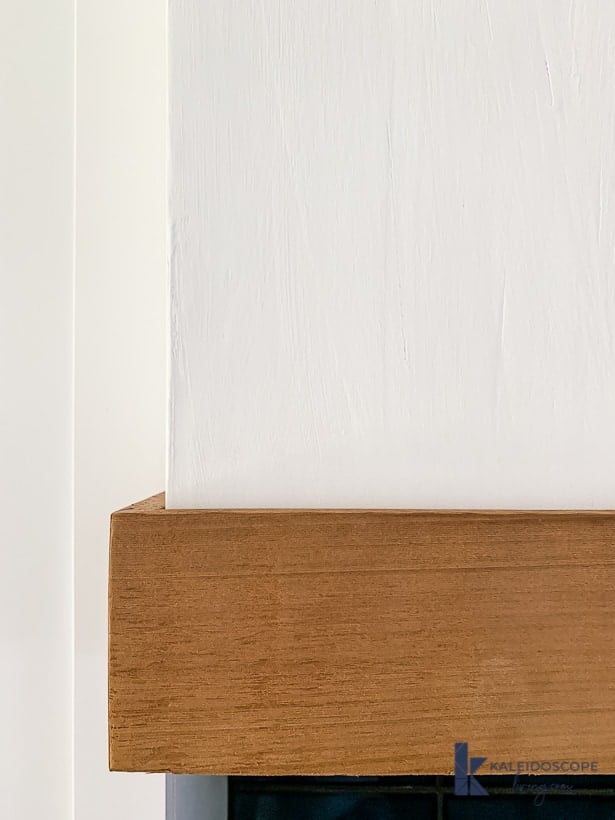
This shot gives you a glimpse of the cool concrete texture.
And this gives you an idea of what the view from the bottom is (not that we ever really look at it this way, lol)!
What do you think? We love how simple it is. And while it's hard to tell in photos, the concrete texture in person gives it unique character that we love!
Before you head out and get started, be sure to check out my FREE design guides that will help you help you design spaces you absolutely love! Subscribe now and you will receive a password so that you can access everything in one convenient digital library.


Last Updated on August 10, 2021