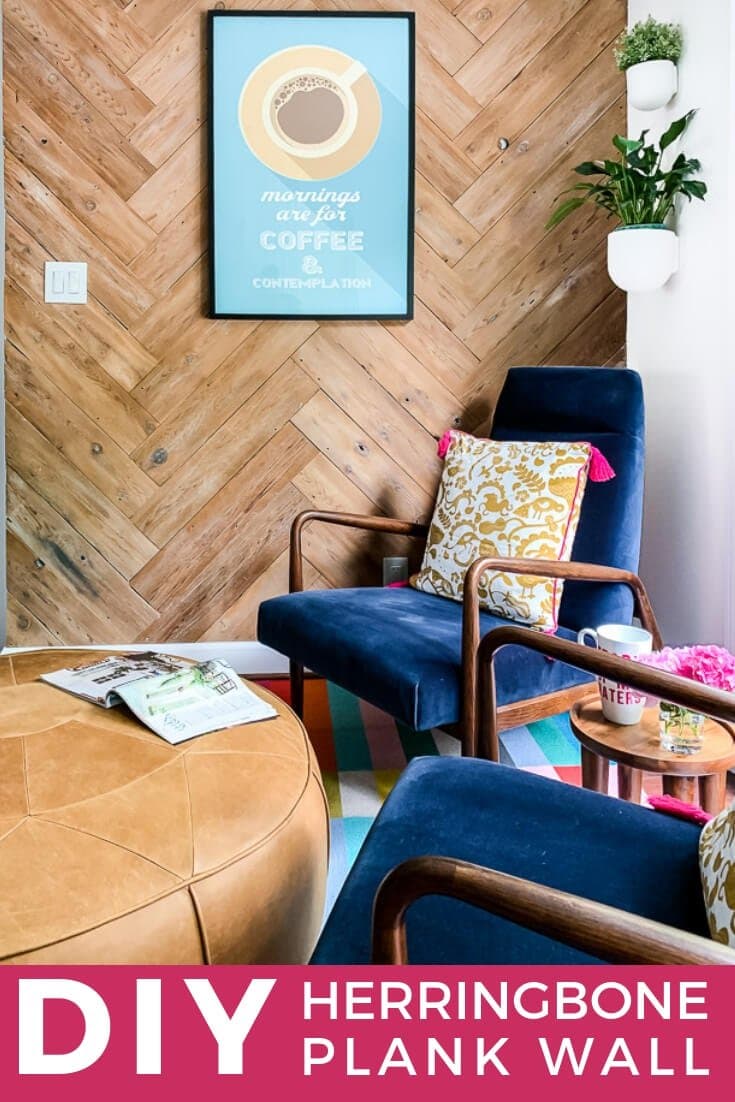
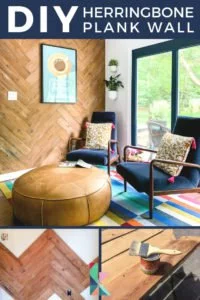
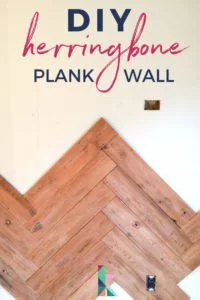
DIY Herringbone Plank Wall (upcyled from an ugly, old fence)!
Learn how to turn reclaimed wood into a stunning DIY plank wall! Create an affordable statement wall in a herringbone pattern with this full tutorial.
Hey friends! This is an old project that I felt was time to update since our kitchen has changed so much! So, I've updated it to answer some of the most questions we've received about it AND to include new photos. This is still hands-down one of our favorite DIY projects we have ever tackled, which is why we couldn't possibly get rid of it when we recently completed our big kitchen renovation. We also recently installed the easiest DIY board and batten wall treatment ever in our new house, so be sure to check that out if you decided the herringbone look isn't for you :)
We initially created this DIY plank wall way back in 2014, when we gave our old kitchen a bunch of cosmetic updates so that we could save for our complete kitchen renovation. I'm so glad we did! It wound up taking us 6 years to save for our full kitchen remodel! It was worth the wait, but the cosmetic updates we made cost us less than $700 and allowed us to enjoy the space while we saved for the full remodel.
But back to this plank wall! Initially, I planned to create a standard, horizontal reclaimed wood DIY plank wall. And I was excited about it. Then, my marvelous, amazing, genius husband and DIY partner very casually said, “Why don't we do a herringbone plank wall?” WHHHHHHAAATTTT??? I thought he would think I was going out on a design limb by wanting to do a plank wall, so for him to take it up a notch made me the happiest wife on earth! My answer, of course, was YES!
Sourcing Wood for the Plank Wall
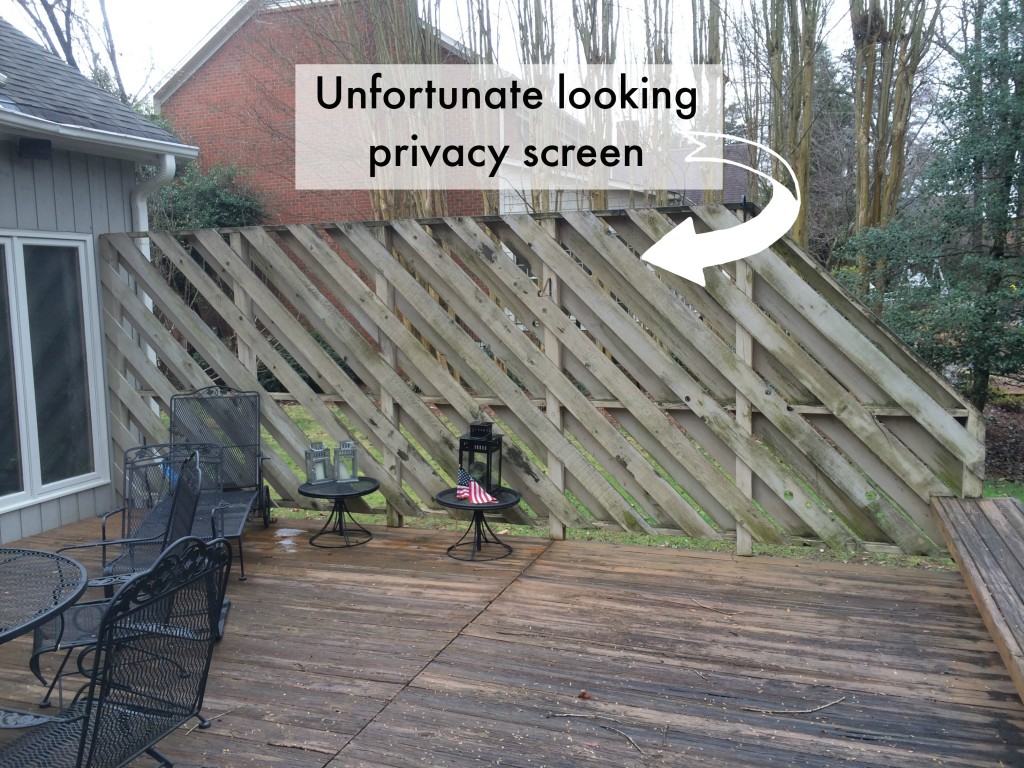
Our first hurdle came when we started brainstorming where to get the wood. We did not want to spend much money since we are on a serious budget for our kitchen refresh. We thought about pallets and even looked for some reclaimed wood on Craigslist. But we just weren't excited about any of the possibilities. Then, my genius husband suggested we use the wood from the privacy fence on the deck. It was SO UGLY and we were planning to take it down anyway.
Preparing the Wood

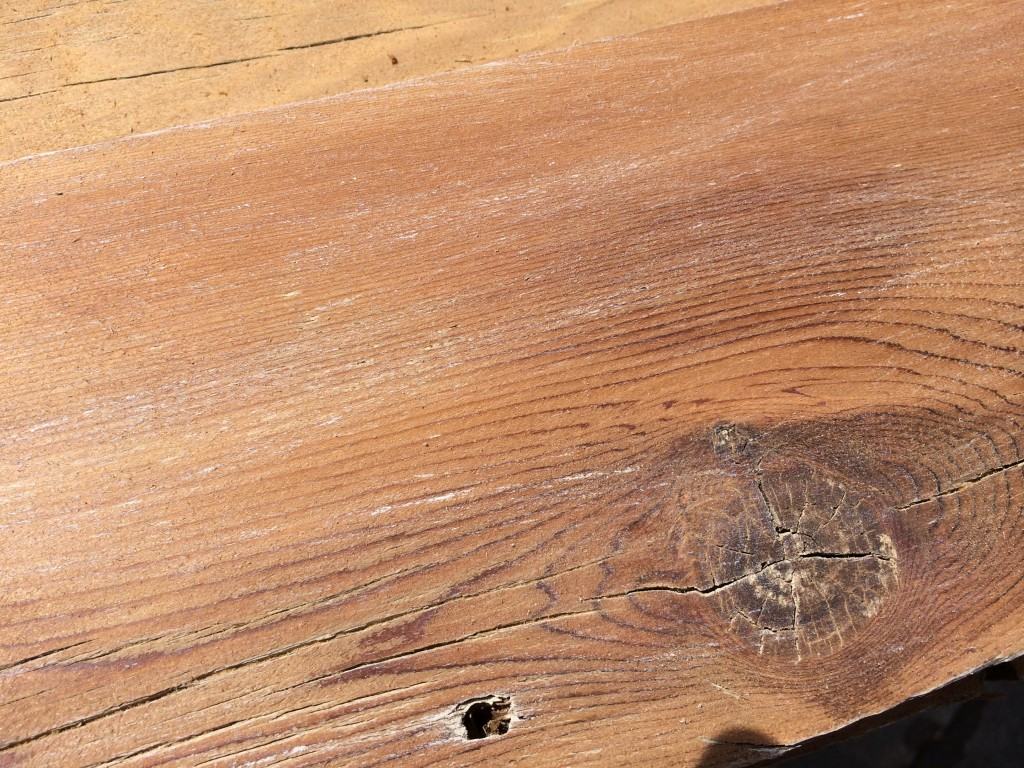
Joe started by removing boards and sanding them down. It was a messy job, but the boards looked great once they were sanded down. Turns out there was gorgeous cedar under all the old paint and green algae.
We played around with various stains and finishes until we settled on a simple combination of tung oil and a very, very light dry brushing of grey paint.
This was the look we ended up with:
Once our wood planks were “perfectly imperfect,” we started planning for the wall application.
To be honest, we had a hard time figuring out exactly where to start. But we did figure it out, and now you can benefit from all of our head-scratching.
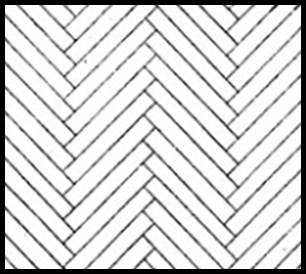
What is a herringbone pattern?
First, let's quickly review the basics of a herringbone pattern. With a herringbone pattern, the ends are straight cuts that are butted against each other to create a 90-degree angle. The cuts are actually quite easy, because they are all straight cuts everywhere, except where the ends meet the end of a wall. Here is a diagram of a herringbone pattern:
This post contains some affiliate links for your convenience. Click here to read my full disclosure policy.
DIY Plank Wall with a Herringbone Pattern: Tutorial
Materials needed to create a herringbone plank wall:
- Compound Miter Saw
 (or circular saw and speed square)
 - Nail Gun
- 24-Inch Level
- Speed Square
- Measuring Tape
- Chalk Line (or marker)
Steps:
1) Measure and find the center of your wall. Use a long level and a marker, or a chalk line, to draw a vertical line all the way down the center of your wall.
2) Grab your first two boards. Again, note that all of your boards (except those that terminate at the end of a wall or meet up with a wall in the corner) will be cut to the EXACT SAME LENGTH and will be straight cuts. Our boards are 28 inches long.
Butt the end of your boards together to form a 90-degree angle. Align the boards along the center line that you marked on the wall. The center line should intersect the middle of the two boards. See below for an illustration of what I mean (the grey line represents the center line that you will have drawn on your wall).

To confirm that your angle is correct, place your speed square in the corner created by the boards. If your 90-degree angle is perfect, the speed square to sit in the corner without shifting around.
Once you are certain your angle is correct, nail the boards into place with your nail gun. If you don't have a nail gun, you could use a hammer and nail to do it the old-fashioned way. Be sure to get at least one nail per board in a stud so that they are sufficiently secured to your wall.
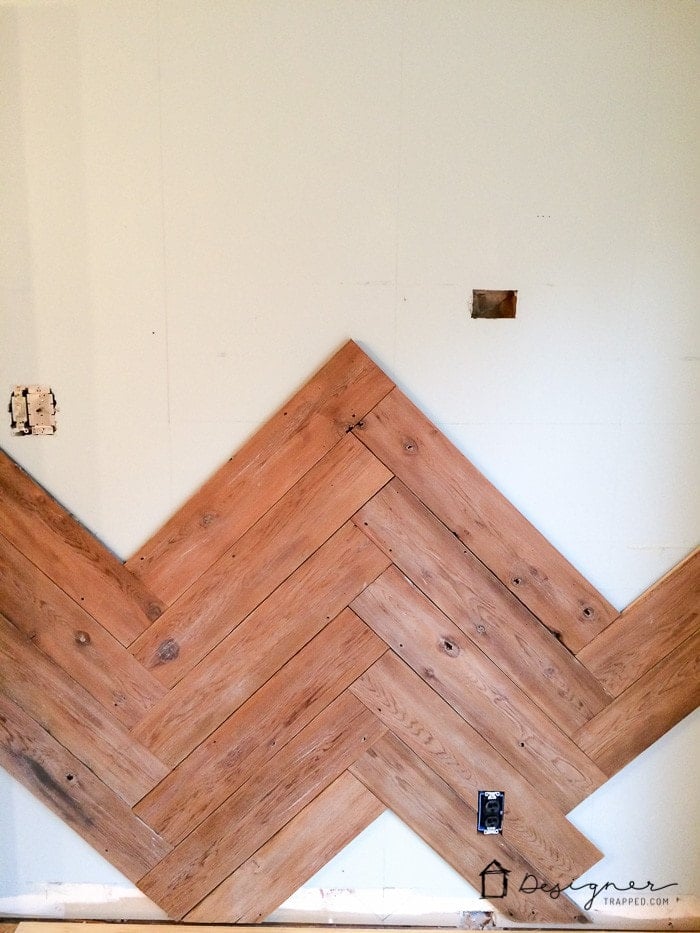
3) Continue adding boards and confirming your angles before nailing them into place. It moves fairly quickly, with the exception of having to make some special cuts to allow for outlets and light switches. Just mark and cut the boards accordingly.

And here is the finished product. We LOVE IT! This gorgeous DIY plank wall now serves as the perfect backdrop for the casual sitting area in our new kitchen. And for years it served as a beautiful background for our kitchen table (now we have seating at the island and opened the kitchen to our dining room, so we no longer needed the table in the kitchen).
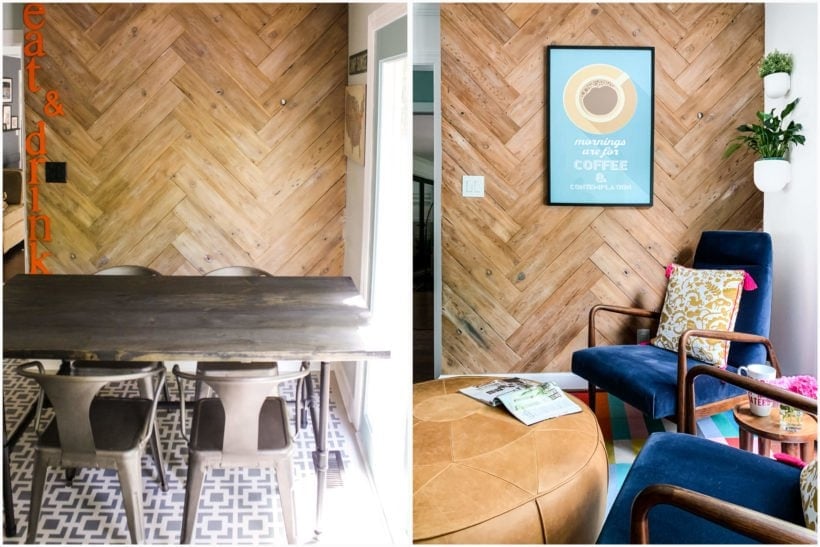
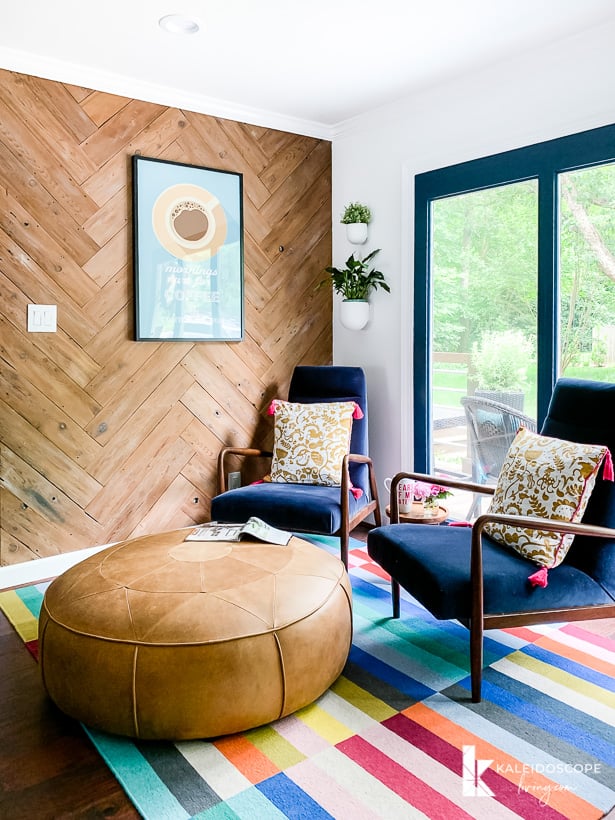
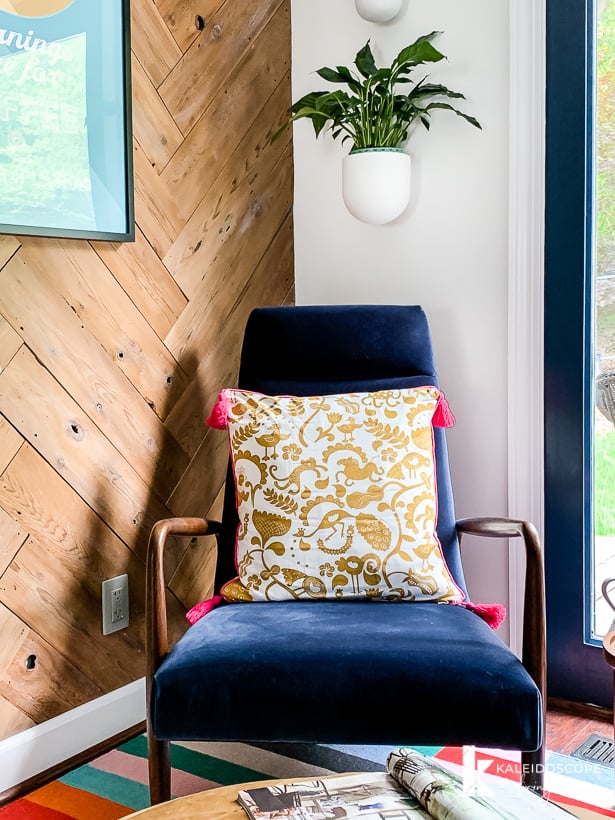
This awesome herringbone wall is an amazing focal point for any room and is one of my favorite accent wall ideas we've ever used, but don't forget the rest of your space!
Other posts you may enjoy:
- The Easiest Board & Batten Accent Wall Tutorial
- DIY Wood Plank Wall
- Modern DIY Plank Wall Tutorial
- How to Paint Kitchen Cabinets Without Sanding or Priming!
- How to Choose Paint Colors for Your Home: 6 Simple Tips to Follow
- 8 Interior Design Mistakes You Don’t Even Know You are Making (and How to Fix Them)
Wondering how I approach transforming rooms and spaces in our home? Check out Designer in a Binder®.

And if you want exclusive content and behind-the-scenes sneak peeks, be sure to subscribe before you head out!

Last Updated on May 8, 2025
That easily was the best and most sinple way ive ever seen an accent wall done. It looks like you used about 60 planks. How long were the nails you used? It looks amazing: professional even. Great job.
Awesome job!
Thank you Kennedy!
Wow! You are my hero. That wall is so fantastic, and the wood transformation is amazing. Thanks so much for sharing. I am adding this to my find a place to do this in my house list. :)
Thanks so much, Kelley! We love our herringbone wall!
amazing work! really look nice, warm and comfy! congrats!
Thank you!
The wall looks great! However, aren’t you concerned with having treated lumber in your home?
Thanks, Stephanie! The wood is cedar, so it was not treated :)
Love the herringbone pattern!! This looks totally, professionally, fabulous!!!
Hi Tasha! I LOVE your wall! I had the artsy idea to make this happen in my house and I’m SO glad that you did it first so I don’t have to fumble through and mess it up! I am wondering how you determined the length of your boards in order to get the pattern just right on the wall. Your herringbone looks so delightfully centered :) Thank you!!
Thank you, Stacy! As I recall, we measured the midpoint of the wall and marked it. Then we held two boards up in the herringbone pattern {butted together to form a 90 degree angle} and eye balled the length that would give us 4 equal sections. I wish it was more scientific than that, but there was some guess work involved. I hope that helps some. Let me know if you have any other questions!
Sooooooo Fabulous!!!! Can you tell me what width the wood boards are?
Thank you, Stephanie! I believe they are 6 inches wide. I hope that helps!
I’ve done a few plank and board and batten walls, but never a herringbone pattern. You did a fantastic job! I’m sure it’s going to look even better once the kitchen is completed. Love, love, love!!!
Thanks so much, Katie!
What a great idea! It turned out amazing! Consider it pinned! :)
Awww, thanks so much, Beth! I really appreciate it!
This looks awesome. What a great project upcycle. I love the rustic look of this. I’d love to have this in our bedroom I’m redoing. Hmmmm! It might just happen.
Shannon ~ bohemianjunktion.com
Thanks, Shannon! It would look awesome in a bedroom!
I think you should make a wall like this at my place! hehe So pretty!! You’ve been featured at From Dream to Reality! :)
Thank you so much, Christine! You made my night!
It’s gorgeous! I was watching an episode of House Hunters International recently and there was an apartment in Paris with original floors that were over 100 years old that had the most gorgeous Herringbone floors. So this isn’t just a trend, it should stand the test of time. I LOVE, love, Love it! I’m scanning my house to see were I can put one, I just decided- the back and side of my peninsula in my kitchen!
Thanks so much, Janet! That is exactly why we opted for a herringbone pattern. It’s a true classic! It will look gorgeous on the back of your peninsula. I hope you will share your results!
I don’t blame you for being so excited over this project, Tasha. It is fabulous! Your project is going to be featured at The Scoop this Sunday night. Thank you for linking up!
Oh my goodness, thank you so much, Suzy! You made my day!
That looks awesome! Nice work, and a totally do-able project, too.
It is totally doable, Amelia! You should give it a try!
That looks awesome! I’m a huge fan of re-using wood!! Also, the stain+paint combo is great!!
Thank you so much, Kelly! We are so happy with how this project turned out!
gorgeous! Love how your wall turned out. :)
did you see my table top I blogged about this week? http://www.myrepurposedlife.com/2014/04/wooden-chevron-tabletop-using-shutter-slats.html
catching you this week.
gail
Thank you so much, Gail! I just returned from checking out your AMAZING table top. I love it! Looks like Louie does, too! Thanks so much for catching me this week :)
Tasha, this is incredible and what a great use of old wood! Thanks for sharing it over at The Makers and I hope you are having a great week!
Oh, thank you so much, Katie! My pleasure linking up at your fabulous party! I hope you are having a fabulous week as well!
I absolutely love how this turned out Tasha! This project is totally worth bursting for!
Thank you so much, Carrie! You are so sweet!
Girl…this is awesome! You WOW me with every single projects you make!! Pinning:)
Thank you, Aniko!!!! Now if I can just get that eat-in area furnished, we will be in good shape :)
Oh wow! LOVE it-I am definitely doing this in my morning room! Oh, the possibilities.
Thanks so much, Janai! I would love to see how your project turns out!
Oh I’m SO, SO jealous of your wall! Just amazing! I don’t know how you guys keep coming up with these amazing ideas! I’m DYING to see the rest of the kitchen too :) Thanks so much for linking up at Thursday STYLE! Have a great week :)
Awww, thanks so much, Angela! We are dog tired, but our kitchen makeover is coming along. We have family coming in town this week, so we probably won’t get much done until after Easter, but we are so tired, I think the break will be welcome :)
I love this! What a fantastic way to use what you already had and make it stylish! That wall makes a nice focal point and statement. Well done! :D
Thank you so much, Julie! I am thrilled that is cost us absolutely nothing! I can’t wait to finish the kitchen and to put a table and chairs in front of the wall. Have a great weekend!
I love this SO much! It really makes me miss our similar wood walls in the living room of our old house. They add so much warmth and character! And congrats on marrying the genius and thought to do herringbone :)
Thank you, Melissa! Now I just need to finish the rest of the kitchen. Sigh. We are TIRED! Have a fabulous Friday and weekend!
this is FANTASTIC! I love it SO much!you did an amazing job!
Hi Anna! Thank you so much. We are so happy with how it turned out, and it was actually much easier than I expected. Have a fabulous weekend!
What a cool way to upcycle! You’re right-that fence was very unfortunate. But that wall is gorgeous! Thanks for sharing at Fridays Unfolded!
Alison
Nancherrow
Thanks so much, Alison! It’s my pleasure linking up to your party!
This is awesome Tasha! So funny how styles come back cause my parents did a similar plank wall in their first home. It looks amazing!
That’s funny, Corey! Sounds like your parents have fabulous taste, just like you :)
Um, holy crap. I totally just burst on your behalf. GORGEOUS. Also, your husband knows what herringbone is?!! Marry him all over again. It is incredible!!
Thank you, Kelly! LOL! I just read your comment to Joe. You are right. Any man that knows what herringbone is is my SOUL MATE! I think I’ll keep him for sure :)
That’s so fabulous! LOVE it! And I’m really impressed that not only was your husband on board with the whole plank wall idea but he even knew the word for herringbone ;)
Thank you! LOL! I hadn’t even thought about that, Gretchen. You are right, that is impressive!
This looks amazing!! Never would (wood?) have guessed where you got the wood from. Sorry, couldn’t resist the pun.
LOL! I love puns :)
This turned out amazingly Tasha! I love it- what a great transformation and reuse!!
Thank you so much, Krista! I am so excited about it!
Great job and I love the Herringbone pattern. What an incredible upcycle!
Thank you so much, Carmody!
Hi Tasha, you have out done yourself with this one. I love the herringbone pattern, it looks even more amazing in the wood on the wall. And using the privacy screen, genius! Hold on to that one, he’s a keeper for sure. Was your privacy fence made of cedar? I love the finish you came up with too, it looks great! Thanks for sharing :)
Awww, thank you, Meg! He is a keeper :) We aren’t totally sure what type of wood the planks are, but I don’t think they are cedar. I wish I knew!
That wall looks amazing!! I can’t even believe you made that out of an old fence. Now that’s crafting on a budget if I’ve ever seen it. I can’t wait to see what you come up with for the rest of your kitchen!
Awww, thank so much Courtney! We love it and were VERY excited that it did not eat any money out of our small makeover budget :)
Amazing transformation!! I love your herringbone plank wall! I can’t believe that is the same wood as your privacy wall!! Good luck with your project!
Cheers, Colette
Hi Colette! Thank you. We are tired, but are excited to get it all done and reveal it soon!
This looks amazing & I love it. I just know you home is going to be beautiful.
Thanks so much, Janis!
It looks fantastic! Great work and major props to your hubs! Can’t wait to see the rest of the kitchen reno!
Thank you, Angela! We are sooooo tired, but the kitchen transformation is about 50% done and we are loving it. Can’t wait to show it to all of you soon!
Ummm, so awesome!!! I love it too!! Great job, and kudos to your husband for coming up with the idea! I pinned, because I am determined to get a plank wall in my house someday (my closest doesn’t count, but I love it too) I want a big accent wall! Thanks for sharing!! I can’t wait to see the rest of your kitchen when you finish!
Hi Mindi! Thank you so much. I know, I was so impressed when Joe suggested a herringbone pattern. The plank wall in your closet is amazing. Well, your whole closet is amazing. I’ll come to your house and give you a herringbone plank wall if you come re-do our closet :)
Tasha, I love this! It looks beautiful. What a perfect use of your unfortunate looking privacy fence (ha!)! You and your husband did a wonderful job. – Bre @ Average But Inspired
Thanks so much, Bre! We are so happy with how it turned out!
I cannot believe that wall. This is my favorite project you did so far even though I love and are amazed at them all. The fact that you saved that privacy wall and made it look so beautiful is so great. Paul & I are so into recycling things, the reason we have so much stuff. Ha, Ha. You both just keep amazing me with all your interesting projects.
Thanks, Kathy! I think it’s my favorite project, too! It was all Joe’s idea!
This is sorta kinda totally amazing! I love it. I love the texture of it and the color of the wood is beautiful. What a great way to recycle old wood. Great job!
Hi Shavonda! Thank you! We are totally in love with it :)
Fabulous and kudos to your great husband! Loving the look and really, the price was so right! Anxious for the full reveal.
Thanks so much, Debra! I am anxious for the full reveal, too. I can’t wait to get it all done. It’s going to be SUCH a transformation!
Love it, what a great way to recycle the fence! Eagerly looking for your kitchen reveal now:)
Thanks so much, Emilie! I hope to have the full reveal up by early May, but you will start seeing more kitchen projects here and there between now and then :)