Ikea Cabinet Doors & Drawers HACK (now you don’t have to use the pre-drilled holes!)
This post is sponsored by Mohawk Consumer Products. As always, all opinions are 100% mine from using Mohawk’s awesome products for myself.
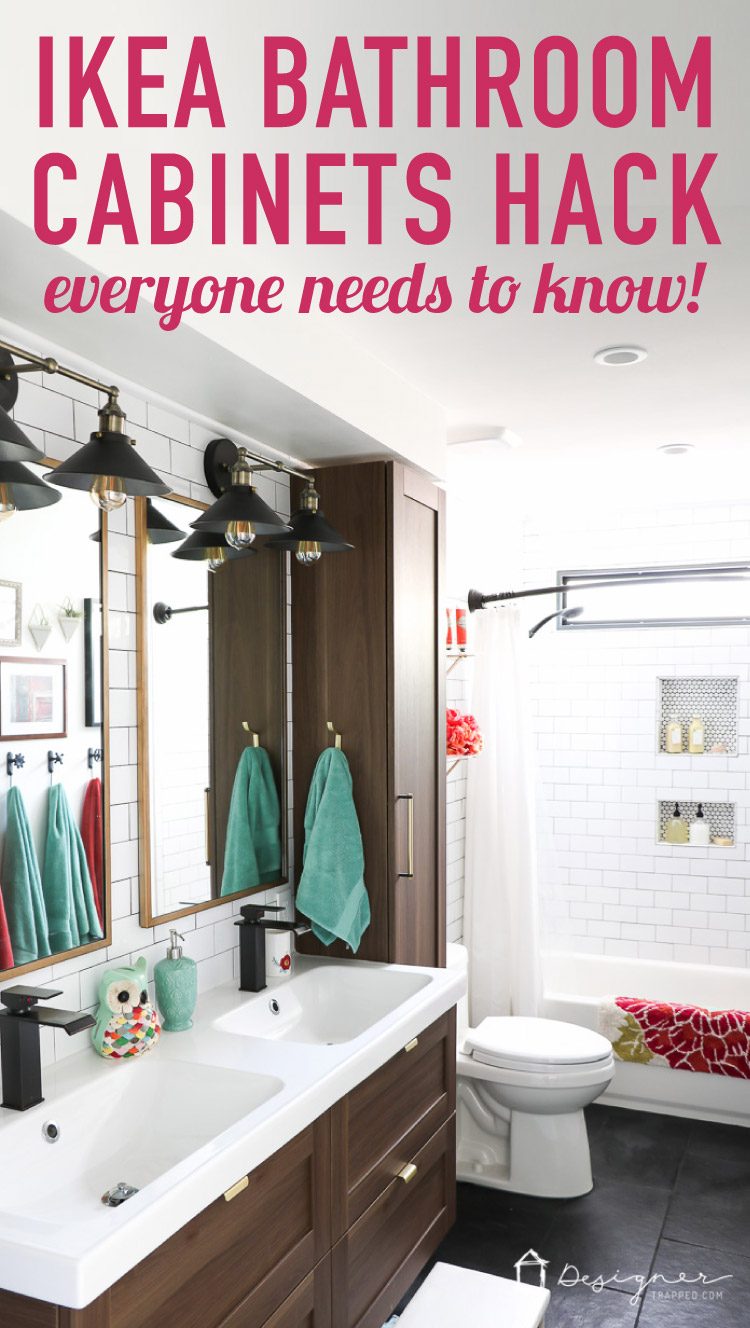
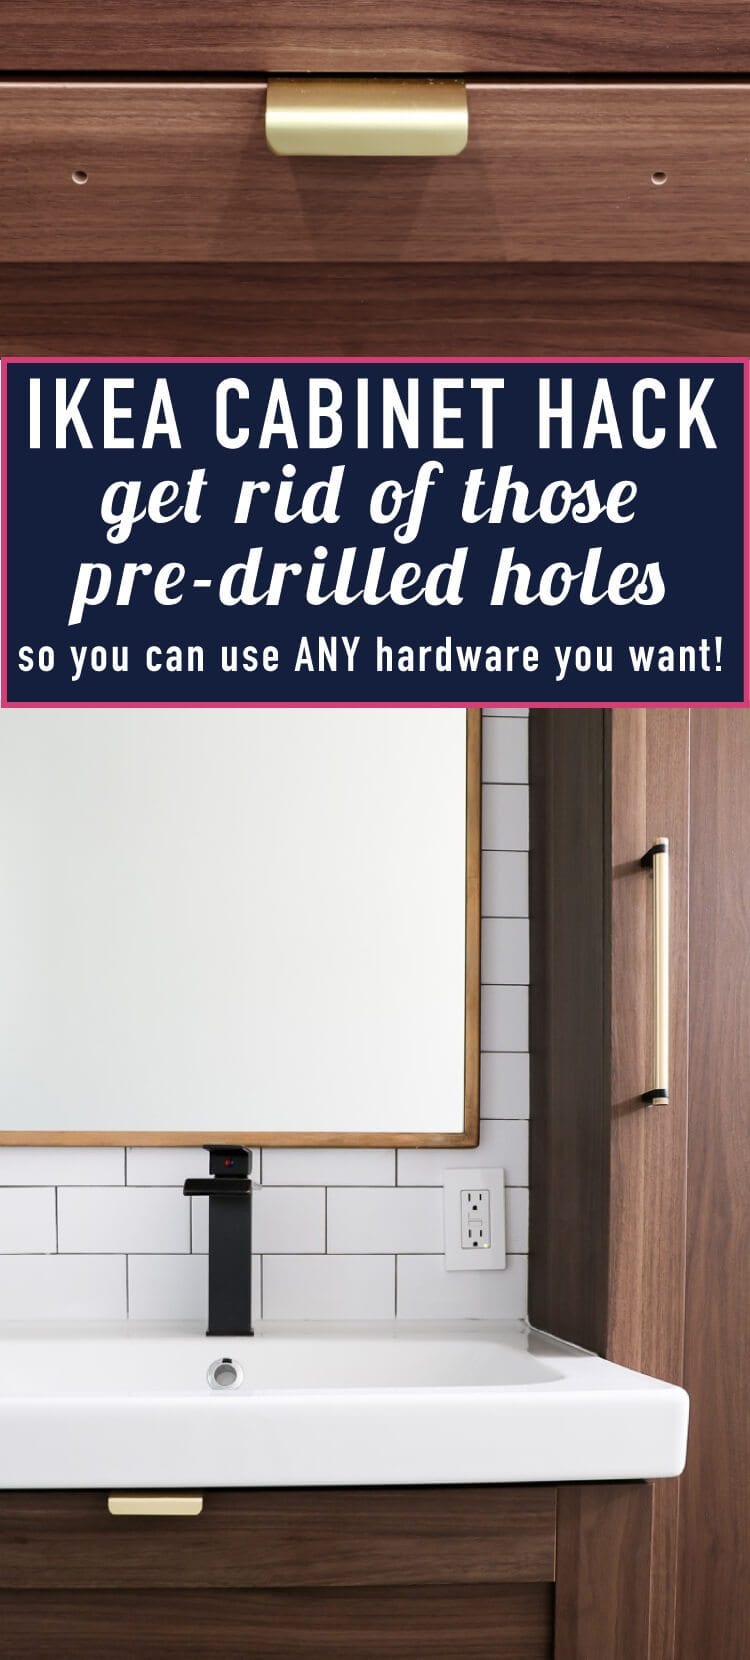
Y'all, I get SUPER excited when I come up with a solution that I know tons of people can benefit from and this is one of them. I am a BIG fan of Ikea cabinets. We installed an entire Ikea kitchen in our last house and were beyond impressed with it. So it was a no-brainer for us to choose Ikea cabinets for our recently renovated twin girls' bathroom (which you can read about here). But there was one problem…. I didn't care for any of the cabinet and drawer hardware but the Ikea cabinet doors come predrilled to fit Ikea hardware (which is an odd size). Plus, I had my heart set on hardware from Rejuvenation. So, I came up with this Ikea cabinet doors hack and can't believe how easy it was! Read on to learn how to hack your own Ikea cabinet doors! This post contains some affiliate links for your convenience. Click here to read my full disclosure policy.
Ikea Cabinet Doors Hack: A Full Tutorial
Materials needed:
- Mohawk Epoxy Putty Stick (I used Walnut, but it comes in a variety of colors–choose a color that is as close to your cabinet color as possible)
- Mohawk Pro-Mark Wood Touch-up Marker (if your epoxy putty is a bit lighter than your cabinet, you can darken it a bit–note that I went a little bit too dark)
- Mohawk Brush Tip Graining Marker (choose a color that matches the grain of your cabinet, if any)
- A leveler card or old credit card
- A small dish of soapy water
- A sharp knife
Steps:
The written instructions are below this video tutorial. This is one of those projects that is easier to SHOW you video than just instructions + photos. The video will play after a brief ad.
1) Mix a small amount of liquid soap into about 2 ounces of water.
2) Cut a small piece of your Epoxy Putty Stick off and knead it with your fingers until the color is totally uniform. You will feel it getting warm in your fingers. If it starts sticking to your fingers, dip your fingers in the soapy water and continue to knead. Know that the working life of the epoxy is short–it's only about 6 minutes after mixing.
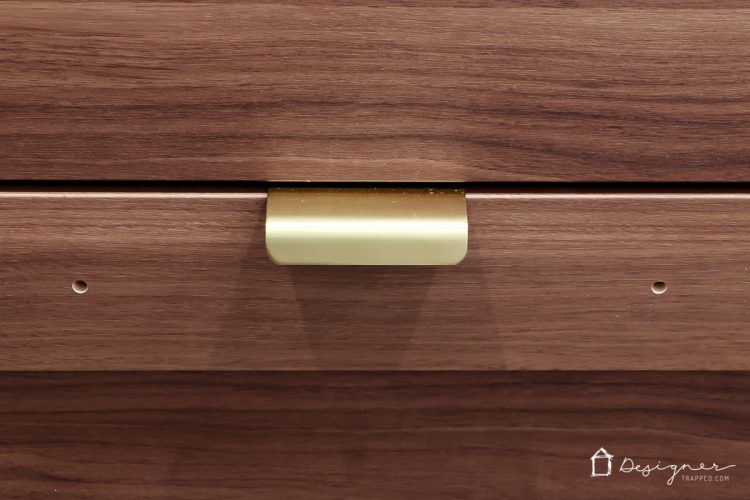
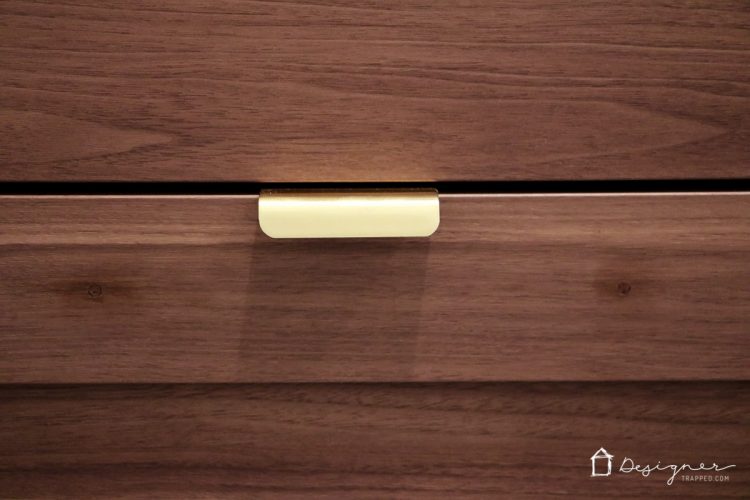
3) Once the color is totally uniform, push the epoxy putty into the holes using your fingers. Then, use a leveler card or old credit card to remove any part of the epoxy putty that protrudes higher than the surface of the wood. You want the epoxy totally level with the surface of your Ikea cabinet doors. If the epoxy begins sticking to the card you are using, just rub the epoxy lightly with the soapy water mixture.
4) Allow the filled area to cure for at least 20 minutes.
5) If desired, use a Mohawk Pro-Mark Wood Touch-up Marker to go over the filled hole to more closely match the color of your Ikea cabinet doors and drawers. Apply it to the repaired area and then blend it with your finger. Note that I went a little too dark with mine, but it's not the end of the world! Still, I would advise starting lighter–you can always go darker if you need to. And if your epoxy putty matches perfectly, you can skip this step altogether.
6) If desired, use a Mohawk Brush Tip Graining Marker to go over the repaired hole area to mimic the grain of your cabinet. Blend it with your finger.
6) The area of the holes on the Ikea cabinet doors is so small, I didn't feel the need to add a top coat for the repaired holes, but you certainly could if you want to!
That's it! If you REALLY look closely and hunt for the holes, you can see the areas I repaired on the Ikea cabinet doors and drawers (the “after” picture below really draws attention to them so I could show you what it looks like close-up), but from even a slight distance away, they are GONE and I was able to use whatever cabinet hardware I wanted. Woo hoo!
 |  |
Here's the result when I step back with my camera.
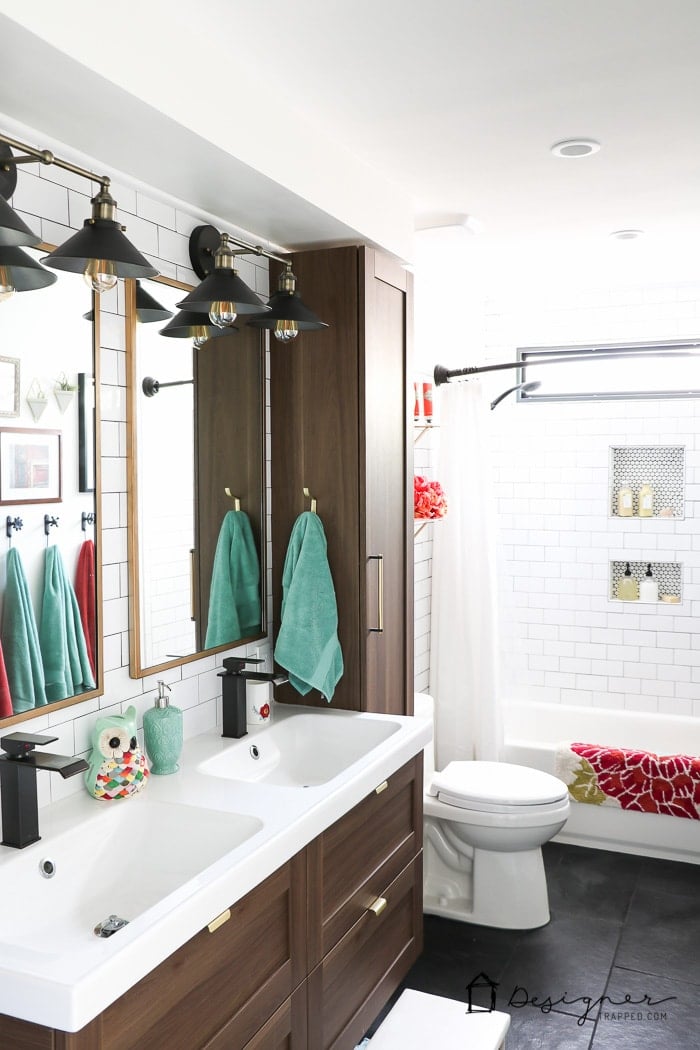

Pretty awesome, huh? If you want to check out the full details of our DIY bathroom remodel, just click here.
[mv_create 1 11 200 2016 key=”1″ type=”list” title=”Most Popular Projects” thumbnail=”<a href=” https designertrapped com wp content uploads diy home decor projects blog jpg a]

Last Updated on August 10, 2021
Wow what an awesome idea!! I never thought to do this on a wood grain cabinet! I filled the holes on our kitchen cabinets with wood filler so I could use different handles, but we painted the cabinets so it was super easy to hide. Your bathroom looks amazing!
amandakatherine.com/blog