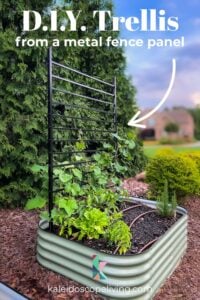
Modern DIY Garden Trellis
After hunting around for an attractive, modern trellis for our raised garden beds and finding absolutely nothing we liked, we decided to make our own. The DIY trellis design we came up with is sturdy, durable, and absolutely gorgeous. Best of all, it's a quick and easy project! Read on for the full tutorial.

Back in June of 2023, we added raised Vego Garden Beds to our yard to grow veggies. We have absolutely loved them (you can read our unbiased review of our Vego Garden Beds here)! Vego actually sells trellises that are compatible with their raised beds, but they didn't have the look we wanted. We hunted around for an option that we liked, but couldn't find anything that was just right. Then we came up with this simple and easy way to create a gorgeous and modern DIY trellis using a metal fence panel. We made two in less than an hour. Quick and easy is my favorite kind of DIY project 🙌🏻
This post contains affiliate links for your convenience. Click here for my full disclosure policy.
How to Make a DIY Trellis from a Metal Fence Panel
Materials & Tools Needed
- 4 x 6 black metal fence panel
- Two pieces of 1/4 inch x 4 foot rebar
- Zip ties
- Heavy-duty mallet
Steps
You will install the fence panel sideways so that the metal pickets/balusters run horizontally instead of vertically. This also means the fence panel rails will run vertically, and the bottom of the rails will actually sit below the surface of the soil. This diagram I made should help give context to the steps below.
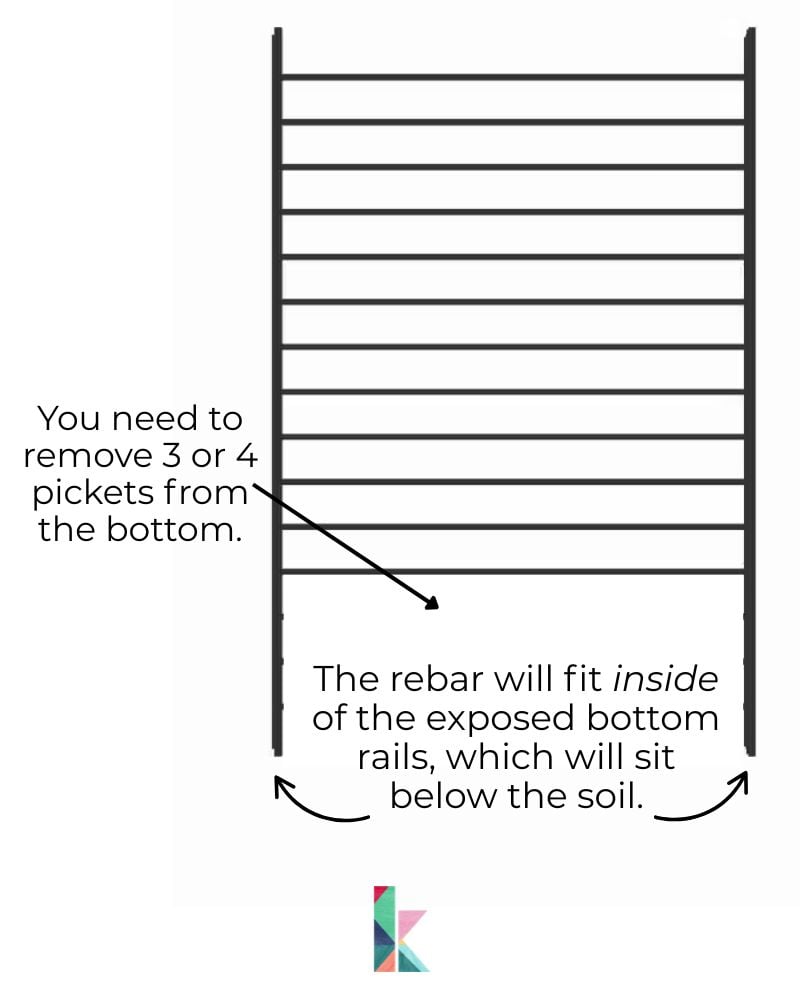
Step 1: Remove 3 or 4 pickets from the bottom of the fence panel.
Step 2: Decide where you want your trellis to sit and mark the soil where the bottom rails need to go.
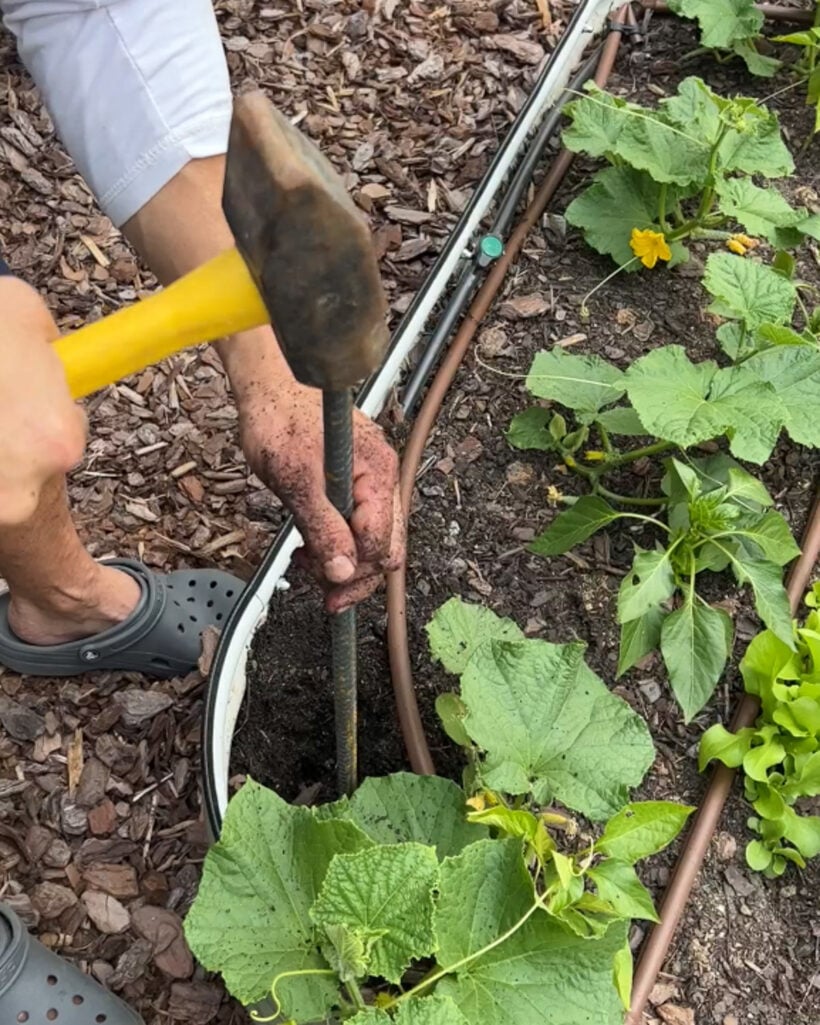
Step 3: Use a heavy-duty mallet to drive a piece of rebar into the soil/ground where you marked each rail. Make sure the rebar is plumb as you drive it into the soil/ground. Our rebar was long enough that we were able to drive it into the ground below our garden beds for extra stability. You want to leave about 12″ of rebar exposed above the soil.
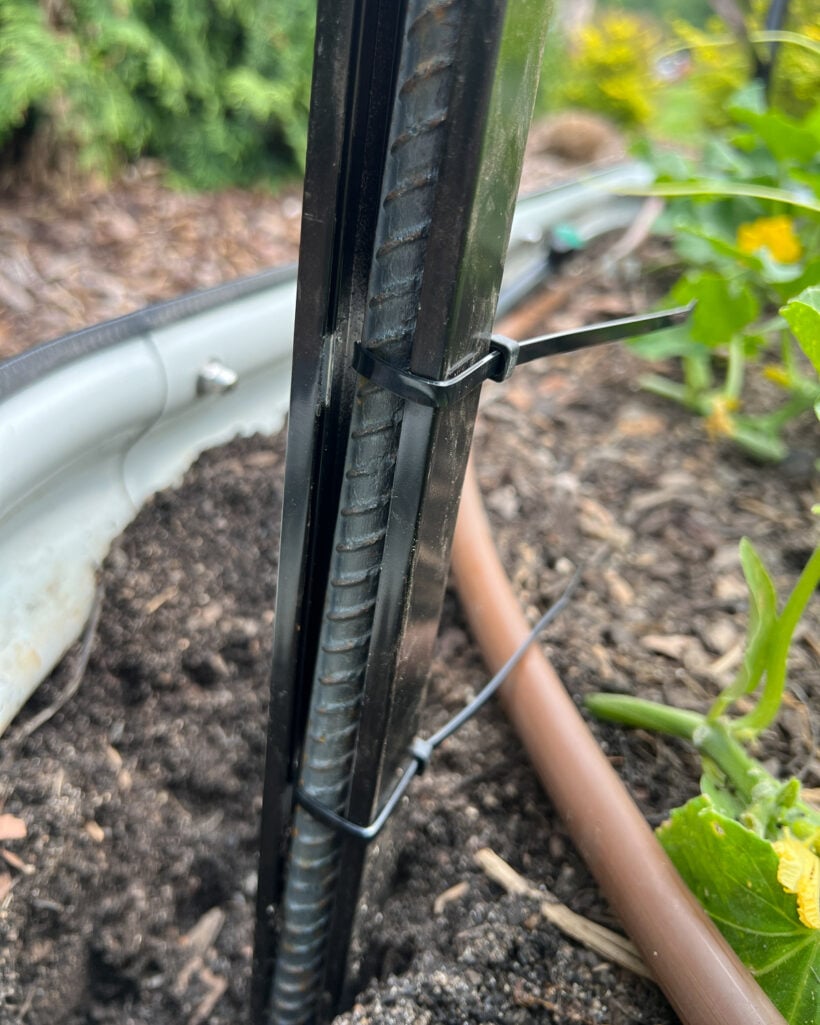
Step 4: After you rebar is installed, place the fence panel. You want the rebar to fit inside the bottom rails, as pictured below. You want to make sure your fence panel is level and plumb. You may need to remove the fence panel and make some slight adjustments to your rebar until everything sits perfectly.
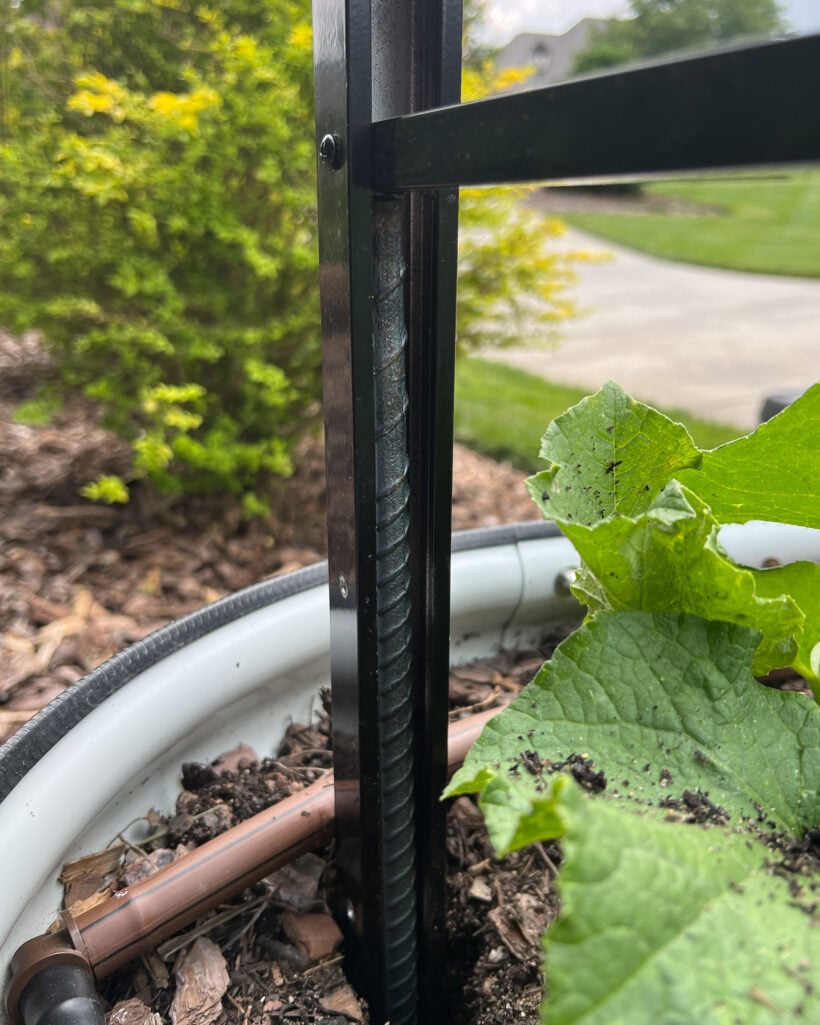
Step 5: Use heavy-duty zip ties to secure the fence panel to the rebar. This step may be overkill, but we wanted to be sure our fence panels couldn't possibly blow out in a bad storm with very heavy winds. It took about 30 seconds, which feels worth it for the extra security.
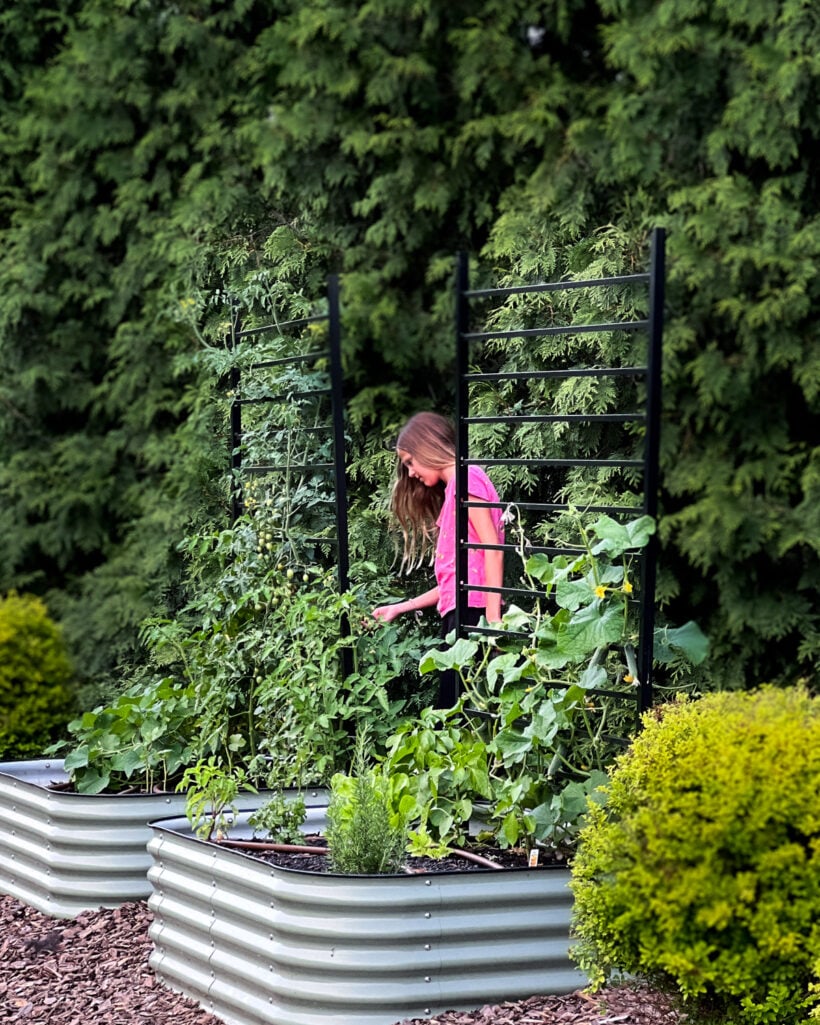
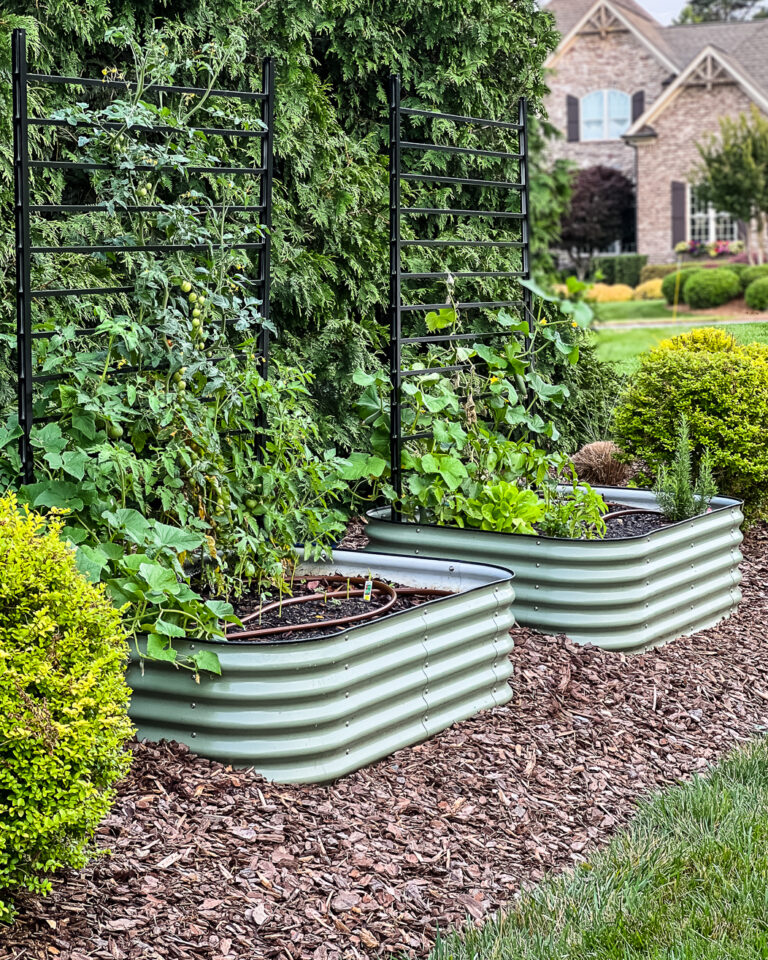
That's it! I told you it was easy. We couldn't be happier with how our DIY trellises turned out. We installed them almost 2 years ago and they are holding up perfectly–no rust, peeling, fading or any issues at all! Here's a look at how they turned out.
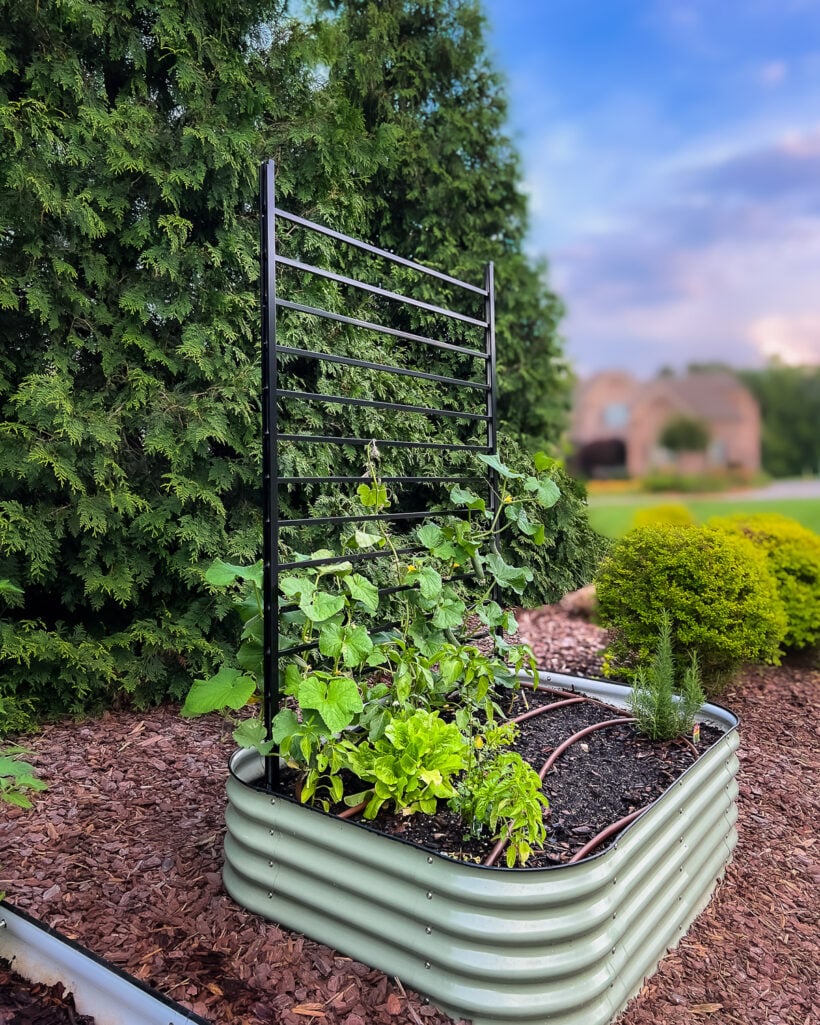
Here's a look at just one of the DIY trellises from a different angle. Isn't it pretty?!
I hope this post has been helpful if you have been looking for a modern garden trellis but have had trouble finding one. I promise, this DIY trellis project is one of the easiest we have ever tackled, so it is very beginner-friendly and the payoff is awesome! Happy gardening!

Wondering how I approach transforming rooms and spaces in our home? Check out Designer in a Binder®.

And if you want exclusive content and behind-the-scenes sneak peeks, be sure to subscribe before you head out!