Personalized Gifts With Cricut Infusible Ink
Last Updated on September 6, 2022
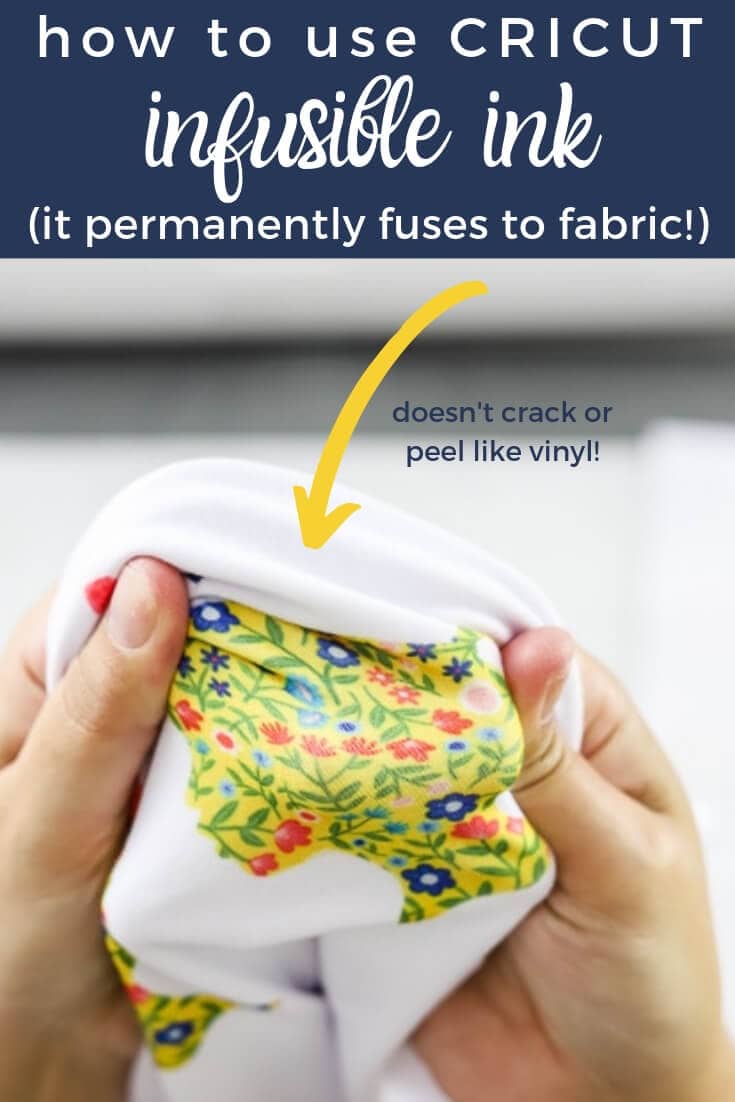
Learn how easy it is to make personalized t-shirts AND coasters using Cricut Infusible Ink! Cricut Infusible Ink is a game-changer because it's permanent and becomes part of the material you use it on!!!!
Cricut changed cutting machines as we know them when it released the incredibly versatile Cricut Maker in 2017. I mean, it cuts FABRIC, crepe paper and so much more. Well, now Cricut has released another product that opens up a whole new world of customization possibilities. Cricut's new Infusible Ink is a GAME-CHANGER if you like to make personalized gifts for people (or yourself)! Infusible Ink transfer sheets and markers allow you to get REALLY bold and vibrant colors that are permanently fused into the material you put your design on.
Today, I'm going to show you how to make some fun t-shirts using Cricut Infusible Ink Transfer Sheets AND a coaster using Cricut Infusible Ink Markers. I chose to make some cute t-shirts and coasters in honor of Sister's Day (which is coming up on August 6th), but you could use these tutorials to make gifts absolutely any time of the year!
Before we dive in, let's answer some questions and give you an overview since this Infusible Ink is so new to the market. In fact, this is the first time I used it!
This is a sponsored conversation written by me on behalf of Cricut. The opinions and text are all mine.
What is Cricut Infusible Ink?
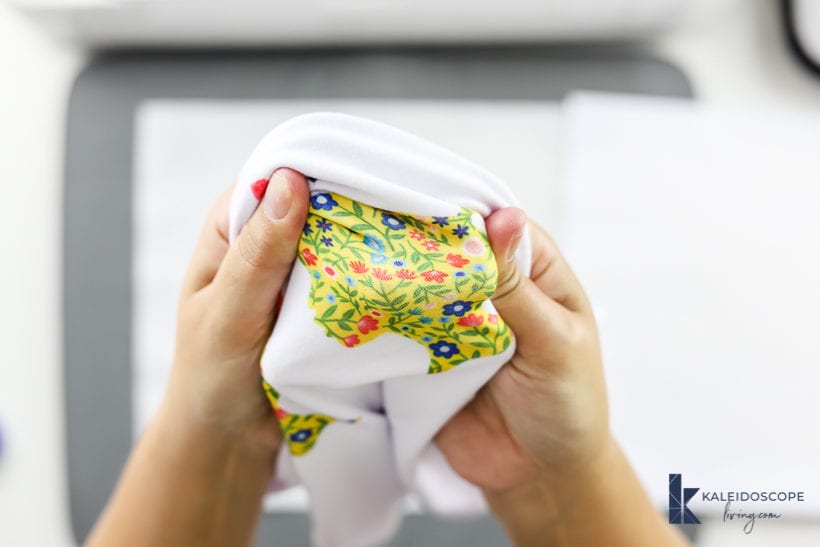
Infusible Ink becomes part of the material you are using it on. That means it is peel-proof, flake-proof and wash-proof.
It differs from heat-transfer vinyl. Vinyl is attached to the material using an adhesive. That means it can peel and flake over time. You can see in the photo below that infusible ink actually becomes part of the material it is used on.
How To Use Cricut Infusible Ink
If you have used heat transfer vinyl before, you need to know that using Cricut Infusible Ink is fairly different. It’s REALLY IMPORTANT to read through how using Cricut Infusible Ink works from start to finish. So, basically, forget everything you know and start from the beginning.
OVERVIEW of the Cricut Infusible Ink process
Don't worry–detailed tutorials for the t-shirts and coasters follow, but here's an overview of the process that I think is important to understand first :)
Step 1: Choose your materials.
You can choose from Infusible Ink Transfer Sheets or Infusible Ink Pens or Markers for your design. Then you also need to choose an Infusible Ink Compatible Blank (a coaster, t-shirt, onesie, etc.). From June 21st to October 2, 2019, Infusible Ink products are available exclusively at Michaels.
Step 2: Create your design & cut it out.
This part is business as usual. You want to use Cricut Design Space to create your design. Then use your Cricut Maker to cut it out of an Infusible Ink Transfer Sheet. Or draw your design on laser copy paper with Infusible Ink Pens or Markers. Be sure to mirror your design before cutting it out! Place it color side up on your cutting mat.
Step 3: Apply heat.
Use your Cricut EasyPress 2 to apply heat and transfer your design onto your blank.
This post contains some affiliate links for your convenience. Click here to read my full disclosure policy.
How to Make a T-Shirt With a Cricut Infusible Ink Transfer Sheet
Materials Needed
- Cricut Maker or Cricut Explore cutting machine
- You can read my unbiased review of Cricut vs. Silhouette in this post.
- You can read all about the incredible versatility of the Cricut Maker in this post.
- Cricut StandardGrip Machine Mat
- Cricut EasyPress 2
- Cricut EasyPress Mat
- Cricut Blank (compatible with Infusible Ink)
- Infusible Ink Transfer Sheets
- Butcher paper (comes with sheets)
- White Cardstock (80 lb.)
- Lint roller
- Scissors and tweezers
Steps
Step 1:
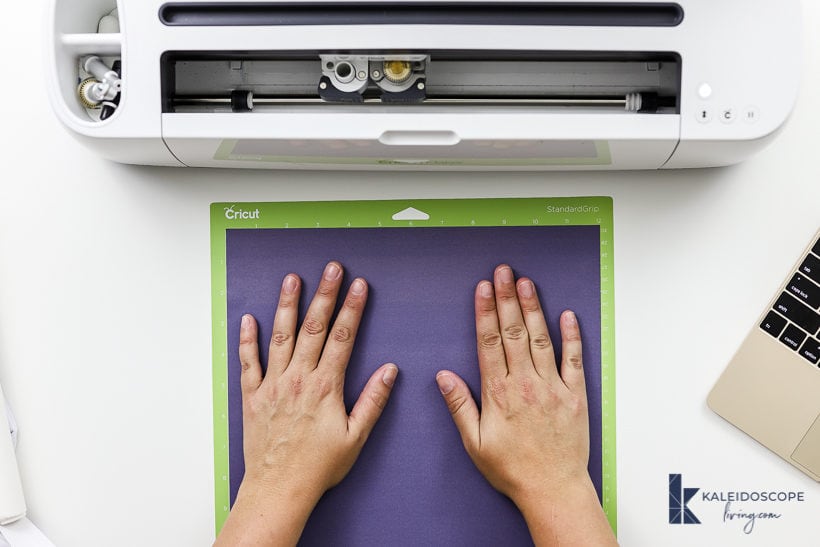
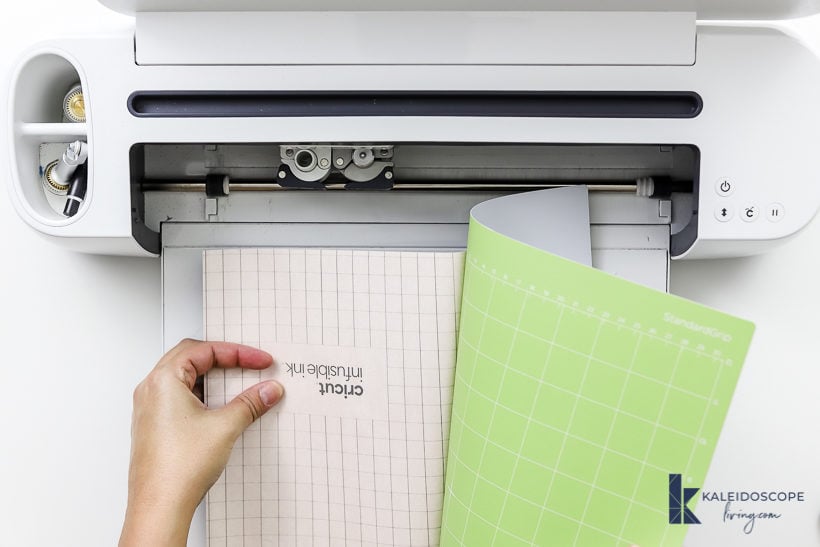
Place your Infusible Ink transfer liner side down on your cutting mat. I used my standard grip mat.
Step 2:
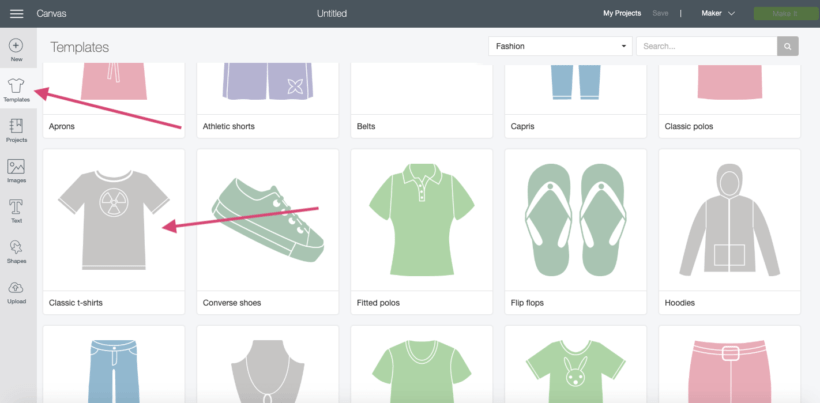
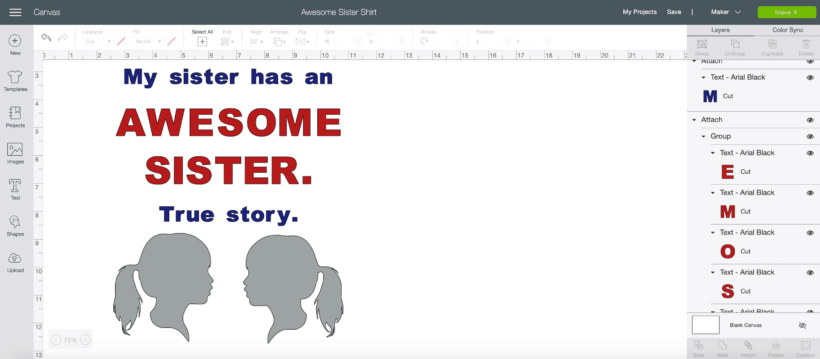
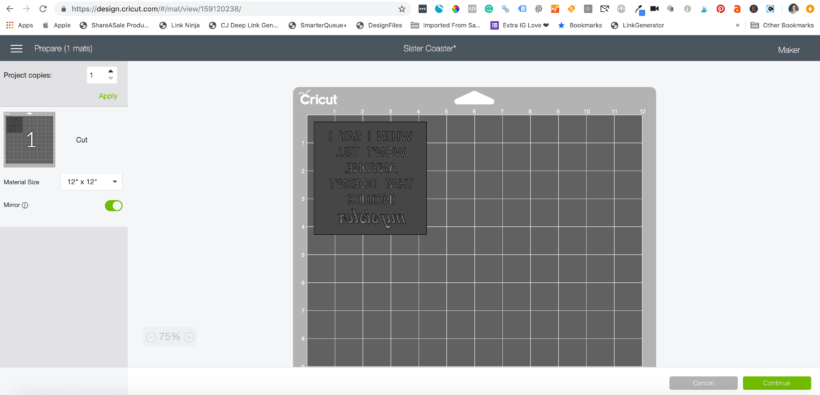
Create your design in Cricut Design Space. If you want to, you can choose one of the easy-to-use templates to help size your design. I decided to just measure my t-shirts.
Because I wanted the spacing of my design to remain exactly as it was shown on the screen, I “attached” the portions of my design that would be cut out of the same infusible ink sheet before moving on to the next step.
Step 3:
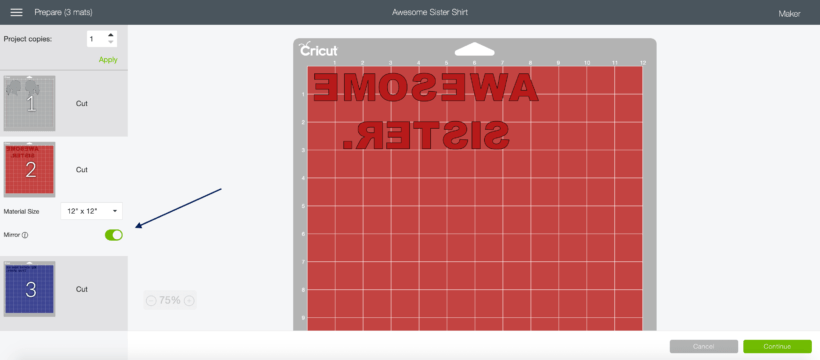
Cut out your design using your Cricut Maker. Select “browse all materials” and then select “Infusible Ink Transfer Sheet.” If you are using a Cricut Explore machine, select “custom” on the dial. Be sure to mirror your design before you cut it out!
Step 4:
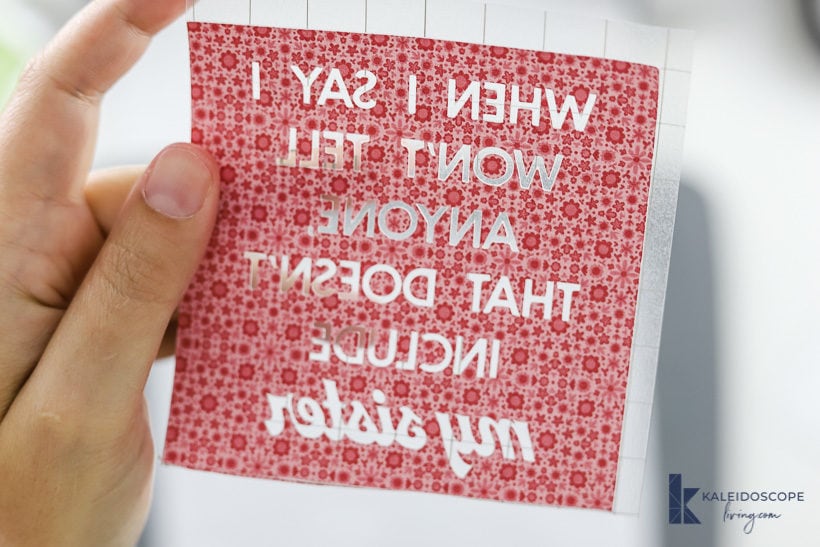
Now it’s time to weed your design. Weeding Infusible Ink is much different than weeding heat transfer vinyl!
To weed Infusible Ink Transfer Sheets, you use what is called the “cracking” method.
First, peel the cutting mat away from your cut design.
Next, you need to curl and roll the cut paper. You’ll know you are doing it right if you hear a light cracking sound as the cuts separate. Don’t worry if your design lifts off the liner a little bit.
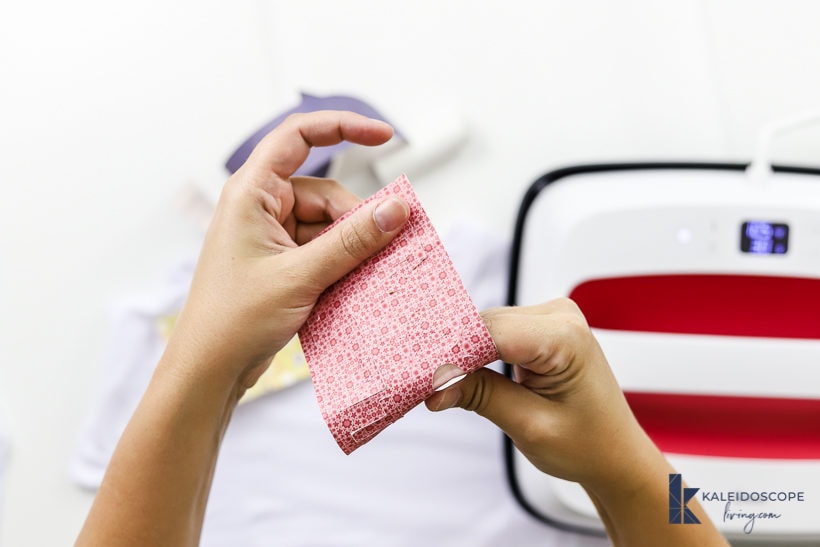
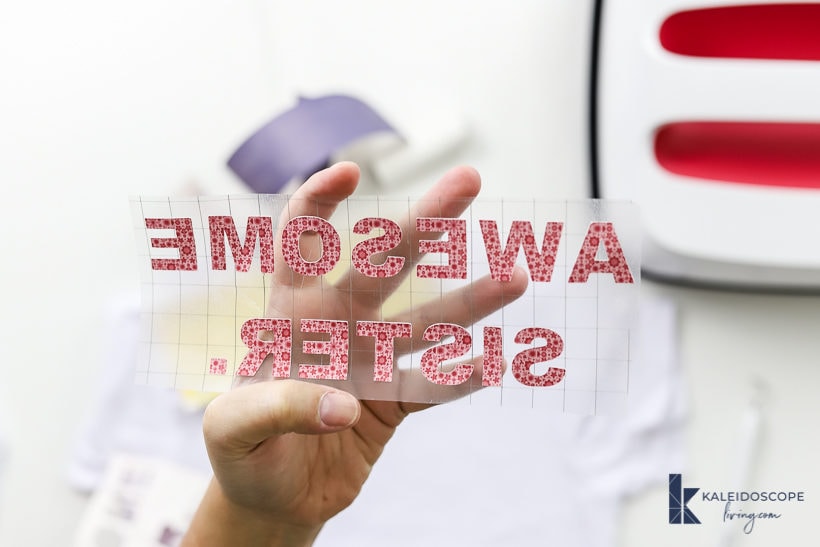
Once you have finished “cracking” your design, remove the excess paper so that just your design is left on the liner.
Step 5:
If needed, trim the clear liner so that it does not extend beyond the heat plate of your Cricut EasyPress 2.
Step 6:
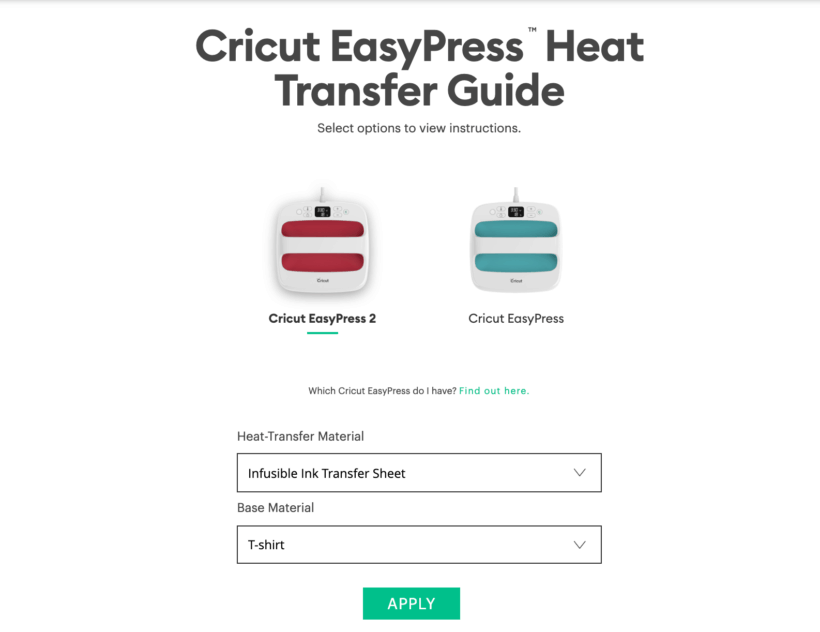
Now you need to determine your EasyPress heat settings. You can use the original EasyPress, but your results may not be as good. Regardless of which machine you are using, I recommend clicking here to go to the interactive Cricut EasyPress Heat Transfer Guide put in your exact machine and materials to get the proper recommended heat settings before you begin. This is what my search & results looked like:
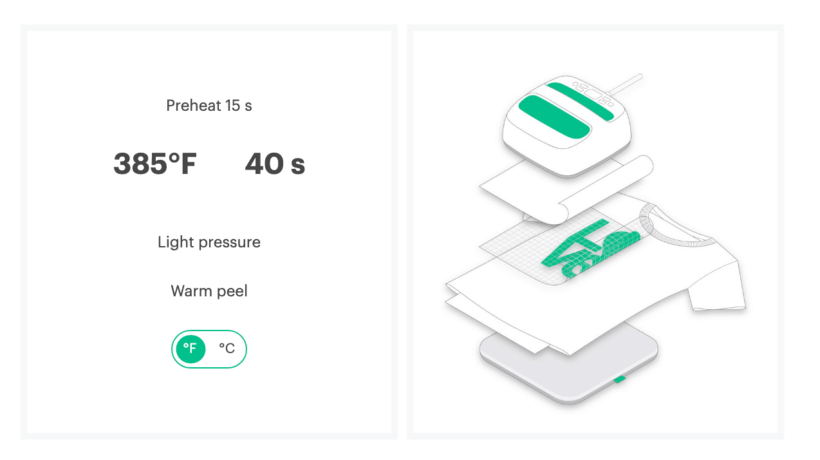
Step 7:
Pre-heat your EasyPress to whatever temperature settings are recommended for your machine and materials. I pre-heated my EasyPress 2 to 385 degrees. While it heats, place your t-shirt on the Cricut EasyPress mat and place a sheet of white card stock inside the t-shirt.
Use a fresh lint roller to remove any lint from your t-shirt. THIS IS VERY IMPORTANT. DON’T SKIP THIS STEP. Even small amounts of lint on a shirt will impact the quality of your transfer.
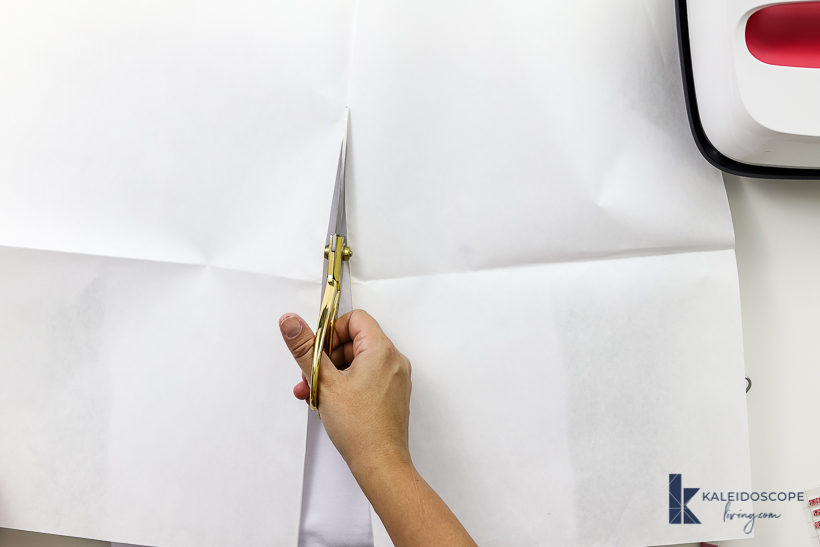
Cut a sheet of butcher paper so that it’s larger than your Cricut EasyPress plate. Place it on top of your t-shirt. Then press your Cricut EasyPress on top of the butcher paper at 385 degrees for 15 seconds to pre-heat your t-shirt. This removes any moisture and wrinkles from the surface, which is critical. DON’T SKIP THIS STEP EITHER!
Step 8:
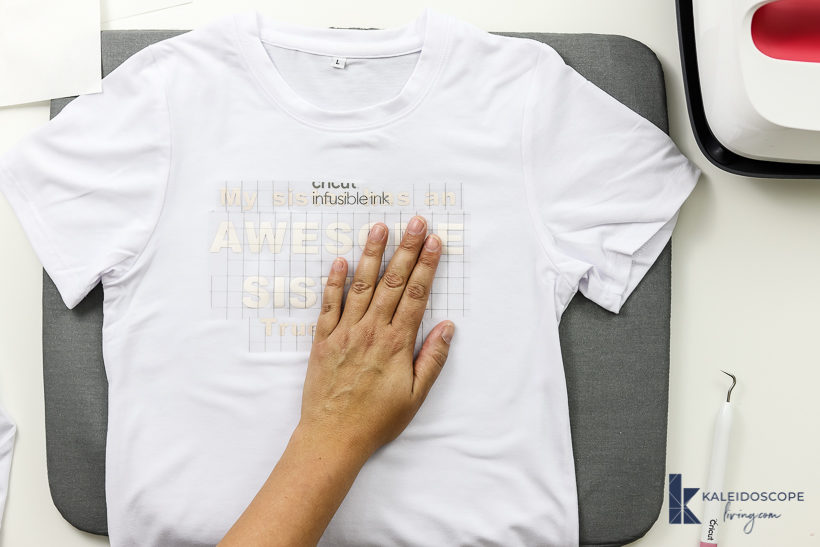
Once your t-shirt has cooled, place your weeded design face down on your t-shirt (so that the clear liner is on the top). Then cover your design with butcher paper.
Heat your design at 385 degrees for 40 seconds. Don’t slide or move your EasyPress around at all.
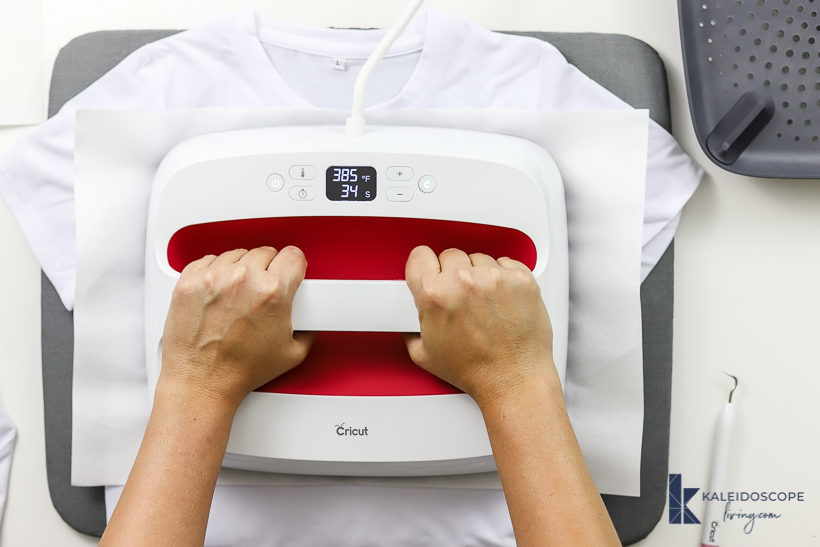
When the timer goes off, slowly lift your EasyPress straight up, so you don’t accidentally move the design. Let your project cool completely. Then remove the butcher paper and the liner.

That's it! Check out just how fabulous these t-shirts look!


How to Make a Coaster With a Cricut Infusible Ink Transfer Sheet
Materials Needed
- Cricut Maker or Cricut Explore cutting machine
- You can read my unbiased review of Cricut vs. Silhouette in this post.
- You can read all about the incredible versatility of the Cricut Maker in this post.
- Cricut StandardGrip Machine Mat
- Cricut EasyPress 2
- Cricut EasyPress Mat
- Infusible Ink Compatible Blank (I used these Cricut Square Coaster blanks)
- Infusible Ink Transfer Sheets
- Cricut Heat-Resistant Tape
- Butcher paper
- Lint-free cloth
- Scissors & tweezers
Steps:
Step 1:
Place your Infusible Ink transfer liner side down on your cutting mat. I used my standard grip mat.
Step 2:
Create your design in Cricut Design Space. Be sure to size your design to fit on your coaster blank. Since the square coaster blanks I used are 3.75″ x 3.75″, I added a 3.75″ square to my canvas so that I could size my text appropriately. I attached my design again (as described in the t-shirt tutorial above) so that the spacing and placement would remain as it looks on the screen.
Be sure to mirror your design before you send it to your Cricut!
Step 3:
Cut out your design using your Cricut Maker. Select “browse all materials” and then select “Infusible Ink Transfer Sheet.” If you are using a Cricut Explore machine, select “custom” on the dial. Be sure to mirror your design before you cut it out!
Step 4:
Now it’s time to weed your design. Weeding Infusible Ink is much different than weeding heat transfer vinyl!
To weed Infusible Ink Transfer Sheets, you use what is called the “cracking” method.
First, peel the cutting mat away from your cut design.
Next, you need to curl and roll the cut paper. You’ll know you are doing it right if you hear a light cracking sound as the cuts separate. Don’t worry if your design lifts off the liner a little bit.
Once you have finished “cracking” your design, remove the excess paper so that just your design is left on the liner.
Step 5:
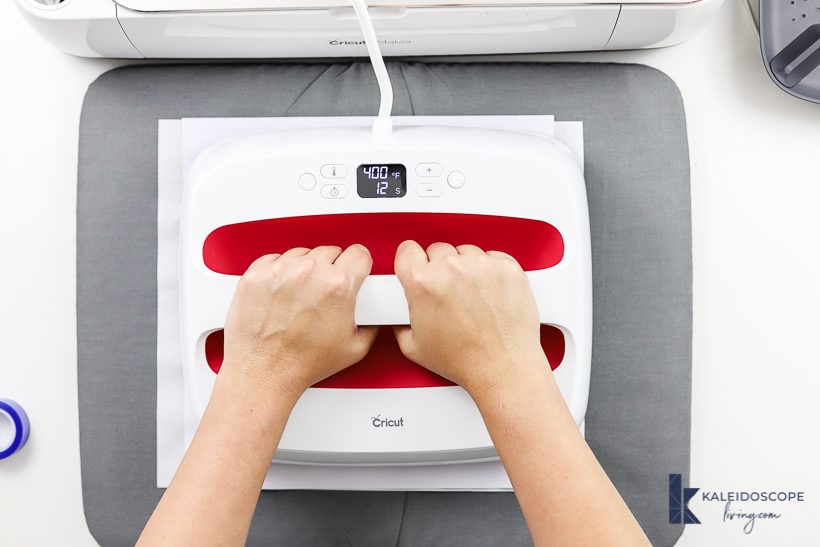
Now it's time to prep your coaster for the transfer! First, use a lint-free cloth to remove any debris from your Cricut coaster blank and make sure your hands are dry and lotion-free.
Cover your Cricut EasyPress Mat with butcher paper to protect it so you don't accidentally transfer infusible ink onto it :) Then place your design face down on your coaster blank, using heat resistant tape to secure it in place (if needed–the sticky backing of the infusible ink transfer sheet may be enough to keep it in place). Next, place your coaster on top of the butcher paper and mat with your design facing up. Finally, cover your coaster with white cardstock.
Step 6:
If you are using a Cricut EasyPress 2, press your design at 400°F (205°C) for 60 seconds. If you are using the original Cricut EasyPress, check out what settings to use with the Cricut EasyPress Heat Transfer Guide.
Step 7:
When your EasyPress timer beeps, slowly lift it away from your coaster, trying not to move your coaster or butcher paper in the process. Your coaster will be HOT. Let it cool. Then remove the cardstock, tape and your design.
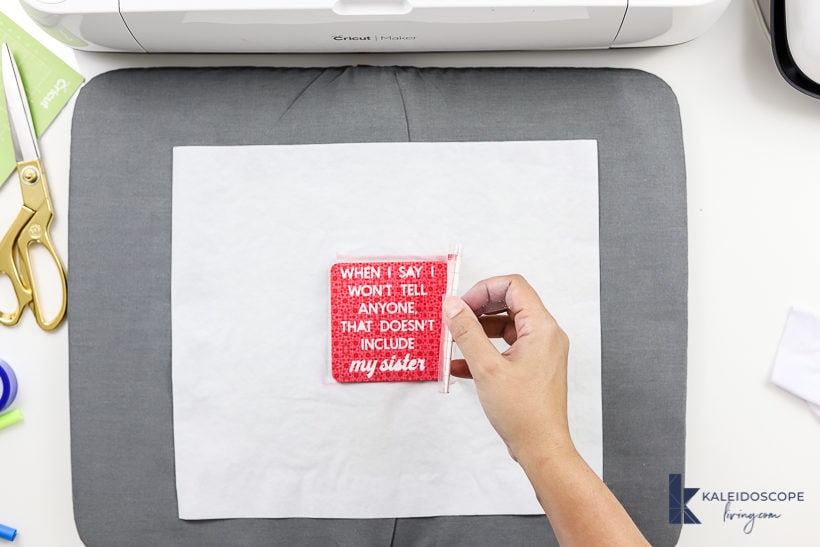
That's it! I can't get over how vibrant and clear the colors are! To care for your coaster, just wash it with warm water or glass cleaner (don't use harsh scrubbing pads).

Other posts you may enjoy:
- Silhouette vs. Cricut – My Unbiased Review
- Silhouette & Cricut Projects for Your Home and Life
- How to Use Cricut Iron On Vinyl on Stretchy Fabrics
- Which Cricut Machine Is Right for You?
Wondering how I approach transforming rooms and spaces in our home? Check out Designer in a Binder®.

And if you want exclusive content and behind-the-scenes sneak peeks, be sure to subscribe before you head out!