How to Display Art On Almost Any Smart TV
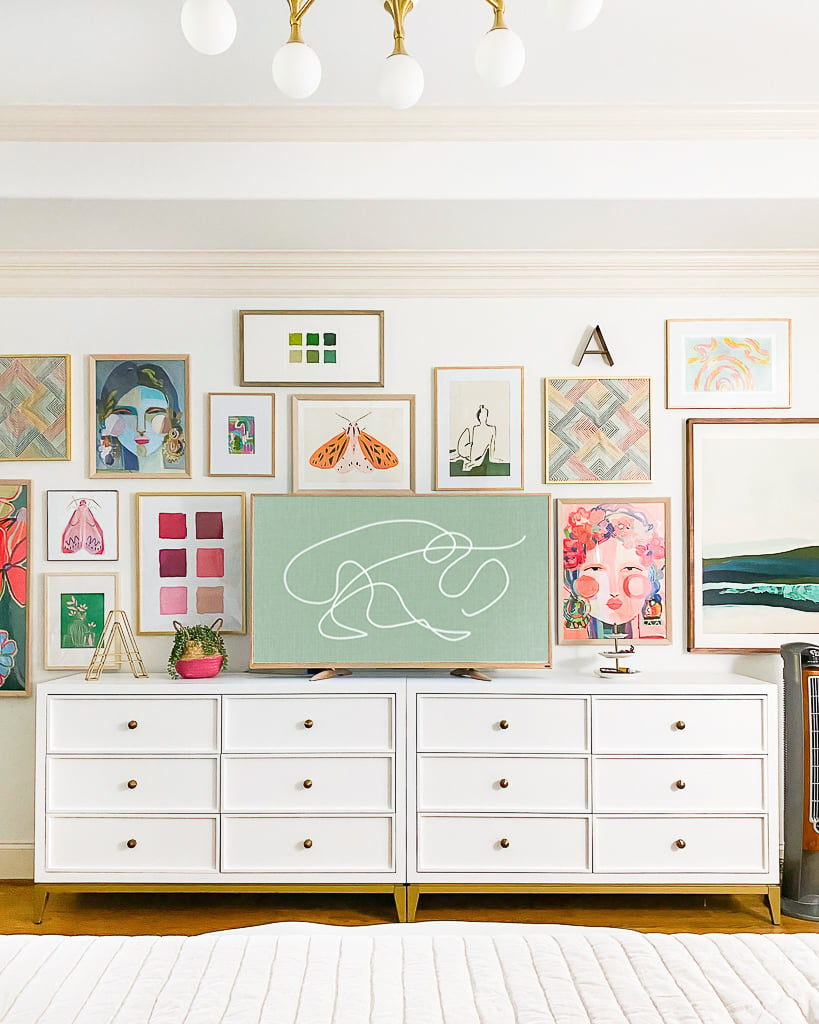
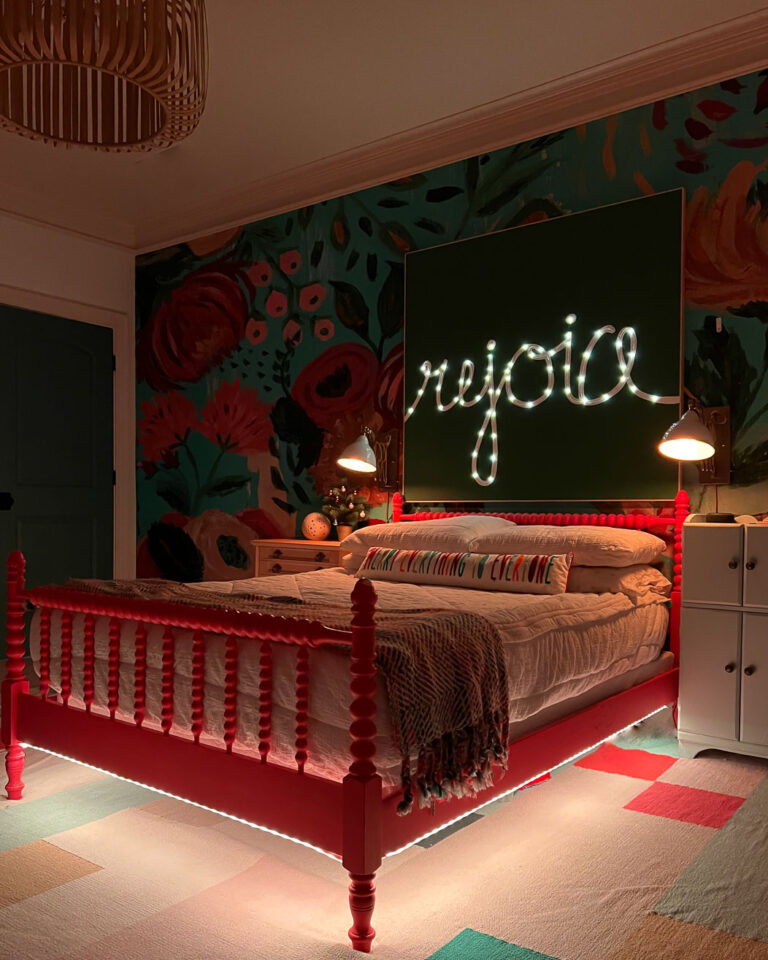
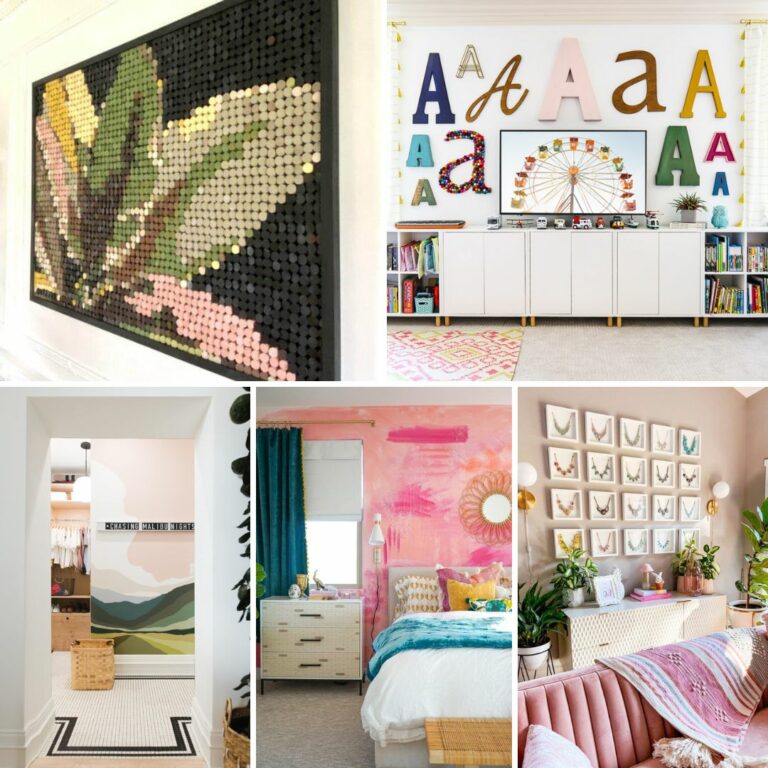
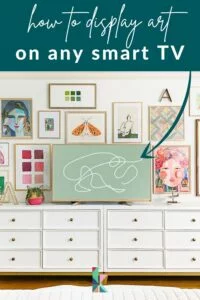
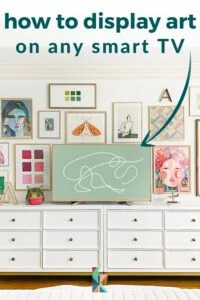
Have you ever wondered how to display art on your TV or make it look like you have a picture in your TV? If so, you are in the right spot! And guess what? You don't need an expensive Samsung Frame TV to make your TV look like art on a wall. All you need is a smart TV (which is pretty much all TVs these days). See that TV nestled in the gallery wall in our bedroom below? That's a very basic and inexpensive smart TV, but it looks beautiful, right?! Read on to learn exactly how I did it and how you can do it in your home!
If you have spent any time on social media in the past few years, you have probably noticed that a ton of people have TVs that display art on them in their homes. Tons of people have Samsung Frame TVs, which were designed for the specific purpose of looking like art hanging on a wall when you aren't actively watching TV. Frame TVs are very cool and we have one hanging above the fireplace in our family room. But in my opinion, they are too expensive to justify placing them in less visible rooms–you can read my full review of whether the Samsung Frame TV is worth it here.
If you don't want to spend a ton of money on a Frame TV, you can still display art on any smart TV! And you can even update the basic black plastic frame on your TV. I'll show you how to do both in this post. Consider it a very affordable alternative to a Frame TV! You might even consider it a Frame TV hack.
Why should you display art on your TV?
I think this project struck such a cord when I first shared it on Instagram because let's be frank… TVs are typically eyesores. And decorating around a TV can be tricky because they are big black boxes that don't blend into home decor. In fact, usually stand out and become an unintentional and unwanted focal point because they tend to be large and placed in a prominent viewing spot.
Displaying art on your TV when you aren't watching it is a fantastic way to make it a pretty focal point that works with the design of your room, instead of detracting from it. It's also fun to change the art you display depending on your mood or the season.
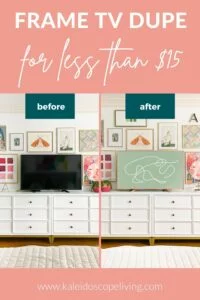
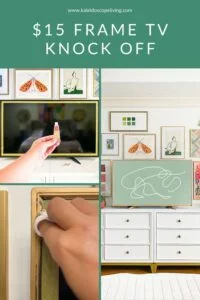
I completely transformed the very basic Fire TV in our bedroom for less than $15 in around 15 minutes. Just look at what a HUGE difference it made in our space!
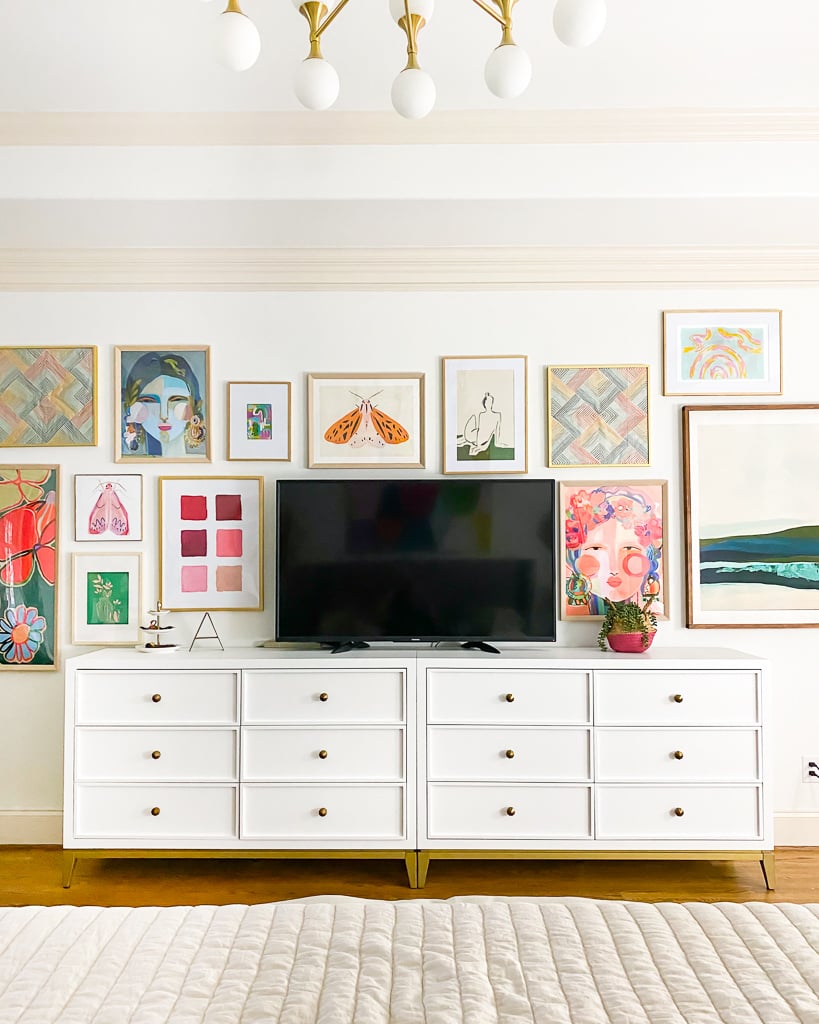
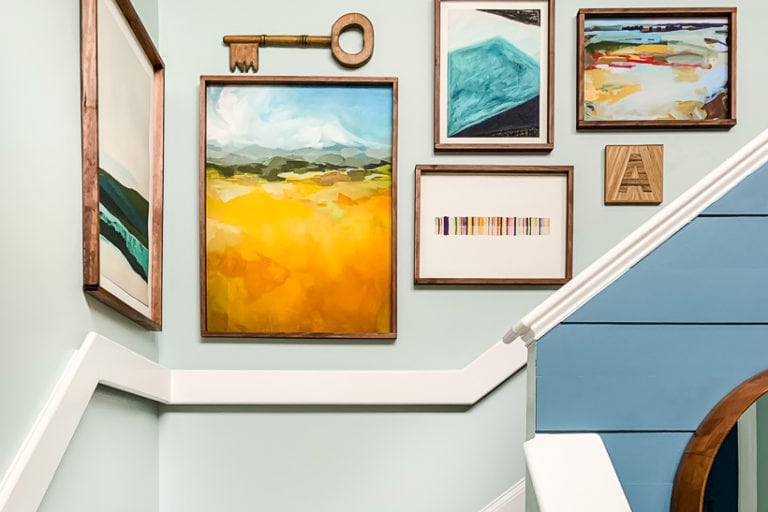
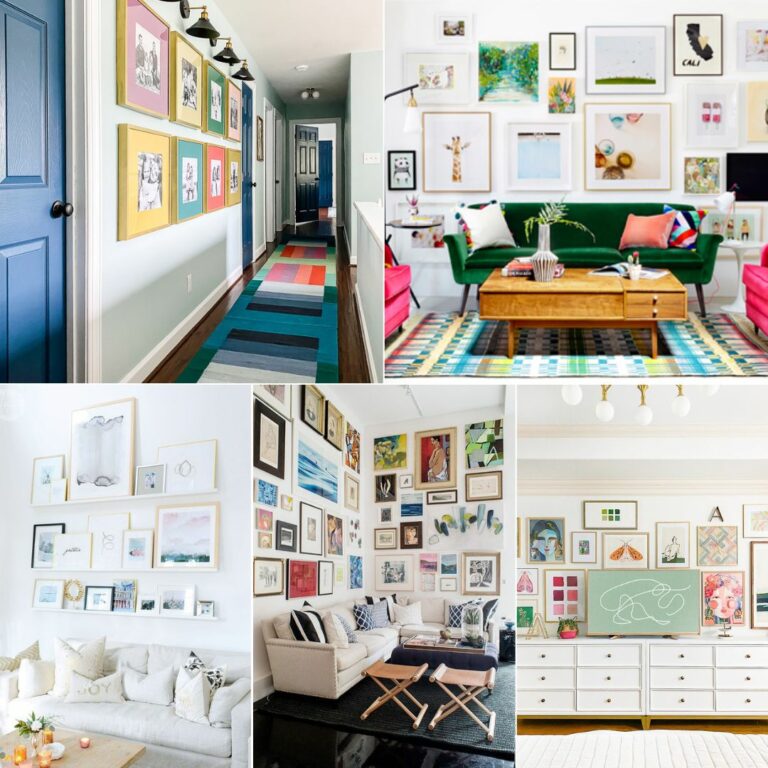
You may notice that the plastic frame on our TV changed from gold to black–be sure to check out how I updated the basic plastic black frame on our TV to a gold beauty for about $5. It's a great extra step to take, especially if you want to have your TV blend into a gallery wall (you see my favorite gallery wall ideas and tips here).
Options for Displaying Art on a Smart TV
The first step is finding digital art that will display properly on your smart TV. The good news is that it's EASY and inexpensive. You can buy pretty much anything you can imagine for between $2 and $6 per digital art piece. I've rounded-up some of my favorites (including many that we have used) for you at the bottom of this section.
Click on any image below for full product details.

Once you find digital TV art that you love, go ahead and download it. Then you have two options for displaying it on our TV. You can watch the short video below for an overview of both options. I recommend watching it before reading the detailed instructions because they will make more sense after seeing the video :)
Option 1: Use TV Art as a Screensaver
The steps you follow for displaying digital art on your TV will depend on what type of smart TV you have and the exact settings menus, etc. change regularly. If the exact directions below don't work for you, I hope they still give you enough of a framework to figure it out even if your menu options are slightly different.
How to Display Art on a Fire TV
1. Download the Amazon Photos iOS or Android app, or sign in on the web browser. I found it easier to use the web browser, especially since I purchased and downloaded my digital art on my computer anyway.
2. Log in to Amazon Photos and upload the art piece or pieces you have chosen. I recommend putting them in a folder labeled “TV Art.”
3. Next, go into the settings on your FireTV. Click on “Display & Sounds” and then scroll down until you see “Screensaver.”
4. Then click on Screensaver and select “TV Art” (or whatever you named your folder).
4. Last, choose your display settings. I have mine set to come on after 5 minutes and I turned off the Smart Captions, Alexa hints and Date & Clock so that when the art is displayed there aren't any words or messages displayed over it.
How to Add Art to a Chromecast TV
1. Upload the art piece or pieces you have chosen to a gallery in Google Photos.
2. Open the Google Home app on your phone.
3. Choose your Chromecast device.
3. Click Settings, then Ambient mode > Art Gallery (or whatever else you may have named it).
How to Add Art to a Roku TV
In the Fall of 2024, Roku rolled out a new feature called “Backdrops.” It allows you to easily display digital art on your Roku TV, essentially turning it into an art canvas. Roku Backdrops has a library including thousands of free 4K photographs and works of art to choose from. You can also upload your own images.
Here's how to use Backdrops on your Roku TV:
- First, you have to enable the feature. Find the Backdrops app by going to Settings > Home Screen Menu > Backdrops > Open Backdrops app. If you don't see it, try searching for “Backdrops” in the app store on your TV.
- In the Backdrops App library, choose either an image or a collection you like by clicking on it.
- To cycle through a collection of images, select “Set as Backdrop” or “Start Backdrops” from the collection page.
- To display a single image as your Backdrop, click on the image and then click “Start Backdrops. When only a single image displays in Backdrops, if you select * to show the Backdrops Options menu, you should see that “Image Duration” is set to “Don't Change.”
- To upload your own images or digital art directly to the Backdrops App, go to “Add your photos” in the app. Select “Upload photos.” Then follow the onscreen instructions. You can also choose “Connect Google Photos” in the App if you prefer to upload photos from your Google photos account.
- After you enable Backdrops, tap your remote's power button to start Backdrops. If you want to turn off your TV completely, press and hold down on your power button until the screen goes dark. If you want Backdrops to automatically when your TV is idle, go to Home > Settings > System > Power and turn on “Auto Power Savings.”
If for some reason you don't want to use the Backdrops feature or it's not available on your Roku TV, you can still add digital art to your Roku TV! Here's how:
- Upload the art piece or pieces you have chosen to a gallery in Google Photos.
- Install the Photo View channel.
- Open “Photo View” and then sign in with your Google account.
- Choose the album with the art piece or pieces you want to display.
- Set “Photo View” as your Roku’s screen saver by clicking Click Settings > ScreenSaver > Change Screensaver > PhotoView option.
- Finally, you will want to adjust the amount of time before the screensaver starts from Roku’s settings. To do that, click Settings > ScreenSaver > Change wait time.
Years ago, before the Backdrops feature was introduced, this is how we added digital art to the Roku TV in our family bonus room and it worked like a charm.
How to Add TV Art to an Apple TV
1. Upload the art piece or pieces you have chosen to an album in iCloud.
2. Next, turn on your iCloud integration in your Apple TV settings. Do not turn on Photo Stream when prompted.
4. Go to screen saver options in Apple TV’s settings.
5. Click Photos > iCloud.
6. Choose which album you’d like to use.
Option 2: Display Art on a TV Using YouTube
The downside of the screensaver method is that it will only kick on after a certain amount of time. If you want more control over when and for how long art is shown on your TV, then you may prefer using YouTube. Essentially, you can display a chosen art piece by playing a video of a static image that lasts for an hour or more.
Here's how to do it:
- Make sure your smart TV is connected to the internet and that you have the free YouTube app installed. If it's not installed on your TV yet, you should be able to easily download it from your TV's app store.
- Choose the art you want to display. Not only are there tons of free TV art options on YouTube (just search “tv art” in YouTube to find them), but many digital art sellers include a YouTube link that you can use to display your purchase via YouTube. This is something we have started offering on the new TV art designs we sell in Kaleidoscope Living shop!
- Once you've chosen what you want to display, press play and voila! Your chosen digital art will be displayed in all its glory on your TV.
Option 3: Use Samsung's Ambient Mode (for select Samsung TVs)
Some Samsung TVs offer something called “Ambient Mode.” This feature is primarily available on Samsung QLED TVs and the Samsung Frame TV that use Samsung's own operating system (not FireTV or Roku). If Ambient Mode is a feature of the Samsung TV you own, below are instructions for how to use it to display art on your TV via the SmartThings App. You can find additional ways to set up Ambient Mode here.
1. Save the image(s) you want to display on your TV to your phone.
2. Download the SmartThings App to your phone and follow the instructions to connect your Samsung TV to the app.
3. Select “Art Mode.”
4. Click the “Add photos” icon and then add the image(s) you want to display.
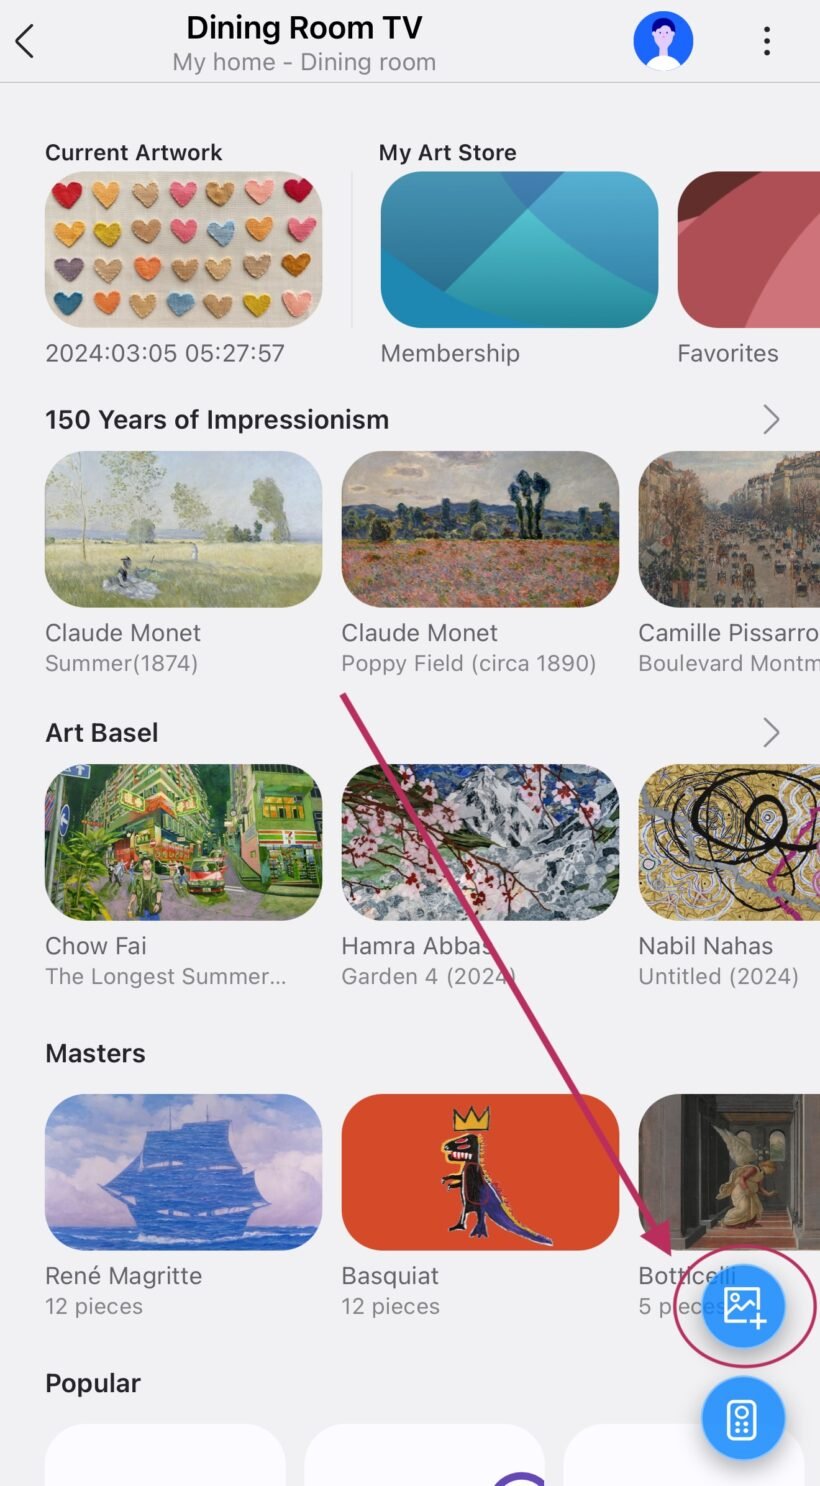
5. Click “Set on The Frame.”
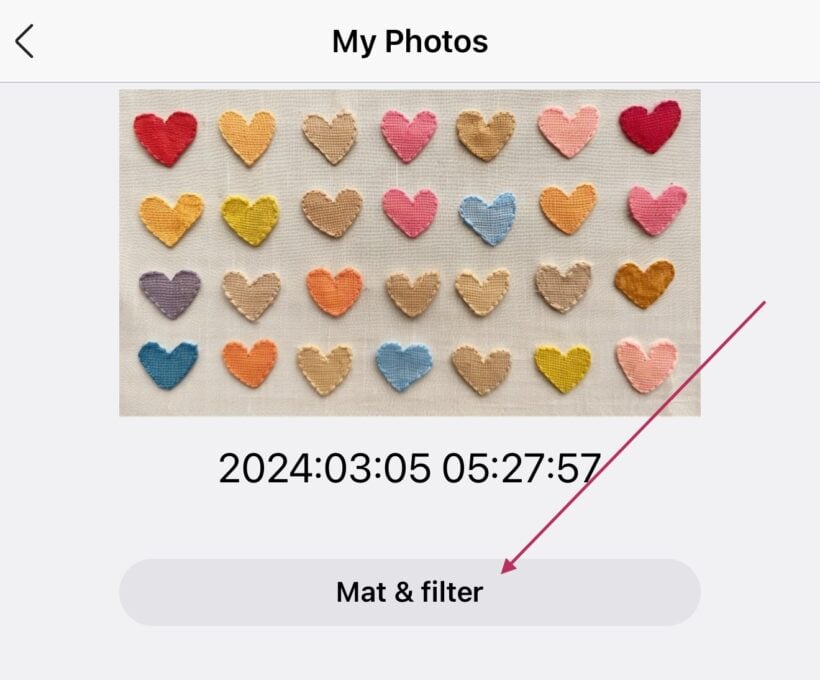
6. Click “Mat & filter” to choose your display options. You can choose to add a digital mat to your image, adjust the brightness and color temperature, etc.
Frequently Asked Questions
Great question! Displaying digital art on your TV is a fabulous way to transform your space, but it's important to be mindful of the potential for screen burn-in.
Screen burn-in is a permanent discoloration of areas on an electronic display, such as a TV screen. It can occur when a static image is displayed for a long period of time. This could potentially happen if you leave a piece of digital art on your screen for too long without changing it.
Not all TV screens are equally susceptible to burn-in. OLED screens can be more vulnerable to burn-in. On the other hand, LCD TVs are much less susceptible than Plasma TVs. And Samsung's The Frame TV uses special algorithms to minimize burn-in caused by displaying the same image for a long period of time. And Roku's new Backdrops feature is designed with with OLED burn-in protections in place.
To further prevent burn-in, try to regularly change the digital art displayed on your screen, avoid leaving the TV on one stationary image for too long, and avoid using full brightness for extended periods of time. The exact timing for when burn-in can occur varies greatly and depends on several factors, including the type of display, the brightness setting, and the specific image being displayed. To avoid burn-in, avoid leaving the TV on one stationary image for too long, and avoid using full brightness for extended periods
We feel comfortable displaying digital art on our LCD TVs for up to 2-hours at a time and have not experienced any screen burn-in.
We pretty much never change the image on the TV in our bonus room. But I change the art on the TVs in our family room and primary bedroom seasonally and for holidays.
Yes! I've never done it myself by my friend Ashley has a great post on how to hide TV cords on your wall (and other cords, too).
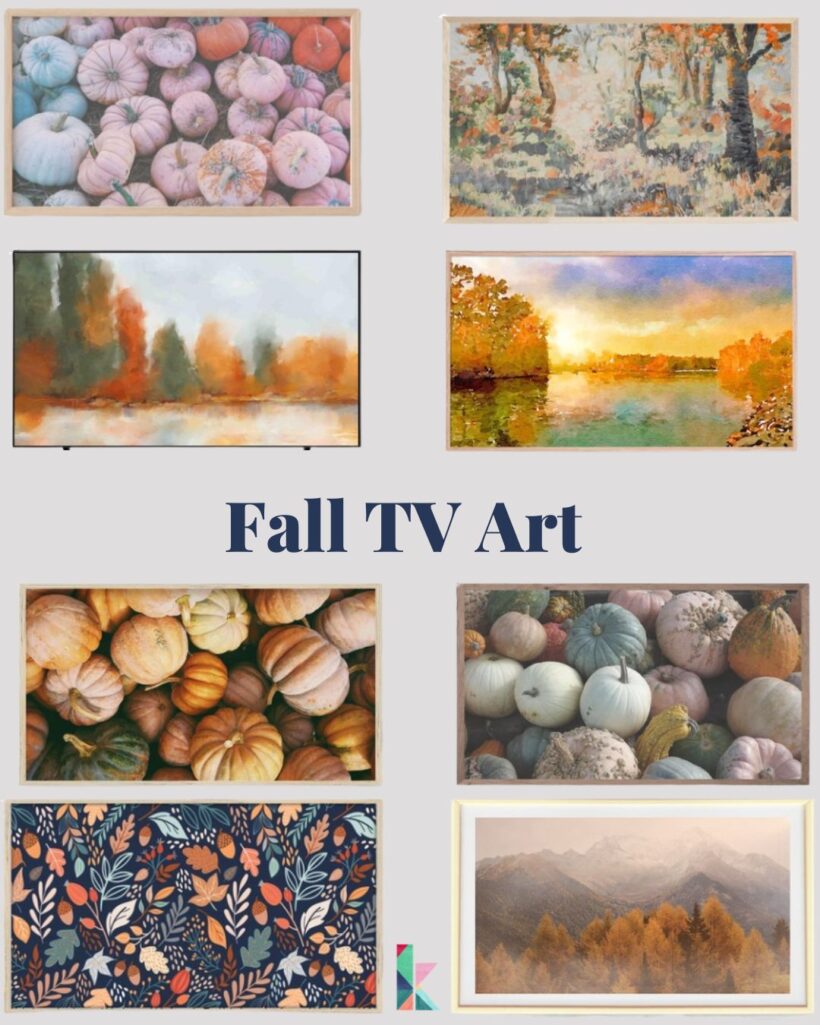
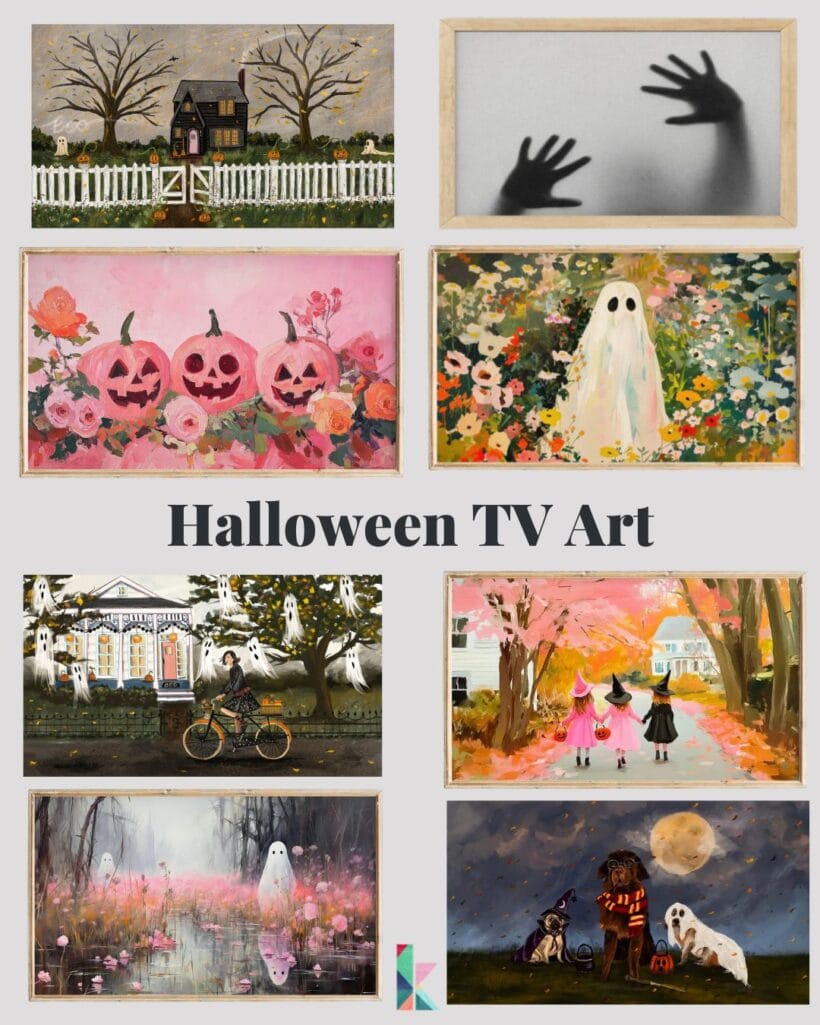
You can find links to some of my favorite options for seasonal and holiday art by clicking on one of the images below.

Wondering how I approach transforming rooms and spaces in our home? Check out Designer in a Binder®.

And if you want exclusive content and behind-the-scenes sneak peeks, be sure to subscribe before you head out!

Last Updated on October 9, 2025

So sorry if I’m missing it but where can I find how you changed the frame color??
I used gold Rub N’ Buff to change the color of the black plastic on the TV. It’s wax based, so it won’t chip the way spray paint might.
This is such a fantastic and budget-friendly alternative to Samsung’s Frame TV! I love how you’ve shown that anyone with a smart TV can turn it into a stylish art display without breaking the bank. The idea of transforming a regular screen into part of your home decor is brilliant, especially for those of us who want form and function in our living spaces.
Thanks again for these creative and super actionable tips!
Very helpful but our TV is a regular samsung smart TV. Is it covered by an instructions under one of the options you describe (fire, roku, chrome cast etc)?
Yes, you just need to know what software runs the smart features. It will generally be either Fire or Roku.
Hhello, I purchased one of your TV art pieces, but did not see the the YouTube link in the email.
Hello Shana. The YouTube link is in the PDF named “READ ME- Colorful Christmas Village TV Art.pdf”. I hope that helps.
Great article. Can I mount any TV vertically, and display content vertically (in portrait mode)? Finding mixed answers to this online.
Hi Josh. I don’t believe you can mount the Frame TV vertically to view the screen in portrait mode. I’m not aware of it having that capability. Hope that helps!
ACKKKKK!!I have tried to view the video on how to set up digital art on a smart TV and I get very LOUD Christmas music over the track of your explanation. I searched to be sure that some other ad wasn’t running and I still can’t get it to play correctly! HELP! I’d really like to try this and I can’t hear the instructions or turn off the other track.
Thanks!!
Hi Nancy! Thank you so much for bringing this to my attention. I have fixed it, so you should be able to hear the overview of the instructions now :)
Hi Tasha, I stumbled across this post and was interested in knowing which Fire Stick version you used. I have one but cannot seem to find the screensaver option.
Hi Phyllis. We don’t use a Fire Stick. The TV itself is just a “Fire TV” so I believe all the software is built directly into the TV.
I think this is a helpful article, but the title is misleading. Not all smart TVs are covered by the tips you provide, and it wasn’t able to help me.
Hi Sam! Even if the screensaver tips didn’t work for you, the YouTube option should. I don’t know of any smart TVs that wouldn’t allow for the free YouTube app download :)
Nice tip. Can’t wait to apply it on my Samsung tv @Tasha
So glad you like it!
Please tell me if I can use photos from my Samsung Ultra 21?
We have a smart SONY older TV., 8 years old.
Thank you.
Jean Ann
jeanannincolorado@gmail.com
I have no idea, but I bet if you contact Samsung they may be able to help you :)