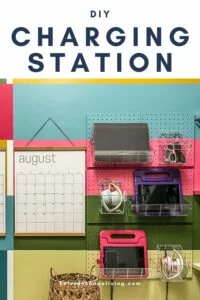
DIY Family Charging Station for iPads, Phones & More!
Creating a family charging station for our family’s electronics (iPads, phones, cordless headphones, etc.) has been a total game-changer. I was so tired of having charging cords and devices strewn all over the horizontal surfaces in our house. Finally, I came up with the idea for this wall-mounted pegboard charging station and it is a total game-changer! Read on to learn how I did it!
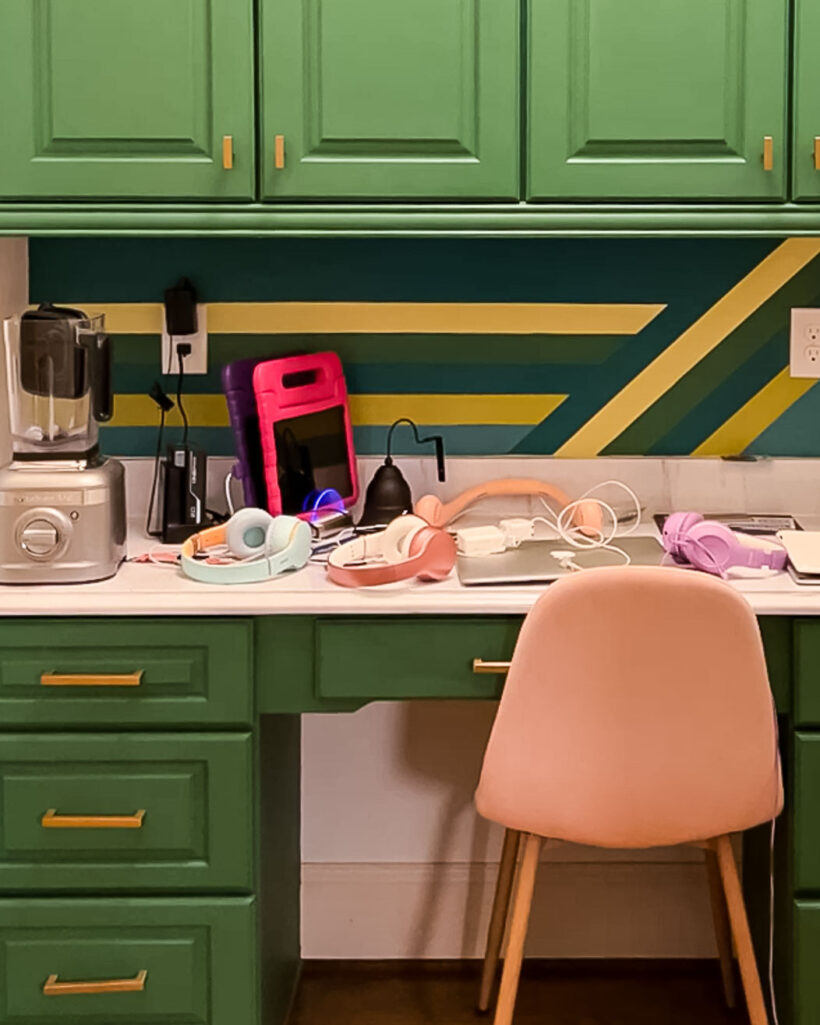
We have had an electronics and charging cords mess in our home for years. And we have tried many, many different store-bought solutions that kind of helped, but never really solved the problem. You can see what I mean below in this view of our old built-in office (which we have since remodeled into a DIY Butler's pantry). Notice even though we were using a charging station like this, it didn't fit everything so we still had a mess of cords and headphones everywhere. Bleh.
I should mention that one of our house rules is that our girls' iPads and phones have to stay downstairs when they go to bed. So even if they don't need to be charged, they put them in their dedicated bins on the charging station every night. Joe and I charge our phones in our bedroom, but I do charge my iPad in the charging station :)
I finished installing our new vertical charging station about 6 weeks ago and am THRILLED to report that it is working perfectly and everyone is happily using it. Such a huge win. So let's dive into the tutorial!
This post contains affiliate links for your convenience. Click here for my full disclosure policy.
Step-by-Step Tutorial: Pegboard Family Charging Station
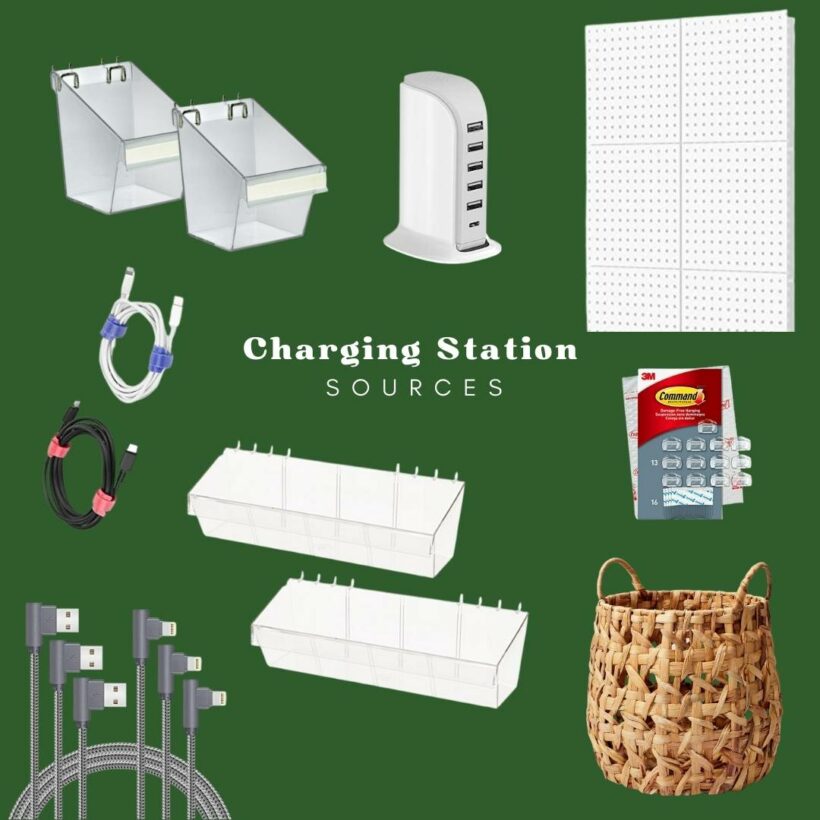
Materials Needed
You can find links to everything you need to complete this project by clicking HERE or on the image below.
Video Overview
You can watch a short video that gives a good overview of this project below. The written instructions will be much easier to follow if you watch the video first–it will play after a brief ad.
Steps
Time needed: 1 hour
This easy DIY charging station could take as little as an hour to create, but it will take several hours if you choose to paint yours like I did.
- Determine the size of your charging station.
I roughly measured out how much space I thought we needed to fit all of our devices comfortably first. I also factored in the scale it should be for the space. Since the wall we planned to hang ours on is 10 feet tall, it couldn't be too small. (Psssst…I teach about choosing furniture and decor that is the proper scale/proportion for a space in Designer in a Binder).
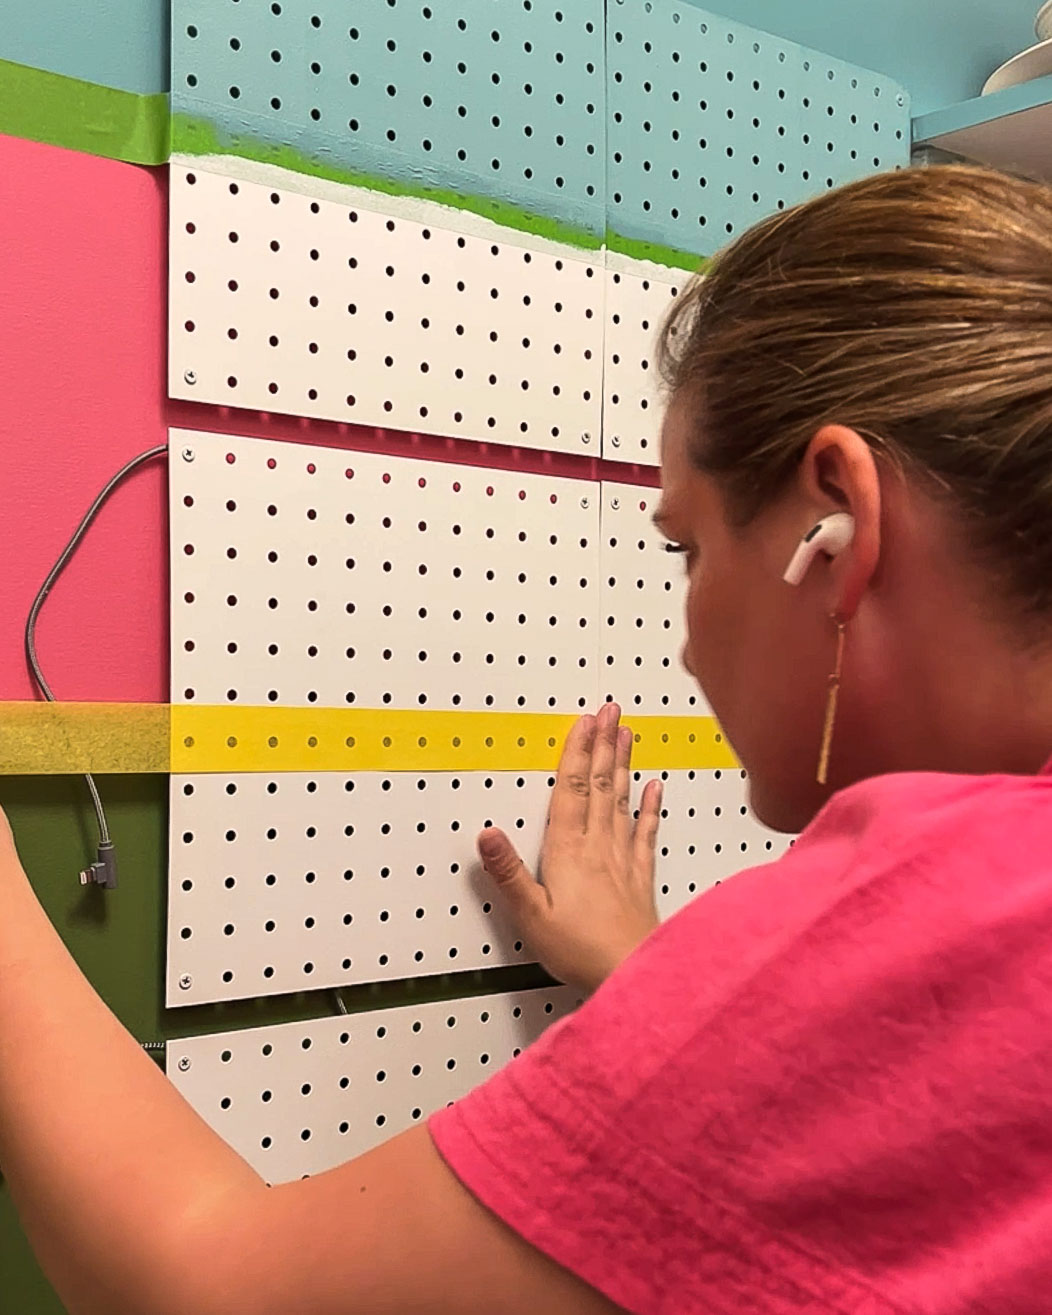
- Choose and hang your pegboard.
We prefer the way metal pegboard looks (it's just a bit sturdier and the holes are more crisp/clean) so we ordered 6 metal panels that are each 12″ square. So our total pegboard surface measures 36″ tall x 14″ wide. The downside is that we had to hang 6 panels separately. If you choose wood pegboard instead, you would only have to hang one large panel. Make sure whatever pegboard you choose includes wall spacers so that your pegboard sits off the wall a bit. And you'll notice I left a little bit of horizontal space between each set of two panels–more on why later…
- Paint your pegboard, if desired.
I wanted our charging station to blend in with the mural I painted on the wall, so I painted it, but this is completely optional.

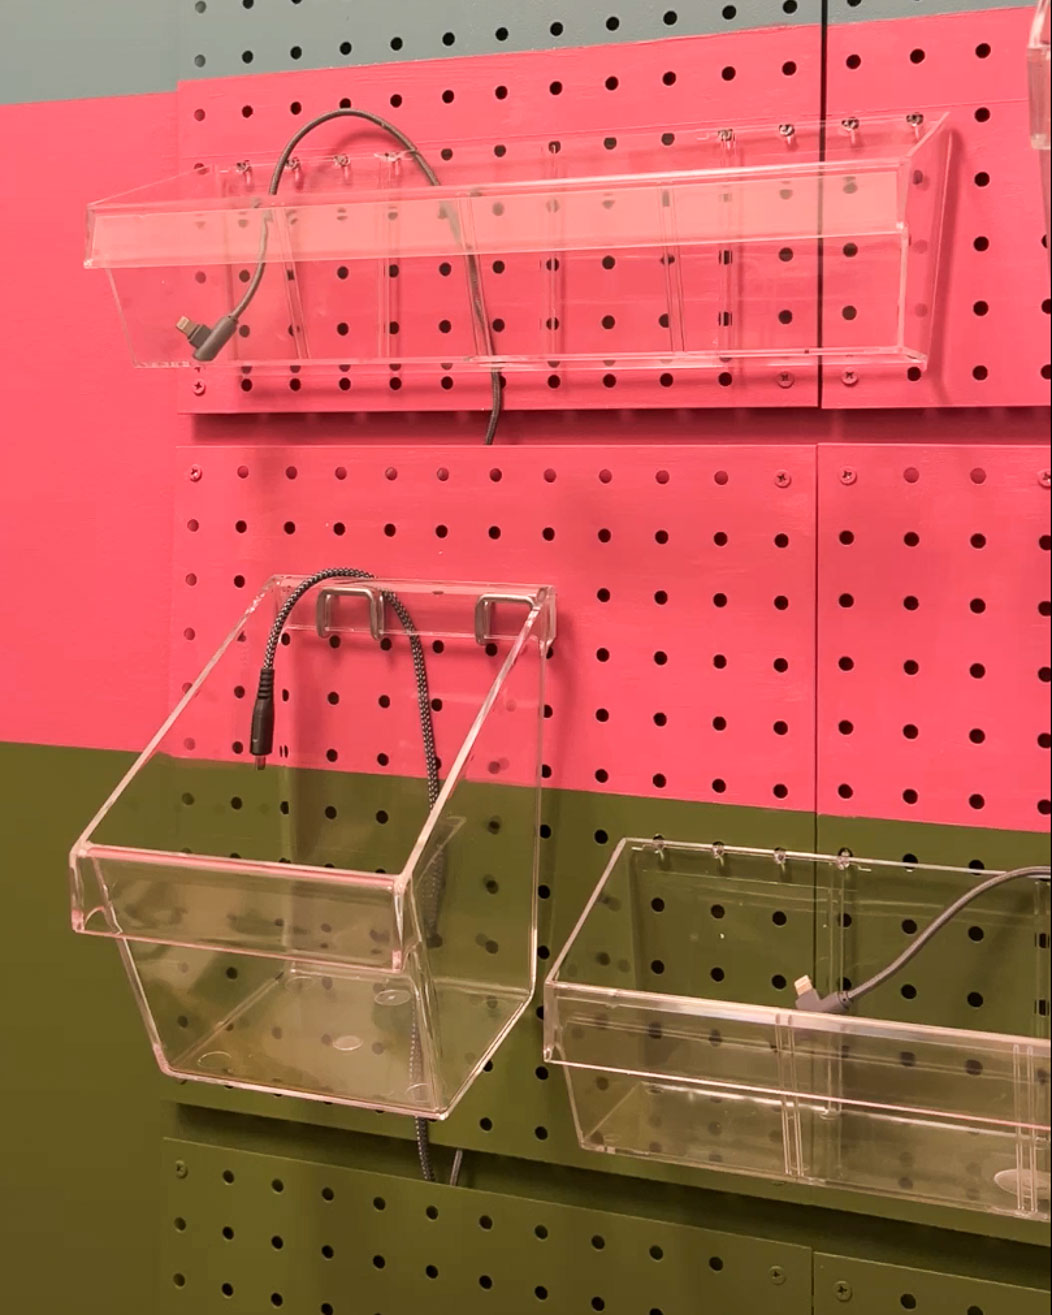
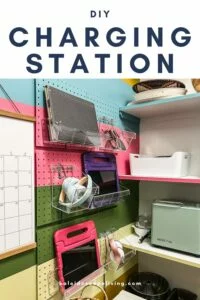
- Add your pegboard bins, hooks, etc.
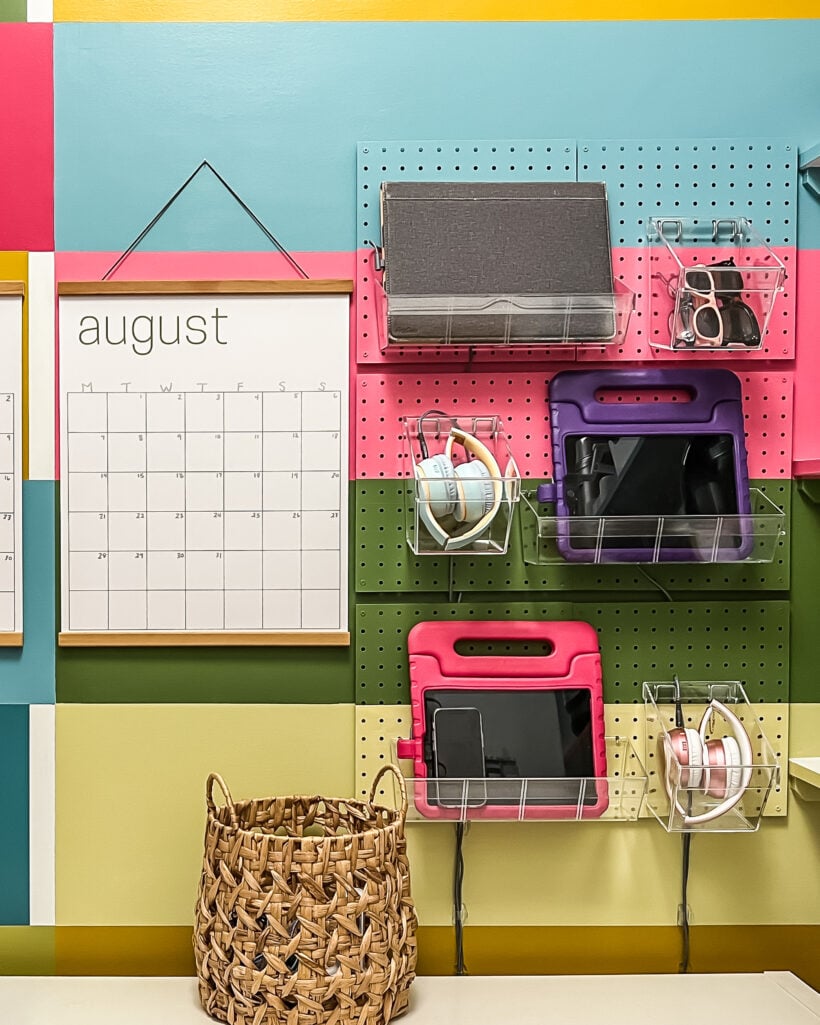
We chose clear acrylic storage bins to hold our devices and I love them. They look expensive, but note that they come in packages of 4, so the price per bin actually isn't bad. They just look so nice and clean. But there are tons of pegboard storage options to choose from–just choose what makes sense for your family and devices!
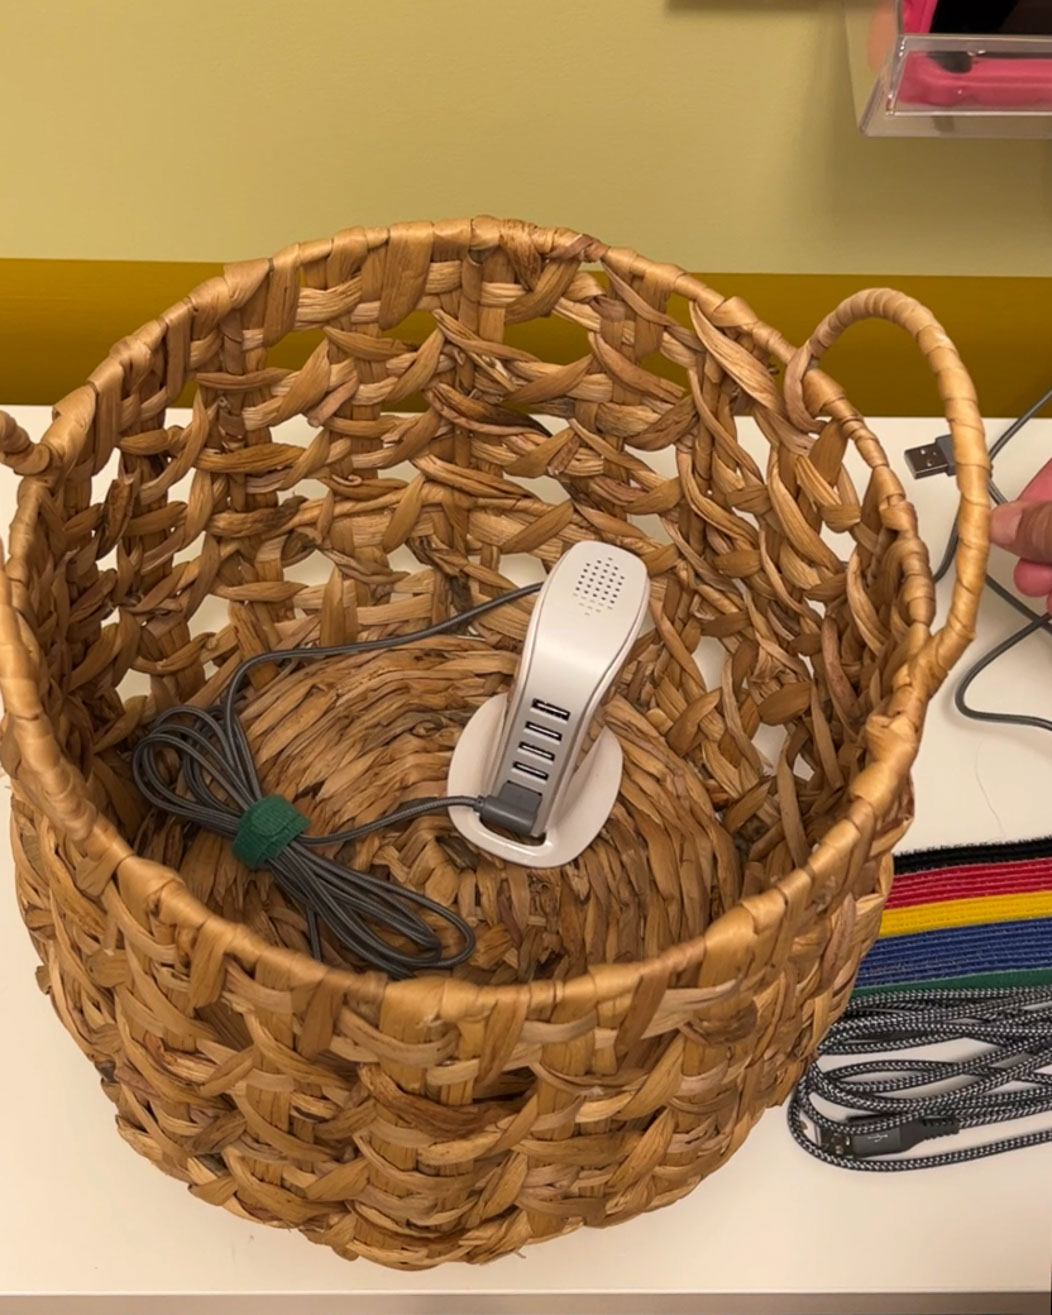
- Add a USB charging tower to a basket.
Because I really wanted to minimize visible cords as much as possible, I added an inexpensive USB charging tower to this basket that I've had for years. You want to choose a bin or basket that has large enough holes to run your cords through.
- Run cords from the charging tower to your devices.
I ran the charging cords behind the pegboard (which sits off the wall a bit due to the wall spacers) and then pulled it over the bottom of the pegboard that it needed to go to–this was possible because I left a bit of horizontal space between each set of pegboard panels. Then I ran the cord behind the bin for whatever bin it corresponds with. If you are using wood pegboard, I would recommend just drilling a hole big enough to run your cord through to the bin.
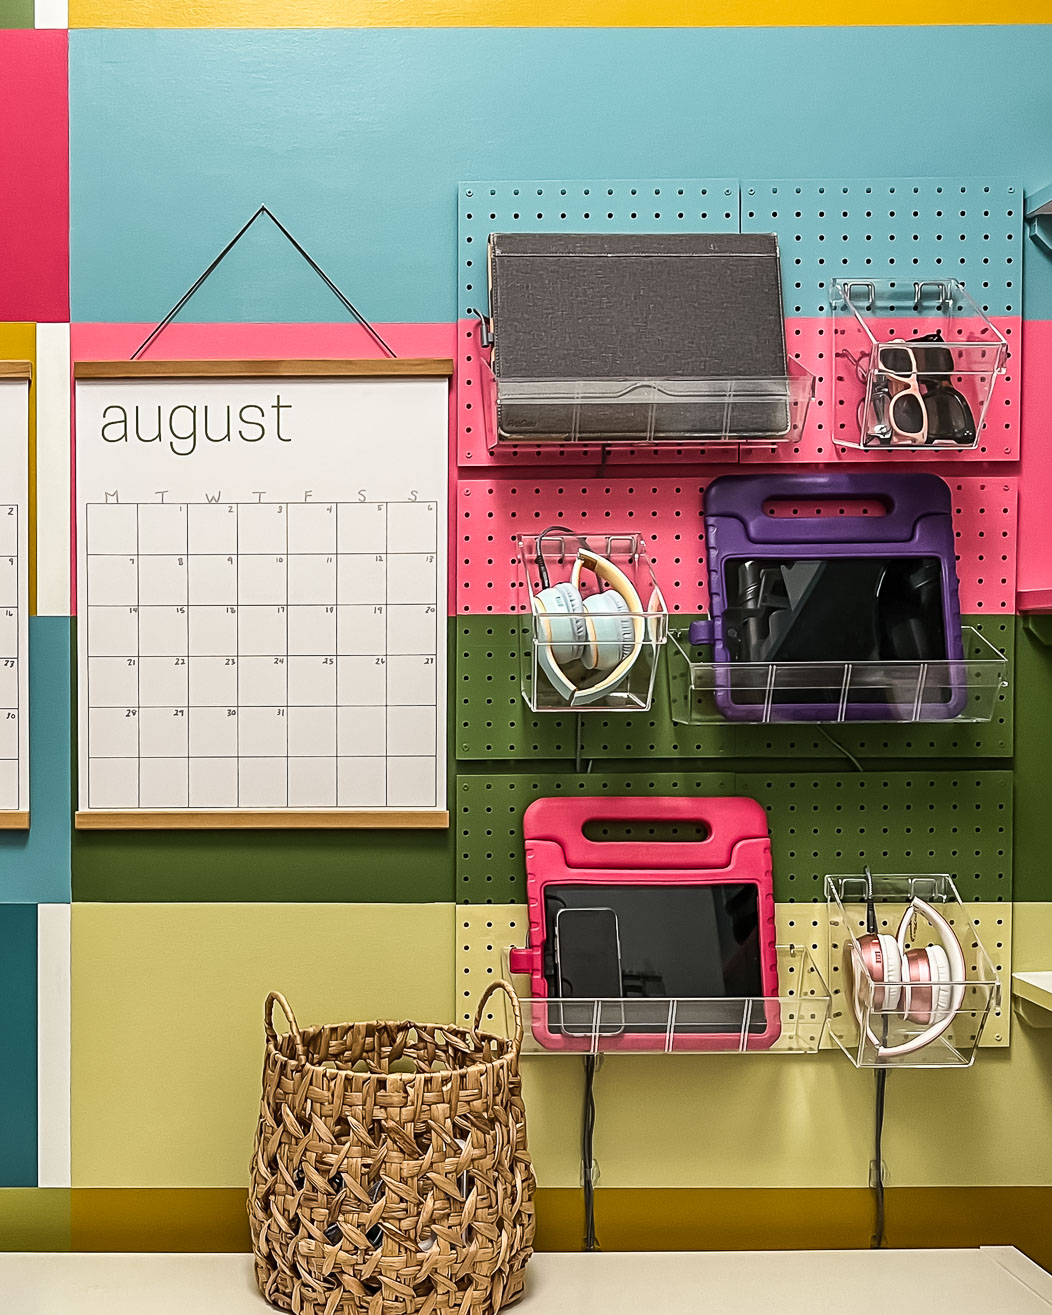
- Add your devices.
My girls store their iPads and phones in the same bin. Each bin has only a single cord because they really never need to charge both things at the same time. Their wireless headphones use a different type of charger, so their headphones each have their own bin and charging cord. I store my iPad in the top bin since I'm taller than them. We even use the extra square bin for storing sunglasses that we don't keep in our cars.
- Tame any cords that are visible on your wall.
Again, this is optional, but it makes such a difference. I used Command Cord Clips to tidy up the cords that were visible under the bottom of our pegboard. It was quick and easy and looks sooooo much better.

That's it. Now you can plug in your devices and enjoy this whole new world of organized charging cords and electronics! We no longer have cords and devices cluttering our countertop or desk.
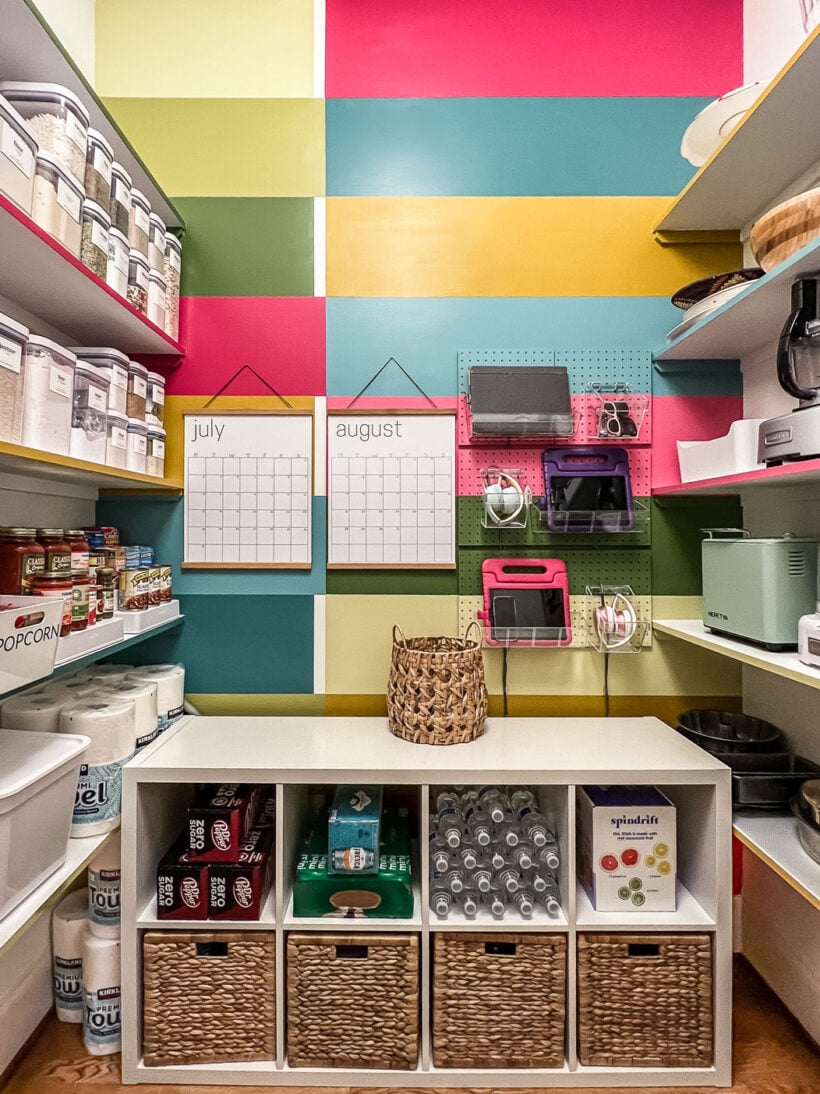
Going VERTICAL with our family charging station and using pegboard storage is the perfect solution for us and it's been going strong for 6+ weeks now. I also love that it makes good use of this formerly unused wall in our pantry! What do you think? Does this seem like it would be a good option for your family?
More family ORGANIZINg
Wondering how I approach transforming rooms and spaces in our home? Check out Designer in a Binder®.

And if you want exclusive content and behind-the-scenes sneak peeks, be sure to subscribe before you head out!

Last Updated on October 9, 2023
Looks great! Not sure how you reach all the way over the cubby shelves that are 12-can soda carton depth to get to the charging storage. Or is the photo deceptive–is there space to walk to the back of it to get to the wall. I may be biased coming at it from my 5-foot none perspective.
I used an acrylic staggered forward-facing file sorter on my large (two-wall) desktop ( so I can spare the desktop space) with drawers on the bottom and a vertical hub next to it. The devices fit in the file folder slots. Don’t have headphones to deal with, though.
Hi Linda! The IKEA Kallax bookshelf is only 30 inches tall and about 15 inches deep–not hard to reach over for even our girls (who are about 5-feet tall right now). Their devices are located in the lower bins so that they are easy to reach :)
Hi. I enjoy seeing and reading about all your DIY projects. One question on your charging station: where are the cords coming out of the basket? I see the basket and the cords coming up the wall from behind the floor unit…Thanks.
Hi Jennie! The cords come out of the back of the basket then either run up the wall behind the pegboard. The cord for the USB charging tower runs out of the ack of the basket and down to the plug on the wall behind the bookcase :) Since the cords run out of the back of the basket and it’s positioned against the wall, you can’t really see that part. I love that it’s nice and hidden :) Hope that helps!
This turned out fantastic! Love the colors and especially the function. Our house is just 1200 sq. feet, so no extra closet or pantry area for this idea. We don’t have too many devices though.
Congratulations on another beautiful, budget friendly makeover.
Thank you so much Gina!
This is brilliant and I wish I had thought about it when my kids were younger!
Thank you so much Christine!
Looks very nice and functional. I live by myself and don’t need anything that elaborate so my organization of cords was buying a dollar plastic basket and putting all the cords and surge protectors in it. It sits on the floor between my desk and the curtain and is hidden by my desk chair. Very simple, but looks much nicer than cords laying all over the floor.
Yes, sounds like a perfect solution for you Gloria!