Built-in Office Turned DIY Butler’s Pantry
Anyone else have one of those awkward built-in desks in or near your kitchen that you don't use? You know what I'm talking about, right? They were super popular in the 1980s and 1990s. I don't know about you, but we did not use (or even like) ours, so we came up with a way to reinvent this space as a Butler's pantry!
There are lots of photos of the finished Butler's pantry in this post for you, but I also walk you through why we made the changes that we made, how I created the space plan and design for this space and more! I think it's important to design process behind the pretty photos :) I hope you find it helpful!

This post contains affiliate links for your convenience. Click here for my full disclosure policy.
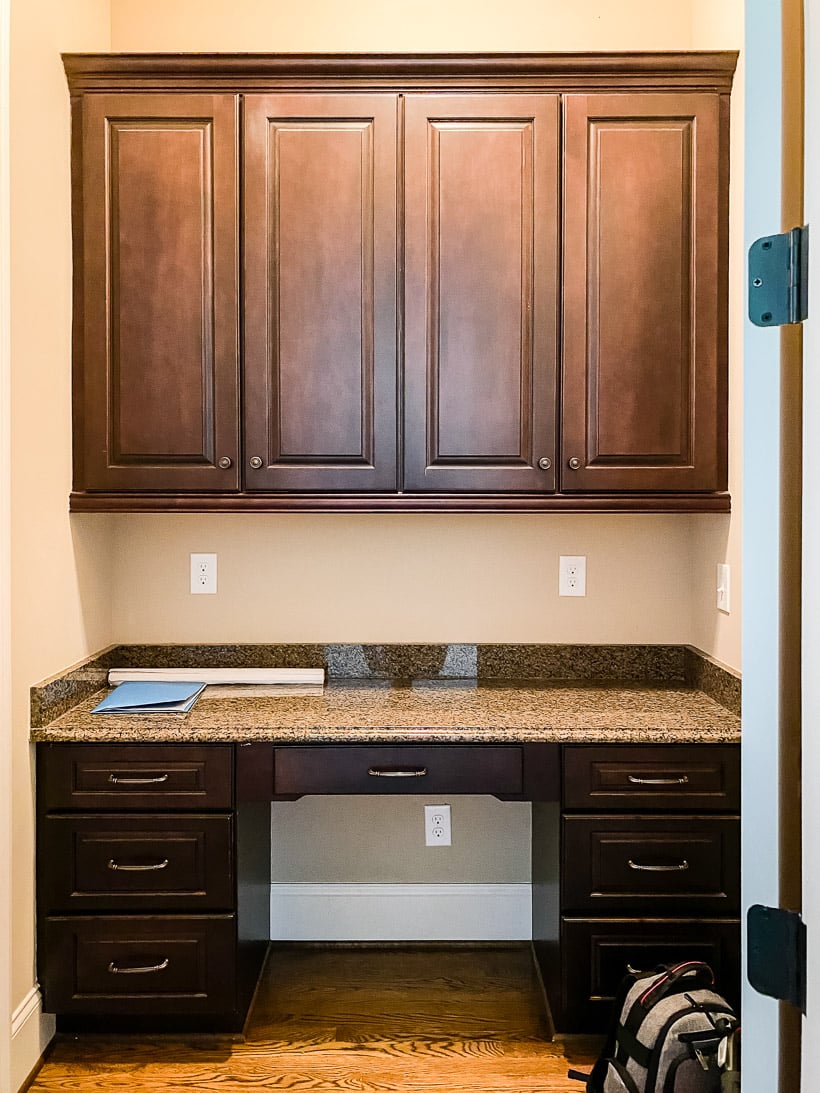
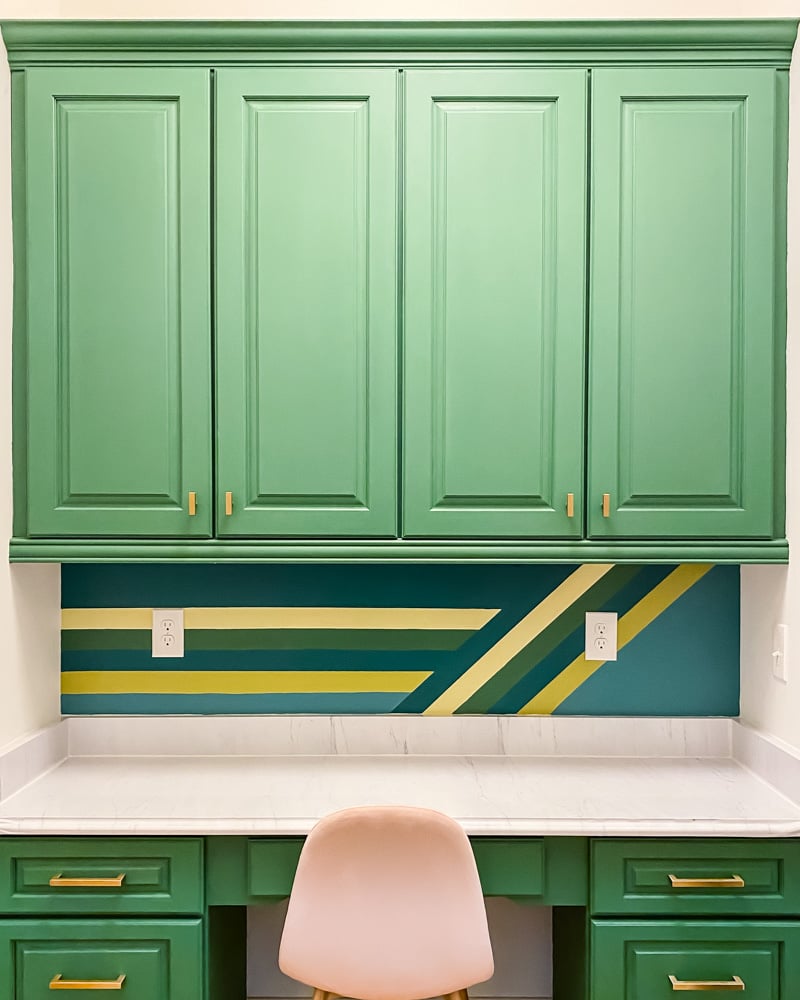
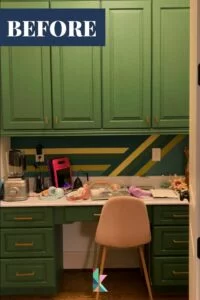
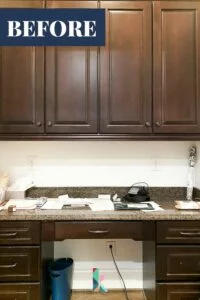
Even though our current home was built in 2012 after the built-in desk fad was kind of over, we have a built-in desk/office between our kitchen and large walk-in pantry. Below you can see what it looked like when we moved in. About 2 years ago, we painted the cabinets, backsplash and covered the outdated granite countertops with this faux marble vinyl about we gave it a little makeover 2 years ago).
The Problem With Our Built-In Office Area
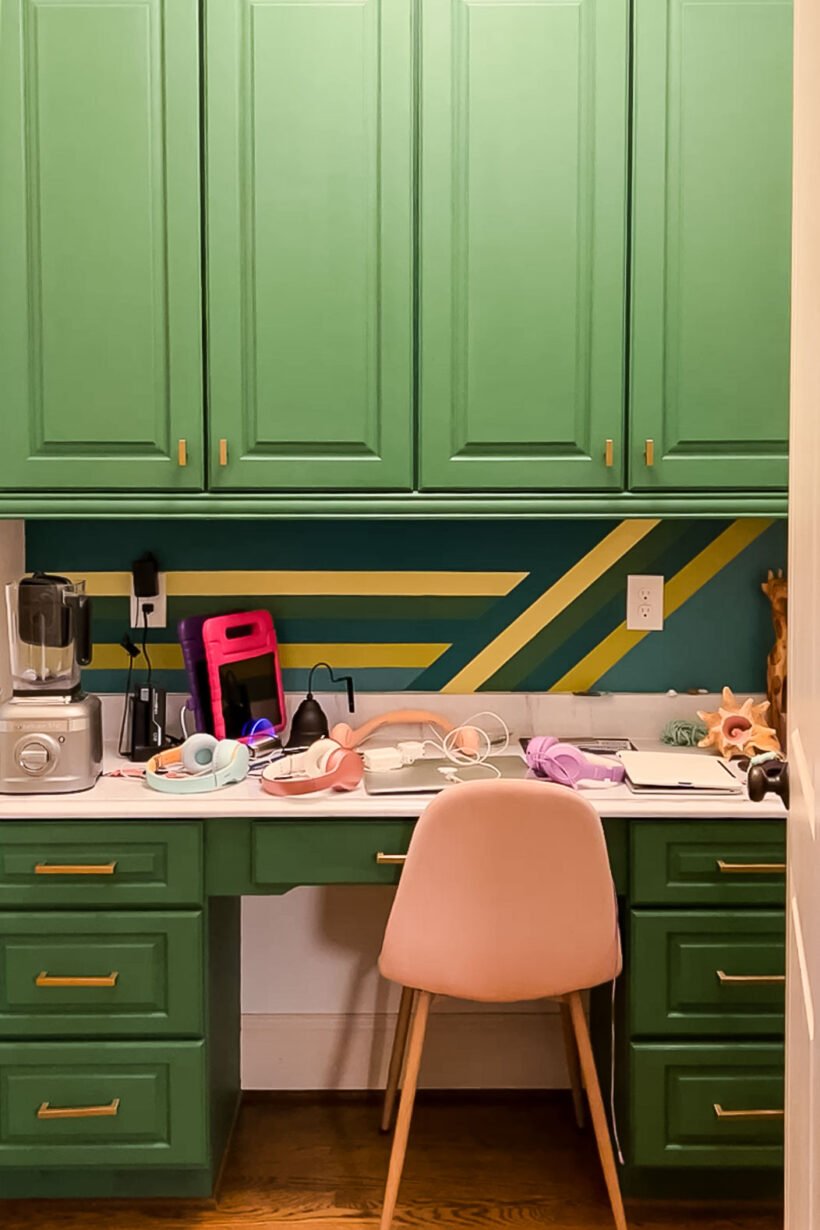
We have never actually used this space as an office (we have a desk with filing drawers in front of our DIY wall shelves in our family room that we use for paying bills, etc). So here's the reality of how this space usually looked… It was a constant mess and just not functional for us at all. It just became a horizontal surface that was always cluttered. And y'all, we are very tidy people! But because we didn't really use this space, we didn't stay on top of keeping it tidy.
If you have read my blog or followed me on social media for any length of time, then you may remember that wasted and/or unused spaces are a big pet peeve of mine. So we decided to turn this space into a Butler's pantry that we will use multiple times a day, every single day.
What is a Butler's Pantry?
A butler's pantry is a room or space, usually near the kitchen. Traditionally, a butler's pantry was located between the kitchen and dining room of large homes.
What's the Point of a Butler's Pantry?
Back in the day, a butler's pantry was used as a service and storage area so that dinner guests wouldn't see a messy kitchen. A butler's pantry between the kitchen and dining room made it easier for a host/hostess (or a butler if the household employed one) to entertain without ever having to go into the kitchen or give guests a glance at the kitchen mess.
These days, a lot of people use butler's pantries in their homes for additional storage. Some people like them as a place to prepare food and clean up without getting their entire kitchen dirty. Others use them as a kind of “working kitchen” that is located behind their main kitchen because it helps hide the mess and is a place to put less pretty, more utilitarian things like small appliances.
For us, we could really benefit from a secondary refrigerator because of the way we choose to grocery shop. We could put it in our garage, but we'd rather have it in the house. And since this area sits in between our kitchen and walk-in pantry, it's the perfect spot for one. Our walk-in pantry is HUGE, so we don't need any more non-perishable food storage.
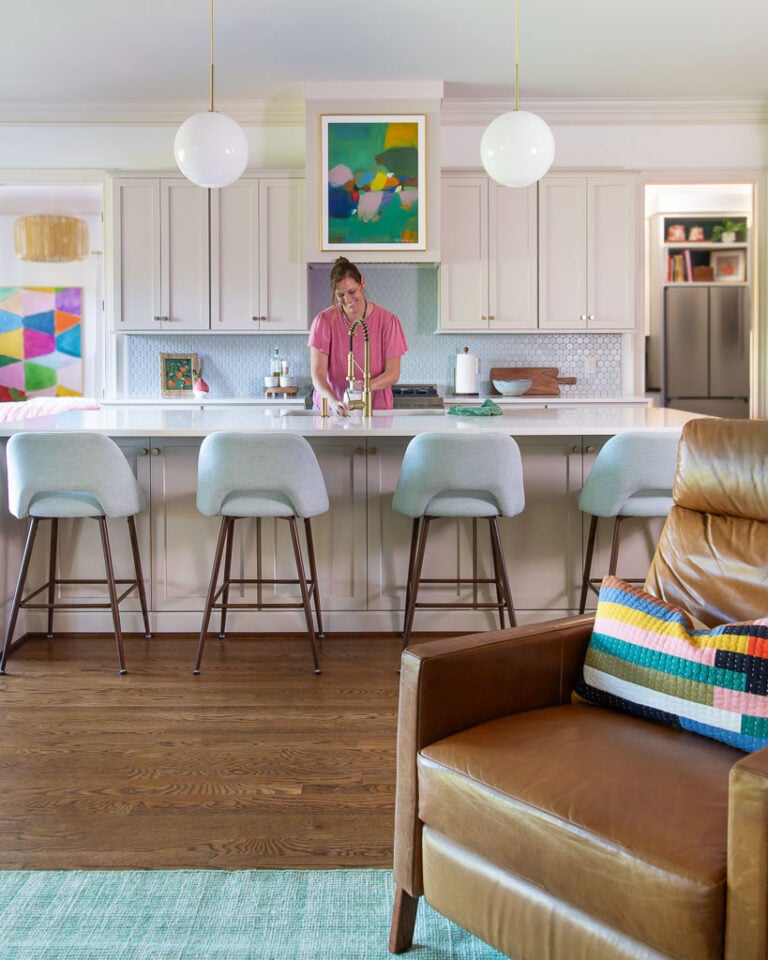
Sounds totally “extra,” but the size of our kitchen is deceiving–it has very little usable counter space so it would be nice to have somewhere else to keep the blender and toaster! It will be a perfect spot for making smoothies, toast, packing lunches, etc.
Our Butler's Pantry Layout and Design
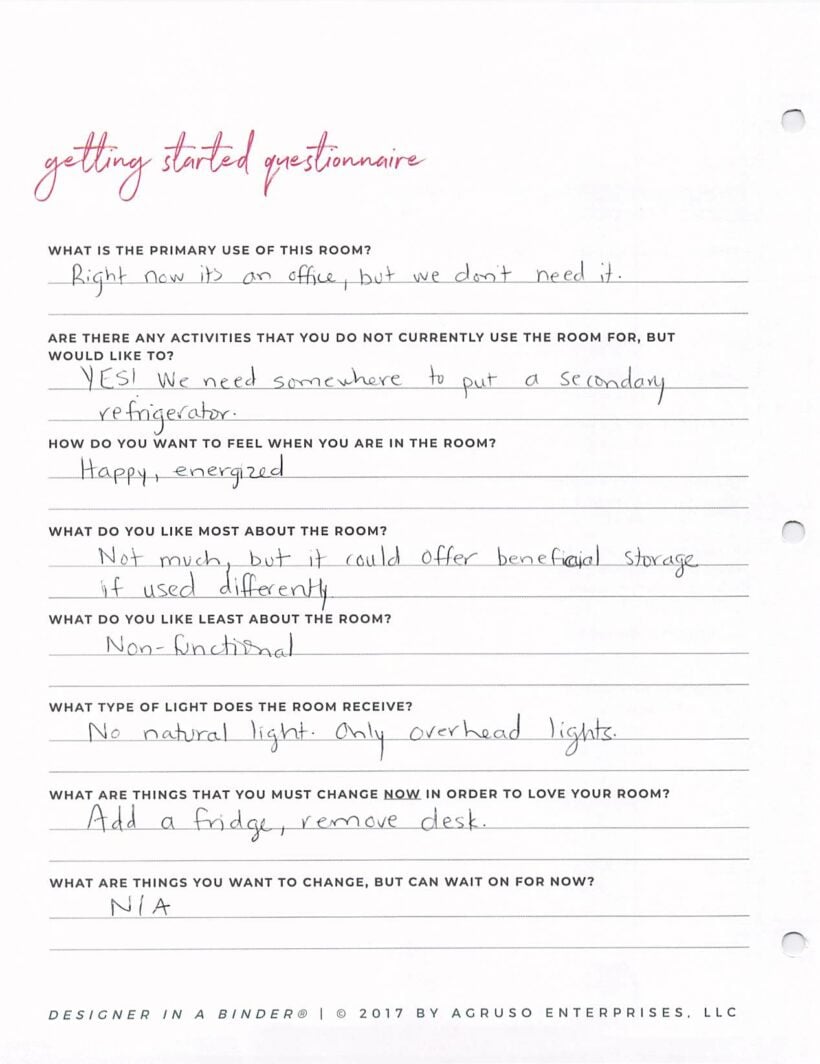
With those thoughts in mind, I took out my Designer in a Binder® and started filling out the worksheets. It's incredible how answering the questions in the worksheets still helps give me clarity so quickly.
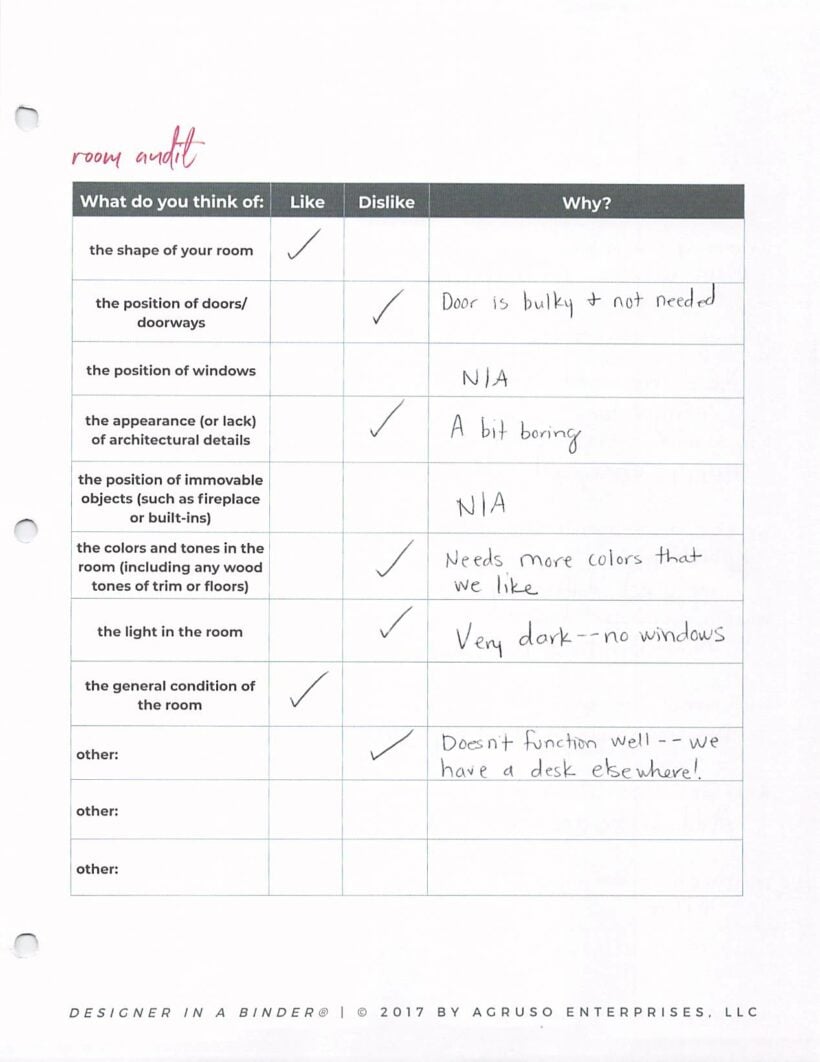
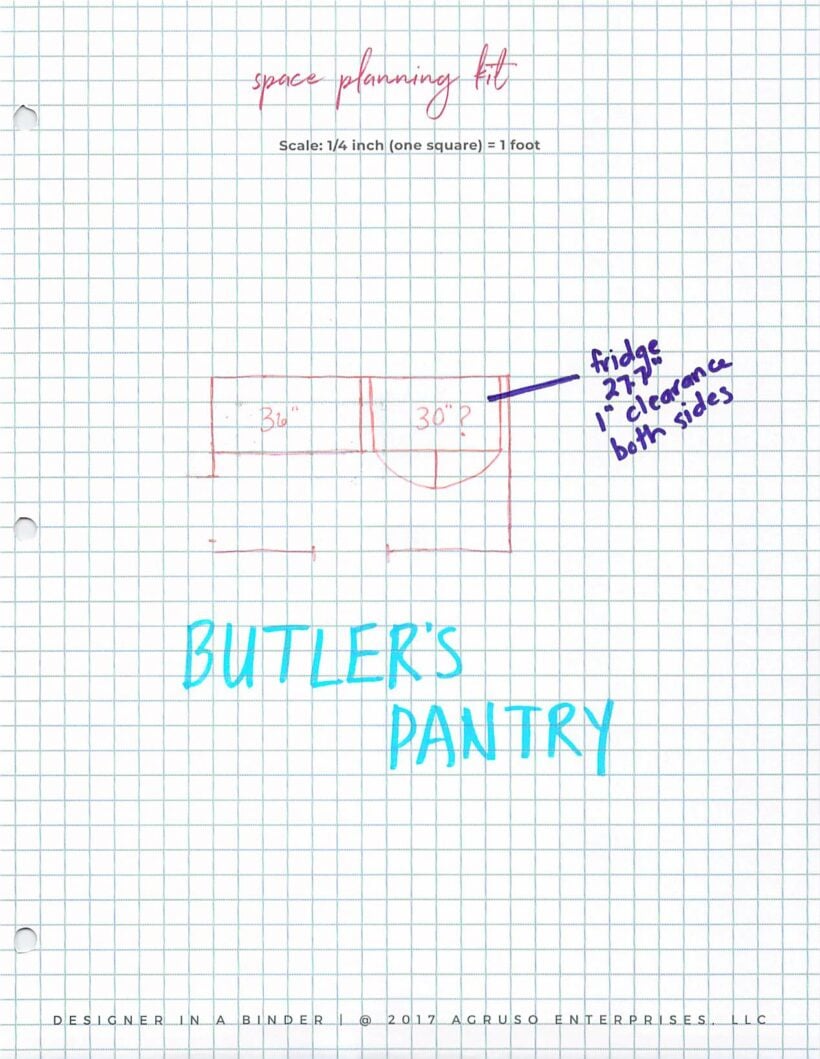
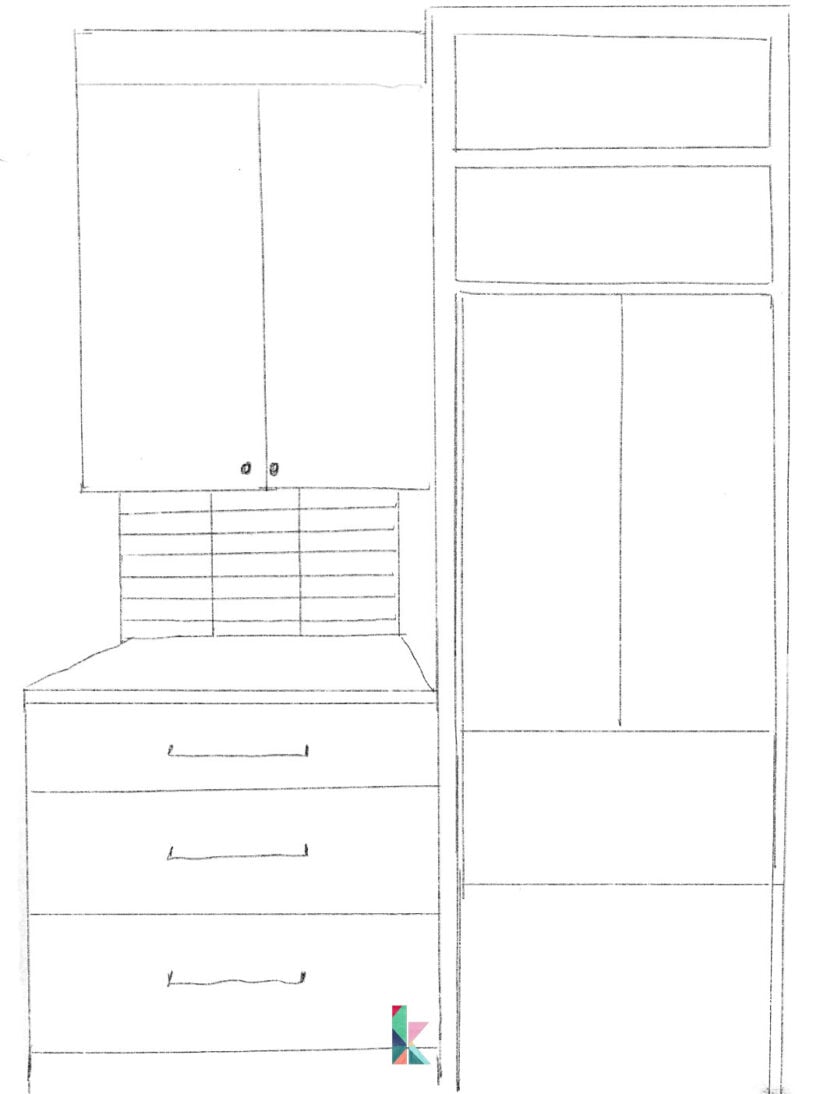
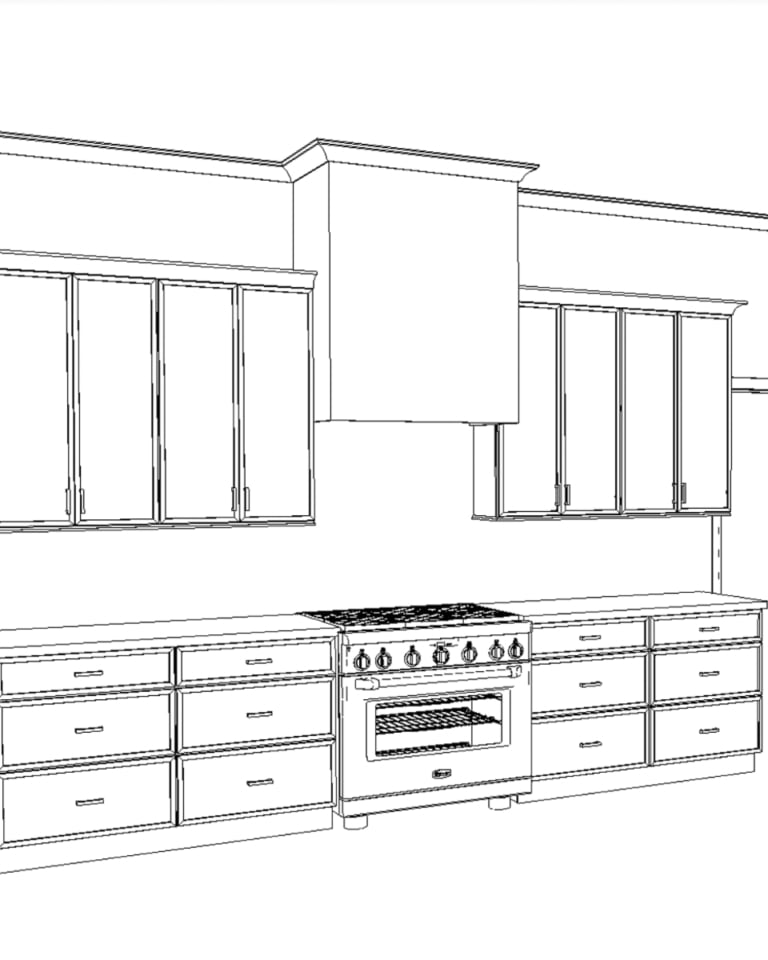
Once I knew what we could (barely) fit into our future butler's pantry, the really fun part started. Here is a sketch of the layout that we came up with.
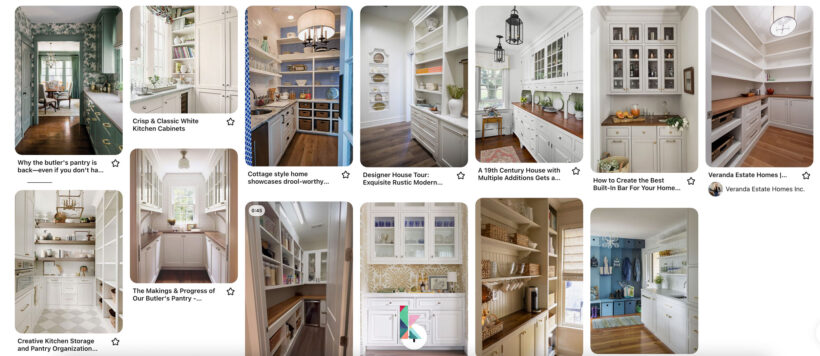
Then it was time for my FAVORITE part… Finding design inspiration and coming up with a cohesive design plan for the space. I walked through inspiration portion of Designer in a Binder®. The strategy I teach in the binder for finding your inspiration and figuring out where to go from there works so well and is TOTALLY effortless.
Here's a peek at the inspiration photos I pinned and studied before coming up with my own butler's pantry design. I then filled out the inspiration questionnaire in Designer in a Binder. I realized quickly that I gravitated towards white cabinets and wood countertops. I also pinned 3 designs that included wallpaper. So I knew those were important elements to include!

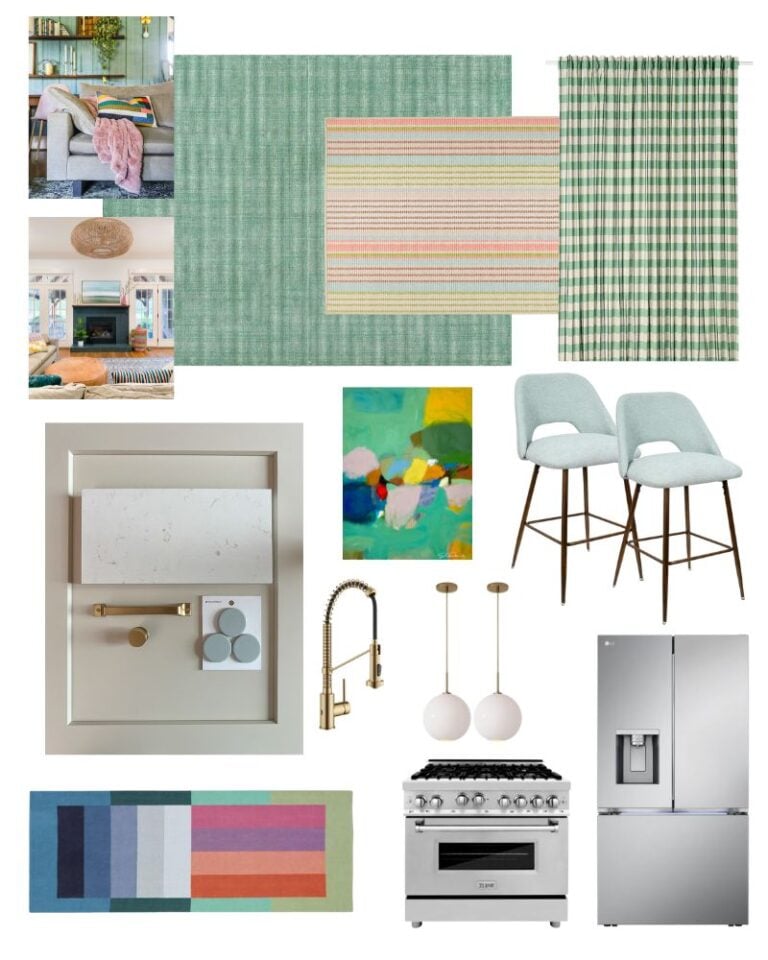
I made a mood board with Canva (below) to visualize all of the design elements together and played around with different colorful kitchen art until I was happy with everything. Fortunately, we had some of this wallpaper that I love leftover from when I added it to the wall behind the DIY wall shelves we added to our family room. And we had enough tile left from our DIY fireplace makeover to tile the backsplash area! I was really hoping the color block runner that we had in the hallway of our old house would fit in the space, but it turned out it was about 6 inches too long :(
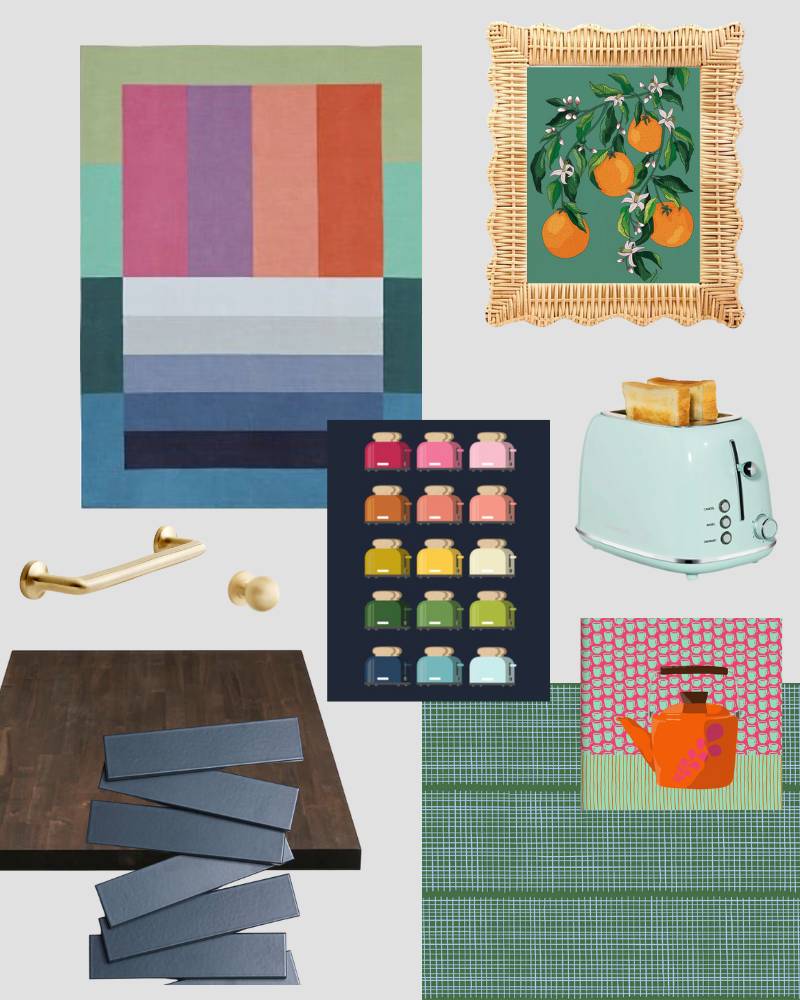
SHOP THE DESIGN

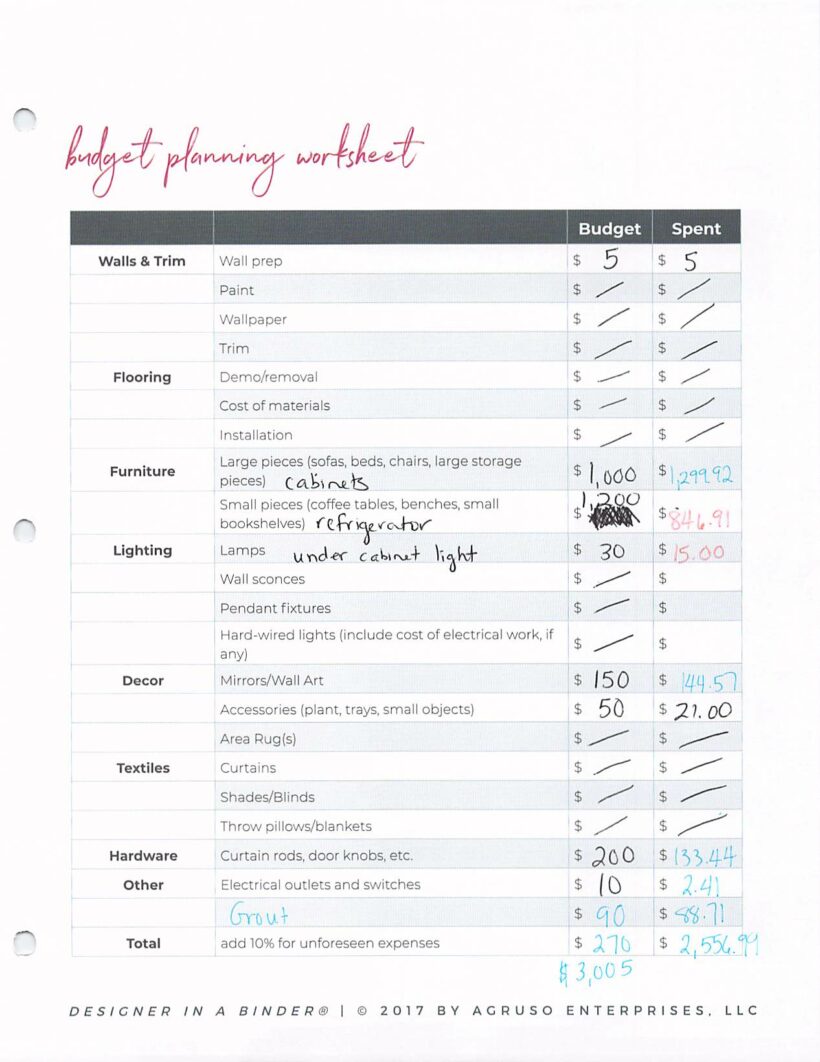
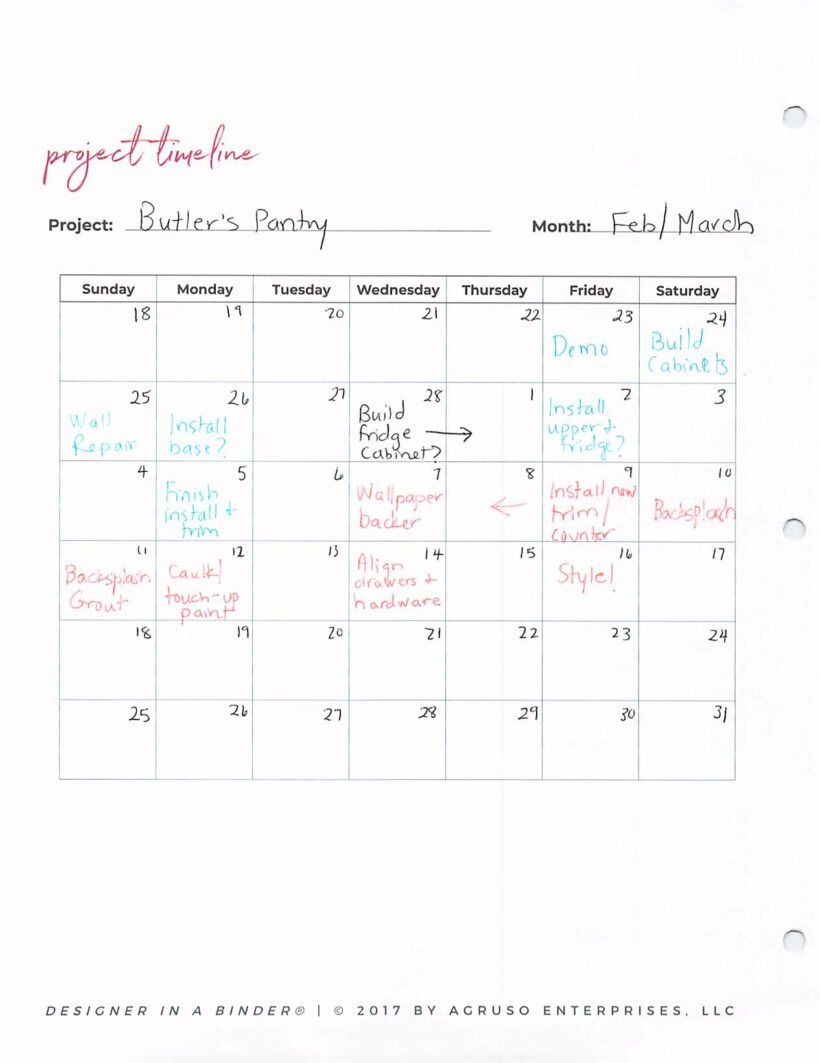
Then I used Designer in a Binder® to create our budget, to-do list and schedule (you can see a couple of the worksheets below). This project took a while to finish, y'all. We worked on it here and there as we had time. Projects take time–never forget that when you see time lapse reels on social media!
The Demo of the Built-In Office and DIY Butler's Pantry Build
You can watch a recap of every step of this project in the video below. Keep in mind, it took us about a month to complete this project start to finish. Projects take time, y'all! That's normal.
Our Butler's Pantry Reveal
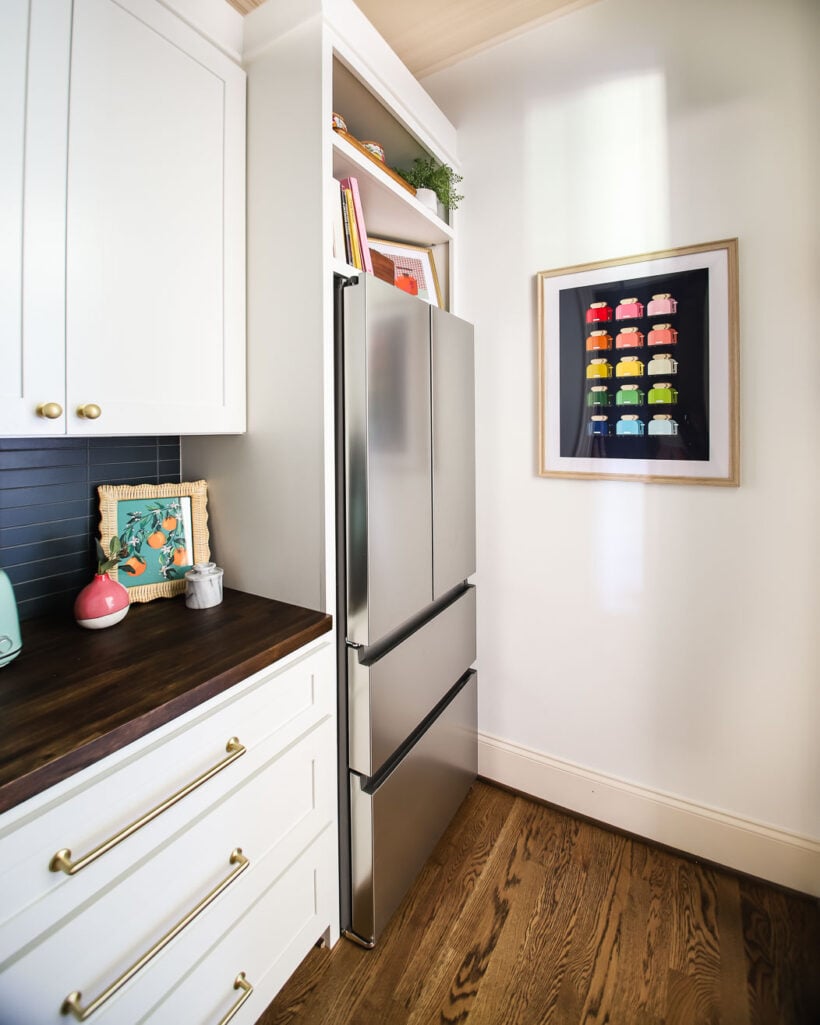
Now that you know where we started and how we got to this point, let me show you how it turned out!
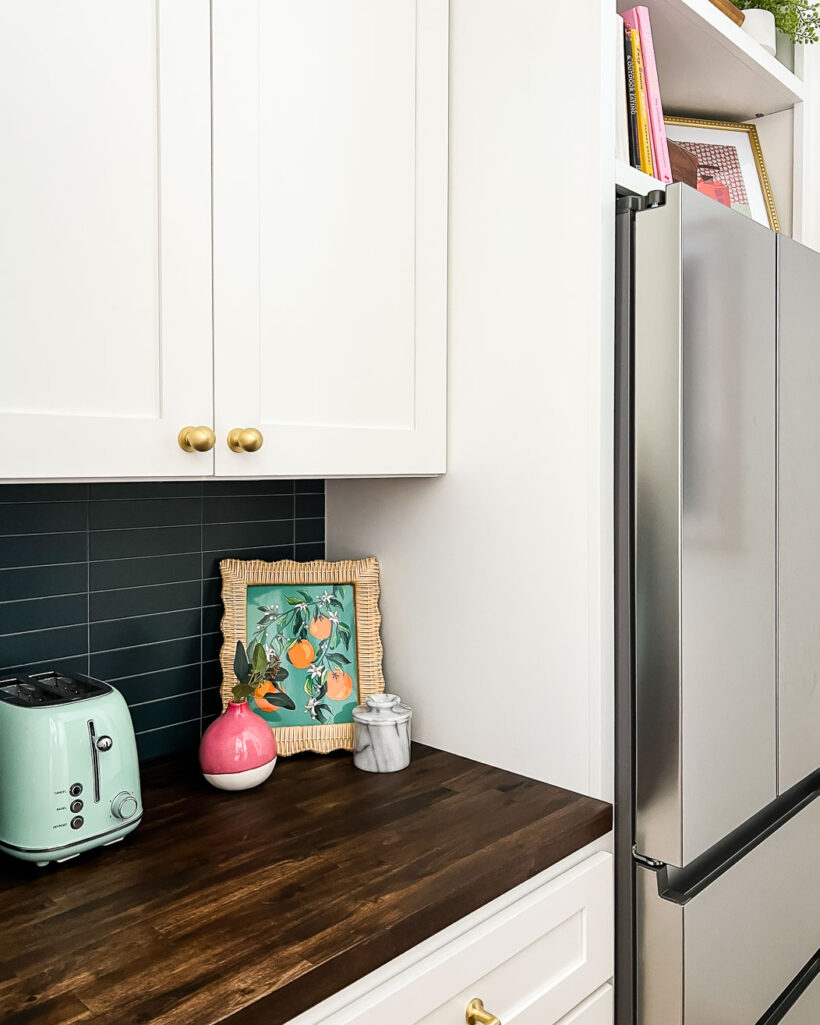
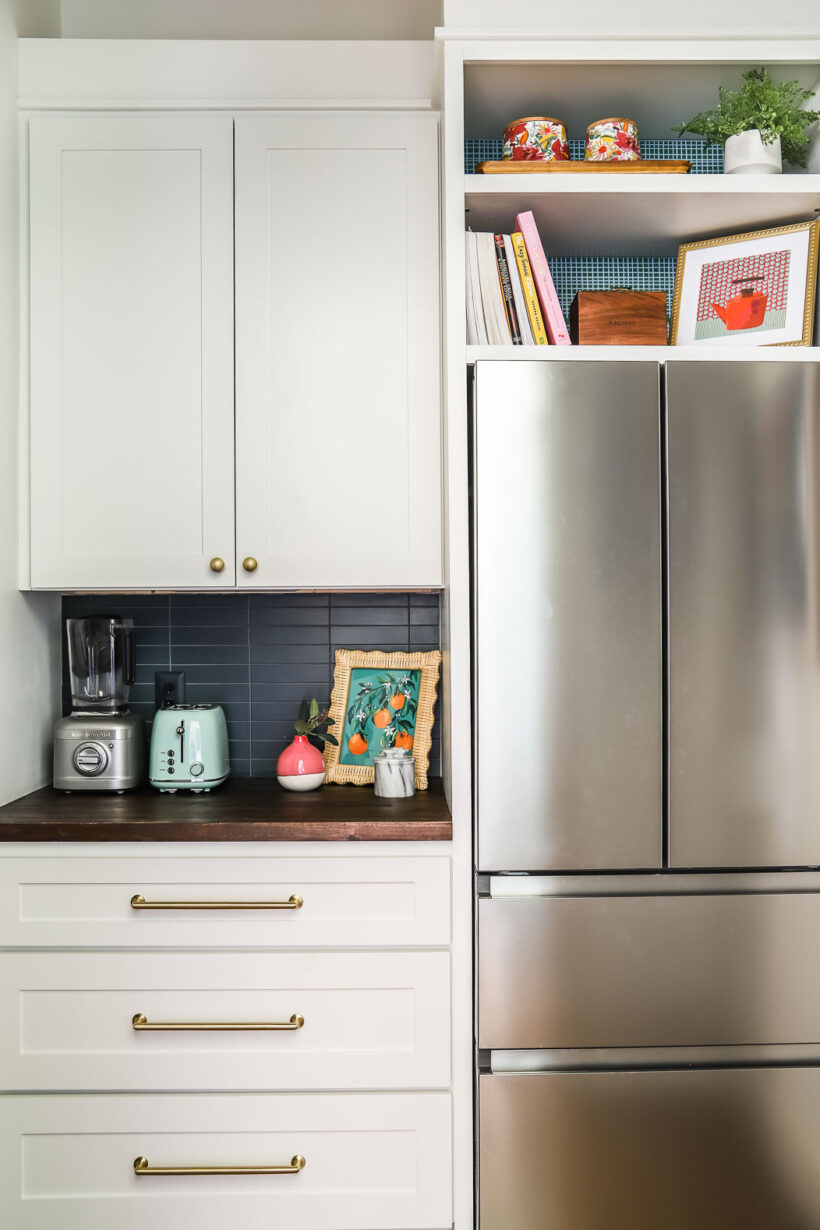
If you followed along with the transformation on Instagram, you know that we purchased the upper and lower cabinets, but we had to build a custom cabinet for the refrigerator because this 27.7″ refrigerator we used is not a standard size. I'm pretty proud that the cabinetry we built blends in seamlessly with the cabinets we purchased!
I'm thrilled with how the backsplash turned out. You can learn how to install a tile backsplash in the tutorial I shared recently and you can see budget-friendly DIY backsplash ideas here.
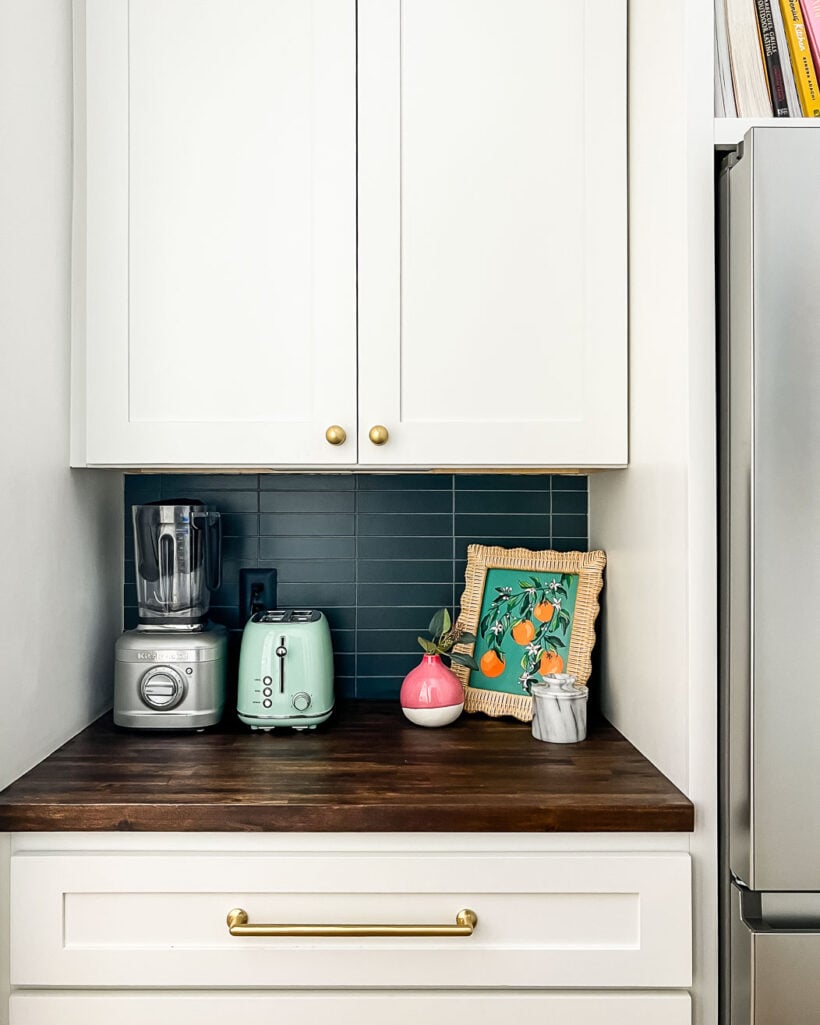
The space on its own is fairly neutral with the white cabinetry, wood countertop and navy tile backsplash. So you know I was excited to bring some color into the space in creative ways! If you love the idea of decorating with color, but it makes you nervous, check out this post: 5 Tips for Decorating With Color Even When It Scares You.
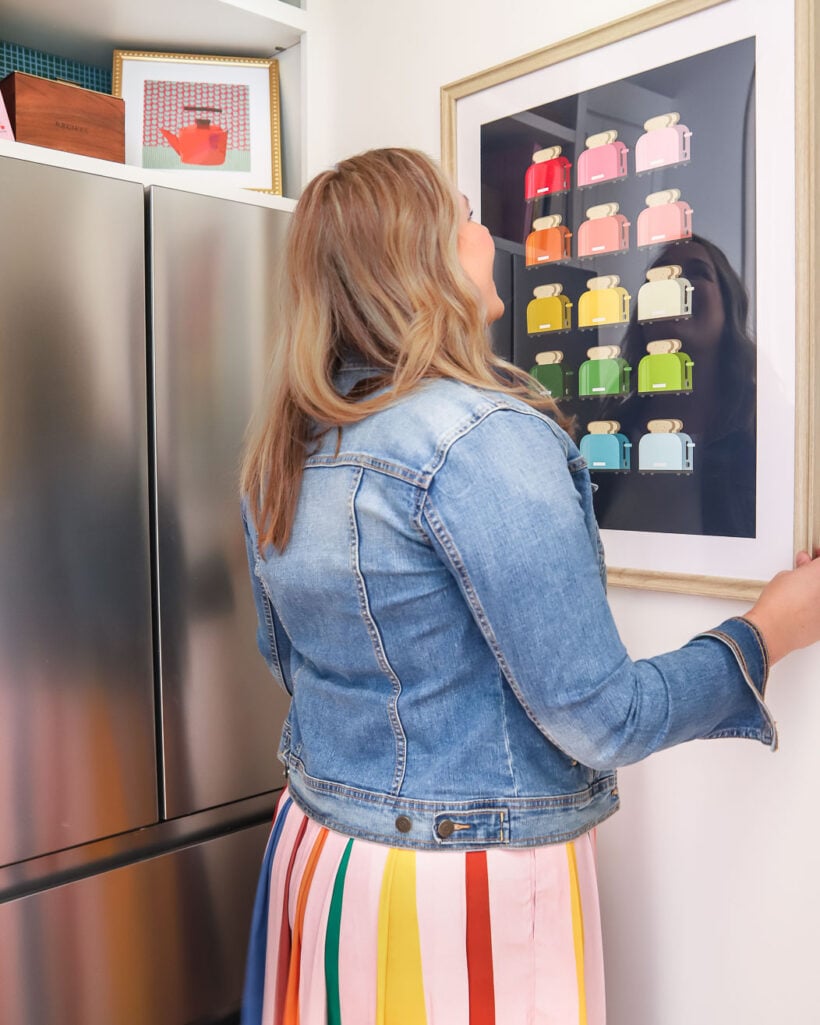
I added the first pop of color by using this wallpaper to cover the back panel of the refrigerator cabinet. I love how it looks behind the shelf. I used my method of how to any wallpaper removable in case we ever want to change it.
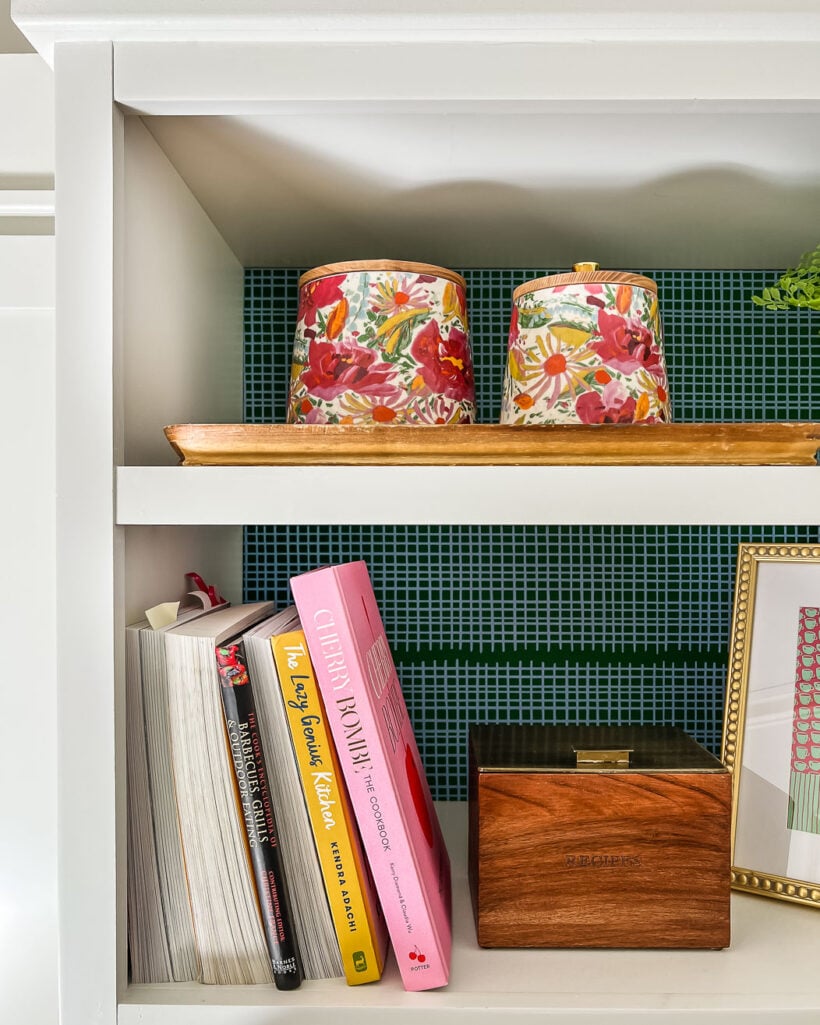
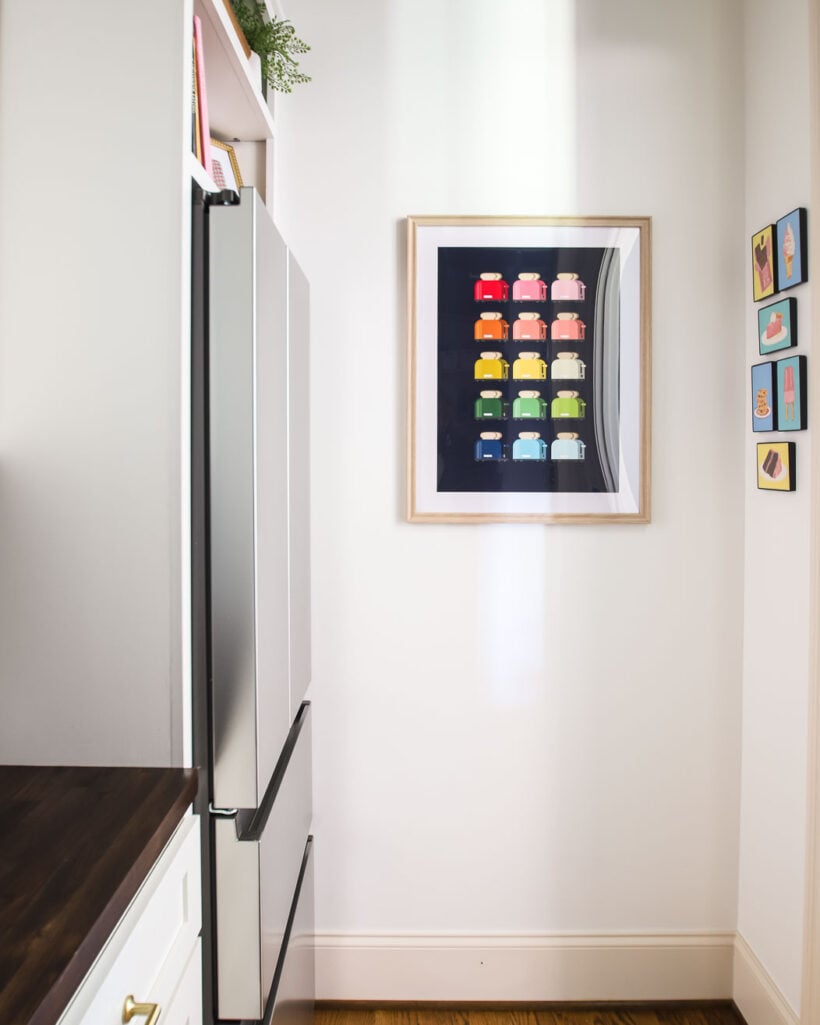
Then I brought in more color with some colorful kitchen art, cookbooks we already had and our cute toaster :)
I even added some special paint-by-number postcards that we painted with our girls about 5 years ago to the sliver of wall by the door opening. It's a special memory that we can peek at every time we walk out of our pantry.
So that's it! I'll be back with more tutorials and to show you how we will organize and use this space. But we are already in love with it and are so grateful to now USE this area every day!
Here's a before and after before you head out!
Butler's Pantry Source List
- Backsplash Tile
- Toaster
- Mable Butter Keeper
- Refrigerator
- Drawer Pulls (ours are 12 inches long)
- Cabinet Knobs
- Wood Countertop
- Cabinets
- Wallpaper
- Orange Blossom Art
- Scallop Rattan Frame
- Gold Bead Frame
- Tea Kettle Art
- Recipe Box
- Faux Fern
- Colorful Toaster Art
- Wood Poster Frame
Other posts you may enjoy:
- Kitchen Pantry Organization Tips & Ideas
- Affordable DIY Countertops That Will Blow Your Mind
- How to Refinish Butcher Block Countertops
- Budget-Friendly Kitchen Makeover Reveal
- Creative Pantry Shelving Ideas to Optimize Storage Space
- How to Maximize Your Walk-In Pantry Space
More Design Inspiration
To see more of my own designs and designs from Designer in a Binder® customers, check out these posts!
Wondering how I approach transforming rooms and spaces in our home? Check out Designer in a Binder®.

And if you want exclusive content and behind-the-scenes sneak peeks, be sure to subscribe before you head out!

Tasha — I see Dana K. White in the photo in the Beautiful Home Summit picture. My favorite declutterer. You always put on a great venue.
Nailed it! As always, beautiful integration on color, texture and layers.
Do you have a source for the beautiful color block rug you were going to use?
Thank you so much, Cazra! Unfortunately, that color block rug is about 5 years old and isn’t available anymore. I purchased it from West Elm.
This is an awesome idea. You gave me an idea of what to do with our 6-foot pantry that my husband just hates. It’s a semi-walk in about cabinet deep with with plain Jane folding doors. I’m thinking less storage plus coffee bar. Thanks for showing your work sheets. Now let me get out my Designer in a Binder (your Deluxe offer) that I bought around the start of covid19 and put on the shelf for better days.
Oh I’m so happy to hear that Doris! I hope you can create a space that both you and your husband love!
Such a wonderful idea! It looks great.
Thank you so much Jayne!
I love it! What a great use of the space. So much more functional for your family.
Thank you Kristi! We are already using this space so much!
So good!! And so fun to see your paint by numbers up. ❤️. Love that you showed how you used your designer in a binder workbook too. I’ve wanted to see how you used it but haven’t made time to look around. Very helpful. Thank you!
Can’t wait to ride along on this new project makeover! Everything you do is gorgeous so I am excited to see your plans come to fruition!
Oh thank you Cindy! We are really excited to create a functional Butler’s pantry in this area. It will be great to have a space that we use multiple times a day instead of the built-in desk area that we never use :)