Tips for a Budget Bathroom Makeover + Attley’s Bathroom Reveal
Renovating a bathroom can be a daunting and expensive task. According to the National Kitchen and Bath Association, the average cost of a bathroom renovation is around $8,100. But we were able to transform our daughter's dull and outdated bathroom into a vibrant and stylish space for less than $2,000! In this post, I'm sharing the creative solutions we used to save money and the specific things we did to pull off this dramatic bathroom makeover on a budget. With just a little work, you can give your old bathroom new life.
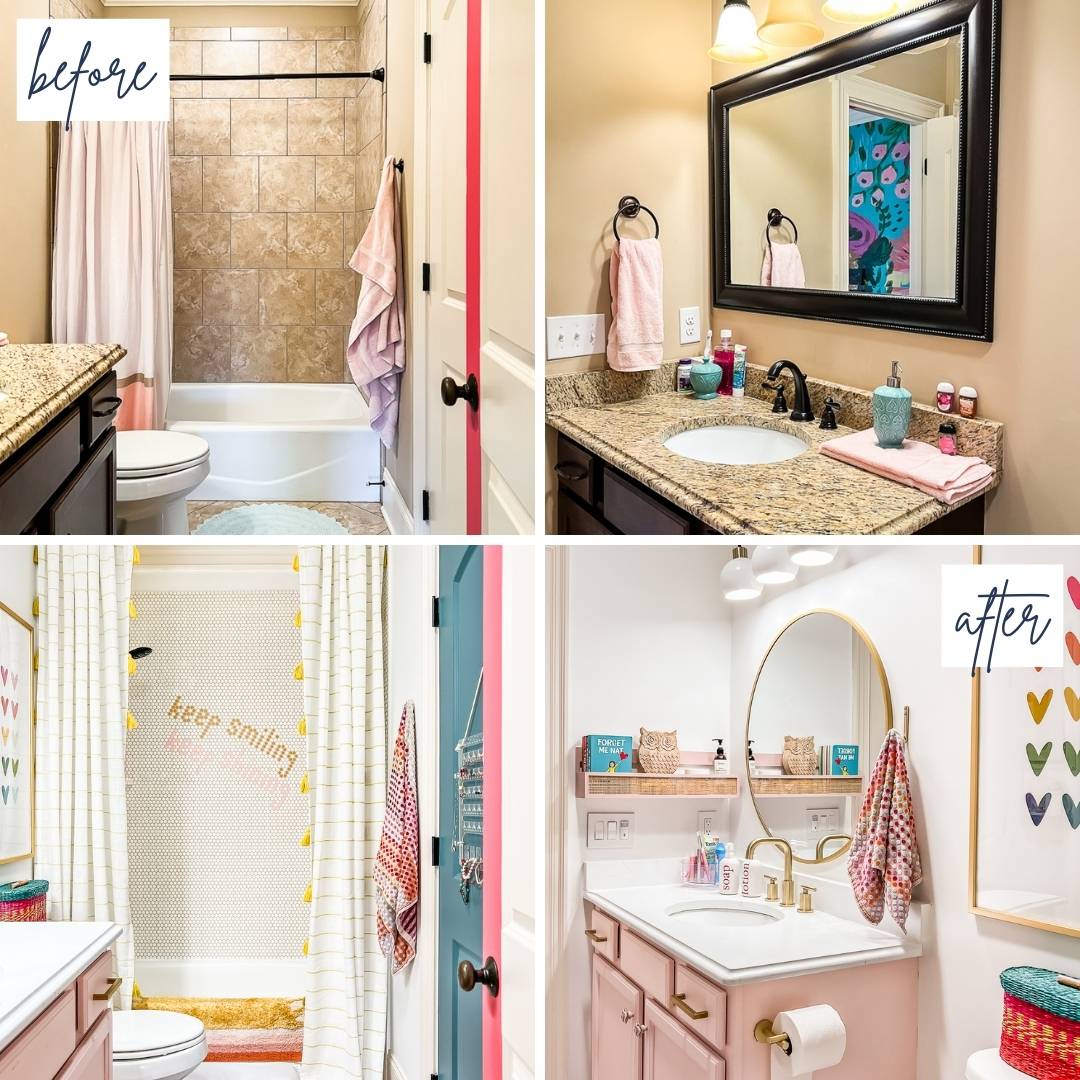
Y'all, we survived yet ANOTHER bathroom makeover/renovation! This is far from the first bathroom we have updated. A couple were complete gut jobs, but others were incredibly budget-friendly DIY renovations like this one! To stretch your bathroom renovation budget, check out this entire post with DIY bathroom remodel ideas to save money. And you can see the details of the other four other bathroom renovations and makeovers we have tackled at the end of this post.
We completely updated our daughter Attley's bathroom for under $1,700, including the cost of all the materials and decor, which is a whopping $6,400 lower than the average bathroom renovation cost of $8,100. Read on to learn how we did it!
This post contains affiliate links for your convenience. Click here for my full disclosure policy.
Tips To Tackle a Bathroom Makeover on a Budget
Tip 1: Start with a Plan
Creating a plan is the first step to any successful renovation or room makeover. As always, I used the Designer in a Binder® system to plan this bathroom makeover from start to finish. As part of that process, I created a digital mood board to get a good visual of everything together before I started ordering anything. We also used Designer in a Binder® to plan our budget, list what we needed to purchase, and create a to-do list and project timeline.
Having a solid design and execution plan will help everything go more smoothly, I promise! We started our bathroom remodel with a clear idea of what we wanted to do, and we stuck to the plan and avoided unnecessary spending and wasted time.
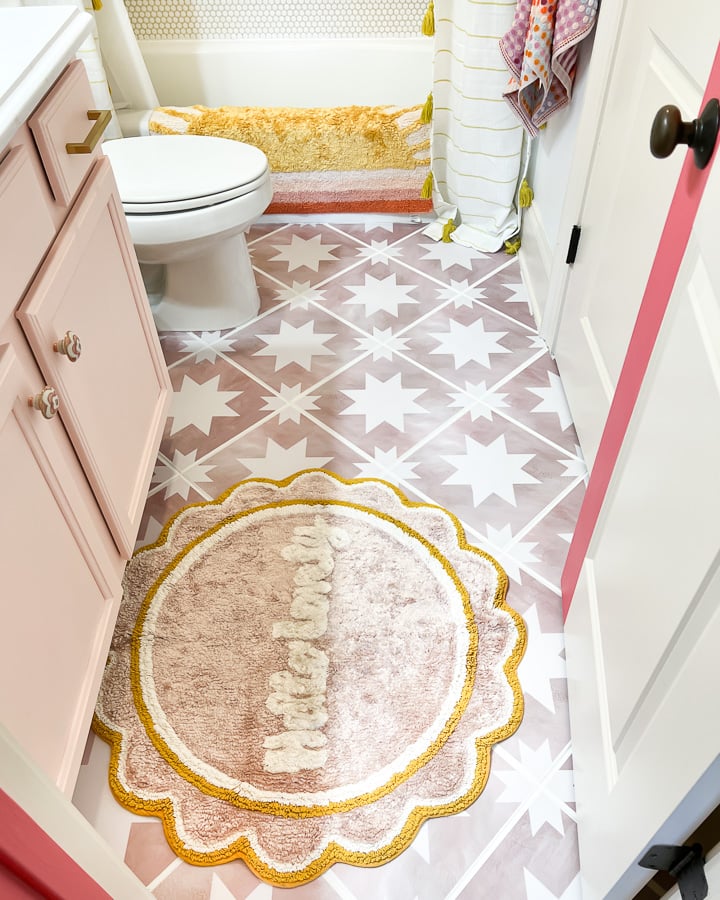
If you are a Designer in a Binder® customer and are curious, this bathmat was the “crucial element” for Attley's bathroom—it made all the other decisions so easy! (Click here for a similar mat).
Tip 2: Keep the Existing Layout
If you want to save money on a bathroom renovation, you can save a ton of money by keeping the existing layout. Changing the layout of your bathroom can often require moving plumbing and electrical, which can get expensive quickly. By keeping the existing layout, you can focus on updating the aesthetic of your bathroom with new fixtures, paint, and decor rather than spending money on costly plumbing and electrical work. This can be a great option for those on a budget who still want to give their bathroom a fresh look. In Attley's bathroom, we were happy with the layout, so we kept it and saved ourselves a ton of money!
Tip 3: Reuse as Many Existing Materials as Possible
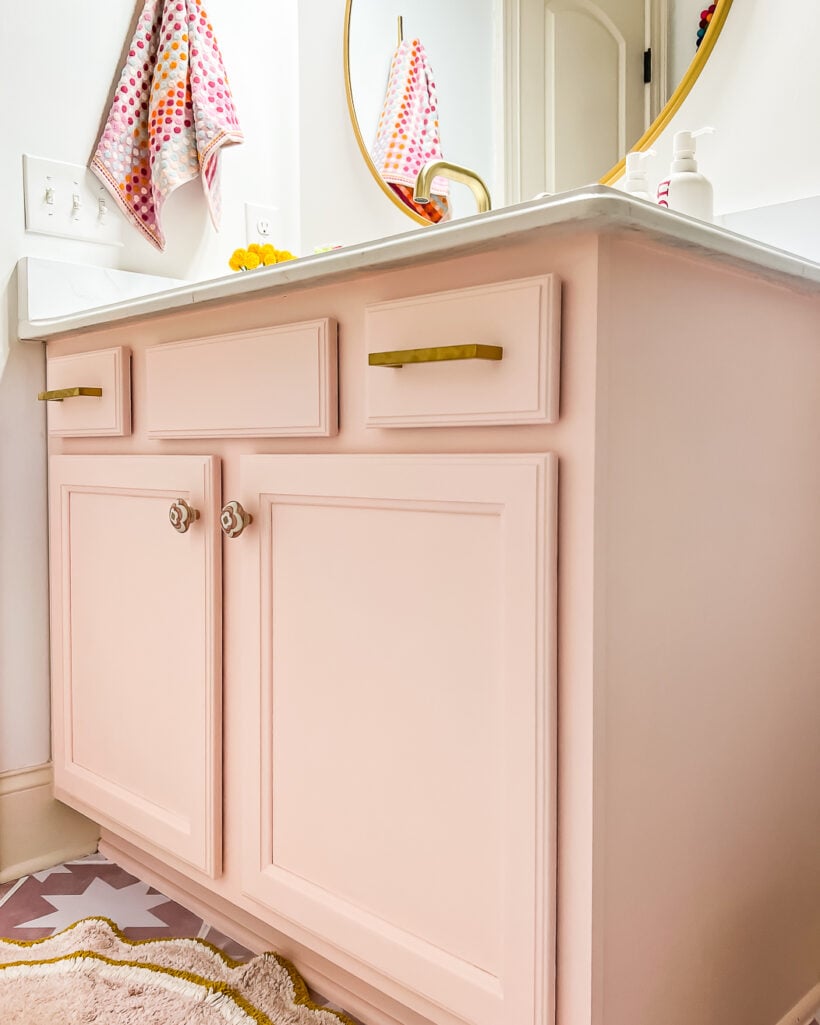
Another way to save money on a bathroom renovation is by reusing existing materials whenever possible. For example, if your current vanity, sink, or bathtub are still in good condition, consider keeping them and simply updating their look with a fresh coat of paint or new hardware. This can be a cost-effective way to give your bathroom a new look without spending a lot of money on new materials like bathroom cabinetry and plumbing.
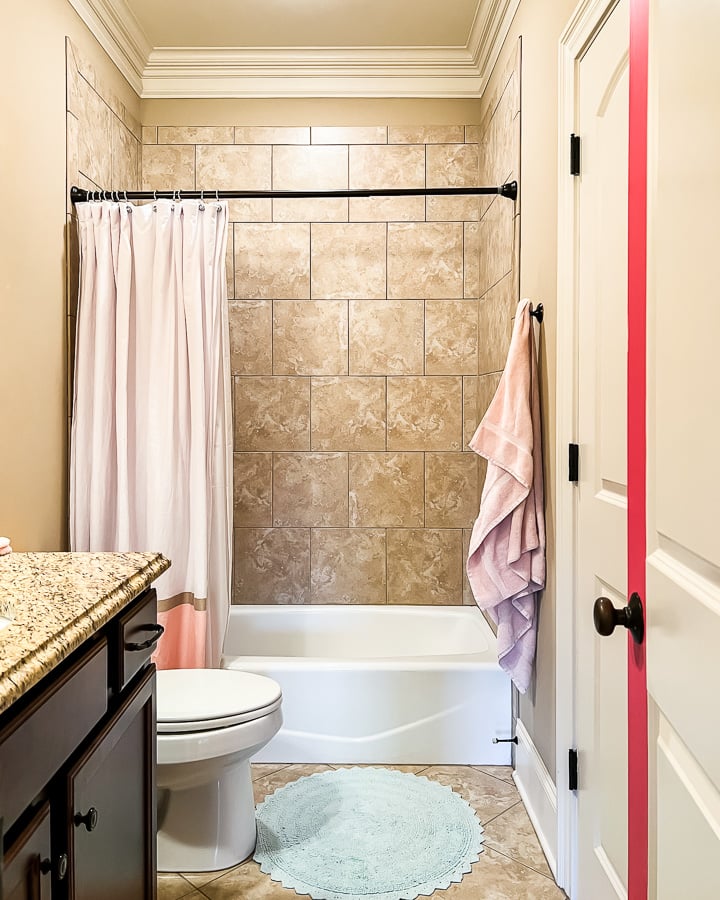
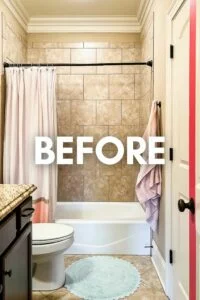
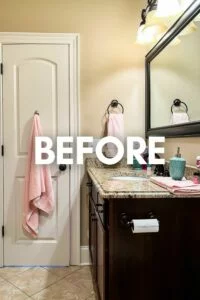
Attley's bathtub, toilet, sink, and vanity were all in great shape, so we decided to keep all the existing materials in her bathroom. But aesthetically, they didn't fit in with the style of our home. So we decided to update several things with paint! This leads me to my next tip…
Tip 4: Update as Much as You Can with Paint
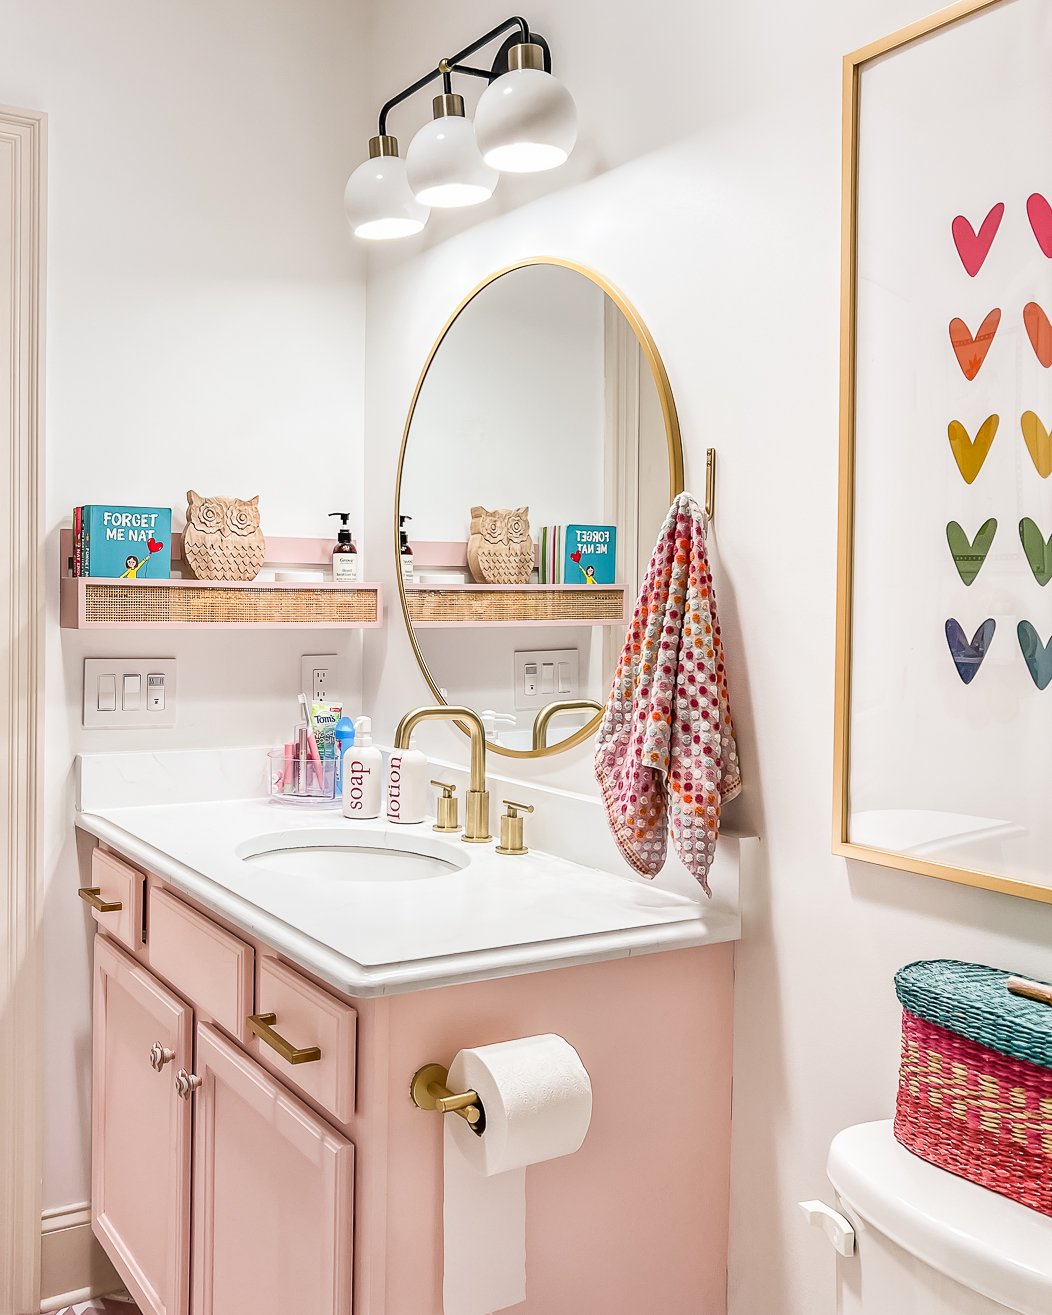
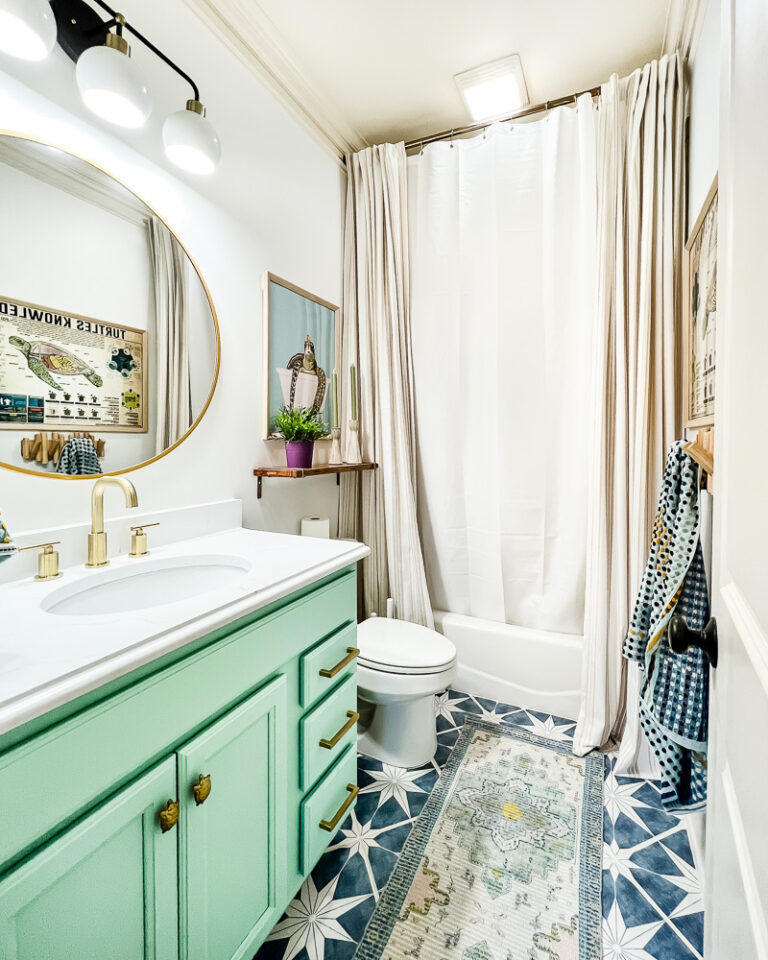
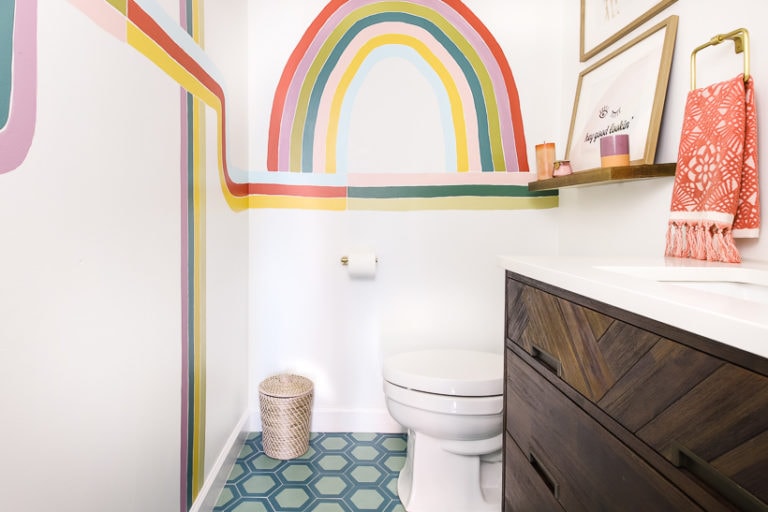
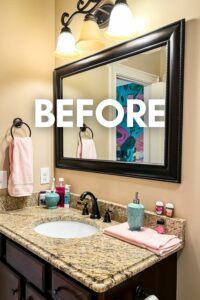
The easiest way to transform a bathroom is to give it a fresh coat of paint. Lighter colors are a great way to brighten up. We repainted Attley's formerly brown walls with Pure White by Sherwin Williams. That alone made a huge difference!
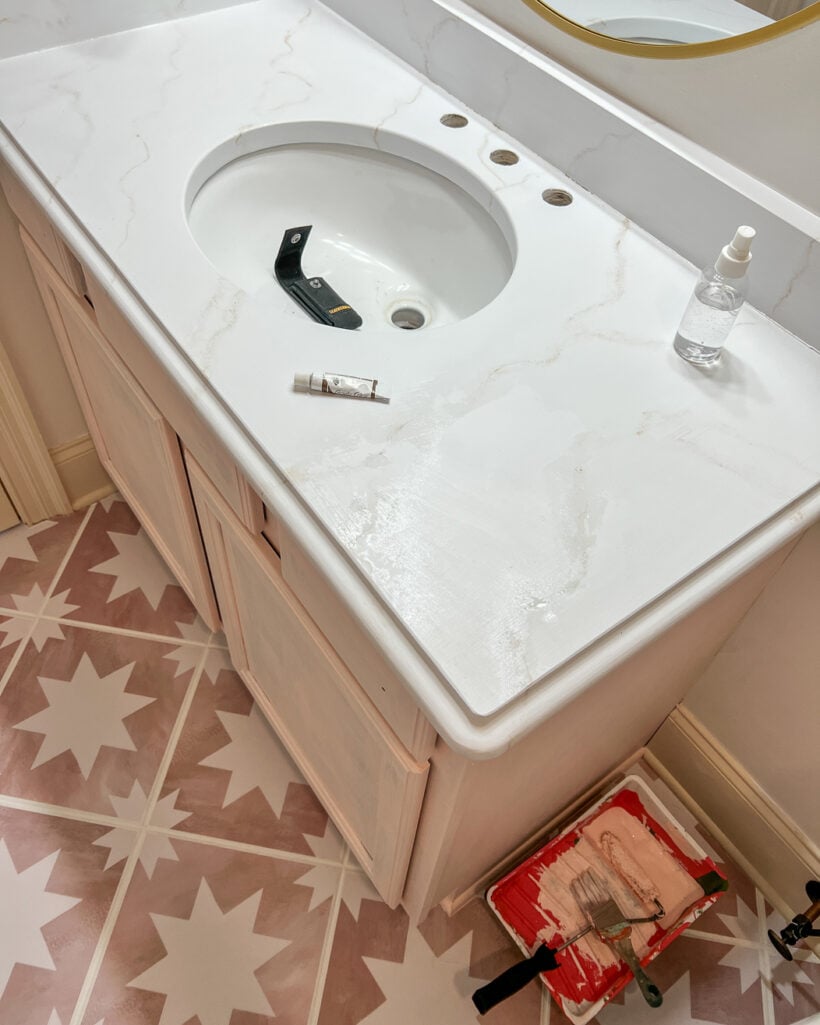
I also painted her countertops to look like marble (it's been almost two years, and they are holding up beautifully). I also used this quick and easy cabinet painting method to paint her vanity. Those three simple painting projects made a HUGE impact in this bathroom. Paint is honestly the best small bathroom idea.
Tip 5: Update an Outdated Floor Tile
If you have an outdated bathroom floor that is in good shape, you can change its appearance without ripping it out and replacing it! There are lots of cheap flooring ideas you could apply in a bathroom. In Attley's bathroom, I covered her old brown floor tiles with these GORGEOUS tile stickers.

There's a lot of confusion and misunderstanding about tile stickers, so I highly recommend you check out this post with everything you need to know about tile stickers. The short version is that they are incredibly durable and waterproof. The tile stickers in both of our girls' bathrooms are holding up perfectly. If you are skeptical (most people are), you can watch the short video below to see for yourself :)
Tip 6: Consider Tiling Over Existing Tile
If you have outdated shower tile, you may think the only option to update them is to paint your shower tiles (which can be done with a special kit) or rip them out and start over. Let me tell you, complete tile installation is no joke. But there is another option that will save you time and money! You can tile over existing tile if the tile is in good, stable condition without any leaks or cracks. I know it sounds a bit crazy, but hear me out…
When we were trying to figure out how to deal with the brown tiles in Attley's shower, I remembered that my friend Bre from Brepurposed tiled over existing tile in one of her bathrooms. Her father-in-law is a tile expert, so I was convinced it could be done well. She didn't do it in a shower, but it made me wonder if I could. So I started doing research.
After lots of research, we decided to go for it and tile over our existing tile. Check out my post on how to tile over tile and determine if it is a good option for you! I share exactly how we did it and when it's a viable option (spoiler alert–it's often a BAD idea).
Since our shower tile was in perfect condition and we were 100% confident we had no leaks, grout deterioration, or moisture issues, we decided to tile over it! I ordered the penny tile we chose immediately and gathered the rest of the supplies we needed. As you'll see from the photos, it worked perfectly! We installed the penny tile over her old tile almost two years ago and haven't had any issues.
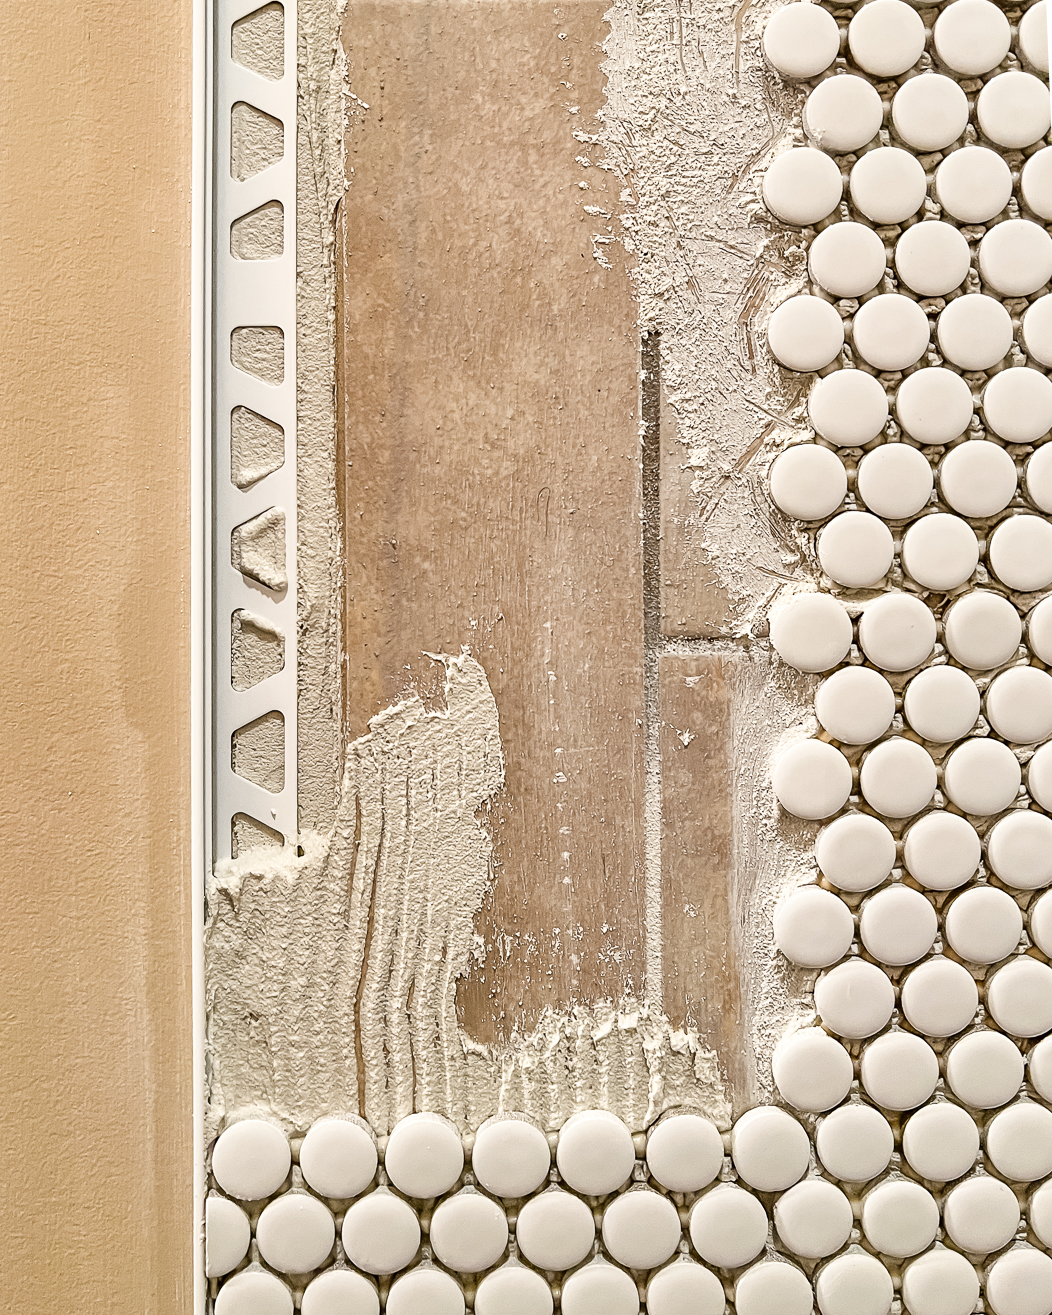
Tiling and grouting Attley's shower was not a small job, but it turned out beautifully! And because we didn't demo the old tile, we saved a ton of time and money because we didn't have to replace the cement board, etc.
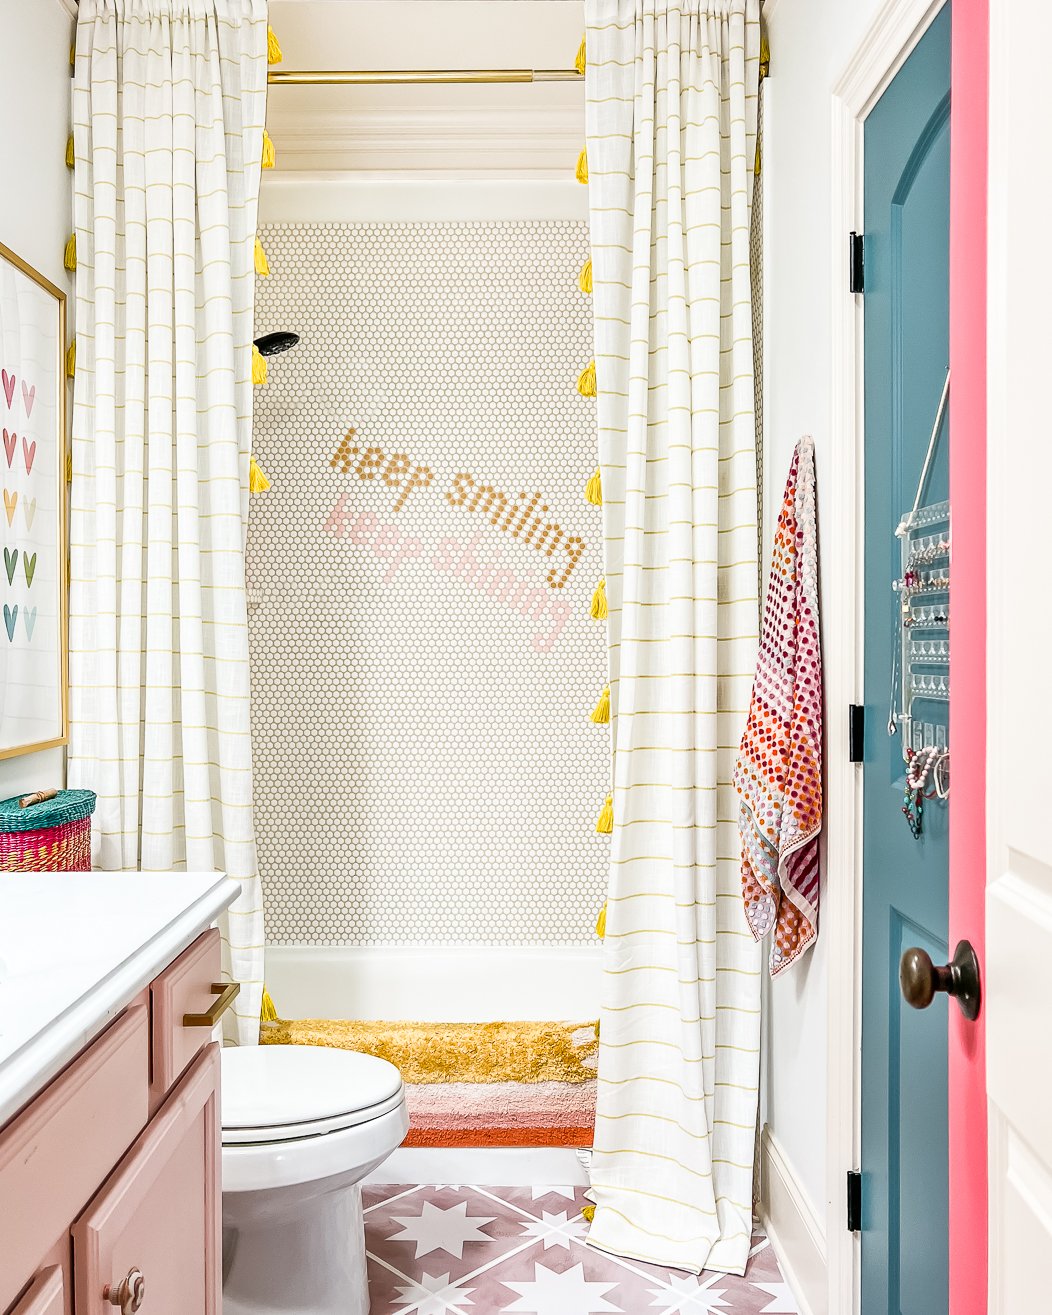
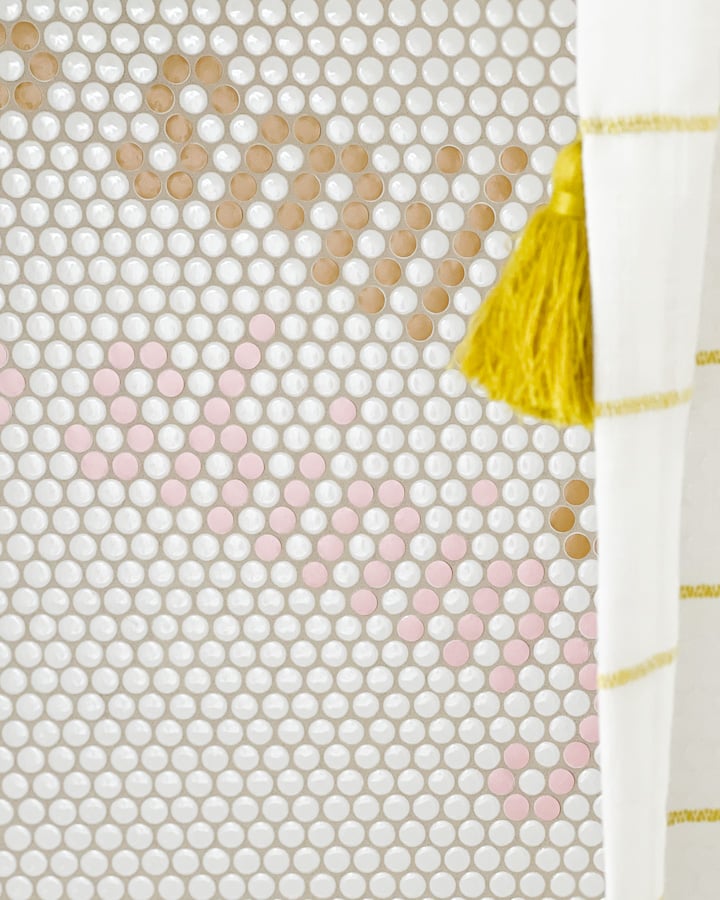
I also added a personal touch by using the same method I used on our DIY tile headboard–I added vinyl circle cutouts to add visual interest and create a custom message on her penny tiles (vinyl is waterproof!).
Tip 7: Upgrade the Lighting and Plumbing Fixtures
These days, if you go online or to any home center, you can find quality light fixtures and faucets that look great but don't cost a fortune. Spending a bit of money to update the lighting and fixtures in your bathroom will go a long way toward giving your bathroom an updated look.
I swapped out the old mirror for a 32″ round wall mirror. I also updated the light fixture with this beautiful and modern light fixture and swapped out the bathroom faucet for this more modern option.

Tip 8: Make an Impact with the Bathroom Decor
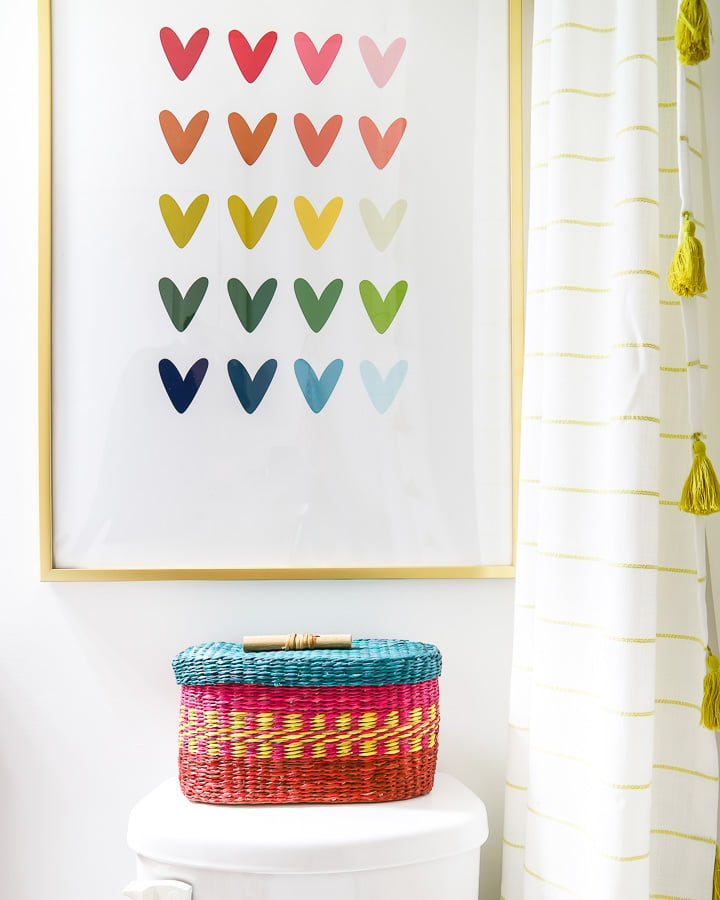
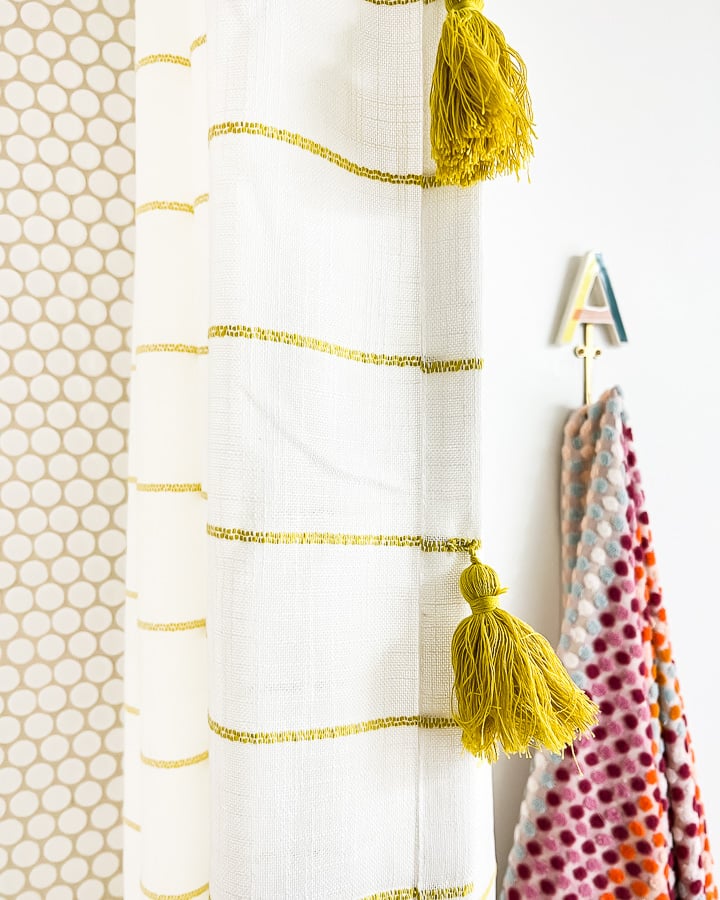
Don't underestimate how much you can transform a bathroom with well-thought-out bathroom decor that will make a big visual impact. For example, I hung 9-foot window curtains (click here for similar) on each side of the shower and this 9-foot shower curtain on a separate rod behind the curtains. The curtains frame the shower and tub beautifully, and because we hang them all the way to the ceiling, the bathroom feels much larger than it is!

I also added colorful artwork and accessories. If you have been around a while, you know Attley loves ALLLLLLL the colors :) Attley begged me to include a rainbow art print in her bathroom (I chose the 24 x 36 size) and framed it with this inexpensive poster frame that is a favorite of mine. And when I saw a storage basket (similar) that fits toilet paper perfectly, I knew we had to have it in her bathroom.
Her bathroom also has a few other fun touches, including a cute monogrammed hook for hanging her bath towel (bathrooms need plenty of towel hooks and handy storage).
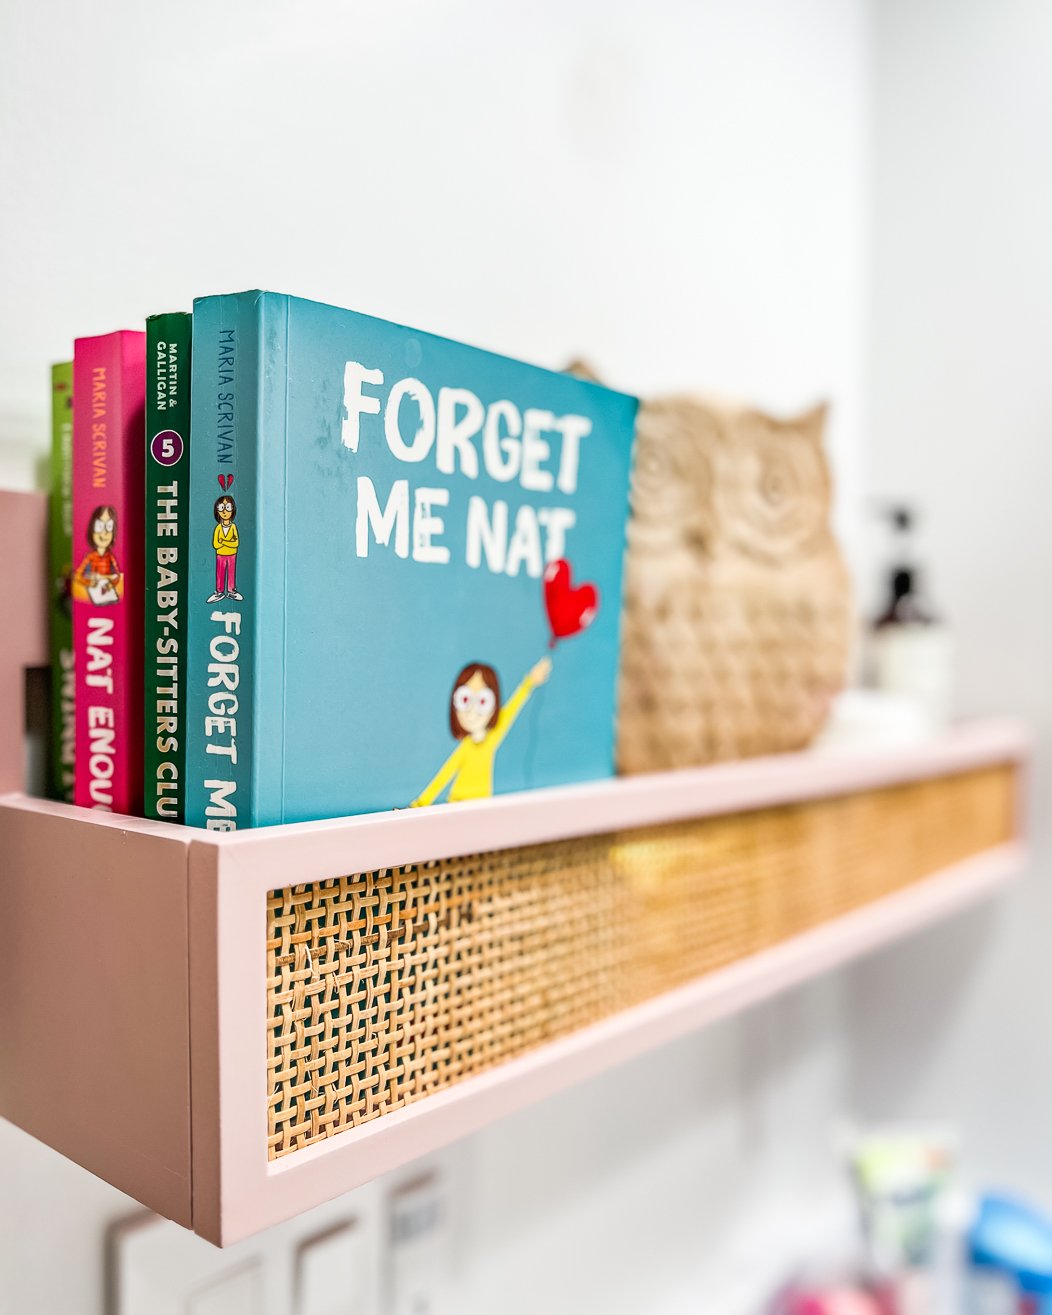
Recently, I added some cute and functional storage to her bathroom since she is now a tween and has more things like jewelry and makeup cluttering her countertop. I hung this adorable wall shelf by her sink to get her books, lotion, and hand sanitizer off the countertop.
I found this inexpensive acrylic jewelry organizer that we hung on the back of her door. This also enabled us to get all of her jewelry off her countertop.
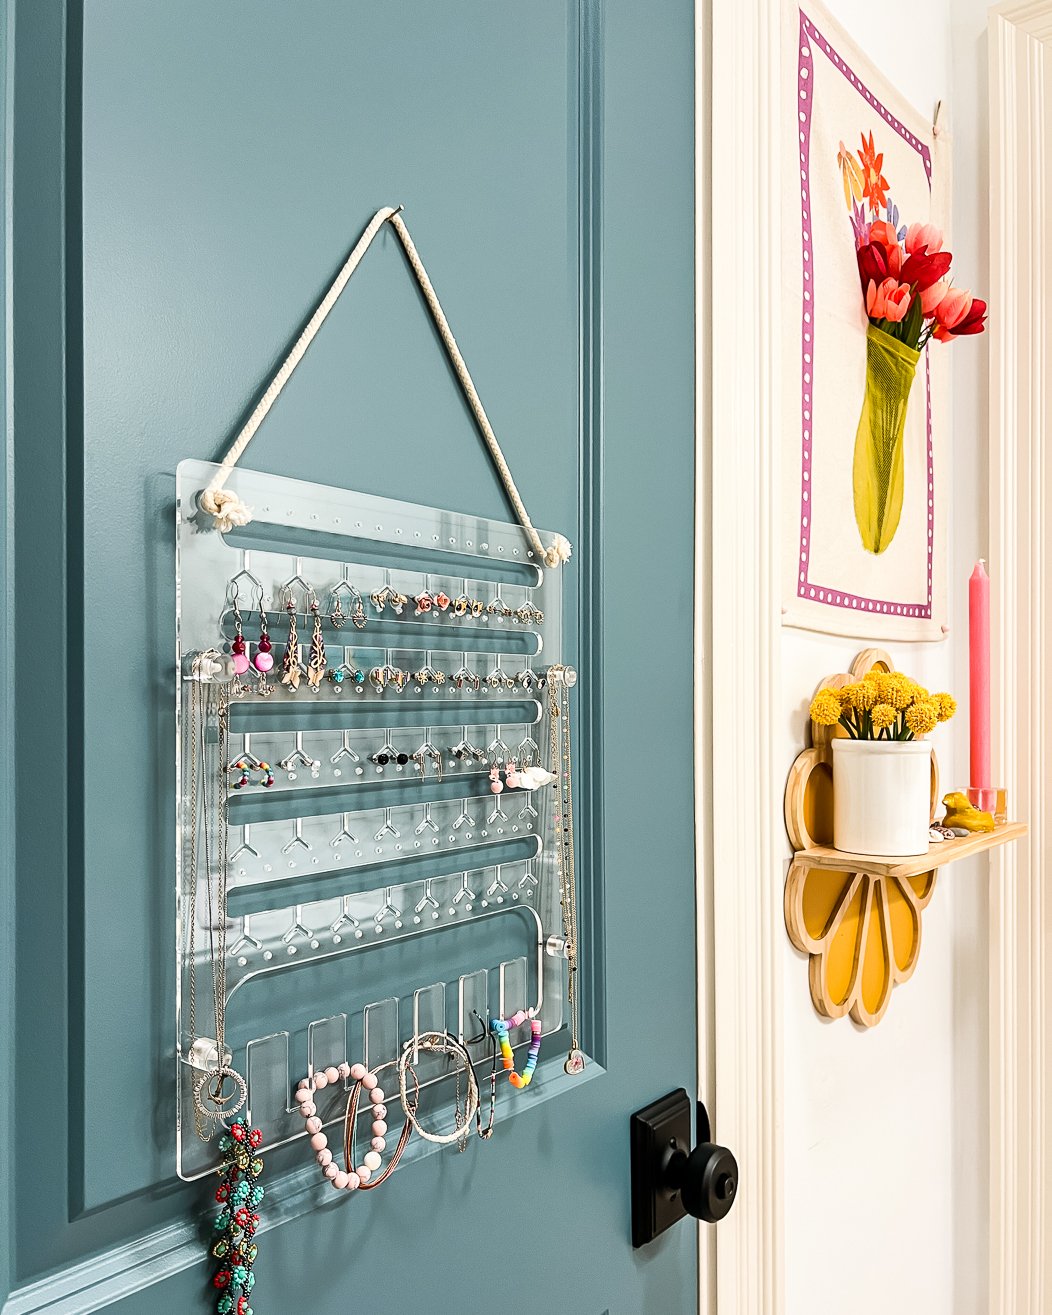
I also added this cute flower wall shelf and wall tapestry I'd had for a while to the wall behind her vanity for fun :)

What do you think?! Attley literally bounced up and down when I revealed the finished space to her. That made every bit of work totally worth it. PS: About a year after tackling this budget bathroom makeover, we had a VELUX Sun Tunnel installed in Attley's bathroom, so now it's flooded with natural light!
Detailed Bathroom Makeover Budget Breakdown
Wondering how much this bathroom makeover on a budget cost? You can find the breakdown below:
- Shower tile: $213
- Grout, primer, thinset and other supplies for tiling over tile: $286
- Tile stickers (3 packs of 9): $153
- New vanity light: $259
- New mirror: $90
- New sink faucet: $85
- Pair of 9-foot curtains (click here for similar option): $50
- 9-foot shower curtain: $18
- Wall paint: We used leftover paint, but a gallon of paint would cost around $40
- Cabinet paint: $22
- Countertop paint (we used leftovers for free but new would cost $44–all you need to complete this countertop is this white base coat and this for the veining)–then top with polyacrylic)
- Polyacrylic: We used leftovers for free but new would cost $10
- New cabinet knobs: $30
- Inside curtain rod mounting brackets: $5
- Curtain rod: $32
- Decor (bath mats, art, frame, towels, shelves, hooks, etc.): $278
- Shower head ($24)
- GRAND TOTAL: $1,639
I hope these tips and seeing Attley's budget-friendly bathroom makeover breakdown show you that you can dramatically transform your space by giving it a bathroom makeover on a budget! The key is to keep the existing layout, update the elements you already have, and do as much of the work yourselves as possible!
Bathroom Source List
- Wall color: Pure White by Sherwin-Williams
- Trim and ceiling color: Divine White by Sherwin-Williams
All other products that I can find links to are below.
Scroll and click any image below for full product details.

Our Other Bathroom Renovations & Makeovers
If you want to see the details of the four other bathrooms we have transformed over the years, check them out below.
Avery’s Budget-Friendly Bathroom Makeover REVEAL
We transformed our daughter Avery’s beige and boring bathroom into a fun and beautiful space for only $900. And we did it all without doing any demo! You won't believe what it used to look like.
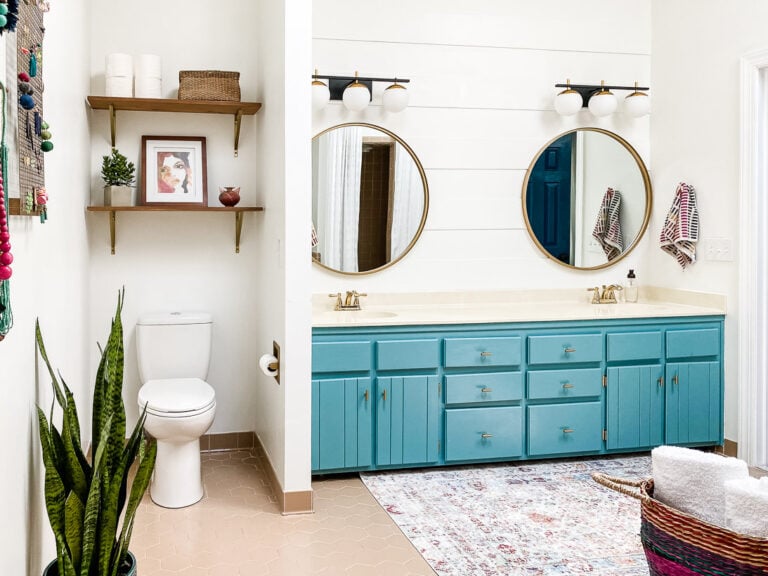
Affordable Master Bathroom Remodel REVEAL
Think you can’t completely transform a master bathroom on a budget? Think again! This affordable master bathroom makeover completely transformed the space without changing any of the major elements in the space.
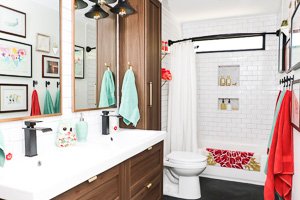
DIY Bathroom Remodel REVEAL
We completely gutted and renovated the bathroom our girls' shared in our old home. We ripped out the old carpet and tile, removed a wall, added a window and replaced absolutely everything from the cabinetry to the tile. And we did 95% of the work ourselves. Check out how we did it!
The REVEAL of Our Colorful DIY Bathroom Remodel
See how we gutted and remodeled the half-bath of our old home in just seven days. We tiled the floor, painted a fun wall mural, replaced the toilet and vanity and more! Check out how this project unfolded.
Wondering how I approach transforming rooms and spaces in our home? Check out Designer in a Binder®.

And if you want exclusive content and behind-the-scenes sneak peeks, be sure to subscribe before you head out!


Thanks for the bathroom renovation and remodel tips! I was Planning to update my bathroom soon, and your insights will surely come in handy. Can't wait to apply them to my own project.