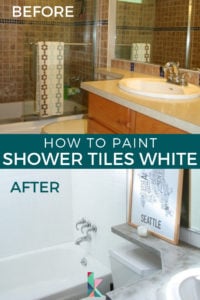
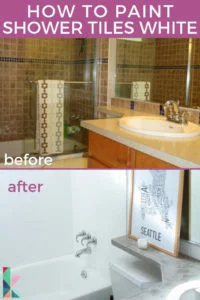
How to Paint Shower Tiles White
Do you have outdated tiles in your shower that you want to transform on a budget but aren't sure what to do? Believe it or not, you can PAINT shower tiles to get beautiful and long-lasting results. You just have to be sure to use the correct products for the job. Read on to learn how to do it!

This post is brought to you by Karisa who blogs over at Petite Modern Life.

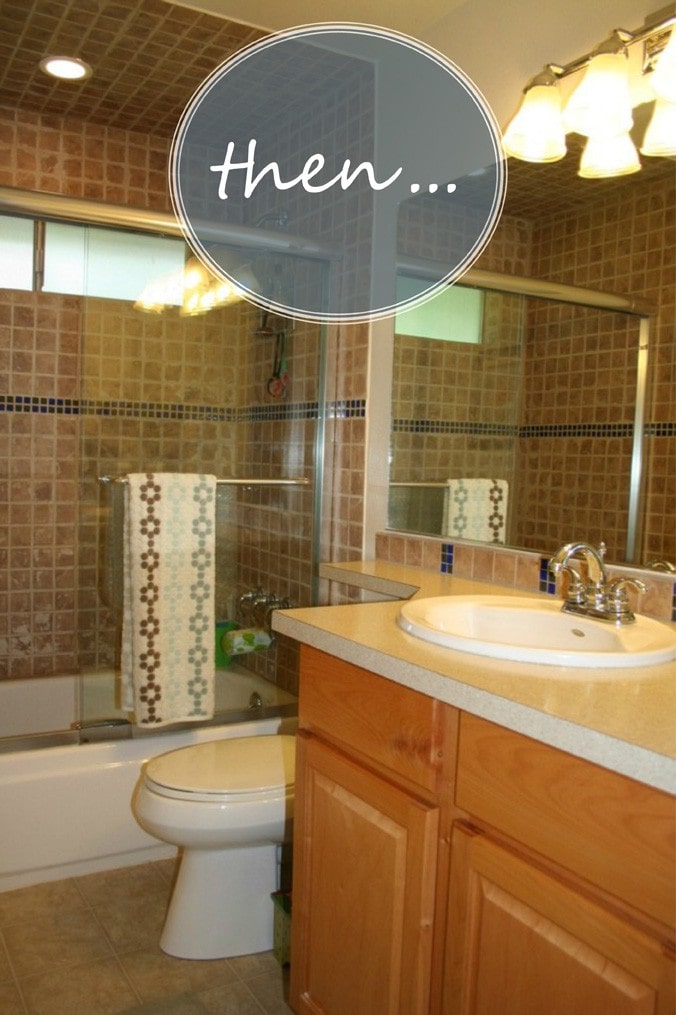
Today I’m going to share with you another project that made an astonishing difference in our home’s look! Painting our shower tiles white!
Though our guest bathroom had been updated by the previous owners, I had always dreamed of having a shiny white bathroom. So I thought through my options of how I could change the bathroom's look:
1. Demo and re-tile.
2. Only tear out the accent tiles and replace them with something brighter.
3. Find a way to paint over the tiles.
This post contains some affiliate links. Click here to read my full disclosure policy.
Option 3 definitely seemed the least messy and costly, but up to that point I hadn’t known of any way to effectively paint tiles! Until I stumbled upon Rust-Oleum Tub And Tile Refinishing 2-Part Kit, White.
It had great reviews of durability and ease of application. And for $26 a box (I ended up buying 3) it was much less expensive than buying new tile. Keep reading to learn exactly how I did it!
How to Paint Shower Tiles
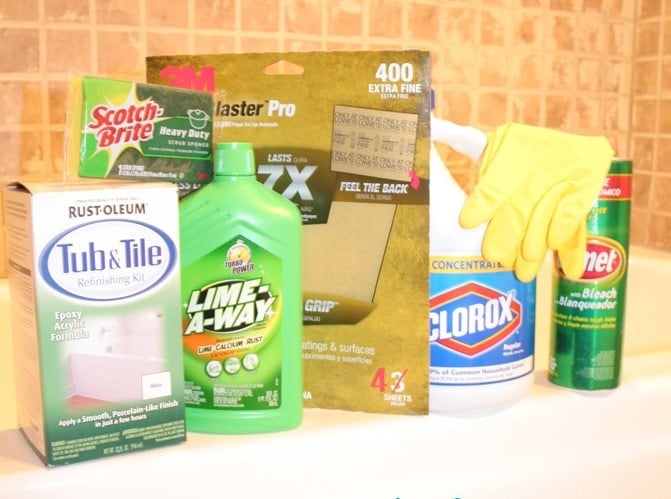
Materials Needed
- Rust-Oleum Tub And Tile Refinishing 2-Part Kit, White
- Utility knife
- Flathead screwdriver
- 400 grit sandpaper
- Fan
- Multipurpose Respirator
- Cleaning gloves +extra
- Scotch brute heavy-duty sponge
- Lime-a-way
- Bleach
- Comet with bleach powder
- Small high-density foam paint roller and paintbrush. This paint did not come off even wrapped up brushes so I suggest having extra rollers and using cheaper brushes.
- Small tray
Steps to Painting Shower Tiles White
Time needed: 2 days
Learn exactly how to paint outdated shower tiles white by following these steps!
- Remove any glue or caulk from your existing tiles.
First you need to take off any glue and caulk that is touching the tiles you are going to paint. We decided to remove our whole glass shower door and use a curtain in the future, so there was a lot of glue to peel off the wall. Using an X-acto knife, utility knife, or flathead screwdriver with a hammer, get all the glue and caulk out so the paint will seal well. This part took me a good exhausting few hours, so you might want to do this ahead of time. Others pointed out that this would be a good time to fix any broken tile and grout if you want.
- Clean your tiles thoroughly.
Next, you will be following the instructions on the paint can on how to use your cleaning supplies to prep the tile surface. They are tough chemicals, so I put on my respirator and gloves, and turned on the fan before completing all of these cleaning steps.
– Vacuum the tub of dust and hairs. Rinse.
– Apply bleach, scrub, and rinse thoroughly (I totally pulled my garden hose through the window to spray down ALL the tiles, including the ceiling)
– Next, spread Comet across the tiles and scrub away. Rinse thoroughly.
– Finally, spread LimeAway across the tiles and let sit 5 minutes. Scrub. Rinse thoroughly. - Let your tile dry completely.
Let your tile dry for at least 90 minutes before painting.
- Ventilate the area as well as possible.
This is when you need the best airflow going, but if you can, set it up so that the fumes don't get into the rest of the house. If I moved my respirator to wipe my nose while in the bathroom, I could feel my heart rate shoot up. This is really potent (and possibly dangerous) stuff. Consider that well before starting this project.
We kept the bathroom door shut with the fan pushing the air towards the open window. It helped to have the rest of the house's windows open (but the bedroom doors closed).
It'll stink it up bad for a few days. Some people even said they were glad they did it just before going on vacation. I didn't think it was unbearably bad so long as the bathroom door stayed shut and fans stayed running (for about 3 days). - Prepare the products.
Keeping your gloves and mask on, shake the activator and base cans up to mix well and then pour them into your paint tray. When mixed, the paint looks very watery, but it goes on like solid glue.
- Paint!
Use a paintbrush and/or roller to apply the paint to your shower tiles and grout. The grout is tricky to cover; that's where I used a brush the most. Using your roller, go in one direction, consistently feathering your edges. If you allow a paint dribble it will not look great when it dries. This paint dries fast. You can touch up spots easily in subsequent coats.
- Allow the first coat to dry, then recoat.
In between the first and second coat wait about 2 hours for it to dry. Wrap your paint and brushes super well with plastic wrap in between coats. The can says to wait a day before the 3rd coat, but do not let your mixed paint sit out for more than 6 hours.
If you're not sure how much paint you'll need, the can shows the ratios to mix if you want to leave some unmixed in the can for a later day.
For all my tile, I did 3 coats + 1 touch-up session and used almost 2 full kits. Layer three ultimately covered up the previous tile color.
After painting the tiles we realized that the tub was biscuit rather than white, so I bought another kit and used half of it's contents to repaint ~2 coats on the tub.
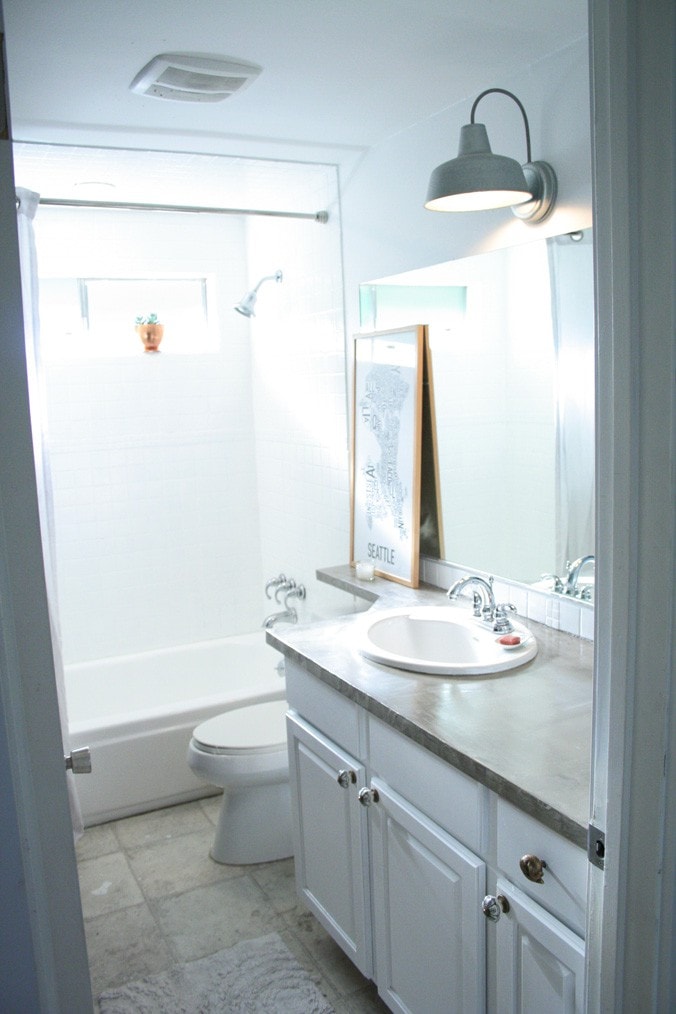
That's it! Just look at how much painting my shower tiles transformed our bathroom!
If you love this project, be sure to pin it so that you can refer back to it later :)
Next on the list are the floors! We're going with a dark grey rectangle tile. I can. Not. Wait to see this in completion! I hope you're inspired to have at your dated or “just not right” bathroom too!
If you liked this post, you'll love the other ones on my blog, Petite Modern Life!

Isn't it amazing what a difference painting the shower tiles made in Karisa's bathroom?! I hope. you loved her guest post.
Other Budget-Friendly Bathroom Ideas You Will Enjoy:
- The Easy Way to Update Bathroom Tile Without Replacing It!
- Affordable Primary Bathroom Remodel REVEAL
- Attley’s Budget-Friendly Bathroom Makeover REVEAL
- Avery’s Budget-Friendly Bathroom Makeover REVEAL
Wondering how I approach transforming rooms and spaces in our home? Check out Designer in a Binder®.

And if you want exclusive content and behind-the-scenes sneak peeks, be sure to subscribe before you head out!

Last Updated on January 27, 2023
Hello, I’m thinking of using this product for a busy bathroom. How has the paint hold up through cleaning and normal use? Do you recommend?
This is a contributor’s post. If you pop over to Petite Modern Life she will probably be able to help you!
It looks amazing! Good for you!!
Hi! Thank you for this tutorial. Heather, of October 2014, asked if you sanded as per the instructions. I wondered if you did, as it wasn’t mentioned in the tutorial. Also, how’s it holding up today? Do you think you could use it on a bathroom floor tiles? Thanks! I’ll let you know if I do it! (We have 1950 mud-set tiles that are HORRIBLE to remove!)
Got my rustoleum and am ready to go, but I noticed you didn’t say anything about actually sanding…did you do that step? The box says to use “wet/dry” sandpaper…did you do that?? Loved your tutorial, super pumped to give this a try!!
Heather, did you do it?!
Love this transformation. So much brighter and all of the accessories really shine now. Great job, Karisa!
You did an excellent job! Haha, your mask is great & I liked Baine, hah. That’s too funny! I hope your having a great Sunday!
Thank you Leslie! We’re really happy with the outcome and walking into a refreshingly bright bathroom. And lets be real, I liked the mask and might’ve even made Darth Vader noises at my husband. :P #nevergrowup