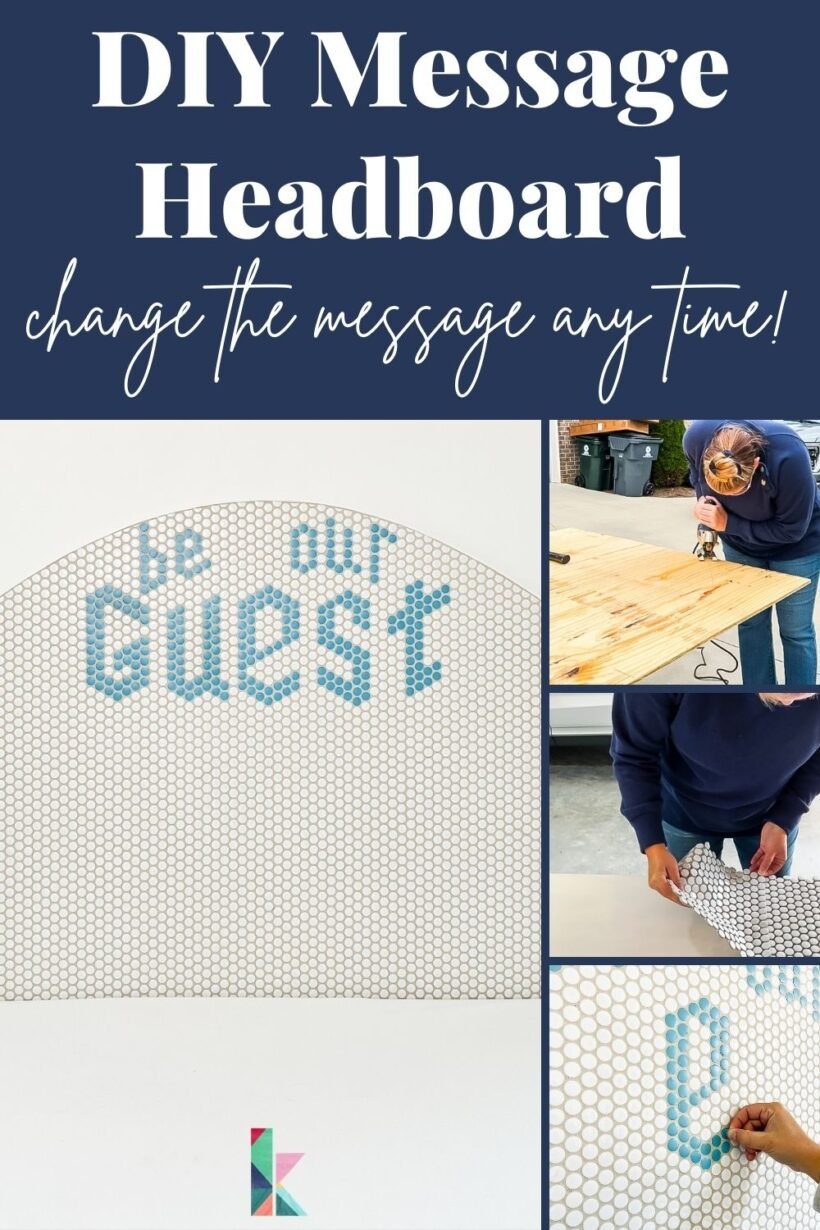
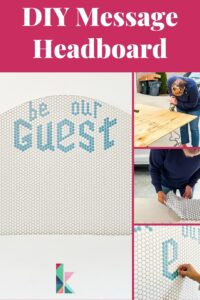
DIY Headboard With Customizable Messages
Want to make a statement in any bedroom? Make this DIY headboard that allows you to create custom messages and designs that change whenever you want!
If you are a regular around here, you already know that we are finally turning our attention to our guest room. If you missed the post where I shared my design plan for our guest room, you can check that out here. You may notice that there was no bed included on that design board. That was on purpose! It's because we planned all along to make a DIY headboard. And since this type of headboard is an original idea that popped into my head one day, I couldn't include an inspiration photo like I would normally do.
We've made our own headboards before, like these that were in our twin girls' room back when they still shared a room. But for our guest room, I didn't want an upholstered headboard. I didn't want a leather or wood headboard. I wanted something truly unique. I wanted to make a headboard that could easily change with the seasons or for holidays. So this is what I came up with. A tile headboard that I could customize with vinyl circles. It's definitely a statement piece for our guest room.
Now, let's dive into this tutorial with step-by-step instructions so that you can make one of these headboards for yourself!
Thank you to DAP Products for sponsoring this project. This post contains affiliate links for your convenience. Click HERE for my full disclosure policy.
Customizable DIY Headboard Tutorial
Materials needed:
- 4 x 8 sheet of 1/2 inch piece of plywood (you could also use MDF board)
- 1/4 in. x 1-1/2 in. x 8 ft. Primed White PVC Lattice Moulding
- White penny tile
- Musselbound Adhesive Tile Mat (we used 1 1/2 packages)
- Grout (we used this grout in the color Biscuit)
- Wood cleats/French cleat (for hanging your headboard–we made our own, but they are inexpensive to buy at a hardware store and will save you time)
- Brad nailer and 1-inch brad nails
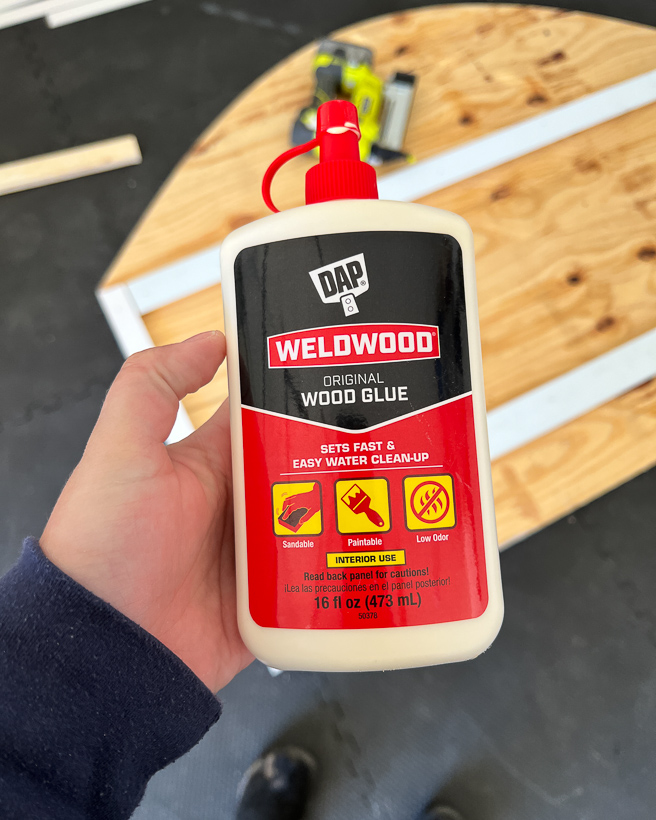
- DAP Weldwood Original Wood Glue
- DAP RapidFuse All Purpose Adhesive
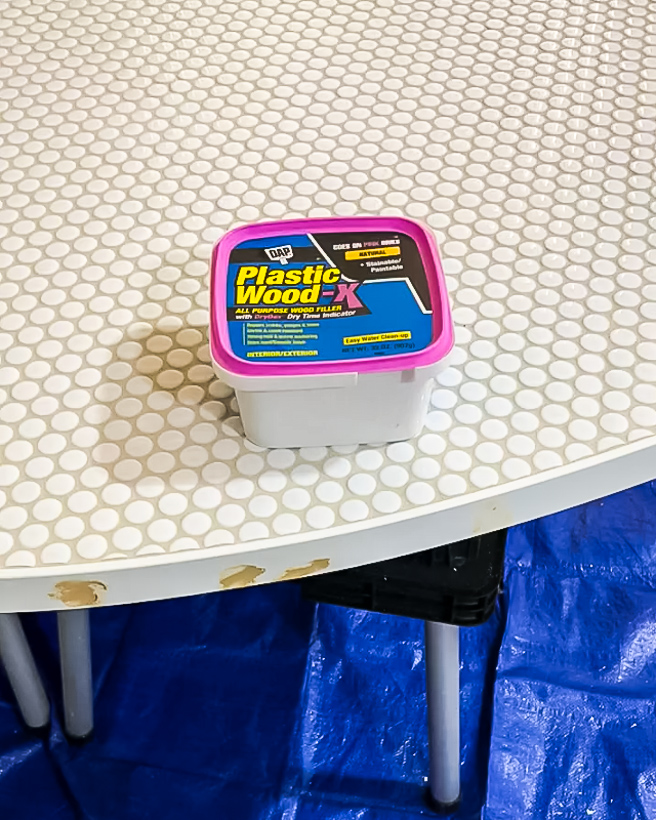
- DAP Plastic Wood X
- Jigsaw
- Sandpaper
- Wood screws
- Tile nippers
- Drill driver or screwdrivers
- White paint
- Vinyl in any color you like
- Cutting machine or round punch cutter that is the same size as your penny tiles
- A cutting machine (I used my beloved Cricut Explore Air 2)If you are thinking about buying a cutting machine (which I highly recommend–they are a DIY enthusiast's BEST FRIEND), you can read my review of Silhouette vs. Cricut cutting machines in this post to help decide which one is best for you!
- You can some of the different projects I have used my cutting machine by clicking here.
Step-by-step tutorial for making this headboard:
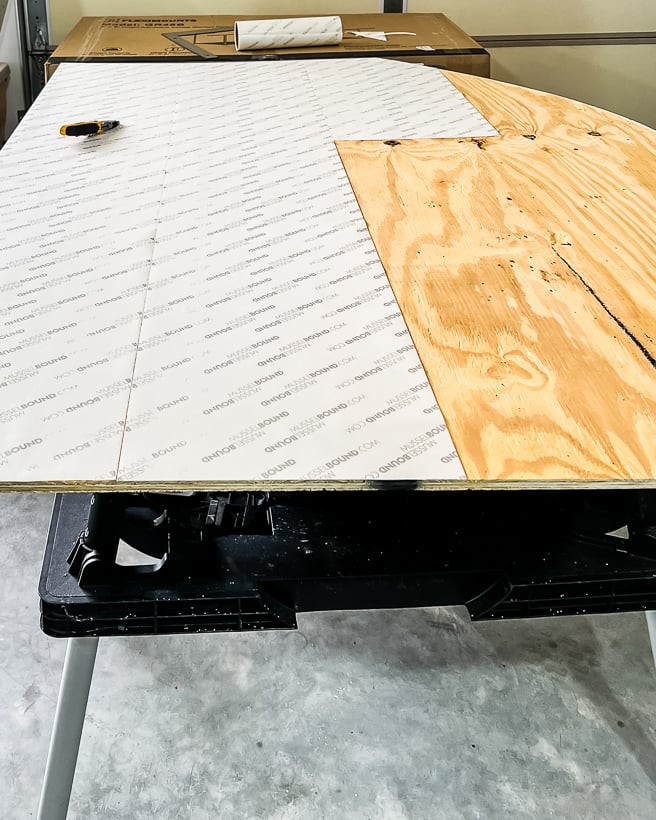
1) Use a jigsaw to cut out the shape of your headboard from your 1/2 plywood. We chose an arched shape and made it 64″ wide. Our queen-size bed is only 60″ wide, but we wanted the headboard to extend a bit beyond the mattress since bedding, etc. adds some width. This project would be WAY easier if you prefer to skip the arch!
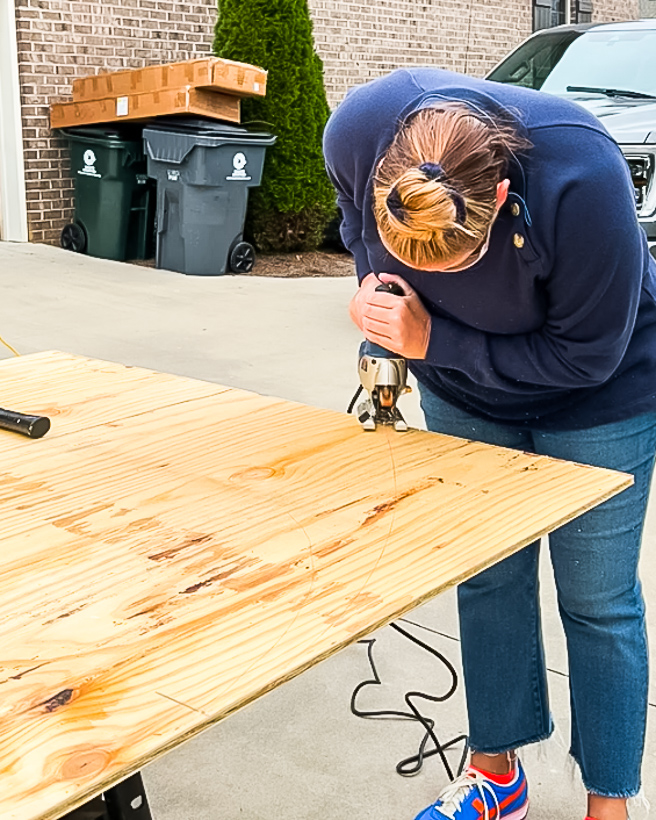
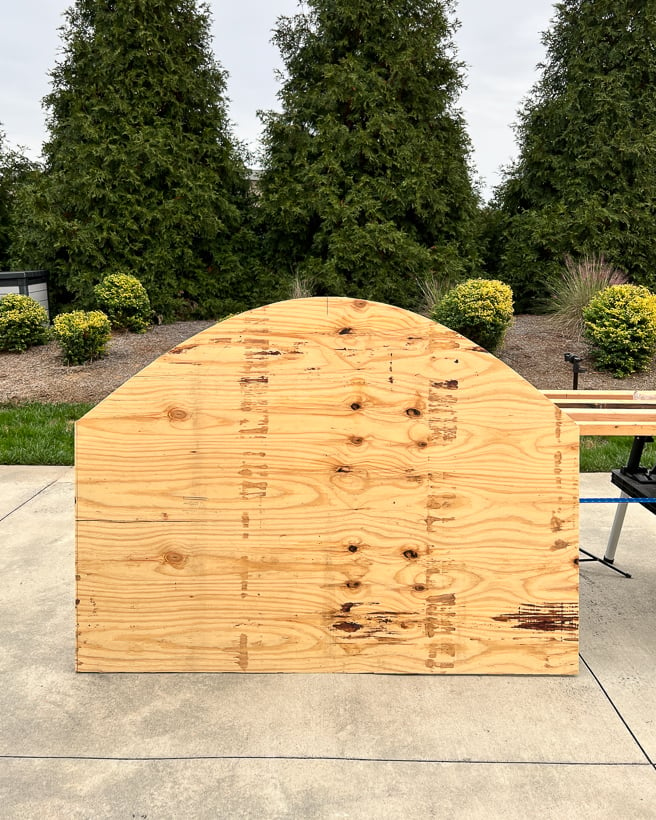
2) Sand the edges to smooth them out.
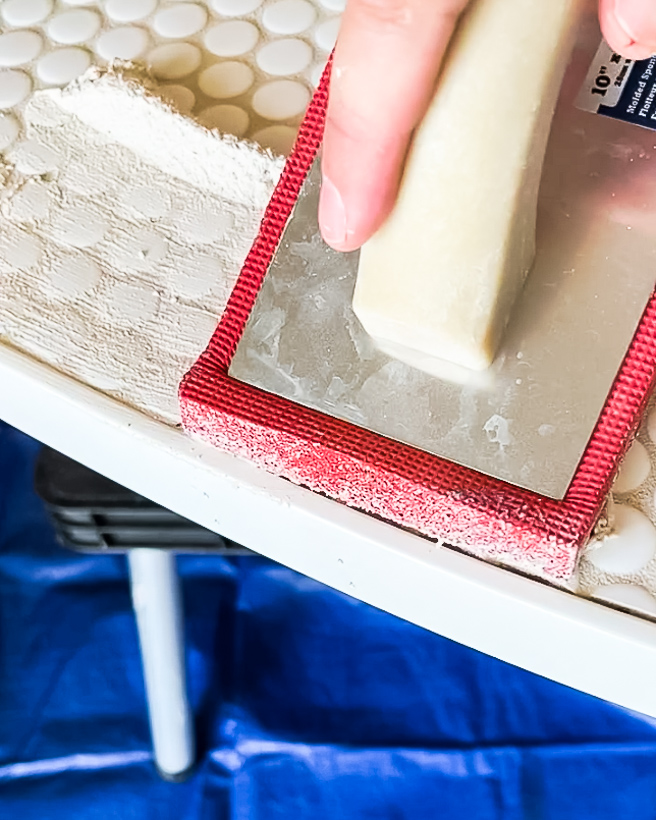
3) Apply Musselbound Adhesive Tile Mat to the entire surface of the plywood. Musselbound takes the place of thinset/mortar. It's easy to trim off the excess with a utility knife.
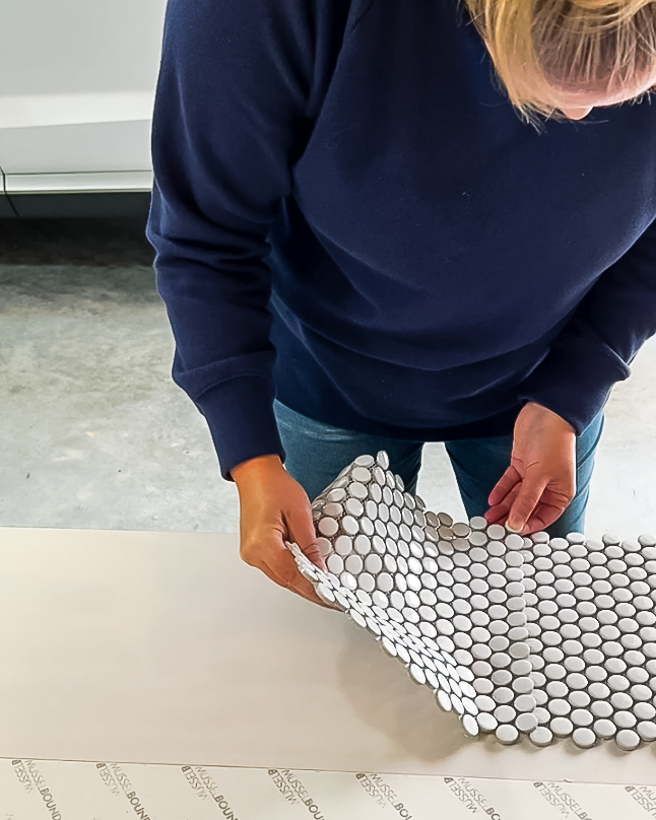
4) Lay all of your tile.
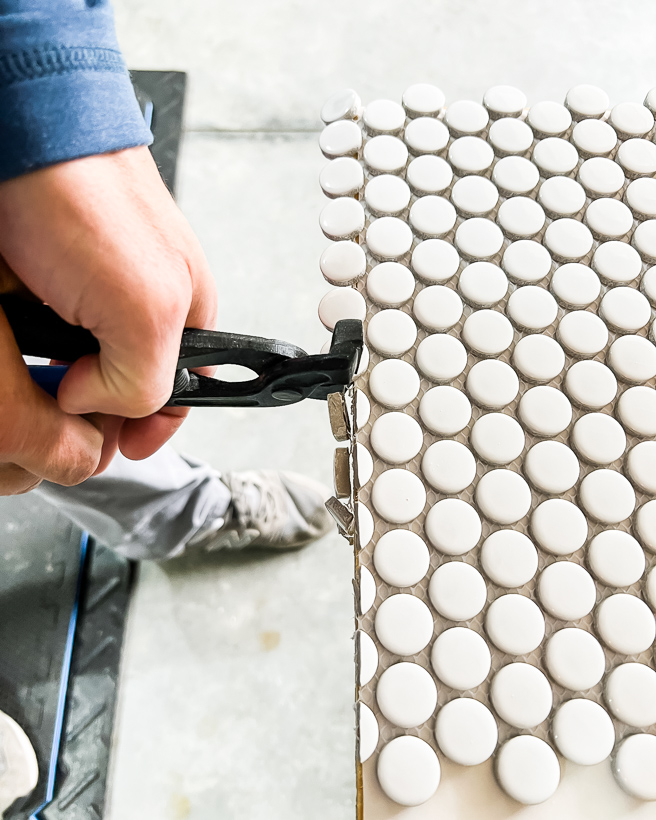
5) Use tile nippers to trim any of your tiles until they are all flush with the edge of the plywood.
6) Grout the entire surface of your headboard except the inch or so around the edge of your headboard–you will grout the edge after you apply the trim. Let your grout cure overnight.
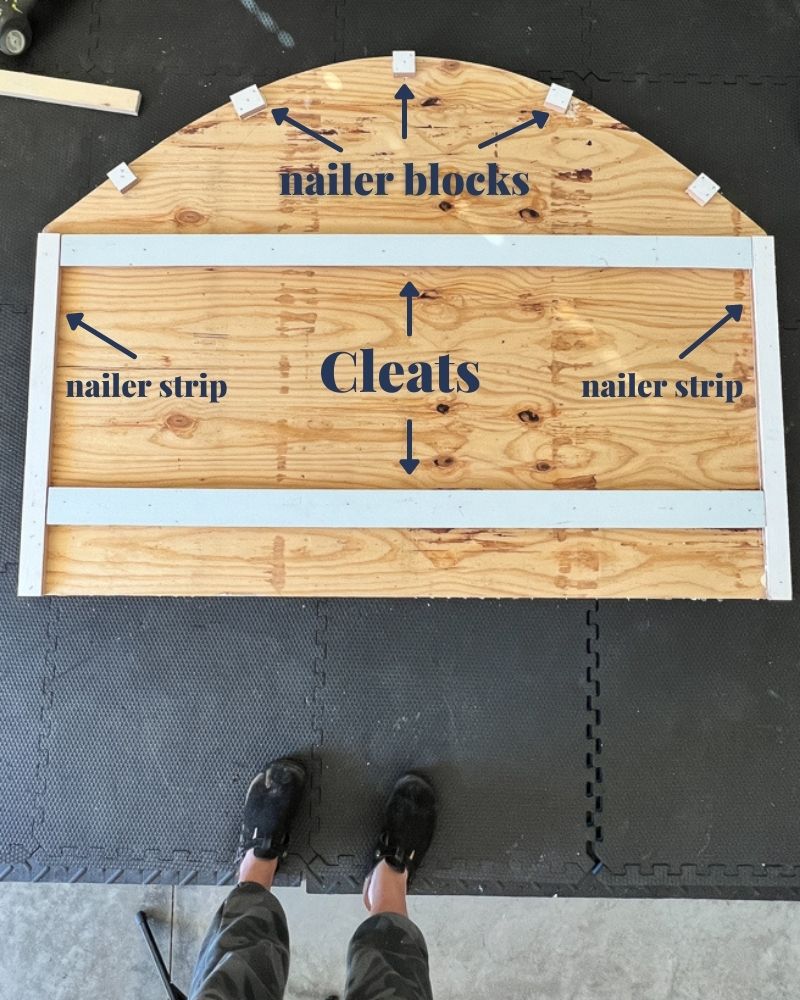
7) Flip your headboard over so that it's face down on the ground. Use DAP Original Wood Glue and a brad nailer to attach scrap wood around the perimeter of the plywood so that you will have something to nail into when you attach your trim. If you choose to make an arched headboard also, you will need to cut small blocks of wood to serve as nailing blocks around the curved part of the headboard.
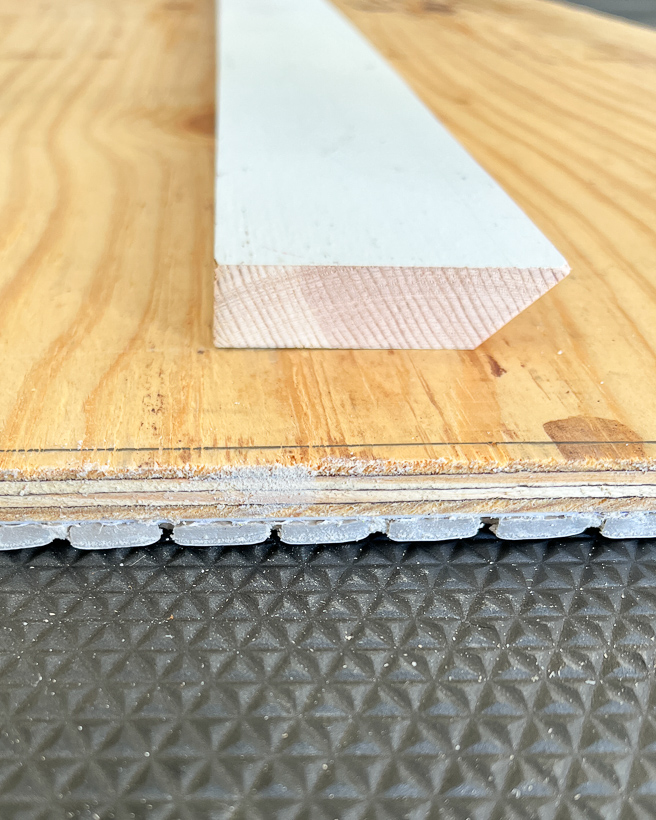
8) This DIY headboard is too heavy to attach it to a bed frame directly. We opted to use cleats. We made our own, but I recommend just purchasing some! Either way, to attach your cleats use DAP Original Wood Glue and 1-inch long wood screws to attach your cleats–be sure to countersink your screws so that they sit flush with or below the surface of the wood. We opted to use 2 cleats for a couple of reasons. First, as you can imagine, a tile headboard is heavy. Second, we wanted to ensure that the headboard didn't rock against the wall which might have been a problem if we only used one. This is what a cleat looks like from the side.
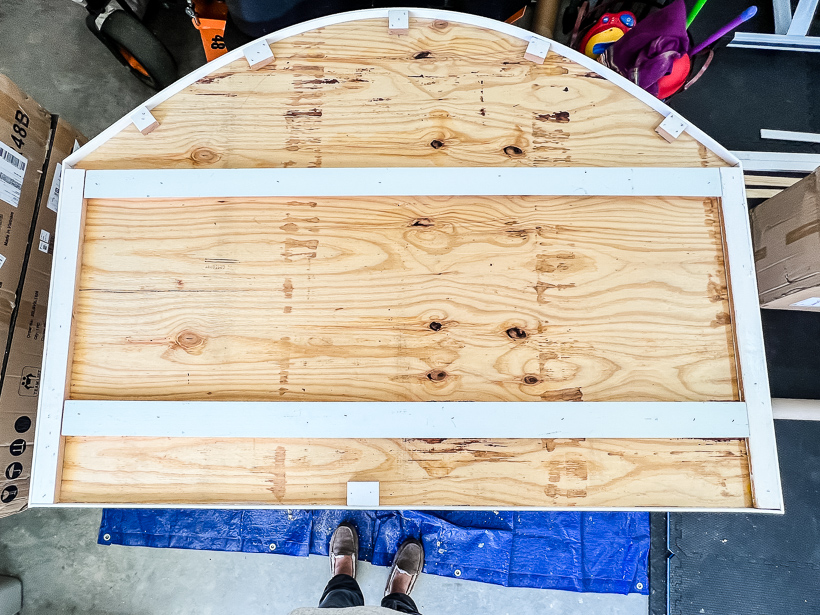
This is what the back of our headboard looked like when we were done attaching the nailer boards and cleats.
9) After cutting your PVC Lattice Moulding to length (the exact lengths and angles you will need to use will depend on the exact size and shape of your headboard) use DAP Rapid Fuse and a brad nailer to attach the trim along the outer edge of your headboard. If you don't have a brad nailer, you could probably use a staple gun and staples. Position it so that the trim is flush with the tile and overhangs the back of the headboard. This will hide the cleats and the nailer boards when it's hung.
This is what the back of the headboard looked like after we attached the trim.
10) Grout the edge of your headboard to fill in the gap between the tile and trim.
11) Use DAP Plastic Wood X to fill any nail holes in your trim. Wait for it to dry then sand and paint the trim.
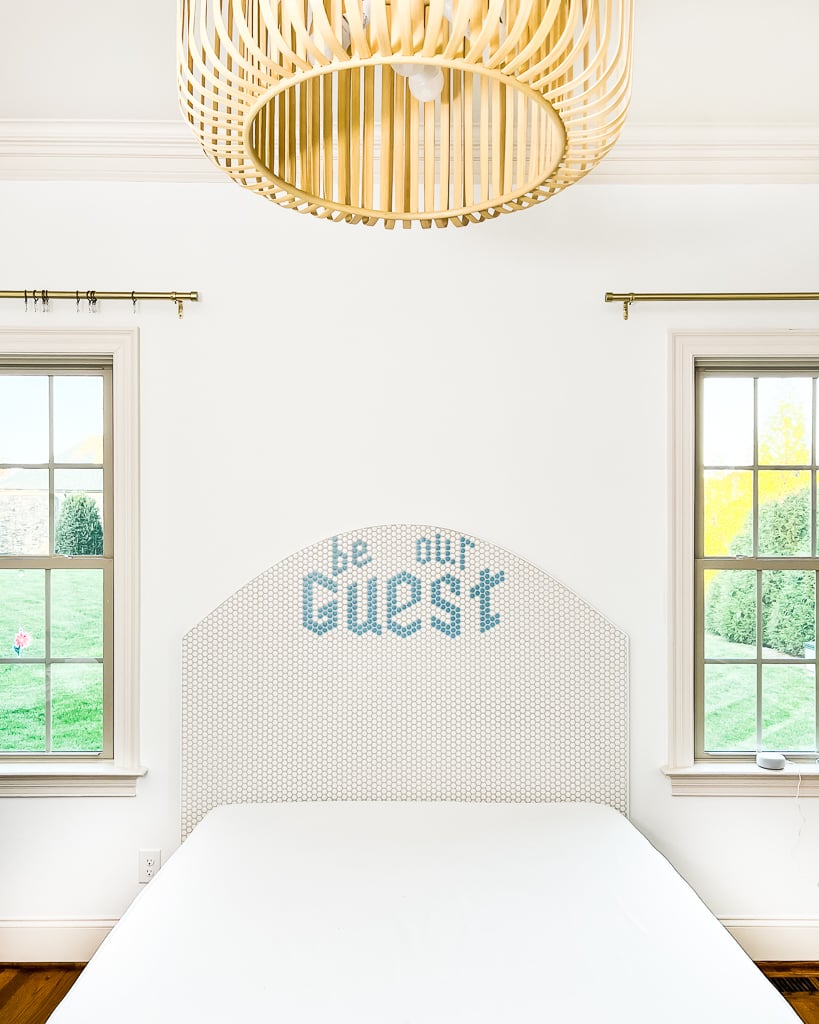
12) Decide on the height you want your headboard to hang and measure to determine where the corresponding cleats need to be mounted to your wall–make sure to screw into studs so that they can handle the weight of the headboard.
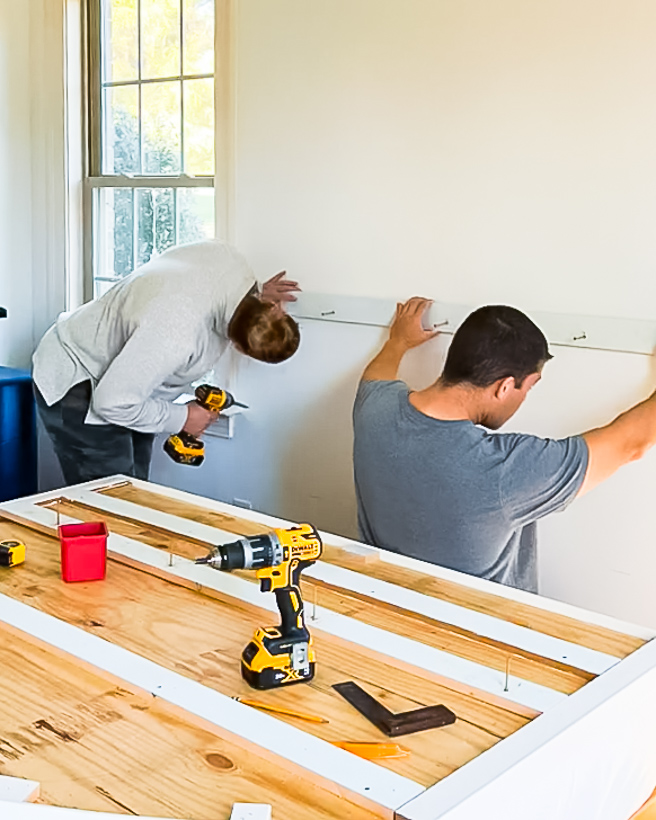
13) Hang it up!
How to add custom messages to your DIY headboard:
If you want to add custom messages to your headboard, read on!
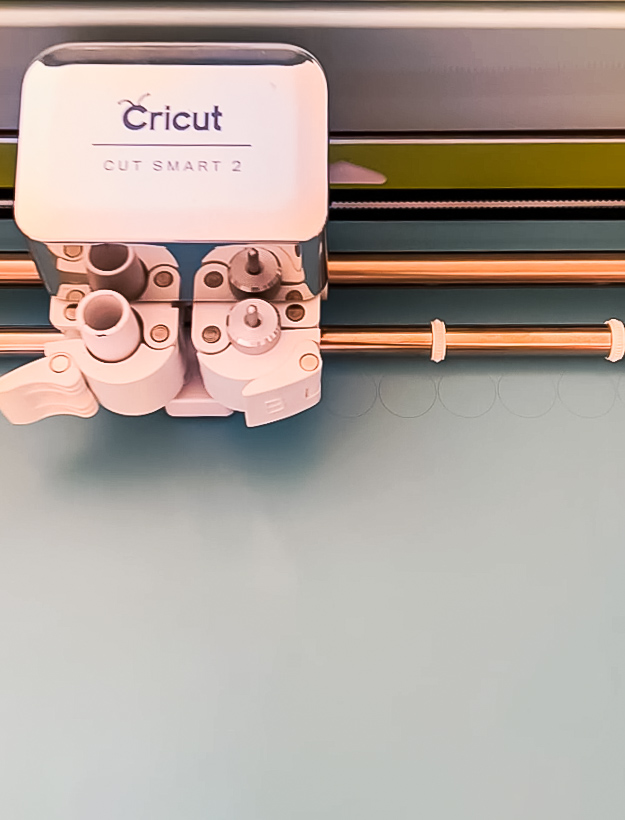
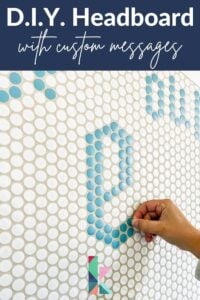
1) Use a cutting machine or round punch cutter that is the same size as your penny tiles to cut out vinyl circles. I cut mine to .7 inches using my Cricut Explore Air 2 and they are the perfect size.
2) Decide on a design. I try to plan my out in advance so that I don't make a zillion mistakes. My best tip is to find the center of your headboard and work your way from the CENTER out towards the edges.
3) Peel and stick your vinyl circles on your headboard. When you get sick of it, peel them off and add a new design!
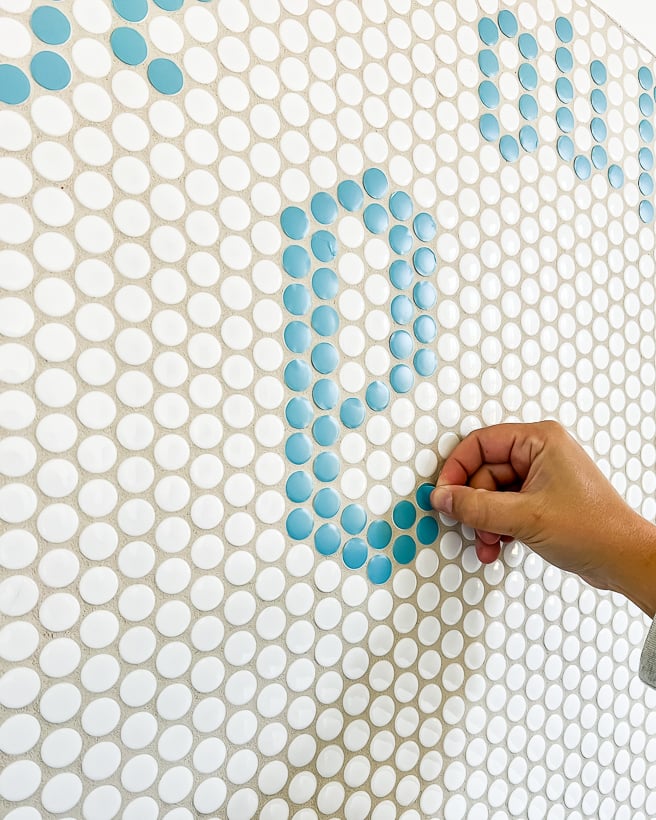
This is just our first message :) I'm already excited to change it up for Christmas. What do you think?!

Other posts you may enjoy:
- Eclectic & Colorful Guest Room Reveal
- How to Make a Large Lumbar Pillow (the EASY way!)
- 17 Gorgeous DIY Headboard Ideas
- Stylish Dressers We Love (That Don’t Break the Budget!)
- Bedroom Wall Art: Top Designer Picks
Wondering how I approach transforming rooms and spaces in our home? Check out Designer in a Binder®.

And if you want exclusive content and behind-the-scenes sneak peeks, be sure to subscribe before you head out!

Last Updated on October 3, 2022
how do you hang it up?:(
Hi Nitza! The details about how we hung it are in the post. We used french cleats :)