How to Install a Tile Backsplash (The Easy Way)
Don't underestimate how much a tile backsplash can add to your kitchen, butler's pantry or home bar. A beautiful tile backsplash can make a huge impact and dramatically change how your space looks. There are countless options for tiling a kitchen backsplash (and plenty of budget-friendly DIY backsplash ideas). You can choose from marble mosaic tiles on mesh backing, to ceramic subway tiles, to peel-and-stick tiles and everything in between.
I have installed tile backsplashes a few times now, and I promise… installing a tile backsplash is really straightforward and is a beginner-friendly DIY project. Keep reading to learn how to install tile over drywall the easy way!
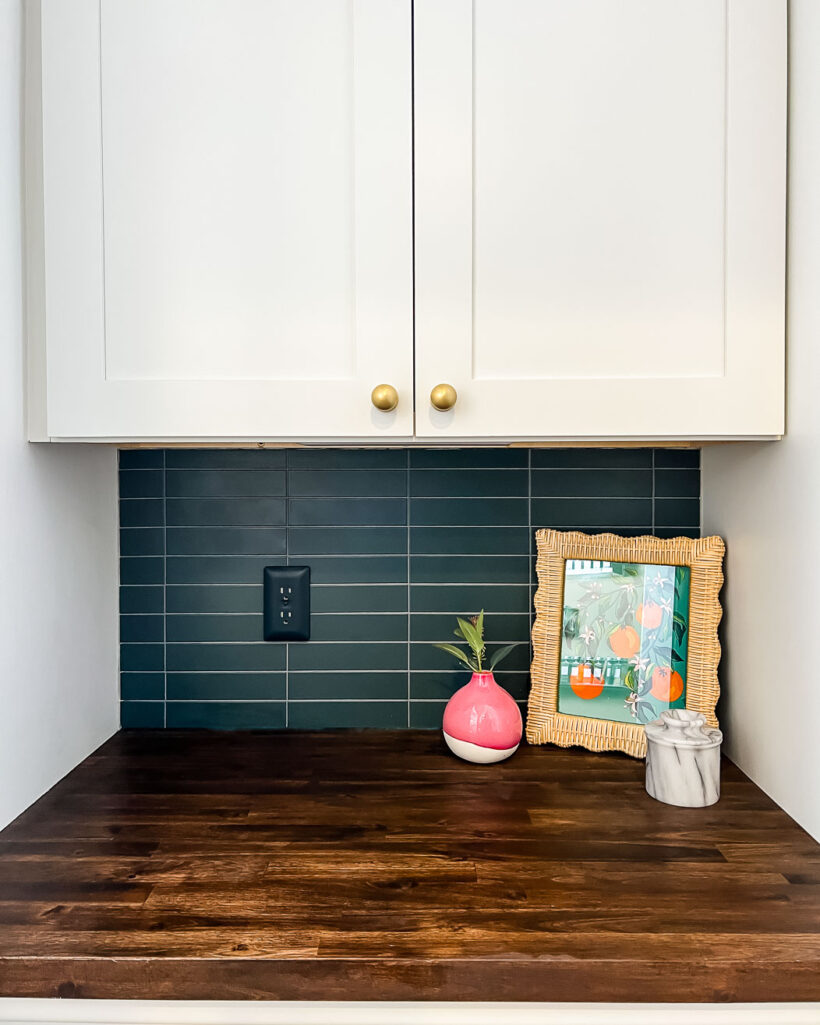
If you have watched my Instagram stories recently, you may have seen me installing the ceramic tile backsplash in our brand new Butler's pantry (which was formerly an unused built-in office/desk area). And you probably noticed how quick and easy our backsplash installation was!
We used this gorgeous tile that we had leftover from our fireplace makeover. We both love it and it meant we didn't have to spend any money on new tile! And we both love the simplicity of a stacked tile pattern, but you could still use this tutorial for any pattern you choose.
How to Install a Tile Backsplash the Easy Way
Materials needed
- Tile of your choosing (this is the tile we used)
- Level
- Measuring tape
- Tile saw or manual tile cutter and tile nippers
- MusselBound tile adhesive
- Utility knife
- Grout (this is the grout we used in the color Pearl Gray)
- Sponge
- Bucket
- Grout float
- Tile spacers (we used 1/16 inch spacers)
- Caulk
- Painter's tape & plastic or paper to protect surfaces
Time needed: 4 hours
Learn how to install a tile backsplash following these simple steps!
- Prepare the Walls for Tile
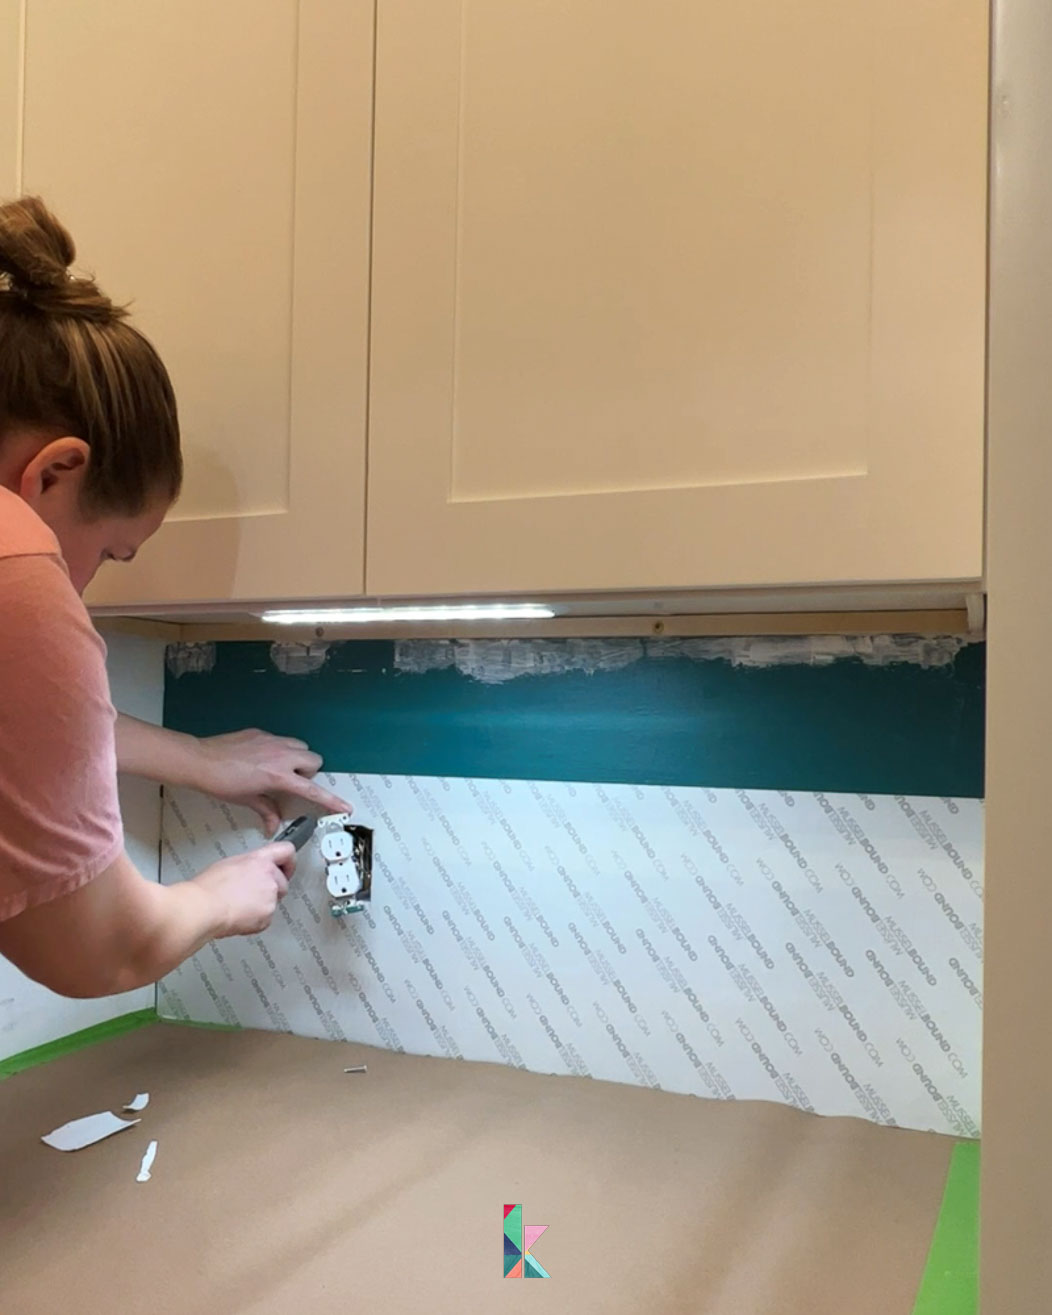
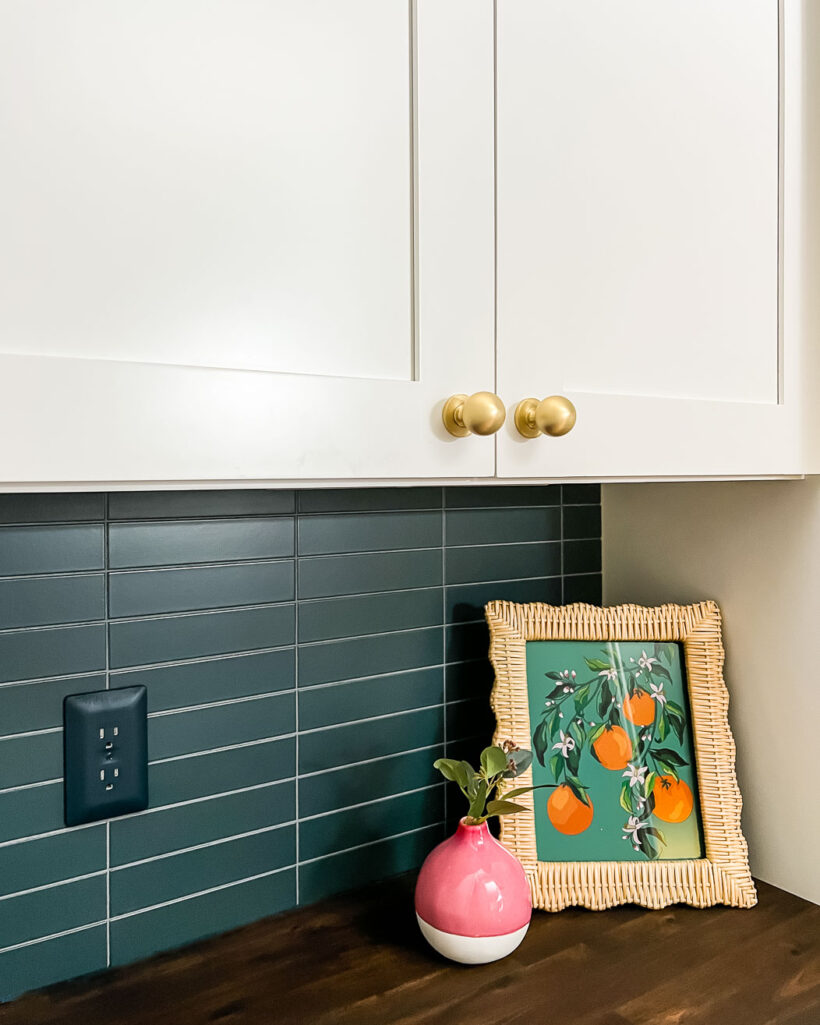
First you want to clear the space. Then you need to do any wall repair that is needed (repairing holes or gouges in your drywall, etc). Once any repairs are done, be sure to clean your walls well. If you have any outlets in the backsplash area, be sure to turn the power to those outlets off. Remove any outlet covers and switch plates in the area to be tiled. Then protect/tape your countertop, cabinets, etc. that you don't want to accidentally get grout on.
Our wall looked a bit weird since I had previously painted a design on the wall, but you can see I did some minor drywall repair below the upper cabinet we installed.
- Check for Level and Install a Ledger Board if Needed
Our countertop was perfectly level–yay! If it is not, you will want to draw a level line OR attach a ledger board (a fancy term for a thin strip of wood) to the wall. The ledger board will temporarily support your backsplash tile until everything cures. If you are installing backsplash tile in an areas where there is no countertop (like behind appliances), you will need a ledger board to keep your tile level and supported.
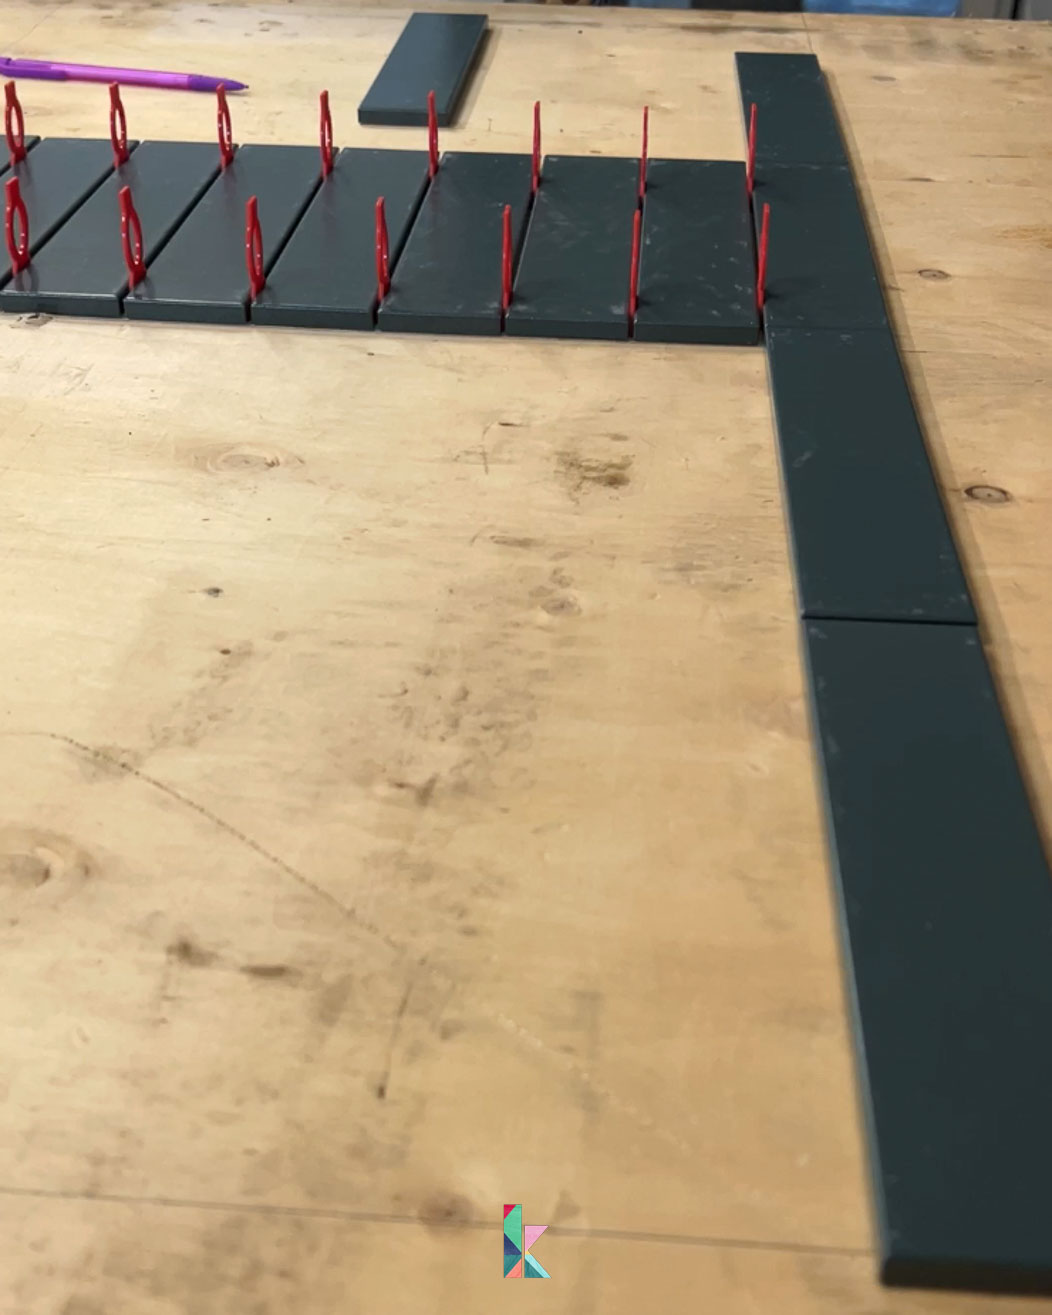
- Plan Your Tile Layout
Carefully measure the length and width of your backsplash area. We then drew out that area on a piece of scrap wood. Find the center of the area and mark a vertical line since many tile patterns (like ours) look best when centered. Then, dry lay your design to make sure everything will fit properly. This is important because you don't want to be left with tiny slivers of tile anywhere.
Start by dry-laying your tile vertically (be sure to use the spacers you have chosen to use). Confirm that your vertical layout will work without leaving any tiles that are too small/thin.
Next, dry lay your tile horizontally (again, be sure to use your spacers) and check the ends. If any pieces would need to be cut too narrow, adjust your layout. - Apply Adhesive to the Wall
Once you are confident in the layout of your tile backsplash, you are ready to apply to your tile adhesive. You can use thinset or mortar, but I prefer using MusselBound tile adhesive mat. We have used it several times now (for our fireplace makeover and for this DIY tile headboard) and it's so much less messy than thinset! The only downside of the MusselBound tile adhesive mat is that you cannot “scoot” or slide tiles around once they touch the mat. And the adhesive is STRONG. If you misplace a tile, you have to pry it off, which isn't super easy. But even with that in mind, I strongly prefer using it over messy thinset (which we have also used many, many times).
If you decide to use MusselBound tile adhesive mat, cut it to size and stick it on your wall. Use a utility knife to cut out around any obstacles like outlets or light switches. - Install Your First Row of Tiles
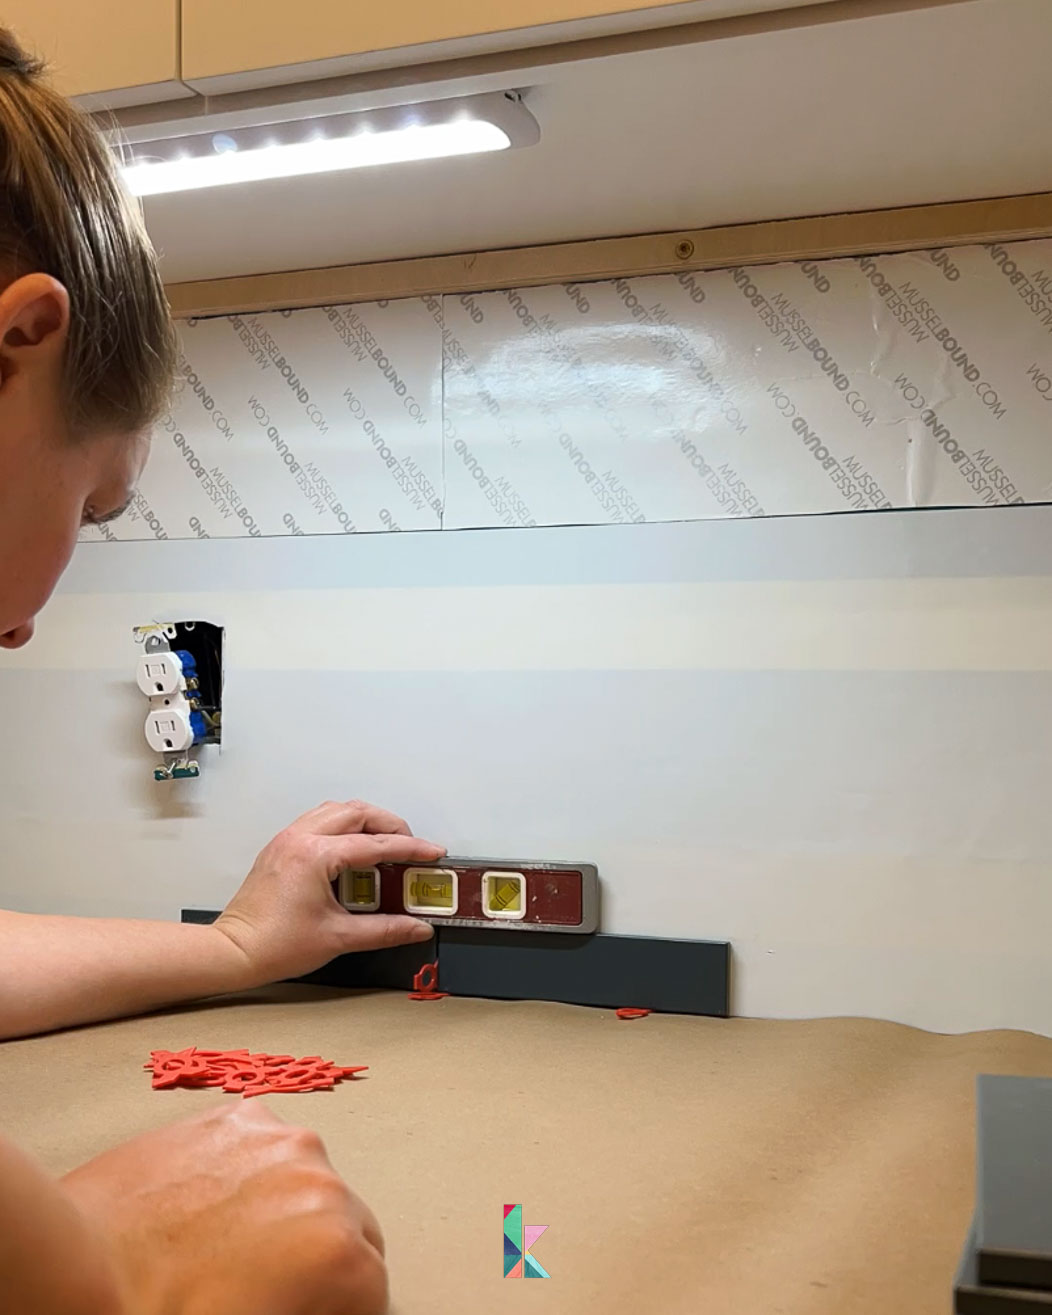
Peel the protective paper off your MusselBound tile adhesive mat. Then press your first piece of tile into place, being sure to leave a 1/8-inch expansion gap where it meets your countertop. We started from the center and worked our way out. Even though I had confirmed our countertop was level and was using it as my guide, I checked for level constantly as I worked on the first row. If your first row isn't level, your entire tile backsplash will end up being wonky.
- Install the Rest of Your Tiles
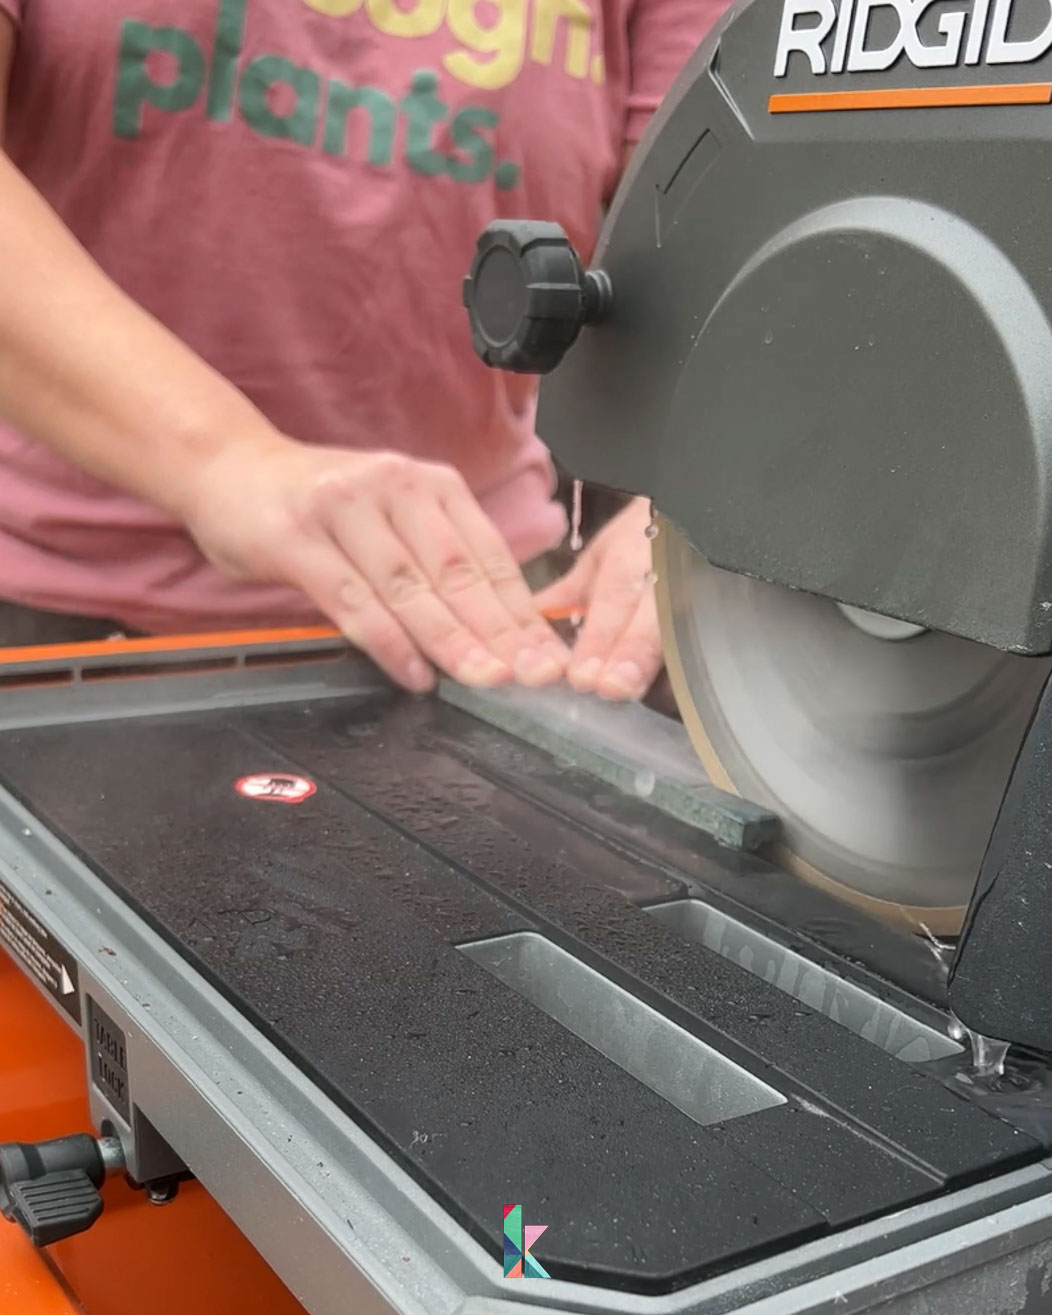
Keep placing your tiles using spacers to ensure perfectly even spacing. I placed all of the full tiles first. Then we measured and marked each tile that needed to be cut. We have a wet saw, but you can absolutely use a manual tile cutter and/or nippers to cut tile. The tile saw is by far the least scary saw in all the world, which is why I'm comfortable using it.
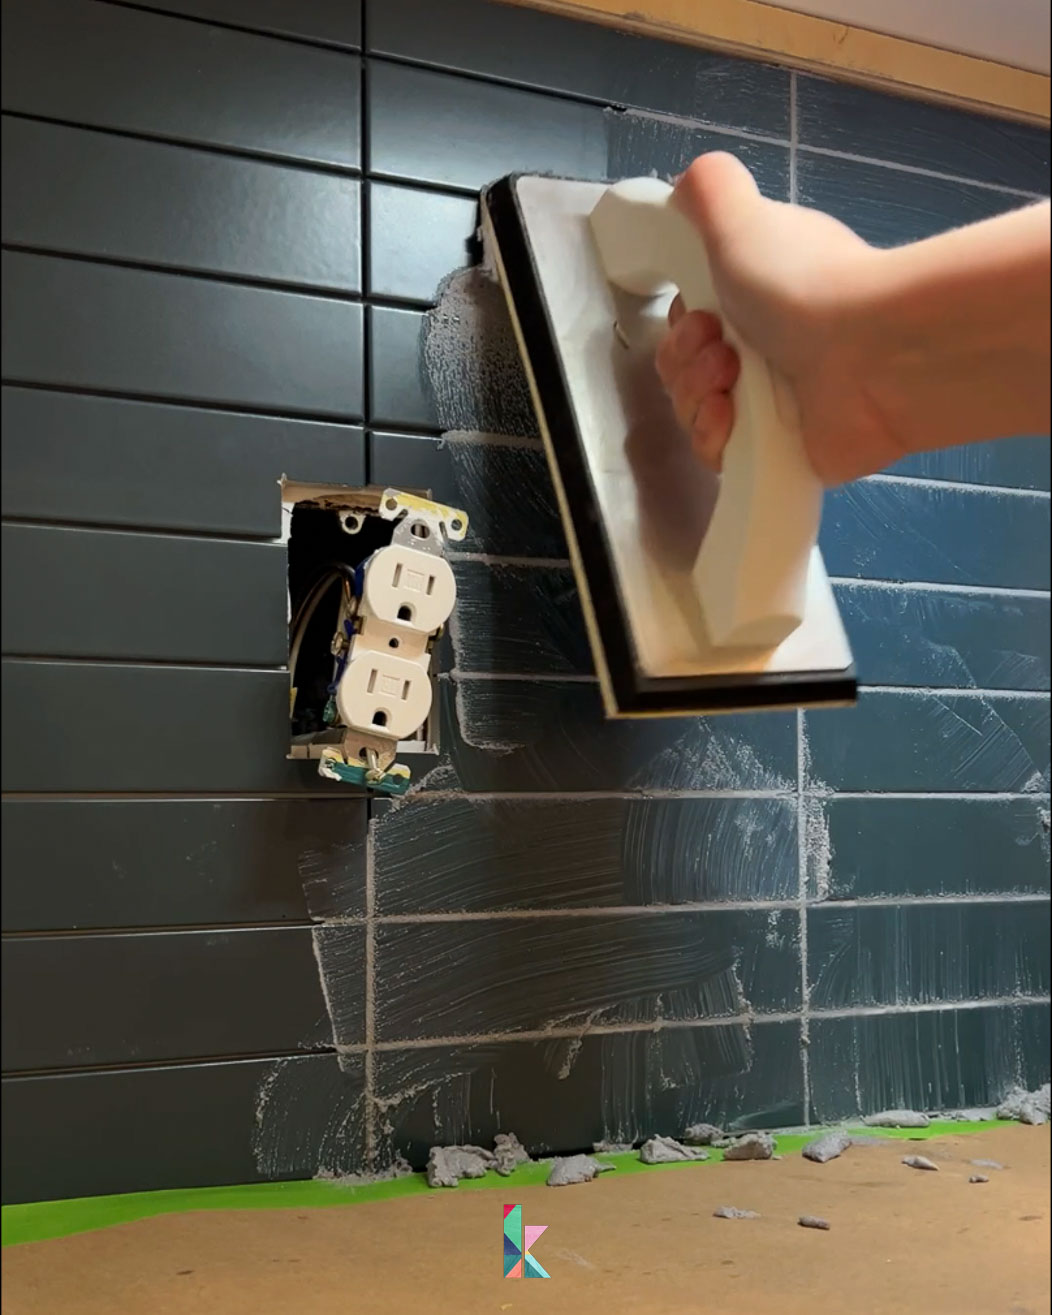
- Apply Your Grout
I highly recommend pre-mixed and pre-sealed grout that eliminates the need for a separate grout sealer. It makes it so easy! Grouting is messy, but it isn't difficult. Use a rubber float to apply your grout into all the joints. Hold your rubber float at a 45 degree angle as you work. Make sure to fill all of the tile joints/grout lines fully.
- Clean and Dehaze Your Tile
After you have grouted, follow the manufacturer's instructions for whatever grout you are using and wait the recommended amount of time before wiping away any excess group with a damp sponge. Be sure to rinse your sponge often as you do this! Once all the excess grout is cleaned off, let your grout dry for a while (again, the instructions on your grout should specify how long) before giving your tile a final cleaning. You may noticed that your tiles look a little hazy before your final cleaning. If you accidentally wait too long to wipe the haze off, you might need to purchase a haze remover.
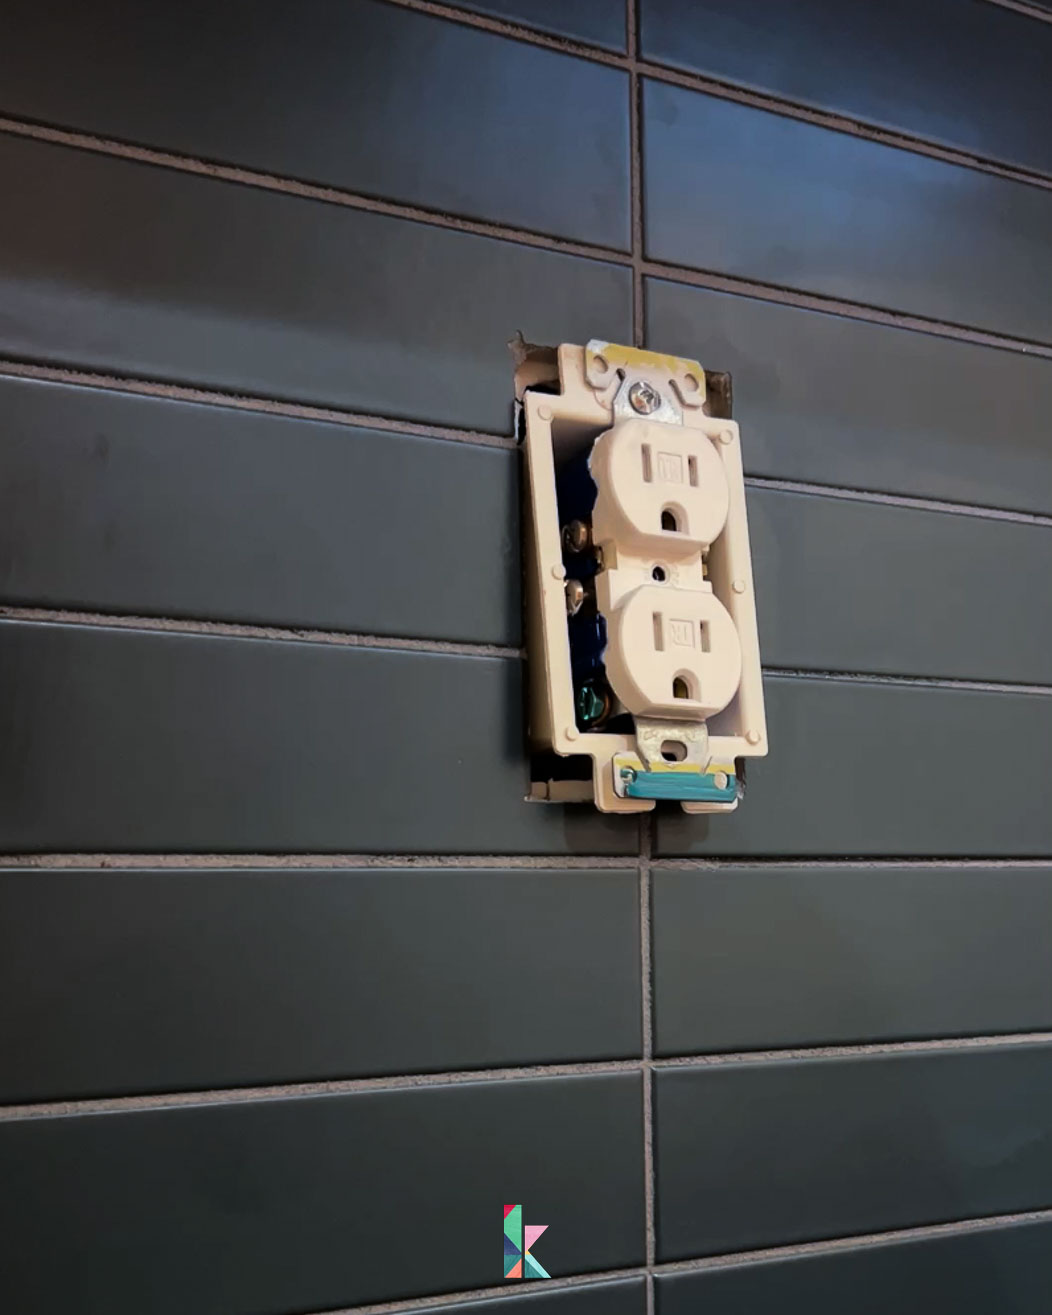
- Install and Outlet Extender & Replace Outlet Covers, etc.
Be sure to add box extenders to your outlets and/or switches to ensure they sit level with your new tile backsplash. Then replace your outlet and/or switch covers.
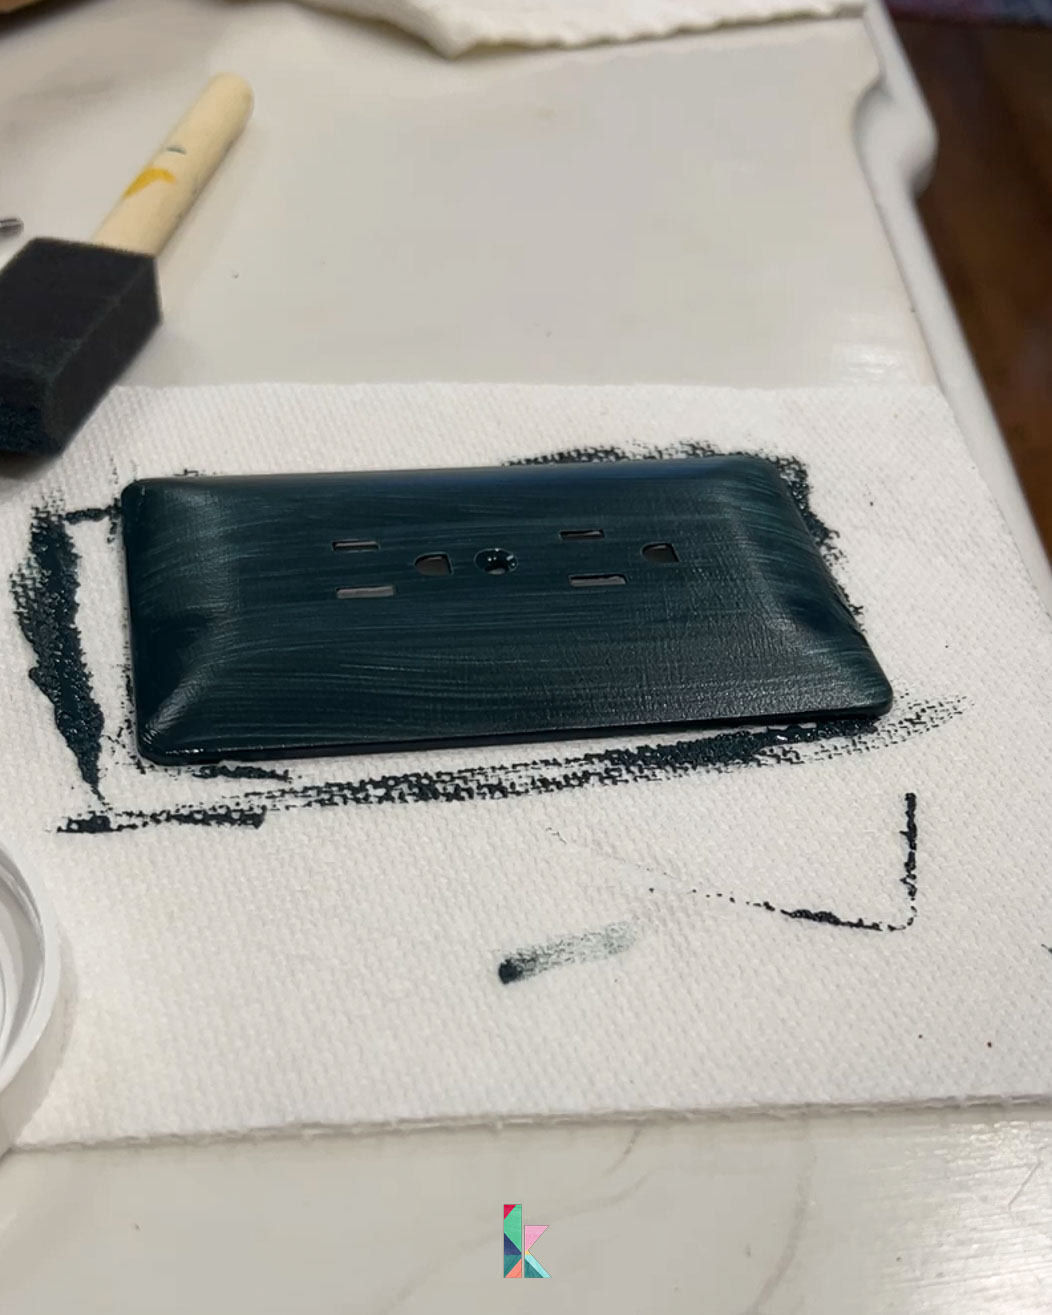
I bought a paintable outlet cover and painted it to match our backsplash tiles so that it would blend in and not stick out like a sore thumb. So easy. - Caulk Your Joints
Last but not least, you need to caulk the gap/joint between your countertop and tile backsplash. I also like to caulk between the backsplash and any wall corners.


That's it! We couldn't be happier with how it turned out.
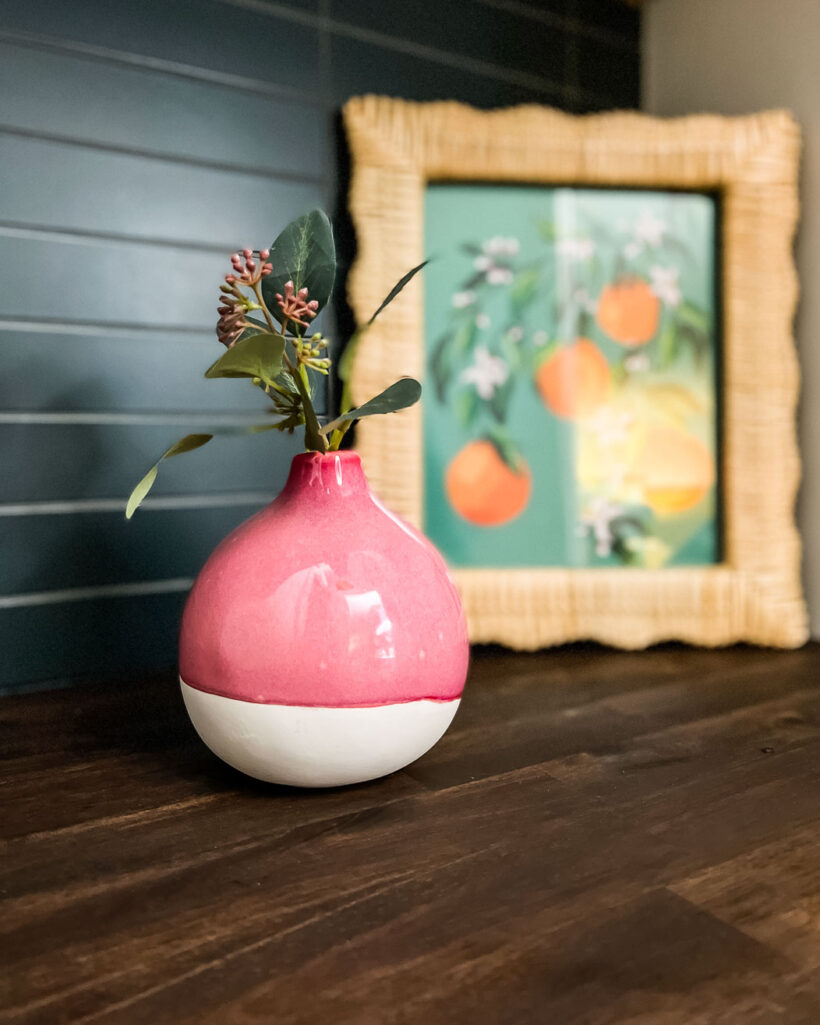
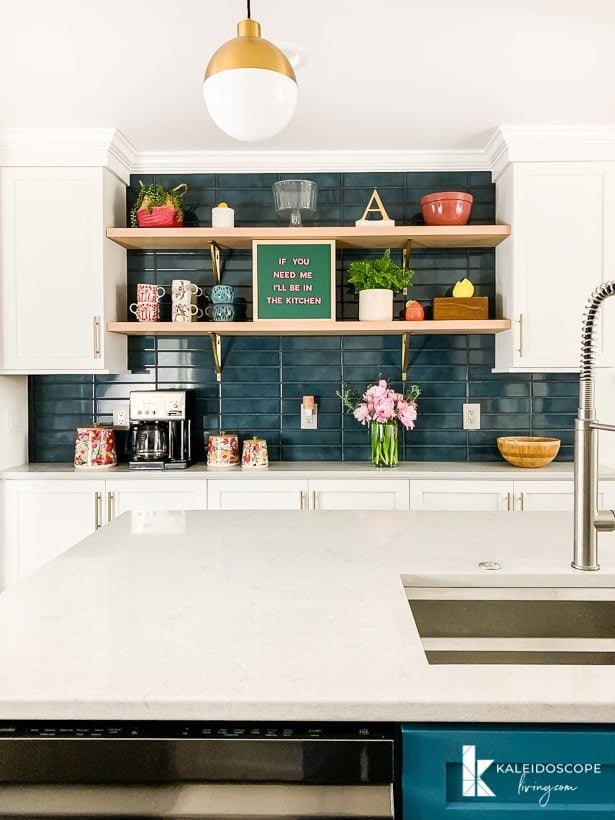
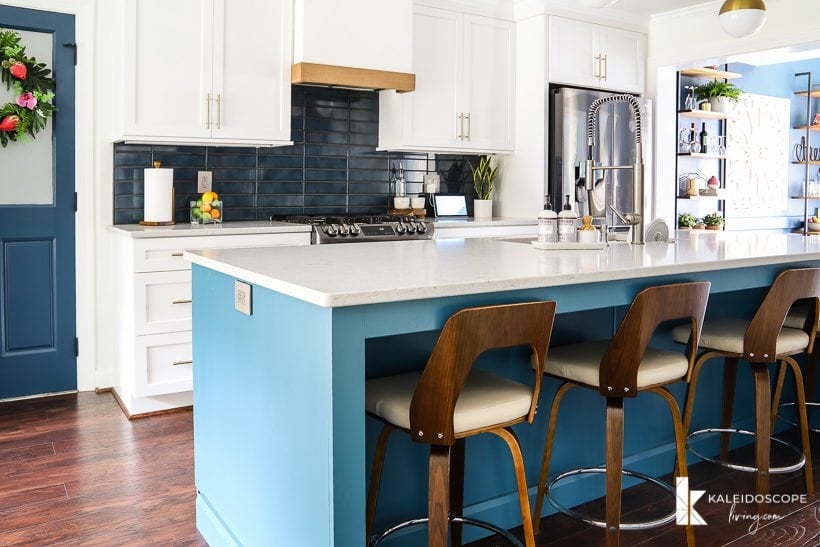
Obviously, we installed this tile backsplash on a very small area in our new butler's pantry, but we used this same method when we installed these two LARGE backsplash areas when we renovated the kitchen in our old home! We used a larger, glossy ceramic tile, but can you tell we are fans of the horizontally stacked tile pattern? And this blue color?! Lol. What can I say? We know what we like!
If the thought of tiling a backsplash feels a bit overwhelming to you, you can always paint your tile backsplash! I've painted outdated tile backsplashes a few times and it has always turned out great!
Other posts you may enjoy:
- How To Paint Kitchen Cabinets Without Sanding or Priming
- Our Budget-Friendly Kitchen Makeover REVEAL!
- Affordable DIY Countertops That Will Blow Your Mind
- How to Paint Countertops & What You NEED to Know First
- The Easy Way to Update Bathroom Tile Without Replacing It!
- How to Install a Floating Tile Floor
Wondering how I approach transforming rooms and spaces in our home? Check out Designer in a Binder®.

And if you want exclusive content and behind-the-scenes sneak peeks, be sure to subscribe before you head out!

Last Updated on May 8, 2025
Love how simple and clear this tutorial makes tile backsplash installation! The step-by-step breakdown is super helpful, especially for a DIY beginner like me.
I’ve used Musselbound on many kitchen backsplashes. One thing I have noticed is that you really can’t use a wet saw because the moisture in the tile will not allow it to stick. I use my Dewalt tile cutter with diamond blade. Works like a charm.
Yes, that is definitely a drawback of the Musselbound. We put our cut tile pieces in the oven to dry them quickly. Weird, but effective!
What kind of caulk do you use?
When caulking the joint lines between the backsplash tile and countertop or wall, I used a silicone based caulk :)
I’m interested in what product you used to seal the butcher block counter. :) Thanks!
Hi Emily! We used this natural beeswax to seal our butcher block countertop: https://shop.fusionmineralpaint.com/products/beeswax-finish?sca_ref=2002079.dBTXFwbMwy I hope that helps!