How to Install a Floating Tile Floor
Unhappy with your existing floor? You can update it without any demo! This floating floor installation project is a simple one that can be done in less than one day. You will have a beautiful new floor to show for it.
If you follow me over on Instagram, you know that we recently changed our laundry room floor by floating luxury vinyl tile OVER the old tile floor. We had previously installed beautiful tile stickers over the outdated ceramic tile floor and we loved them. But sadly, when I ordered the tile stickers I didn't know that I really should have ordered the tile stickers to be 1/8th inch SMALLER than the tiles themselves. I ordered the tile stickers to be the exact same size as our tiles. That resulted in along the edges of the tile stickers as we walked on them (and our laundry room gets a lot of foot traffic). So after 9 months, the edges and corners were starting to peel up.
I was sad that the tile stickers didn't work out because I loved the colors and pattern so much. But, you win some and you lose some. So I started researching options for a new laundry room floor.
I knew I really didn't want to have to demo the tile floor. So initially I was considering luxury peel and stick vinyl tile like we used in our old laundry room. But that would require me to fill in the grout lines and build them up to the same level as the top of the tiles. That didn't sound super fun.
What is a floating floor?
Floating floors have become increasingly popular recently. The term “floating floor” does not refer to a type of flooring material. Instead, it is a reference to a particular flooring installation method. A floating floor can be installed with a variety of materials including laminates, vinyl planks, engineered hardwood, and luxury vinyl flooring. A floating floor installation involves individual planks or tiles with interlocking edges that come together to form a single mat-like surface that rests on whatever is underneath it. And in many cases you can float a floor right over your old flooring!
Many floating floor products already have the underlayment attached to the planks or tiles themselves. Otherwise, an underlying is first installed over whatever surface the floor will be laid over. No matter how you slice it, a floating floor installation is MUCH quicker and easier than traditional glue-down or nail-down methods that are used for traditional flooring such as hardwood floors or ceramic tile.
Floating floors are popular for kitchens, bathrooms and laundry rooms. One reason for their increase in popularity recently is that they are very DIY friendly. Because you can tackle a floating floor installation yourself, you can save a ton in labor costs. And the cost of a floating floor per square foot is generally more affordable than traditional flooring options.
This post contains affiliate links for your convenience. Click here for my full disclosure policy.
The floating tile flooring we chose
After doing research, we chose this SMARTCORE Pro Gardena Marble 12-in x 24 inches. We chose it because it is 100% waterproof–it won't swell, crack or peel when exposed to water. And it allows for easy DIY click installation over existing hard surface floors with no subfloor prep, acclimation or adhesives. It's also incredibly durable. We also like the look of it! It was a win all the way around.
Now let's dive into the tutorial!
Floating Tile Floor Installation Tutorial
Materials needed
- Flooring of choice–this is what we used–SMARTCORE Pro Gardena Marble 12-in x 24
- Mallet
- Utility knife
- Jigsaw (optional)
- Oscillating tool
- Tile spacers
Step-by-Step Instructions
For an overview of this project, I highly recommend watching the short video below. Detailed written instructions follow the video :)
Time needed: 6 hours
Follow these steps to install a floating tile floor. It took us about 6 hours for this 12 feet x 8 feet laundry room. It was the easiest floor installation we've ever tackled!
- Read the instructions.
First and most importantly, read the instructions that come from the manufacturer with your particular flooring and that relate to your particular subfloor! The instructions I detail below are for this exact flooring and describe how to float your flooring OVER an existing tile floor that was in stable condition (no cracks, failed grout, etc.).
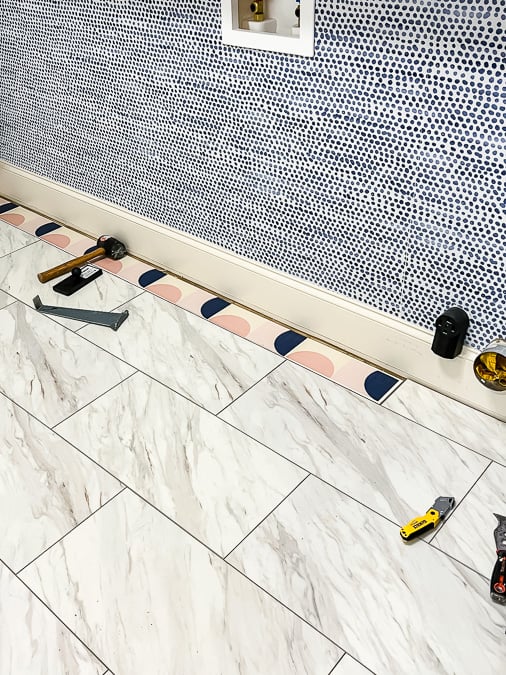
- Remove any shoe molding or quarter-round.
The reason for this is that you need to leave a 1/4 inch gap between the flooring and the baseboard or wall around the perimeter of the room to allow the floor enough space to expand and prevent buckling. You can then reinstall your shoe molding or quarter-round to hide the gap.
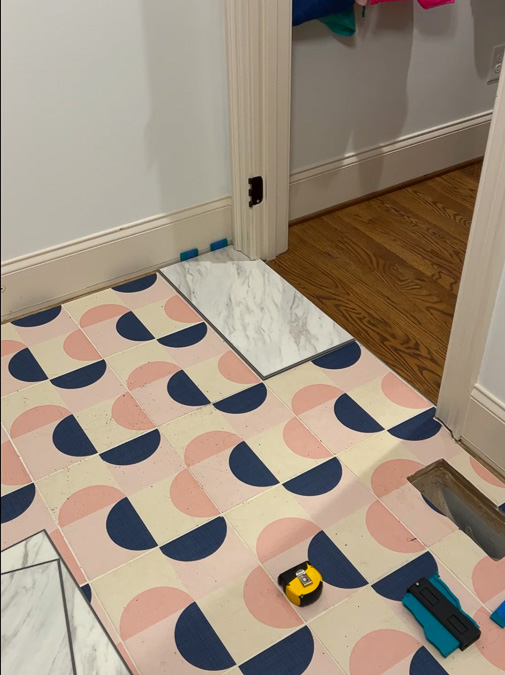
- Decide on your layout.
Running the flooring parallel with the longest wall usually looks best. Then measure the width of the room (subtract the expansion gap on both sides) and divide by the width of your flooring to calculate how many rows of tile will be needed. Chances are you'll need to rip (trim lengthwise) the last row of tiles to fit. If your calculation results in a final row that's at least 6 inches wide, then the first row should be a full-width plank. But if the last course is narrower than 6 inches, rip the first row down to ensure the last row will be at least 6 inches wide.
- Begin your installation from the proper starting point.
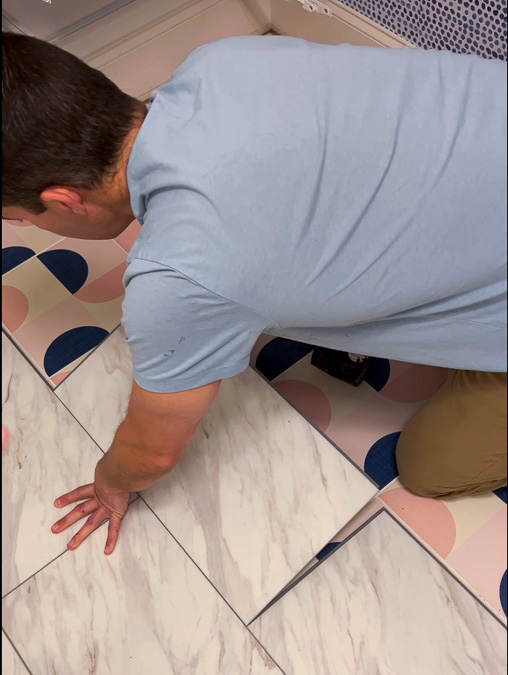
Start installing from the LEFT corner of your room. Place the tongue side of your first tile in the starting corner (work from left to right). Use several spacers to maintain 1/4″ expansion gap along the walls.

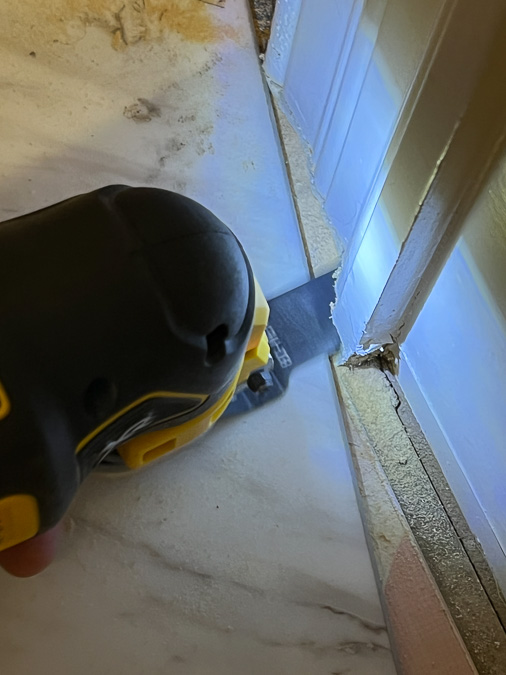
- Undercut door casings (if necessary).
If you have a doorway to work around like we did, use an oscillating tool to undercut your door casings. Simply place a scrap piece of tile under your oscillating tool blade as you cut to ensure that your door casings will be cut to exactly the right height.

You may also need to trim away part of the tile if your threshold extends past your door casings like ours did.
- Complete the first row.
Install the second tile in the first row by aligning and dropping the end tongue over the end groove of the first tile. Apply light pressure to join the two tiles together. If you need to, use a rubber mallet to fully lock the short sides of the tiles together. Be sure to use several spacers to maintain 1/4″ expansion gap along the wall. Repeat this process until your first row is done.
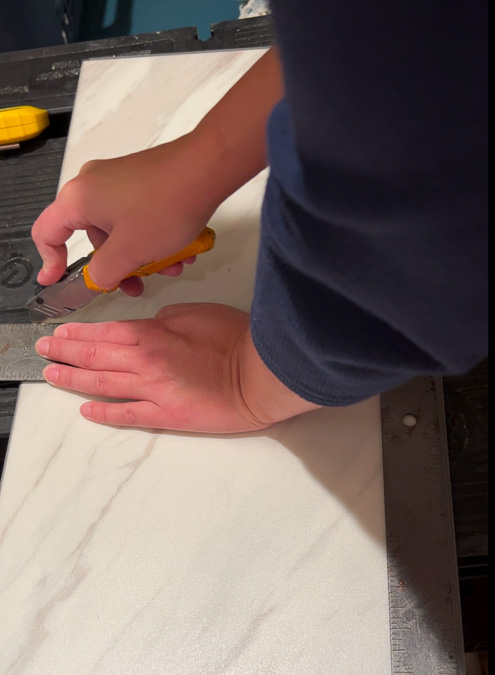
- Start the second row with a half tile.
Start the second row by cutting a tile to the desired length. Always begin a row with either a full tile or a half tile so the joints are consistently staggered in a “brick” type pattern. We were able to make our straight cuts with a utility knife, but you could certainly use a table saw or some other method if you prefer.

- Install the second row.
Install the first tile in the second row by inserting the long side tongue into the groove of the tile in the first row and then pushing it down into place. If you need to, use a rubber mallet to fully lock the short sides of the tiles together.
- Repeat until all of your field tiles are installed.
Continue installing your floating floor, making sure to stagger each row. Remember to leave a 1/4 inch gap between your final row and the back wall. If you don't leave enough room for expansion, your tiles will buckle and/or pop apart.

- Install transition molding (if needed).
Because there will likely be a difference in the height of your floating floor and any flooring it adjoins, you will need to install a piece of transition molding that matches your floor material.

- Install shoe molding or quarter-round to hide the expansion gaps.
Install your shoe molding or quarter-round molding to hide the expansion gaps. If you have never done that before, check out this post on how to install quarter-round. Then caulk and paint as needed!


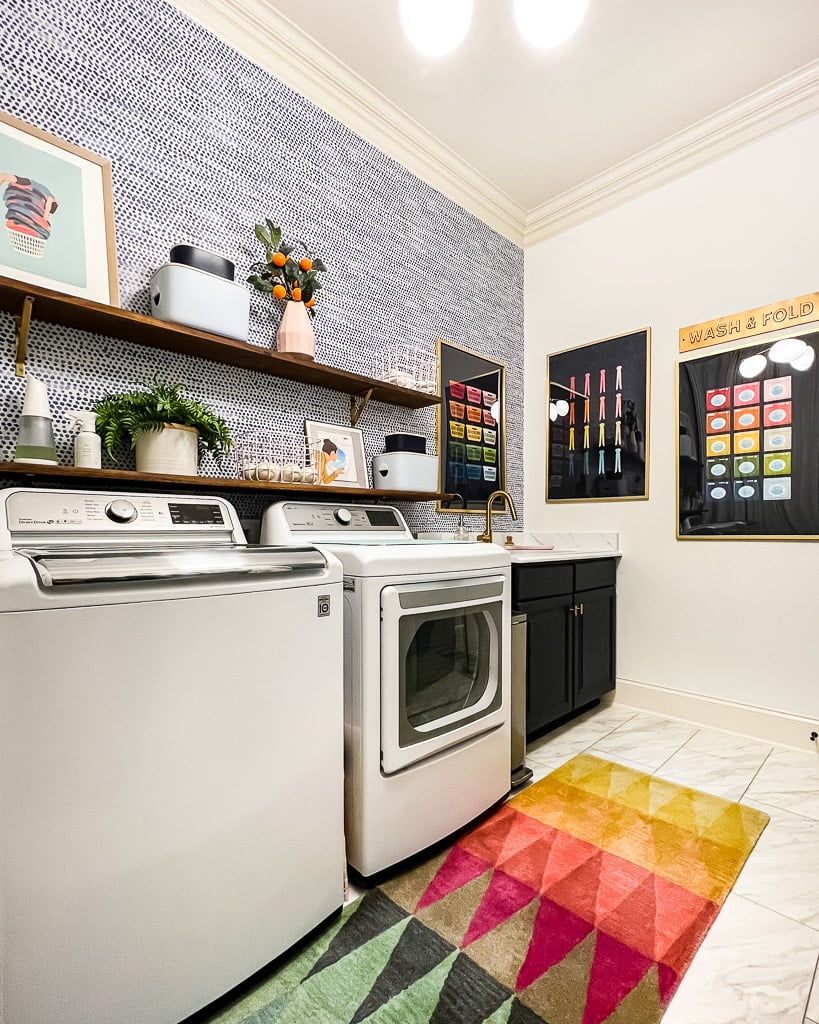
That's it! Check out our finished floor. We love it. We installed it about 16 months ago and it's holding up beautifully. It cleans easily and is SUPER durable. No regrets.
We are so happy with how it turned out! I can't more highly recommend this type of floating floor. The installation was so quick and easy. It took us about 6 hours to install the floor and get the room put back together (it's 12 feet x 8 feet for size reference). Here's how it looks all finished.
Other posts you may enjoy:
- Cheap But Gorgeous Flooring Ideas
- The Best Garage Flooring Options for a Fresh Update
- The Easy Way to Update Outdated Tile Without Replacing It
- How to Paint a Vinyl Floor for Long-lasting Results
Wondering how I approach transforming rooms and spaces in our home? Check out Designer in a Binder®.

And if you want exclusive content and behind-the-scenes sneak peeks, be sure to subscribe before you head out!

Last Updated on March 6, 2022
Great blog! Installing a floating tile floor is a great DIY project that can transform your space. It’s a straightforward process: just start by preparing the subfloor, lay down the underlayment, and then snap the tiles into place—no adhesive required! With a bit of patience and precision, you can achieve a professional-looking result with ease.
We are considering this exact type of flooring for our small bathroom. However, I’ve read several reviews with people saying the short side of the planks are really hard, or even impossible to snap together. Did you experience this at all when installing? I’m scared to buy this because of what I’ve read.
Hi TJ. No, I don’t remember them being hard to snap together at all (and we’ve installed some “wood” laminate planks before that were hard to get together). It’s been a while, but I remember these being really easy to install!