Our Budget-Friendly Pantry Makeover
We are very lucky to have a large, walk-in pantry but it was an absolute mess and didn't function well for our family. It was also drab and lifeless so it didn't fit in with the rest of our colorful home. Over the course of a couple of weeks, we tackled this full pantry makeover for less than $600. We added a ton of functionality and gave it a whole new look without any demo and on a small budget. Check out how we did it!
The Issues in Our Pantry
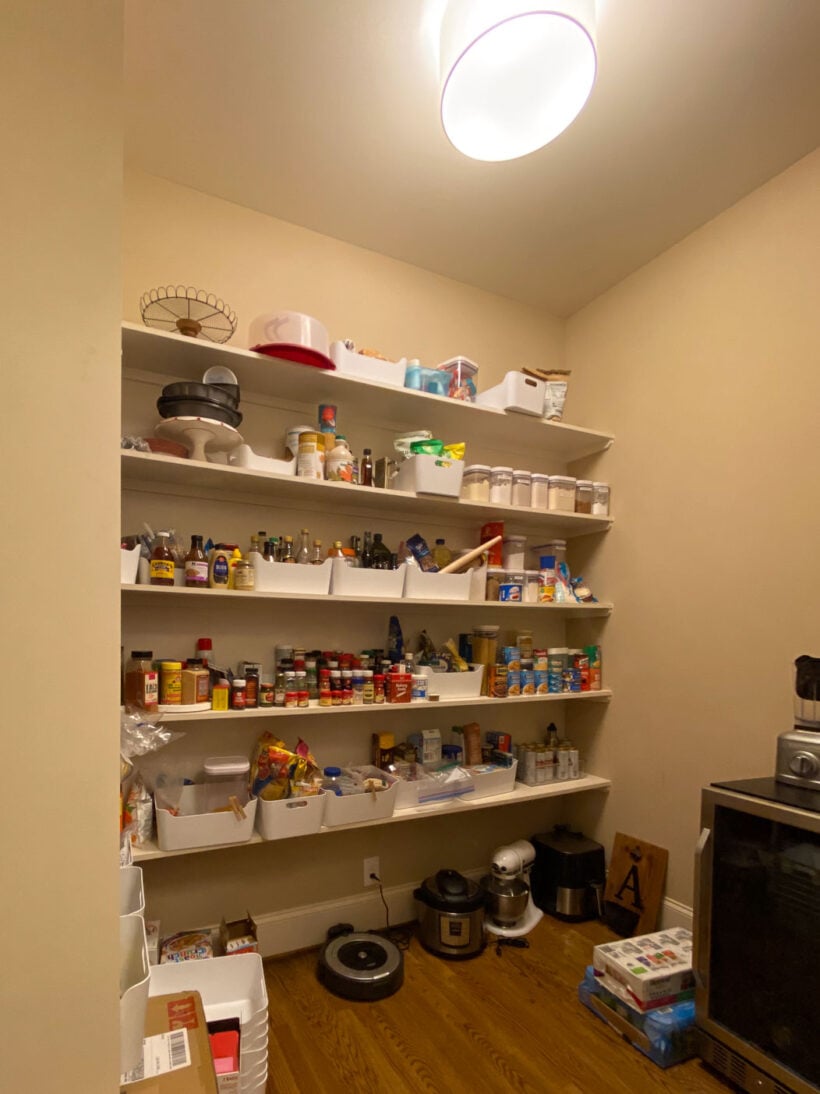
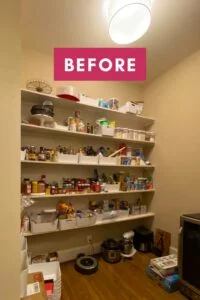
We didn't love the drab beige and brown colors of our pantry, but we knew changing the aesthetics of the space would be easy. The big issue is that the pantry didn't function the way we wanted it to. It was a disorganized mess with boxes all over the floor. The pantry shelving didn't fit everything in a way that made sense.
The depth and spacing of pantry shelving is critically important to how well a pantry functions. I have an entire post about pantry shelving ideas because it really is that important.
Our house was built in 2012 and the pantry shelves are original to the house. The shelving is made of solid wood and it is STURDY. They were not bent or warping at all, which is great (and impressive). And the depth of our shelves is darn near perfect–they are 13″ deep. You generally don't want pantry shelving that is deeper than that because then small items get easily pushed to the back and lost.
The problem with our pantry shelves is that they are all spaced evenly, which is not ideal. The spacing is 24″ between all of the shelves which results in a lot of wasted space–you can see how much space between the shelves was wasted in the photo below.
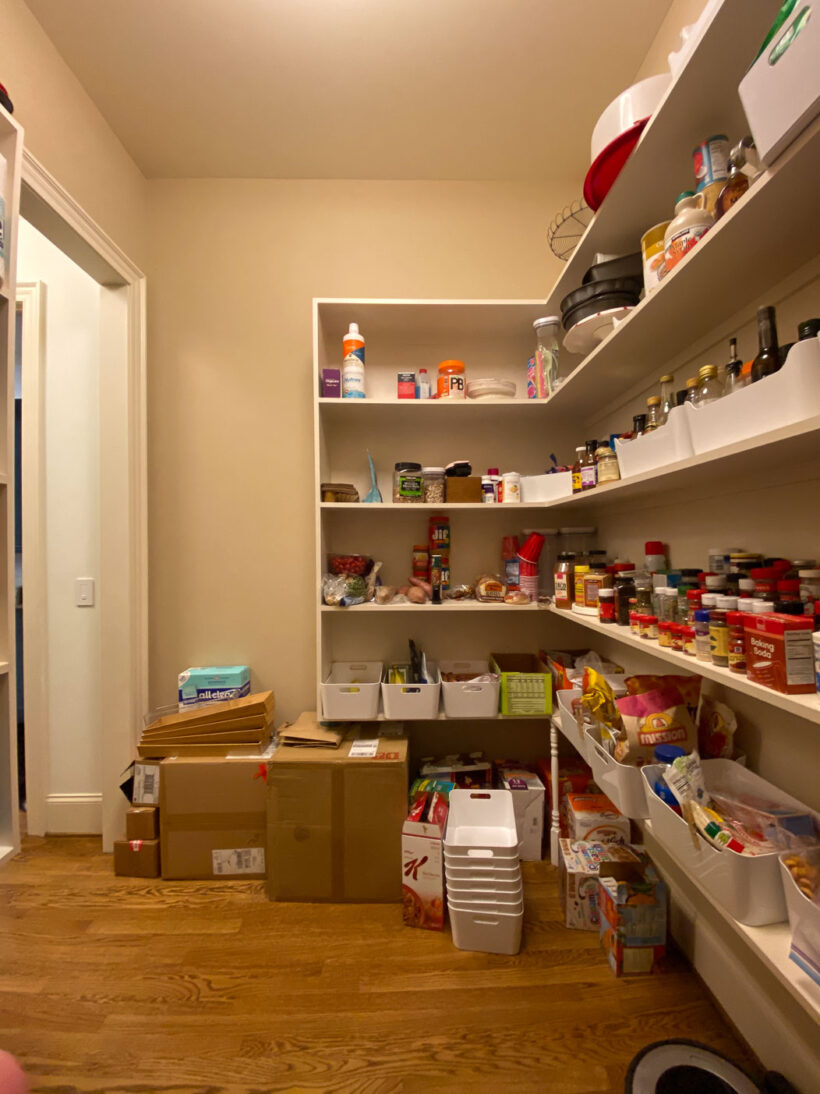
Ideally, you want pantry shelves of different heights to allow you to maximize your pantry space with smart shelf placement. But since our shelving is sturdy and in great shape, we decided to do our best to optimize it and avoid waste. Not replacing the shelving also helped our budget!
This post contains affiliate links for your convenience. Click here for my full disclosure policy.
Pantry Makeover Details
Here's how we updated our existing pantry and made it way more functional for our family without spending a ton of money.
Made it a Bright & Happy Space
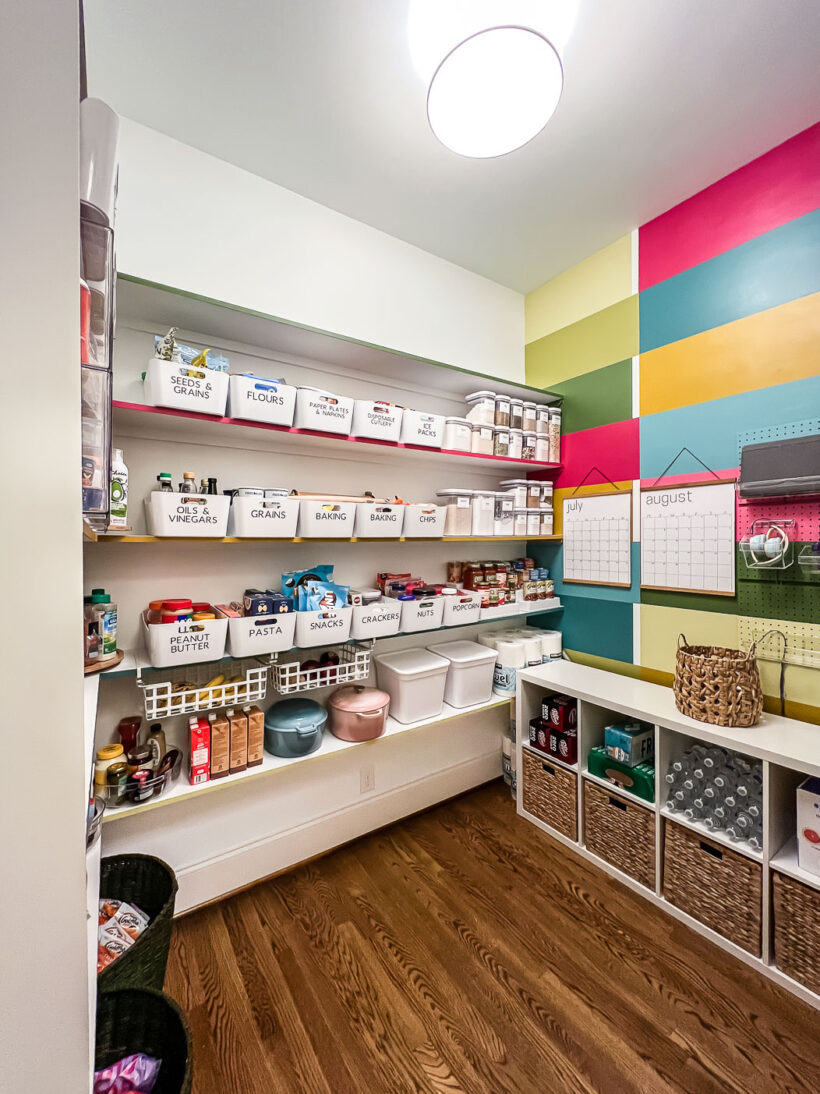
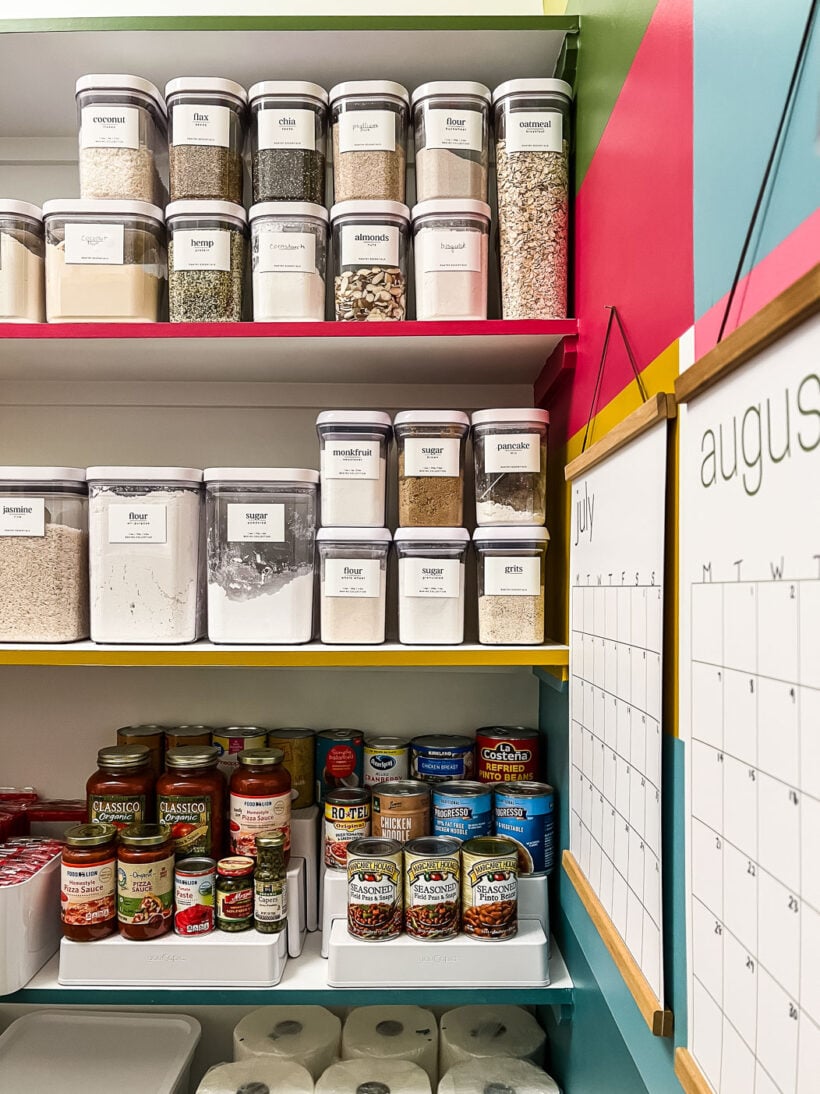
Since our pantry doesn't have any windows, we wanted to make it feel as bright as possible. So we got rid of the brown walls and beige shelves. We painted almost everything (the walls, shelves and ceiling) Pure White by Sherwin Williams. That made a HUGE difference. Then I painted a colorful wall mural on the back wall. For fun, I painted just the edges of the pantry shelves as well :)
I hand-mixed some of the colors that you see in the mural, but I have listed as many of the pantry mural colors as possible for you below–they are all from Sherwin Williams.
- Garden Spot (dark green)
- Auric (mustard yellow)
- Edgy Gold (medium green)
- Pale Moss (light green)
- Gala Pink (dark pink)
- Lagoon (darkest blue)
Used Smart Pantry Storage
Instead of replacing the shelving as part of our pantry makeover, we found some affordable pantry storage solutions that allowed us to capture some of that wasted vertical space. You can find most of our pantry organizing pieces HERE, but I've also linked to individual items below for you :)
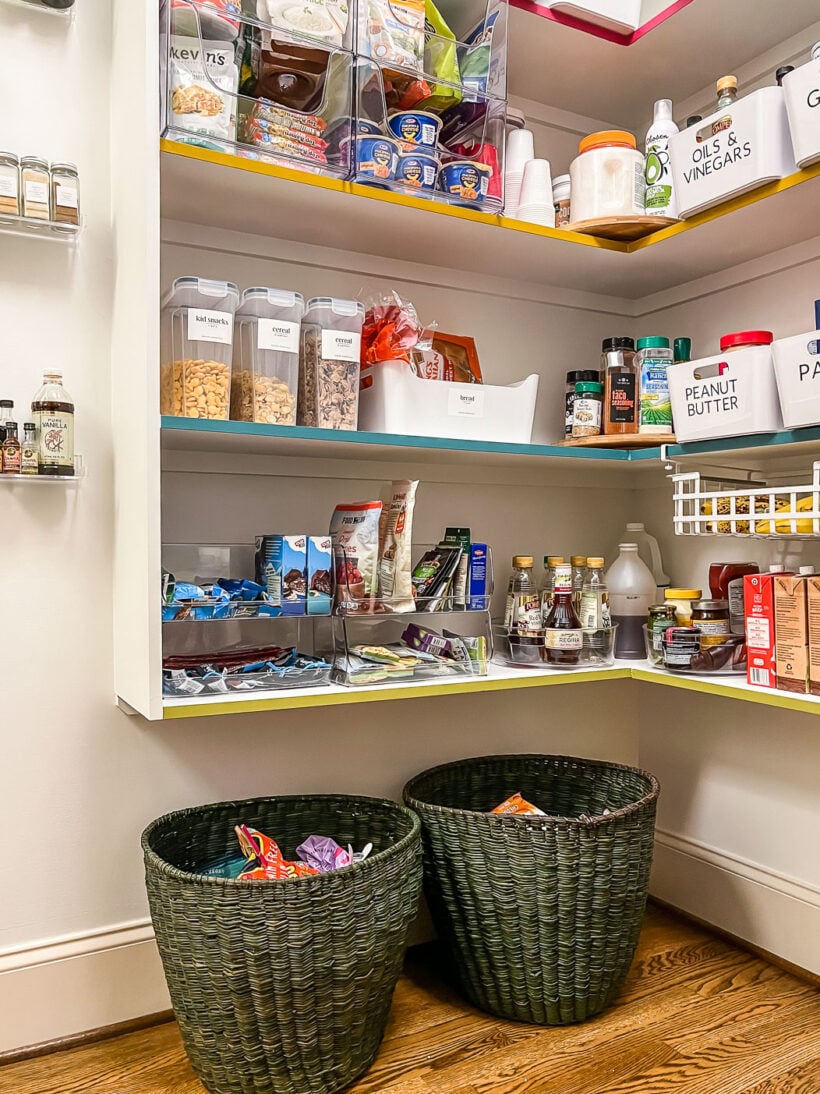
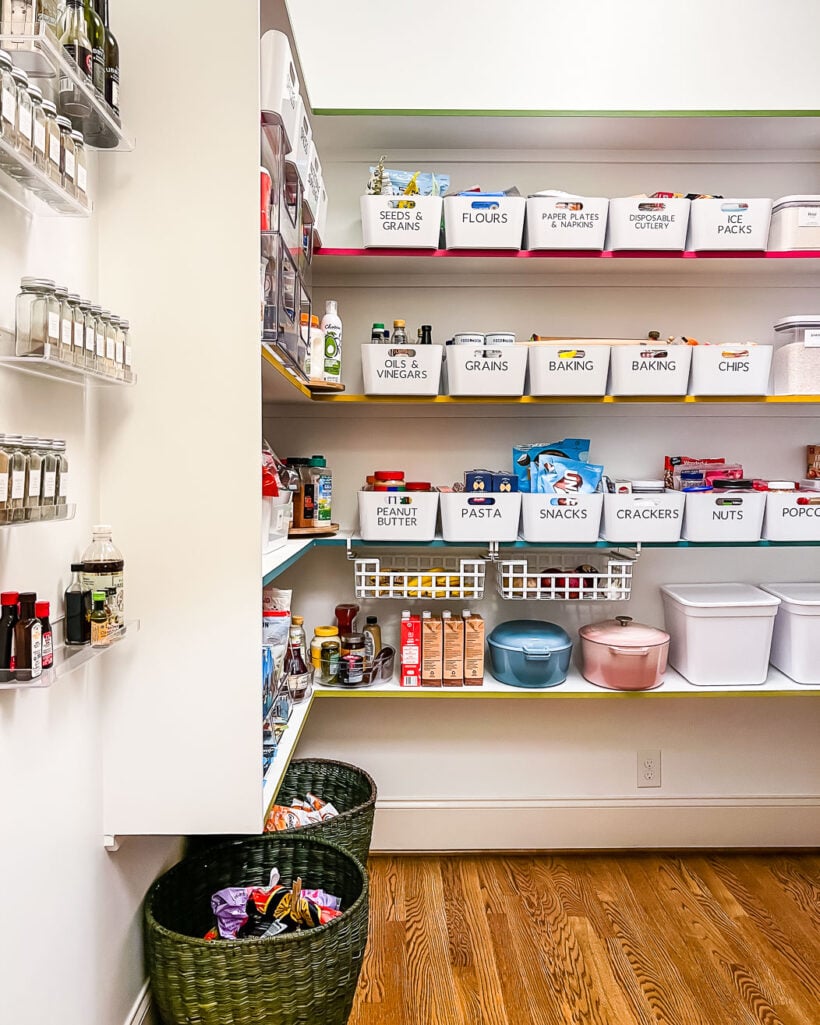
- These under-shelf drawers are PERFECT for our produce since they allow for so much air circulation.
- The large clear stackable bins on the yellow shelf allow us to use the full height of the shelves and I love that they are clear so it's easy to see what's in them.
- The smaller clear stackable bins on the bottom shelf helped us gain some vertical space. They are perfect for holding small, individually packaged items.
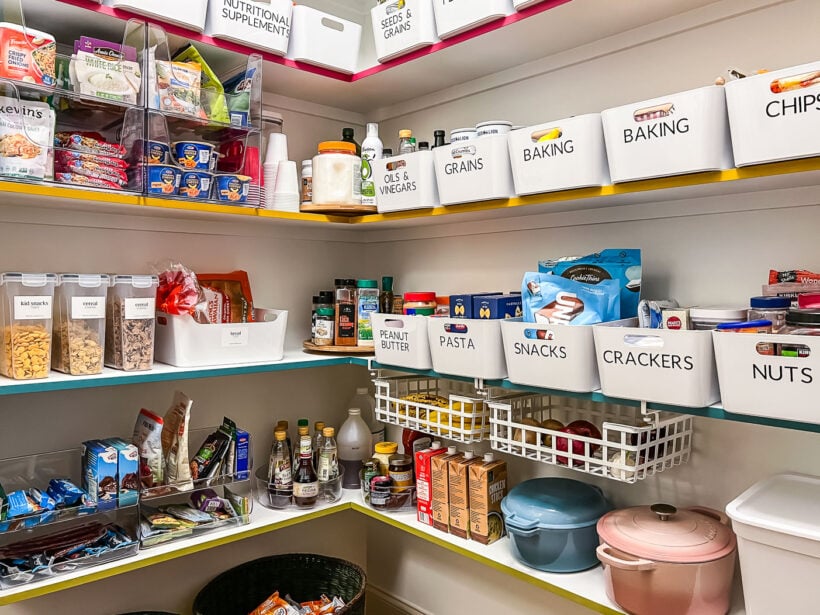
- We also added these adjustable shelf risers for our canned and jarred items, which helps capture some of that vertical storage.
- We have decanted our dry goods for many years using these airtight OXO Pop containers. They are great because they are modular in the sense that the containers easily stack on top of each other in endless configurations. By stacking them, we were able to use the full height of the pantry shelves without losing the ability to see everything.
- I added these super inexpensive pantry labels to them. The set comes with 135 essential ingredients, 75 baking ingredients, 135 herbs & spices labels plus 45 blank labels you can customize.
- For anything that requires cooking instructions, I cut out the instructions and place them in the container. You could tape them on the bottom of the lid or the back of the container if you prefer.
- The set of pantry labels includes 258 “best before date” labels you can add anywhere you want if you are worried about keeping track of expiration/best-before dates.
Maximized the Pantry Corner With Lazy Susans
We also added lazy susans to the corner to maximize every inch of the corner space. Corners in pantries tend to be where a lot of things get buried and lost, so lazy susans are a great option for pantry corners!
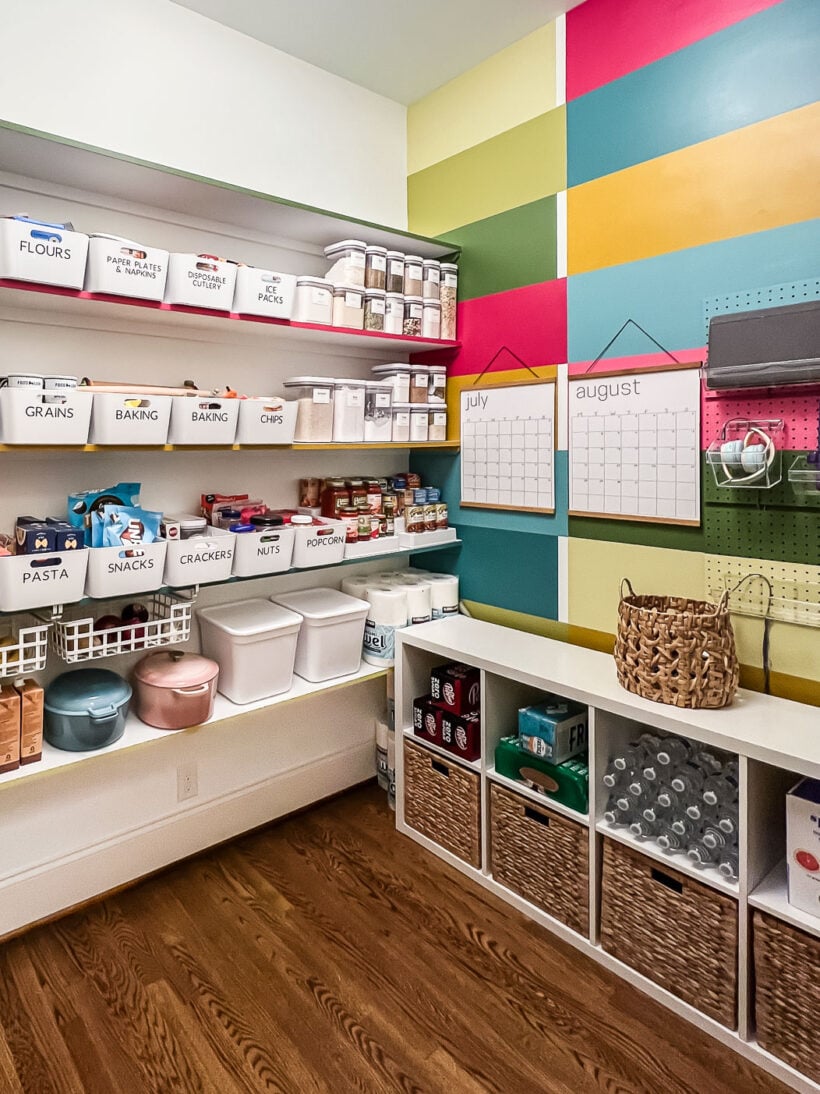
Grouped Like Items Together in Labeled Bins
We have used these white bins for years in so many different spots around our home. We absolutely love them. And you can see that we continued to use the same bins as part of our pantry makeover–I just made labels for the bins with my Cricut so that everyone knows where things go. Using labeled bins helps so much by keeping like items together. They also help us realize when we are close to running out of something because it's easy to see at a glance that the bin is partly empty.
Added Floor Baskets for Extra Bulk Items
As part of this pantry makeover, we wanted to get everything off the floor of the pantry, with one big exception… I knew that really big floor baskets would be the perfect place for us to keep extra stock of things like goldfish and cereal that we buy in bulk at Costco. I'm so happy with this solution for storing backup stock! It feels like a good use of floor space and the baskets make everything look tidy. Having all of that backstock on the shelves would have been a total waste of space since we don't actually use it until we need it.
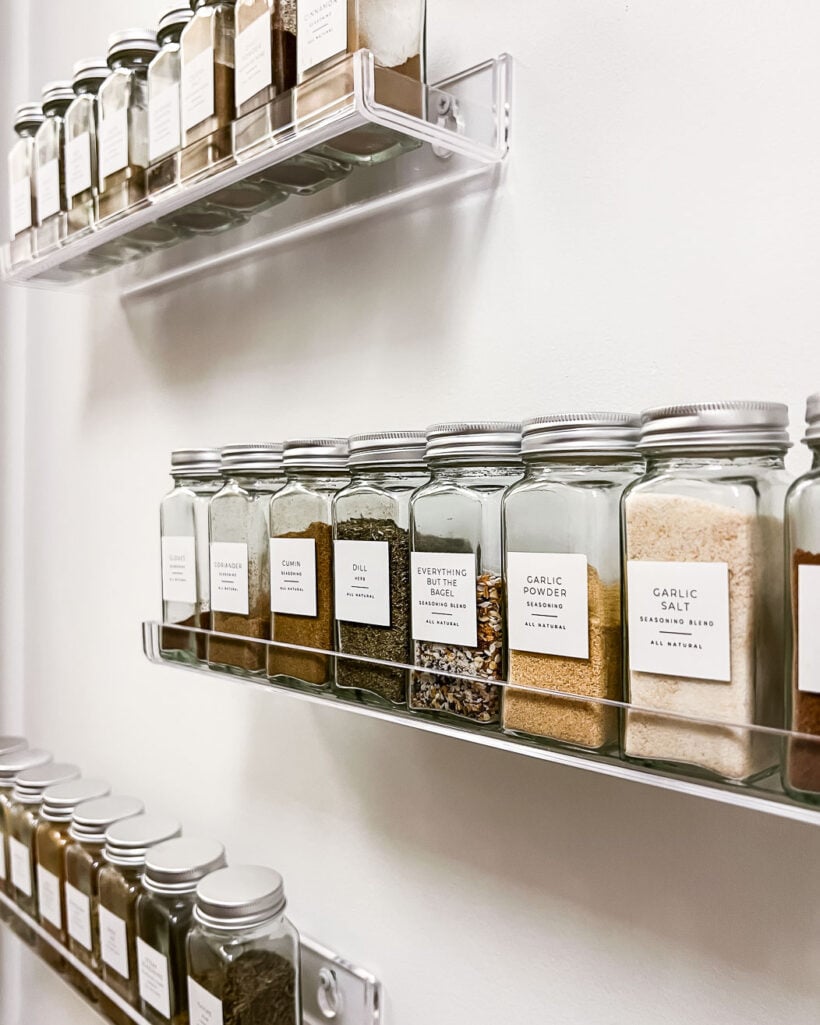
Hung Wall-Mounted Spice Shelves
We don't have enough cabinet or drawer space in our kitchen to store our spices or extracts in it, but they took up a lot of room on our pantry shelves. So we added these acrylic shelves to this small wall space. I used these spice jars to make the storage uniform and added spice labels (which are different than the ones that come with the jar set–just a personal preference). Any extra spices are stored in a bin on the top shelf and we refill the jars as needed. It's a very simple solution that works well! If you don't have the wall space to do something like these, check out these awesome spice storage ideas.
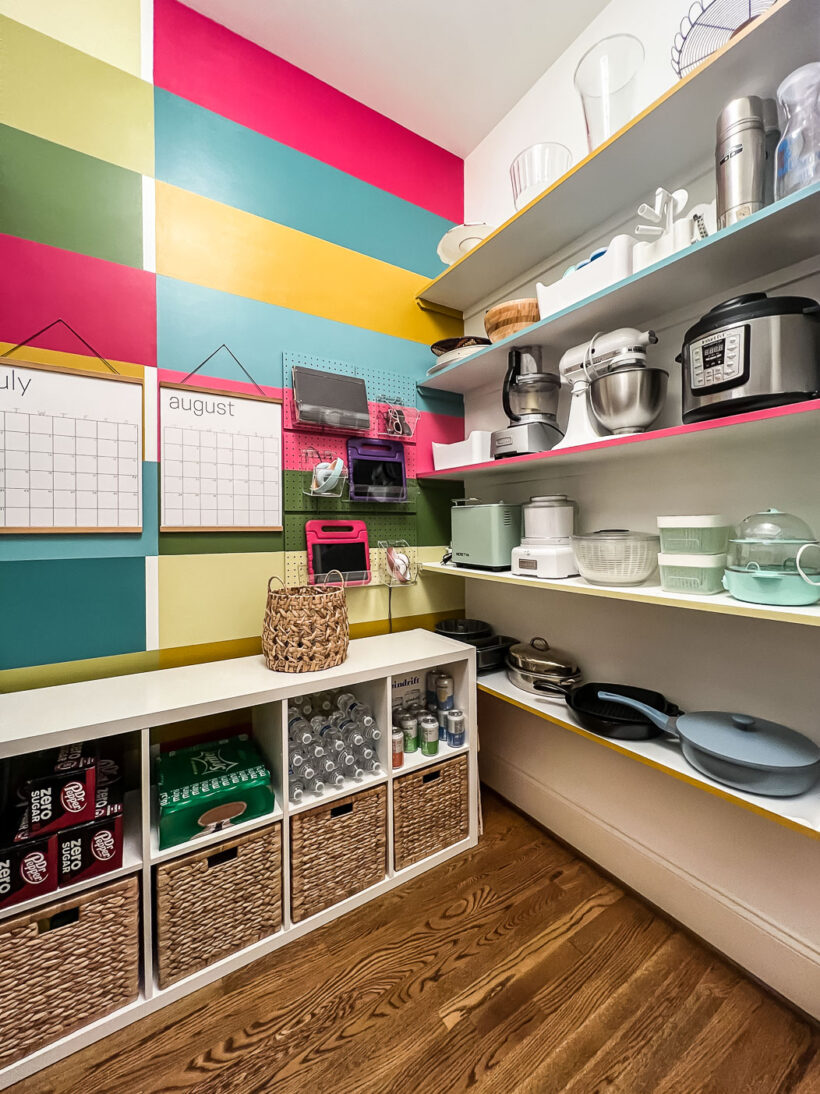
Added a Bookshelf for More Storage
Since we recently added a secondary refrigerator to our DIY butler's pantry, we no longer needed the small beverage fridge that used to be along this back wall. So we moved it out and brought down an old IKEA Kallax bookshelf and baskets from our attic and were THRILLED to find that it fit perfectly on the back wall of our pantry. It's perfect for extra drink storage. And we store our extra Ziploc bags, trash bags, etc. in the baskets on the bottom shelf. By adding the bookshelf, we were also able to free up more of the pantry shelving.
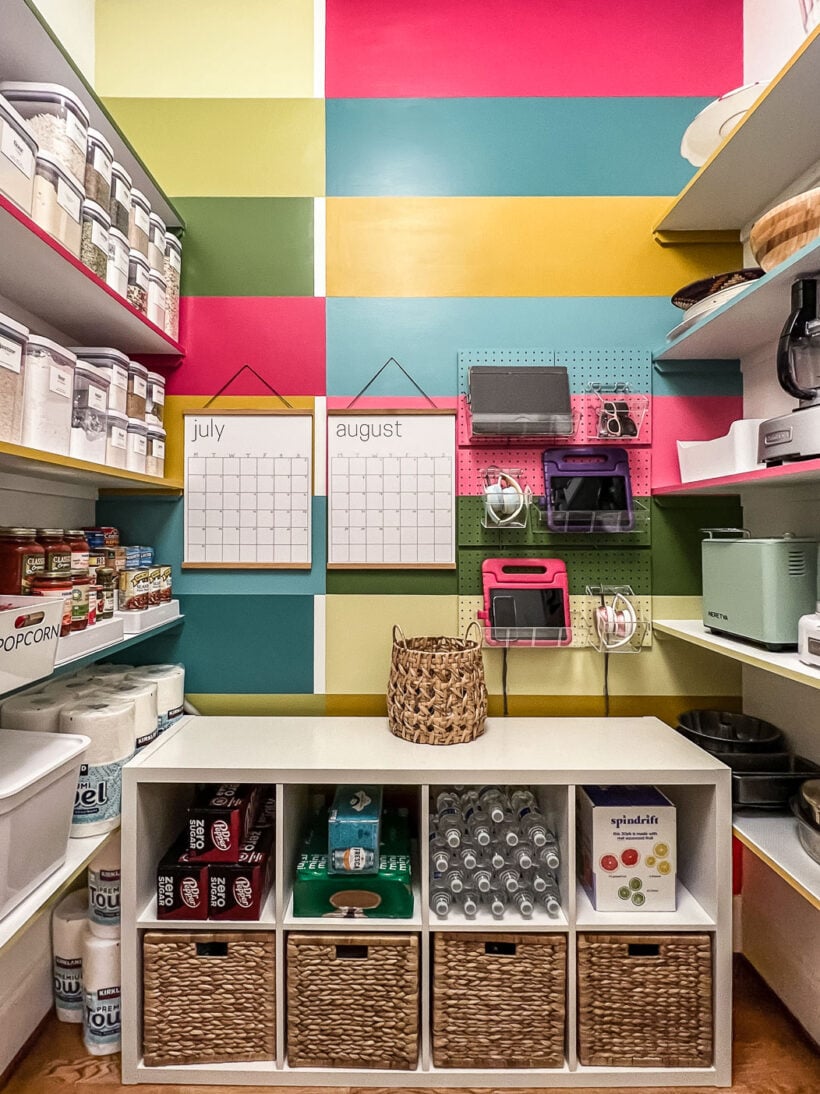
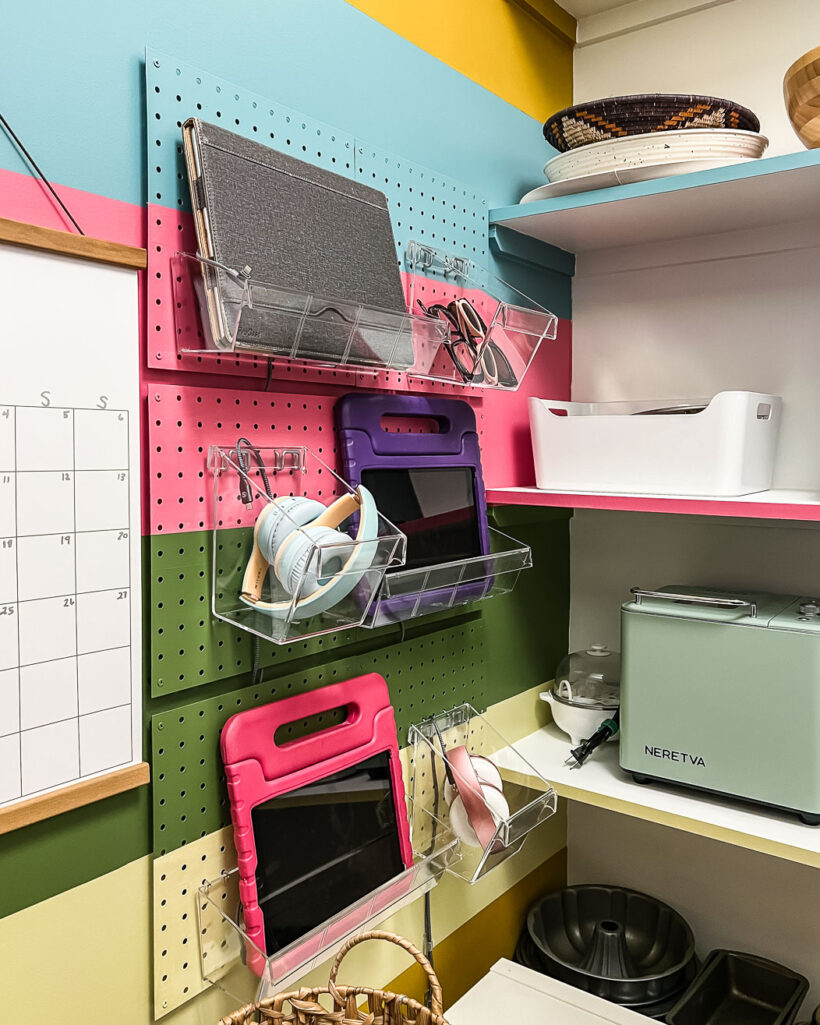
Hung a Family Charging Station
The bookcase also serves the purpose of holding things like the basket I used to hide cords for our new DIY family charging station. Since our pantry is such a large space, I wanted to add some additional functionality to it that had nothing to do with food or cookware storage. I had been searching for a solution for charging all of our family's electronic devices–I was so sick of charging cords, phones and iPads all over the place.
Our new charging station takes advantage of the otherwise blank wall in our pantry. Everyone happily puts their devices away in the charging station every night (whether they need to be charged or not). I'm thrilled to be rid of the visual clutter of devices and cords left on countertops or tables!
You can watch the video below for an overview of how I put the charging station together. It will play after a short ad.
Grouped Cookware and Small Appliances Together
Last, but not least, we were mostly able to group all of our “kitchen overflow” stuff that doesn't fit in our kitchen into this one portion of the pantry. Before, there were some food items over here also. Since we were able to fit all of the food on the other side of the pantry, this section fits all of our serving ware, cookware, small appliances, etc. that we can't fit in our kitchen cabinets. Our kitchen may look big, but it's shocking how little cabinet storage we have! If you are curious, I have a whole blog post sharing how we have organized our kitchen cabinets to make the most of what we do have.
Pantry Makeover Budget Breakdown
In case you are curious about how much this pantry makeover cost us, we spent less than $600. Here's a breakdown:
- Paint- around $200
- A few new baskets, bins, labels & under-drawer shelves- $237
- DIY family charging station components- $145
- Everything else we already had, including that old IKEA bookshelf and baskets that we brought down from the attic 🙌🏻
So there you have it! So far everything is staying nice and organized and it feels sooooooo good. I'm genuinely surprised how much we were able to improve the function in this space with some organization and additional storage solutions/tweaks. I am incredibly glad that we didn't rip the shelving out and start from scratch, which we really did consider at one point. What do you think?!
More Kitchen IDEAS
Wondering how I approach transforming rooms and spaces in our home? Check out Designer in a Binder®.

And if you want exclusive content and behind-the-scenes sneak peeks, be sure to subscribe before you head out!

Love this and using it as my pantry inspiration! I’ve been searching for pantry ideas with color and this is exactly what I want! Just got the white in the walls and I’m already so much happier. Tackling the color wall next! Any tips for the color wall? Thanks for sharing.
Thank you Lyndy! I played around with color options on my computer using Canva first! That helped me figure out the direction I wanted to go with the color palette and color placement.
I love the touch of painting the edge of the shelves different colors!
Thank you Erin! That is one of my favorite touches as well :)
Love it! Did you change the lightbulb or did changing the paint really make that big of a difference? It seemed like it had a yellow glow before.
Thank you Crissy! Those are the exact same bulbs! Isn’t that crazy?! The brown and beige paint made everything look yellow before.