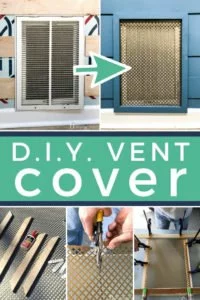
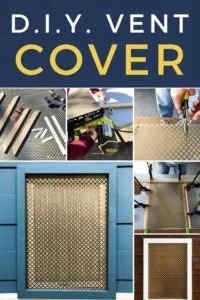
DIY Vent Cover (it’s pretty and easy)
The vast majority of air grille covers are just ugly! Learn how to make your own beautiful DIY vent cover with this easy-to-follow step-by-step tutorial.
Hello friends! If you read my blog regularly, then you already know that we recently created this DIY modern plank wall in our foyer. Well, in the process we realized just how ugly our air grille cover was. It just stuck out like a sore thumb. So, we decided to do something about it. We made our own DIY vent cover in about an hour with super inexpensive materials. The end result is so pretty and so worth it! Read on to learn how to make your own!
Thank you to DAP Products for sponsoring this post. This post contains some affiliate links for your convenience. Click here to read my full disclosure policy.
DIY Vent Cover Tutorial
You can watch an overview of this project in the short video below. Written instructions follow as well :)
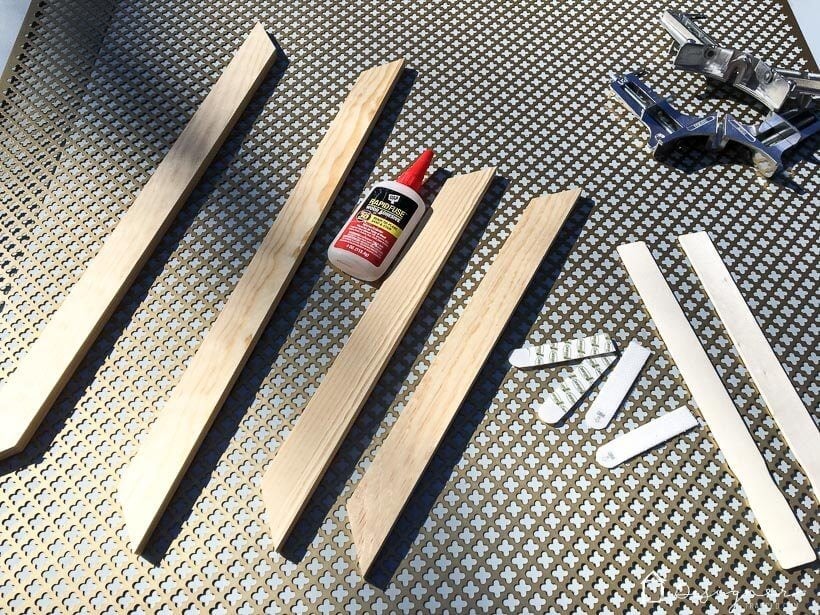
Materials Needed:
- 1/2 x 2-inch pine wood
- Compound miter saw or a miter box and hand saw set
- Decorative metal sheet
- This stuff is so versatile. We've also used it to make this DIY kick plate for our front door–so much cooler than boring kick plates sold at stores.
- Metal Snips
- DAP Rapid Fuse
- Corner clamps and regular clamps
- Measuring Tape
- Command picture hanging strips
- Scrap wood pieces (if necessary)
Steps:
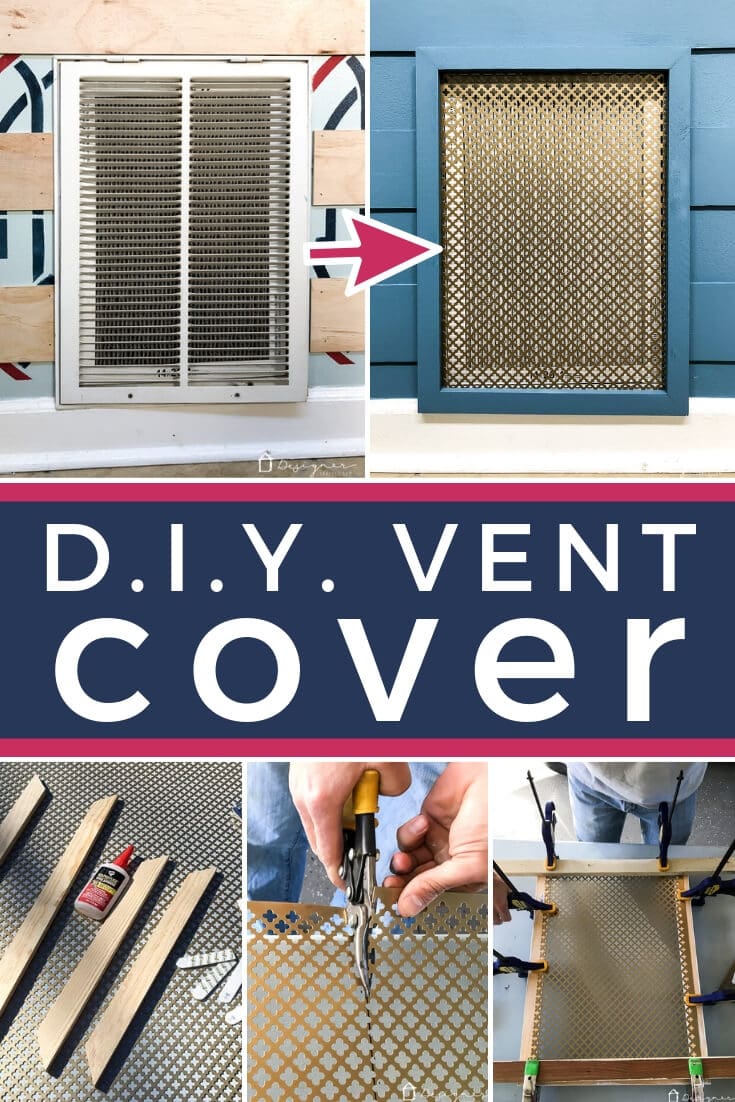
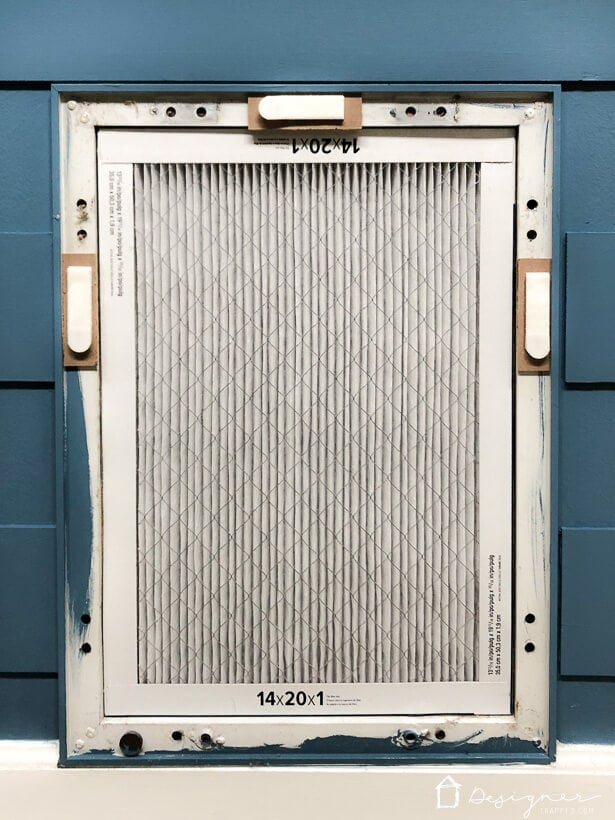
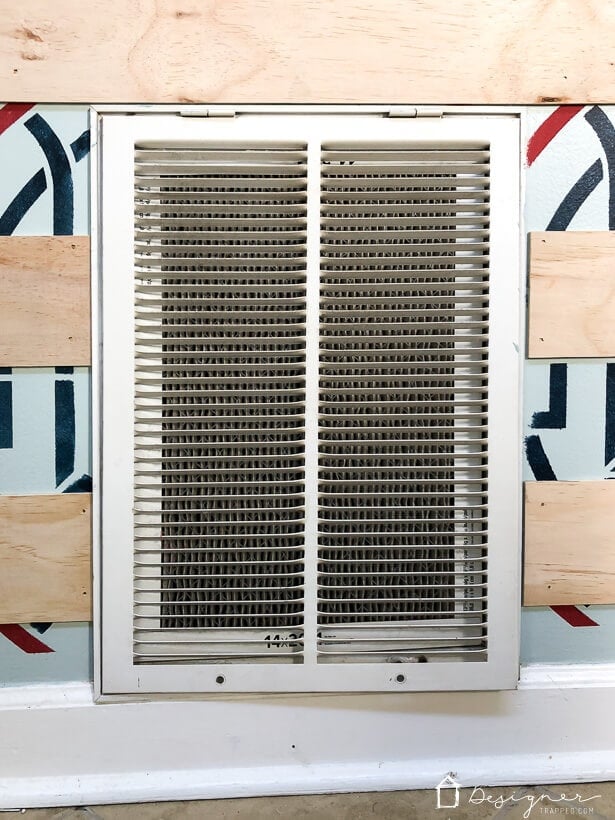
1. Measure the size of the air return opening in your wall. Ours is 14″ x 20″.
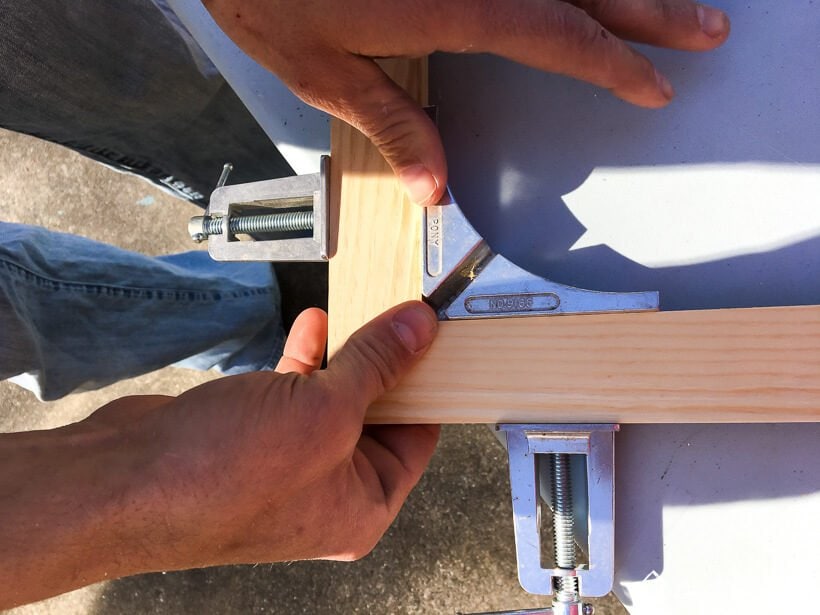
2. Cut your pine to length. We mitered the corners, but you could do butt joints if you want to. We used our compound miter saw to make our cuts, but you could absolutely make these cuts with a miter box and hand saw set.
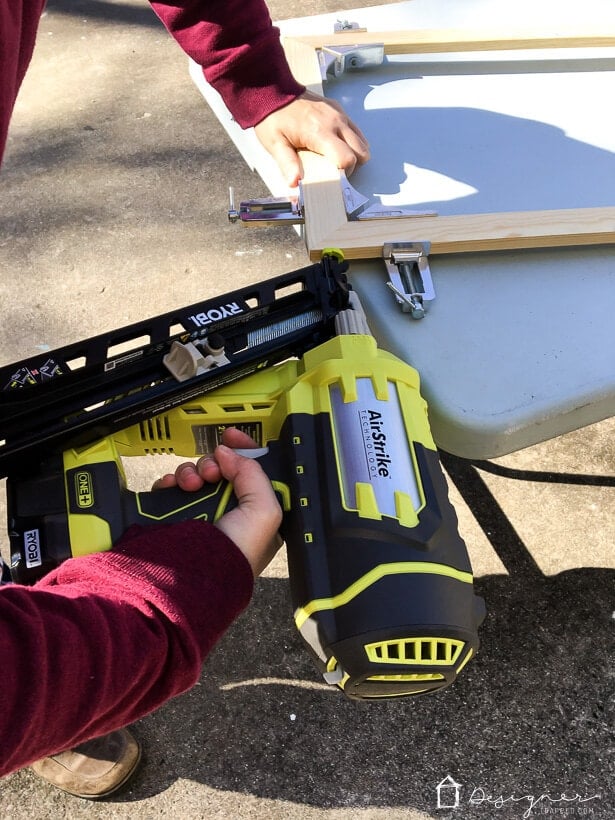
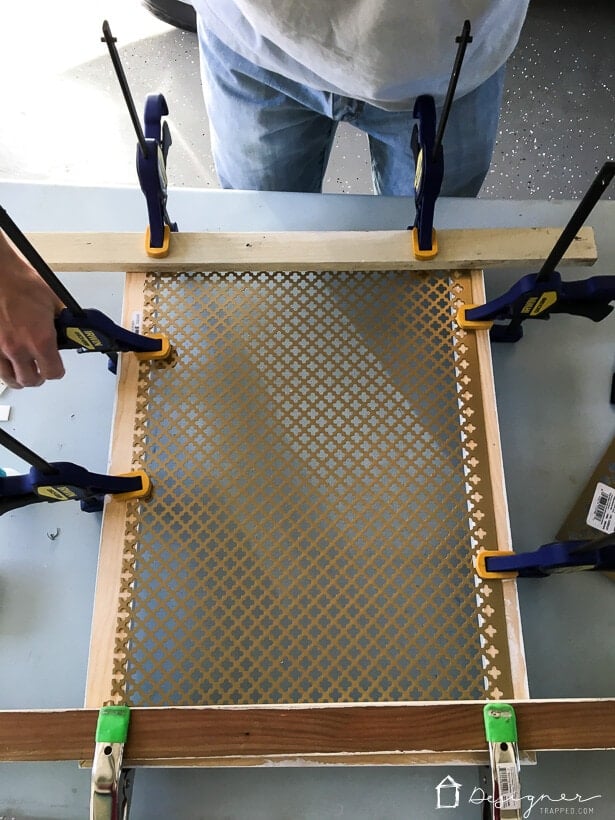
3. Assemble the outer frame of your DIY vent cover. We glued the edges with DAP Rapid Fuse and then used corner clamps to make sure the frame stayed perfectly square. Then to reinforce the corners, we used our brad nailer to put a nail in each corner.
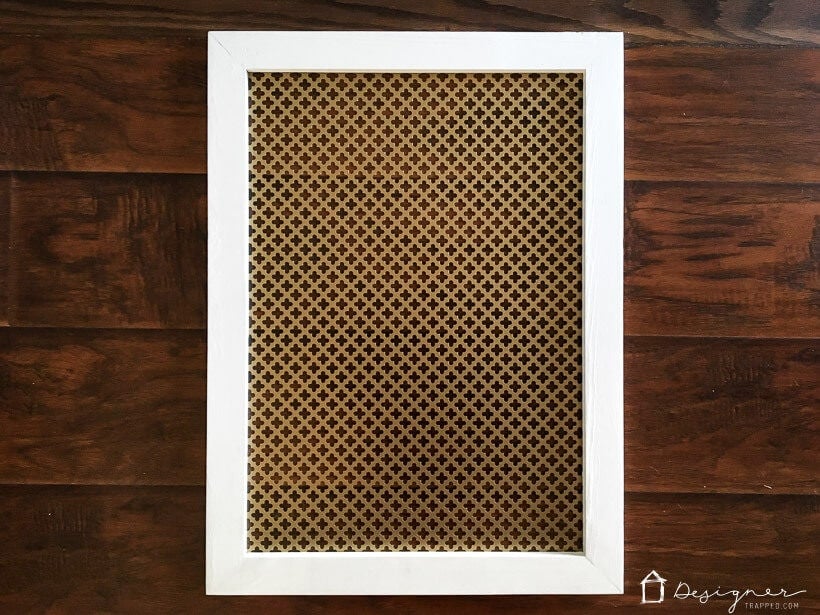
4. Once your frame is assembled, you should probably go ahead and paint it. We didn't paint it until after we attached the metal sheet, which meant I had to be a lot more careful. Ooops.
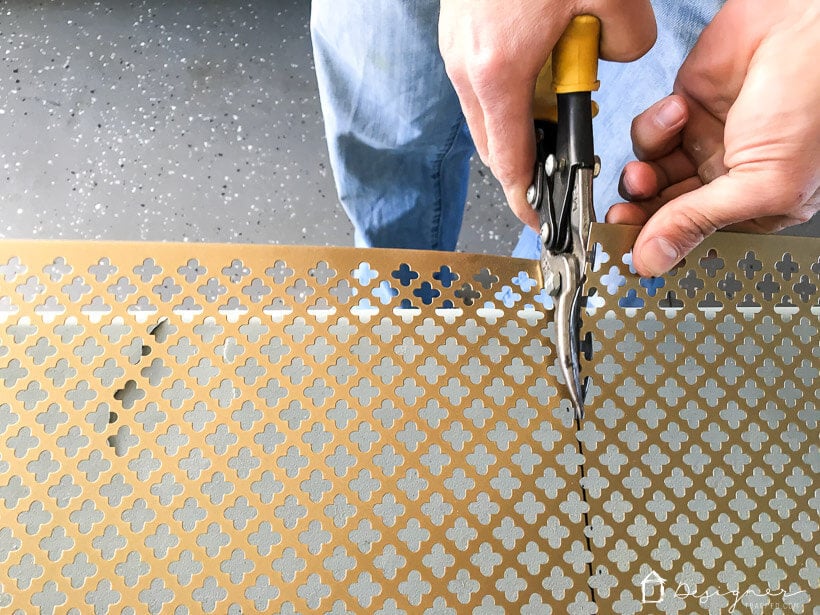
Then use metal Snips to cut your decorative metal sheet to size. Be sure to cut it a bit smaller than your frame so that it doesn't overhang the edges of the frame.
5. Next, use your DAP Rapid Fuse to glue the metal sheeting to the back side of your frame. Then use clamps to hold it in place while the glue cures (which only takes a few minutes). Don't worry if you don't have a zillion clamps like us. You could also just hold it in place or use something heavy to hold the metal sheet down while it cures.
6. Once the glue cures, remove the clamps. Take a look at how much better things are looking already!!!! Such a huge improvement.

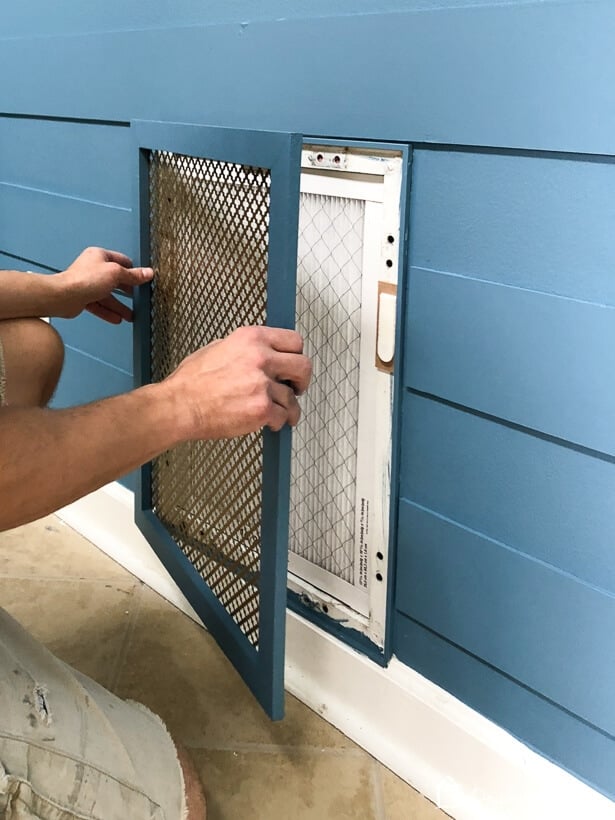
7. After your DIY vent cover is painted and fully assembled, you are ready to hang it. * Note that we had to attach some thin scraps of wood to the air vent frame in the wall so that the new frame would sit flush. You may not have this same issue, but if you do, just glue them to the frame on your wall with DAP Rapid Fuse and you'll be good to go. * We used Command picture hanging strips to attach the new DIY air vent cover to the frame on the wall.
The reason we used the Command picture hanging strips instead of regular command strips is that because they kind of look like velcro and the pieces lock into each other. That means we can remove the vent cover to change the filter whenever we need to and then pop it right back into place. In other words, the picture hanging strips allow you to remove and replace the vent cover without having to use new command strips every time :)
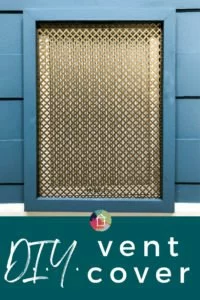
That's it! When you are done you will have gone from this….
to this!
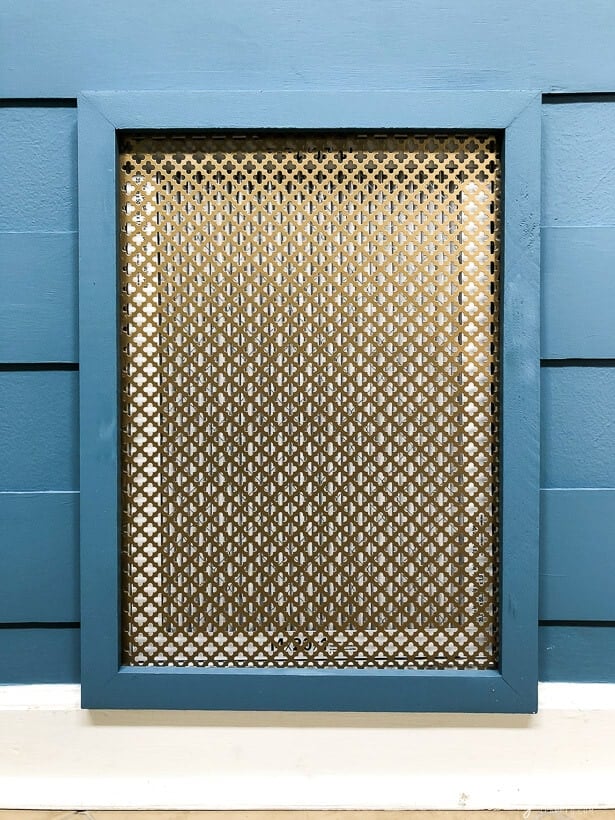
The decorative metal sheet we used for this project is so versatile. We've also used it to make this DIY kick plate for our front door–so much cooler than boring kick plates sold at stores.
What do you think?! Doesn't it look so much better?
Other posts you may enjoy:
Wondering how I approach transforming rooms and spaces in our home? Check out Designer in a Binder®.

And if you want exclusive content and behind-the-scenes sneak peeks, be sure to subscribe before you head out!

Last Updated on May 11, 2022