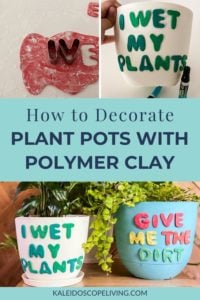
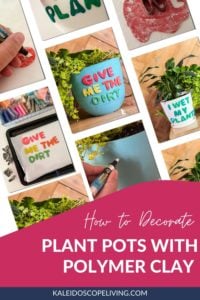
How to Decorate Plant Pots With Polymer Clay (and a sense of humor)
Transform plain plastic plant pots into something special by adding your own polymer clay decorations. It's easy and super fun!
Hey friends! If you follow me over on Instagram you know that I've recently delved into the world of being a plant mom. I've always loved plants and think every room needs at least one (which we talk about in this podcast episode). And now I have more than ever. I have several in our master bedroom and kitchen. I gotta tell you, once you buy the first plant that you love, it's kind of addictive. And plants are affordable enough (especially if you start propagating your own, which I am already doing some of in Avery's room). But WOWZER, planters and plant pots can add up quickly.
I've already discovered ways to save on cute plant pots and this method is one of my favorite. All you need are some super inexpensive plastic pots (these are my favorites) and some polymer clay. Let's dive into the tutorial so you can learn how to easily decorate plant pots for yourself!
Thank you to DAP for sponsoring this post. This post contains some affiliate links for your convenience. Click here to read my full disclosure policy.
How to Decorate Plant Pots with Polymer Clay
Materials Needed:
- Inexpensive plastic pots (these are the white ones I love and I found the blue one here)
- Polymer clay (this is the set I ordered)
- DAP Rapid Fuse With Plastic Primer
- Corn starch (it helps keep the clay from sticking to your surfaces as you work with it)
- Cookie cutters (these are the ones I used)
- Parchment paper, a cookie sheet and an oven
- Sandpaper and wax (optional)
Instructions:
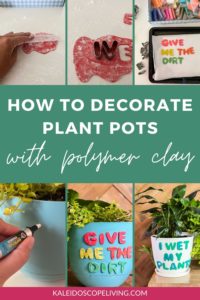
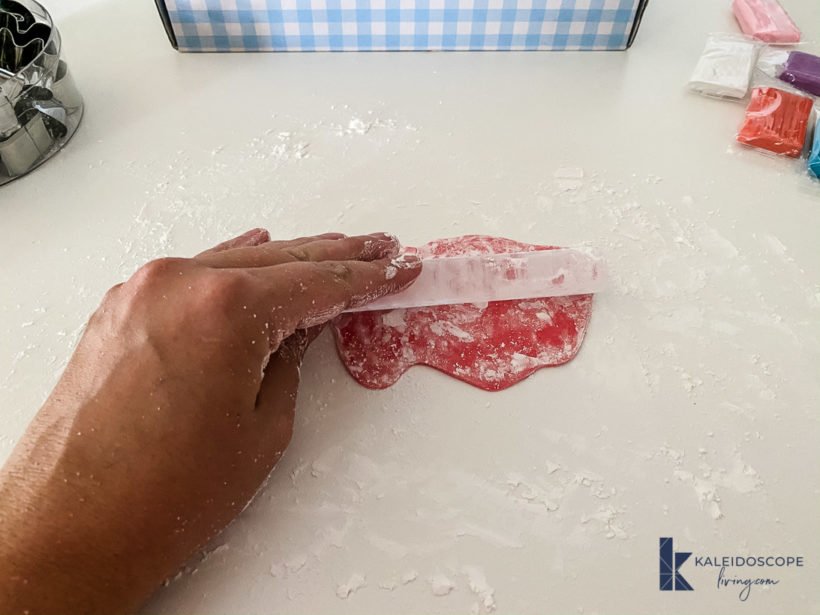
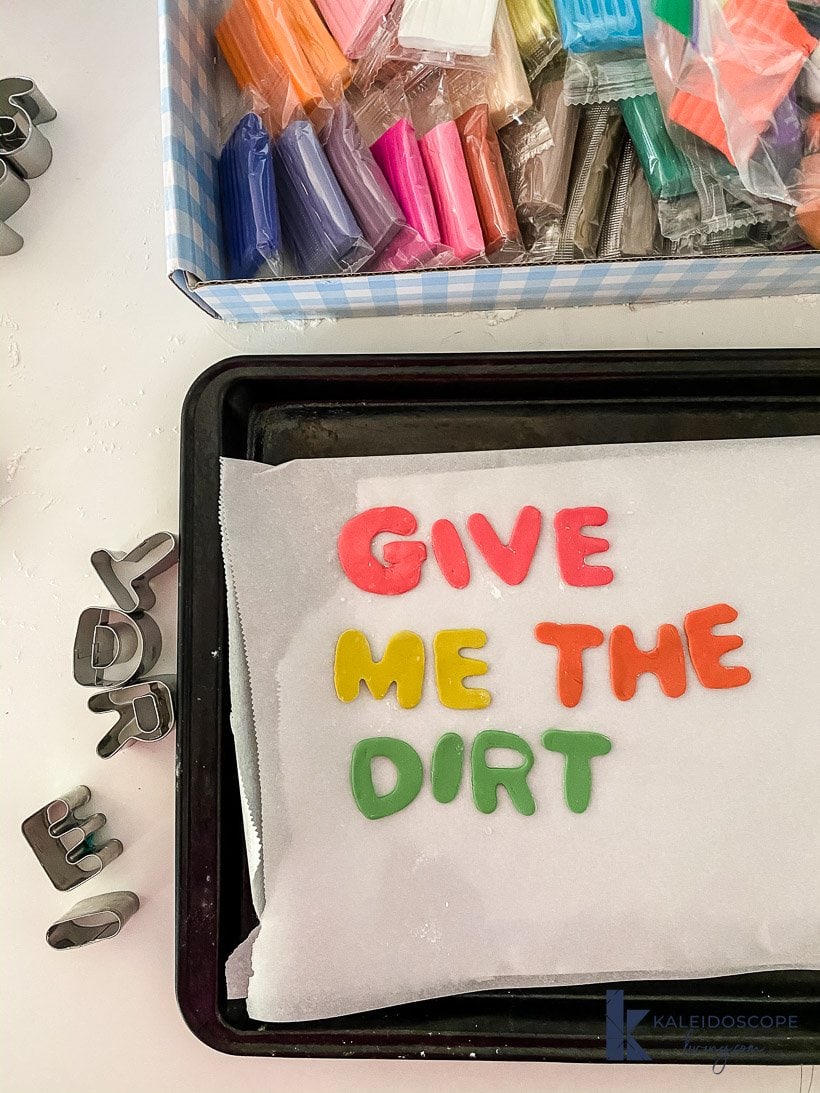
Step 1: Dust the surface you will be working on with a little bit of corn starch.
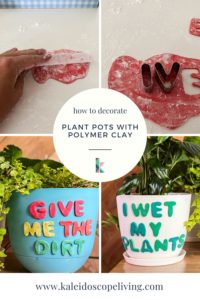
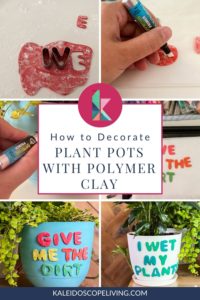
Step 2: Choose the first color you want to use. Polymer clay needs to be softened and kneaded before working with it. It's quick and easy! Just mush it around with your fingers and hands until it's warm and soft.
Step 3: Use something round to roll your polymer clay out. The polymer clay set I ordered came with a handy acrylic roller. Do your best to roll it to an even thickness. I rolled mine pretty thin, but there are no hard and fast rules.
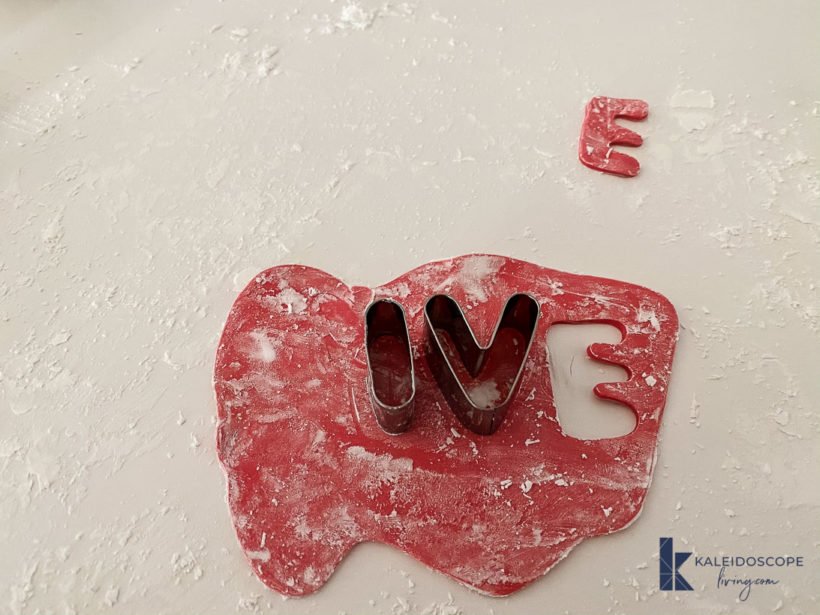
Step 4: Use your cookie cutters to cut out whatever words/shapes you want. If you have trouble getting your cut clay out of the cookie cutters, you can use a pencil to help poke them out–just be gentle.
Step 5: Once you are done, place some folded up parchment paper on a cookie sheet and transfer your polymer clay shapes on top. Dip your finger in water and smooth out any imperfections BEFORE you bake them. It also helps remove excess corn starch.
Step 6: Bake according to the directions on your particular brand of polymer clay. It varies a bit based on the brand/variety. For mine, I baked them at 275 degrees for 10 minutes.
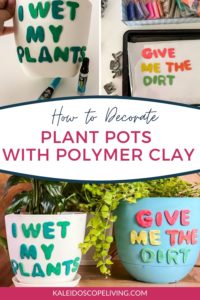
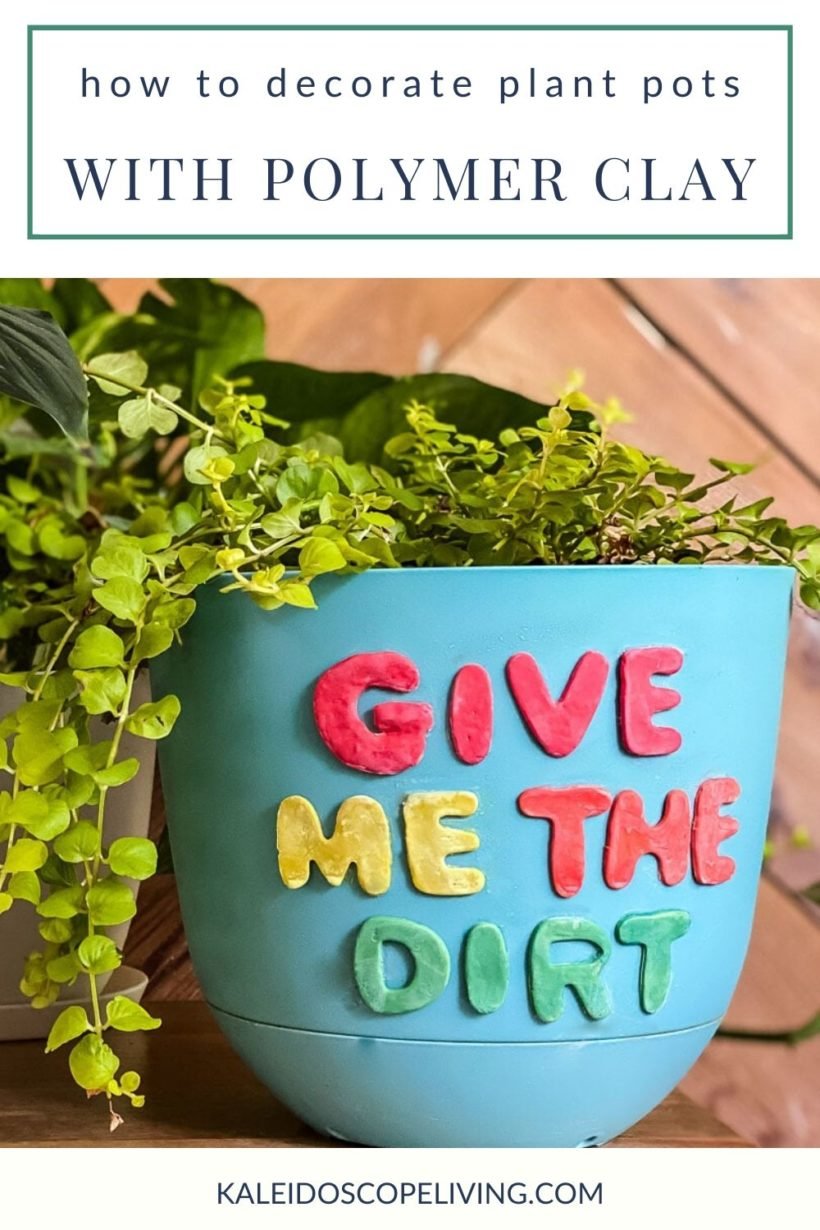
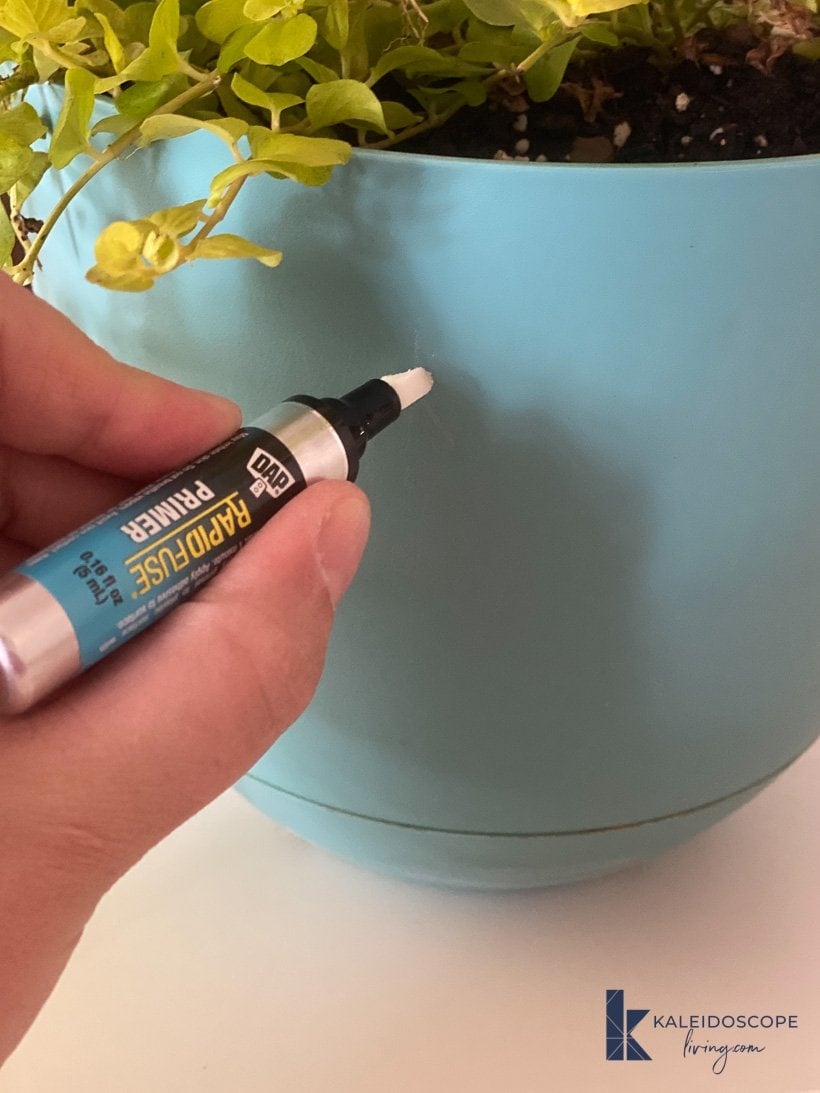
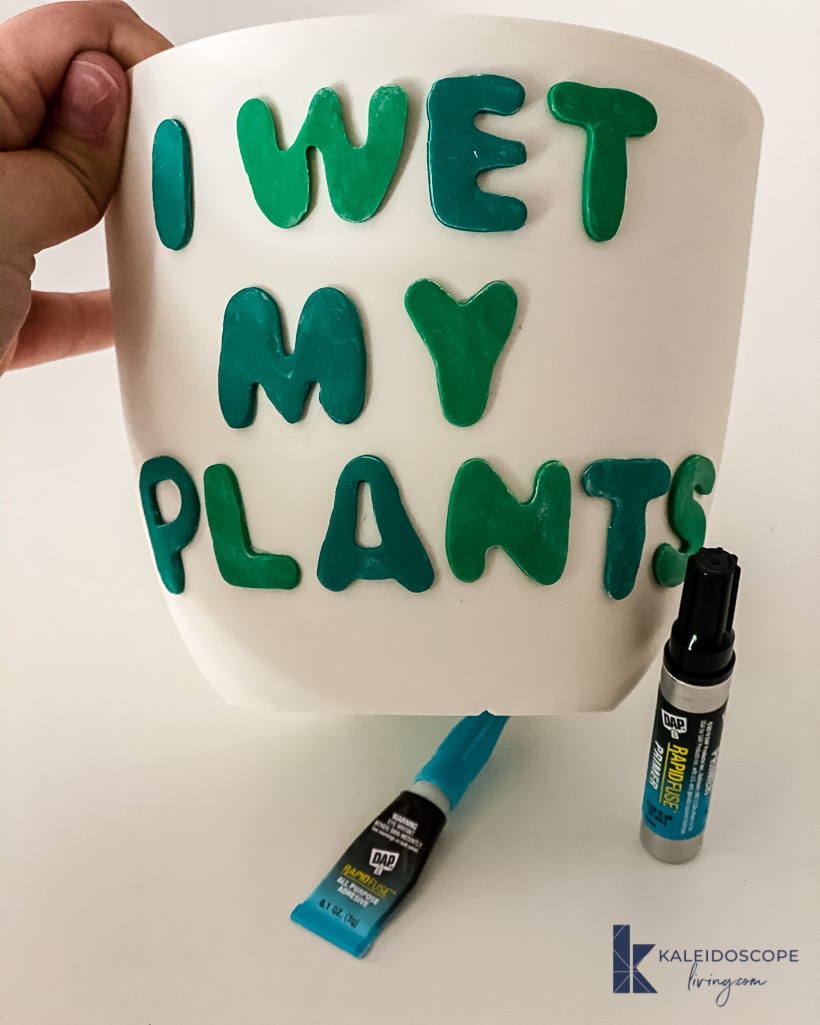
Step 7: After they cool, they should still be a bit flexible (after all, polymer clay is basically plastic). That's PERFECT because round plant pots are obviously curved. Flip all of your shapes over and rub the DAP plastic primer all over the back of your polymer clay shapes AND on the part of your plastic pot(s) that you are going to glue the shapes onto. Let it sit for 1 minute.

Step 8: Squeeze a small amount of your DAP Rapid Fuse all over the backside of each shape. Then place it on your plastic pot and hold it in place until it is set (it's really quick–less than 30 seconds for something this lightweight). Repeat until you are done!
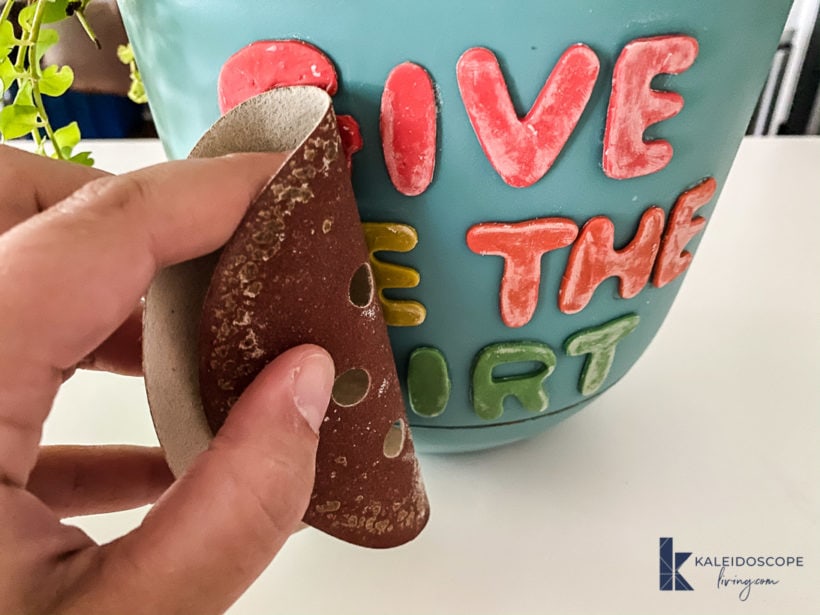
Step 9 (optional): Lightly sand your polymer clay shapes and then wax them if you want. It smooths them out a bit and intensifies the color of the clay :)
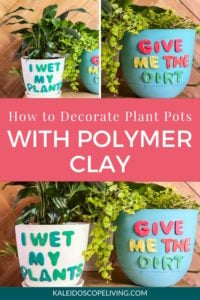
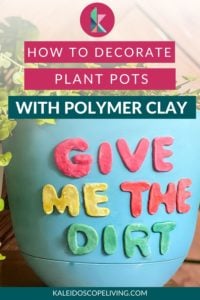
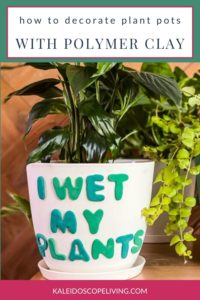
That's it! How friggin' cute are they?! I can't wait to make more. These are the only 2 I have made so far. I think they will make awesome gifts for my plant-loving friends!
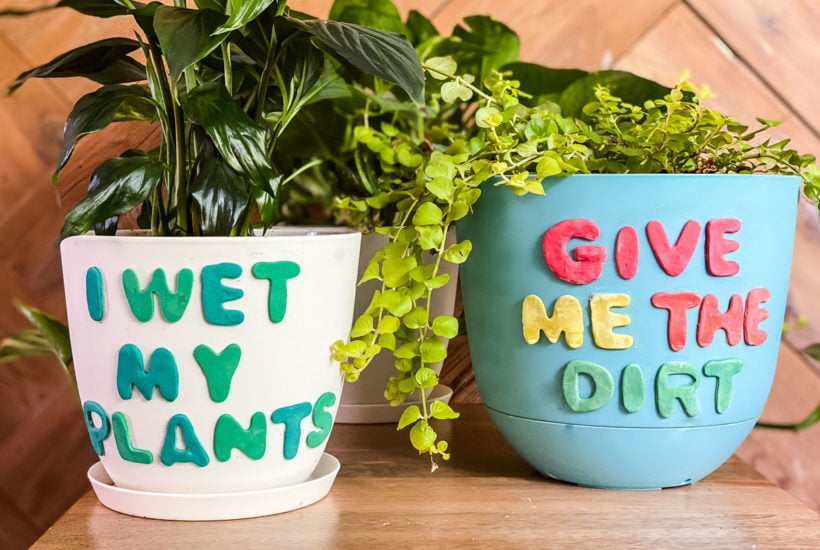
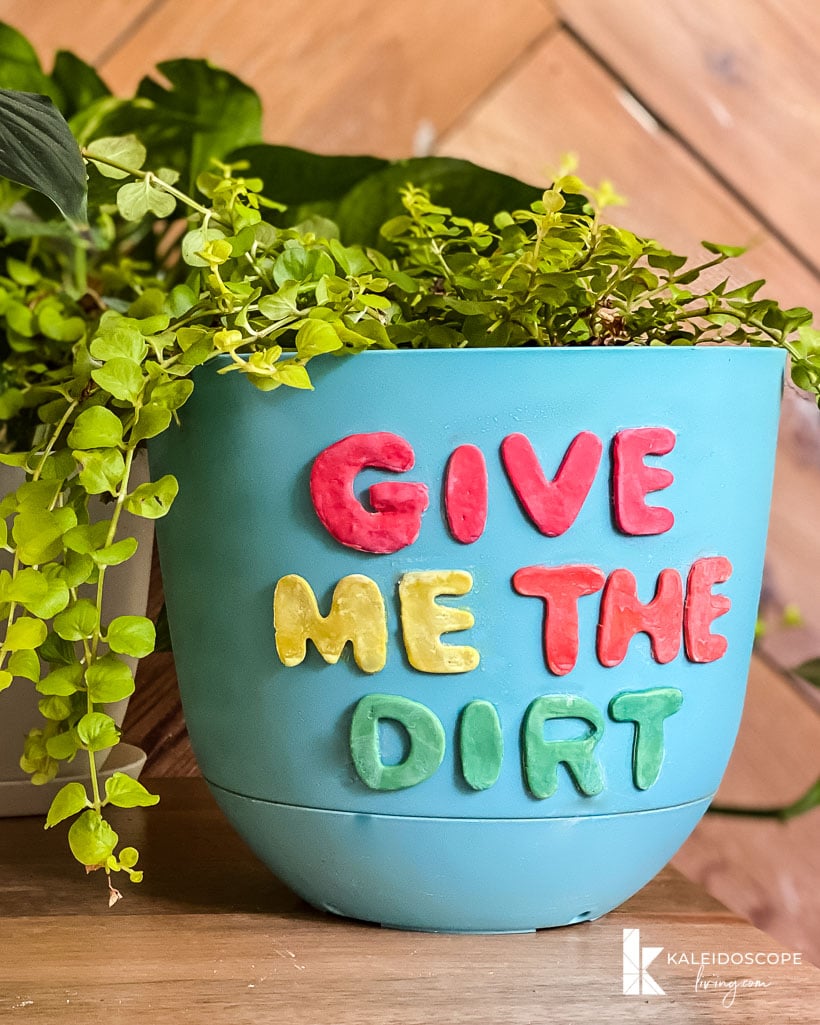
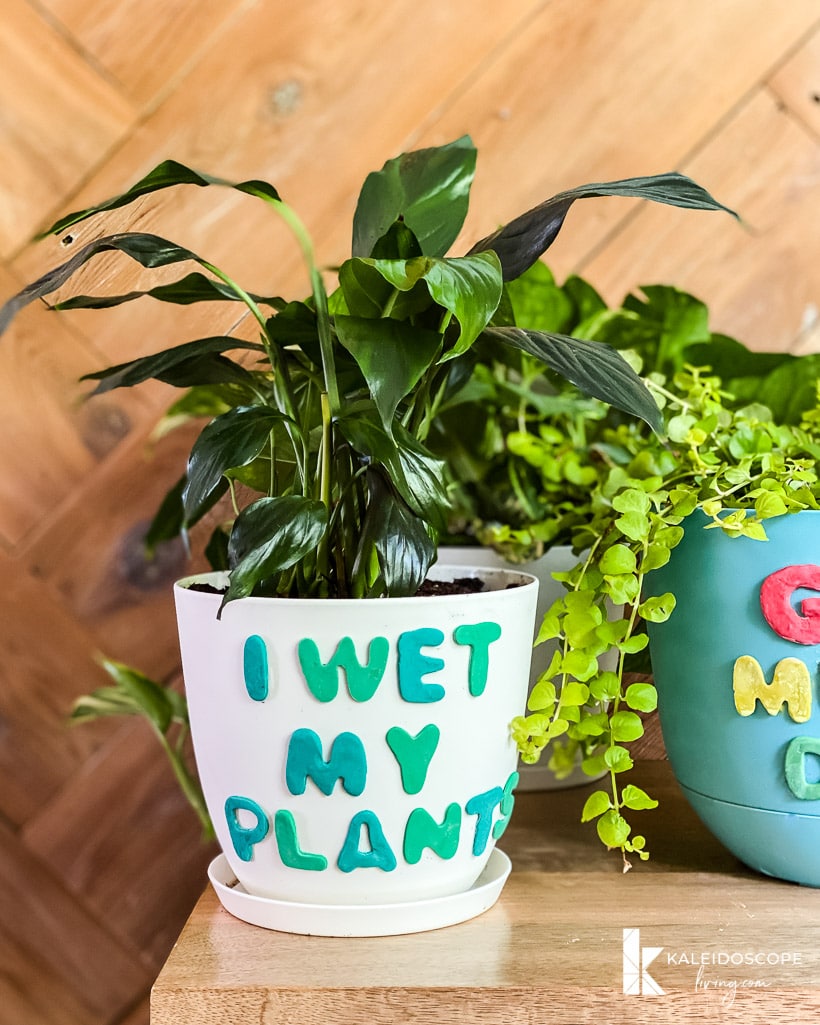
Now that I know how to decorate plant pots with polymer clay, I suspect I'll be making a lot more of these. If you are a friend or loved one, please act surprised if I make one of these for you ;)
Wondering how I approach transforming rooms and spaces in our home? Check out Designer in a Binder®.

And if you want exclusive content and behind-the-scenes sneak peeks, be sure to subscribe before you head out!