DIY Budget-Friendly Kitchen Makeover (under $1,000)
Think a DIY budget-friendly kitchen makeover is impossible? Think again! We totally transformed this dark and outdated kitchen into a light and airy beauty for less than $1,000!
Oh my goodness, y'all! We have finished Thea's budget-friendly kitchen makeover and it's soooooo good! Best of all, I originally committed to keeping the budget under $2,000. But I wound up completing the transformation for UNDER $1,000! Needless to say, I am pretty pumped about that final number.
Don't get me wrong, I know $1,000 is still a lot of money! But in the world of $20,000+ kitchen renovations (including our own massive kitchen renovation that we completed earlier this year), completing a complete kitchen makeover for under $1,000 is pretty epic! And it's affordable enough that most people can work into their budgets and/or save for over time!
This is going to be a long post. Just warning you now. I'm going to try to keep it organized and as informative as possible for you, so I'm dividing it into sections. And yes, rest assured there is a complete source list, including information about the paint we used included for you :)
You can watch a video overview of Thea's budget-friendly kitchen makeover below. It will play after a short ad.
Before you dive in, here are the detailed tutorials for the projects we completed in Thea's kitchen:
Related Tutorials
- Budget-Friendly Kitchen Makeover Reveal
- How to paint and seal kitchen cabinets without even removing the doors
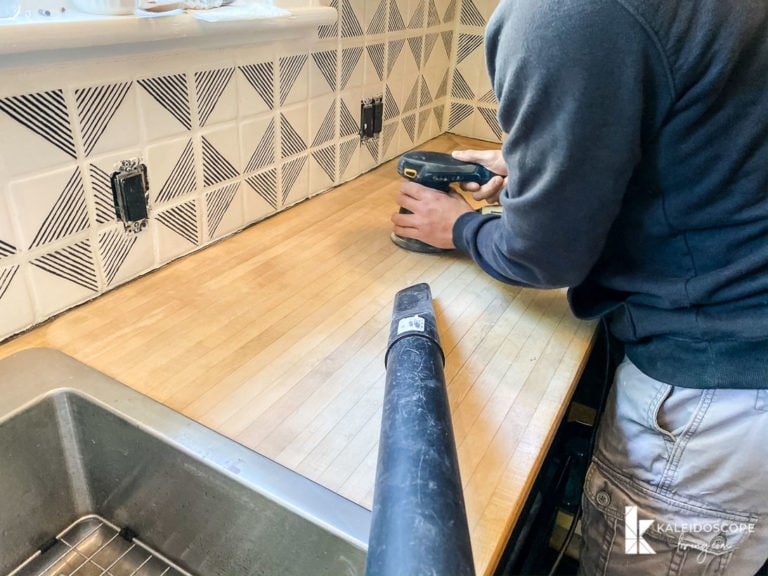
- How to sand and refinish butcher block countertops
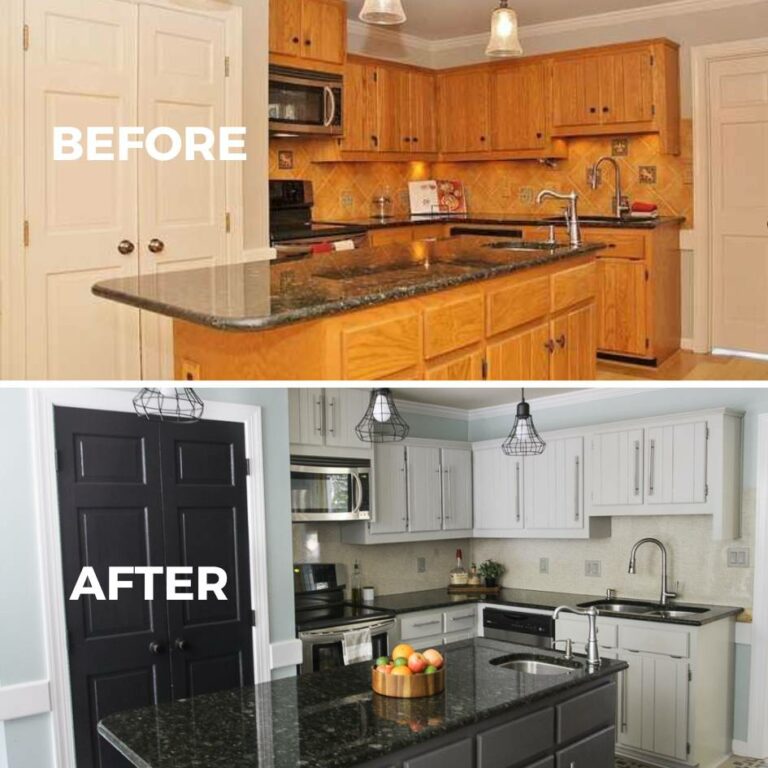
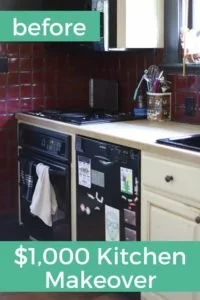
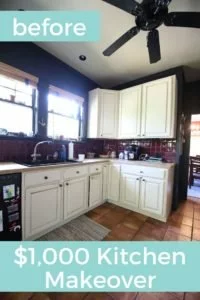
Thea's Kitchen BEFORE the Makeover
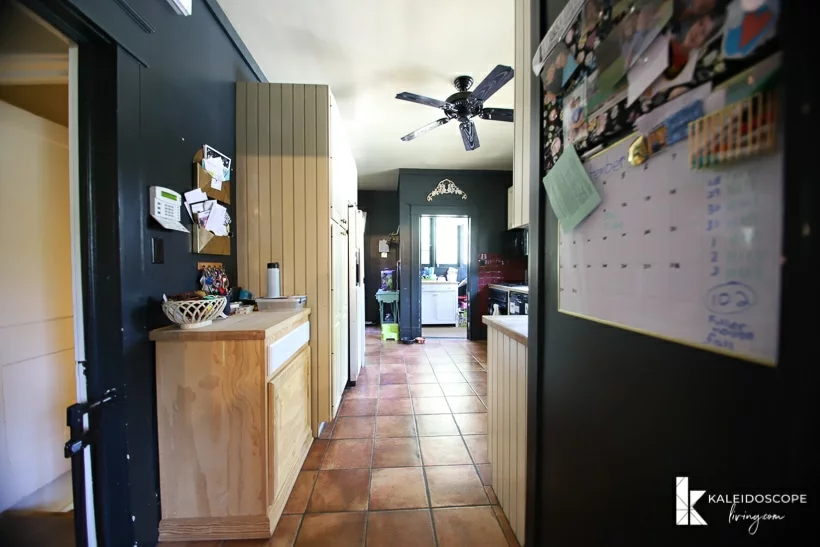
The walls and trim were technically painted a dark green color, but to the naked eye, their kitchen was BLACK. Very cave-like. Not exactly how you want to feel in a kitchen. Here's the view looking back toward the dining room.
You'll notice that their appliances are black, and since they were staying that was a really crucial thing to consider in our design plan (spoiler alert, I wanted the black appliances to blend in instead of standing out).
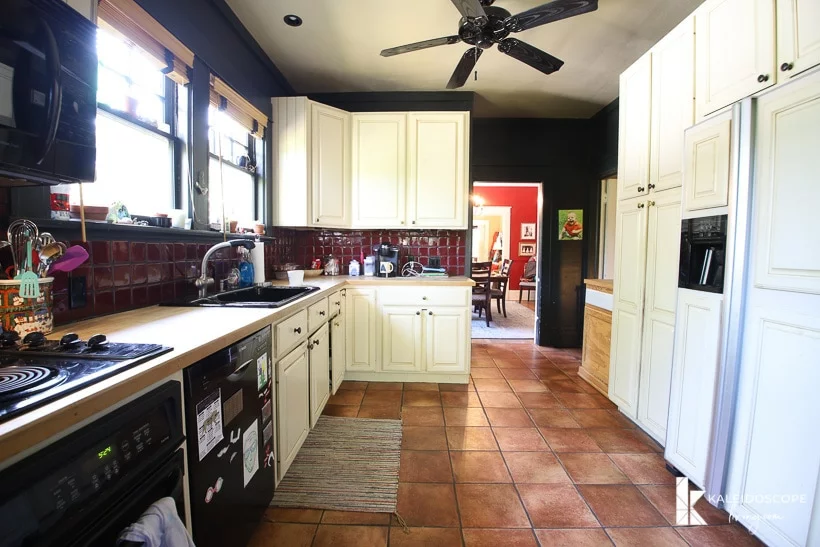
The lighting in the kitchen was minimal. The ceiling fan had no light kit on it and there are just a few overhead can lights. Of course, the fan was also black, lol!
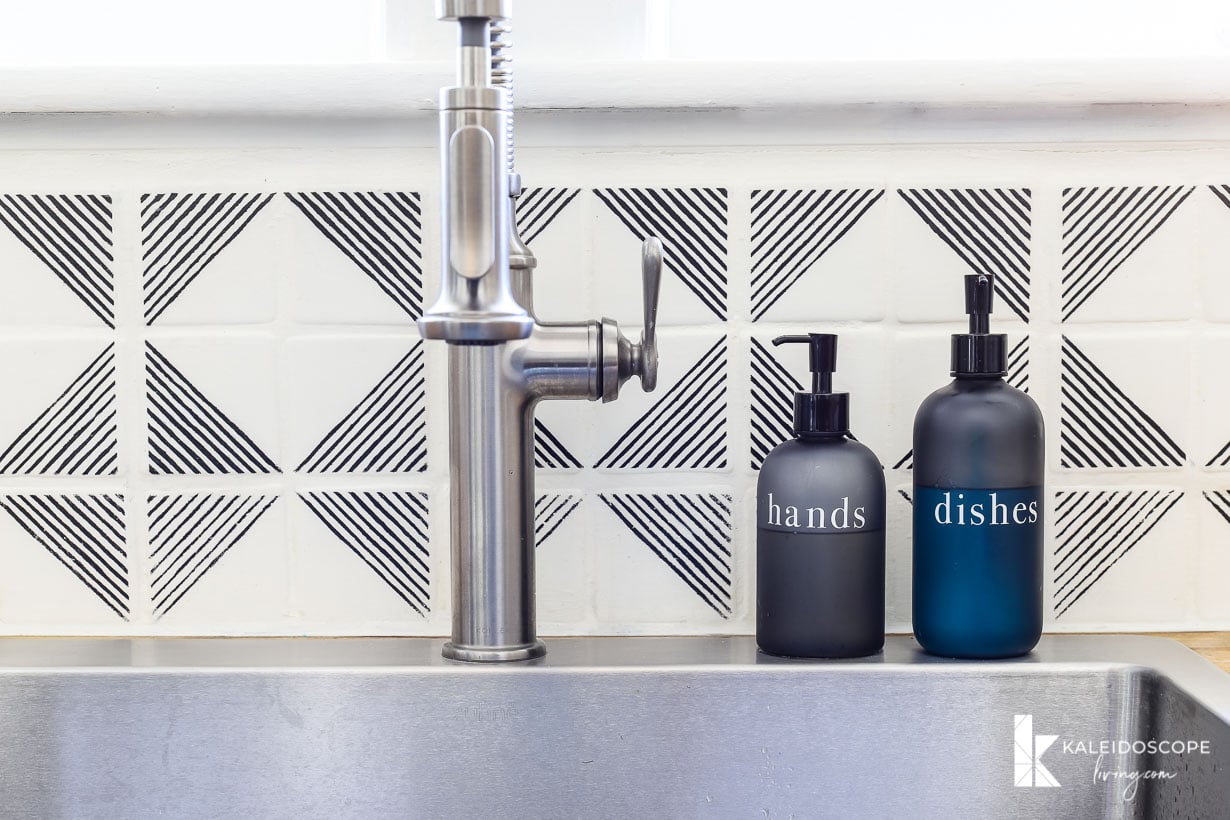
The backsplash was very red and shiny. Thea HATED it, so it has to go. But, replacing the tile wasn't an option in our timeline or budget. So, we painted and stenciled her backsplash. Click here to check out the full tutorial on how to paint and stencil a tile backsplash!
This is the view on the opposite wall. They have some large pantry cabinets, which is great. Thea doesn't love the paneled refrigerator, but I think she will be okay with it once we are done!
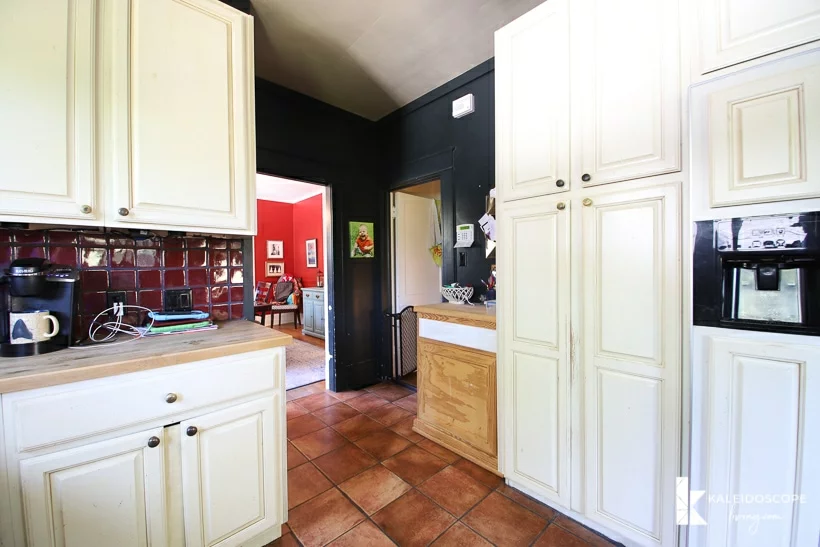
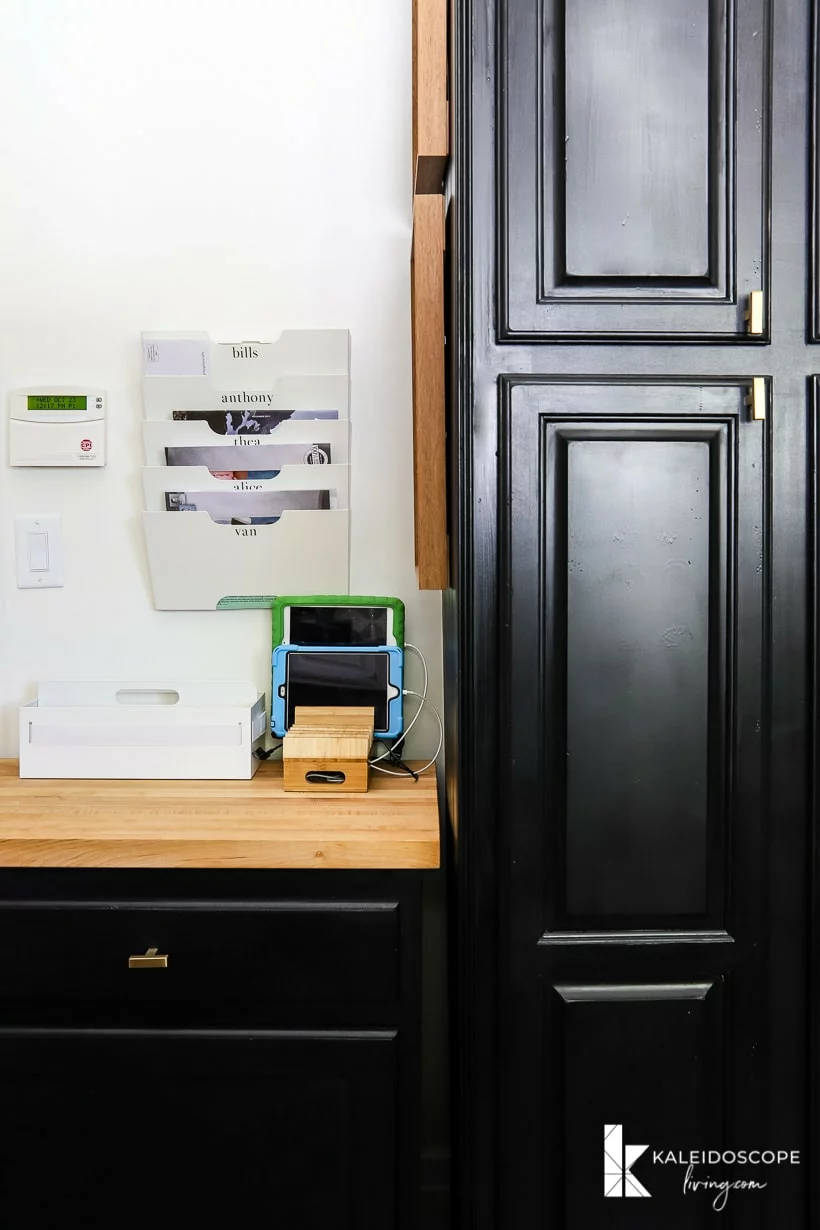
To the left of the pantry cabinets is the family “landing zone/command center.” But it definitely wasn't being utilized to its full potential. And I'm a big believer in the importance of command centers and the best command center options. Don't worry–as you'll see later in this post, we turned this into a super functional command center and landing zone for their sweet family.
All the cabinetry was solid wood and aside from needing to have some hinges tightened and adjusted, they were in good shape! They were just worn out needed a little love and a lotta paint.

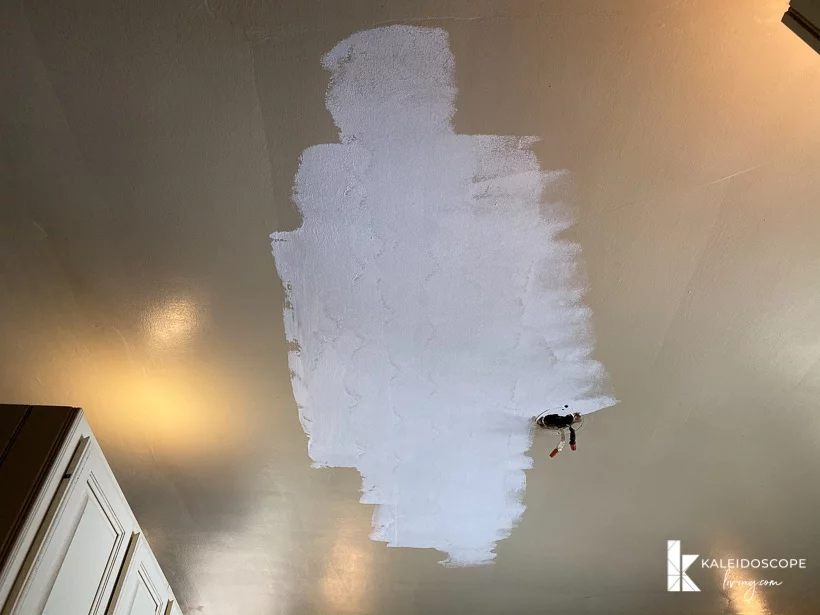
The ceiling was YELLOW. At first we thought it was white paint that had yellowed. But after we started priming it (see below) we realized it was actually painted a yellow/cream color. So, we knew we had to lighten and brighten it up!
The Budget-Friendly Makeover Plan/Inspiration
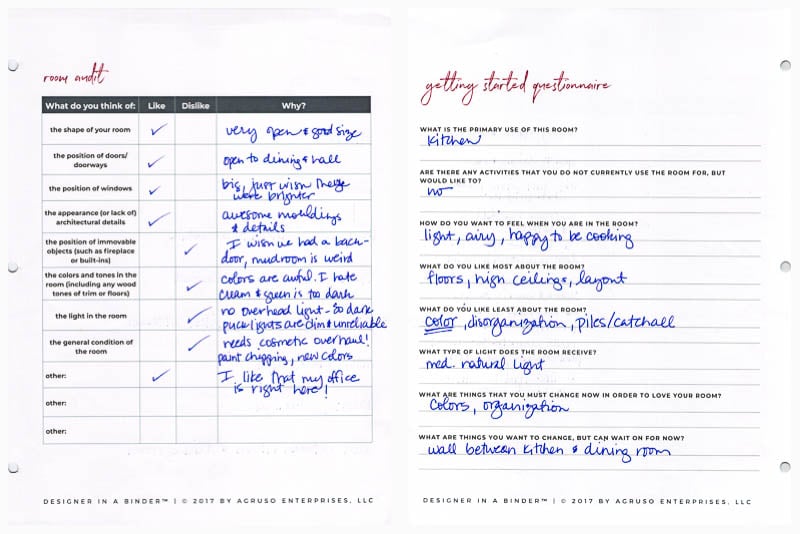
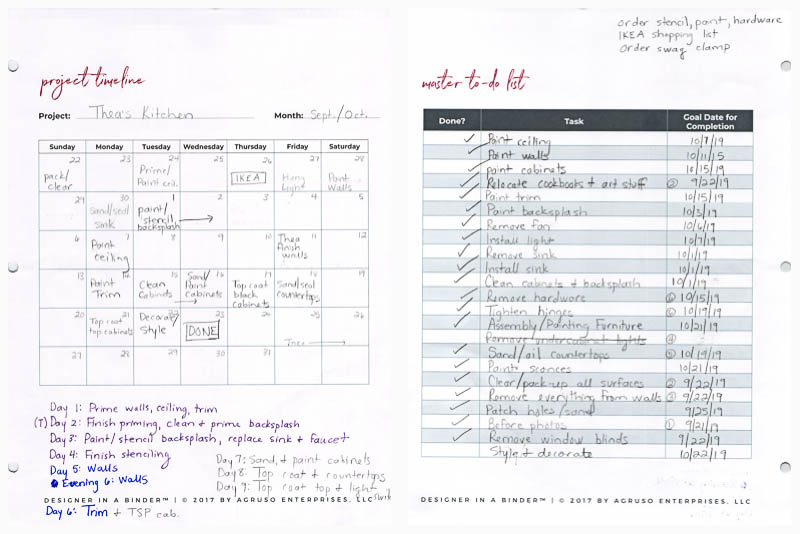
Thea filled out the planning pages of Designer in a Binder to help me figure out what she didn't like about her old kitchen AND to give me a solid idea of what she wanted to include in the makeover! Designer in a Binder is the design system I have used for years to complete every room in my own home AND when I help friends and family. I finally turned it into a physical product earlier this year and I'm so glad I did. It helped us stay organized and focused throughout this huge project!
Here's a peek at some of the Designer in a Binder completed worksheets for Thea's kitchen project:
This post contains some affiliate links for your convenience. Click here to read my full disclosure policy.
Here's the mood board of the design I created for her kitchen (learn how to make a mood board here). As I mentioned above, I really wanted to find a way for her black appliances to blend in, so I knew black lower cabinets would be a perfect way to do that. Plus Thea and I both LOVED the idea of black cabinetry. It's very chic and modern.
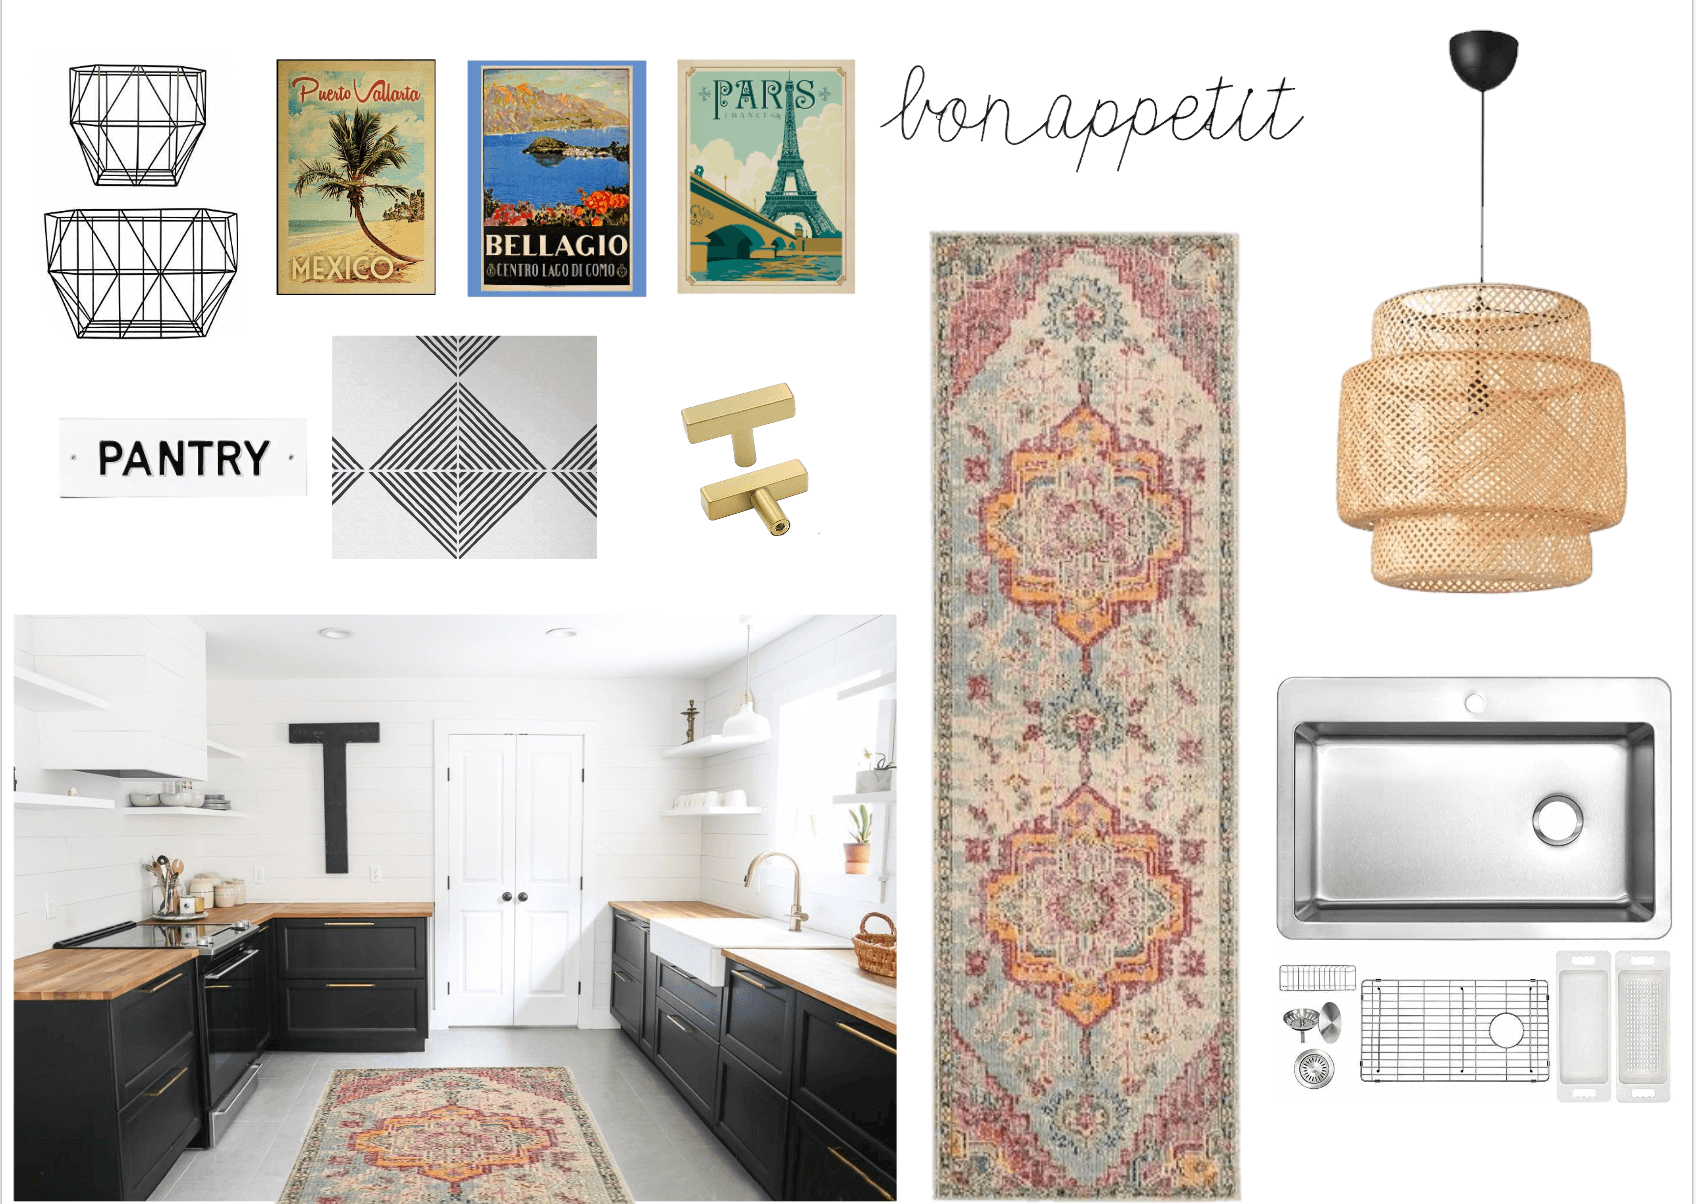
Note that all the changes we planned for her kitchen were really cosmetic and functional improvements. Everything in the kitchen needed to stay, so we found a way to make the existing elements work together with a new design aesthetic. The ONLY thing we removed and replaced was the sink and faucet.
Sources: Click on any image below for product details

Budget Breakdown: How We Completed This Kitchen Makeover for Less than $1,000
If you are wondering how we completed this project for under $1,000, the short answer is PAINT and HARD WORK. Here's a list of everything we did in the space. We didn't hire anything out.
- Primed the walls, ceiling, and all the trim
- Painted the walls, ceiling and all the trim various shades of white
- Painted the cabinets
- Top-coated the cabinets
- Painted and stenciled the backsplash
- Top-coated the backsplash
- Removed the fan
- Hung a new overhead light
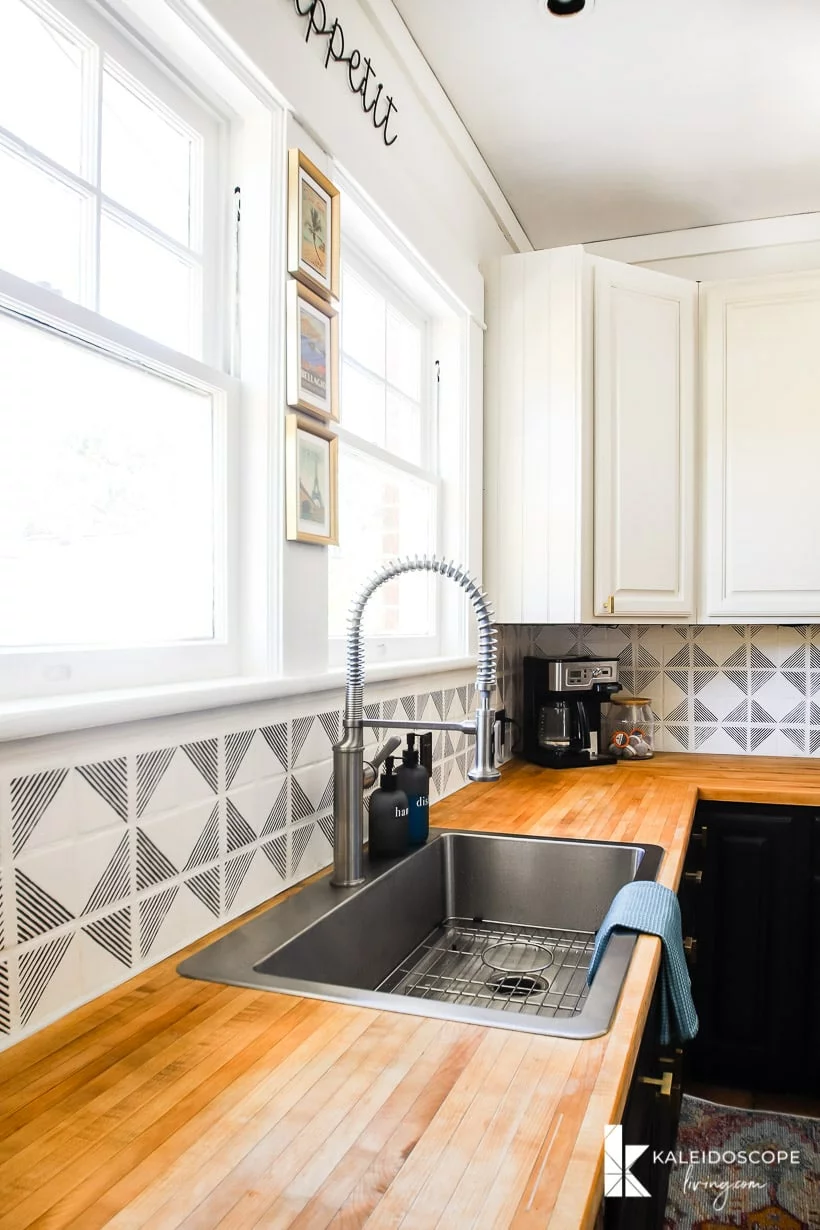
- Replaced the black sink and old faucet
- Sanded and refinished the butcher block countertops
- Replaced the cabinet knobs and pulls
- Styled and decorated
Again, we used Designer in a Binder to create and track our budget for this project. You can see what we planned for and what everything cost on the worksheet below.
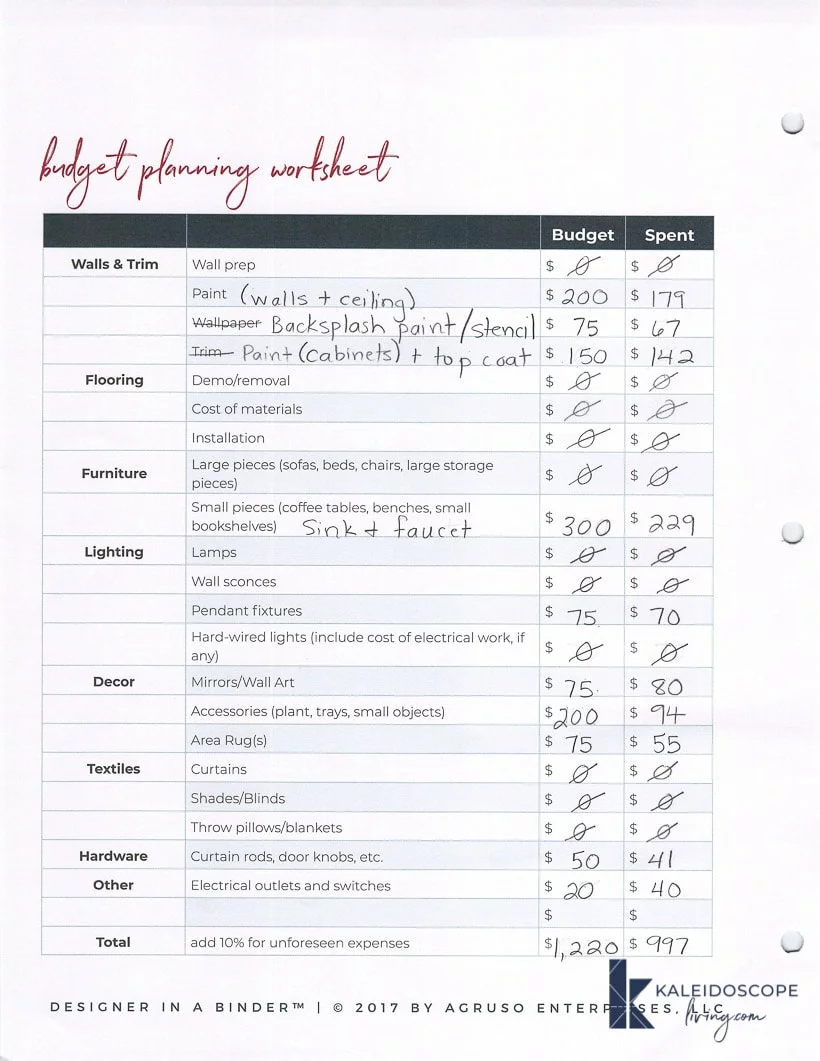
And if you want a more detailed budget breakdown, I created this spreadsheet to give you more detailed itemizations.

How Long Did the Kitchen Makeover Take?
It took about 9 days of work, but we didn't always work on consecutive days. And not all 9 days were full workdays. We used our Designer in a Binder to plan out what needed to be done and our timeline for the project. You can see my notes about what we completed on each workday on the bottom of the worksheets.
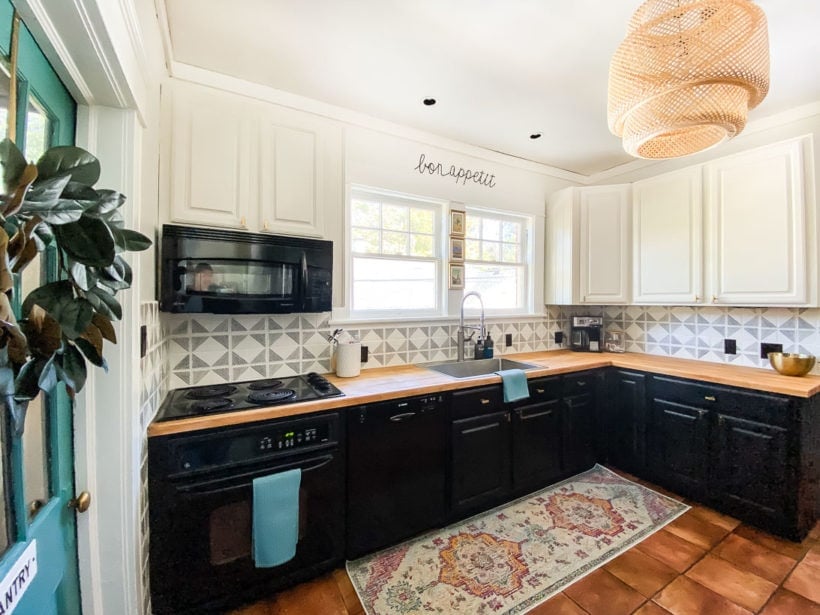
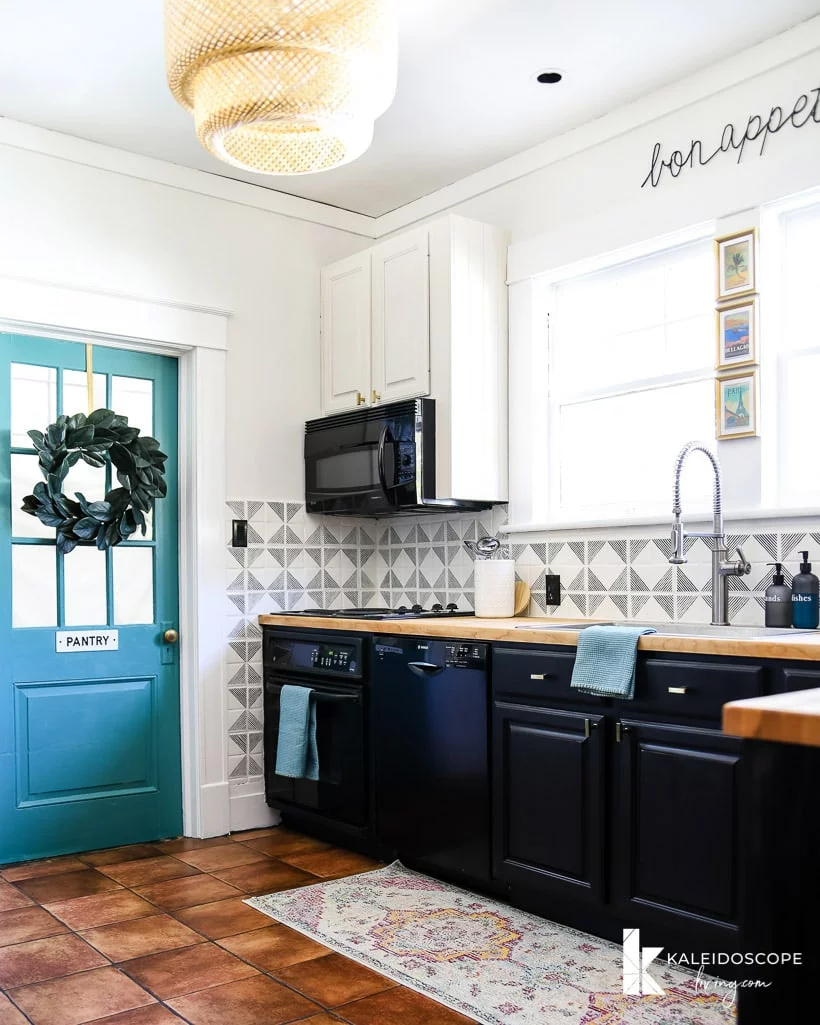
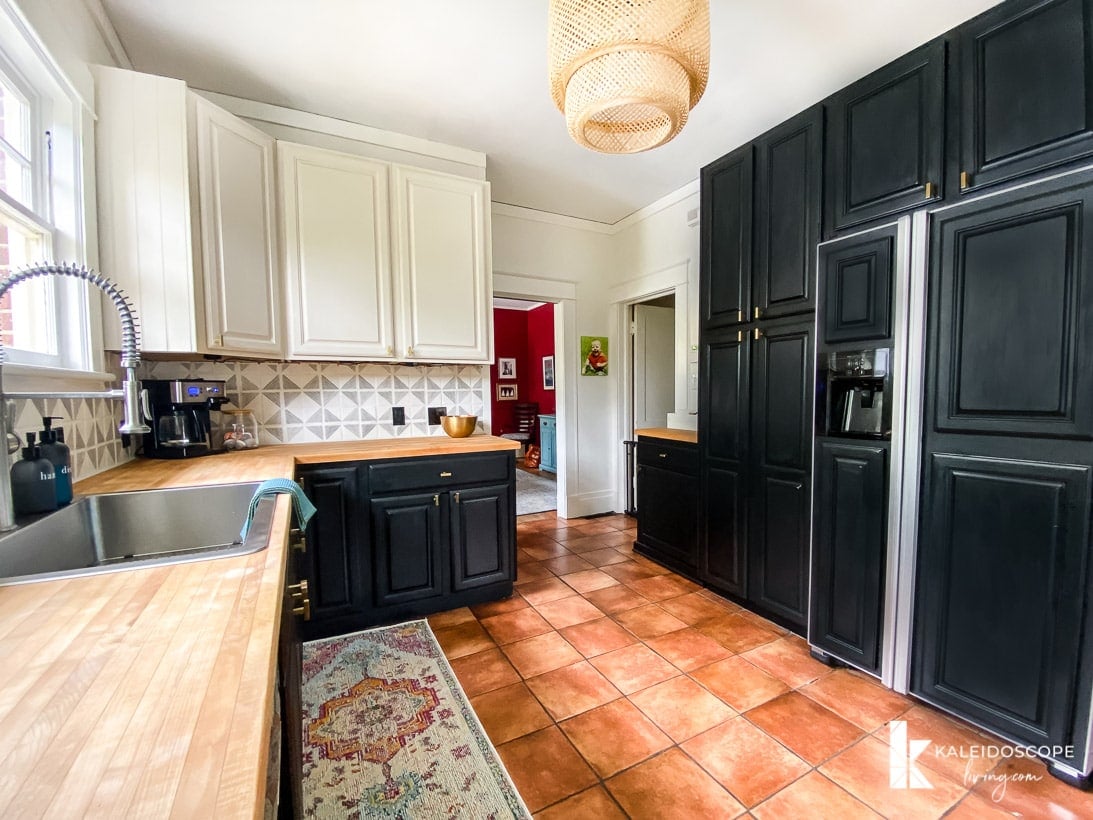
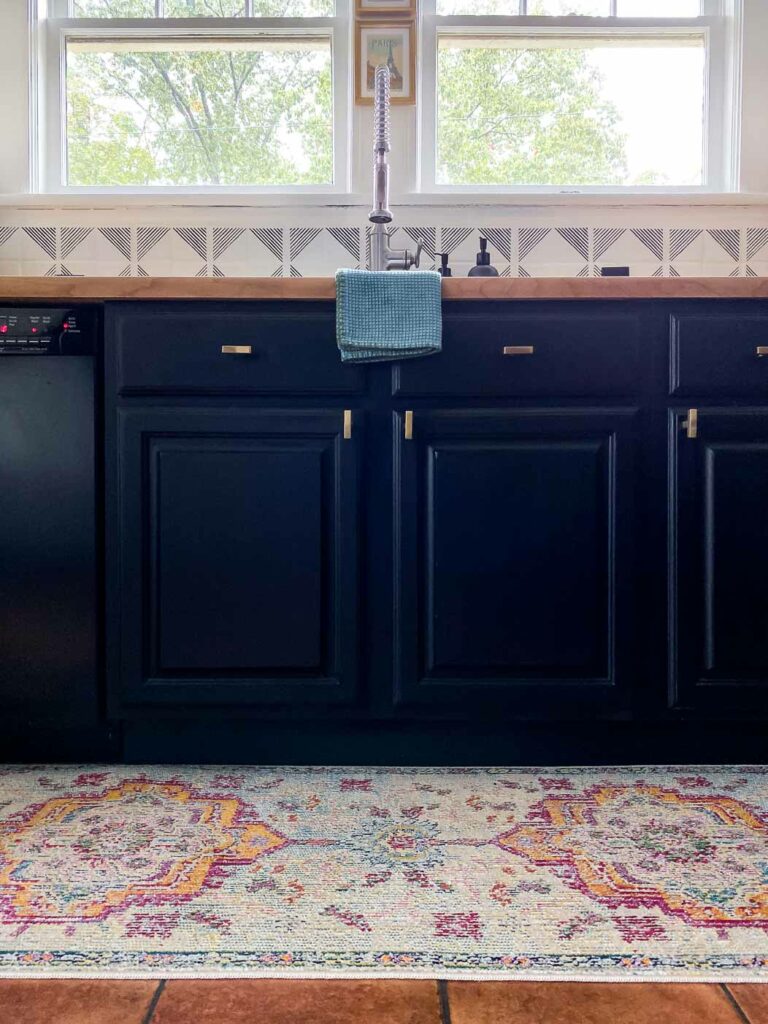
The Budget-Friendly Kitchen Makeover REVEAL Photos
Okay, okay. I'm not going to make you wait any longer to see how this project turned out. You can see for yourself! Here are lots of “after” photos for you.


Complete Source List
Related Tutorials
- Budget-Friendly Kitchen Makeover Reveal
- How to paint and seal kitchen cabinets without even removing the doors
- How to sand and refinish butcher block countertops
A special thanks to Fusion Mineral Paint and Clare for gifting us with some of the materials for this project. The retail cost of the gifted materials were included in the $1,000 kitchen budget so as not to skew the actual cost of this makeover.
Paint Colors:
- Primer: Sherwin-Williams multi-purpose primer
- Ceiling paint: Flat white ceiling paint by Clare
- Wall paint: Timeless by Clare
- Trim paint: Whipped by Clare
- Black cabinet paint: Coal Black by Fusion Mineral Paint
- White cabinet paint: Raw Silk by Fusion Mineral Paint
EXCLUSIVE DISCOUNT
I've never been sponsored or paid by Fusion Mineral paint, but they have generously offered my readers a 10% discount that will be automatically applied when you click and order HERE.
Remember, a little bit of this paint goes a LONG way, so you don't need much (we used only 4 pints to paint our kitchen cabinets as part of our budget-friendly kitchen makeover).
Decor Sources: Click on any of the images below for full product details.
More Kitchen IDEAS

Wondering how I approach transforming rooms and spaces in our home? Check out Designer in a Binder®.

And if you want exclusive content and behind-the-scenes sneak peeks, be sure to subscribe before you head out!


Thea’s kitchen looks 1000% better…but I am wondering why you didn’t do something about the floor? You can add a plywood floating floor for like 300$ (adapt https://www.picklee.com/2012/12/12/farmhouse-wide-plank-floor-made-from-plywood-diy/) without damaging the existing tile or may be able to find a floating laminate floor (check costco) for a similar price or paint with stenciling or paint for stone floor look (https://www.homedepot.com/p/DAICH-SpreadStone-SpreadStone-2-5-gal-Summit-Grey-Satin-Interior-Exterior-Decorative-Concrete-Resurfacing-Kit-SDCR-U-SG/305223954)….?
Also you guys forgot to caulk the ceiling moulding…. otherwise this is a really amazing transformation!
Thea really loved her floors and wanted to keep them as is :) And we didn’t forget to caulk, we were just too tired to do it, lol! The homeowners will do it eventually, I’m sure!