Colorful DIY Photo Gallery Wall
A photo gallery wall is a great way to display family photos. But so many gallery walls look exactly the same. We took our photo gallery wall up a notch by infusing it with color and personality. I share exactly how we did it in this post!
If you have followed me for any length of time, you know how much I love gallery walls! We recently added one to our upstairs hallway and y'all have gone crazy (in a good way) for our colorful photo gallery wall that we added to our upstairs hallway. I never expected the response I got to it over on Instagram–thank you! And I know many of you have been patiently waiting for the tutorial. And today is the day, friends!
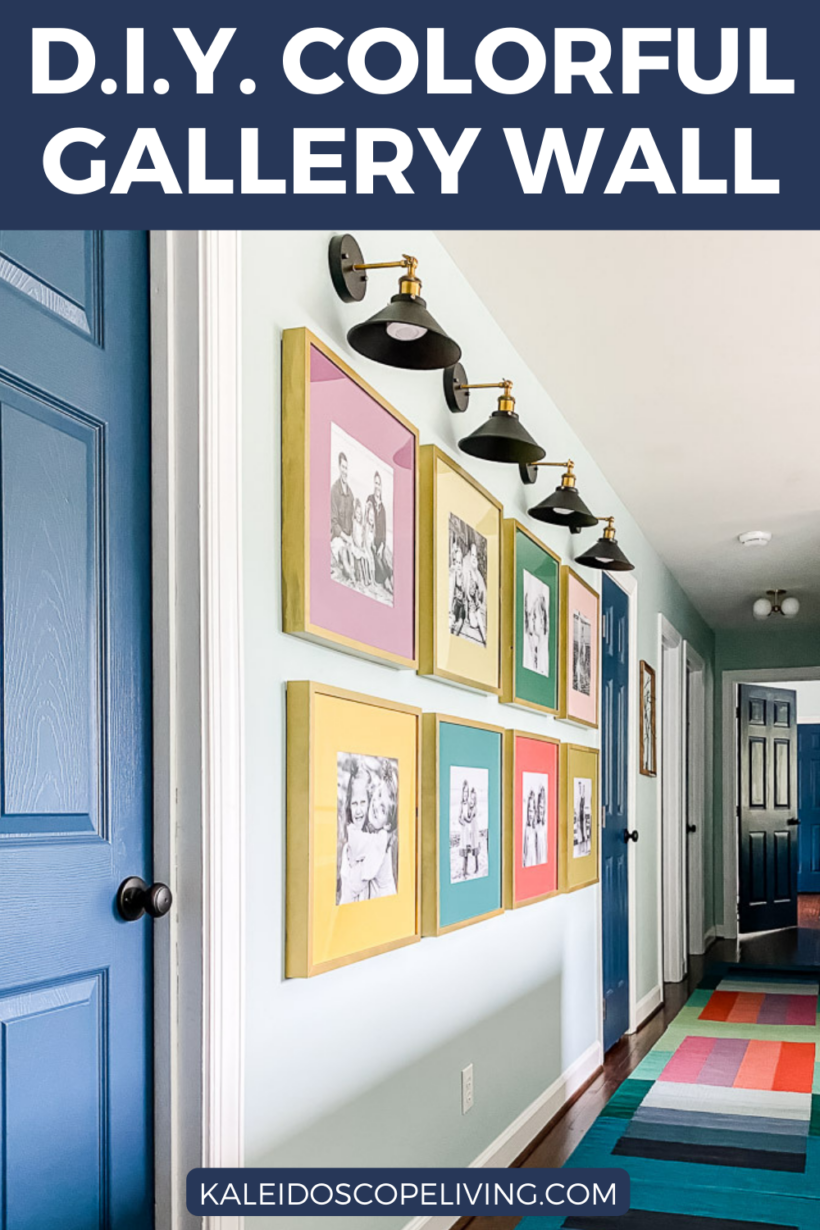
We hadn't made any changes to our upstairs hallway in over 6 years, so we recently gave our hallway a makeover. The biggest impact in the hallway is the addition of this super colorful gallery wall that is highlighted by sconces. And y'all have been inundating me with questions about it. What colors did I use? What frames? How did I hang them?
Alllllllll of those questions are answered for you in this detailed colorful DIY photo gallery wall tutorial video I made for you! That's right friends!!!! I'm starting to focus more on creating videos and growing my YouTube channel.
If you prefer to read and see photos, no worries! The full tutorial is still written out for you below.
This post contains some affiliate links for your convenience. Click here to read my full disclosure policy.
How to Create a Colorful Photo Gallery Wall
Materials Needed:
- Command picture hanging strips
- IKEA 19-inch square frames
- NOTE—> You do not have to live near an IKEA to buy these frames. They will ship an entire box full of these frames to you for only $9.99!
- 12″ x 12″ photo enlargements (I had mine printed by Shutterfly)
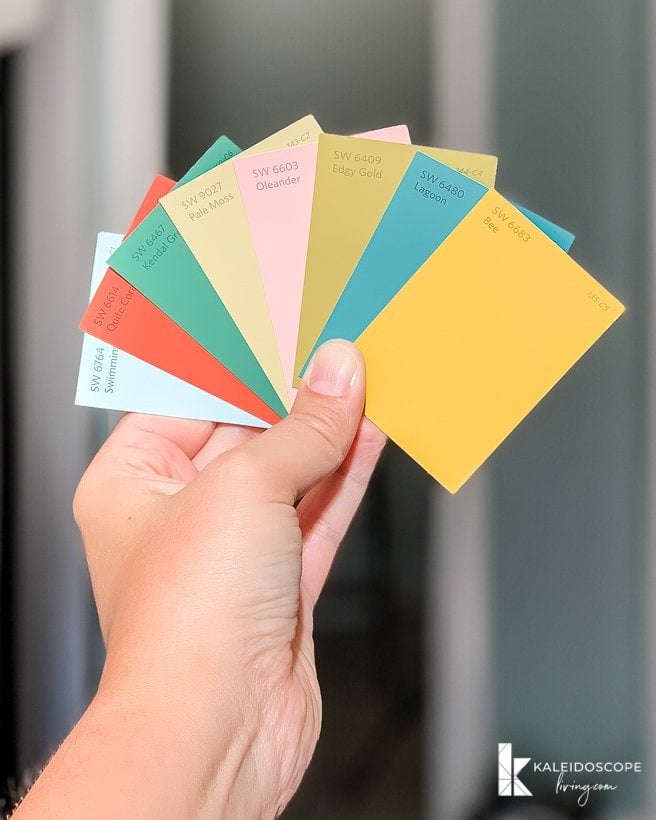
- Latex or acrylic paint in colors of your choice
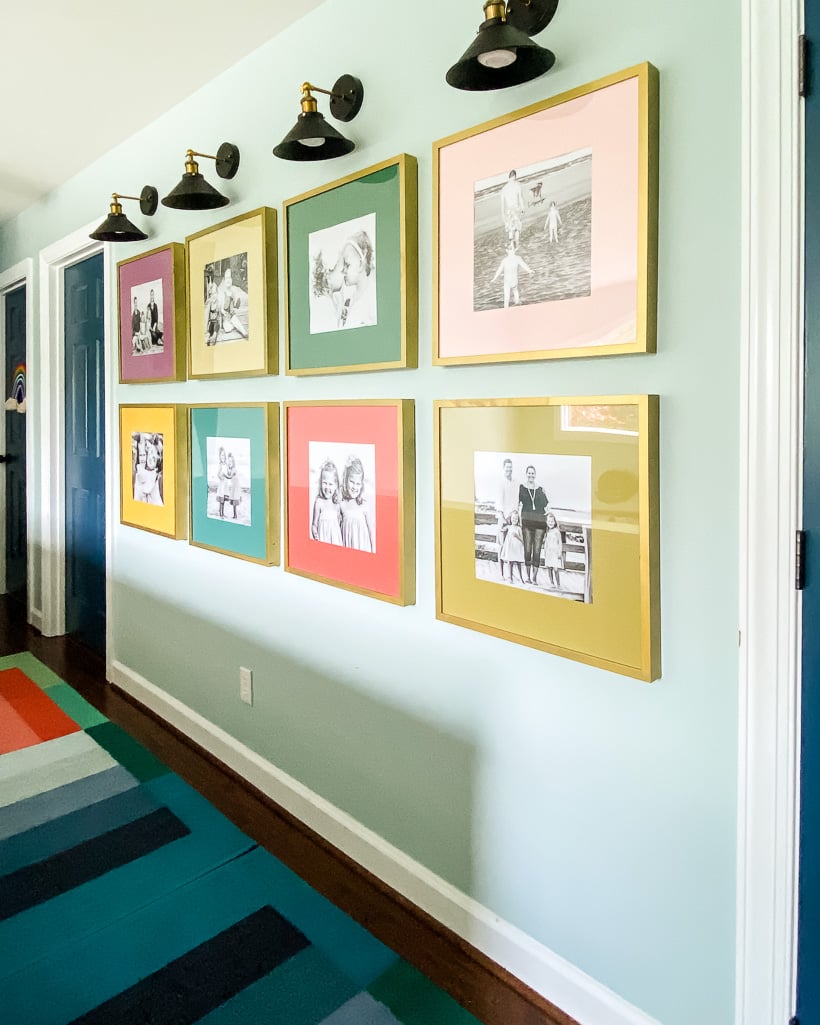
- I had 8 samples mixed in Sherwin-Williams colors in sample sizes. These are the colors I used: Quite Coral, Bee, Pale Moss, Lagoon, Oleander, Edgy Gold and Kendal Green
- The purple I used is Orchid by Amy Howard at Home
- Paintbrush
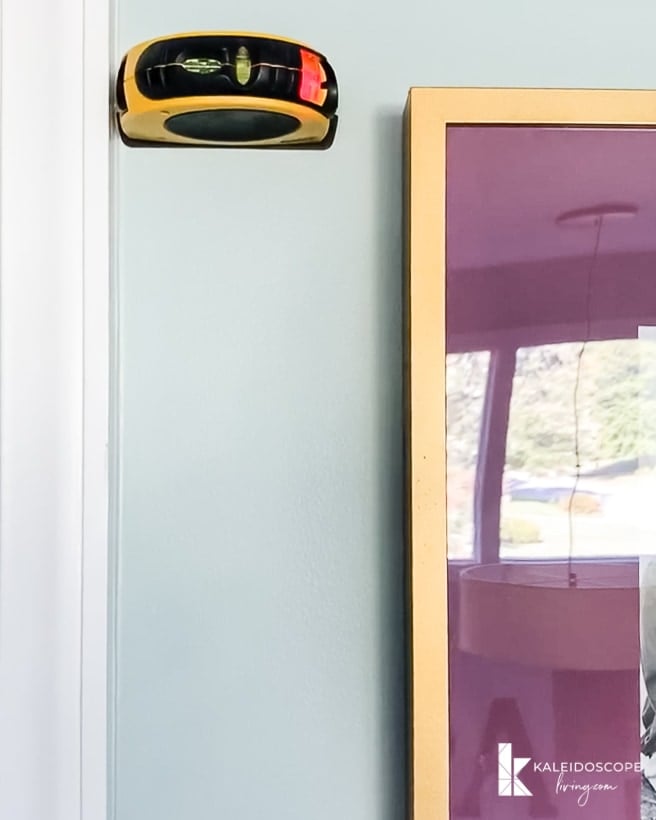
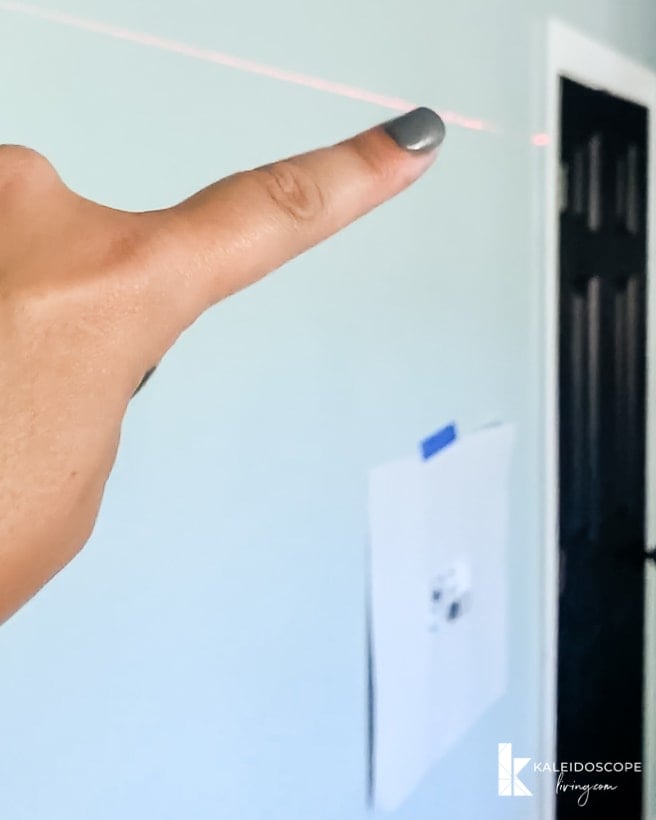
- Laser level
- Dropcloth and/or apron
- Gold spray paint (if desired)
- Black and gold sconces
- Puck lights
- Velcro
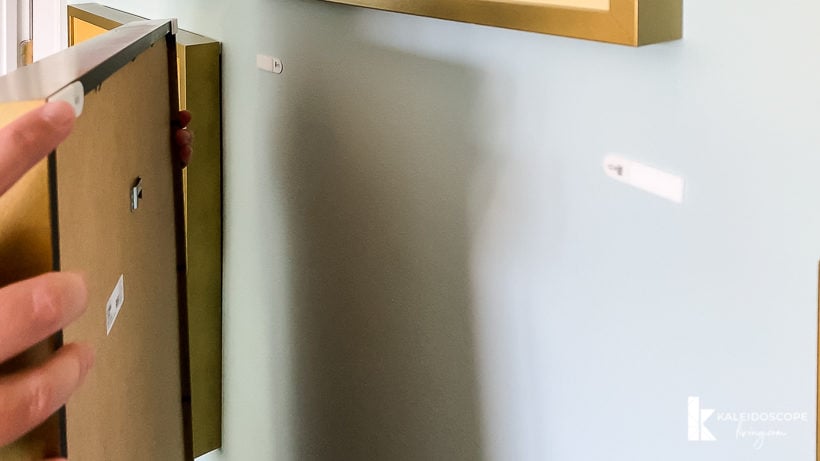
Step 1: Unwrap your frames and remove the white mats from them.
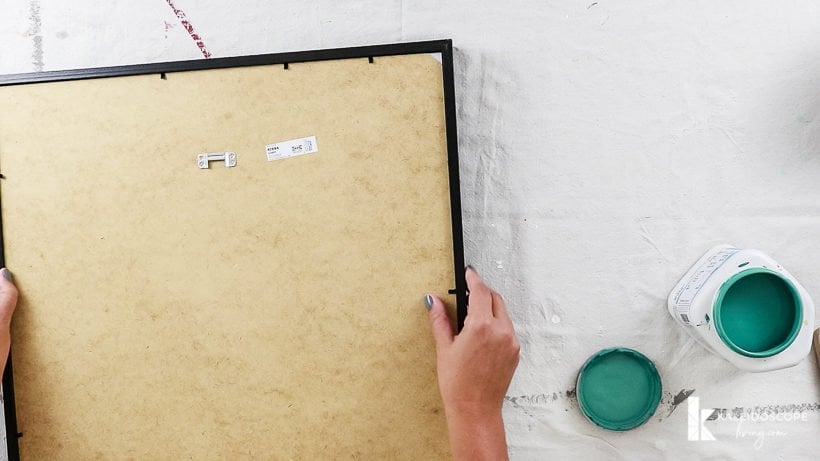
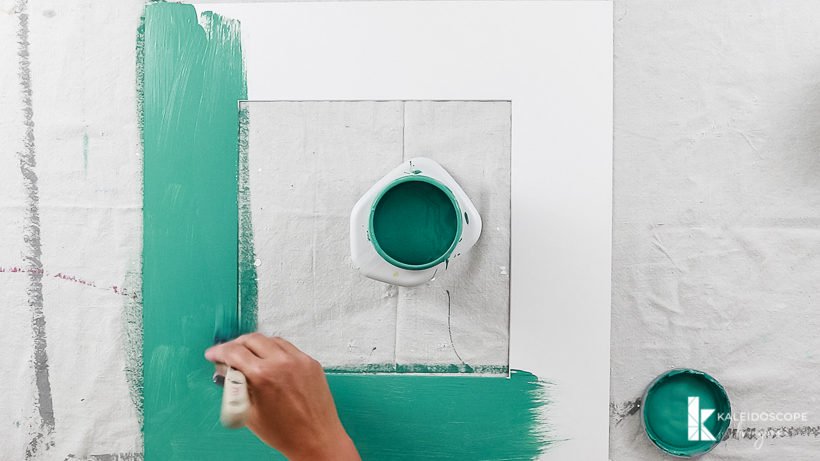
Step 2: Paint your mats.
Use a paintbrush (I use a 1 1/2 angled brush, but it really doesn't matter what kind of brush you use) to paint your photo mat. There's no magic technique, but do try to use long, even strokes. Unless you are really lucky, each mat will require 2 coats of paint. But don't worry. You only have to let it dry about 30 minutes in between coats.
I used the same colors that I used to paint the colorful mural in our colorful powder room renovation.
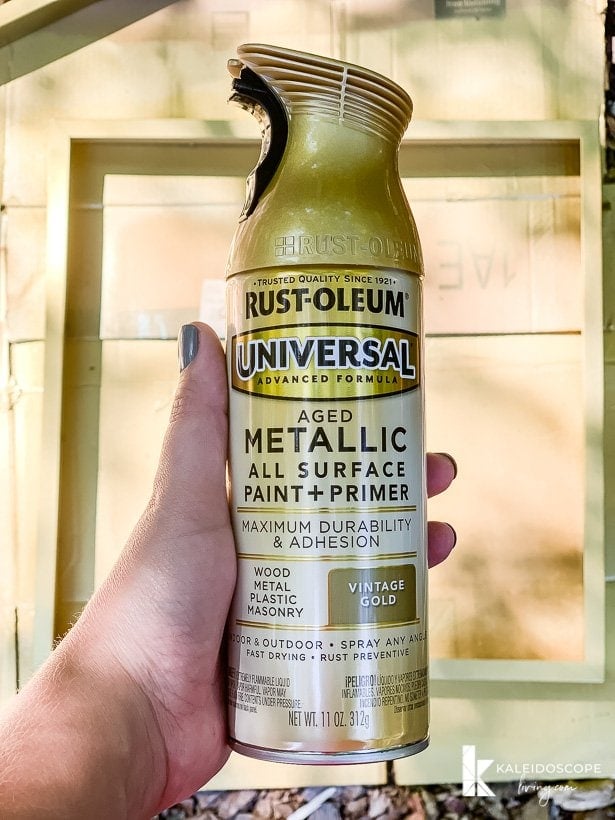
Step 3: Spray paint your frames gold.
Whenever I was waiting on my photo mats to dry, I would head outside to spray paint my frames. I started with black frames and they were fine. But in the end, I decided I liked black better.
This is the spray paint I used to paint the frames gold. When spray painting, LIGHT coats are best! They go really quickly and dry fast. I applied 4 coats to my frames, allowing them to dry about 30 minutes in between coats. If you apply too much spray paint, you will get drips, which is NOT cute.
Step 4: Repeat until you are done with all your frames and mats.
Repeat with all your frames and mats until they are done! I completed a total of 8 frames/mats. Once they were thoroughly dry, I popped the photos in and reassembled them.
I chose black and white frames because I thought it would be a nice contrast against the colorful mats. I had all my 12″ x 12″ enlargements printed by Shutterfly and they turned out great (as always).
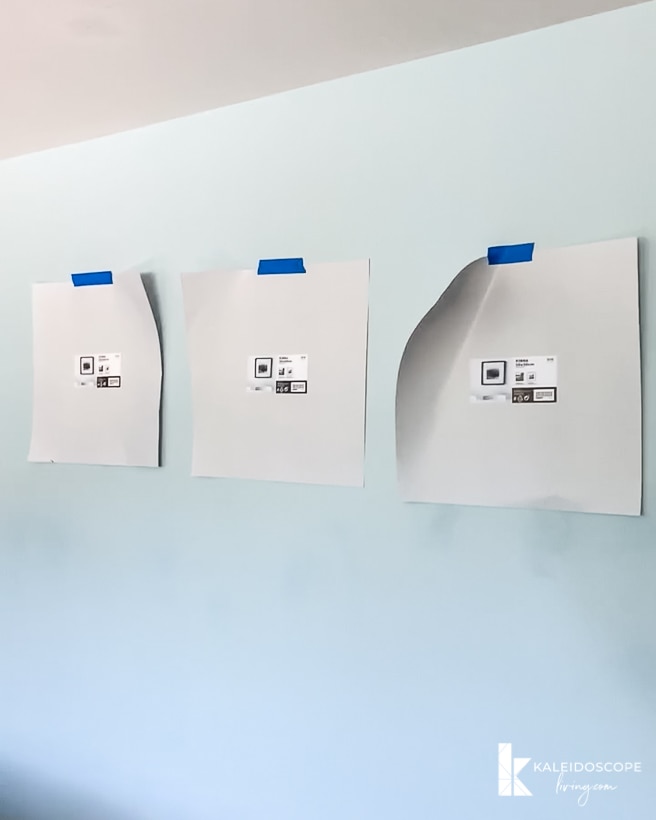
Step 5: Decide on your gallery wall layout.
Use the paper inserts from your frames and painter's tape to decide on the layout for your gallery wall. This is one of my favorite tricks!
Step 6: Hang your framed photos.
Apply your Command picture hanging strips to the back of your frames. I like to use 1 in each corner so that they remain perfectly level. The small or medium-size strips will work fine for this project. Just follow the instructions on the packages to ensure that you use the strips properly. They are EASY to use!
Use a laser level (or traditional level) to make sure your frames are perfectly even as you hang them.
Step 7: Add optional lighting (no hard-wiring required)
If you want to add sconces above your lights like I did, then keep reading! You don't have to hardwire them OR plug them in. These are the materials I used:
So how did I add sconces that actually light up without hardwiring them OR plugging them in?! I used the “magic light trick” that Nesting With Grace came up with! You can click below to watch her video on exactly how to do it. So smart and easy!

We are so in love with how this project turned out. It didn't cost a ton of money relative to the HUGE impact it has on the space. Here are some more photos for you.
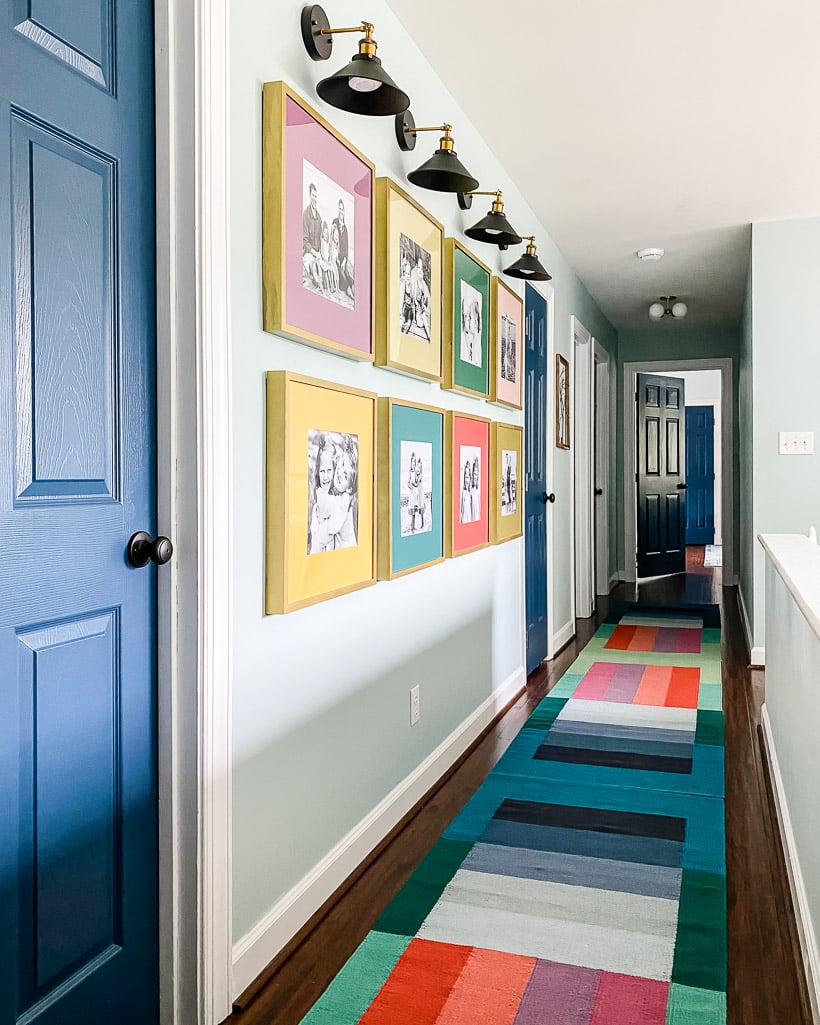
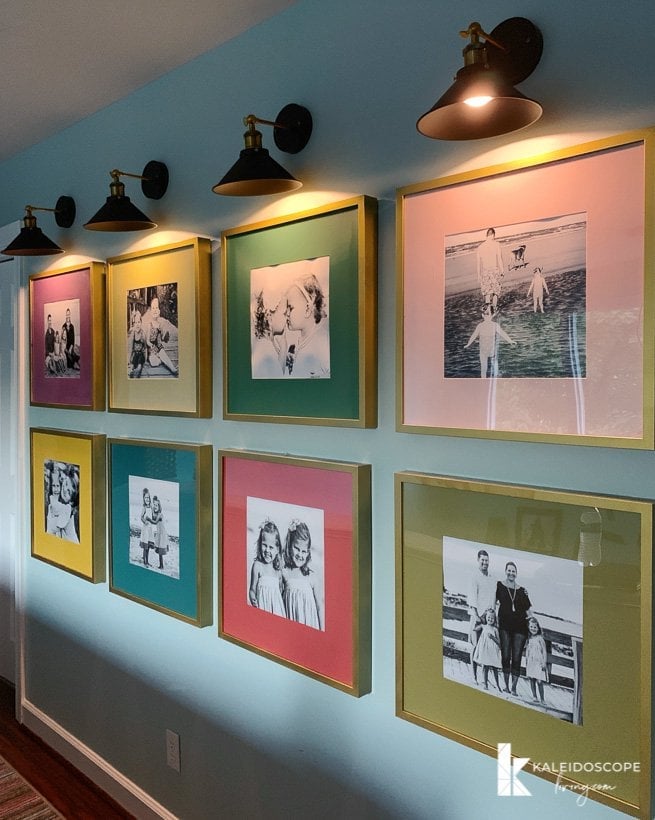
What do you think?! We love how this project turned out!
Other posts you may enjoy:
Wondering how I approach transforming rooms and spaces in our home? Check out Designer in a Binder®.

And if you want exclusive content and behind-the-scenes sneak peeks, be sure to subscribe before you head out!

Last Updated on March 17, 2022
This just solved a problem that I have been stressing over for nearly a year. When we moved to our new house I wanted to be able to use several large framed prints that belonged to my Mother before she died. The problem is that she had them matted in colors that don’t work with my house. I didn’t want to spend a fortune on new mats (they are large pieces) and I didn’t want to tr to sell them. I had no idea I could paint the mats so that they would fit in with my decor! Thanks!