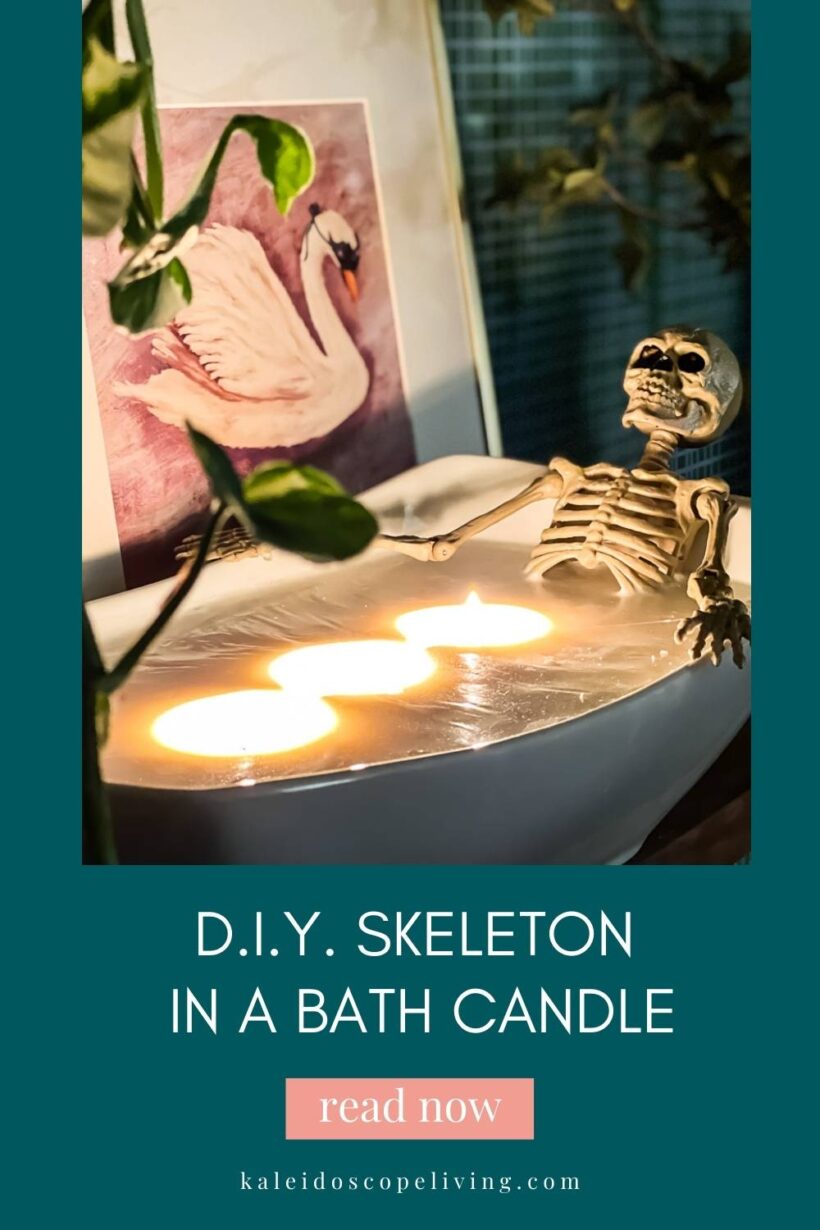
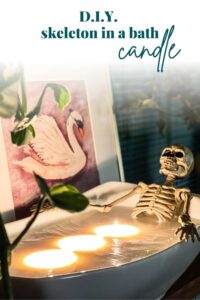
DIY Halloween Candle: Skeleton in a Bath
I ordered an adorable skeleton in a bath candle from Amazon, but it was TINY and I didn't love the fragrance. So I decided to make my own supersized version of it. It was easy and will last for YEARS!
If you follow me on social media, you know that this year is the first year we have added any sort of Halloween decor to the inside of our house. Gasp, I know.
We didn't even add outdoor Halloween decor until a couple of years ago when our girls started begging us to decorate. And since we had just moved into our current house, we thought it would help get them excited about the big change so we went for it.
Well this year, they expressed an interest in adding INTERIOR Halloween decor and I was reluctant. But now I wish we had done it sooner! We have had so much fun with it. You can take a tour of our interior Halloween decor here.
This post contains affiliate links for your convenience. Click here for my full disclosure policy.
As I was browsing interior Halloween decor, I stumbled upon this adorable skeleton in a bath candle on Amazon and ordered it even though it seemed a bit pricey (it was $33 when I ordered it).
It arrived and though it was adorable, it was much smaller than I expected (my fault for not checking the dimensions) and I didn't love the fragrance. In short, I didn't feel it was worth $33 and I also felt it was way too small to make any sort of impact in a space. I'm generally of the opinion that you shouldn't display objects that aren't larger than the size of your fist.
But I LOVED the concept! So I decided to make my own, very large skeleton in a bath candle! And you can too. Let's dive into the tutorial.
How to Make a Skeleton in a Bath Candle
Materials Needed for this DIY Halloween Candle
- A ceramic piece that looks like a bathtub (this is the rectangular serving bowl I used)
- A plastic skeleton that fits in whatever ceramic piece you have chosen (this is the exact skeleton I used)
- Soy wax flakes (I used 4.5 pounds)
- Wicks (I used 3)
- Essential oil of your choosing to add fragrance (this is the essential oil I used–it smells AMAZING)
- Double Boiler Wax Melting Pot (this is optional but if you use a non-designated pot/bowl just know it will have residual wax in it that you can't get out)
You can watch the video below to see an overview of how I made the candle. I've also written out the instructions below the video :)
Step 1: Melt the wax.
Place your soy wax flakes in a double boiler wax melting pot and place it into a pot of boiling water. Heat the wax, occasionally stirring, until it gets to around 175 degrees (I used a meat thermometer to check it). If you don't have a thermometer, heat it until the wax is fully melted and pourable. In terms of yield, the soy wax flakes melt down to about half their starting measurement. In other words, you will get about 1 cup of melted wax per 2 cups of soy wax flakes.
Step 2: Add your fragrance.
Let your wax cool slightly. Then add whatever essential oils or fragrance you like. This is the essential oil I used–it smells AMAZING and is perfect for fall. We've also been diffusing it throughout our house also. I was pretty generous with the fragrance. And I didn't count the # of drops because I don't have the patience for that, lol.
Step 3: Place your skeleton and attach your wick(s) to the container.
I plopped the skeleton in the container. I placed him so that it looks like he's casually lounging in the bathtub. I decided to use 3 wicks since it's such a large candle. I used my hot glue gun to attach the wicks to the bottom of the serving bowl so they wouldn't move around when I poured the wax in. I used metal skewers to support the wicks while the wax hardened (you want them to stay as upright as possible).
Step 4: Pour the wax into your container.
Slowly pour your wax into your container. Since our candle is SO large, I had repeat steps 1, 2 and 4 multiple times. I made sure the last batch filled the “tub” nicely while still leaving a bit of room at the top.
Step 5: Let the wax harden overnight.
Allow your wax to harden overnight. After it does, trim each wick to 1/4 inch.
Then put it wherever you want and enjoy! The supplies for this definitely added up (to around $50), but given that the tiny candle from Amazon was $33, I feel it's a pretty good deal! And we will just keep adding wax as needed, so I feel like it was well worth it!
I placed our skeleton in a bath candle on the shelves that sit in front of our freshly wallpapered wall (see how to make any wallpaper removable and renter-friendly here) and I couldn't be happier with it. It's nice and large so it makes an impact. And it smells divine. Best of all, my girls LOVE it and light it every night. I hope someday they will tell their kids about making a skeleton in the bath candle with their mom when they were kids :)
Take a look at how it turned out!
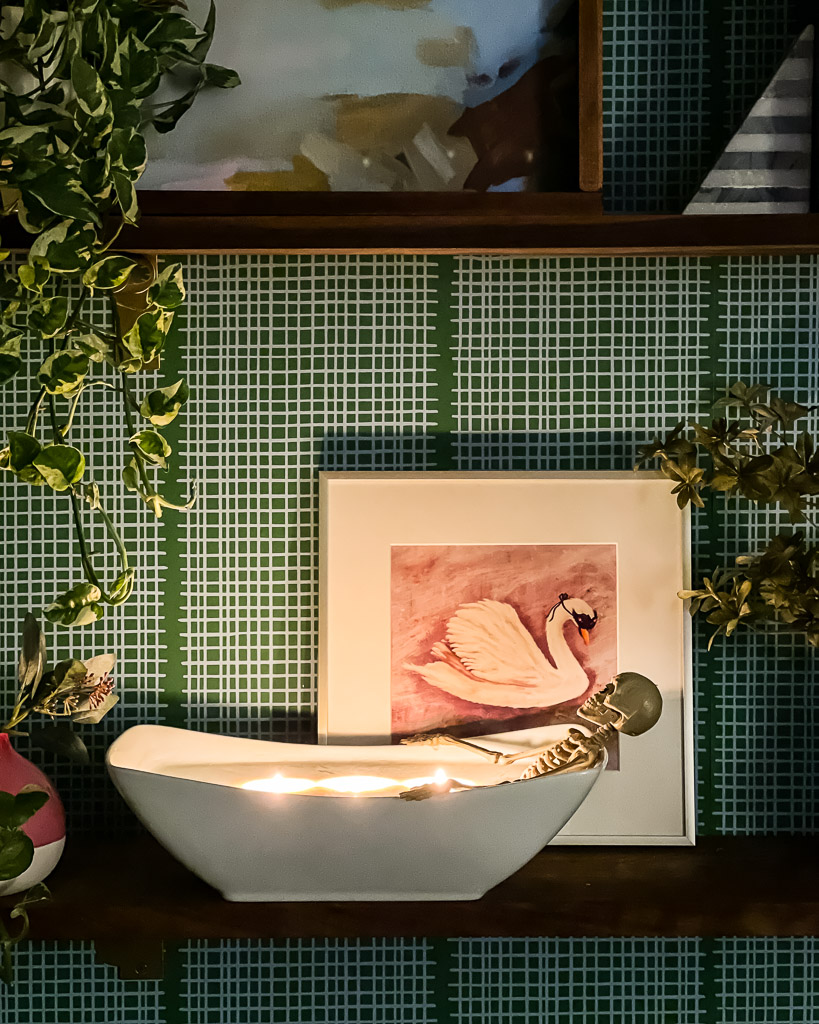
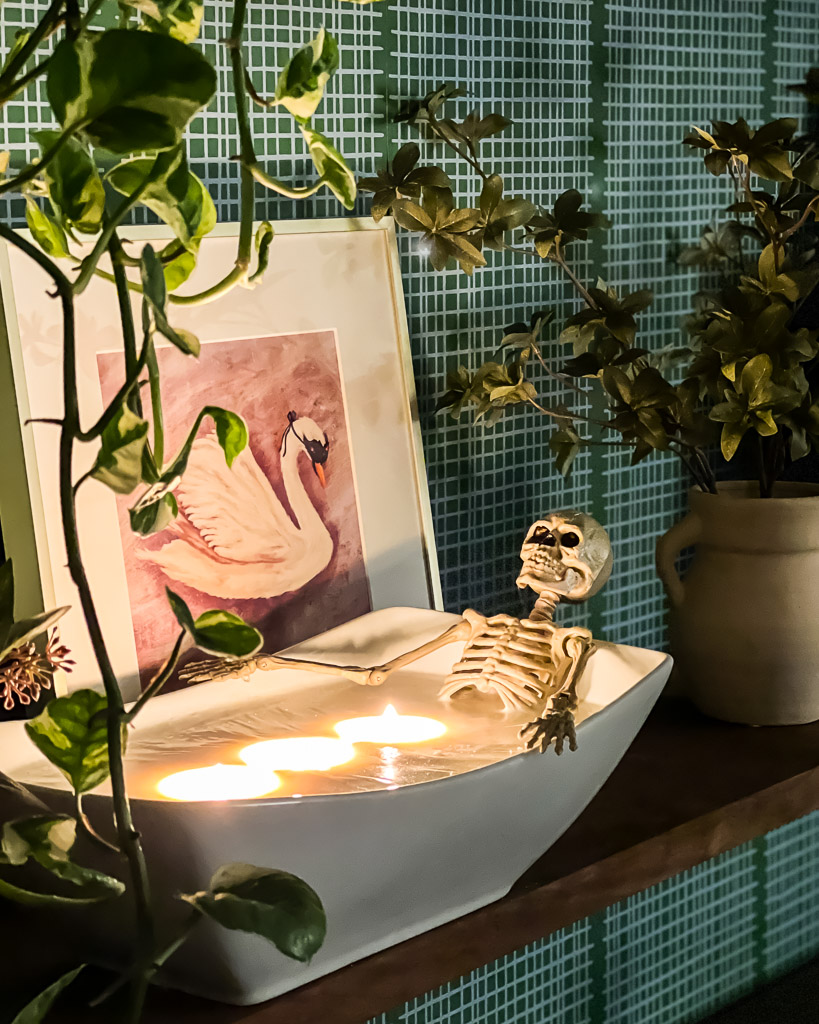

What do you think?! We all love it so much!
Other posts you may enjoy:
- No-Carve Pumpkin Decorating Ideas We Love!
- My 2022 Halloween Decor Picks from Target, Amazon and More
- Inspiring DIY Thanksgiving Crafts and Decor
- Colorful & Modern Free Fall Printables
- The Absolute BEST Fall Printables (for FREE)
- Stylish & Inexpensive Fall Decorating Ideas
- DIY Halloween Costumes for Toddlers and Kids
Wondering how I approach transforming rooms and spaces in our home? Check out Designer in a Binder®.

And if you want exclusive content and behind-the-scenes sneak peeks, be sure to subscribe before you head out!


Great idea and the perfect gift for my best friend! But doesn’t the plastic of the skeleton melt in the heat of the candle?
It hasn’t! The Amazon candle we purchased was also plastic. As long as you don’t put your wicks too close to the plastic and/or let the candle burn all the way to bottom where the plastic legs are and supervise your candle whenever it is burning (as should be the practice with ALL candles), you should be fine.
So clever and turned out super cute!
Thank you so much!