Easy Furniture Repair to Match IKEA Paint Colors!
This easy furniture repair system makes it effortless to repair dings and dents in your IKEA pieces in no time flat, AND it perfectly matches IKEA colors. This product is an IKEA lover's dream come true! You get a close match to help you with those IKEA hacks, custom pieces, or any existing IKEA piece that needs a quick facelift.

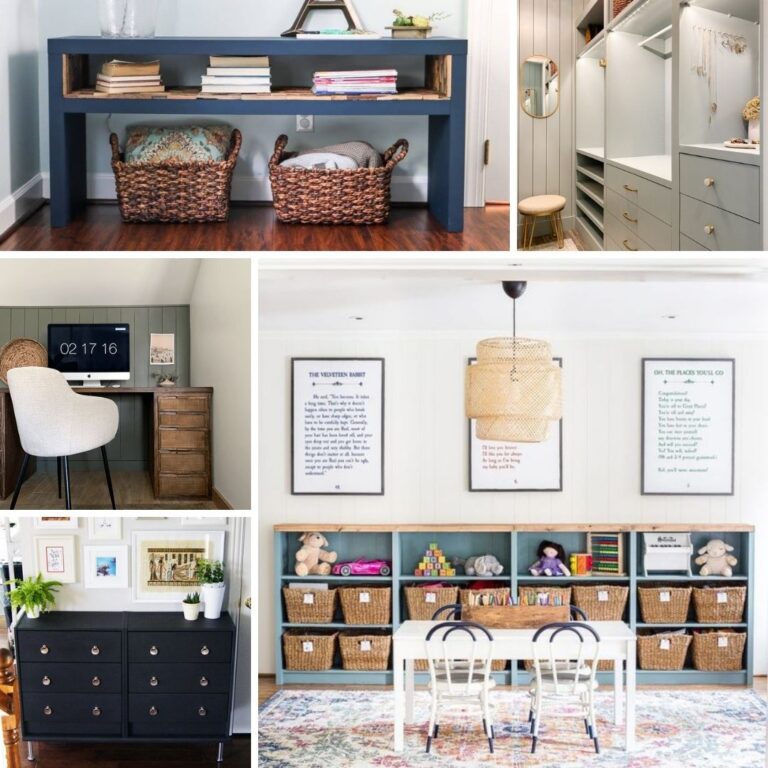
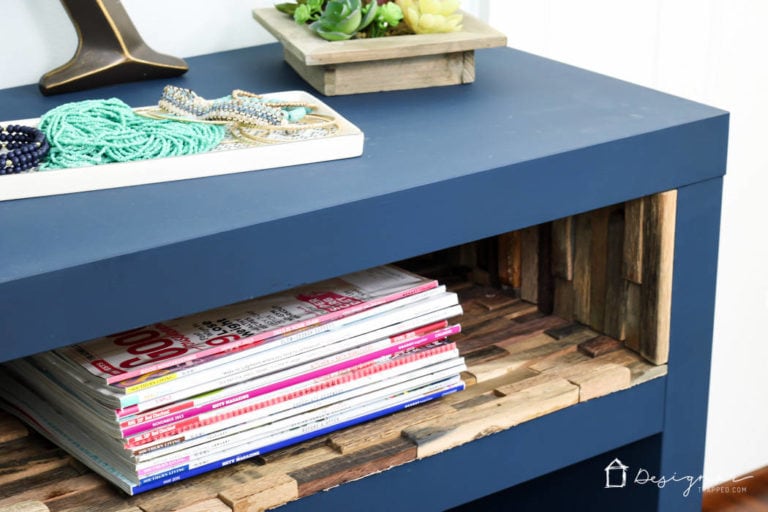
If you have read my blog for any length of time, you know I am a hard-core lover of IKEA furniture. I'm the person who's always down for IKEA trips, and it's especially fun to transform plain furniture into something with a unique look. I've done my fair share of IKEA hacks over the years, including this popular IKEA Malm hack and my IKEA desk hack (that looks like a high-end desk).
I've also hacked lots of stuff for my kids over the years, like their IKEA kids' table and chairs. And let's not forget about this IKEA Billy bookcase hack I used to create the look of custom built-ins that went totally viral.
Seriously, I could go on and on about my love of IKEA furniture. And while I have always been totally impressed by the quality of IKEA's pieces, the fact is that we've had some pieces for so long that they absolutely have gotten dings and dents along the way (which I completely expect with any furniture, for the record). And while I was happy to discover the secret to painting IKEA laminate furniture years ago, I never really had a great way to repair those dings and dents and match the colors of the IKEA pieces until now :)
So when I found out that Mohawk created a 3-in-1 Repair Stick in colors that were created to match the most common colors of IKEA furniture perfectly, I wanted to hug them.
This post contains affiliate links for your convenience. Click here for my full disclosure policy.
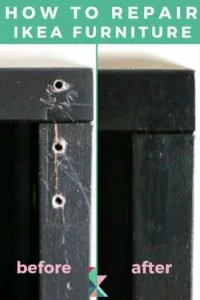
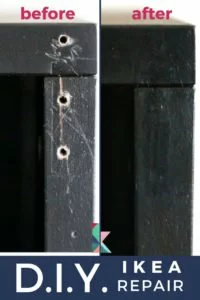
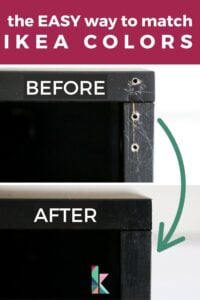
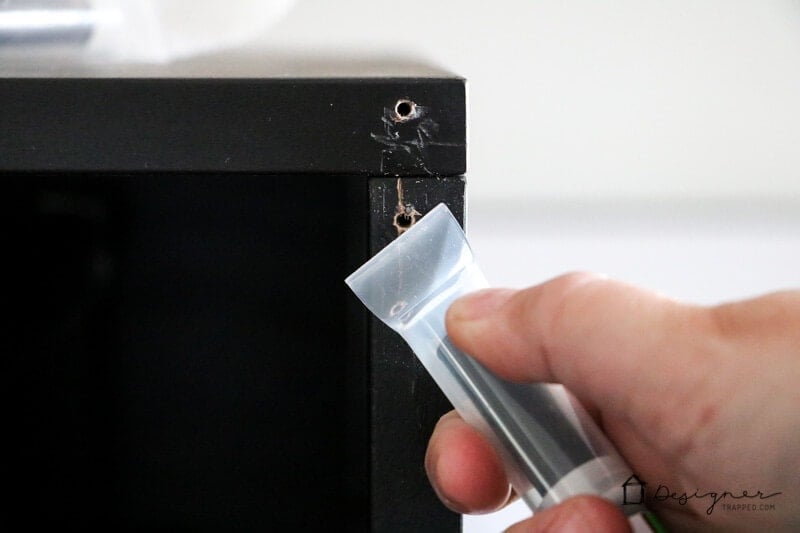
I couldn't wait to try out Mohawk 3-in-1 Repair Sticks! I've used them several times. And most recently, I used them to repair some holes on our IKEA Galant bookshelves. They are the common IKEA faux wood grain “black-brown” color.
I long thought hanging a curtain rod and curtain from the black IKEA bookshelves was a good idea to create a custom cabinet that allowed me to keep what was on the shelves hidden. But in the end, I didn't love how it turned out, so I removed the rod and hardware, leaving big old, ugly holes where the screws had driven into the top corners of the bookshelves. These were more than minor nicks or a small touch-up job.
But with the Mohawk 3-in-1 Repair Sticks, I repaired the holes in minutes, kept the unique characteristics of the piece, and got a perfectly correct color match with a nice application. Read on to learn how I did it.
DIY IKEA Furniture Repair With Perfect Color Matching
Materials Needed
- Mohawk 3-in-1 Repair Stick in whatever color you need for your project. I've linked to the white option since that is the most common IKEA furniture color.
- There are 4 colors available that are specifically matched for IKEA furniture colors: black, brown, white, and white stain.
- For IKEA's black-brown furniture color, I recommend using the brown paint and the black fill stick to get the best match.
- Paper towel
Steps
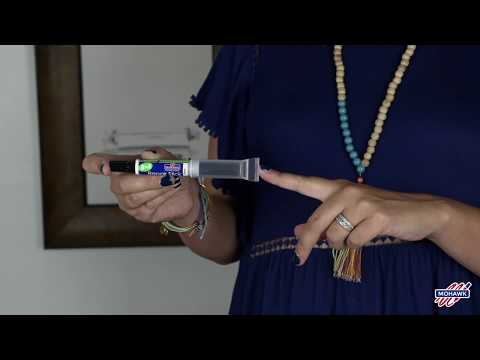
If you prefer video tutorials, you can check out one of the official demonstrations of the Mohawk 3-in-1 Repair Stick featuring yours truly below as I repaired a black IKEA office chair below. But there's also a written version of this DIY furniture repair tutorial for those who prefer written instructions and step-by-step photos. Even if you aren't an experienced painter or IKEA hacker, you'll get awesome results from this Repair Stick.
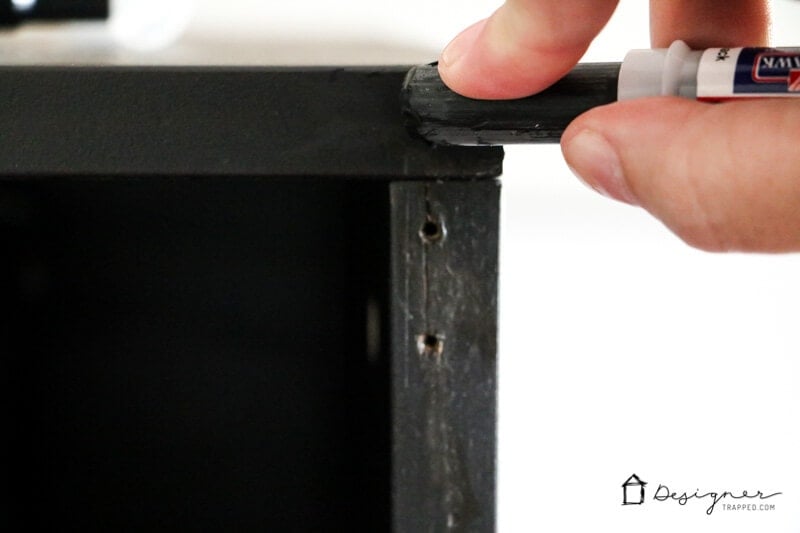
1) First, use the built-in leveler cap to run across the damaged area on your furniture to remove any damaged pieces protruding above the surface.
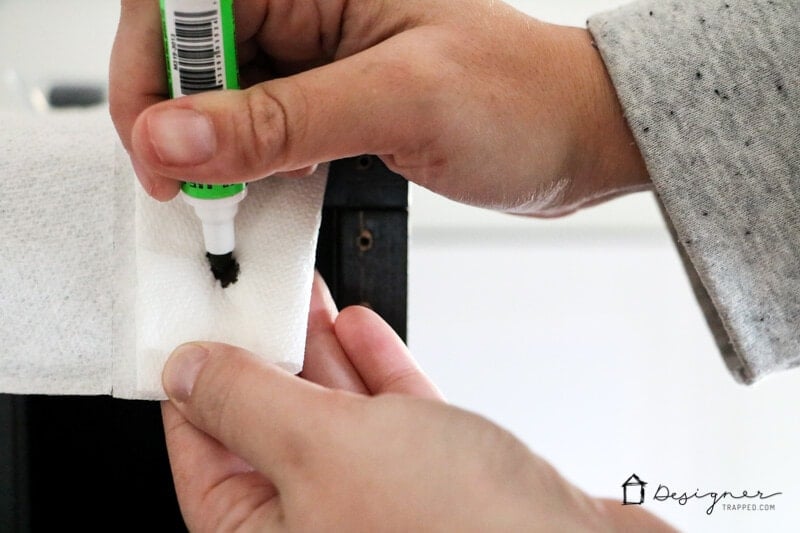
2) Next, shake your 3-in-1 Repair Stick for around 60 seconds to mix the paint. Then, press the marker tip down onto a paper towel until the paint covers the entire marker tip.
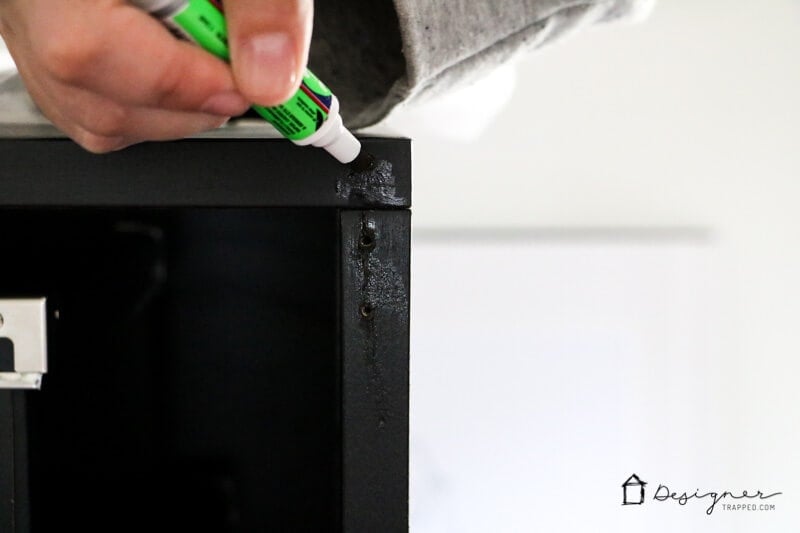
3) Use the paint marker to replace any color lost by the damage you are repairing.
4) Next, use the fill stick to fill any dings, dents, or holes. Hold it at a 45-degree angle and press firmly as you rub the fill stick back and forth over the damaged area. Continue rubbing until you get full coverage. Be sure any voids are completely filled. I recommend erring on the side of overfilling the damaged areas :)
5) Use your leveler cap to scrape off any excess material.
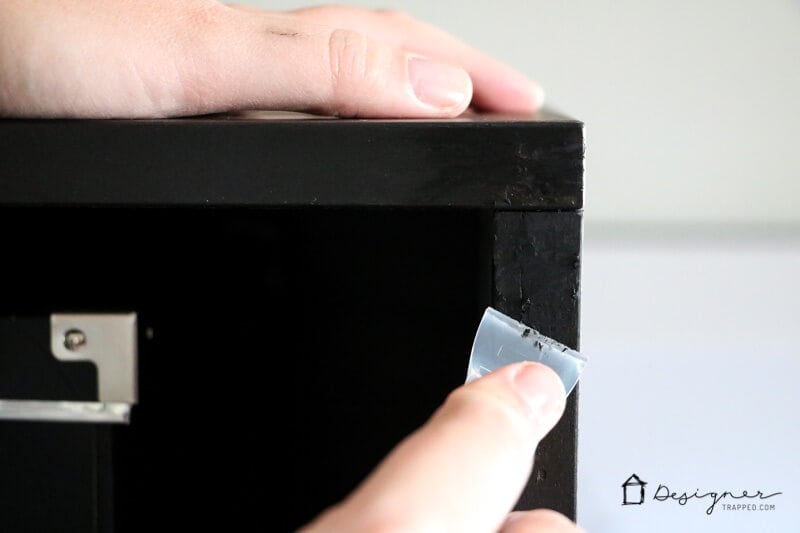
6) Finally, use a cloth or paper towel to gently buff any wax residue from your piece.
That's it! I told you this furniture repair is easy! But that really isn't the best part. The best part is that with Mohawk's 3-in-1 Repair Sticks, you can perfectly match the IKEA paint or stain on your piece, which I've NEVER accomplished before this product came out: a 5-minute repair and a perfect color match. I definitely call that a DIY win! Check out the before and after.
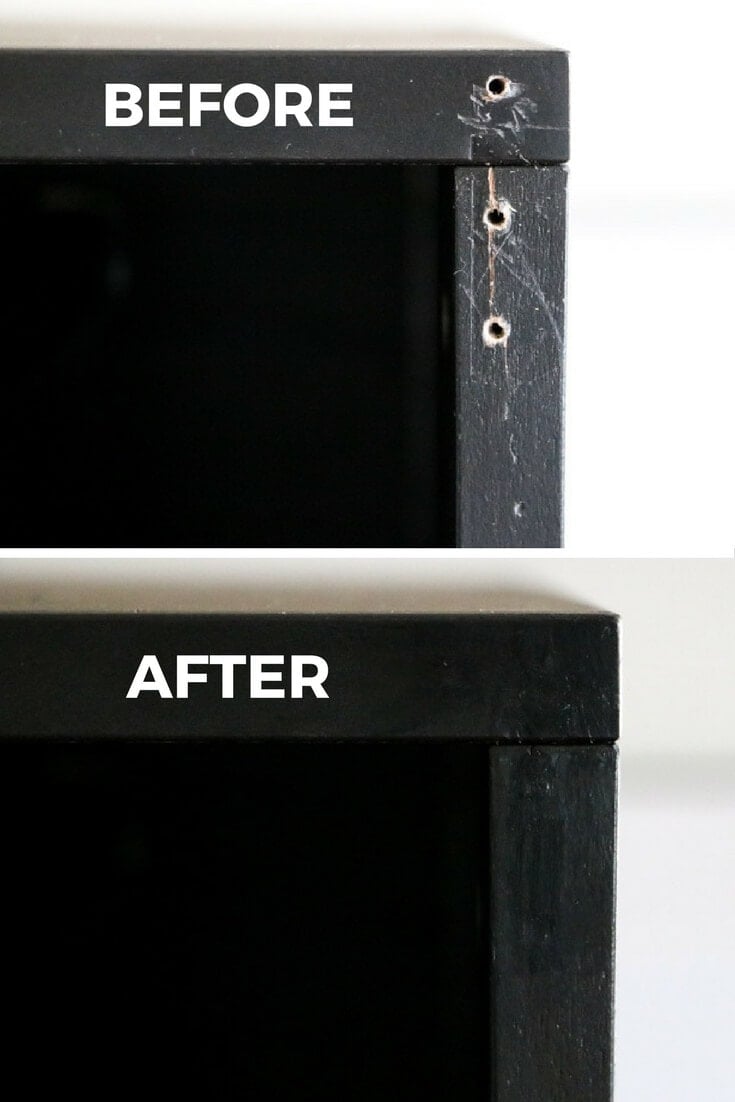
These bookcases are much easier on the eyes now that all the damage I inflicted on my IKEA bookcases has been repaired. There's no need to get out a power sander, and there are no visible brush strokes or other signs of a cover-up. The whole thing took just minutes to fix and required nothing more than the 3-in-1 repair sticks.
What do you think? Do you have any IKEA furniture that needs repair? How about that light grey dresser, small bathroom cabinet, IKEA coffee table, or shelves? The pigment or paint lays smooth, so you get a perfect stain AND the perfect coverup for any size project.
More IKEA HACK Posts


Wondering how I approach transforming rooms and spaces in our home? Check out Designer in a Binder®.

And if you want exclusive content and behind-the-scenes sneak peeks, be sure to subscribe before you head out!