Practical (and Pretty) Pantry Organizing Ideas
Are you tired of constantly rummaging through your pantry for that one ingredient you need? Do you find yourself buying duplicates of spices and canned goods because they get lost at the back of your shelves? A disorganized pantry can be frustrating and can turn cooking into a tedious task. However, with a few simple tips, you can transform your pantry into a functional, organized, and even beautiful space. In this post, I'm sharing the best pantry organizing ideas and tips that will make your pantry the envy of all your friends and family.
After living in our home for nearly 3 years, we recently gave our pantry a budget-friendly makeover (you'll see several photos of it throughout this post). And let me tell you, it has made a world of difference in everything from unpacking groceries to cooking our meals! As we were gearing up for our big pantry overhaul, I did a ton of research to find the best pantry organizing ideas and I'm sharing some of my favorites in this post with you. The thing I love about all these pantry organizing ideas is that they are versatile. It doesn't matter if your pantry is a giant walk-in pantry or a closet (note: we do have a separate post on How to Maximize Your Walk-In Pantry Space). There are so many ways to make everything accessible and orderly!
Declutter and Donate
Before you do anything else, it’s essential to declutter your pantry. Go through each item you have in your pantry and check for expiration dates. Get rid of any expired products, stale items, or anything you know you won’t use. Donate any unopened and unexpired products that are still good but that you know you won't use. You might also want to create a food inventory for your pantry to help you know what you have on hand to avoid buying more items you don’t need.
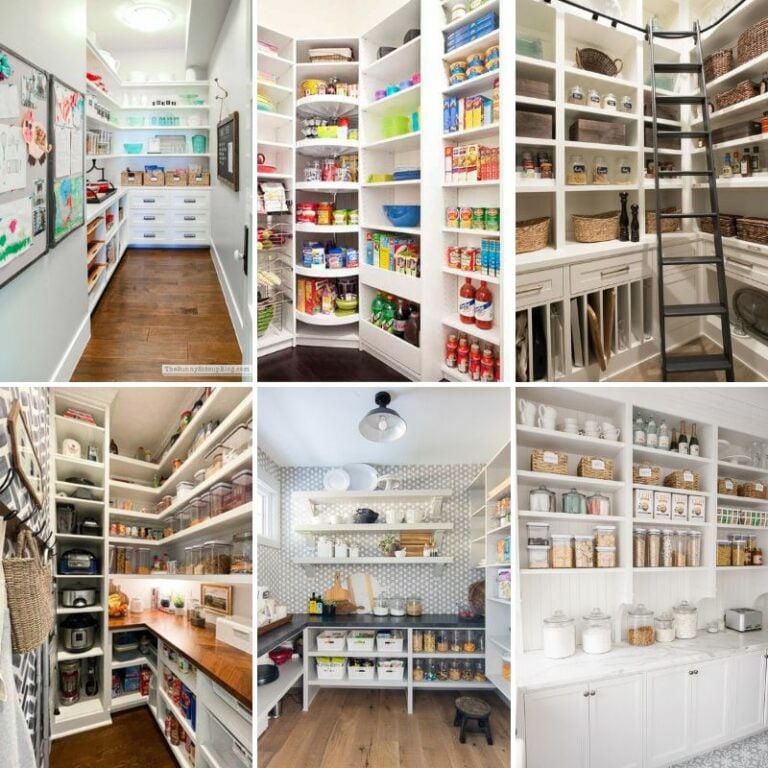
Optimize Your Pantry Shelving
After you have sorted everything, get ready to tweak your pantry if needed. I have an entire post about creative pantry shelving ideas to optimize storage space that you should check out if you aren't sure if your pantry shelving makes the most sense. Here's the short version… make sure your pantry shelving isn't too deep and that the shelves are spaced too far apart.
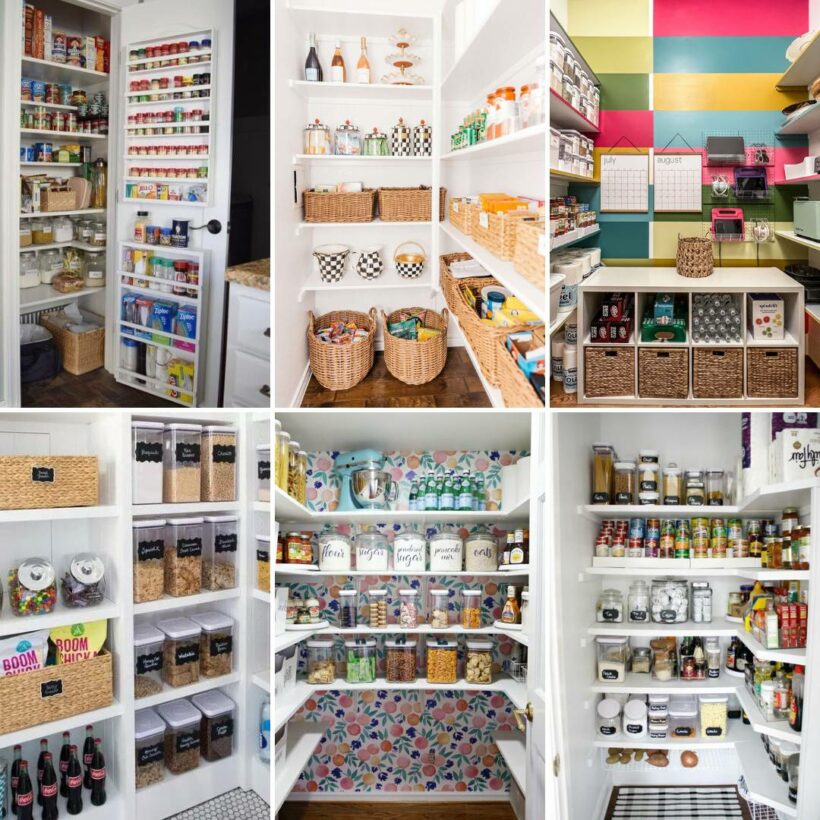
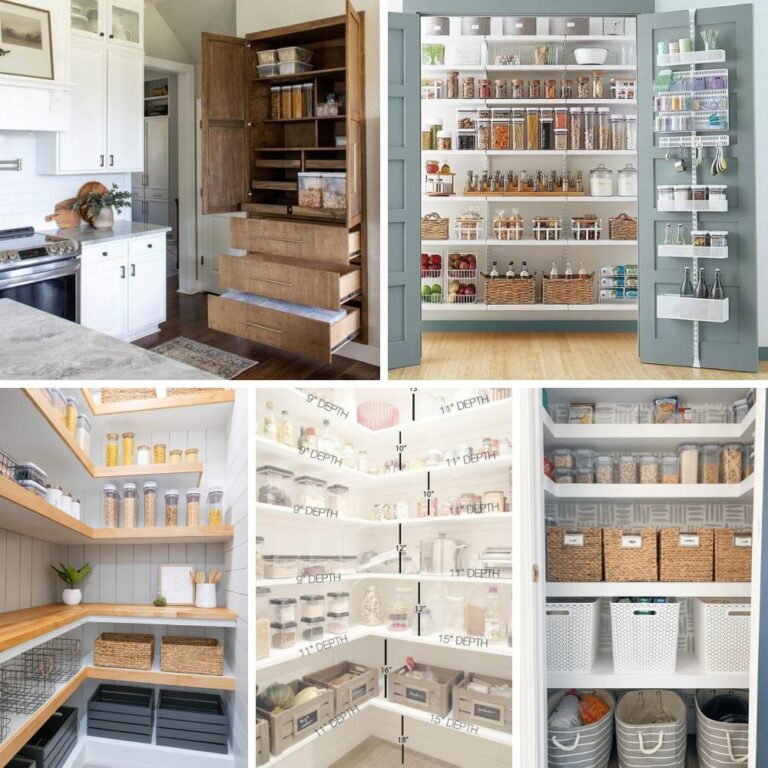
If your pantry shelving is not working, build some custom DIY shelves like the ones you see below. The beauty of building your own shelves is that you can customize the height, spacing and depth to exactly what you need. Keep in mind that a lot of pantries have really deep shelving, which is not ideal because it's so easy for things to get lost behind stuff on shelves!
Use Clear Bins and Containers
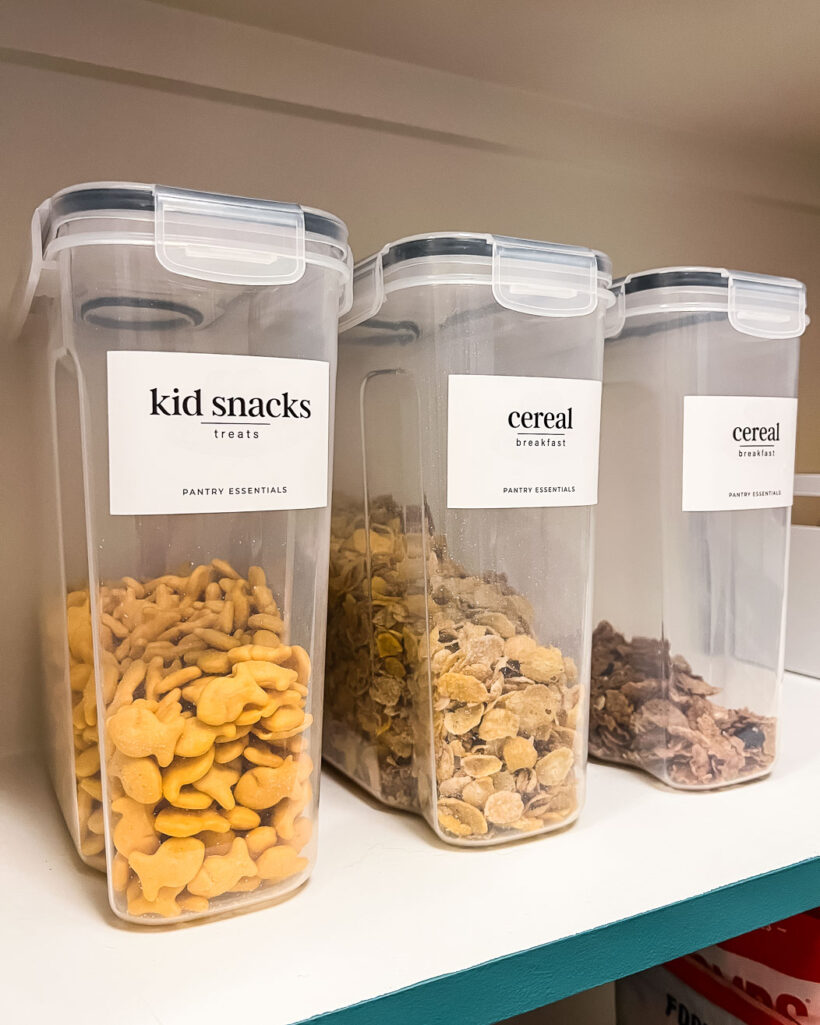
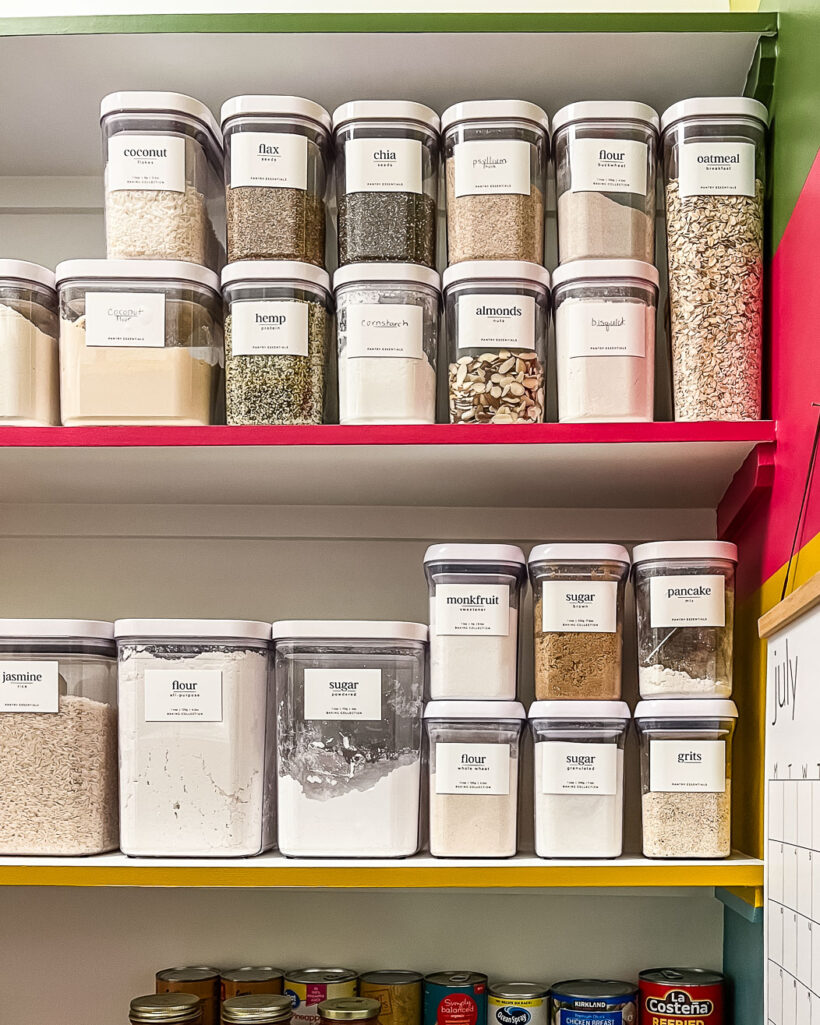
Clear bins or containers are an excellent way to keep your pantry items organized while keeping them visible. Whether you choose plastic, glass, or wire bins, clear storage containers make it easy to see everything you have and avoid buying duplicates of what you already own. Label each bin or container to keep everything organized and easy to find.
We love using these clear OXO Pop containers for our dry goods because they stack neatly on top of each other, which is a great way to add some vertical storage. And by decanting our dry goods into the clear containers, we can easily see when we are running low on something!
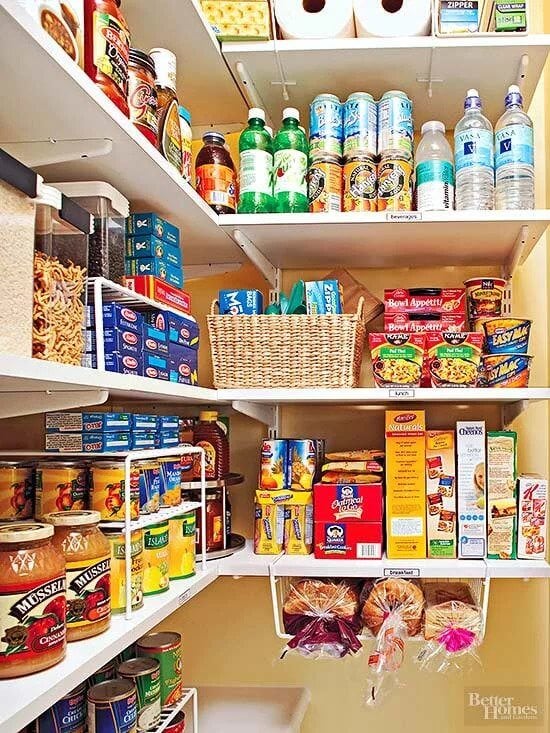
Maximize Space in a Narrow Pantry
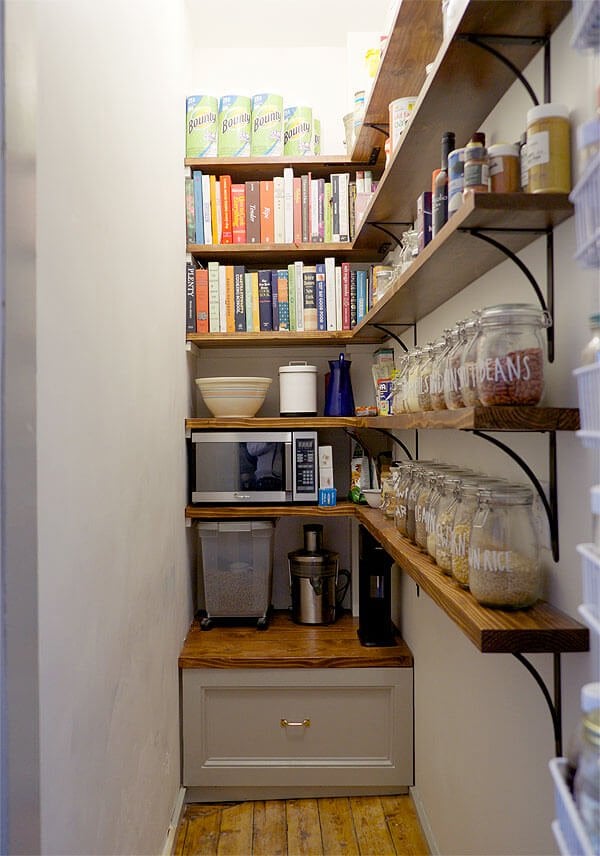
When you are dealing with a small pantry space, it can be hard to figure out how to organize your pantry. This New Yorker does a great job making his small pantry functional and pretty by using shallow shelves along the length of the pantry and deeper shelves at the end.
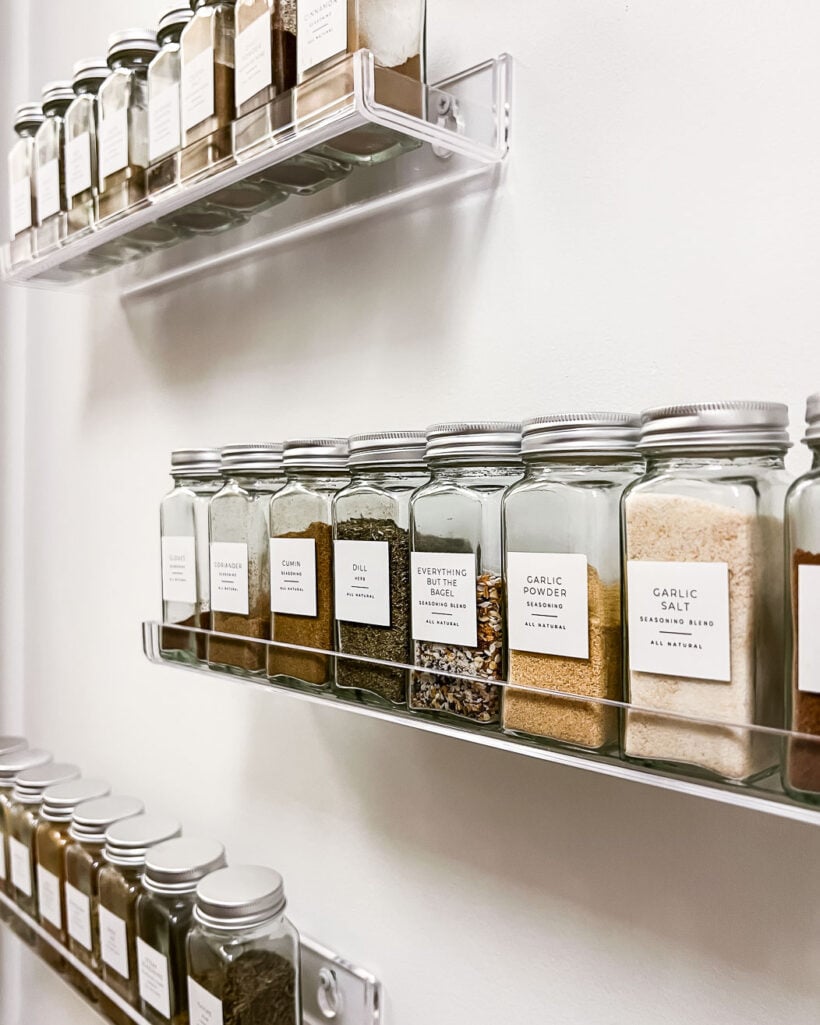
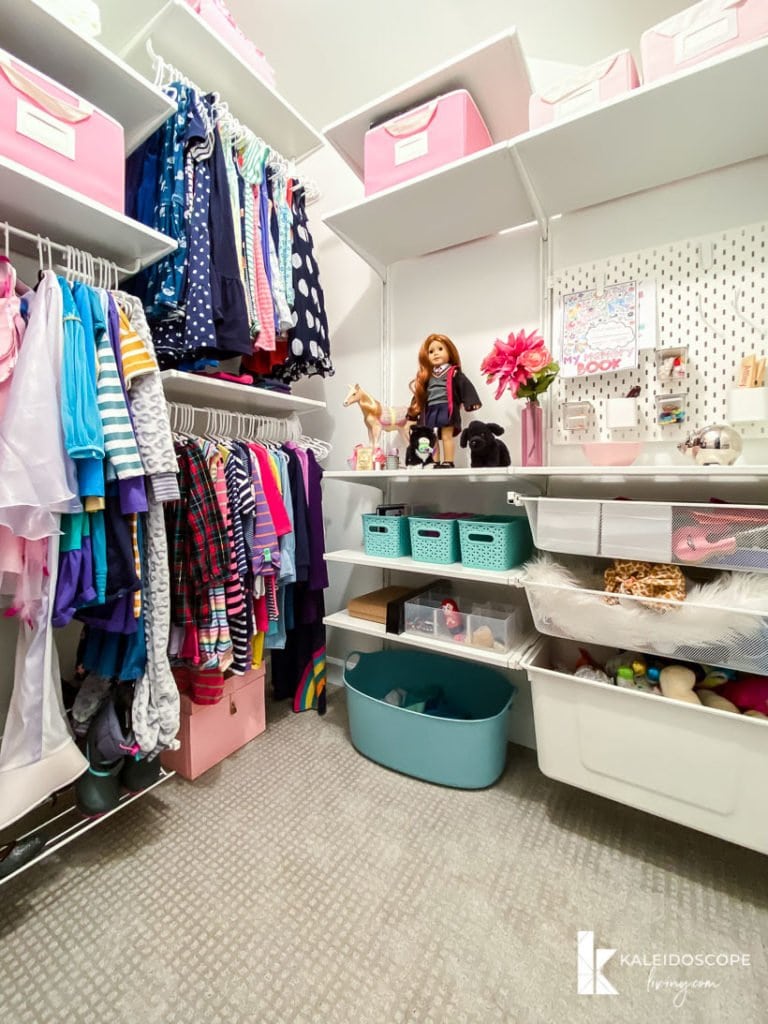
Utilize Vertical Space
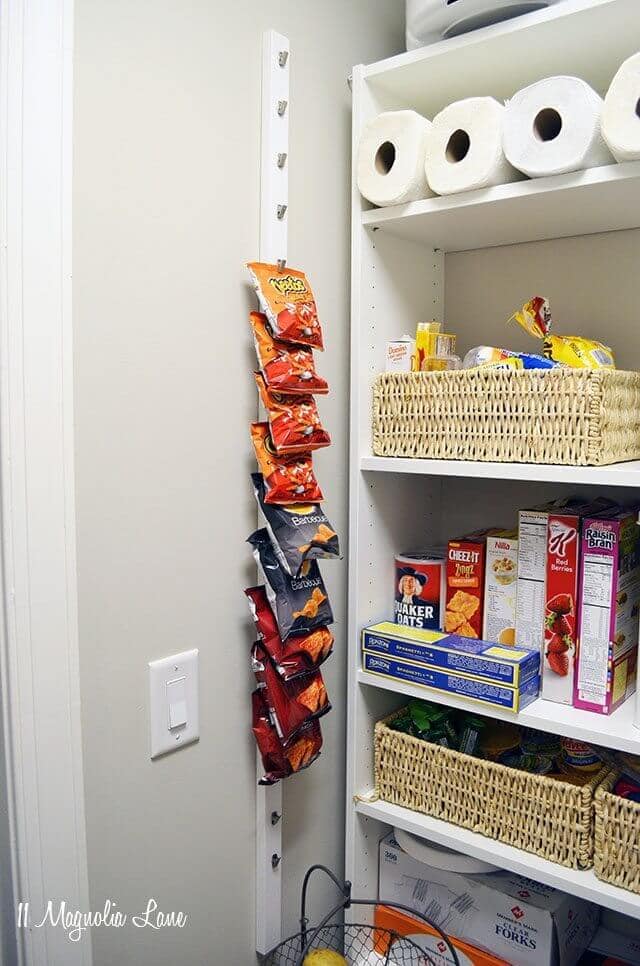
Make the most of every inch of your pantry storage by finding ways to use the vertical wall spaces that are often overlooked. This smart use of vertical space for bagged snack storage is one of my favorite pantry ideas!
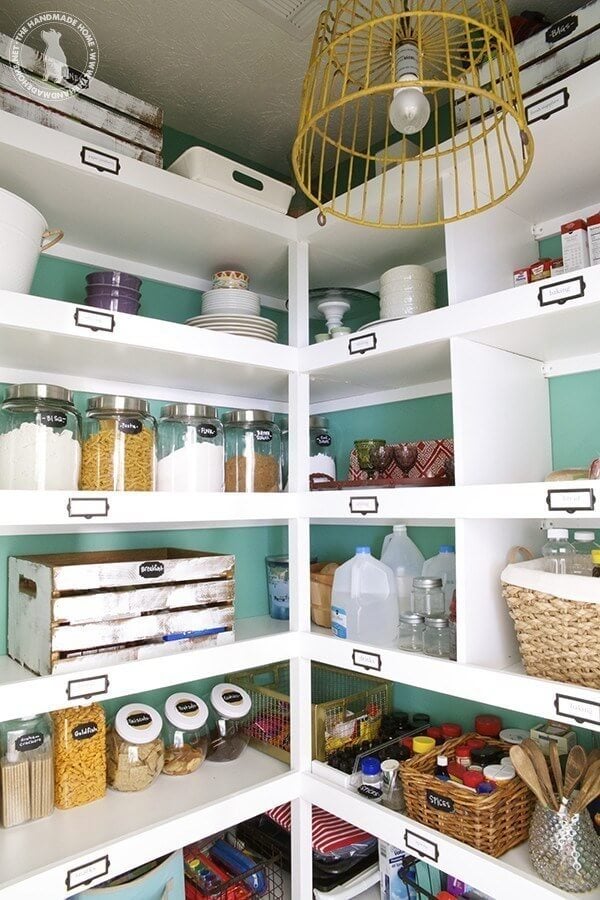
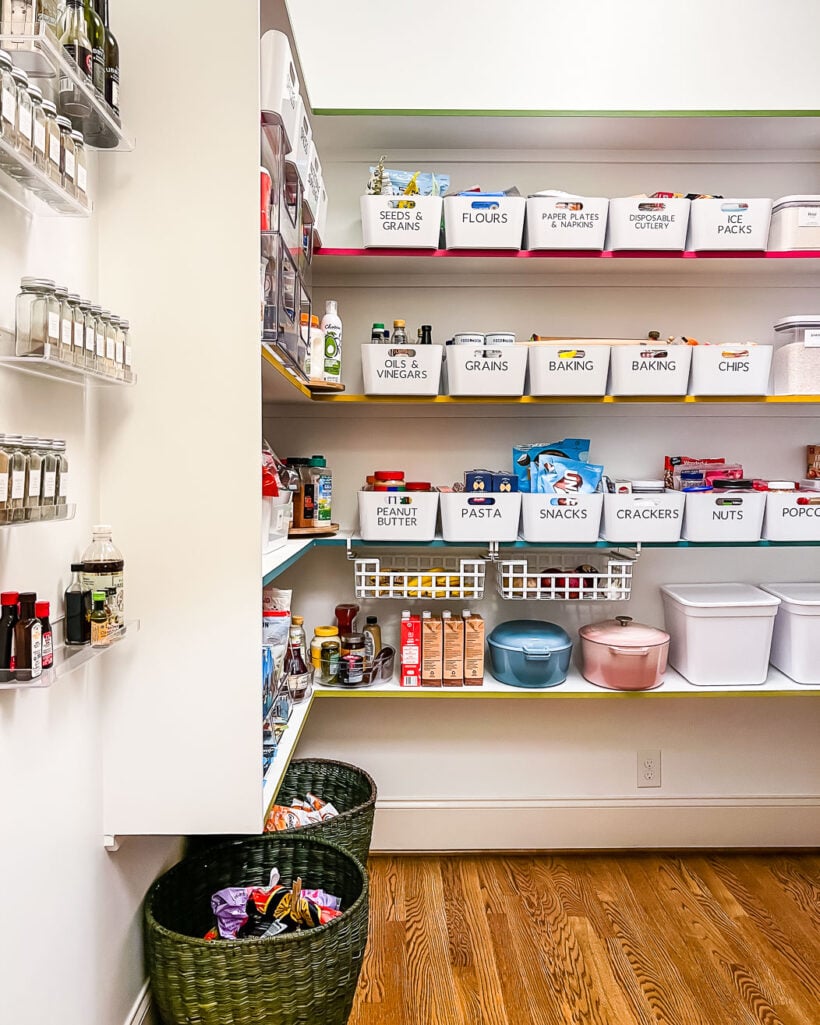
In our own pantry, we had a small section of wall without shelving, so we added these small acrylic shelves to store our spices (which we don't have room for in our kitchen). It has worked out so well for us!
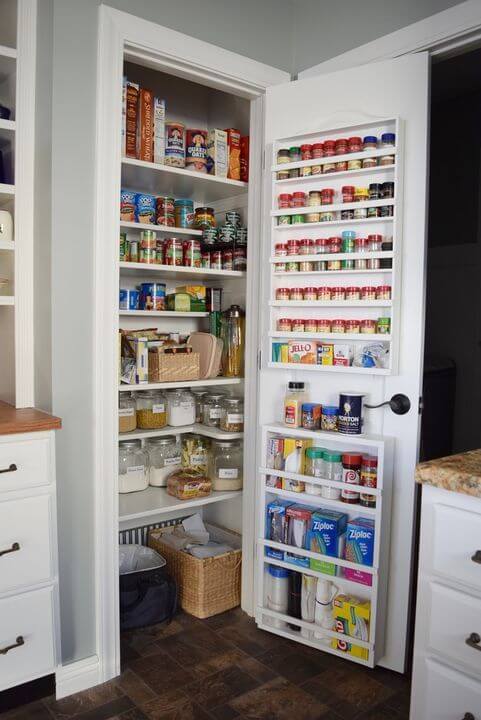
Add Storage to Your Pantry Door
It is not uncommon for a home to have the panty in what is virtually a closet in the kitchen. The back of the pantry door is valuable storage space when you add smart back-of-the-door storage! Just look at how many spices, ziploc bags and other items fit on the back of this pantry door. Amazing.
Use the Floor as an Extra Shelf
I'm surprised by how few people use the floor space in their pantry for storage. If it makes sense in your space, treat the floor as an extra shelf. It's a great place to store small appliances like your rice cooker and crock pot and for smaller items that are corralled in baskets.
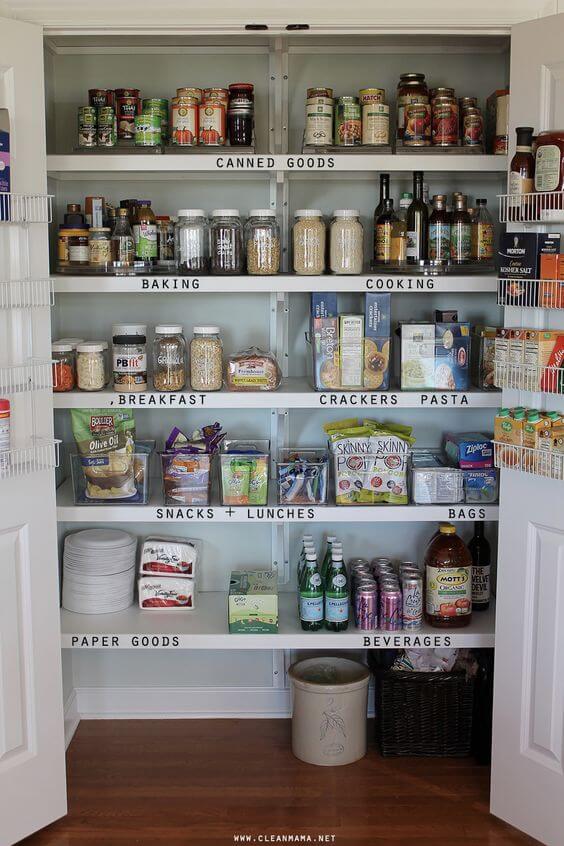
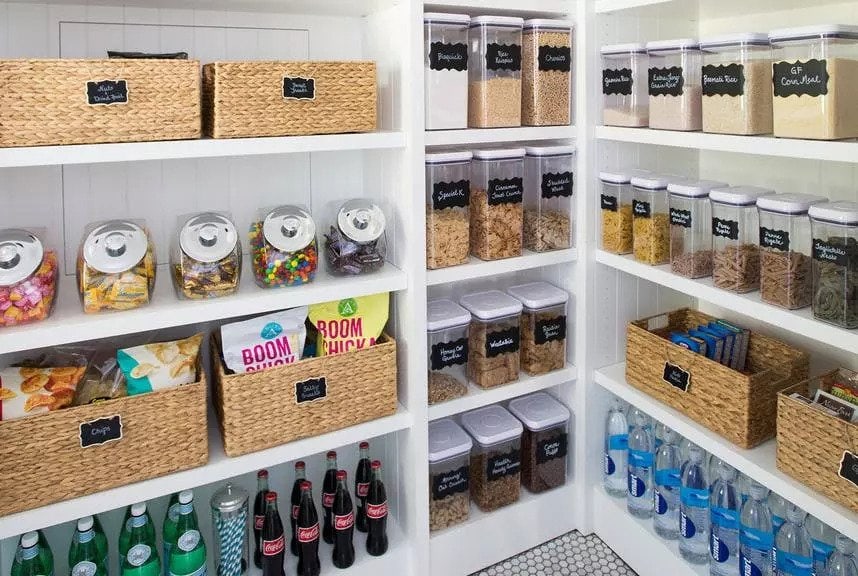
Create Zones
Organizing your pantry into zones can help you keep track of what you have and where everything is. Think about how you use your pantry and create sections for each type of food item, such as spices, baking supplies, snacks, and canned goods. Creating zones can also help you determine the best storage container, and it’ll help you keep your pantry tidy and easy to navigate.
This simple pantry organization works well and makes sense because there are clearly labeled zones!
Use Lazy Susans in Corners
This is one of the most important pantry organizing tips I can give you… Use lazy susans to maximize the space in corners! Corners in pantries can be tricky. Either they become dead space that doesn't get used OR items get shoved in the corner and forgotten about because they can't be seen. The best way we have found to turn those corners into valuable storage space is by using lazy susans. Total game-changer.
Use Shelf Stackers
Another smart way to maximize the vertical space in your pantry is by using shelf stackers for canned goods and other short items. You can effectively double or triple your shelf space!
Add Under-the-Shelf Drawers
We added these pretty under-the-shelf drawers to some of our pantry shelves for extra storage and function. And since they allow for so much airflow, they are perfect for storing some of our produce!
Use Large Floor Baskets
You may have noticed those big green baskets in the photo above. We purchase a lot of pre-packaged snacks and things like cereal at Costco, and it takes us a while to go through them. We don't want all of the extra stuff taking up valuable space on our shelves, so we use large floor baskets to store the items we don't need right away.
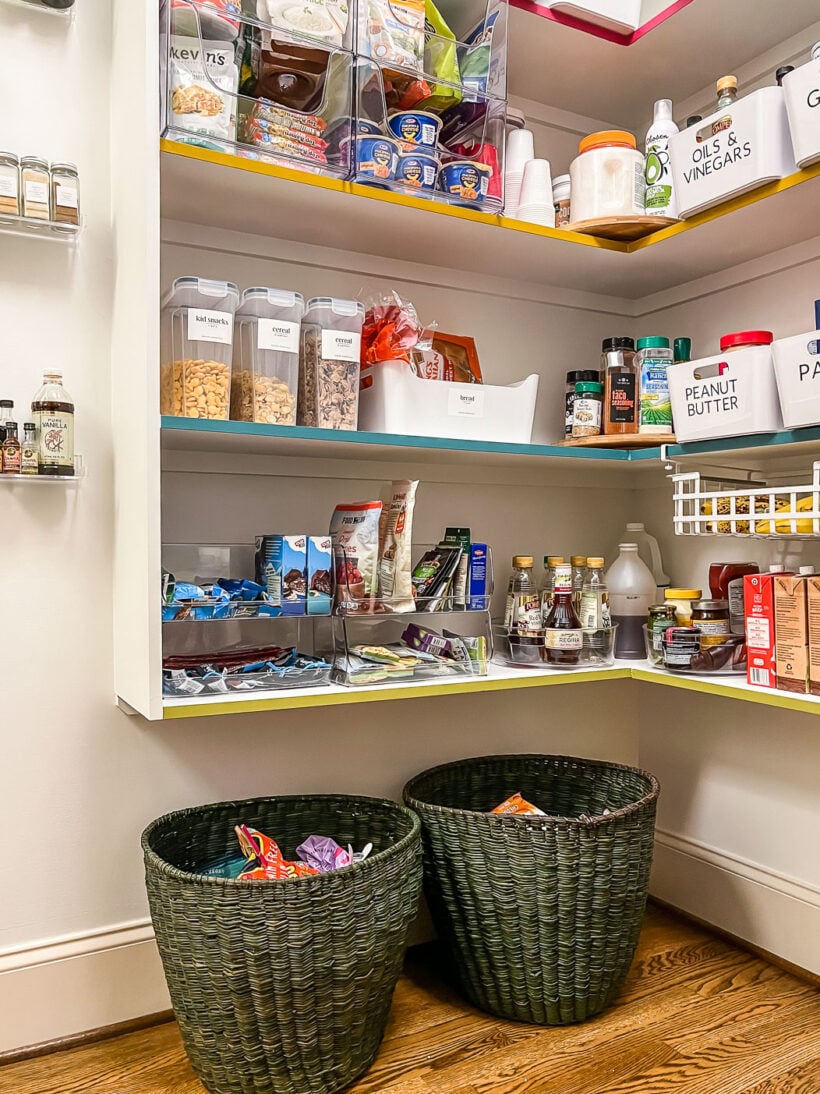
Floor baskets are also a great option for making kid snacks easy to reach if you still have little kiddos!
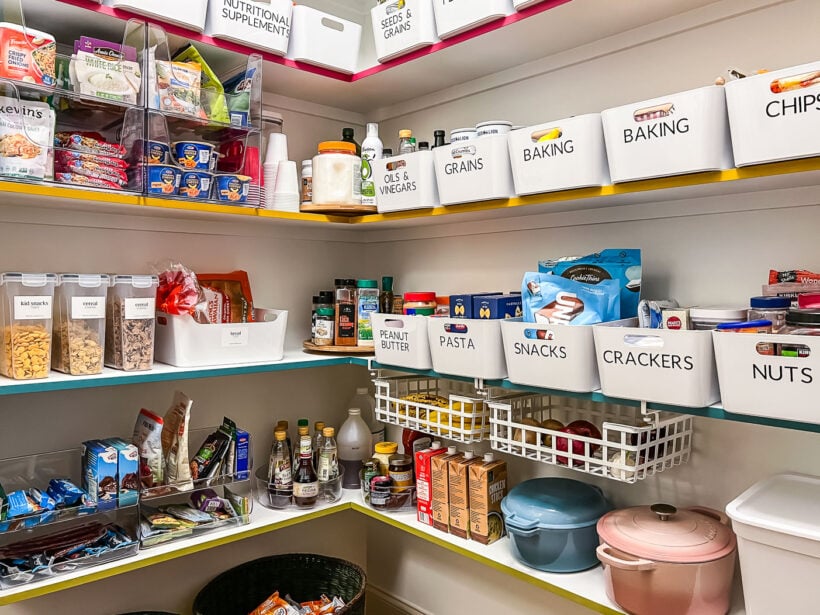
Label Everything
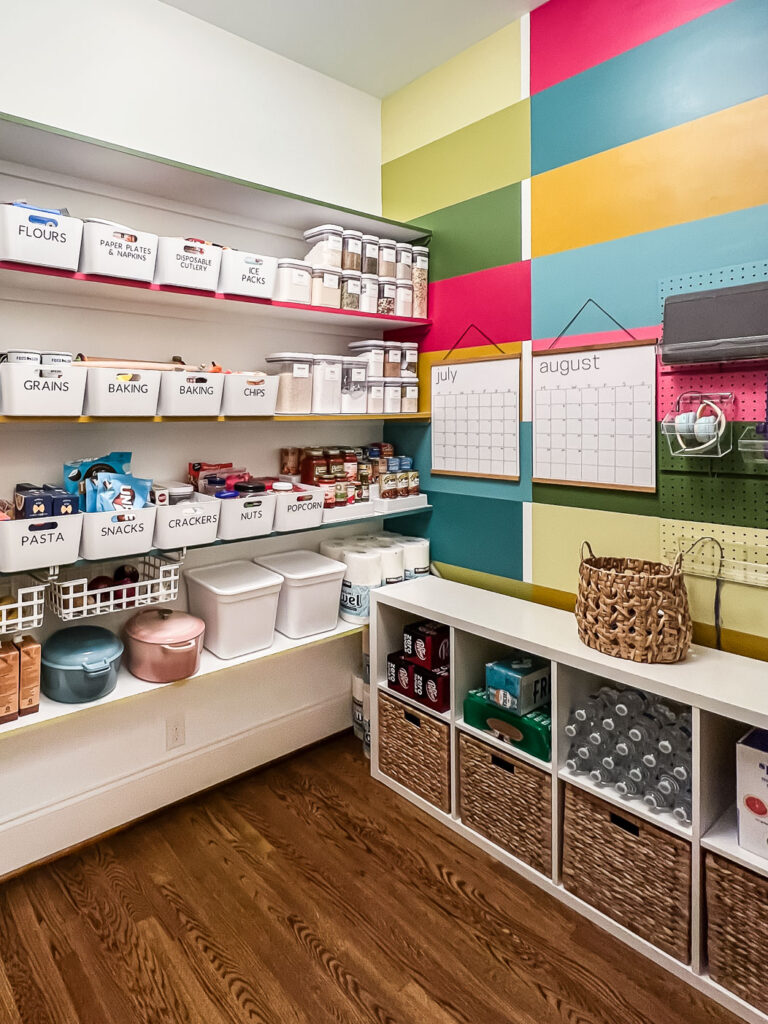
This is another one of those pantry organizing ideas that make such a difference–label everything! Trust me, this simple step can work wonders for keeping your kitchen organized and maintaining harmony in the family food zone! By labeling as much as possible in your pantry, you're creating a foolproof system that allows everyone in the family to know exactly where things belong. No more guessing games or misplaced ingredients! 🙌 You may have noticed tons of these inexpensive white bins throughout our pantry–they are perfect for storing similar items. I used my Cricut to make large labels for them.

But I recently ordered this huge book of pantry labels (648 labels for under $20) and I'm so happy with them!

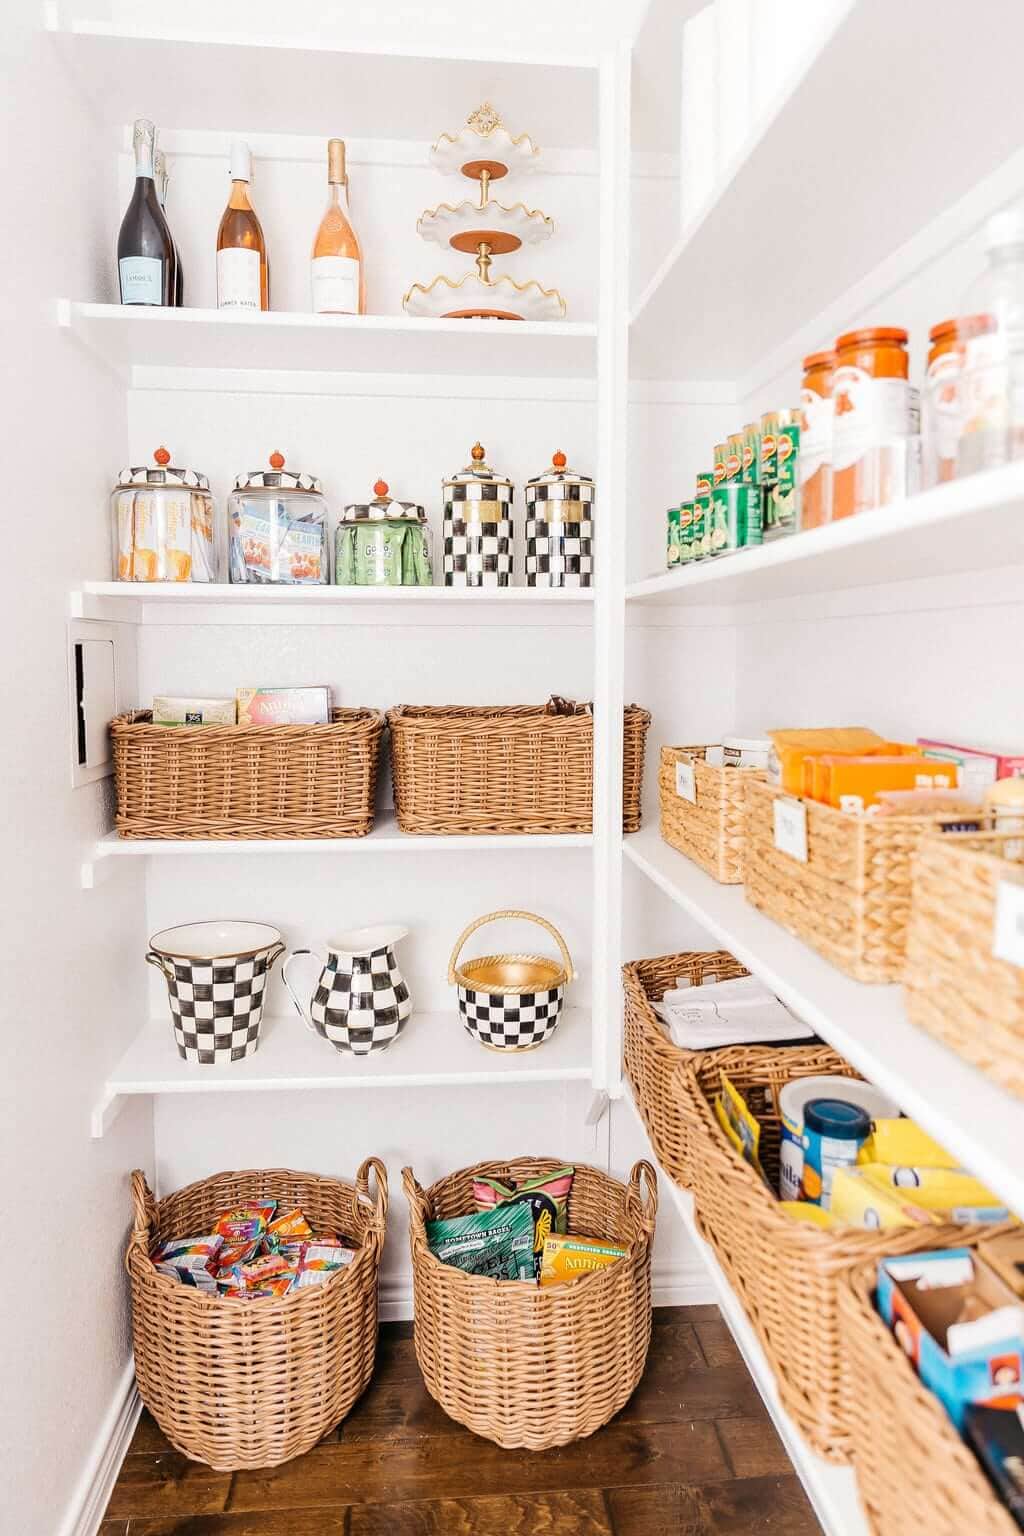
Use Uniform Storage
Even organized pantries can look visually chaotic. One way to calm the chaos is to use uniform storage containers. This pantry uses clear containers and one type of basket, which really helps minimize the chaos. It looks cool, calm and collected, doesn't it? I love the uniformity of it!
If uniformity calms you, then this pantry with simple white bins and clear bins would be another great option for you!

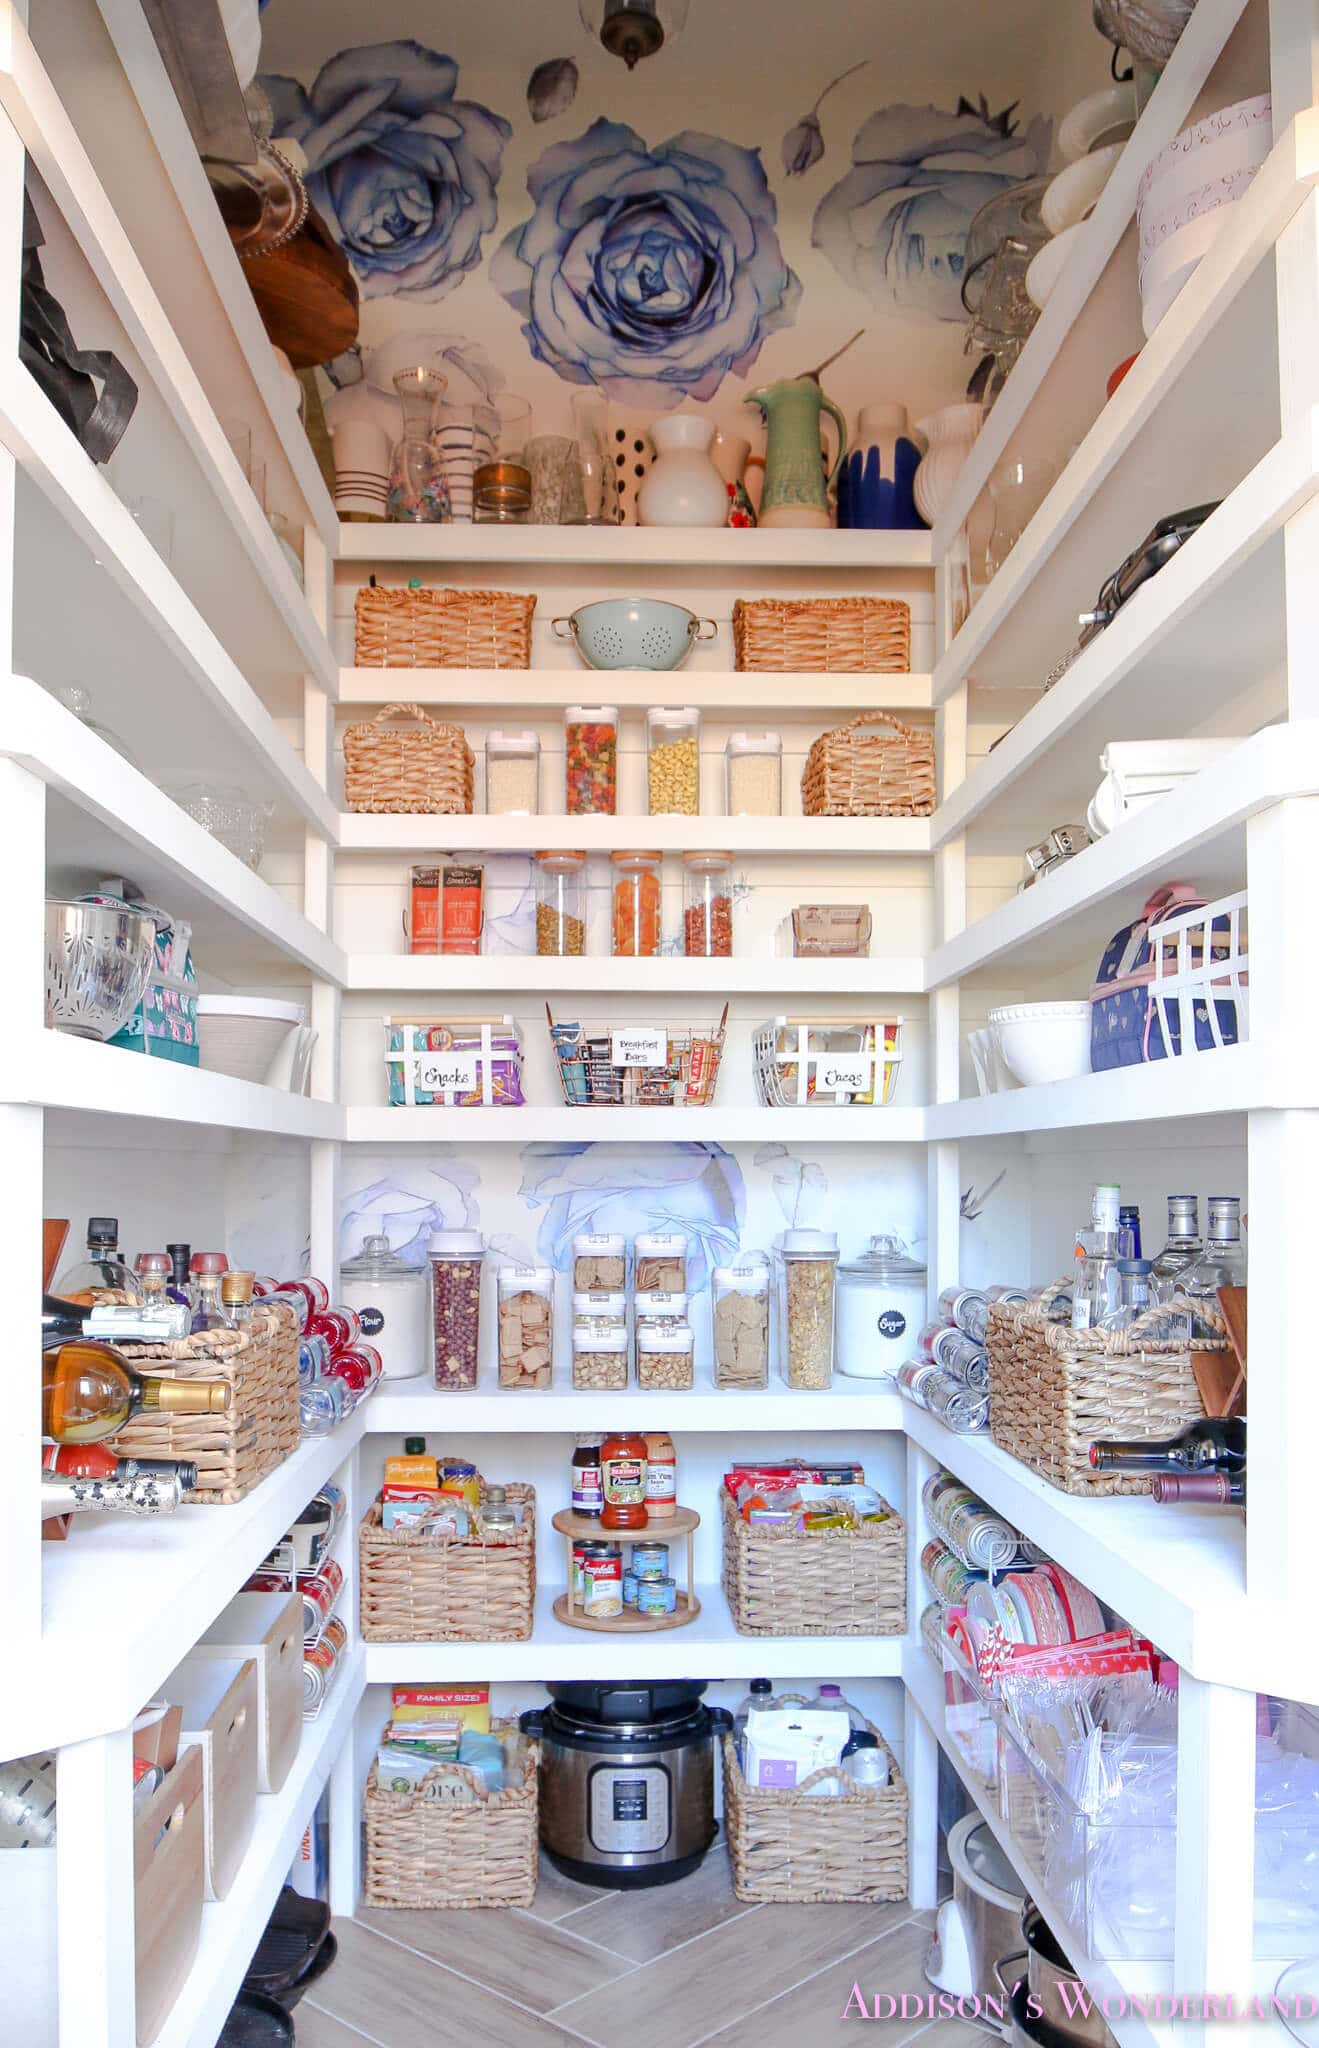
Add Wallpaper or Other Personal Touches
Last but certainly not least, elevate the look of your pantry with some personal touches. You can add wallpaper or a fresh coat of paint, install a pretty light fixture or even add a custom pantry door! By creating a space you love to be in, you’ll be more motivated to keep it organized and tidy. I have found this to be true with every space we have organized over the years (from organizing our kitchen cabinets to our linen closet organization)! Once we get a space organized and functioning well, it's easy to keep it that way.
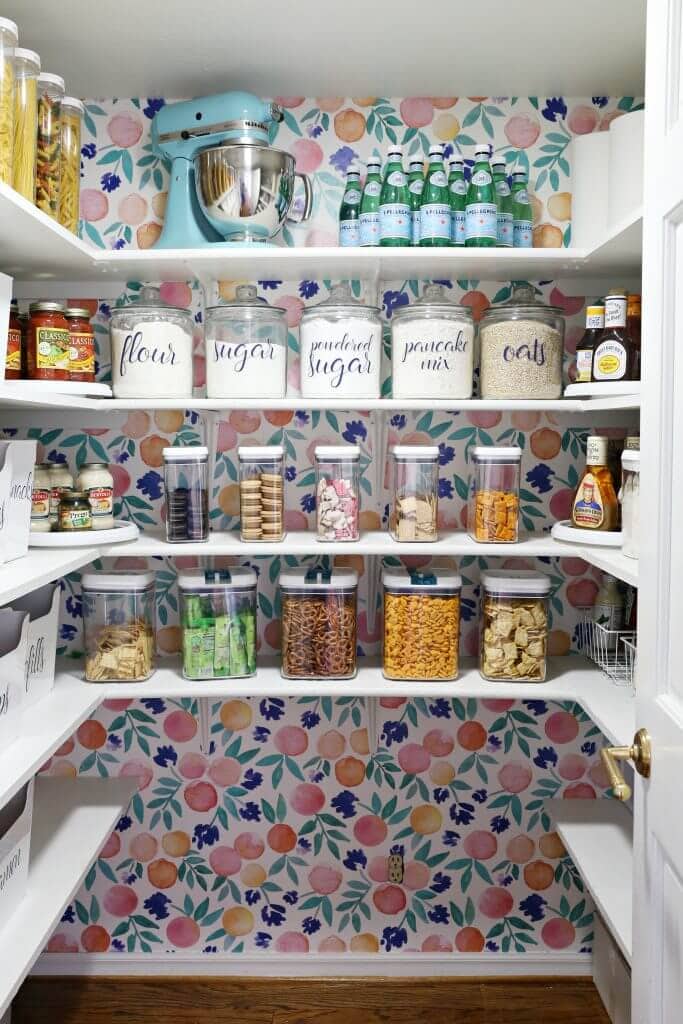
If you are a color-lover like me, then consider adding a fun, colorful wallpaper to your pantry! I love how the wallpaper shines through the clear containers and makes the whole pantry feel happy.
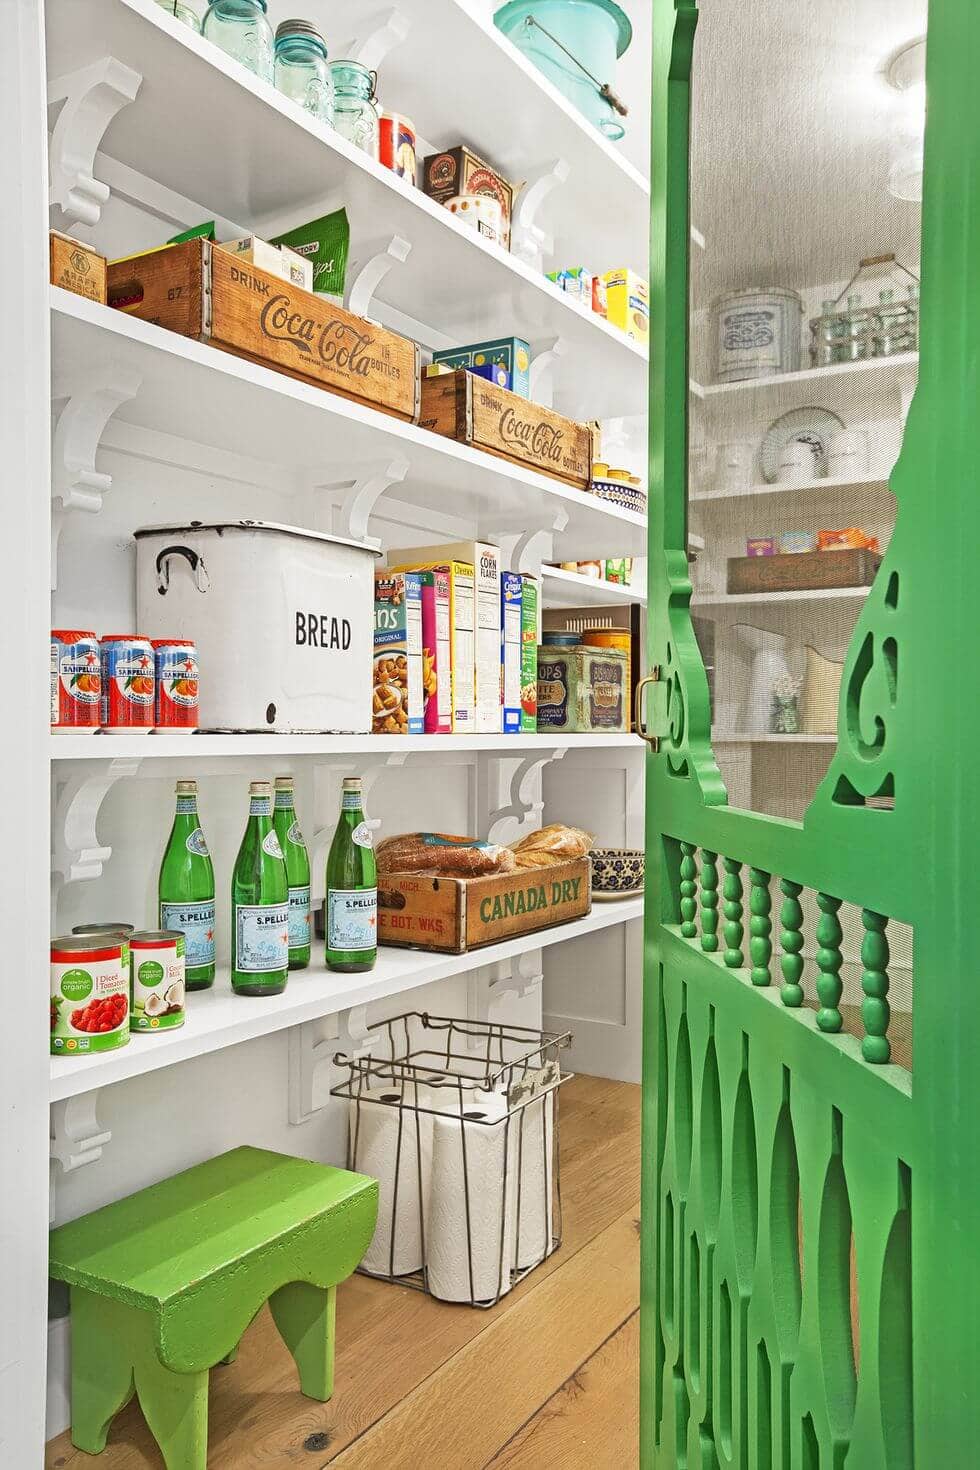
Don't want the same kind of pantry door everyone else has? Think outside the box. I love the idea of using this screen door and those vintage bins are beautiful!
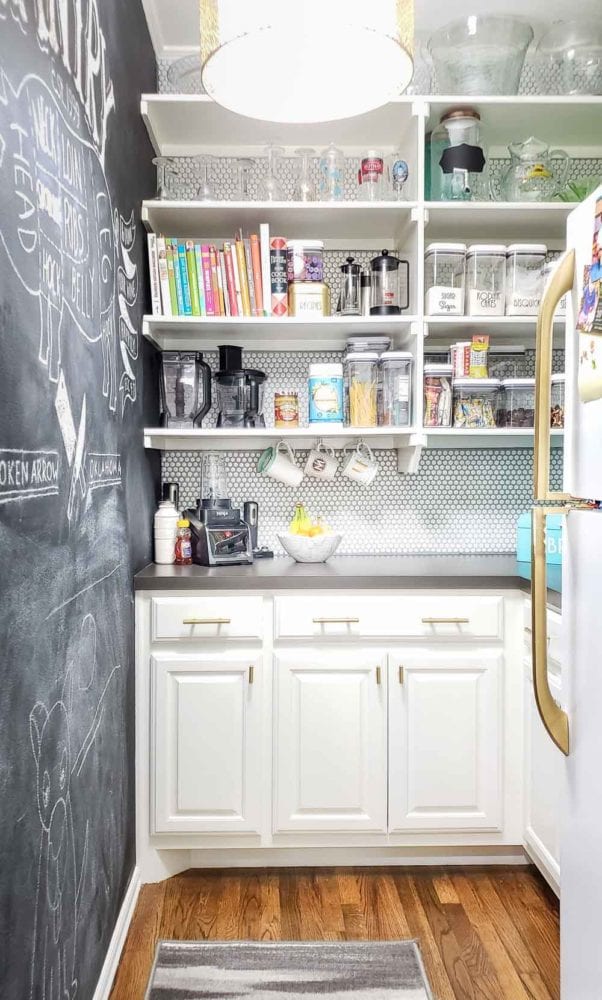
If wallpaper isn't your thing, how about this fantastic chalkboard wall and that penny tile?! I love that Melissa really created a Butler's pantry out of her space with both cabinetry and open shelving. We recently completed our own DIY butler's pantry and I was totally inspired by this space.
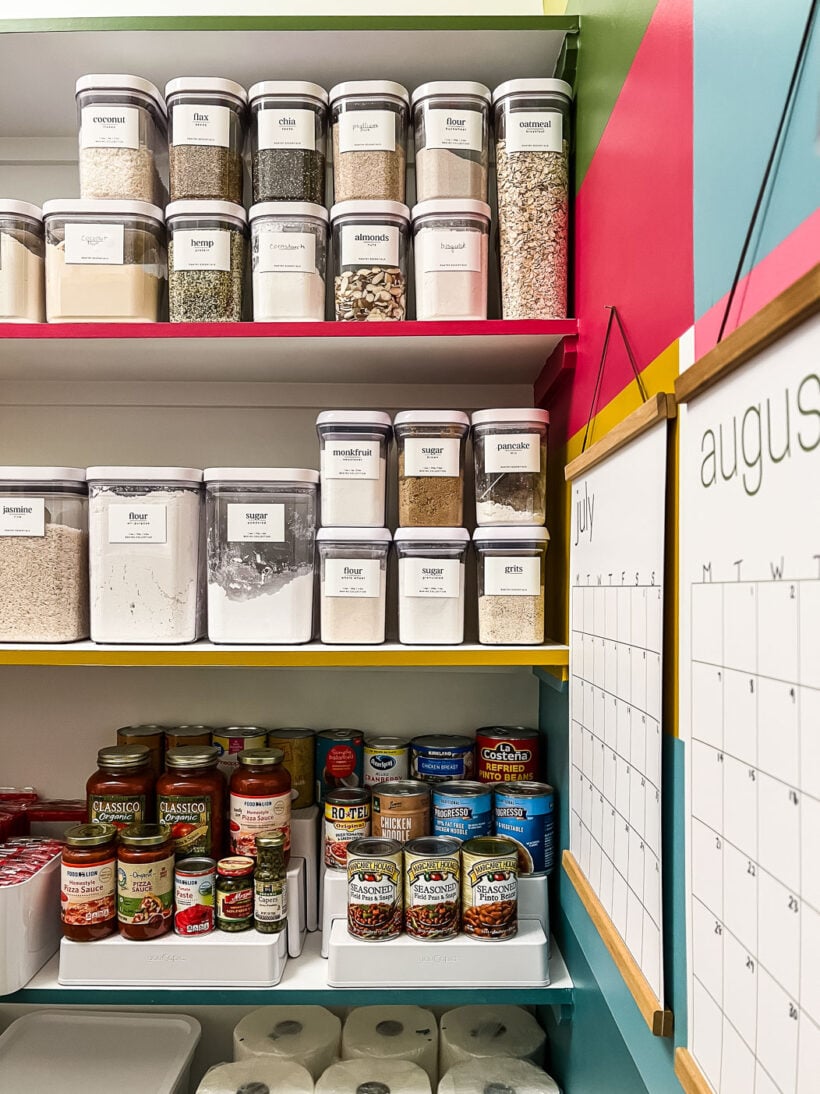
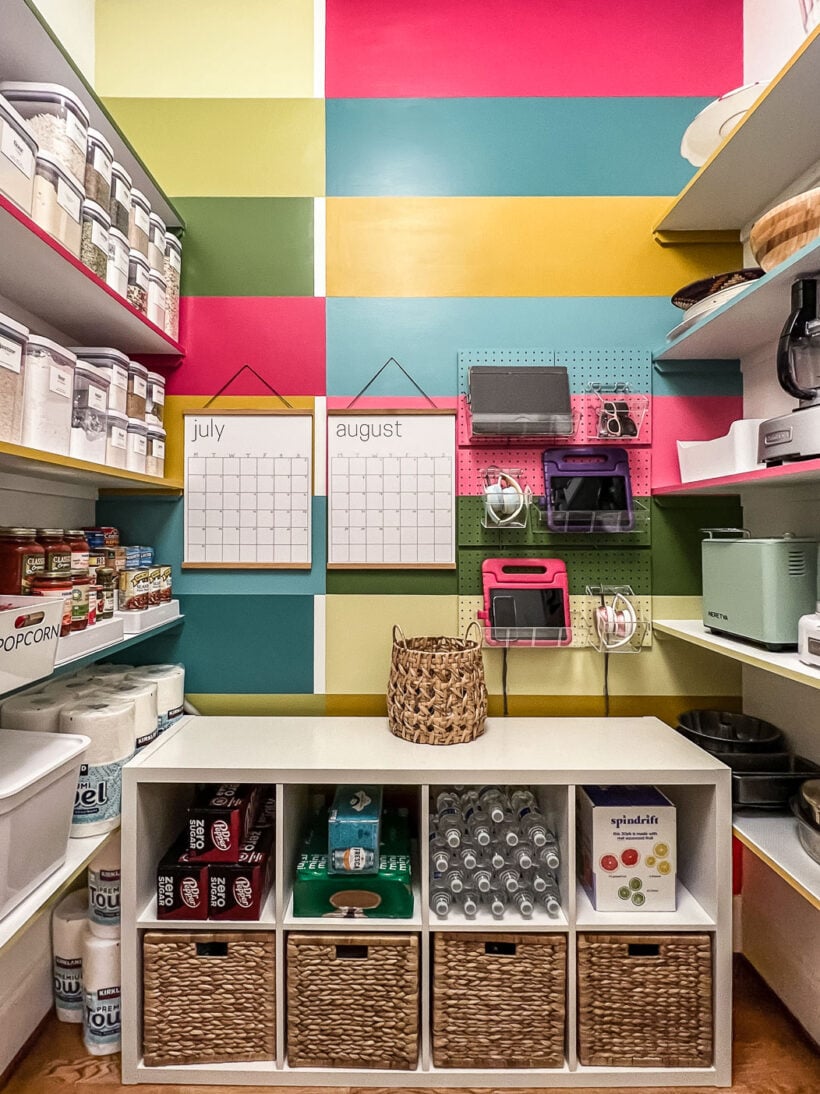
And of course, you could always paint a colorful mural like we did in our pantry. I absolutely love how much color and interest it adds to the space. Plus it serves as the perfect backdrop to the DIY family charging station we added!
A well-organized pantry can save you time, money, and make putting away groceries and cooking much more enjoyable. I hope these pantry organizing ideas have you feeling inspired to declutter, organize and beautify your pantry space!
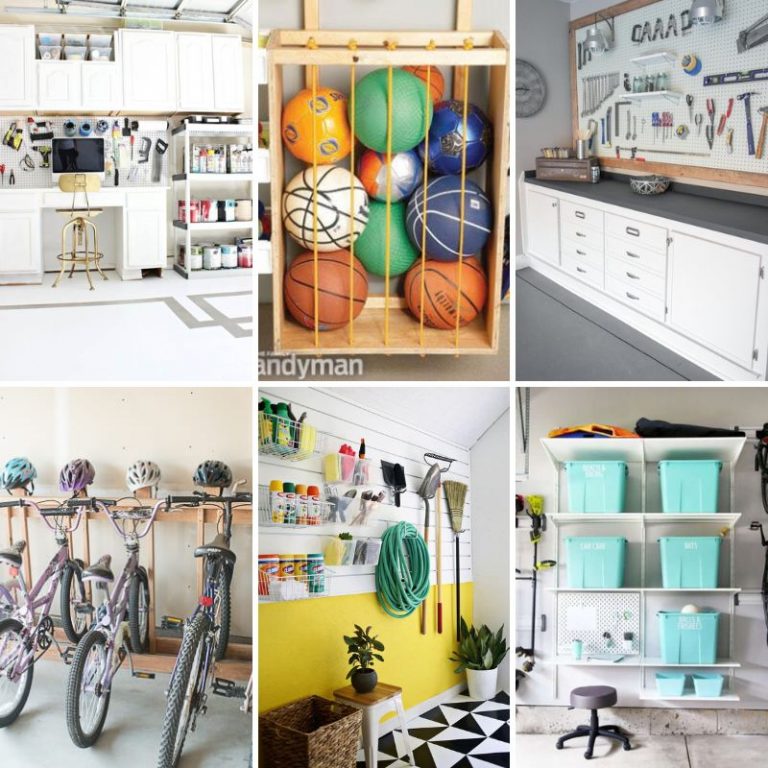
More Practical Storage Ideas
Wondering how I approach transforming rooms and spaces in our home? Check out Designer in a Binder®.

And if you want exclusive content and behind-the-scenes sneak peeks, be sure to subscribe before you head out!

Wondering how I approach transforming rooms and spaces in our home? Check out Designer in a Binder®.
And if you want exclusive content and behind-the-scenes sneak peeks, be sure to subscribe before you head out!