Our Kitchen Renovation Reveal- It’s Neutral AND Colorful
Well, y'all, our kitchen renovation is complete, and I'm so excited to share all the details with you. We changed the layout to dramatically increase our cabinet and countertop space and simplified the cabinetry so that it suits our style more. The bones of our kitchen are fairly neutral, but as a color lover, I layered in lots of gorgeous color and we couldn't be happier with how it all turned out! Whether you are just curious about how our kitchen renovation turned out or you are looking for ideas and inspiration for adding color to your neutral kitchen, I hope you enjoy!
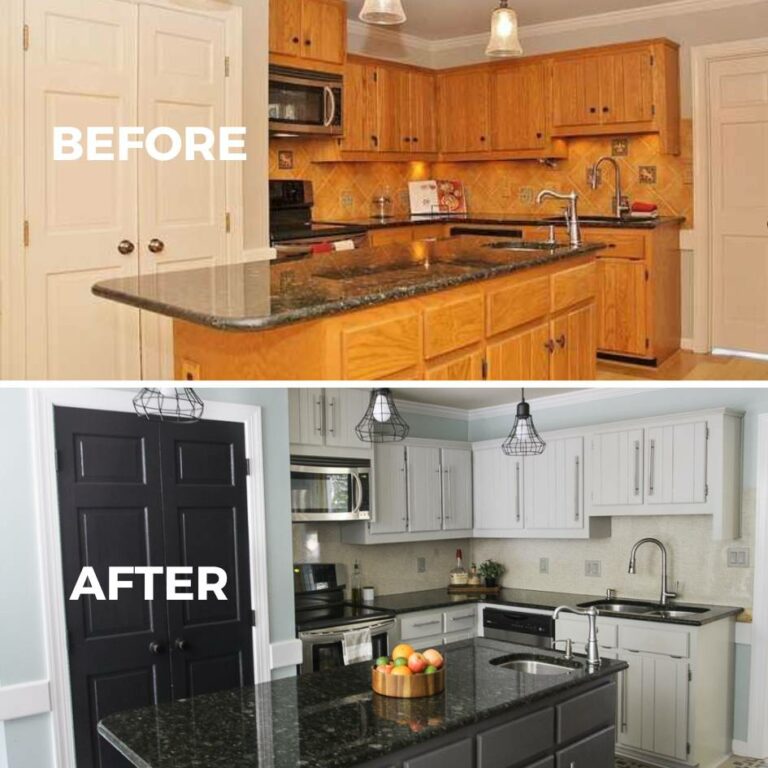
A Look Back at Our Old Kitchen
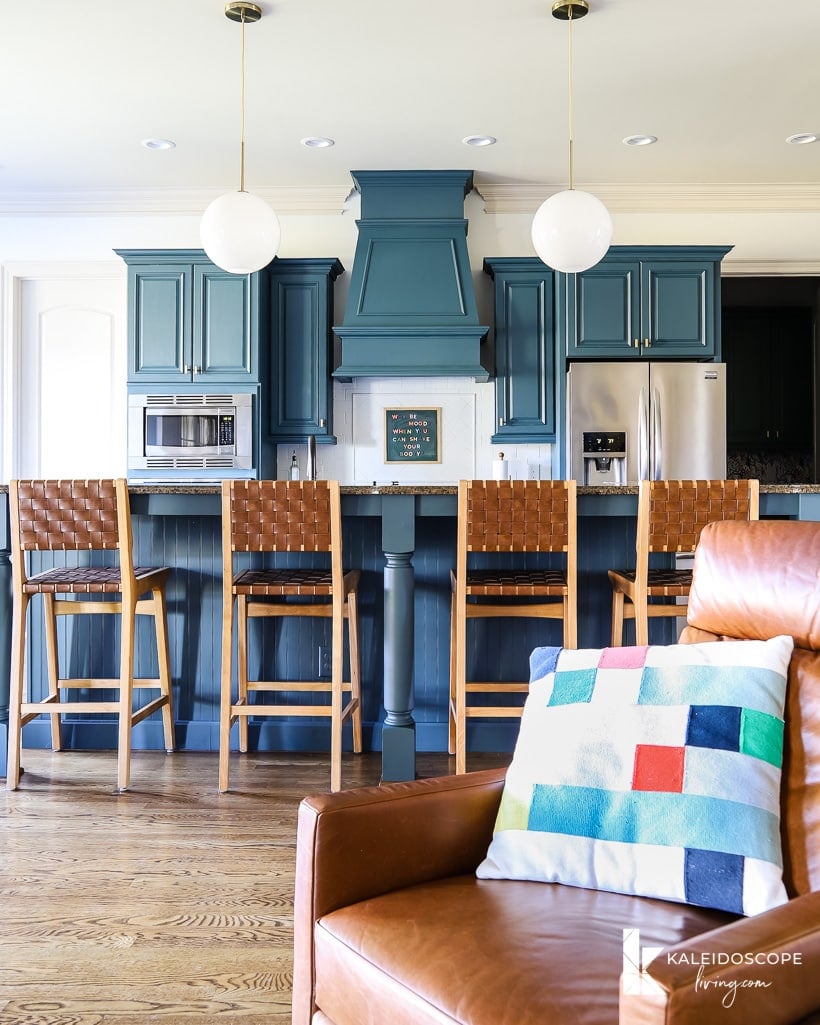
When we bought our home, it was only 8 years old (it was built in 2012). It seemed like the kitchen had decent “bones.” But we knew we wanted to make cosmetic changes to the kitchen to make it more our style. And we did! I painted the kitchen cabinets in 2-days without packing anything and painted the tile backsplash using this method. I even painted the countertops to look like marble–I recently shared how our painted kitchen countertops held up after 3 1/2 years.
Those changes made a big impact, and we were so happy with how everything turned out.
Why We Decided on a Gut Renovation
In case you missed it, I shared all of the reasons that we decided to fully renovate our kitchen in this post. You can also watch the short video below, which shows and explains things really well.
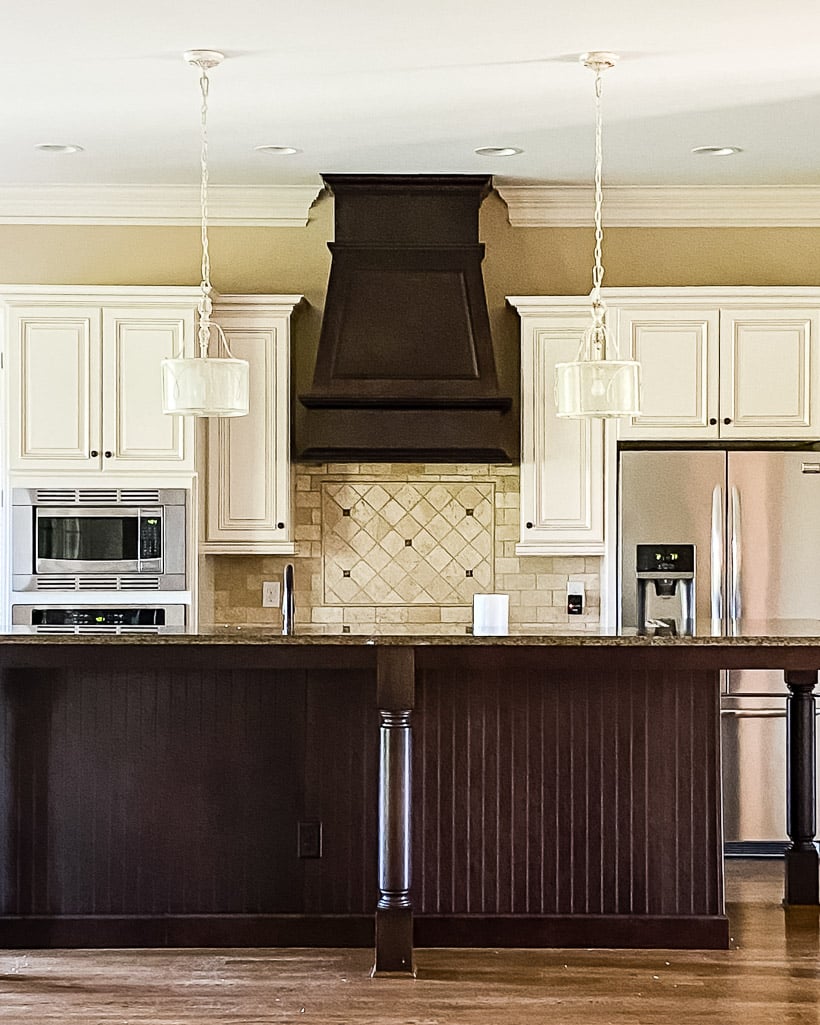
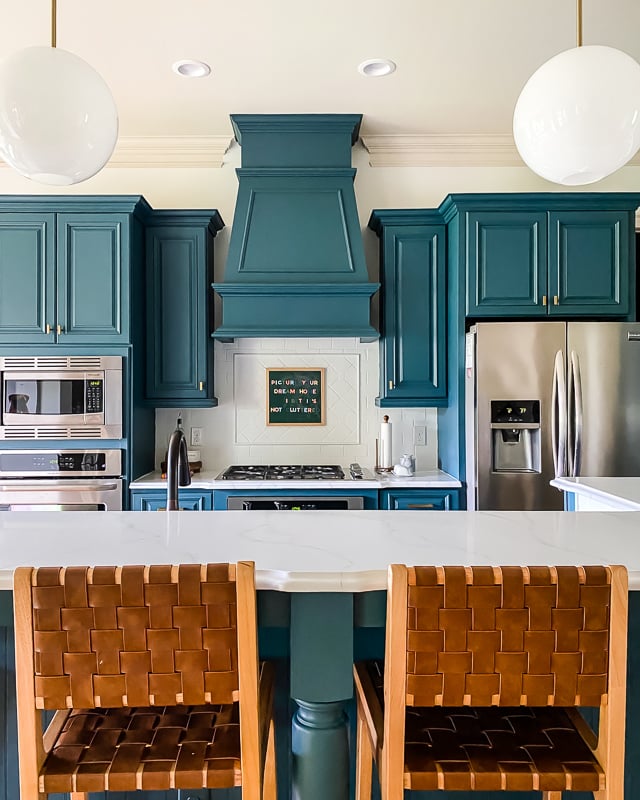
To recap, it wasn't because of aesthetics. The style of the cabinets and hood were more ornate/traditional than we like, but we would never have spent a large amount of money renovating our kitchen just to change the way it looks. With the cosmetic changes we made a few years ago, it was a pretty kitchen!
No, we decided to gut it and start over because there were a lot of functional problems (I got into much more depth in the video above, but here's a brief review):
#1 Lack of counter space for prepping and serving meals. Our largest section of uninterrupted counter space was only 3 feet wide and we only had 18 inches of counter space on each side of the cooktop, which was not even wide enough to put two dinner plates side-by-side.
#2 The appliances were 12 years old, and were starting to fail. The hood vent fan, dishwasher, one of the ovens and the ice maker in our fridge were all broken. The microwave worked but was making a scary noise.
#3 We don’t have a ton of cabinet space in the work zone portion of our kitchen. We only had two 18” upper cabinets for dish and drinkware storage and very little drawer space for cutlery and utensils.
#4 The cabinets weren't in great shape and it was time to replace the countertops. Many of the old cabinets started falling apart as soon as our contractor began removing them. We also had broken drawer slides and none of the soft-close hinges have ever worked. Our painted countertops held up remarkably well for 3 1/2 years, but it was also time to replace them (something we had always planned to do).
The Layout Changes We Made
Once we decided a full kitchen renovation was our best option, we started thinking about changing our kitchen layout to significantly increase the countertop space and cabinet storage in the kitchen's work zone. I used my Designer in a Binder to sketch some layout options, which is always incredibly helpful.
Reclaimed Underutilized Space & Created a Working Triangle
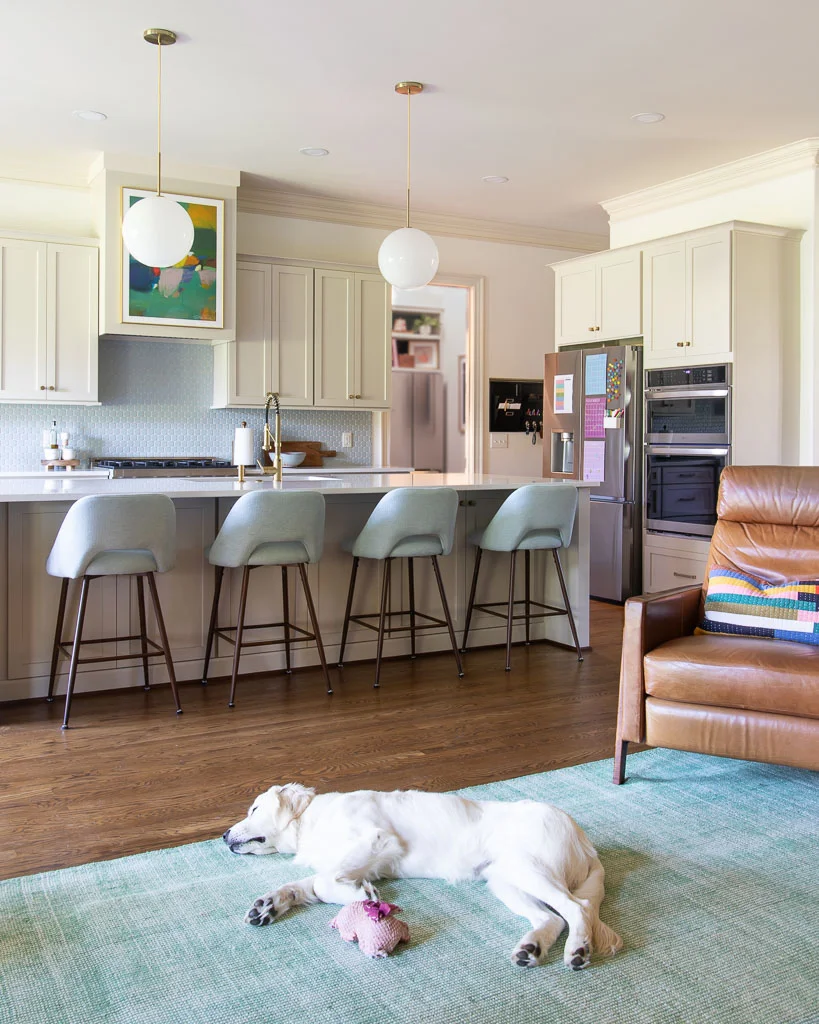
It quickly became clear that moving our oven/microwave stack and refrigerator was crucial to gaining tons of additional counter space. So we decided to move the oven/microwave combo and refrigerator to the wall where an under-utilized bank of cabinetry used to be located. You can see what I'm referring to in the photo below. As I explained in the video I shared earlier in this post, because that cabinetry isn't in the kitchen's work zone, it wasn't practical to use for prep or storing things we use daily.

By moving the refrigerator and microwave/oven stack to that wall, the formerly useless area has now become part of the working zone of the kitchen. In fact, we now have a proper “working triangle.”
Exponentially Increased Our Counter Space
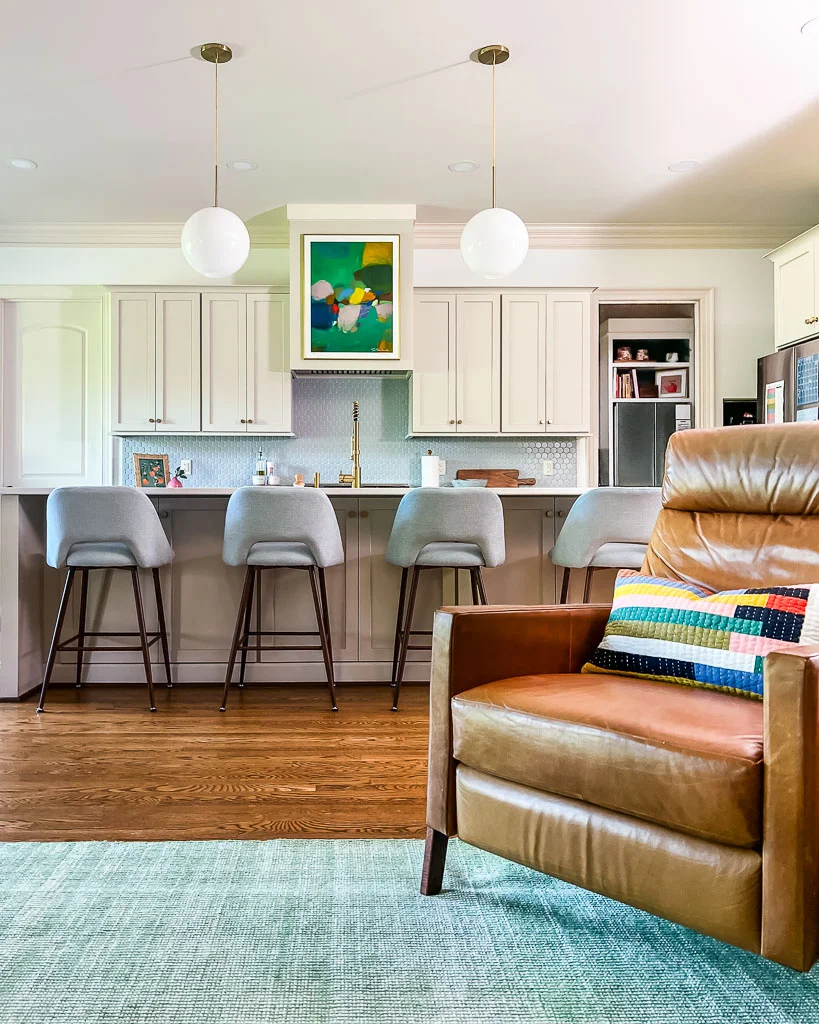
As I mentioned earlier in this post, we only had 18″ of countertop on each side of the cooktop and 36″ to the side of the sink on the main level of the island. With our new kitchen layout, we have a whopping 54″ on each side of the range and 42″ on each side of the sink. And now that the entire island is a single level, we also have 120″ of counter space on the island that we didn't have before (because the second level was at bar height and was only useful for seating/eating).
I cannot tell you how much the increase in counter space has improved the flow and capacity of our kitchen! We cook 95% of our meals at home and now several people can be in the kitchen cooking/prepping/cleaning simultaneously. It is life-changing.
This post contains affiliate links for your convenience. Click here for my full disclosure policy.
Increased & Improved Our Cabinet Storage
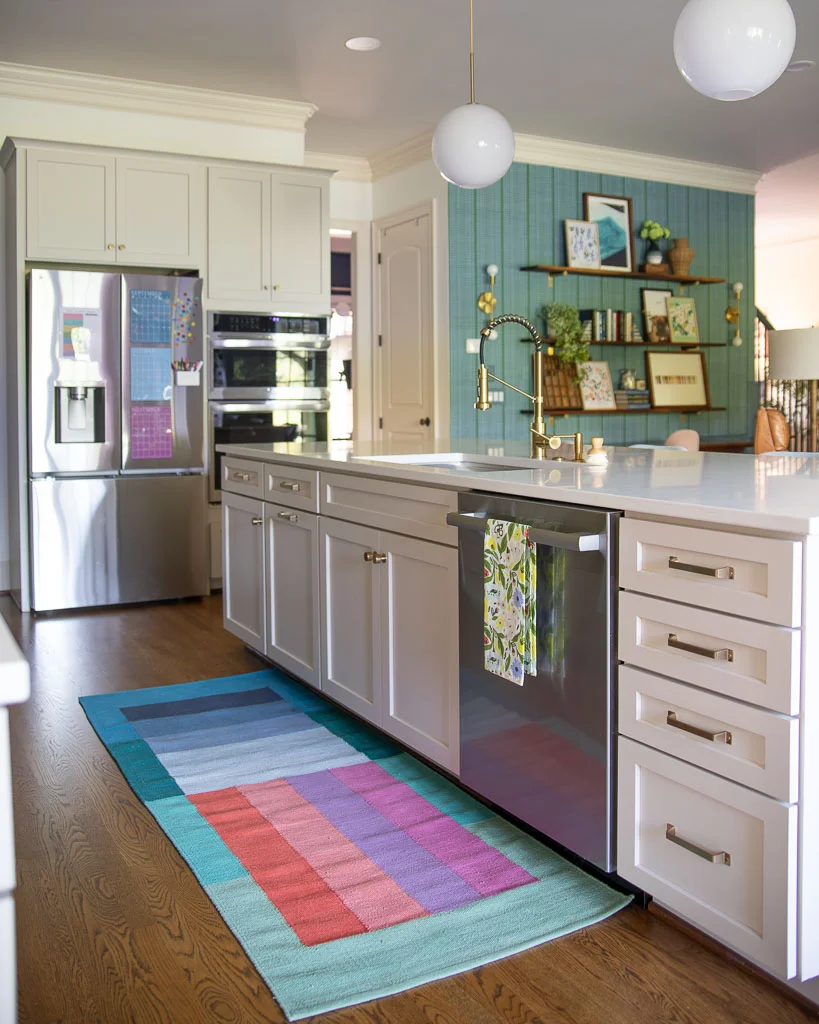
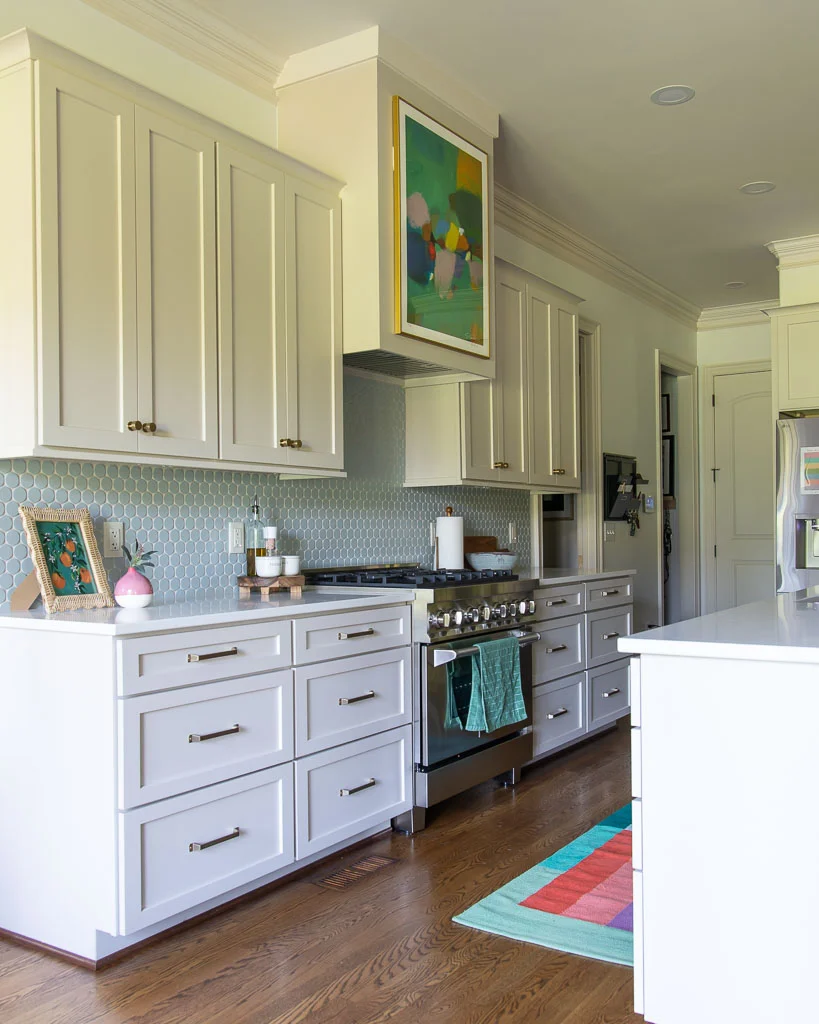
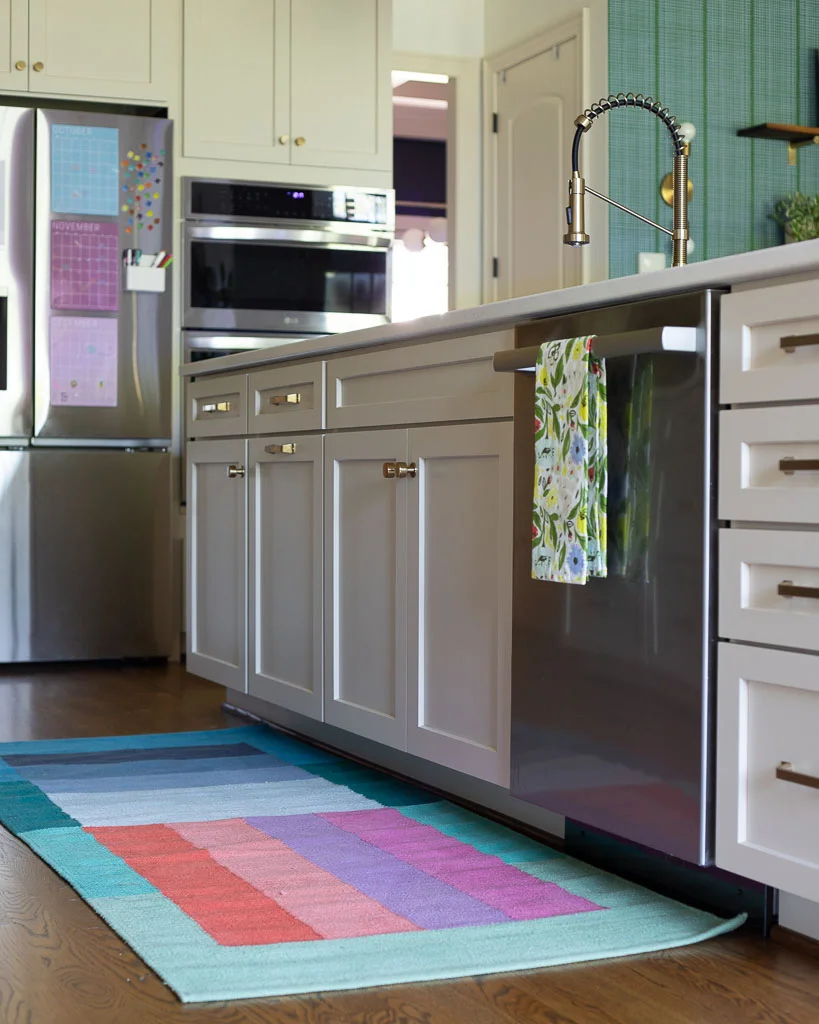
We also drastically increased the storage in the working portion of our kitchen. Instead of two 18″ upper cabinets, we now have FOUR 27″ upper cabinets, which is life-changing. Yes, that's the second time I have used that phrase because though it sounds dramatic, it's true. You may also notice that we chose simple shaker style cabinetry, which is much more our style than the old cabinetry that was more ornate.
We chose to have drawers in all four base perimeter cabinets, which we strongly prefer for storing everything from pots and pans to Tupperware. We also have a lot more top drawer space for our utensils and cutlery now. We were even able to move our spices into a kitchen drawer (we used to have to store them in our pantry).
We also gained a lot of cabinetry by leveling out the island. The working side of our island has one additional cabinet, and two of the island cabinets are larger than what we had before. We also decided to add cabinets along the entire non-working side of our island, so all of that storage is new! Most of those cabinets are empty, but they are perfect for some of our dog items and the few vases we have.
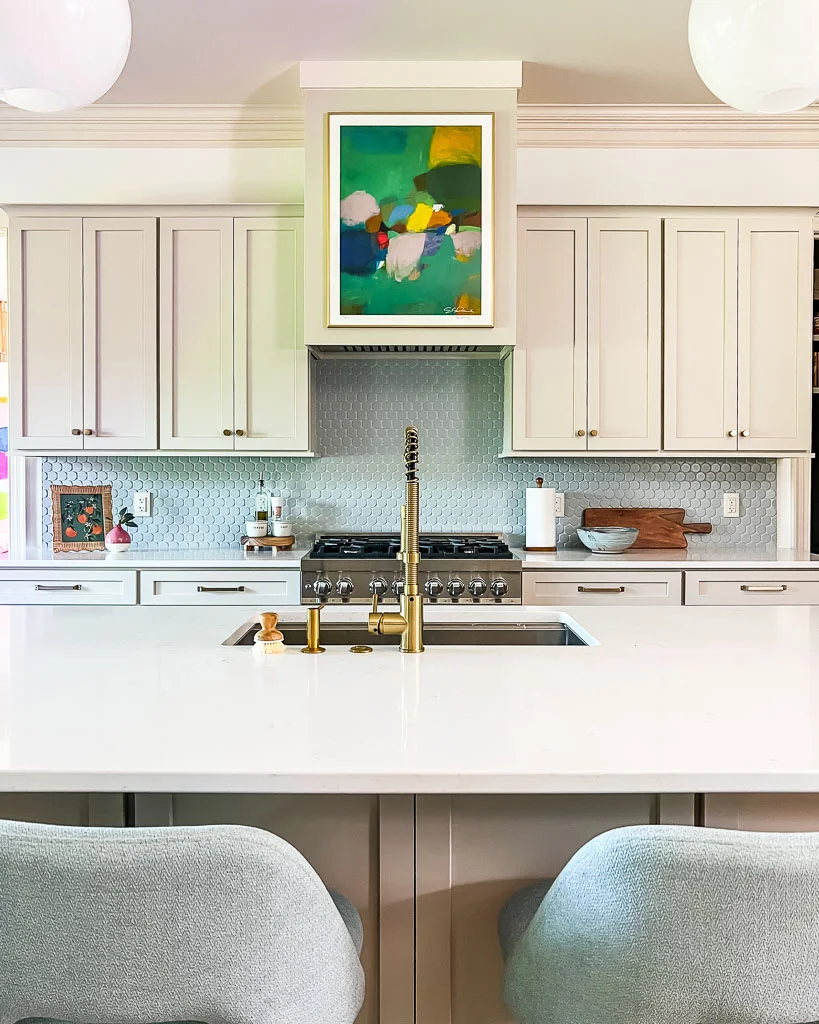
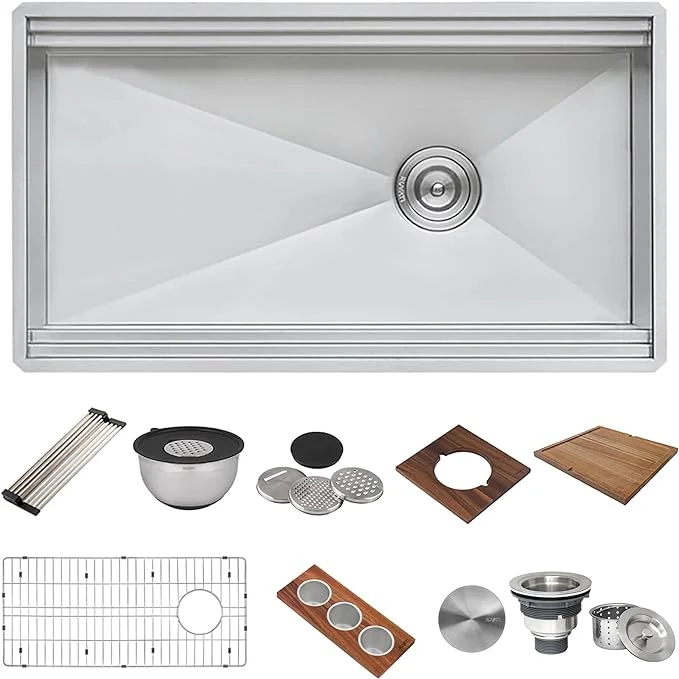
And not one single person asked me, but I have to tell you how much I love our affordable work station sink. We had the much more expensive Kohler Prolific workstation sink installed in the kitchen in our last home and loved it, but I hunted down a more affordable option this time. And I like it even more! I also think it's much prettier. We have the 33-inch version, but it comes in other sizes and includes so many accessories (cutting board, colander, mixing bowl, 3 bowl serving board, drying rack and more–see the photo below).
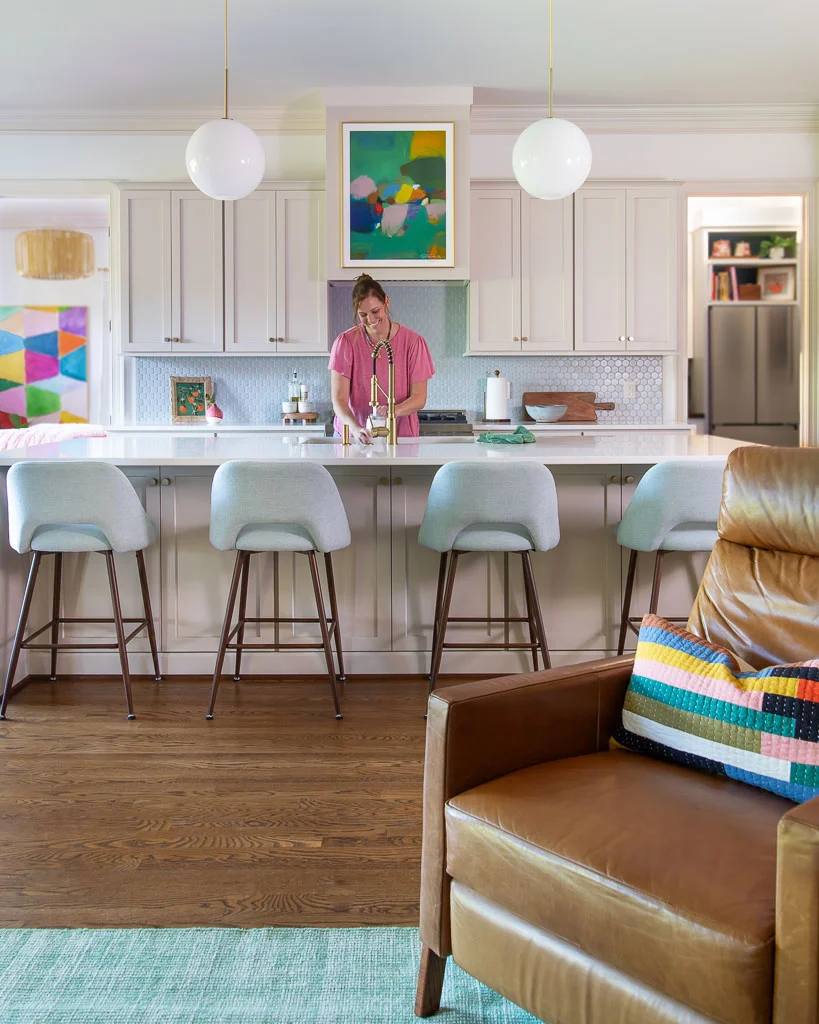
The Neutral but Colorful Design
I wrote a whole post about the design plan for our kitchen–in it, I give a detailed explanation of my design process and reasoning for our neutral but colorful kitchen. I also explain it in the short (less than 5-minute) video below.
We intentionally chose neutral “bones” for our kitchen, because I love how color pops against neutral backdrops. And as a practical matter, choosing neutrals for expensive items like cabinetry and furniture gives us flexibility if we ever want to change the color palette in a space.
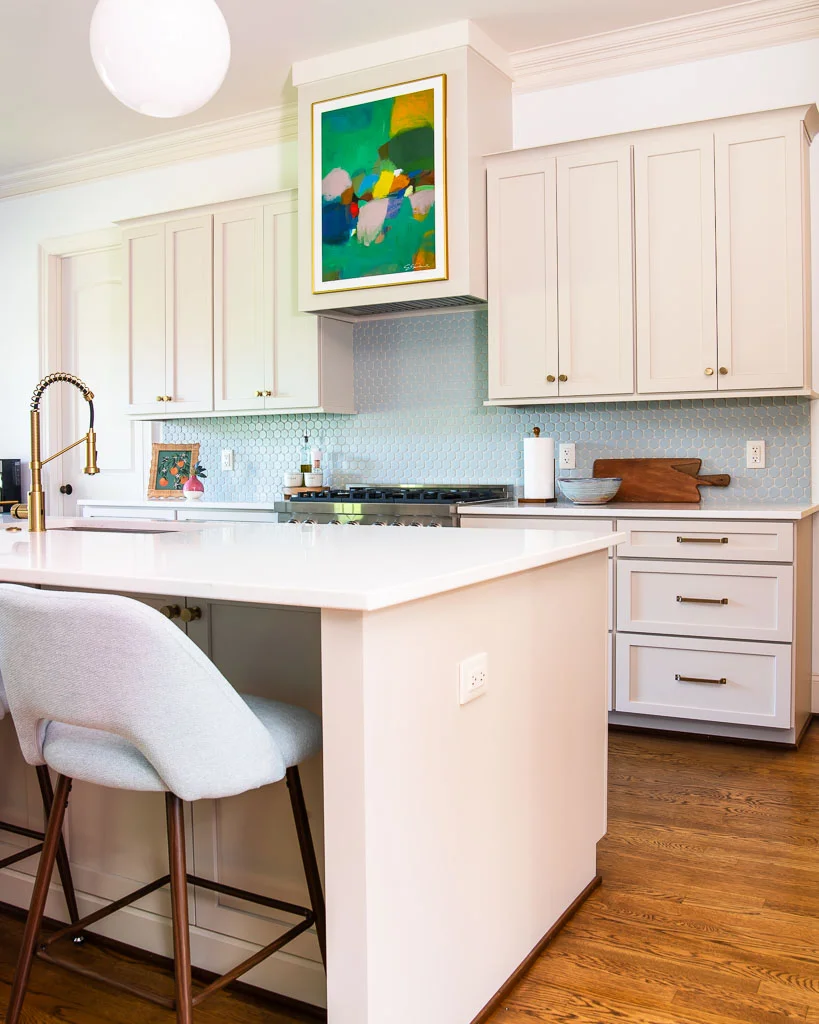
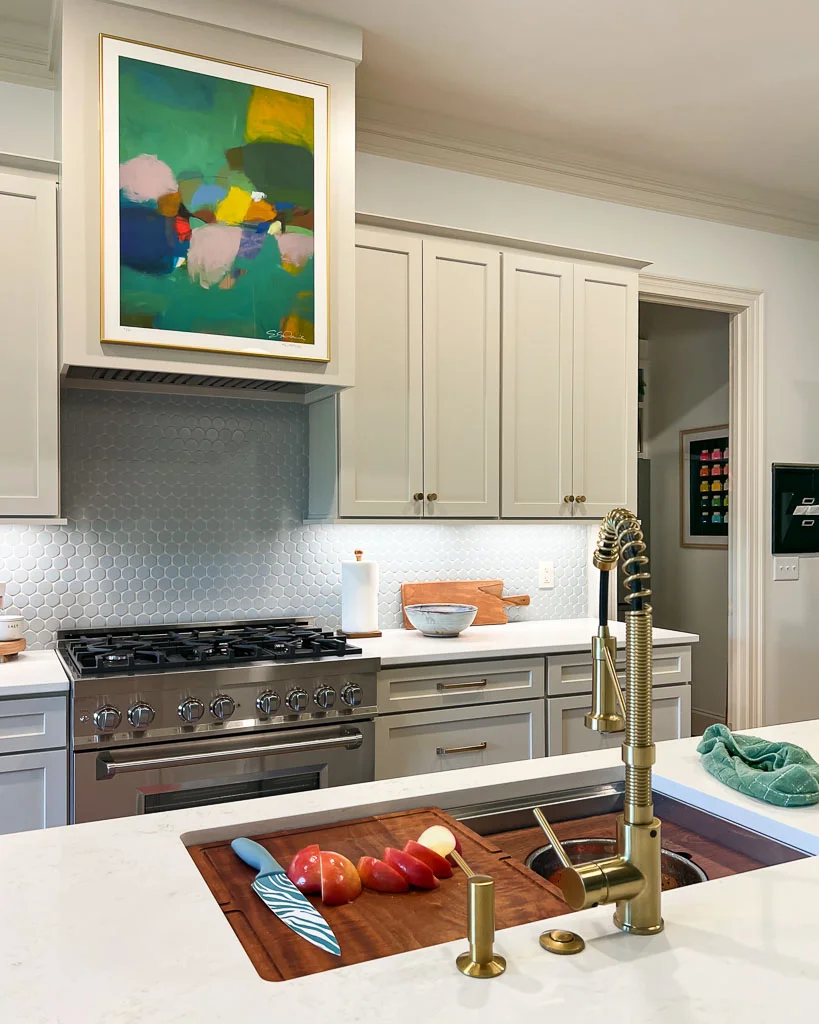
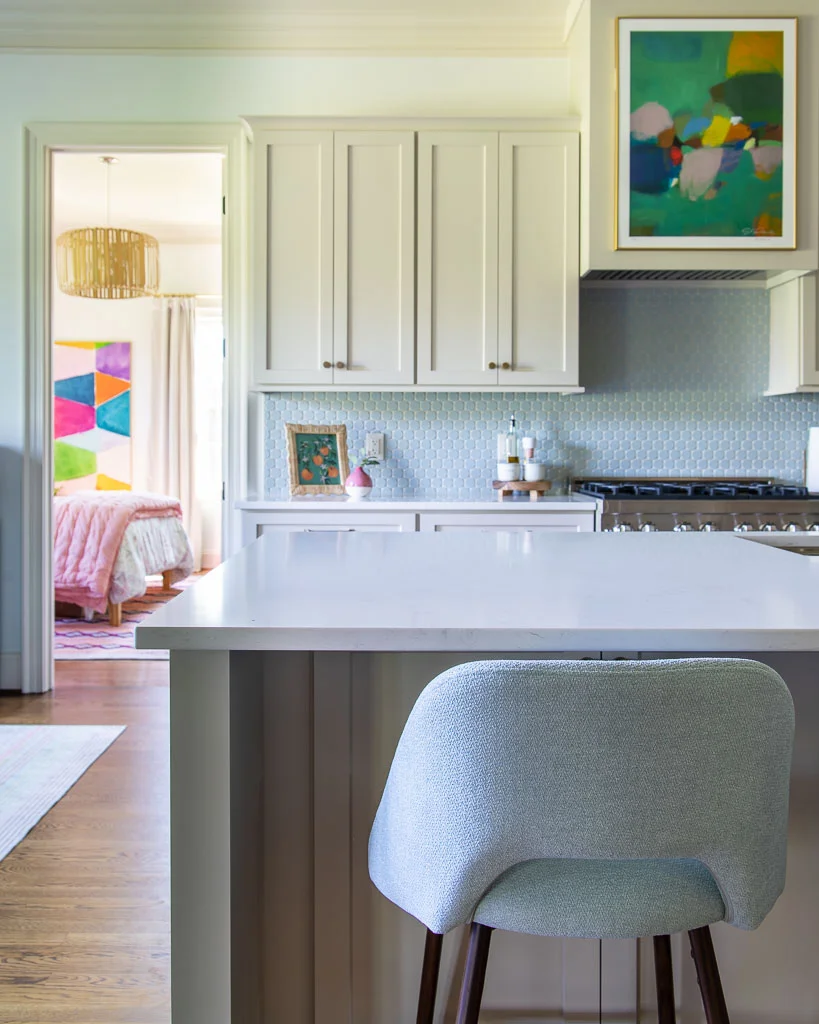
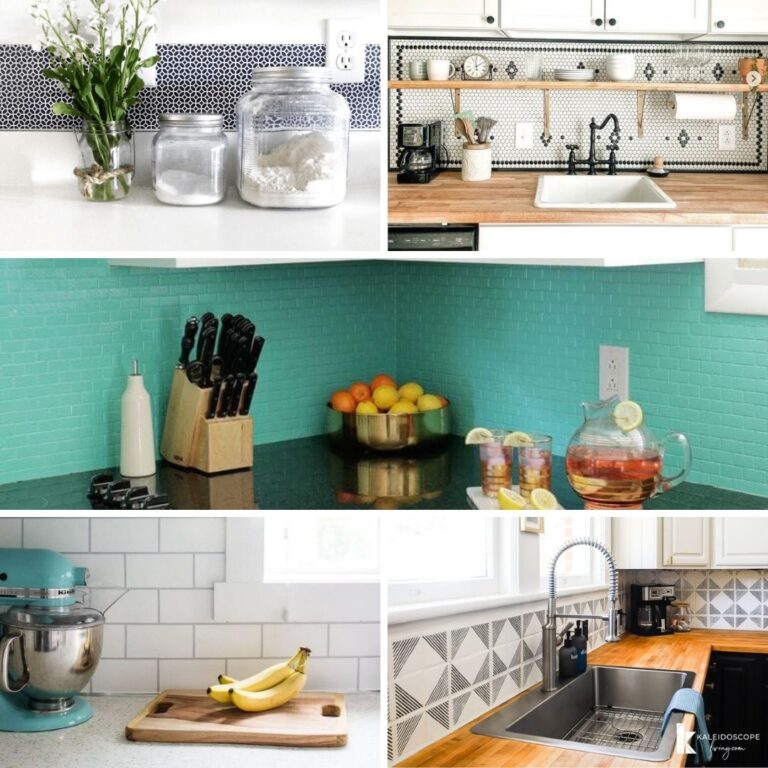
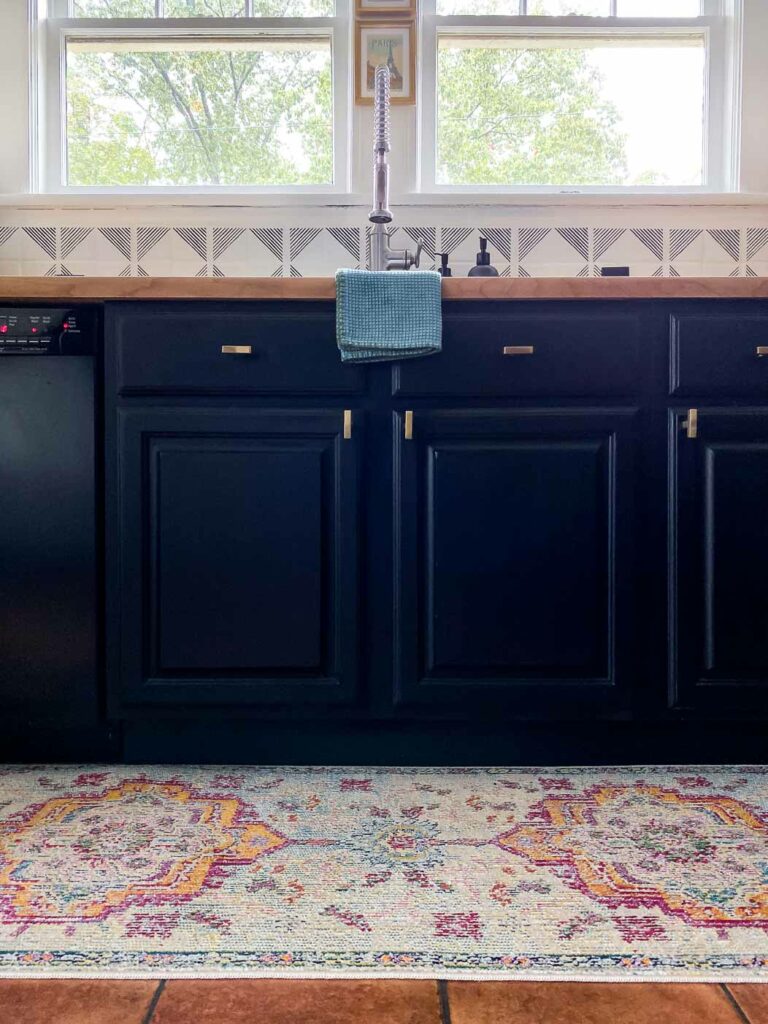
We chose Accessible Beige by Sherwin Williams for the simple shaker cabinetry. Accessible Beige is one of my favorite neutral paint colors for kitchen cabinets. And we chose this light-blue oversized penny tile for the backsplash, which is also fairly neutral.

I layered color into the kitchen by adding a colorful kitchen runner that we've had for years and I'm thrilled to be able to use it again. And little touches like a bud vase, framed orange blossom print and a colorful tea towel weave small doses of color throughout the space.
But the crown jewel and color hero in our new kitchen is the colorful abstract art print by my favorite artist, Eleanor Scott Davis. I finally scored this art print when she launched her most recent collection. I had to set an alarm on my phone and purchased it within 1 minute of the launch to ensure I got one this time. Turns out I was the fastest because my signed and numbered print is # 1 of 50.
Our New Kitchen Sources
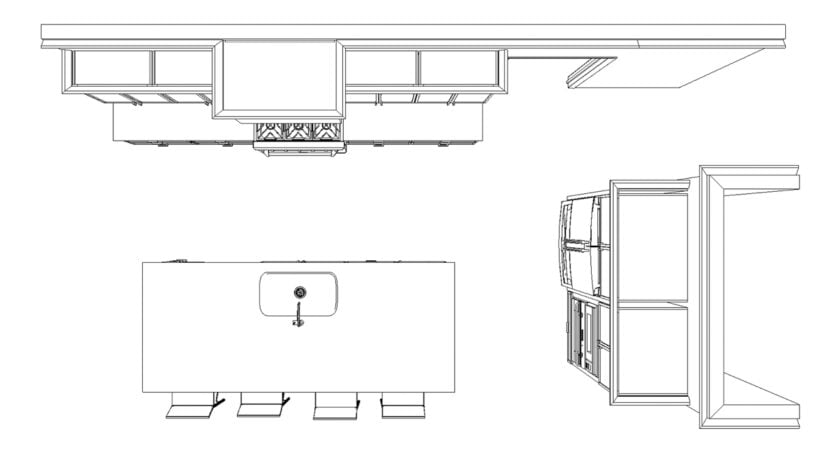
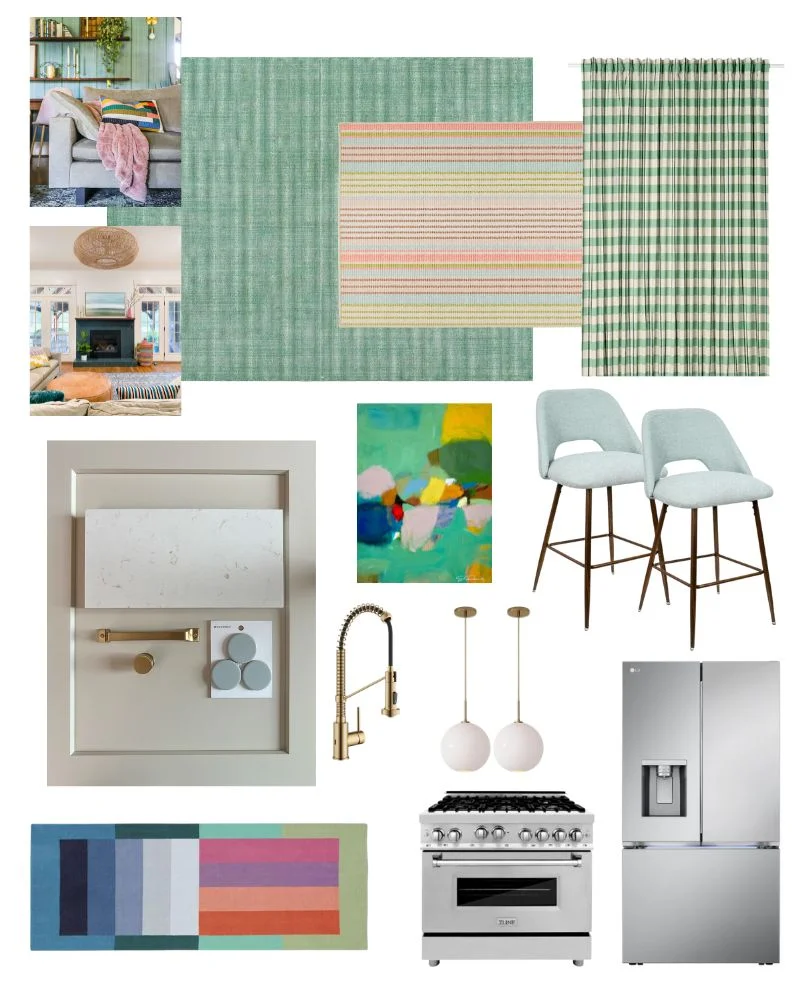
We reused some old items (like the color block runner) that we have had for many years and are no longer available. But I've linked to as many sources as possible for you below the mood board that I created as we planned for our renovation. Note that our kitchen is open to our family room and eat-in kitchen area, so the mood board and sources include some things for those adjoining spaces. Side note–I have a whole blog post on how to create a mood board for free and with no design skills.
PAINT COLORS
- Cabinetry color is Accessible Beige by Sherwin Williams
- Wall color is Pure White by Sherwin Williams
- Trim color is Divine White by Sherwin Williams
RUGS & CURTAINS
- Green check curtains (they are also available here on Amazon)
- Green area rug in our family room
- Ticking stripe area rug
- Colorblock runner in front of kitchen sink (no longer available–we purchased it years ago from West Elm)
FIXTURES & HARDWARE
FURNITURE & ACCESSORIES
- Counter stools
- Floral tea towel & pink bud vase are old and no longer available
- Abstract art print by Eleanor Scott Davis
- Scalloped wicker frame on countertop
- Orange blossom art
TILE, COUNTERS & APPLIANCES
- Light blue oversized penny tile on backsplash
- Countertop: quartz Aspen Gold
- Counter-depth refrigerator
- 36-inch Dual Fuel Range
Well, that's it y'all! Thank you to everyone who followed along and cheered us on as I shared daily updates on Instagram–that made it more fun! I hope to share more about how we organized our kitchen cabinets and drawers soon because we did a lot of research and put A LOT of thought into it, lol! Now that we have the cabinet and drawer space we have craved for so long, we wanted to be sure to make the most of it.
Any questions?! Ask away in the comments or DM me on Instagram.
More Kitchen IDEAS
Wondering how I approach transforming rooms and spaces in our home? Check out Designer in a Binder®.

And if you want exclusive content and behind-the-scenes sneak peeks, be sure to subscribe before you head out!

Gorgeous kitchen! Very impressive gaining so much counter space and function. I too am a big fan of neutral hard finishes and then adding lots of color. Could you share more detailed info about your countertops? Brand?
Thank you! It is a quartz. I believe it is made by VICOSTONE and is called Aspen Gold. I hope that helps!
Sink envy, lol.
Such a wonderful update-thank you for sharing!
Thank you Ann. I am so glad you liked it.
Tasha, your old kitchen was very pretty,but the new one is a showstopper. I’m having a problem deciding which part is my favorite, i love it all.
When we built our house, we found out we basically got the lowest sale price and extra discounts bundling our appliances from Best Buy. Surprised? So was I, but it saved us hundreds of dollars!! If you find a model you like, do a search @ Best Buy by model number. Also, we delayed delivery by several months. Definitely a pleasant surprise, but a win is a win!!
Hi JoAnn- We bought our appliances for our kitchen in our last home from Best Buy and we were also pleasantly surprised.
Your kitchen looks great! What size pendants did you use, the 11 or 13″? Doing a renovation now.
Hi Angei- We used the 13″ pendants.
I love your renovation. So practical and as you said neutral. I can totally understand why you won’t take it for granted, too, with all the devastation others have been facing. Enjoy it.
Thank you so much, Tena!
Your kitchen reno is beautiful. Were you able to stay in budget or were there some surprises? I think that’s what keeps me from doing anything major especially with our almost 50 year old house.
Hi Nikki! We actually came in a bit under budget by purchasing 2 of our major appliances at a Lowe’s Outlet (ding and dent). The quote for all the work done by the contractor was very accurate and we were confident it would be because he renovated the kitchen in our old house as well. The best contractors will almost certainly be the most expensive BUT their quotes should be very, very accurate barring any huge surprises. I hope that helps!
The kitchen looks beautiful! Love the color choices and redesign of the area. We recently demoed our island for similar reasons and added a nearly identical sink!
Thank you so much, Kelly! I hope you love your sink as much as we love ours!