DIY Photo Canvas Prints With Authentic Texture
Do you have a favorite photo that you would love to display in your home but can't find the perfect frame? Or do you want to turn a photo into a canvas on a budget? You can add a photo to a canvas to make your own DIY photo canvas with authentic canvas texture! Not only is it a great way to showcase your favorite memories, but it also adds a personal touch to your home decor. Learn just how easy it is to create your own DIY photo canvas with this step-by-step tutorial!
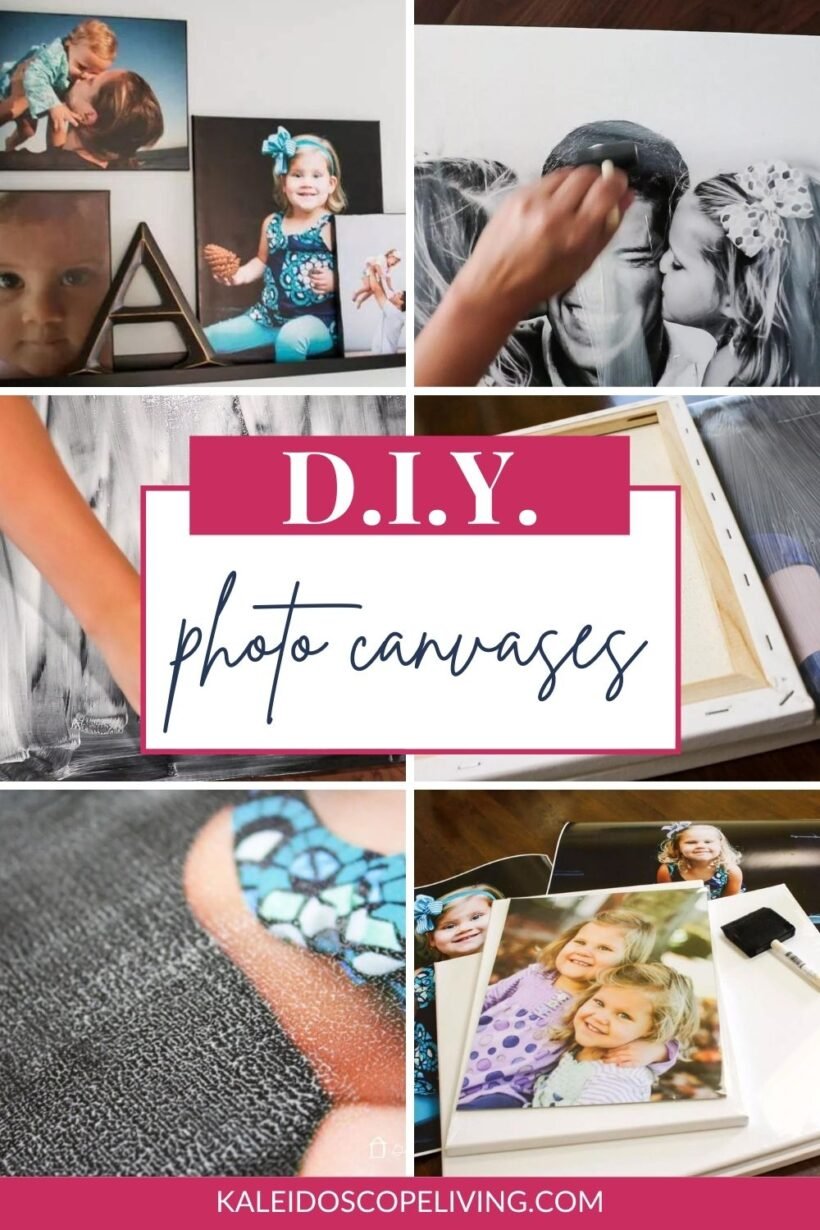
If you have ever wondered “can you turn a printed photo into a canvas?” or “how do I turn a print into a canvas?” you are in the right place! Sure, there are lots of places where you can upload a photo and have it printed onto a canvas, but that can be surprisingly expensive!
I have been making my own photo canvas prints by adding a photo to canvas for years! They are one of my favorite ways to display family photos. They are fun and easy to make, and they are an incredibly affordable option. So get those awesome photos off your phone or computer and start displaying them on your walls! Once you learn how to make your own DIY photo canvas, you will be hooked :)
This post contains affiliate links for your convenience. Click here for my full disclosure policy.
You can subscribe to get FREE printable instructions for this project!
Materials Needed
- Blank canvases
- You can also upcycle old canvases that you have around your house or buy at Goodwill!
- Enlarged photo prints on photo paper (I get mine enlarged at Costco's photo lab) by a photo lab
- I do NOT recommend this method for photos printed at home. Also, do not get “poster prints” from office supply stores–those are printed on banner paper and that paper will peel.
- Mod Podge Matte Finish
- Foam brushes
- Black acrylic paint (latex, chalkboard, etc. are all fine to use)
- Exacto knife / craft knife
- Cutting board
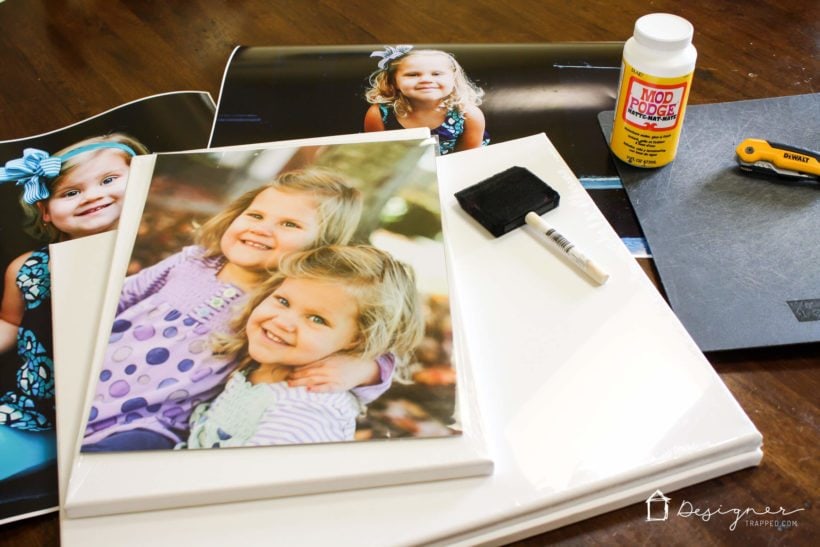
How to Add a Photo to a Canvas to Create a DIY Photo Canvas: A Step-by-Step Tutorial
For this tutorial, you will essentially be gluing a photo to a canvas and then adding texture on top of it. This is the most affordable way I have found to create photo canvases! If you prefer video tutorials, the short video below gives a GREAT overview of this project. It will play after a short ad.
Time needed: 20 minutes
Making your one DIY photo canvas takes about 20 minutes (excluding drying time).
- Have your photos professionally printed.
First, choose the photo you want to create your canvas with and have it enlarged and printed to your chosen size at a photo lab on photo paper. I do not recommend printing them at home–I've heard from many, many people telling me the Mod Podge smeared their photos that were printed at home (even if printed on nice photo paper). Also, make sure they are not printed on “banner paper” (which is often used at office supply stores like Office Depot and Staples). For this tutorial, I chose to focus on professional photos that were taken of my girls on the steps of a lighthouse this fall. I LOVE these photos, so I went with a nice, large size–16 x 20. I had mine blown up at Costco for $5.99 each.
- Paint your canvas (optional).
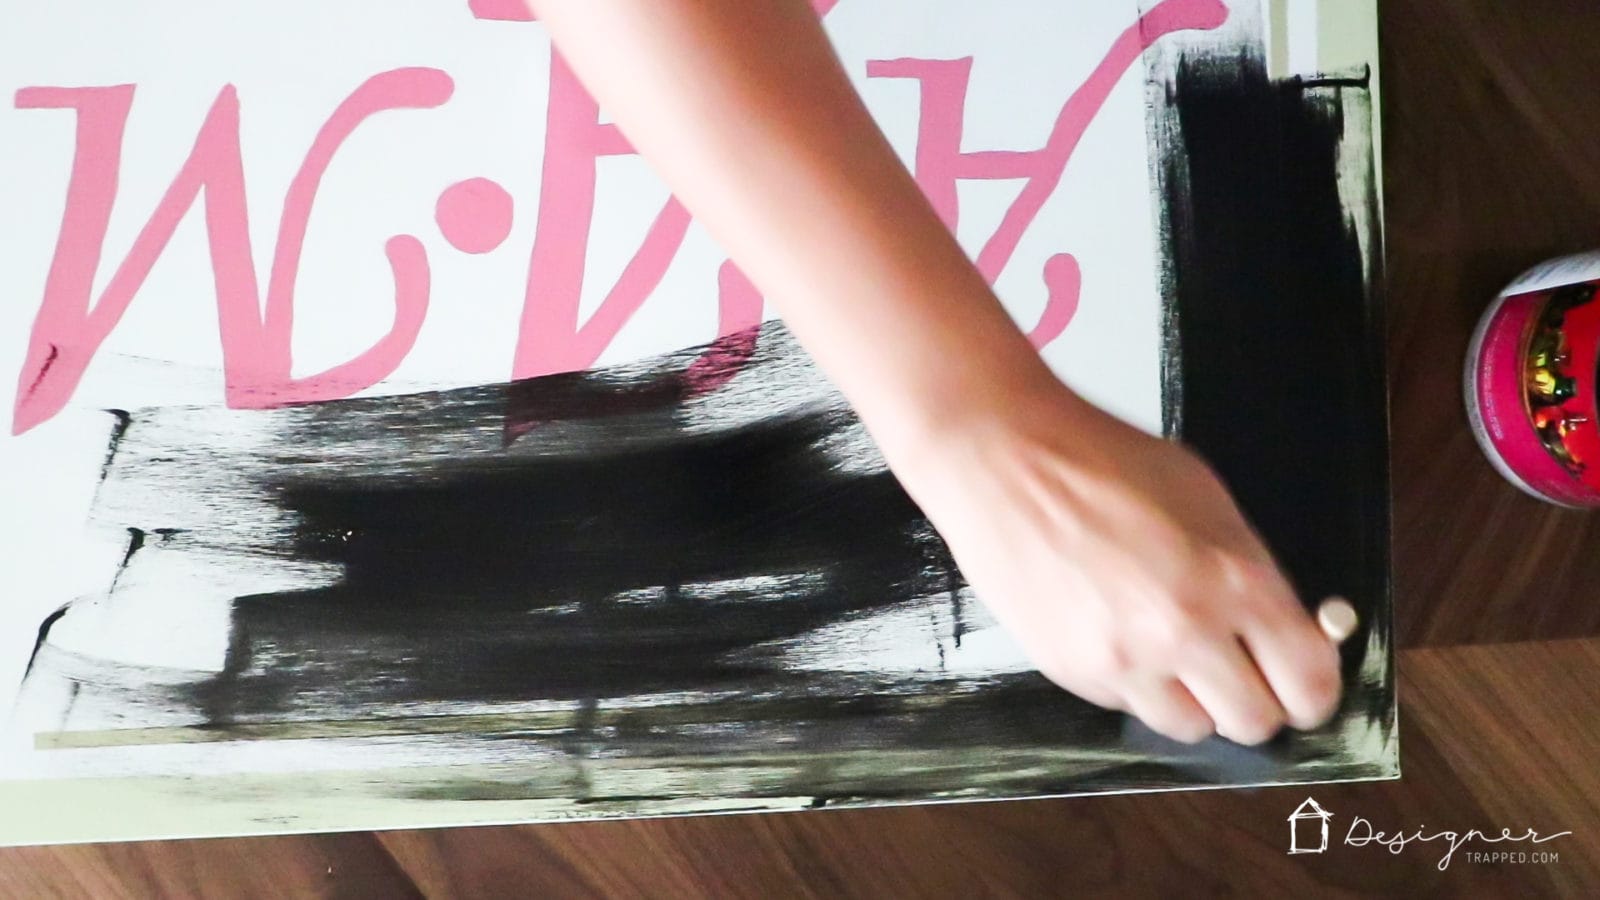
Buy a blank canvas in a whatever size(s) correspond with the photos enlargements you have made. Since my photos are 16 x 20, I purchased a 5-pack of 16 x 20 canvases on sale at Michael's Crafts for $15.00. Paint the sides of the canvas of the canvas with black acrylic paint if you want to–this is totally optional, I just think it gives a more finished look. If you are upcycling an old canvas, paint the entire canvas black. That's what I did for mine!

- Coat your canvas with Mod Podge.
After your paint dries (if you painted your canvas), use your foam brush to coat the front of the canvas with a layer of Mod Podge. Mod Podge is very similar to glue, but is used for decoupage projects.

- Apply your photo on top of the Mod Podge.
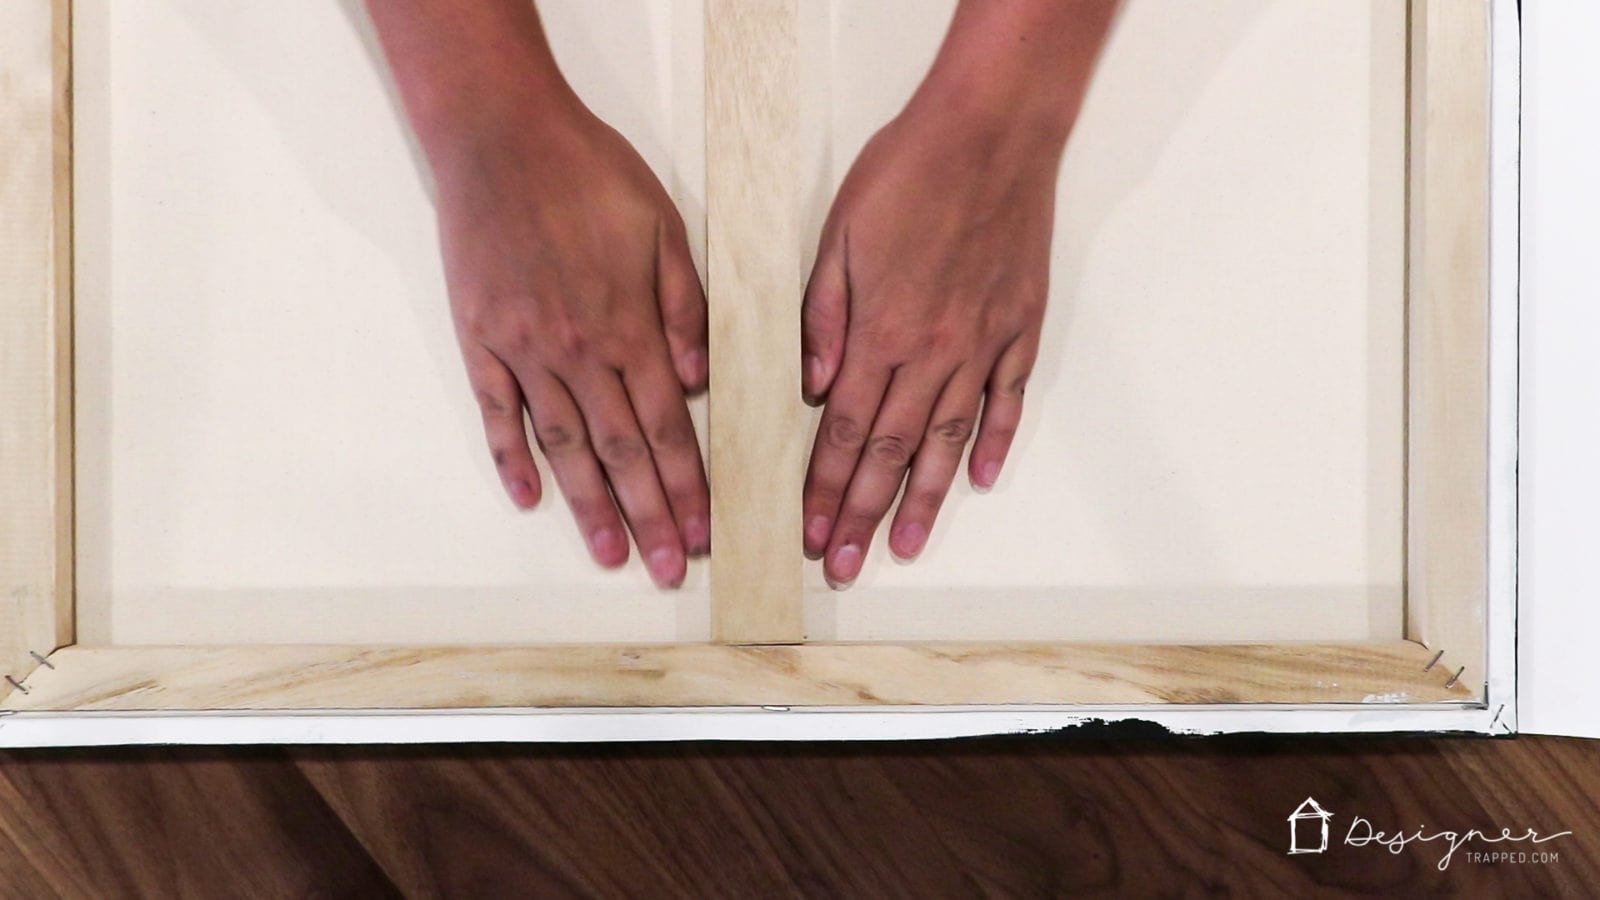
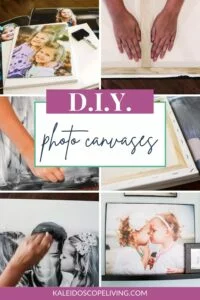
While the Mod Podge is still wet, place your photo with the photo side facing up on top of the wet Mod Podge. Use your hands to press it on, being careful to make sure it's straight. Then flip the canvas over and continue to press/ flatten it with your hands to ensure that it adheres nicely and to smooth out any air bubbles. If you have a brayer, you could use it for this part.

- Let it dry overnight.
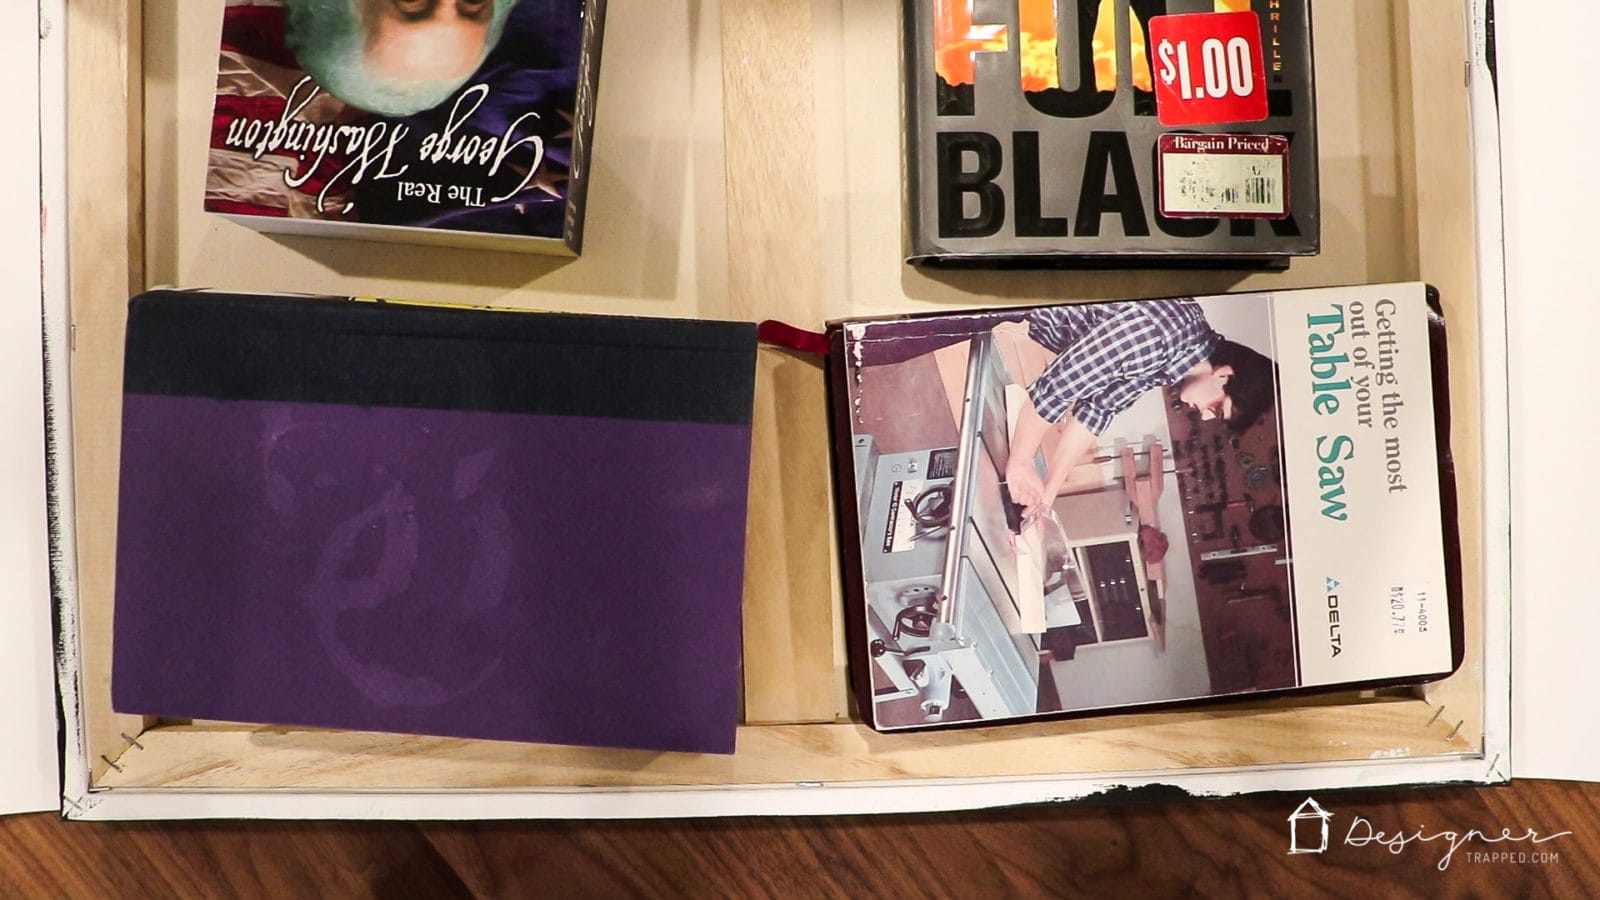
Leave your canvas upside down and place some books on top of it to ensure you photo doesn't wrinkle as the Mod Podge dries. Allow it to dry overnight.

- Trim off any excess photo paper.
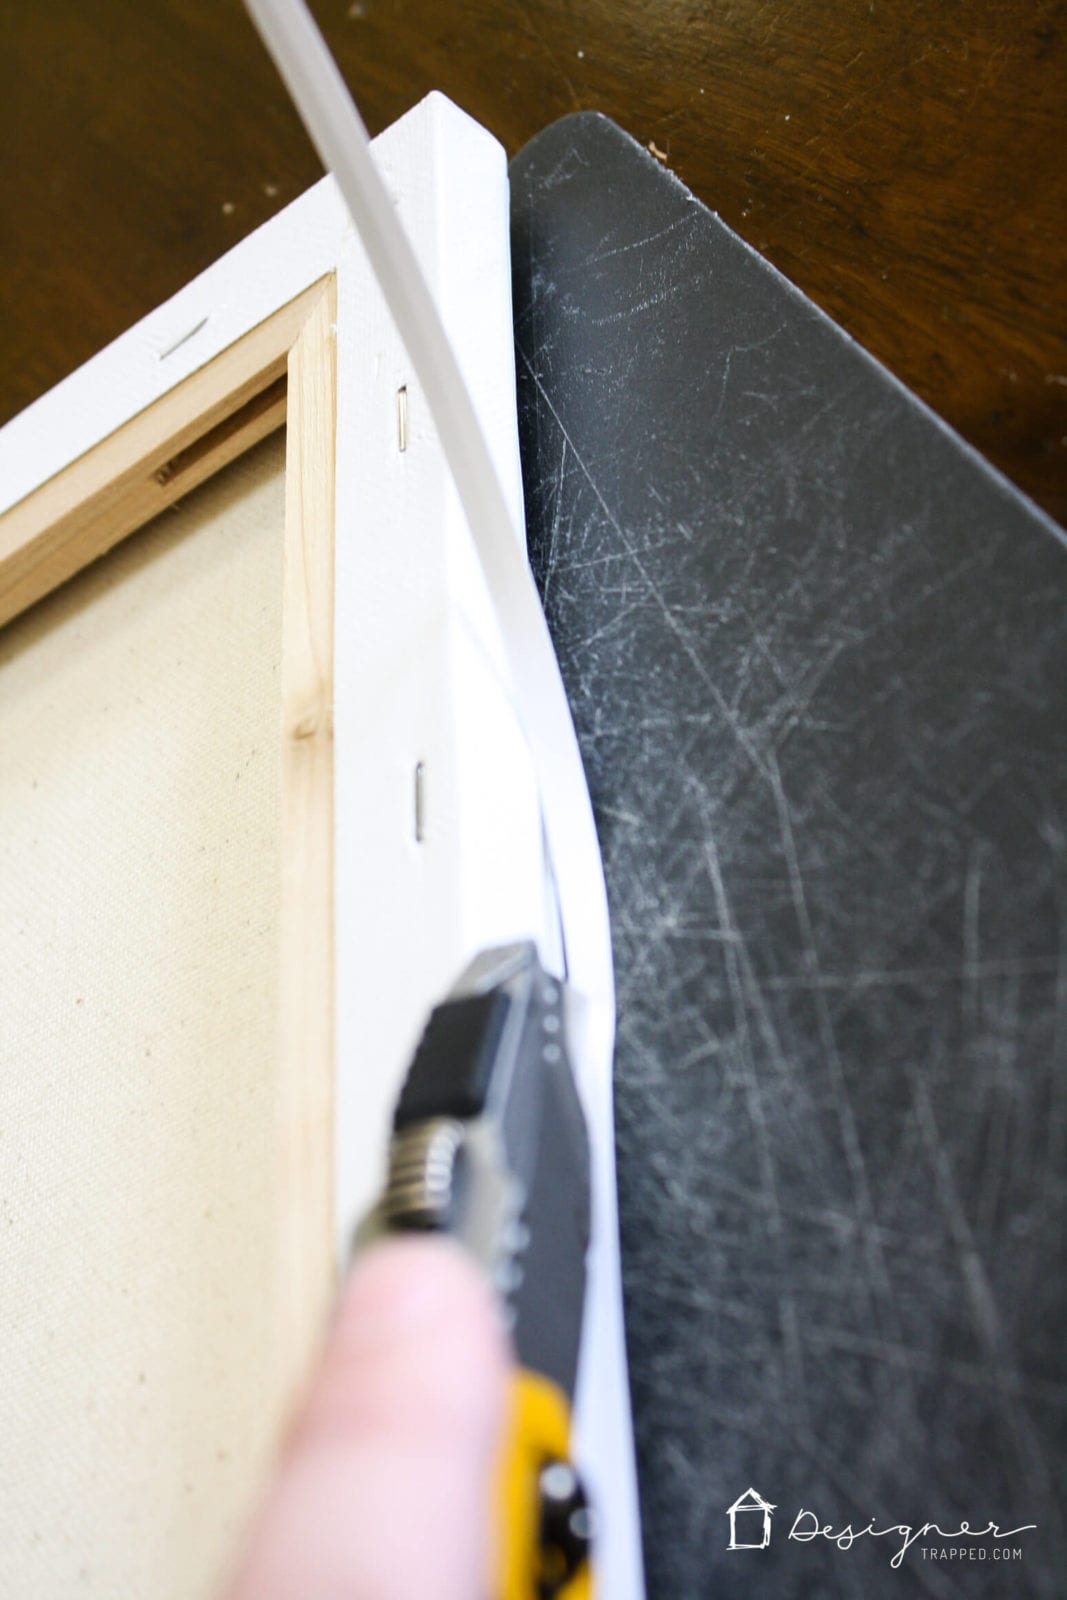
After it dries, you will have to cut off any portion of the photo that is overhanging the canvas. My enlargements from Costco are always a tiny bit larger than my canvases. No problem. Flip the canvas over and grab your Exacto (or utility) knife and cutting board. Using the edge of the canvas as your guide, cut off any portion of the photo that is overhanging the edge of the canvas with your utility knife.

- Add your texture!
Next is the fun part, but you have to have a little faith that this is all going to work out. You are going to “stamp” that canvas texture right on to your photo. THIS TOTALLY MAKES THIS PROJECT so don't stop now.
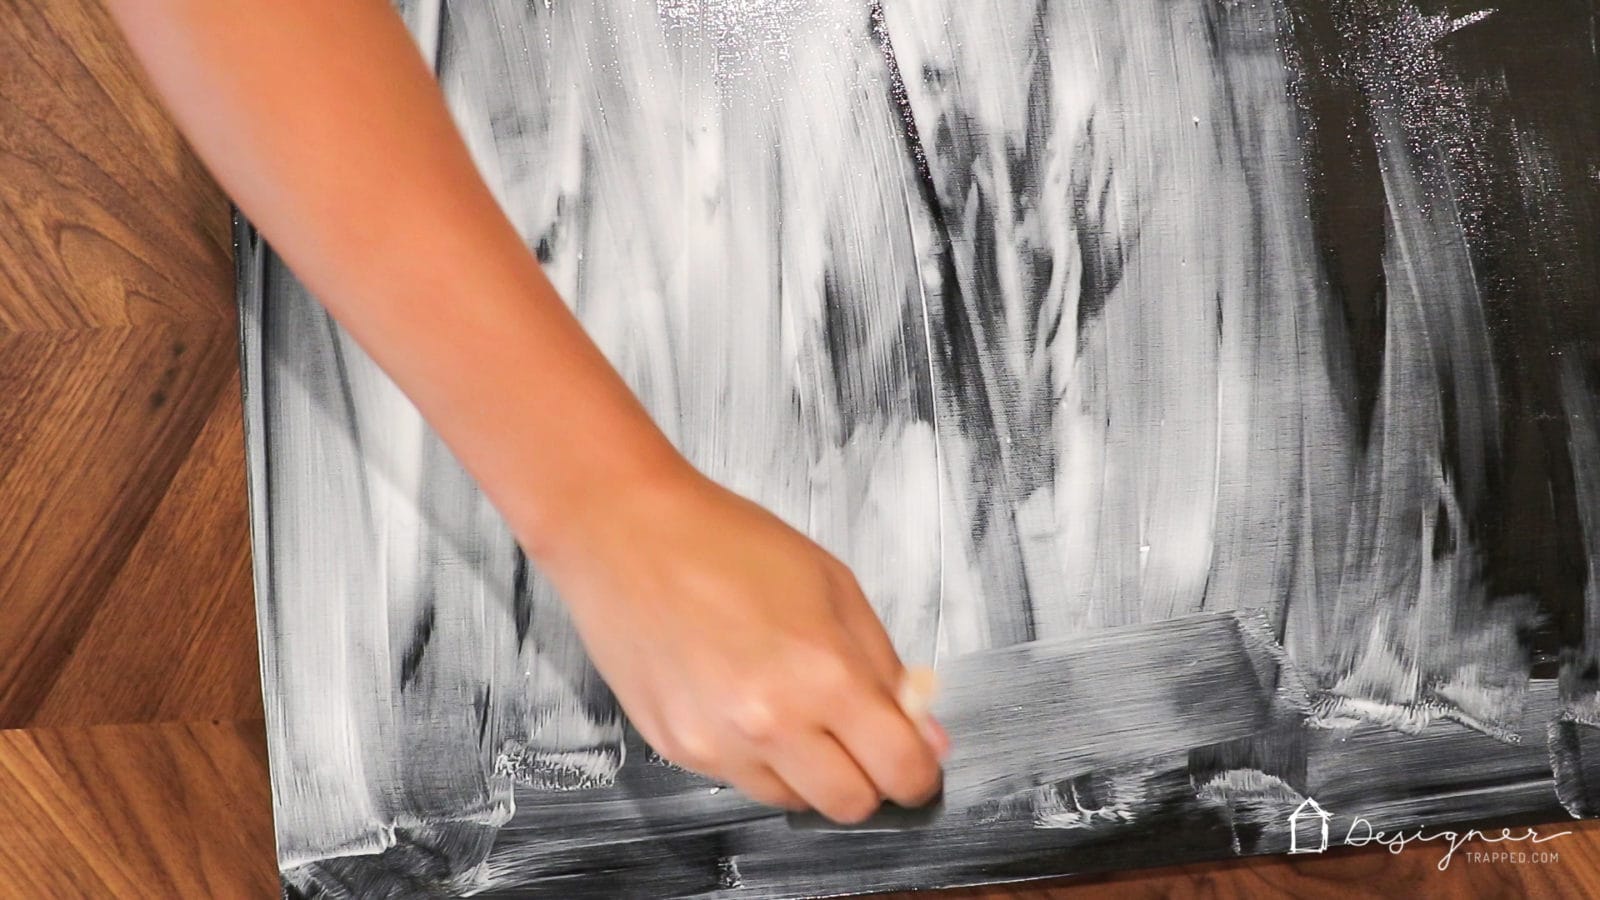
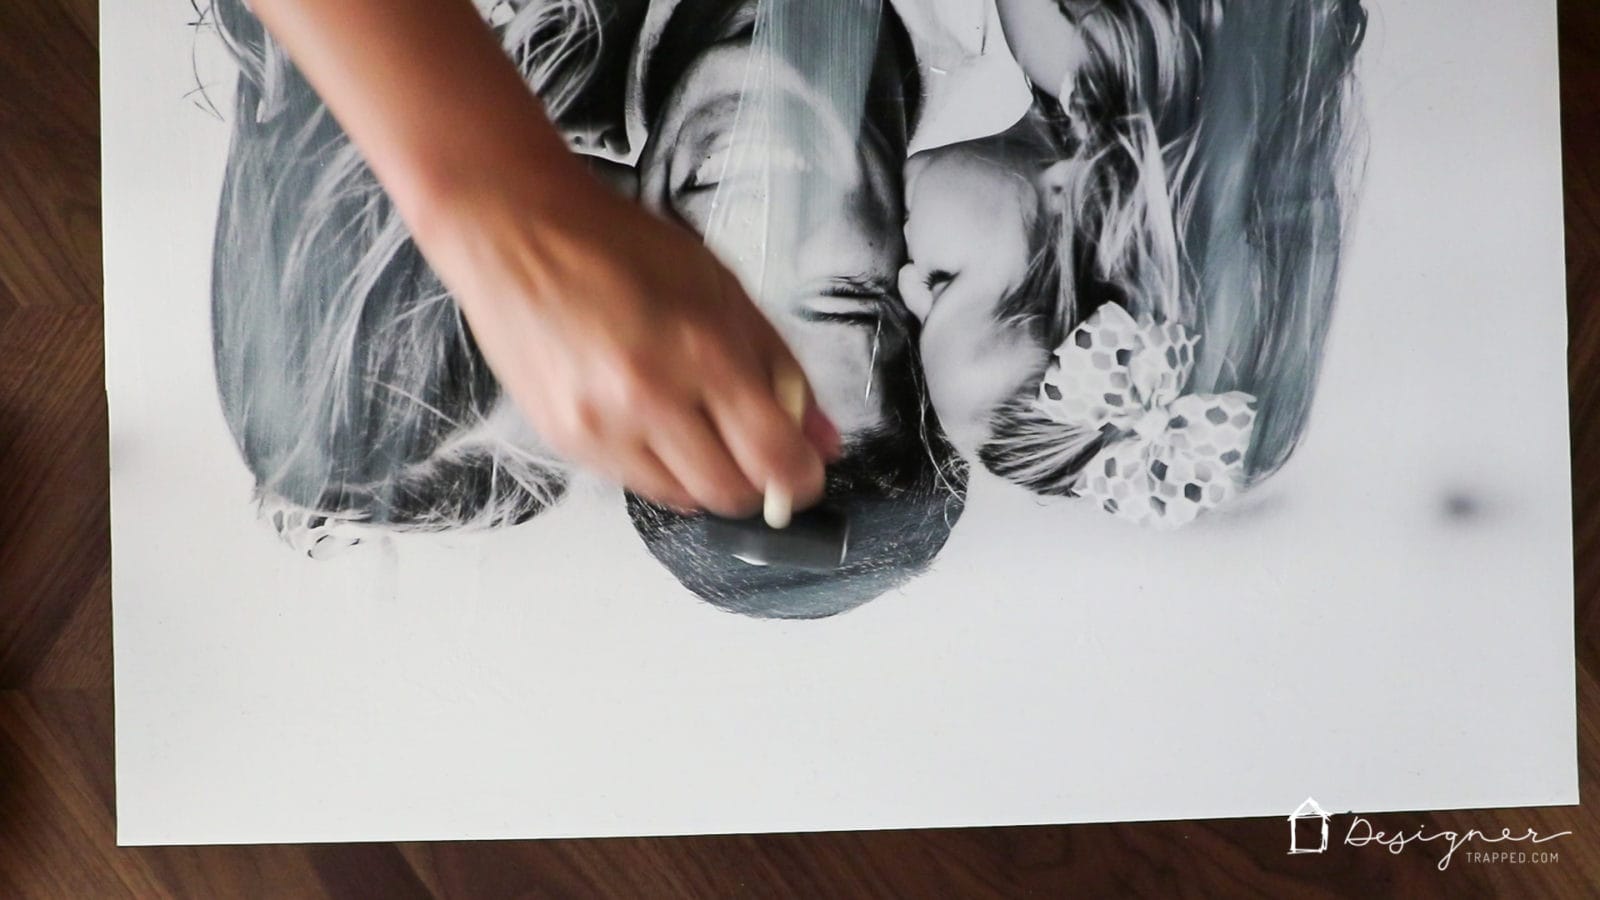
Paint a thin layer of Mod Podge (matte finish) on the front of the photo. Do not panic, I promise, promise, promise you that it will dry clear and will look gorgeous. Use long, even strokes. Seriously, calm down :) You are about to get to the good part.
There are 2 different methods I have used to add that authentic canvas texture to the top of my photos.
Texture Method #1:
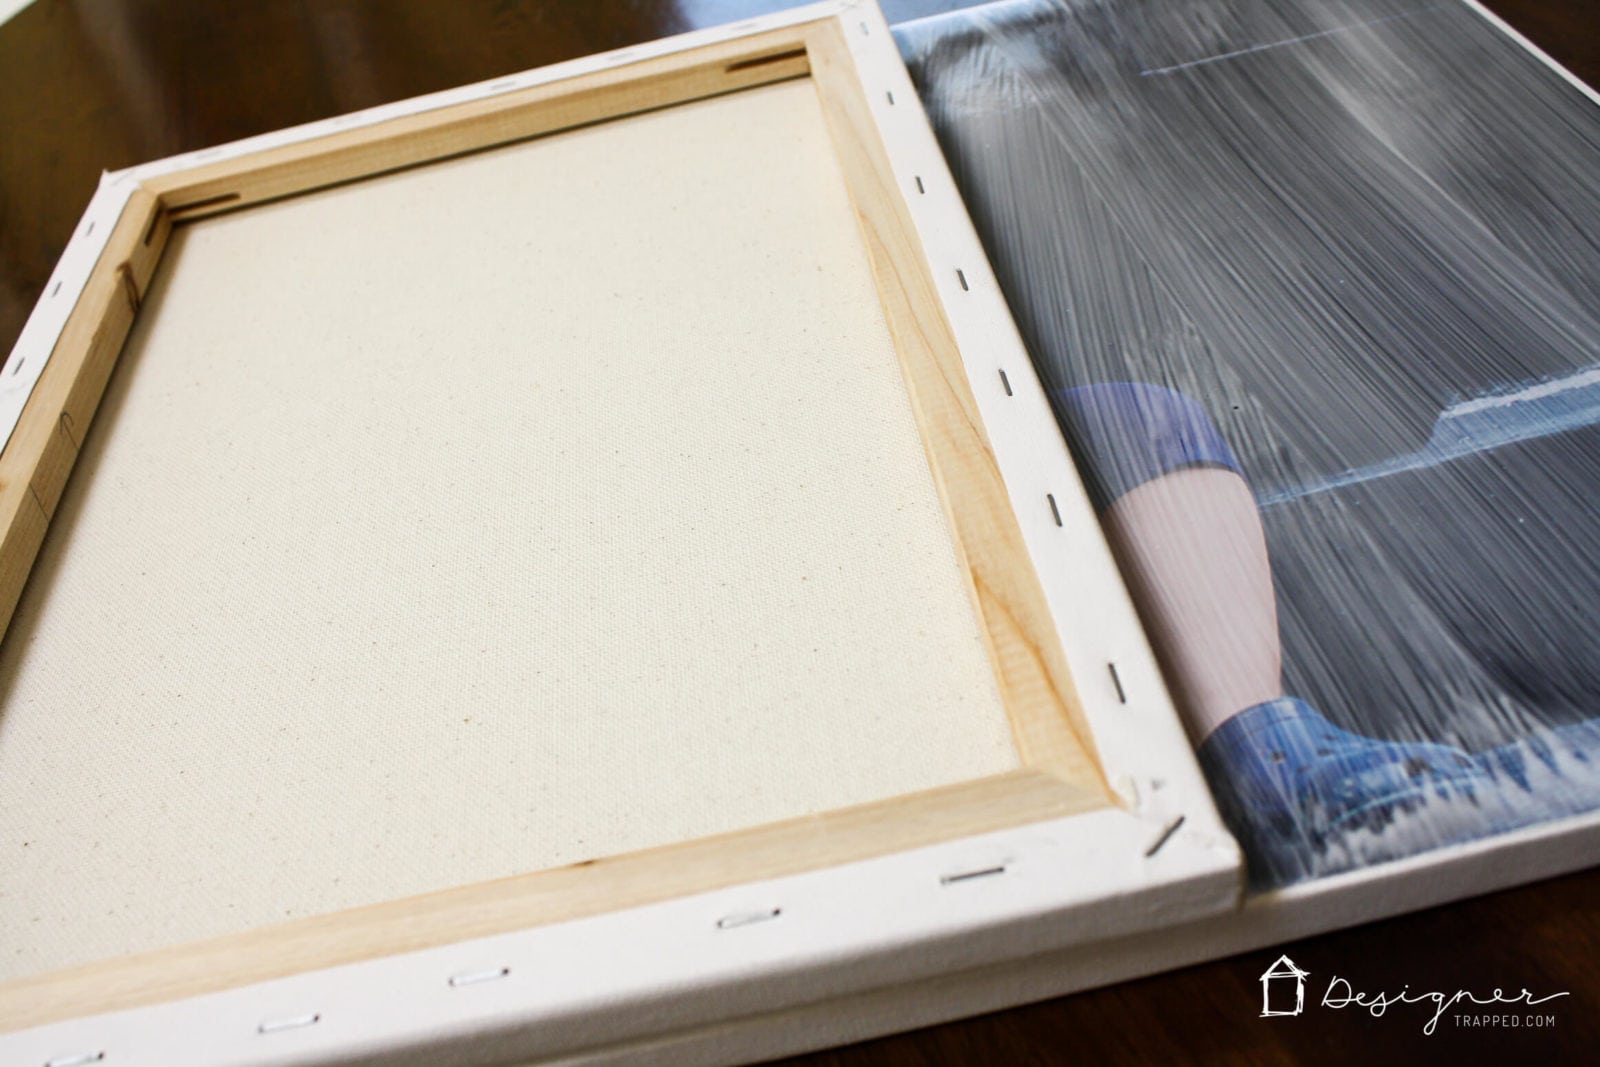
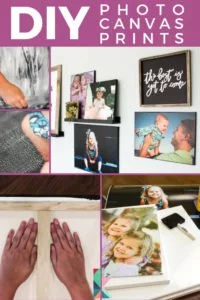
Quickly grab a blank canvas and sandwich it ON TOP of your photo that is coated with wet Mod Podge. Gently press the two surfaces together. Now, peel the blank canvas off and you will be left with that authentic canvas texture. Since I used a spare canvas that was smaller than 16 x 20, I repeated this process until my entire canvas was done.
This is a quick step. You want to “stamp” your canvas texture on AND remove the blank canvas while the Mod Podge is still wet.
Texture Method #2:
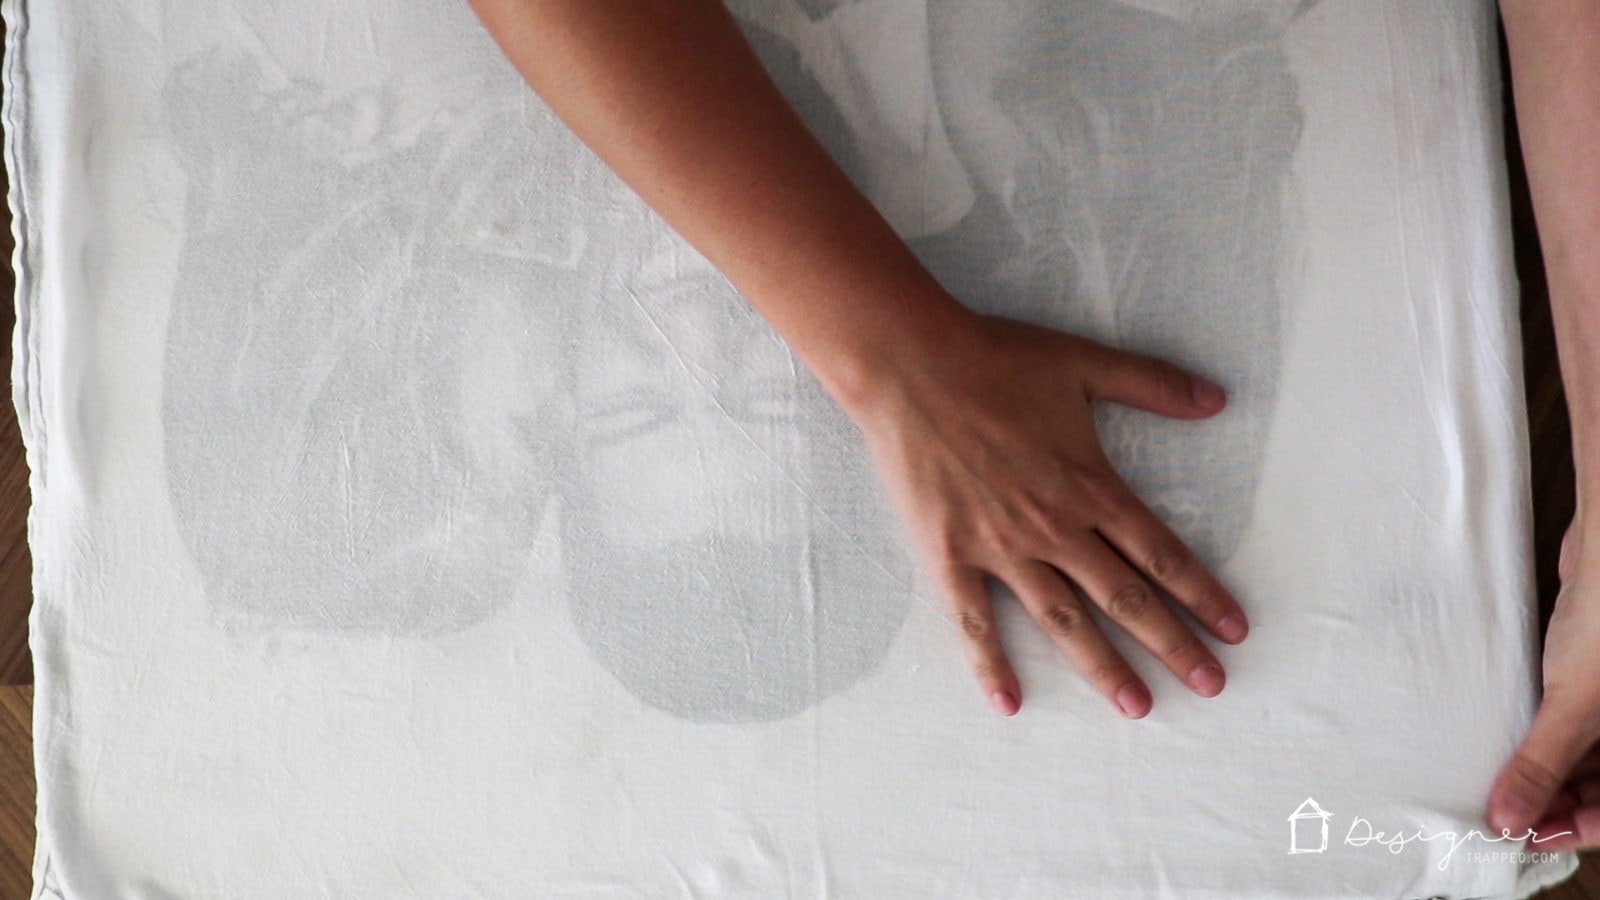
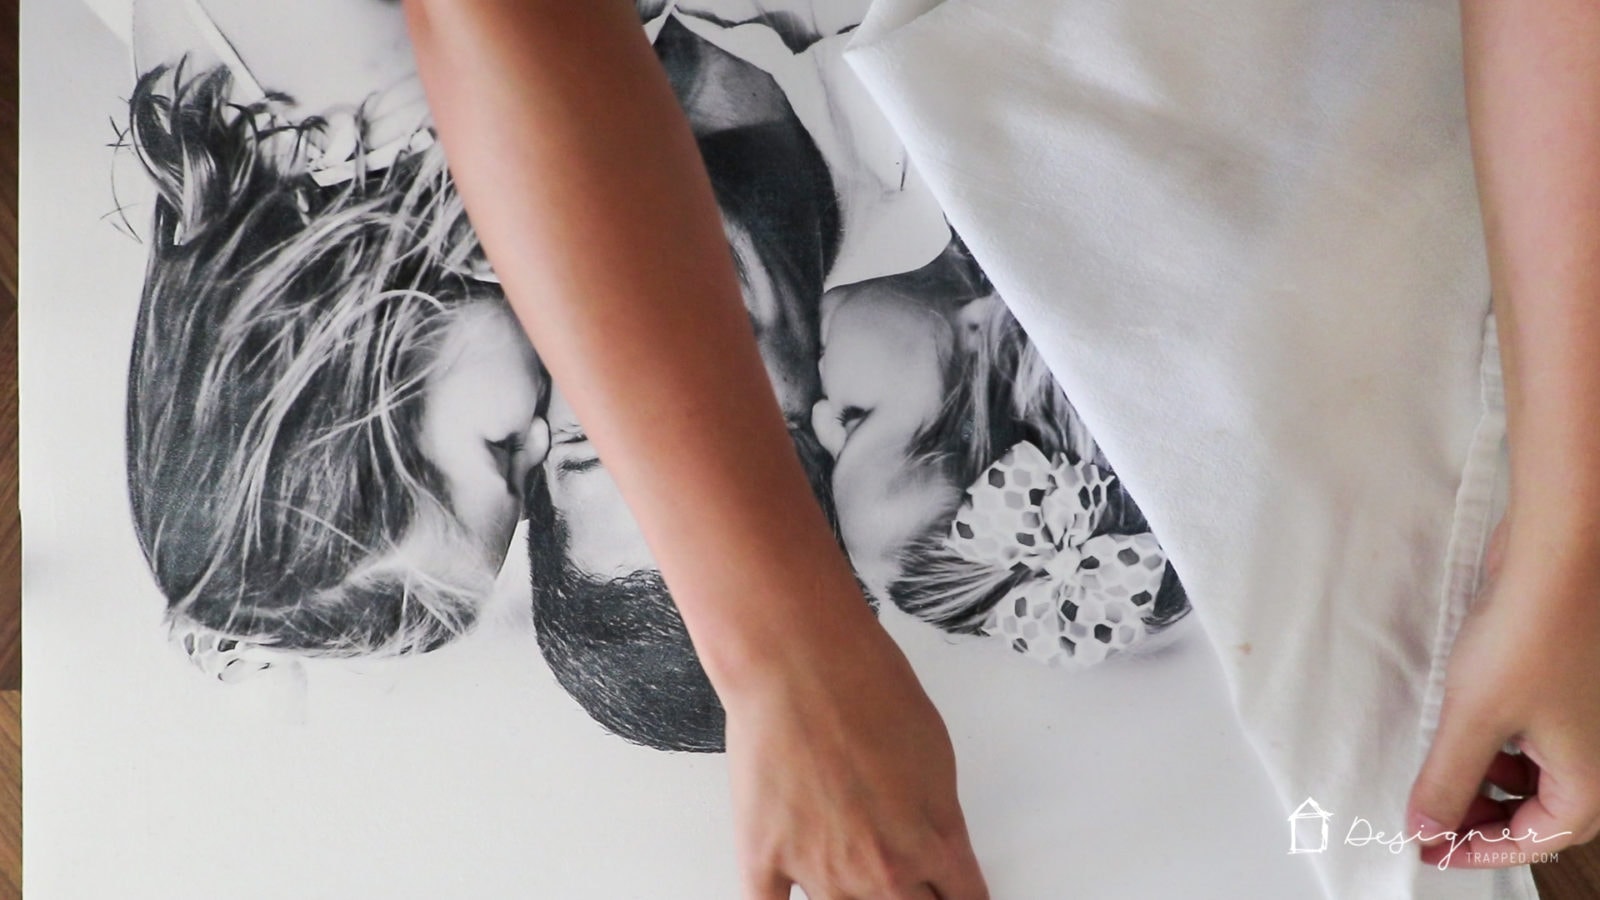
Quickly grab an old t-shirt or dish towel. Spread it out on top of the photo and wet Mod Podge, being careful to avoid wrinkles. Gently press it on top of your photo and then lift it off!

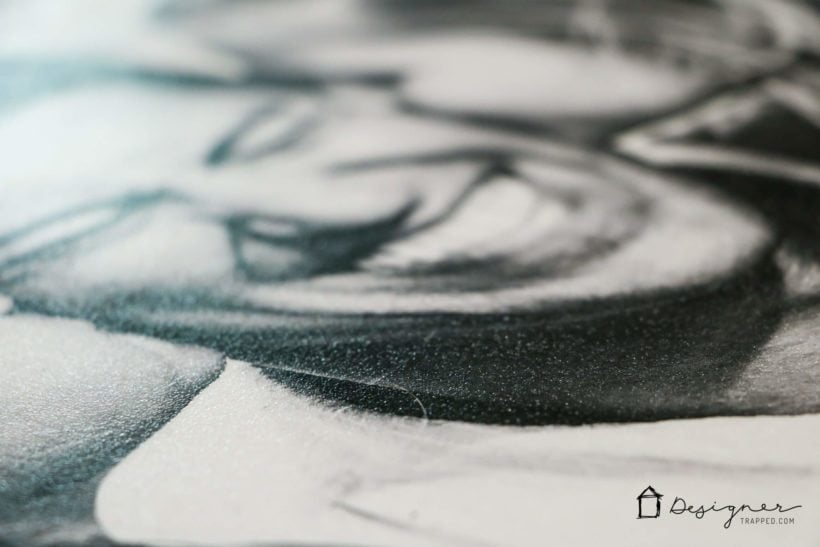
This is how the texture will look while the Mod Podge is still wet.
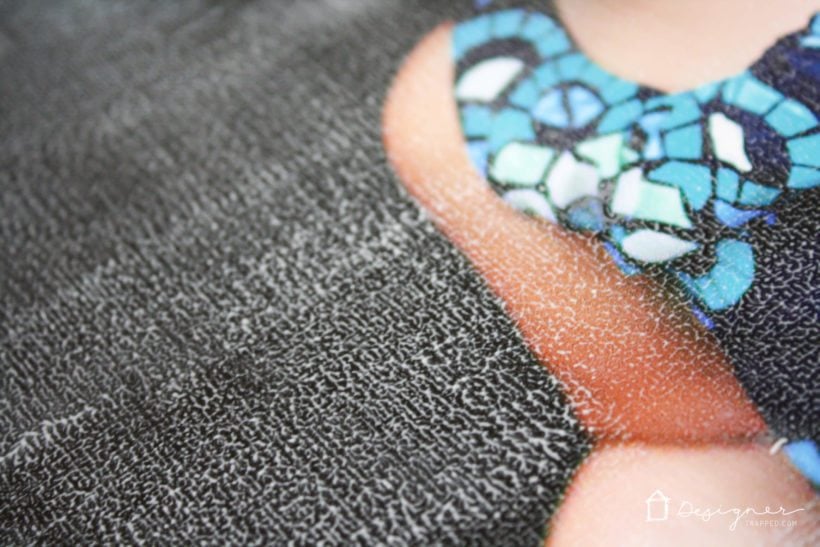
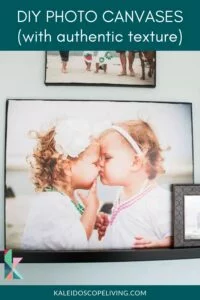
And this is how that G.O.R.G.E.O.U.S. texture will look once it is dry. The first photo is texture using the canvas stamping technique. The second photo is the texture from using the dishtowel technique. Both are beautiful, so use whatever method you prefer!
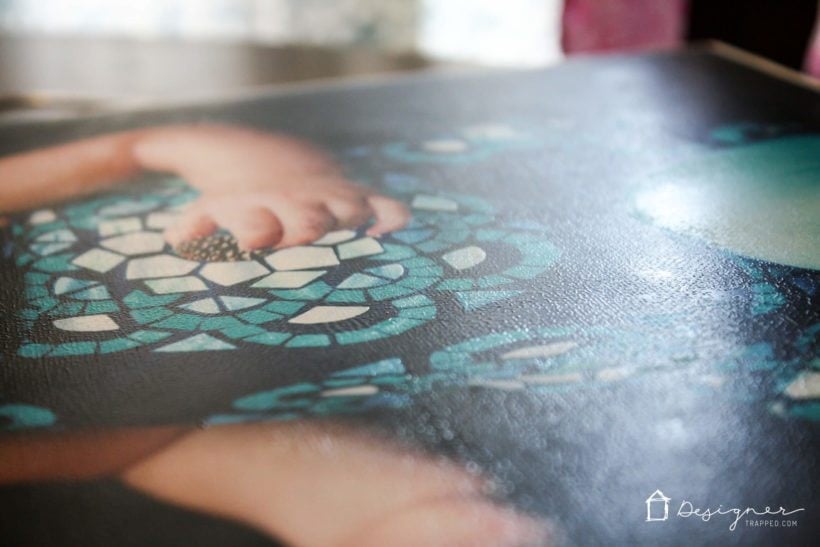
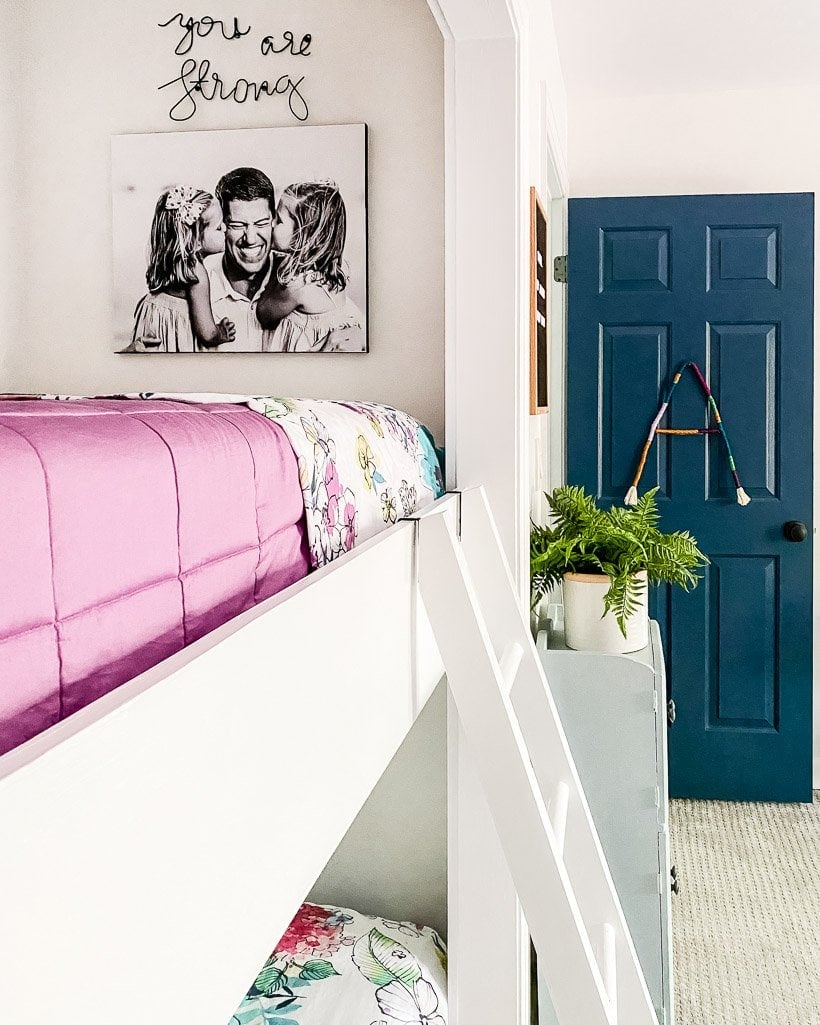
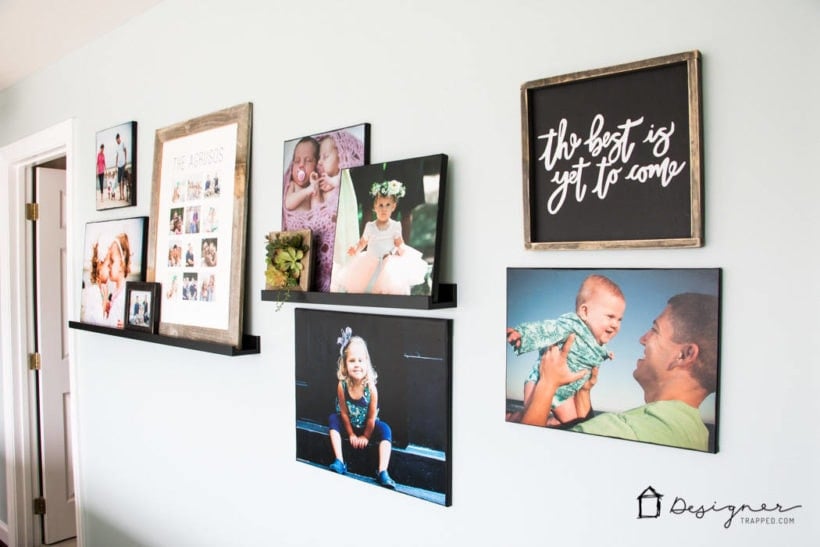
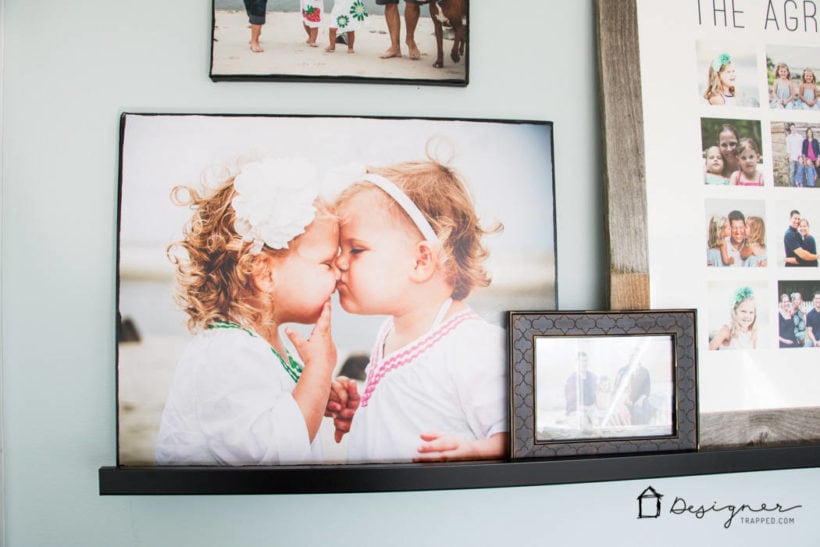
After the Mod Podge dries, hang up your beautiful DIY photo canvas and admire your work!
Frequently Asked Questions
A single DIY photo canvas in size 16 x 20 cost me around $10. Not bad! To order a 16 x 20 canvas from Shutterfly is $71.99 ON SALE. How crazy is that?! I love saving $62.00 :) Each canvas takes me about 20 minutes to complete, not including drying time. It's a fast, easy and fun project.
I do NOT recommend this method for photos printed at home on an ink jet OR laser printer. I've heard from many, many people telling me the Mod Podge smeared their photos that were printed at home (even if printed on nice photo paper).
I do NOT recommend this method for photos printed on regular paper (or even cover weight paper). It is too thin and will absolutely wrinkle, which wouldn't look very good.
No, I do not recommend “poster prints” from office supply stores either. They are usually printed on something called banner paper and that paper will peel.
What do you think? Don't you just LOVE that authentic texture?! It totally MAKES this project and it's not a tip I had seen before I did it for the first time–I was pretty proud for thinking of it ;) Be sure to pin this post to Pinterest if you want to be able to find it again later.
Making your own photo canvases is a creative and fun way to display your favorite memories–they are on of my favorite DIY wall decor ideas ever!. With just a few materials and a little bit of time, you can create a personalized piece of home decor that reflects your style and personality. So why not give it a try? I hope this step-by-step guide has inspired you to create your own DIY photo canvas masterpiece!
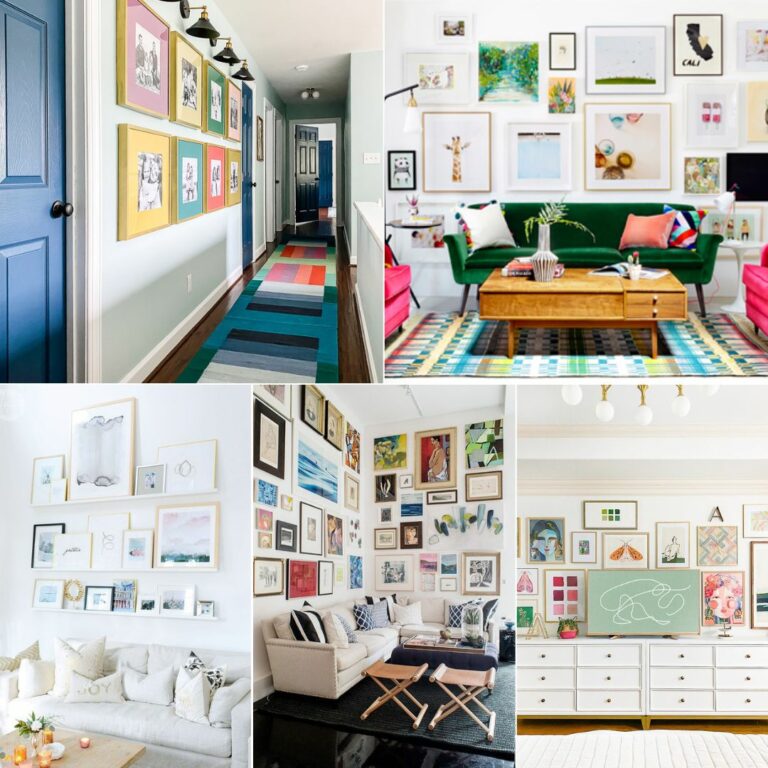
Want more cool ideas for displaying pictures? Check out my colorful gallery wall and this unique family photo gallery wall.
Other posts you may enjoy:
Wondering how I approach transforming rooms and spaces in our home? Check out Designer in a Binder®.
And if you want exclusive content and behind-the-scenes sneak peeks, be sure to subscribe before you head out!


Cant wait to try this, we just got an actual photo printer it uses thermal printing, going to give that a try.
I hope it goes well for you!
I think, I have a way that people could use the sheet method, using regular printer paper, and it not smear. I think, you could put the mod podge on the sheet, instead of the photo and lay it over the photo, pressing gently. I will try that, in case it doesn’t work and I have to redo it. I will let you know how it turns out.
Hi Sarah. Keep me posted. I’ve always had trouble with thinner paper wrinkling, so if you figure out how to avoid that, I’d love to know!
I will be trying this. If I can make it look good I will be giving it to my husband for Valentines Day. Thank you .
Will regular photos printed from WalGreens work just as well? I don’t have time to re-print on “”Photo paper”?
That actually is photo paper so you are good to go. What you cannot use is “banner paper” like what they use at office depot becuase it will peel when it gets wet. good luck!
Hello,
Is it possible to use a regular paint brush instead of a foam brush? I wanted to do this tonight but I realized I don’t have a foam brush.
Sure, that should work Rachelle (though I confess I’ve never tried it)!
I have to say, I just tried this using HP Advanced Photo paper and satin Mod Podge and it came out wonderfully. I also used canvas paper instead of an actual canvas frame and that also worked well to get the texture. Thank you so much for the instructions!
Awesome work Karen! Very smart and good to know about the paper. Thanks for reading!
I looked around and saw printing on canvas for as little as$20. Here is an example.
canvas http://www.canvasdiscount.com/canvas-prints-squa-8×8-1/?gclid=CjwKEAjw652_BRDfkebVrdOGkDISJAD0Q2Runlz8wiSfUJTIUuzqjDk3nSj0yhPbazpD3RGpx8qwYRoCmezw_wcB&ia-pkpmtrack=1-0323038373931393033303-60093102-7938531582-70080158106
I don’t know if you want to publish it, but that’s ok. Youget the point.
I wonder what quality features to look for to compare it against a great product you describe. If the $20 some product works, I would opt for that over spending several hours on the DIY project. Of course, if a comparable product costs $70, it changes the equation.
I know there is no precise answer, but I would appreciate any comments.
You are right the only way to do it is to order different canvas’ and compare.
When I stamped the blank canvas on the photo, some of the photo stuck to the blank canvas! What did I do wrong?
Did you print your photos at home or have them printed at office supply? If so, that may be the problem. They need to be printed at a photo lab on photo quality paper. Hope that helps!
Where do you have Photo prints made in large sizes such as 16 x20?
Aren’t prints very expensive in that size?
You mention the project cost approximately $10.00, however the print alone would cost more, wouldn’t it?
I had mine done at Costco and they were $5.99. Check around at whatever stores you have local to determine the best prices. Good luck and thanks for reading!
Thanks so much for this inspirational guide!!! They come out beautifully!
I would just have ONE WARNING: Be VERY careful using the utility knife on your photos. I’ve had a couple of instances when it actually ripped the delicate photo paper (I’ve had to use it both before and after the mod podge b/c of unevenness of the actual canvas and the finished look relative to the photo edge). I *think* this may be a factor of not using a brand new razor(?) but am not 100% certain. I am going to test it out some more with brand new razors and see if I get more consistency in the finished results.
Thanks again – I just LOVE these finished products with my nature photos!
Thanks for the tip! I would definitely use a new blade if you are having a dullness issue.
cool project!! i have just a few pics that would work. lol!!
Thanks! Make sure you don’t use originals. I would have them copied!
Tasha, is it possible to use an actual original photograph? I ordered a “special” print from the school for our mothers and they are pretty dumb looking. I was searching for ways to jazz them up a bit when I found you! Do you think this will work with a photo print or are they too thick?
~Ocean
I have probably made about 50 of these so far. I seem to like the matte photos from Sams better than the ones from Costco, as the Costco ones discolored with the Mod Podge for me. I cut the photos to fit the canvas first…then use a spray adhesive on the canvas and back of photo, and they seem to work quite well.
I have bought canvasses from Blicks, Michaels, JoAanns, Hobby Lobby, and WalMart, as i look for different sizes to fit different photos… I really like Walmarts 7×14 ones, as you can cut an 11×14 down to size for a unique look.
I use another canvas just as you outline to give it texture, and then, when all done, I spray a couple coats of clear satin spray on them to protect them even further.
They always turn out great!
Thanks for the tips Tim!
Should the pictures be printed with a glossy finish or matte?
I used the matte but you can use whichever you prefer!
Hello! I was planning to try and print it with a paper that has a matte finish on it or something that looks like the photo that you printed above. Will it actually work? My country is very small and has limited choices of papers at our local photo lab.
Whatever the photo lab is using should probably be okay. Mine are actually matte so you should be fine!
when you order at costco is it just the regular photo paper that it gives as an option?
Photo paper is the regular option! thanks and good luck!
I totally loved this affordable idea to having our own canvas prints…I’m giving it a try as I post this I hope it comes out right. How long before I know the lodge podge is dry?…
It is dry when it isn’t tacky anymore! Good luck!
Does it look bad to not paint it black? Or was painting it a preference?
Just my preference. You can do it and paint it black if you don’t like the white.
Mine looks blotchy after doing this. Do you think it might work to go back and give it another coat to even the texture out? I think I may need a thicker coat of modge podge.
Sure give it a try!
My college bound daughter needs some things to hang on her wall so I want to surprise her with a set of canvas prints of family photos and scanned images of her artwork. With college tuition looming, I really appreciate an affordable option – thank you for the great tutorial!
Awesome idea Stacey! Thanks for reading.
I work at a Wal-Mart photo lab and had a customer tell me about this. I finally looked up the directions. I do plan on using canvas boards so I can frame them. Will have let you know how it works. First print will be for my parents of my daughter and me. :)
Awesome! Good luck and I KNOW they will love that.
not sure if this has been asked yet as there are over 400 comments!! haha
I only have gloss mod podge…..will this not work??
TIA!
It will be really shiny. So you may not love it. Hope that helps!
Hey! So could I use a black canvas to do this so I won’t have to paint the edges or would that mess with how the picture looks?!
If you use photo paper it is totally fine! Great idea.
Does this only work with picture paper? All the other photo transfers I have seen are do on printer paper and you put them photo side down on the canvas and then rub the paper off. But not turning out so well for me.
This is not transferring anything, you are actually attaching the photo. So yes it does need to be photo paper!
I am making a memory box with a photo collage. Will I use my regular 3×5 photos and follow these instructions? Other sites have said the photos get ruined. I am just wondering if I need to have a printer print my photos on heavy paper with a laser ink instead of the photo paper.
I personally would not use my original photos if I do not have a digital copy saved somewhere. For original photos, I recommed a high quality copy.
Thank you for this info. I have been wanting to do this for a while. The instructions are very clear.
Awesome! Thanks for reading!
I just made two for myself and I LOVE THWM SO MUCH!! I’m going to have to make more to give as presents. The canvas stamping at the end is genius!! I used a portion of a drop cloth though and it worked perfectly! So excited about this! Thank you for sharing.
Dang it. I was so excited that I didn’t catch my typo. I LOVE THEM SO MUCH!
Awesome! They are such a cool project. Glad you liked it! Thanks for reading.
HI! I really would like to make these, but I have one question on printing the pictures. When you printed them at Costco, did you print them with the lustre finish? I can seem to find “photo paper” as an option when I go to order the prints online.
Thanks!
You should chose the non-shiny option! They may be calling it something different now?! Good luck.
Hi, I was wondering what variations in canvas sizes you used for your collages? I noticed it looked like you did 6-7 pictures in a collage in your hallway and I like that setup. Didn’t know if they were all 16X20 but turned differently or if various sizes.
Oops, I saw a comment further down where you replied about the sizes so disregard. Just missed it the first time I scanned through. Thanks!
No worries! Glad you found your answer. Thanks for reading!
I was wondering when you turn your canvas over and put a book on it to keep out air bubbles, what do you lay the wet canvas on when you turn it over?
Thank you so much for sharing
This step is before you mod podge the top. At this point it is only under the picture. So there is nothing on the top to worry about getting yucky. Good luck!
once the glue is dry and you notice patches that didn’t cover properly can you do a second coat and re-stamp it?? thanks!
Sure I think that would work! Good luck!
Can you use the canvas that you use to make the texture for something else then? And I would think it would be easier to paint the black edges before gluing the picture on. Would that be a problem?
Yes, please reply to this question. I also want to know if the second canvas can still be used later.
Yes, the second canvas can be used again later.
How do you avoid air bubbles?
Hi Alexis! I’ve never had issues with air bubbles. I think using quality photos printed by a lab on photo paper and using a light coating of Mod Podge to adhere the photo to the canvas is important. Use FIRM pressure to press the canvas and photo together and then let it completely dry before applying the Mod Podge on top of the photo. I hope that helps!
This idea is genius! You should absolutely toot your own horn – and I second it! Thanks for sharing this great idea. Can’t wait to try it :)
Thanks so much Darlene!
This is awesome and thank you for sharing!. Quick question. Can you use the photo more than once (say you want to make 2 photos to canvas)?
Hi Ivy! No, since you are actually attaching the photo to the canvas, you can use each photo only once. If you meant instead to ask if you can use the same canvas to stamp more than one photo, the answer is YES! I hope that helps!
Hi, this is such a great idea. I was wondering if you could print your own pictures and use those or does it have to be a “real” photo? I’m afraid the ink will smudge applying the modge podge.
Hi Lynne! I have only used real photos printed at a photo lab on photo paper and would definitely recommend that route. I’m not sure how photos printed at home would hold up.
Hi Tasha,
Thank you for your wonderful tutorial. This is going to be fun. I have a good bit of photos from traveling and I was going to have some of my favorites printed on canvas until I saw the cost. From your tutorial it looks pretty easy to do from home. I am going to give it a try.
Dawn
My website listed below is being set up. I hope to have it published soon :)
You’re very much welcome Dawn. I’m excited to see your canvas and your website! ;)
wow awesome.
Great post as always. So lucky :D
You can check out this etsy shop. It has great picture frames too that you may like https://www.etsy.com/shop/allbuttonedupbytina
I’m glad you like it Safae. The picture frames look great! Thank you for sharing. :)
Awesome. Thank you for the tutorial I am going to give this a go.
Roxanne
My pleasure Roxanne! Have fun with it!
This is great! Can you tell me what sizes you have in your hallway? I really like how you arranged them. Thanks!
This is great! I will be trying this. Can you tell me the sizes of the ones shown in your hallway? I really like how you laid them out.
Hi Jamie! Oh gosh…I’m not sure I remember. I believe the largest ones are 16 x 20, the next size down is 11 x 14, the square ones are either 10 x 10 or 12 x 12. I hope that helps!
Thanks!
Hi! I’m doing this today!! :) How long are the approximate drying times for attaching the photo, and also for it to dry completely after the texturing? This will be my first time using mod podge and I’m clueless :)
Hi Sara! I would allow each coat to dry at least an hour. I hope that helps!
This is brilliant! Love how authentic the photos turned out, they do look like authentic canvas prints! Sharing!!
This looks great, thanks for sharing, do you think it would work with inkjet prints?
Angela – http:// http://www.ladyfyre-graphics.com
Hi Angela! I only recommend using prints printed at a photo lab on photo paper.
Do you use the same blank canvas to sandwich the other side? If so how long do you sandwich one side before going to the other side? Hope that makes sense. Thank you, Barb
Hi Barb! Yep, I use the same canvas. The sandwiching/stamping step is very quick. You just stamp it, lift it up and then stamp the other side. Hope that helps!
Fantastic job on these – I’m pinning for reference!!
This may be a dumb question but is the photo paper the same as what you get pictures of 4×6 and 5×7 prints on? I am trying to order online through costco and want to make sure I am doing it right.
Hi Brittany! Yep, if you are ordering from Costco it should be in the correct paper. Same paper for every size print. Hope that helps!
Thank you for a fun and easy project. Your step by step directions and close-up photos are great. I can’t wait to try this!
You’re welcome Ginny. Really appreciate it.
Thank you for a great project and the step by step directions. The close-up photos help so much. Can’t wait to give this a try!
You’re welcome Ginny. Really appreciate it.
Do you get your pictures printed matte or glossy?
I have mine printed on matte. I hope that helps!
Great thanks!!! Can’t wait to try this!!!
Hi….There seems to be so many different kinds of mod podge I guess depending on what you are using it for…not really sure..but did you use the regular mod podge applied to the canvass itself and onto of the photo????
Hi Rachel! Yep, I used regular Mod Podge in matte finish. I hope that helps!
Hi Tasha, have you had experience or heard of experiences using this method of a photo collage? I cannot decide if I should print multiple photos and then sticking it on the canvas or create a canvas first from my laptop and then print them out as one print? Any advice on your part is much appreciated! Thanks in advance!
I have not heard of anyone trying that, but I would have the collage printed on photo paper as one print. Hope that helps!
The mod lodge didn’t try all the way clear on my photo and left a smeared look. Any suggestions?
My guess is that you went a little too heavy on the Mod Podge, but I’m not sure as I haven’t had that problem.
Will Gloss Modge Podge work?
It should, but I have never tried it :)
I’ve tried gluing a photo printed on photo paper (from Costco) onto a canvas using Mod Podge in the past. At first it seems to stick and adhere really well. However, over time the photo lifts from the canvas and starts to peel off. Have you experiences this at all?
Hi Mischa! I haven’t had that problem. Do you also apply Mod Podge on top of the photo? I do. Maybe that makes the difference?
My photo won’t stick to the canvas! How come?
Hi Angela! Are you using a photo printed on photo paper and applying plenty of Mod Podge to the canvas before applying the photo? If so, I can’t imagine why it won’t stick? Mod Podge is SUPER sticky. Don’t forget to let it dry totally before applying the top coat of Mod Podge over the photo.
What type of paper do you use?
Hi Tatiana! I have my photos printed at a photo lab on photo paper. I hope that helps!
Is gloss paper ok?
I haven’t tried it with gloss paper, but that should be fine Elizabeth.
Can’t wait to try this. Thanks for sharing!
What kind of paper should the original print be printed and enlarged on?
Hi Diane! They should be printed on photo paper at a photo lab. Do not get them printed on banner paper from office supply stores–that type of paper doesn’t work. I hope that helps!
Hi There —
Thanks for this great tutorial!
Do to a home purchase I am frugal in spending this this Christmas so I decided to use your idea as Gifts for family and friends. My plan is to setup an assembly line of 10 prints. My question is, can 1 of the canvas’s be used as the “stamping template” in the assembly line? For instance, I’ll have all my print photos laminated on frames and ready to go. The idea would be use 1 canvas as a template to “stamp” all of my photos with canvas texture.
Do you foresee any issues with this?
Mike
Hi Mike! I use 1 “stamping” canvas for about 4 or 5 canvases. Then, I put a photo on that canvas and start stamping again with a new canvas. So, the stamping canvas never goes to waste, but it does lose some texture after stamping 4 or 5, if that makes sense. Good luck and Merry Christmas!
So talented!!!! Thanks for sharing!
Thanks so much, Kristie!
I was wondering if glossy photo paper and ink jet printing will work for this project. I would like to do this all on my own from home
You could certainly try it, Tammy! I just don’t know if ink jet printed photos may smear when you put the Mod Podge on them. If you try it, let me know how they turn out!
I’m away to do a project like this for my friends christmas, but I forgot to order an extra canvas for the effect step, can I still put the mod podge on top or do I need to have a canvas to do that? I just want it to have a really nice finish
Hi Keira! You can still coat it with Mod Podge, it just won’t have the canvas texture.
Or use a brush and slip slap the mod podge on top of pic. That gives a nice artist texture.
Thanks Susan!
Thank you so very much for this idea. I am a little on a tight budget this Christmas and I wanted to do something special for my fiancé. I am not going to attempt to do this with some pictures of our family and then do a split canvas print for him in a retro or modern print or something funky and quirky. I had looked at some pictures and there is no way I can afford what some cost to buy. This is a wonderful alternative and I am so psyched to start this soon!
By any chance do you know if cvs, walgreens, walmart or office max print pictures like this on photo paper? I don’t have a Costco near by.
Thanks so much!
Kaitlin
Hi Kaitlin! So glad you are excited to try this! Yes, Walgreens, Walmart, Target, etc. all have photo labs that print on photo paper. You do want to AVOID having photos printed at Office Max or Office Depot because they use “banner” paper, which is different. Hope that helps!
I have tried everything to get this right but as soon as I apply the mod podge my prints wrinkle and dry all wavy. I’m not sure what to do. The place I get my prints done assured me it isn’t the paper. Any ideas as to why this is happening? Please help me
Hi Ryan! The only people I have known to have that issue are having images printed on something called “banner” paper at home office supply stores. Are you having your photos printed on photo paper at a photo lab? If not, my guess is the paper is the problem (despite what they are telling you). If you ARE having them printed on photo paper at a photo lab, then my only other guess is that you are applying too much Mod Podge under the photo and/or on top of the photo and perhaps are not allowing the mod podge under the photo to dry for a sufficiently long period of time first. If you can give me more details, I am happy to help in any way I can!
These look beautiful! I can’t wait to try it. Could you please tell me if the photo prints were.matte finish or glossy finish?
Hi Meera! Mine are all matte finish. I had them printed at Costco on photo paper. Avoid “banner” paper. It will peel. I hope that helps!
I bought glossy mod podge (was distracted by my daughter haha) and realized it once I got home… Will it still work with glossy?
It should work Adrianna, they may just be a bit shiny :)
Thank you so much for sharing this! This is so cute and I can’t wait to try it!
Thank you, Sophia!
Thank you SO MUCH for this post. I was looking for an alternative to the $80 canvas prints for a birthday present for my best friend. This will make a perfect present for a housewarming/birthday present of her favorite wedding photos!!
Thank you, thank you! I will work on this this weekend!! :)
YAY! Have fun making them, Stephanie!
i am just really slow some mornings. i understand now after second read thru that top canvas is just for texture. thanks for sharing!
LOL, no problem Tammy!
i am not a crafty person but really love this!
i am just not clear on the stamping part. is the picture print what i hang or the stamped canvas? sorry if this is a totally crazy question i just don’t understand if the print is just a copy plate or is it to be end product? i am just going to follow all the steps and will know soon enough.
I have a question. What setting do you use on your camera to take pictures that still look sharp when blown up? Mine look fuzzy if I make them very big. Thanks!
Hi Karen! I always use my aperture setting and have a high quality DSLR camera, which makes a big difference. What resolution are your photos?
I love this idea and want to do it for a birthday party this weekend. However I am confused on the paper. When I talk to the people at costco they said they’ve never done 16 x 20 on photo paper. Their photo paper goes from 4×6 to largest is 12x 18. So then I wonder if you used their poster paper to get the 16×20 yet you clearly say photo paper. So I got lost somewhere! Do I want the paper to be the same feel as a regular 4×6 you would normally get for prints or is it a slightly different type of paper? I understand not wanting banner paper but is there something inbetween that I am looking for? I sure appreciate your help on this!
thank you
chanda
Hi Chanda! I understand the confusion based on what Costco is telling you. All I can tell you is that my Costco does print 16 x 20s on photo paper. The paper should be exactly the same as a smaller photo, though I do opt for a matte finish. I also just checked the Costco Photo Center website and 16 x 20 photo option is clearly on there! Maybe you could order online and have it shipped to you. Perhaps your store doesn’t have a printer large enough to print a 16 x 20 photo??? Not sure, but it’s odd! In any event, you do want photo paper. I hope that helps!
Hi Tasha! Great job! I want to try doing this soon. I had a question. Do you need to further protect these canvas prints by putting them in a frame or laminating them? Do you have any suggestions to protect these from dust/ environment etc.? Thank you.
Hi Tej! I haven’t done anything additional to protect mine. They are easy to dust and are holding up perfectly. I hope that helps!
I have 2 swans I have done with beads & I gave ordered a wood frame that is a 20 by 30. But my question is , do you no what I can put on my canvas for it to stick to the wood without it soaking threw the canvas. Please help. My name is Beverly Hebert on Facebook
Hi Beverly! I’m not sure I understand what you are asking. Could you clarify? I am happy to help if I can!
Looking forward to trying this thanks for sharing :)
My pleasure, Jill!
Looking forward to trying this. Shouldn’t we flip the photo, though? With your instructions, won’t the photo appear backward? Thanks.
Hi Kathleen! There is no option to flip the photo. The photo is printed only on one side of the photo paper. You are gluing the photo onto the canvas, so you don’t need to reverse the image. I hope that helps!
Tasha
Just wanted to let you know how great my photo canvas project turned out. I did a Google search to find directions, not realizing I would have had access all along on your website ! ( I get your updates right in my in box). The instructions were easy to follow and the end result was perfect for my daughters room away at school. I went to Michael’s to get the canvases as they were advertised at 50% off, and then found black ones available too, bonus!
In hindsight I think I would have painted the white canvases that I used first as it probably would have worked out better for me.
Thanks and
Love your style,
Helen
That’s awesome, Helen! Thanks so much for sharing!
Hi Tasha, did you use a glossy or matte finish for the photo prints? Does it make a difference at all?
Hi Priya! I use matte finish, though I am not sure it matters. Just be sure the photos are printed on actual photo paper. Office supply stores offer photo enlargements that are printed on “banner” paper and that will not work. It has to be regular photo paper. I hope that helps!
Hi, was just wondering if I can use a canvas with a print on it. It’s a lot cheaper than a blank canvas. thanks! :)
I don’t see any reason why you couldn’t–great idea, Chris!
I’m looking forward to trying this for some of my wedding photos! One question regarding the canvas used to make the texture: Do you reuse it for future photo canvases? And if so, does the dried mod podge have any effect on the outcome of the texture? Thanks!
Hi Emmy! Yes, you can use it for future canvases. I use it one to stamp 3 or 4 canvases and then use that canvas to adhere a photo onto and then start the cycle all over again. I hope that helps!
Thanks for the tutorial. Can’t wait to try this!
By the way, what is your wall color? It’s very pretty.
Thanks so much, Rachel! The color of the walls is Babbling Brook by Olympic, which is sold at Lowe’s.
I made a few of these and after about a year they are not looking tight but look wavy. Did that happen to yours? They looked fine at first so I’m thinking it wasn’t just that I used too much glue or something. Any advice, thoughts?
Hi Kellye! No, I have not had that problem and mine have been done for about 1 1/2 years at this point. No idea. Sorry!
Thanks for the great tutorial! I enjoyed trying it out and have added it for my 2015 – July Create post.
http://foundandbliss.blogspot.com/2015/08/july-create-crazy-about-canvas-frames.html
My pleasure and thank you!
Thanks for the great tutorial! I so enjoyed trying it out and have added it as my July Create on my blog.
http://foundandbliss.blogspot.com/2015/08/july-create-crazy-about-canvas-frames.html
nice one. Can I use anything else instead of mod podge?
Hi Alpa! I have only tried it with Mod Podge, so I have no idea. Sorry!
i tried this today on large 12×36 canvases and it worked great❤️. I had panoramic photos that I printed large, cut them down to fit my canvas and saved a ton of money. Thanks for your awesome tutorial!
My pleasure, Sherry! So glad you love it!
Pretty amazing, I wish to try but Mod Podge in our country is not available, any idea how to acquire Mod Podge?
Hi Jojo! I know you can order it on Amazon. Perhaps that would be a way to get your hands on it :)
Hello, Check out Pinterest, its easy to make your own modpodge
If I were to have a print out in matte of something like this, would it work also? Could I do white paint around the edge instead of black? It is for a nursery. https://www.etsy.com/listing/238364848/set-of-3-baby-nursery-prints-what-little?ref=favs_view_10
Thanks!
Of course you could do white, Julie! That would look adorable!
Quick question, the step in where you sandwich the blank canvas on top of the wet one. How long did the two canvas stayed together before you separating them?
Hi Jimmy! You stamp them quickly–pull them apart as soon as you stamp them. I hope that helps!
Hi Tasha! Did you use glossy photo paper for this project or matte? Thanks!!
Hi Kimy! I use matte photos printed at Costco’s photo center. I would not print them at home. I hope that helps!
I like your version of photo transfer on a canvas. I did and gave it to a friend as a graduation gift, but I always felt that the canvas that I made didn’t have that professional look towards it. I’m going to try this out and see if I can turn this into a business!
This is GORGEOUS! Definitely gonna try!!
Yay! Have fun with it, Ashley!
Should I print my photos glossy or matte?
I use matte photos, Sarah. I hope that helps!
I have a question, not a comment…you use 2 pieces of canvas? 1 to “glue” the picture to and 1 to “transfer” it to, my question is this, what do you do with the first canvas?
Hi Laura! You use the first canvas to glue the photo to and the second canvas to stamp the canvas texture on to the first canvas. There is no transfer of the photo. I hope that helps!
This is the best! I actually made a video on YouTube on how to do this over a year ago. When I did my five 16×20’s I think I spent less than $30 for all. It’s so awesome. Here is the link if you want to see my video!
https://youtu.be/lna2oZzi2zI
You did a great tutorial!
Thank you so much for this tutorial! The instructions were great and the photos helped a lot. Made a great Father’s Day gift for under $5. Much appreciated! :)
What kind of black paint did you use or recommend using?
Thanks,
Jennifer
Hi Jennifer! Any black latex or acrylic paint is totally fine. I hope that helps!
Are your photos a matte or glossy finish? Does it matter? I can’t wait to try this!!
I use matte photos, Dana, but I don’t think it matters. Hope that helps!
Are you using actual photos such as you would get from Walmart or Walgreens or photos on paper like I can get on laser prints at Staples?
Hi Paige! I use actual photos that I have printed at Costco.
I used thick, quality posters from an art gallery store on the canvases. And it’s drying with bubbles that I cannot smudge out with my hands or a spatula. Any thoughts? Or is this normal?
Thank you for this amazing tutorial!
Hi Janet! No, I have not had that problem. My best guess is that you used too little Mod Podge on the canvas itself and that the photo did not stick well enough. Also, did you use photos printed on photo paper? Some people try it with photos printed on regular paper, which will almost certainly result in wrinkles and bubbles. I hope that helps!
Yes what I modged-podged on the canvases were thick, paper art posters I boughthrough an art gallery store. I’m also guessing being paper, despite their weight, is the cause. What a bummer! Otherwise this worked out great!
It’s strange, Janet… I have done this with paper posters too, with no problem (see here: https://designertrapped.com/2014/09/diy-canvas-art.html}. I wish I had better insight for you. Sorry!
Gr8 idea! Thanks for sharing.
i totally tried this with an 8×10 and a 24×36! The first time did not turn out so well because when I went to “stamp” the canvas texture it did not stamp the whole thing. So I went back to the craft store and bought some actual canvas material and used that to stamp! It was way easier and it allowed me to smooth out all the bubbles and hard to reach spots that a canvas frame couldn’t pick up! To the person asking if burlap would work I suggest using a canvas fabric instead ! Otherwise this project was awesome ! Thanks you!(:
Great tip! Thanks for sharing!
Hi, I found painting the edges with black paint as the first step helps to avoid accidentally painting portion of the photo. Hope this helps. :)
Did you have a problem with the resolution when ordering the prints?
Hi Kim! I didn’t. All of my digital images were high resolution, though.
I L.O.V.E. this idea! I am going to do it right now. Really! I dragged my kids out to A.C. Moore in their PJs and now that they’re in bed I’m going for it. I plan on doing all their 8X10 school pictures that have been sitting in a drawer for a million years. Well maybe 6. I am going to do a trial run with a picture of me because I won’t care if that gets messed up. Thanks so much for sharing and I’ll be sure to link to your tutorial when I share my finished product.
Good luck, Liz! Let me know how they turn out!
Sorry Tasha – didn’t know that there were more comments there than what was just on this page. i see you’ve answered the question about the use of the blank canvas in multiple previous comments. now i’m trying to find the answer to my first question as i continue to read your helpful answers to previous questions.
Hello – really like your tutorial. it is very descriptive with good pictures to help. i have two questions though. 1. I am new to this (of course) and see some variations in the type of canvas that can be purchased. For example, i see canvas panels and stretched canvas. Can you let us know what type of canvas you purchased?
2. you use a blank canvas to sandwich on top of the picture. Does this ruin the blank canvas? I’m assuming so (maybe that’s why you’re using a smaller canvas for it) but thought i’d ask.
Thanks!
Hi Pab–thank you! I used stretched canvases. I hope that helps! I see that you found the answer to your second question :)
Do you think that a poster picture from Walgreens would work?
It should! I have done this with posters. Check out this post: https://designertrapped.com/2014/09/diy-canvas-art.html
What size photo did you print for the more square canvas? I really want to get a 12 x 12 canvas, but can’t decide what size print to order.
Hi Lindsay! It’s been a while, so it’s hard to remember, but I think I ordered a 12 x 18 print and cut it down to size. I hope that helps!
Hi, this is super cute! I am planning on trying this, but was wondering if you thought burlap canvas would work?
I don’t know, Amanda… Burlap might have a little too much texture. I would worry about the photo adhering well. You could give it a try–if you do, let me know how it turns out!
Was the photo a laser print or an inkjet print? Important info because I believe an inkjet print will smear with the application of ModPodge. Thanks!
Hi KC! The photos were printed on photo paper by a photo lab. I hope that helps!
What is black canvas? Never heard of it. Can it be bought at a craft store, walmart?
Hi Terri! I purchased white canvases and painted the edges black. But, you can purchase black canvases at craft stores. I don’t know if they are available at Wal-Mart.
Thank you so much for the photo canvas tutorial! I’ve wanted to try transferring some photos on canvas for a while, so these instructions will be very useful indeed :)
Omg..Loved your article. I tried today with 16×20 image and guess what came out really good.My husband was so happy.Thanks to you.
Oh yay, Priyanka! So glad to hear it!
I like this even better than transferring an image. It looks easier too. I’ll give it a shot. And thanks for the warning on adding Mod Podge over the image. You read my mind before my mind even knew.
Hey! How long do you let the photo dry on the canvas before stamping it on to the next canvas?
Not long at all! I move from one right on to the next. I hope that helps!
This is the best DIY that I’ve seen this week. Over Christmas, my husband bought me a new DSLR camera and so I’ve taken literally thousands of pictures since then. I’m going to try this out this weekend. Thanks for the great idea. I would love to include it as a guest blog if you are interested.
Thanks so much, Monique! Have fun with it! Send me photos when you are done and we can discuss the possibility of a guest post :) tasha@designertrapped.com
ok i have a question. Do i buy a extra clavas to do The stamp on it? Or how to I stamp the last picture?
Hi Leah! Yes, you will need 1 extra canvas to stamp the last picture. I hope that helps!
I love that you took the time to tell us not to freak out! It really helped. As I was reading and got the the part about putting glue on the print and texturing it I thought “pssssh, crazy person! That’s gonna look bad.” But you were convincing that it would work out. I love it.
I just don’t like how the edges don’t really blend in with the canvas no matter how much I chopped off. I tried to texture the sides but I just ended up using boarder for the sides….which worked out well because it was the exact boarder I used on other projects in the room so they all look like they came from the same place. THANKS for taking the time to make this and sharing.
btw for all the thrifty spenders… that’s still too much for a canvas at the craft store. I always use coupons. Joanns, Michaels, Hobby Lobby, where ever. I usually can find 40-60% coupons so that $10 canvas just turned to $4 or $5! The glue as well. I never pay full price. Which is why I started making what I wanted and was able to find cool things like this from creative people like you!
My pleasure, Janay! So glad it worked for you and that you found a good solution for the edges. And thanks for the tip about spending less on canvases! Thanks so much for reading my blog :)
What kind of paper do u use for the picture?
Is it just paper or photo paper?
It is nice to see it, I will definitely try it!
Thank you, Suzam! It is photo paper. I had my photos printed at Costco on photo paper. Hope that helps!
Hello,
Were the pictures printed on photo paper or just regular copy paper?
Thanks!
They were printed at a photo lab on photo paper.
OMG I thank you! This tutorial is awesome. I’d write more but I have to run to Michael’s! :)
-Thank you,
New fan!
Love your page I want to do this canvas prints for my day care kids parents for family day this week
I have two questions
Do you modge podge over the black painted area as well? And dd you use a tempra or an acrylic black paint?
Thank you for posting
defenitly checking back for more fab ideas.
Hi Marianne! I do not Mod Podge over the painted edges. I think I used an acrylic black paint, but latex should work fine, too! Hope that helps.
I loved reading this. I can’t wait to try it out. Thanks so much for posting this.
Hi Tasha! I am so excited to try this. Quick question – did you use any acrylic sealer once the project was complete? I’ve done several projects with mod-podge, and they are always a little sticky when finished unless I use acrylic sealer. Thank you!
Hi Shannon! Nope, I did not use a sealer. I just topped it with Mod Podge and they aren’t sticky at all. Hope that helps!
I have a couple questions…I saw this tutorial and was super psyched, as I’m looking to do something like this for my best friend’s birthday. However, I’ve encountered some trouble along the way. I’ve attempted this a couple times, and it’s never come out right. Unfortunately, I can’t figure out what I’m doing wrong. I didn’t get prints from Costco, I printed them off myself using photo paper. Is that OK or should I be using regular paper? The initial application onto the canvas is no problem at all, but once I layer mod podge on top of the picture and try and stamp, things go terribly wrong. No matter how little mod podge I use (I heeded your warning about not using too much), it comes out really streaky and not stamping wright. Can’t figure it out really. Thanks so much for your help! Otherwise I thought this was a really cool tutorial :)
Oh no, Tessa! I am sorry to hear you are having trouble. You should be using photo paper, so I don’t think that is the problem. Are you letting the photo dry overnight before you do the stamping? If so, the only problem I can think of is that maybe you aren’t using quite enough Mod Podge. There is a fine line between using the right amount and too much, but try using a little bit more. Also, if only some areas are not stamping, you could let it dry, then apply Mod Podge to ONLY the areas that didn’t stamp correctly and stamp those areas again. That way you don’t have to start all over. I hope that helps!
Curious if it makes a difference on the type of mod podge? I know you used matte but would this also work with the gloss finish?
Thanks for the tutorial! Can’t wait to give it a go!
Hi Sahar! The gloss vs. matte finish is just personal preference. I think the gloss would work just as well!
How many uses do you get out of your “stamping” canvas since it gets layered with mod podge? Or does the increased texture from the mod podge just add to the stamped image?
Thanks.
Hi Scott! I probably use the “stamping” canvas for 5 to 6 canvases at a time, in pretty quick succession {I tend to make them in batches}. Then, I glue a photo on top of the “stamping” canvas and start the process all over again. I hope that helps!
Hi Tasha! Thank you for such a wonderful article! I have a question for the canvas you use for stamping. So after you use it you said you glue a photo on top of it and start the process all over again. Can you please explain what did you mean by that.
Did you mean that you stick any photo to it, take it off and save the canvas for the next project?
Hi! I glue a photo on it and then use a fresh canvas to stamp it. Then I use that canvas for a while (to do 4 or 5 other canvases), then glue a photo to it and stamp it with another photo. The cycle just keeps going. I hope that answers your question.
When you ordered the prints from Costco, did you order the with a thin, white border or as is? Also, did you get them printed glossy or lustre?? Thanks!
Hi Sara! I ordered them with no border in lustre finish. I hope that helps. Happy new year!
I am wondering how you do the black edge without it looking messy on the top? You use the phrase, “sloppy” black edge. How does this turn out, not looking sloppy?
Hi Lorrie! To me, it does look sloppy, but that is the look I was going for. I wanted to mimic the look of the sloppy border that you can have printed on your photos at photo labs. You could certainly paint the edges of your canvas first and forgo the black edge all together if you prefer. I hope that answers your question. Happy new year!
Thank you for the fantastic tutorial! I finished my first attempt at two 16×16 prints last night and they came out FABULOUS! I followed your tutorial step-by-step and they look so great! The black paint finish on the sides and the stamping really makes it! Can’t wait to make a ton more! For those struggling- be sure to let each step dry before moving on to the next and remember- a little podge goes a long way!
Thanks again!
Yay! So happy to hear it, Francesca! Happy new year!
I would love to do this but I use my cell phone for most of my pictures and I’m wondering how everyone gets their cell phone photos printed. It usually says Warning! Low resolution photo being ordered or something like that. Is there a way to fix that? Thanks!
Hi Meredith. I don’t know if there is a way to fix the resolution of a photo after it has been taken, but a photo lab might know the answer. I have never tried to enlarge a cell phone photo. Sorry I can’t be more helpful! Happy new year!
thank you so much for this wonderful tutorial! I dived right in and did nine 11 x 14 canvases. I ordered my prints from Costco and the rest of my supplies from AC Moore. All said and done it cost me only $70! What also helped is I read through the comments before I did this. It helped ,e realize some potential mistakes I might make like using too much or too little glue or not waiting long enough for the, to dry before pressing. Btw pressing was my favorite part! They turned out great! It was my first time doing anything like this and also the first time I enlarged any of my pictures I took. They will make great gifts and now I know what I’m going to do to decorate the rest of my house!
AWESOME, Kristen! So glad yours turned out so well! Happy new year!
What kind of paper did you use?
What do you do with the other Canvas that you used to Stamp the photo?
Does the image completely transfer to the canvas with the modge podge or partially?
I wish you had an image of the stamped canvas after the transfer. Just curious.
I’ve seen other methods where people just put the picture right on the canvas an use water to take the paper off. Have you tried that before and how did it turn out if you did.?
Hi Lex! This actually isn’t a method to transfer the image to the canvas. Instead, you actually glue the photo itself {which was printed on photo paper at a photo lab} onto the canvas and then stamp it to look like the image is printed on the canvas. There is a photo of the finished canvas in the post. There is even a close up of so that you can see the texture. I have never tried the transfer method that you refer to. I hope that helps. Happy new year!
Tasha,
So what do you do with the other Canvas that you used to Stamp the photo? Is it possible to use that canvas for stamping for later projects?
Hi Tasha,
So what do you do with the other Canvas that you used to Stamp the photo? Is it possible to use that canvas for stamping for later canvases projects?
Yes! After I stamp several canvases, I use the canvas that I did the stamping with to adhere a photo to and then use a fresh canvas to stamp another 3 or 4. The cycle just keeps repeating itself. I hope that helps!
Are those actual photos? Or are they on pieces of PAPER with pictures printed on?
I’m a bit worried I did it wrong…I had actual 4×6 or 16×20 photos at Costco. But after looking at your tutorial pictures it almost looks like nice paper with the pictures printed on it. Please let me know ASAP!! Thanks. :)
Hi Kara! They are actual photos from Costco. You did it right!
Awesome THANKS FOR THE TUTORIAL!!!! I just did this with 8×10 photos for Christmas gifts. They turned out great. I did have to put mod podge on the picture and the canvas to have it stick well. Then I put them upside down with books on top and let dry over night before applying the next layer and stamping affect. Hoping maybe my technique will help others. I always try to comment when something actually turns out right on pintrest. Merry Christmas!!!!
Sara
YAY! So happy to hear it, Sara! Happy new year!
Hey there! How are the photo canvases holding up? I purchased regular photos from Costco for this project, but I am wary about the Mod Podge on top. I know sealing is a good bet, but will it bubble and wrinkle?
And what’s your thought on Matte Gel Medium for this?
(I recently made subway art, putting a poster print onto wood. I sealed with Mod Podge, but then it bubbled)
Thanks!
Hi Kara! Ours have been hanging for well over a year now and I have not had any bubbling or wrinkling at all. But I have also put a poster on a canvas using the same method {you can check it out here– and I didn’t have any bubbling with that either, so I am not sure what may have caused your problems with your subway art. I have never used matte gel medium, so I am not sure how that would work. Hope that helps!
I love your directions, but have a question, do you end up wasting one canvas since you put the photo on one and then sandwich it? I would really like to try this but don’t want to waste a bunch of canvases. Thanks!
Hi Patty! No, I have never wasted a canvas. I use the same canvas to stamp several photos. Then, I apply a photo to the “stamping” canvas and use a fresh one to do the stamping. I repeat that over and over, but they all wind up getting used. Hope that helps!
If there is a Staples Store in your area they have 16×20 enlargenents on sale for $9.99. Hope this helps!
Great tip, Tamara! Thank you!
This turned out to be a disaster for me. I used a poster print from kinkos. The photo wouldn’t lay flat and the “stamping” process took off the top layer of the print in several places. I’ve now ruined 2 canvases and a $20 print :-(. I wanted to make several of these for Christmas, can you tell me what I’m doing wrong?
Hi Heather! So sorry to hear you are having trouble. Are you allowing the layer of Mod Podge under the print to dry completely (like perhaps overnight) before putting the top layer on and attempting the stamping? If not, be sure to do that. My only other thought is that it sounds like you may be using too much Mod Podge and that it is making the post print too wet. I have never had this problem with either photo prints or poster prints, so it’s hard for me to know. You can check out my tutorial using a poster print (, but it’s the exact same process, so I am not sure what the cause of your trouble is. Sorry I can’t be more helpful via computer.
If there is a Staples in your area, they have poster prints on sale starting at $6.99 they also have 16×20 enlargements on sale for $9.99. Hope this helps a little bit!
this is amazing!!! i am going to try this. thank you for this tutorial!!
You are so welcome!
I am wanting to do this as a Christmas present with a picture of Christ of the internet what would be your suggestions in how to print it. I am not sure if I should use an actual photo print or poster print..? I seriously love your tutorial best one I have seen texture thing..Genius :)
Thank you, Jessica! You could use a poster print or a photo. I have done this using a poster as well and it worked great. You can check it out here: . Good luck!
I was wondering if its possible to use the poster instead of print?
Absolutely, Kareesa! I have done exactly that. Check it out here:
My paper kept wrinkling as the mod podge dried :(
Hi Justine. Did you allow the first coat of Mod Podge (under the photo) to dry completely before putting the top coat on? Did you have your photos printed on photo paper at a professional lab?
These are excellent tips that I think will save me hundreds. I have a 45×60″ print made of banner paper and can obtain a canvas of similar dimensions. Does anyone have experience/tips for something of this material/proportions? I think its better than buying a frame/matte/backing/acrylic/etc. Any thoughts?
Thank you, Jana! I have read about ordering engineering prints from Office Depot {only available in black and white}, which are quite large. You could them apply them to foam core using and use this method to get the look of a canvas. I hope that helps!
I would like to make several of these canvases. How many time can you use the second canvas? Do you have to clean it in-between “stampings”?
Hi Karen! I use the second canvas 4 to 5 times. Then, I apply a photo to THAT canvas and start stamping with a fresh canvas. No, I don’t clean it between stampings. I hope that helps!
Hi – I followed these steps exactly, but when I “pressed” the canvases together it did not give a uniform stamping. I did sandwich them together and pressed down on the interior of the canvases. Perhaps I pressed too hard and it’s just not that difficult? My dried images are streaky, you can see the areas where I applied the modge podge and it didn’t stamp the canvas very well. It’s REALLY noticeable when the dining room chandelier is on. Any suggestions for how I can save these?!?! Put on another layer and maybe try with a paint roller or something? I don’t see how I could make them worse at this point.
Hmmmm, it sounds like maybe you need to use a little bit more Mod Podge. I would say add another, uniform coat of Mod Podge and give it another try! At the very least, a uniform coat of Mod Podge may help with the streaking. It takes some trial and error to get just the right amount of Mod Podge. If you use too much, the texture doesn’t come out as clearly and it sounds like if you use too little, you could wind up with streaking and patchy stamping. I have had the problem with too much, but have not had the problem that you have had, which is why I am guessing maybe you need to use a bit more. I hope that helps!
I saw this and I have to try! I sent my photos to print at Walgreens, but it only gives the option to print on Satin Paper. Will this be alright or ruin the overall look?
Hi Amanda! I think that will be fine as long as you use the matte Mod Podge. Hope that helps!
Awesome!!! I have been wanting to purchase canvas prints for some time now but they’re too expensive. I am definitely going to try this. Thanks!!
I loved this idea and was so excited to try it! I used an 8×10 canvas from michaels that was mounted onto a wood frame 1/2″ thick. I also used soft gloss photo paper on my home computer to create my print. My photo glued on fine, but when I stamped it, I spent about 10 seconds making sure the canvases pressed together well from the open frame backs, and when I lifted the stamping canvas, many areas of the photo were lifted off. Now I am not sure if I should have used different photo paper (matte finish? or maybe homemade enlargements don’t work?), a different canvas, (one that does not have wood frame, or if I just took too long to peel them apart. Not complaining, as this is obviously an awesome idea, and if I can do it correctly, it will be well worth a few initial problems. Any feedback would be appreciated. I only saw one person with a similar problem, but her post was a little confusing. Knowing your thoughts on gloss prints, if your canvases are mounted on a wood frame, and how many seconds to press before lifting would be a great help for my next run at it:) Thank you!
Hi Joanne! Sorry you ran into trouble. My guess is that it is because you printed them at home. I had mine printed on matte photo paper at Costco and have never had any problems with lifting. I don’t think 10 seconds is too long, but I would estimate I spend more like 5 seconds on that step. My canvases do have wood frames, so that shouldn’t be causing the problem. t hope that helps! Let me know how your next one turns out!
wow ! wow! wow! thanks for sharing this idea..!!! I’m going to make me one of those.!! or 2, or 3 …. :D
Yay, Van! Have fun with it!
Hello, I love the idea and plan to use it myself however, What finish do the prints need? Such as gloss, satin? Or does it not matter? Thanks.
Hi Giovanni! I ordered my prints in matte finish, but I am not sure that it matters. Hope that helps!
I just finished 3 diy canvases. I didn’t see your blog prior to making mine. Do you think i could do a second layer of mode podge to get the stamped canvas look? Thanks!
Hi Jennifer! I do think that would work, though I have never tried it. But, I would go for it! Let me know how it turns out!
Thanks so much for sharing this idea. I’ve wanted to do 3 pics of my girls on canvas but couldn’t find a good solution, until now!
So happy to hear it, Elaine! Let me know how yours turn out!
Hello! Does the “matte: mod podge only work for this project or would a “glossy” work as well? Thanks
Hi Vicki! Gloss should work just as well, it will just have more sheen to it. Hope that helps!
I love the idea! Could you make the photo larger to wrap around the edges of the canvas?
One more question – I have seen other crafts say that the mod podge curls the photo – do you have any tips on how to make sure the photo does not curl?
Thank you for a great tutorial :)
Hmmmm, I’m not sure Tania. The photos just aren’t that flexible and I would worry that wrapping them around the edges would not hold. I have not had any problems with curling. I think if you apply enough Mod Podge underneath AND on top of the photos, you should be in good shape! Hope that helps!
What kind of photo paper did you get it printed on? I am looking at the prints from Walgreens and they have poster prints in the 16×20 but is on satin finish, will that be ok?
Mine were printed on photo paper, but it does work with poster prints. Check out my post on doing it with a poster print here:
I didn’t see a link for the instructions on creating a canvas using poster prints. Could you please share? Thanks!!
Hi Rebecca! Sure thing. Here is the link to the post on creating a canvas with a poster print: https://designertrapped.com/2014/09/diy-canvas-art.html Enjoy!
When making multiple canvases, do you need a new black canvas for each photo?
Hi Rachel! You can use the same blank canvas to “stamp” multiple canvases. Hope that helps!
i used your tutorial tonight, love the idea of the stamping…but i had a few spots that the stamping didn’t take, leaving it smooth, of course after it dried…could i go back and put mod podge on those areas and restamp, or do you think that would mess it up, and just leave it alone? hate that the whole picture didn’t hold the stamping :(
Hi Melissa! I think you could probably add Mod Podge to just the bare spots and stamp them without it messing up the rest of the canvas. I have never tried it, but I think I would go for it! Hope that helps!
Looks great and easy to do definitely going to give it a try. Few people at work interested in buying pictures I take so this would be great. Love the idea of painting the black edge but you could just as easily paint whatever colour suits the person it is for.
Absolutely, Alan! You can paint the edges any color!
Hi! Love your idea and tried it tonight…except I had mounted my pictures to a wood board then tried using a canvas we had on hand to stamp it…it worked okay but the edges of the canvas that are mounted on wood didn’t work to stamp the picture on the wood. Had to rub the part of the canvas that wasn’t wood and the mod podge dried a little too quickly and picked up pieces off the picture. Not sure if that makes sense…I’ll have to try using a canvas to adhere my pictures to next time…thanks for the tutorial!! :)
Hi Amy! That does make sense. I bet you could still do it on wood, but be sure to stamp while you Mod Podge is still nice and wet so it won’t peel the photos at all. If you try it on canvases, let me know if you have better luck!
I just made a canvas wall using this tutorial, and it turned out awesome! Thanks so much for the awesome tips! I will post the pict of how it turned out on instagram and try and tag you in it.
Yay, Jonelle! So glad you love how yours turned out! I can’t wait to see your photo on Instagram!
I’ve had this pinned for a couple of months now. I’ve have finally found the picture I want and I am hoping for a quick response (I will be at my tablet waiting haha) I just made homemade med podge last night. I looked through all the comments and didn’t see anyone asking if homemade will work. I will go get the store bought to do this if you aren’t sure. I used 1 full bottle of Elmers glue which measured to a 1/2 cup and then a 1/2cup of water and shook viciously. Thank you..you blog is awesome!!!!
Hi Brandy! I have never used homemade Mod Podge, so I honestly don’t know if it will work. I will say that the store bought Mod Podge is only slightly thinner than glue. Is that about the consistency of yours? If so, I would go for it!
We just had professional pictures taken, I am so excited to try this!!!!! Your looks great!!
Hi Kirsten! It’s such a fun project. Let me know how yours turn out!
I just made my photo canvases last night!!! I am so happy with how they came out. What an easy project with such a great result!! I had priced the cost to order all the pictures I wanted on canvas and it was HUNDREDS of dollars. I ordered my prints from Costco and my canvases from Michael’s… I ordered a ton for under $90, including shipping!!!
I wish I could share a picture with you to show you! Thank you for sharing this!!!
P.S. The only thing I haven’t done yet is paint the sides black, I can’t decide if I want to keep them white or not…. hmm decisions.. decisions!!
Yay, Kristen! That’s so great to hear!!! You are welcome to email me a photo at tasha{at}designertrapped{dot}com. I would love to see how they turned out!
World’s best tutorial!!! JUst completed 3 canvases for my home following your step by step directions. I absolutely love how they turned out. My mom just stopped by and begged me to do some for her home too! Thank you so much for this fantastic idea!
Awww, thank you so much Meghan! So, so happy to hear you are happy with your canvases.
Excellent trick! I do exited to see my baby’s pictures up now. I purchased the materials except the paint. What type of paint did u use, acrylic paint?
I have used latex, acrylic AND chalkboard paint. All three types seem to work perfectly well. I hope that helps, Lily!
Hi I was wondering if you ever stamped the canvas but didn’t like the way it looked once it was dry, did you redo it? I made 14 this weekend and there are a few that aren’t as perfect I want! Any information would be helpful!
Your tutorial is excellent! ! I recently did about 16 of them. Some of then i put too much mod podge. I was wondering if you ever made a mess up and reapplied mod podge and re stamped the canvas.
Thansk!!
AWESOME Bethlyn! That makes me so happy to hear! I have applied too much Mod Podge, but have realized it when it was wet, so I was able to wipe it off before it dried. I have never tried restamping one that has already dried–sorry!
Thank you for sharing this! I can’t wait to do these to my own photos!
My pleasure, Tess!
Really amazing! This is exactly what I’ve been looking for. Do you think it’d be a problem to paint the sides of the canvas a different color? I know the black is neat but not sure it’ll work in my room. Also, how would you go about replacing the old photo on the canvas with a newer one? Use Mod Podge over the existing photo or attempt to take off the old photo? Thanks so much!
Hi Justin! Absolutely you should paint the sides of the canvas any color you want! I do think I would place a new photo on top of an old one as opposed to removing the old photo. That said, I have never tried either, so it’s hard to say! Hope that helps.
Hi tasha! i want to start making my own canvas as well and i was just wondering if you print your pictures on regular photo paper or do you print them on fabric or cardstock?
Hi Denise! I get my printed on photo paper at Costco. The enlargements there are VERY affordable. Hope that helps!
Hi! I’m trying this out for the first time and am seeing that my photo edges are not lying flat on the canvas. Any tips or is it not really an issue? So excited about finding your blog! :)
Hi Denise! I have never had that problem. It sounds like you may not have placed enough mod podge around the edges??? I’ve never had that problem, so it’s just a guess, but that is my only thought. I hope that helps! Let me know if you have any other questions.
I will start by saying, I am BY NO MEANS crafty…but I am frugal :) I followed this tutorial (thank you for posting!) except I used a black canvas to begin with. It turned out okay.
My Texturing did not turn out as good as yours looks…I guess I should have pressed it better or something. I wasn’t sure since it was my first go-round.
Next time I think I will just do smooth texturing, lol. But I still LOVE the idea of this! Thanks again for sharing
LOL! Thanks, Angie. It will certainly look great with smooth texture, too. I think a lot of people are hesitant when it comes to the “stamping” step :)
I am so happy I randomly came upon these DIY instructions. I am usually quite bad at “crafty” things, but this was easy! I made ten 8×10 canvases in under an hour tonight. Can’t wait to hang them up in my apartment tomorrow!
Hi Olivia! You made my day! So happy to hear you enjoyed this project and that it worked for you!!!
Great tutorial! I have just completed 4 of the 10 photos I plan on finishing this way. On a couple of my completed photos, there are small white bumps that are especially noticeable where there is black in the photo. I didn’t notice them when they were wet. Have you experience this and do you have any ideas to remove them or smooth them out? Thanks!
Hi Julie! It sounds like those are dried air bubbles. I have not experienced them, but if you can catch them while they are wet, you can smooth them out with your paint brush. I’m not sure how to deal with them once dry since I haven’t had that issue. Have you tried lighting scraping them off with a fingernail? So glad to hear you have already completed 4–that’s awesome!
Ok, I’m late to the party, but found this link via Pinterest. I love this idea! However, I did try something similar with a map for my sons nursery, and it came out warped/bumpy. I dont want this to happen with my photos. I’m thinking it was that the canvas was not pulled thought enough? Is there a specific brand you usually like?
Hi Erica! I don’t buy a specific brand of canvases–whatever is on sale is what I go for. When you apply your photo, be sure to turn it over {face down} and really smooth it out by rubbing the canvas with your hands. That should help to keep it nice and smooth. But it does sound like maybe you were working with a loose canvas as well. You should definitely give it another shot!
On my first try tonight, both canvases came out very bumpy no matter how much smoothing I did. I didn’t have it printed on photo paper, just regular paper at Office Max. I think that was the issue. It didn’t hold up when wet and it only got worse as it dried. I’m off to Costco tomorrow to print it on actual photo paper this time and re-doing the project. Despite the bumps, I can really see how much I’ll love it once I get it down right. I need to practice the cutting of the edges since mine came out uneven. I’m testing on 8x10s before I do a bigger one. I’m making all the wall art for our baby girl nursery too. So fun!
Hi Emily! I do think you will have better luck with photos printed at a photo lab. Have you tried it yet? Did you have better luck? After you place the photo on top of the Mod Podge, be sure to flip the canvas over and smooth it with your hands to get out any lumps and bumps. Let me know if you have any questions. I am happy to help!
Yes, the second time around using photo paper did the trick! I’m trying to get a more even texture and found that using a bigger canvas to stamp it is helpful. I didn’t paint the edges of mine black because I did very light colored grey, white and lavender prints for the baby room. It still looks great though!
I used your suggestions to make a wall of photo canvases and they turned out great! Thank you so much for the great, thrifty idea.
Oh, you made my day, Kendall! So glad you love how yours turned out! Thanks so much for letting me know!
I love this tutorial! I love the look of photos on canvas but I only have one due to their high cost! I was so excited to find this and I bought a few canvases yesterday for some photos waiting on frames. Can’t wait to try it out….thank you so much!!! :)
Thanks so much, Corri! I would love to hear how yours turn out!
loved the tutorial and can’t wait to try this. we are merging our families (marriage) and needed a way to display photos of the grands. Now simply need to decide on the wall.
Thanks so much, Mary! Have fun with it!
This is awesome. I have a question about the blank canvas that you use to press onto the photo – can I reuse that blank canvas for other photos that I create later (as the one that I press on top of the photo) or do I need to use a new one for each photo?
Thanks,
Sharon
Hi Sharon! You definitely don’t need to use a new canvas every time. If I make 5 canvases in one sitting, I use the same canvas to stamp them all. AFTER the Mod Podge dries on that canvas, however, it does make the canvas texture less prominent. So, I will actually apply a photo to the canvas I previously used for stamping, and will use a fresh canvas to stamp the next set of canvases. Does that make sense? I hope so!
What kind of paint did you use for the edges? So glad I found your tutorial! This had been a fun project.
Hi Erin! I use regular old black latex paint. One time, I even used chalkboard paint because it’s all I had on hand. It doesn’t have to be anything special. Have fun with it!
If I were to print off my own computer do you think the ink would smear if I let it sit or should I get a copy made? Can you reuse the top canvas to print another? Would you wipe the mod podge off to reuse? Great project and I love saving money!
Hi Julie! I have never tried printing my own. I have only used photos that I had printed at Costco. You can absolutely reuse the top canvas for another. I tend to make mine in batches, so if I make 5 in a sitting, I use the same canvas to stamp all of them. I don’t wipe the Mod Podge off in between, but you could if you prefer. I hope that helps!
Stopping in to pin……after I quit shaking my head for how smart and simple an idea this is. Pat yourself on the back from me.
Lol! Thank you for the pin and your sweet comment!
Genius! One question. I tend to get bubbles when I use mod podge.. any issues w/ that?
Thanks, Beverly! I actually didn’t have issues with that. I used a foam brush. And maybe “stamping” the other canvas on top helps pops any air bubbles??? I’m not sure, but it’s never been an issue for me. Hope that helps!
OMG… I have done the canvas prints before but never did the “stamp” part — absolute GENIUS!! Can’t wait to try this with the new instructions. Thanks
Thanks so much, Cyndy!!!! Let me know how your turn out!
Hi Tasha! I NEVER comment on blogs, but I just had to tell you what a genius you are! This is by far the best canvas tutorial I’ve seen. I just finished my first canvas, and I’m amazed at the result. Your stamping technique makes the finished product look so authentic. This canvas will definitely be the first of many, as I already have plans to do at least four more. The possibilities are endless! I’m excited just thinking about it! Thank you so much for sharing your secret! You’ve given me a fun new hobby that makes me smile. :)
Hi Marie! You just made my day! I am so happy that you enjoyed the tutorial and that you have already made a canvas of your own. Isn’t it fun?! Thanks so much for taking the time to comment and say hello!
You are amazing! Thanks a million for this tutorial. I’ve always wanted to try this but it seemed so complicated. You have broken it down to make it so easy. Super excited to try this and I will be checking out your other posts. Thanks, from another designer trapped in a lawyer’s body :) all the way in the British Virgin Islands!
My pleasure, Tamara! I love “meeting” other designers trapped in the body of a lawyer! I hope your canvases turn out well!
Thank you so much for the tutorial. I just made 12 6×6 canvas’ for Mother’s Day gifts of my grandson. Made one set for each grandparent and one for his mom. I got my pictures printed at Sams and they were .48 each and bought my canvas’ at Michaels when they had buy one and get two free. So all in all a pretty inexpensive gift that looks great.
Oh Kim, I am so happy to hear that you made some canvases and that they turned out well. I hope the grandparents and his mom love them!
I Loooooooove this… Such an Awesome Technique and I Love Costco…. Question, Did you print with the glossy or lustre? Will be trying this over the weekend :)
Thanks
Thanks so much Diana! I had them printed on lustre. I would love to hear how yours turn out!
I recently printed 2 16×20 photos from Walmart the photo lab man told me my mod podge would ruin my photos because ink jet photos aren’t water proof!! Are the prints you covered from an ink jet printer? My photos were only 12$ but I still am nervous about covering them!! This has to be the easiest trick I’ve seen!!
Hi Andrea! That is very strange. I had all of my photos printed at Costco. I do not know if they are from an ink jet printer, but I would guess they use similar equipment to Wal-Mart. Maybe you could get a small 4 x 6 printed at Wal-Mart and test the Mod Podge out on it first? I can tell you that whatever Costo prints them on, they look just like regular old photos on photo paper. Sorry I can’t be more helpful!
I printed my own photos from my ink-jet printer and used this procedure and they turned out fine!
That’s awesome, Teena! Thanks for letting me know!
My photos were walmart poster prints and the modge podge didn’t do anything to ruin them. They look great!
Oh good, Theresa! So, so happy to hear that your are loving your prints and that others like them, too! Isn’t it a fun project?!
I just did this with my kids’ spring pictures and you are right- this is the BEST tutorial for photo canvases. They look amazing and it was not only cheaper than buying printed canvases, but it ended up being much cheaper than framing my 11×14 prints too. I’ll be using this again and again!
Hi Theresa! I am so thrilled that you used my tutorial with fabulous results! You made my day!
I have gotten sooo many complements on them too. Every one wants to know where I got them and when they find out it’s DIY they demand to know how I did it. lol
Such a neat trick! very cool!
Glad you like it, Anshu!
I am so glad I stumbled across your blog! I have seen all the DIY canvas tutorials and tried a couple but it just didn’t look like a canvas print with the brush strokes. I just finished a gallery wall of (9) 16×20 prints and was too chicken to put the coat on top of the pictures. I just used the canvas to mount them. So I practiced your ‘sandwich’ method on a couple of smaller prints and love the finished look so much, I may just take down my 16 x 20 prints and give them a canvas finish! And…I’m so inspired I’m already making a batch of canvas prints to give for Christmas this year.
Hi Carla! I am so, so thrilled to hear that my method worked for you! You should totally go for it on your 16 x 20 prints! Thanks so much for taking the time to comment!
Can I use a canvas that has something on it already (a cheap bought canvas print I don’t like) to stamp the canvas texture on to the wet photo?
I love this idea & can’t wait to try it out!!!!
Hmmm, good question! I think that would probably work! It’s definitely worth a shot since you already have it on hand. Let me know if it works :)
Why not use that canvas as the photo canvas. The photo covers the canvas picture. It’s like getting a free canvas. Now another reason to shop thrift stores and get canvas prints for cheap. I’m thinking that textured fabric might lend to a cool texture on the photos too. Something new to try. Love this whole make your own canvas photo idea. Thanks for sharing.
Hi Catz! Yep, you could definitely buy and use thrift store canvases. Have fun making your own!
I am so excited to have just read this DIY project! I have pinned and shared it with some friends. This is a “Why didn’t I think of that” type of project. Thanks for the inspiration! My walls are going to love me and my husband might want to kill me when he see’s the finished projects thinking I ordered them from somewhere. I can’t wait and the best part is that I get all of my pictures from Costco! Thanks again!
Awww, thank you, Jennifer! Ih ope you and your friends have fun with making your own. Your husband will love you when you tell him how inexpensive they were!
Thank you Tasha for the easy tutorial! Who knew it could be that easy. I’m going to work on some photos with my nephews next time they’re over…they’ll LOVE it. You’re the best for sharing your knowledge with us all.
My pleasure, Mimi! I hope you have fun making your own!
I just completed my first 3 photos~love them!
Here’s one:
http://www.pinterest.com/pin/221309769163051457/
Hi Esther! Thank you SO MUCH for sharing your project with me. The photo on Pinterest looks fantastic. Is that a photo of your and your husband? Whoever it is, it’s a great photo of a loving couple! So glad you enjoyed the tutorial!
Thanks for the feedback. Yes my and my hubby~married 7 1/2 years now.
Fabulous! This is very much worth a try! Thanks so much for the tutorial!
Glad you enjoyed the tutorial, Terry! You should definitely give it a try. It’s so much easier than you can possibly imagine!
Wow! I was peruving online canvas prints and they’re awfully proud of their work (as you said, $50-$80) I’m wanting just this type of photo (3 actually!) and will definitely be attempting this project. Wow! once again, and thank you!
I know! They are so expensive, it’s crazy. So glad you are going to give this a try. Thanks for stopping by, Esther!
Love this idea, but I have one question. You said you used professional photos and Costco enlarged them for you. I don’t know of any place that will do that with professional photos due to copyright issues. Ours stores around here refuse!
Hi Elaine! Great question. I always purchase a full copyright release CD of all of our photos for this reason. I only pick photographers who offer this as an option! I also enlarge a lot of my own photos. About 40% of my canvases are made with my own photos, so it still works well with “amateur” photos.
Thanks for replying to my question. I love this decorating idea. I have tried to get copies of really old photos from when I was a child. The photographer is long dead and gone, but most places still won’t copy them. Hence, my question.
Oh…Wow–I am surprised they won’t do anything with old photos. Have you tried scanning them in and then submitting the digital file online? I wonder if that would work.
This is amazing Tasha!!! You are my hero, truly!! Pinned!
Awww, thanks so much, Mindi!
Beautiful, Tasha! Thank you for the awesome tutorial ~ I’m pinning this.
Thank you so much for sharing this at DIY Showcase on VMG206.
~ Megin of VMG206
Thank you, Megin! I love your party!
This project turned out beautifully. Great addition with the black paint trim, too. I bookmarked it and will share, too. I really want to try this in my daughter’s room. Thanks for a great post!!
Hi Dana! Thank you so much for stopping by and for your sweet comment. Have fun with this project! I think you will love it!
I truly love this idea Tasha! I have seen numerous tutorials for applying pictures to canvas, but this one is by far the best one I’ve seen yet! Thanks again for linking up to Thursday S.T.Y.L.E. each week. I can’t wait to make my own canvas pictures using your tutorial:)
Awww, thank you so much, Katie! I would love to see how yours turn out!
what?! no kidding! you are a genius tasha! that replicating the texture of blank canvas to get that professional texture is pure genius!!
i am totally going to try that texture effect♥
huggies♥
rea
Tasha these look awesome. I love everything about them, from the images to the way to made and displayed them. I really need to do something like this in my house. Great job!
You are so sweet, Courtney! I really appreciate you stopping by and your sweet comment.
Oh my gosh! I’m so excited!! Seriously, thanks for sharing this. I have a blank stairwell just asking for this. Thank you!!
You are so welcome, Suzie! I think photo canvases would look fabulous on a stairwell wall. I would love to see how yours turn out!
wow! great tutorial! My question is this… is the “stamped” canvas then ruined? Or is it reusable?
gail
Hi Gail! Thank you! That’s a fabulous question. I have used my “stamp” canvas again with no problem. In other words, the canvas I have used to stamp the others then becomes its own photo canvas. That said, I always wind up with one spare to be the “stamper,” so I will always have one canvas that winds up not getting used as a photo canvas. If I ever use the “stamp” canvas for anything other than a photo canvas, such as a painting, I would probably lightly sand the residual mod podge off before reusing it. I hope that helps!
Such a neat idea! We just got back from Disney, I’m going to have to do this with some of our vacation pics.
Thanks so much, Jennifer! You should definitely try it with some of your favorite photos. It’s so much better than just storing them on your computer :)
Thanks so much for linking up at Thursday STYLE! I absolutely love this project! Have a wonderful weekend :)
My pleasure, Angela! I love linking up to your party. Happy weekend!
LOVE this! I have been wanting to do this for some of our wedding photos and your tutorial is so easy to follow {and fun to read}. Thanks for sharing at The Makers and we hope you will join us again next week!
Thanks so much, Katie! Of course I will join you next week. I love your party!
This is BY FAR the best tutorial that I have found! You killed it! I have tried this in the past and it was always missing something… thank you!
I would love it if you would stop by and link this up at my new Pinterest Linkup party!
http://www.21random.com/that-friday-pinterest-party/
Off to devour your blog!
Hi Chrissy! Thanks so much for your sweet comment and for the invitation to link up at your party!
I think your canvases are just gorgeous! I love how they turned out! Great idea on using another canvas to create the texture. You’re a genius! Thank so much for sending readers my way if they’re a little too scared to try this version. Either way the readers will get a great finish!
Thanks, Carrie! My pleasure to link to your tutorial. I think your method is awesome!
Your wall is beautiful, so are you kids, thanks for sharing your tutorial. I would love to try this with some family photos.
Hi Sarah! Thank you so much :) Heading over to check out your blog now!
That turned out so cool, Tasha! I’m wondering could you paint the canvas black before you adhere the photo to it with modge podge if you wanted straight edges rather than the sloppy black edges? Or you need to paint later to disguise the edge of the photo?
Thanks so much, Carrie. I have done it both ways. You can definitely paint the edges black before, but I do feel like you need to go back over the edges of the photo after the fact because they will appear white. You can do it pretty easily without getting paint on the front of the photo if you choose not to paint any kind of edge of the photo itself. I hope that helps!
Beautiful!!! Love this idea and looks so simple!! One question, Did you use actual photo paper for your pictures and did you print on computer paper??
Hi Jessica. I had my photos printed on photo paper at Costco–very affordable!
WHAT! You are *brilliant.* Brilliant, I tell ya. I had no idea you could replicate the texture like that. This opens up a whole world of art ideas to me! :)
Hi Kelly! Awww, thank you! I can’t wait to see what you do with the texture trick :)
Love this idea! Awesome result! Quick question. Are you enlargements actual photos? What finish? Glossy or Matt?
Hi Kira! I use photo enlargements that I get at Costco, so yes, they are actual photos. I prefer matte finish. I hope that helps!
What a great tutorial! We’d love to attempt a 16×20 canvas. On the Costco site, “prints and enlargements” only go up to 12×18. I see 16×20 in “poster prints” for 5.99 (or “collage prints” which I assume isn’t right). Is “16×20 poster print” the one you ordered that gave you the right photo paper quality? Sorry for the specific Q, but I hope to get it right the first time b/c it looks like it takes a couple days for it to come in and I need it before the weekend. :) Thanks a bunch!
Hi Vicky! That is so strange. Maybe they stopped offering them. Mine were definitely printed on photo paper. With that said, you can do this with poster prints, too. You can check out my post on that here: It’s the exact same method and worked great for me!
I am all over this post!!! love love love it. That is so smart! I’m definitely going to be recreating this at some point in the future. thanks for sharing your smarts with us!
Hi Anna–so glad you enjoyed the tutorial! I would love to see how your projects with this technique turn out!
Brilliant!!! Your canvases look amazing. I happen to have some blank canvases in my craft room.. Might have to try this!
Thanks so much, Kelly! You should definitely give it a try. You will love the result!
Tasha,
What a great tutorial. I just love the photo walls. Thanks for sharing.
Thanks, Kathy! We hope you had a FANTASTIC birthday!!!
Get OUT! That is a fabulous technique! Thank you for the awesome tutorial!
High Five, Girlfriend!
~ Ashley
THANK YOU, Ashley! You are so sweet and are so welcome! Glad you enjoyed the tutorial!
This is FANTASTIC!!! Never ever in a million years would I have thought of this. So smart. Thank you!!! I will definitely be doing this . . . and I can’t wait. Thanks again! Pinning, too. – Bre
Thank you so much, Bre! I really appreciate it. I would love to see how yours turn out. Thanks so much for the pin and the tweet!
This is so cool! Thanks for sharing! I need to work on some projects with photos, and I’m going to have to copy this! You have a such a gorgeous family :)
Hi Angela! You are so sweet, thank you! You should definitely do this–it’s so fun! I would love to see how yours turn out!
Those turned out looking SO great. I’m going to have to try these out for sure. I’ve been working on putting a photo wall together in our new house! :)
Lindi
Sweet Southern Sparkle
http://www.sweetsouthernsparkle.blogspot.com
Hi Lindi! Thank you so much for stopping by and for your sweet comment. I would love to see how your photo wall turns out. Heading to your blog now!
This is fabulous!! Need to get my daughter to do this with her professional photos.
Hi Kim! So happy you stopped by. This is SUCH a great way to display your favorite photos. I hope you can convince your daughter to do it!
We are really on the same wave length! I am posting a really similar photo canvas tutorial tomorrow – though slightly different. Great minds… And I love your photo wall!
Hi Carrie! It’s so funny because Carrie This Home posted a great tutorial last week. Different from mine, but she also has a great way to get texture on hers. Yes, great minds think alike :)
GENIUS!!!!!!!!! I heart you!!! I just ordered my first canvas thru Costc with a coupon, but I know I’m going to want more!!! Thanks for the great tutorial and a few laughs!!
Amber @ Averie Lane
ps…PINNING!!!!
Awww, thank you so much, Amber! And thanks for pinning. I really appreciate it. Happy Sunday!
Not that you’re looking for feedback on your photos…but the one of your girls kissing made my heart smile…so beautiful!!
These canvasses are such a great idea, thank you!
Oh, thank you Ali! That is one of my favorite photos of them :) Thanks for your sweet comment!
are you able to reuse the ‘smaller size canvas’ for ‘stamping’ for other future canvases photos?
Hi Vanessa! Yes, I always reuse the canvases that I do the stamping with. Nothing ever goes to waste. Hope that helps!
Do you rinse off any of the MP left from “stamping”?
Hi Laurie! I do not rinse the Mod Podge and/or wipe it off, as I am afraid that would actually smooth out the canvas texture and since I use the same canvas to stamp multiple canvases, I like to keep as much texture as possible. I hope that helps!