How to Replace Balusters to Update Your Stair Railing
Replacing stair spindles or balusters (the vertical or horizontal bars on a stair railing) is a straightforward project. You just need the right tools and a bit of time. Learn exactly how we updated our stair railing by replacing just the balusters with this step-by-step tutorial.
I'm so freakin' excited about today's post because it means we have successfully updated our stair railing and replaced our balusters. And I'm sharing a step-by-step tutorial for exactly how we did it in this post!
Thank you to DAP Products for partnering with me on this post.
If you've been around you may remember that when I shared the “before” tour of our new home before we moved in I was super nervous about how traditional some of the elements of the home were. Two of my biggest concerns were: 1) the coffered ceiling in the dining room and 2) the stair railing. We overcame the traditional coffered ceiling in our dining room by giving it a new look with wallpaper. But updating the stair railing felt far more intimidating and scary.
We've tackled a DIY staircase makeover before by removing carpet and installing hardwood stairs in our old home (and it was surprisingly easy). But ripping out iron balusters and replacing them? Yikes. It sounded hard.
Turns out replacing your stair railing/balusters is TOTALLY DOABLE as a DIY project. It is time-consuming, but it truly is not hard. Even beginner DIYers should be able to complete this project. So let's get into the details. First up, let's talk about the different parts of a stair railing and staircase.
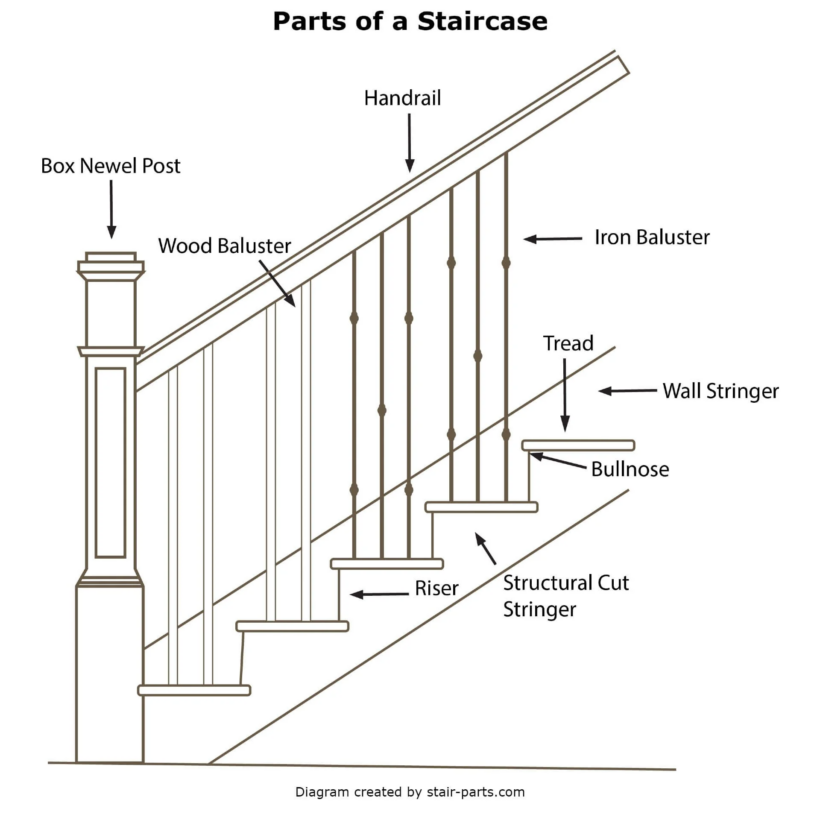
Parts of a Stair Railing
This diagram from Stair-Parts is helpful for understanding the different parts of a stair railing and staircase. Sometimes people refer to balusters and “spindles.”
What Parts of a Stair Railing Can You Replace?
You can replace as much as you want! This video shows you how to replace the balusters and newel post and handrail, so if you are looking to replace everything, definitely check it out. But if you are like us and you really just want to give your stair railing an updated look without having to replace everything, you are in the right place!
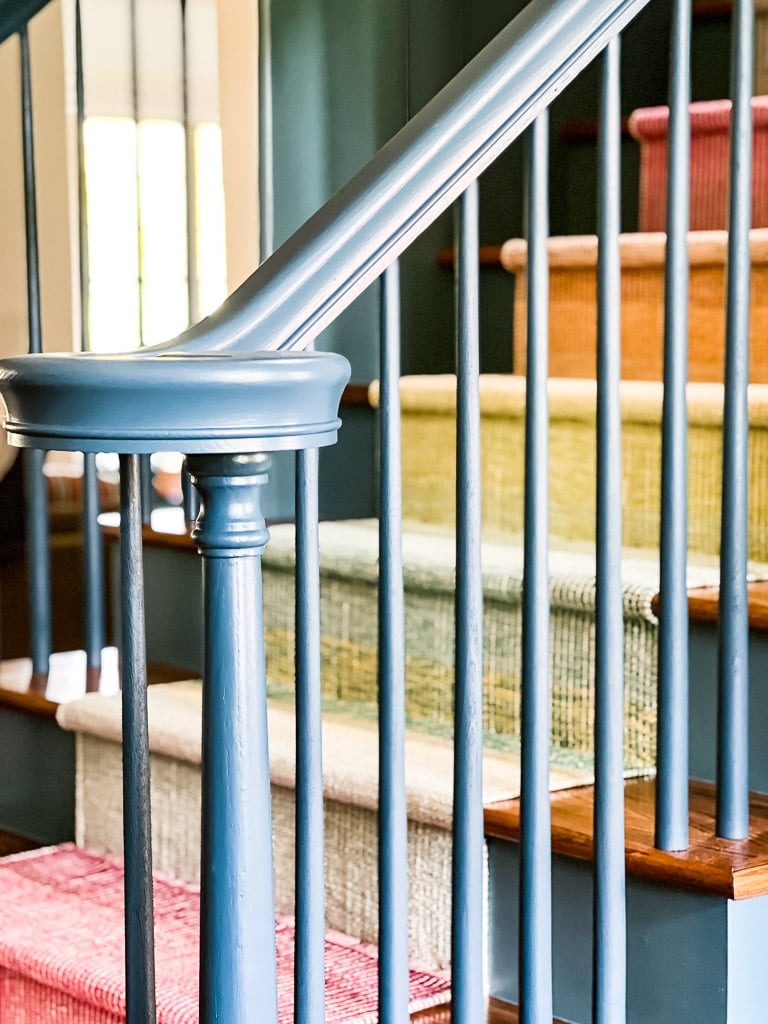
Our handrails and newel posts were in really good shape and I knew painting them would update them enough for our liking. It was really the old iron balusters that were not our style at all. So if you've ever wondered, “can you just replace the spindles?” the answer is YES! We only replaced our balusters and we did it without having to disassemble the entire stair railing.
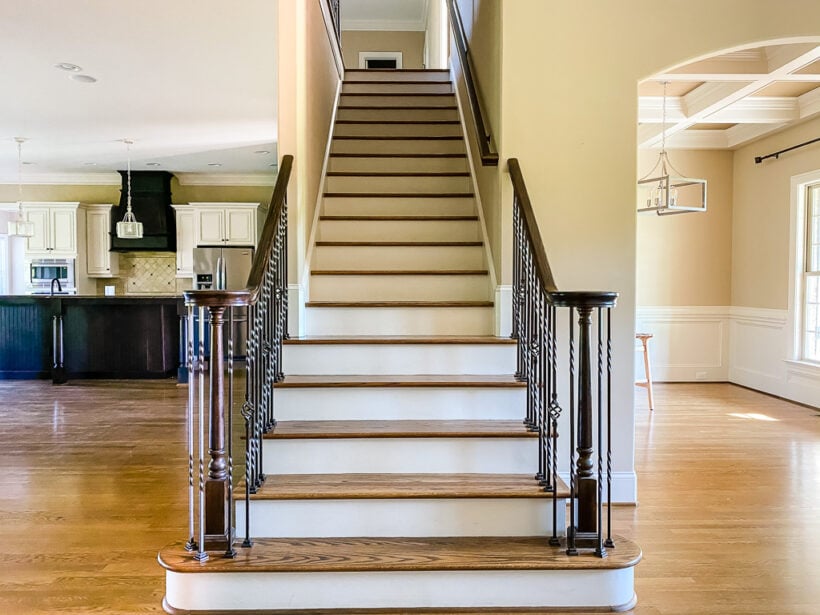
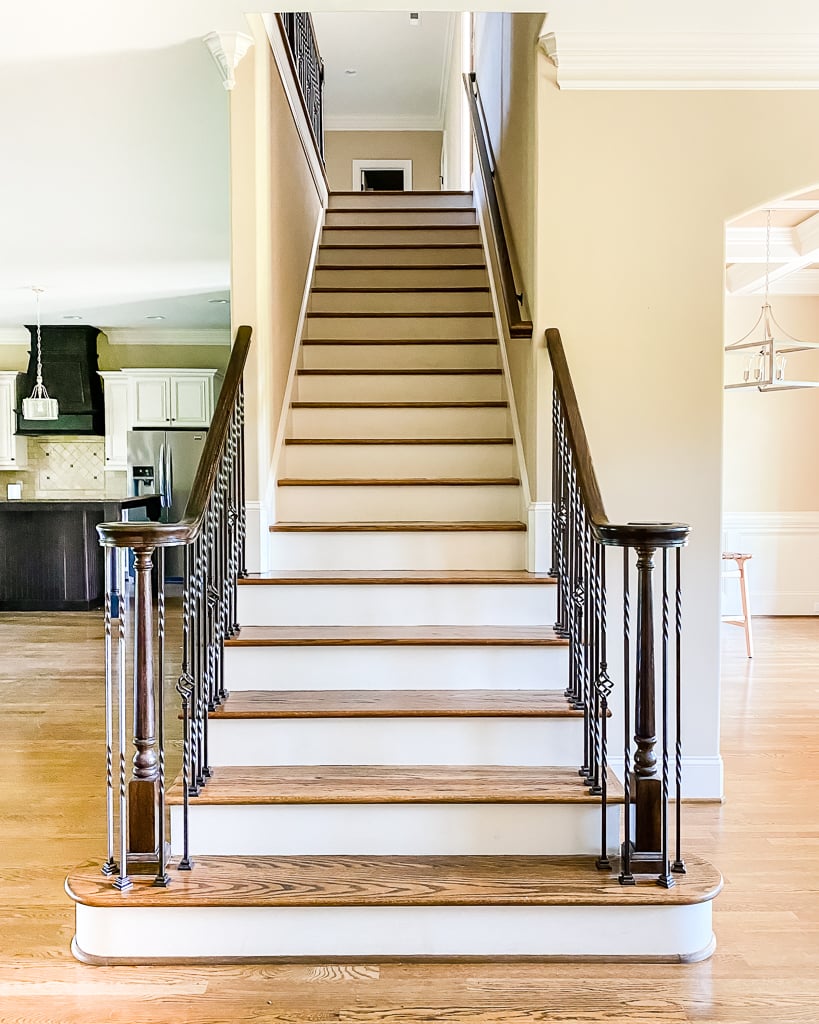
This is what our staircase used to look like (it's also a fun reminder of how our dining room and kitchen used to look).
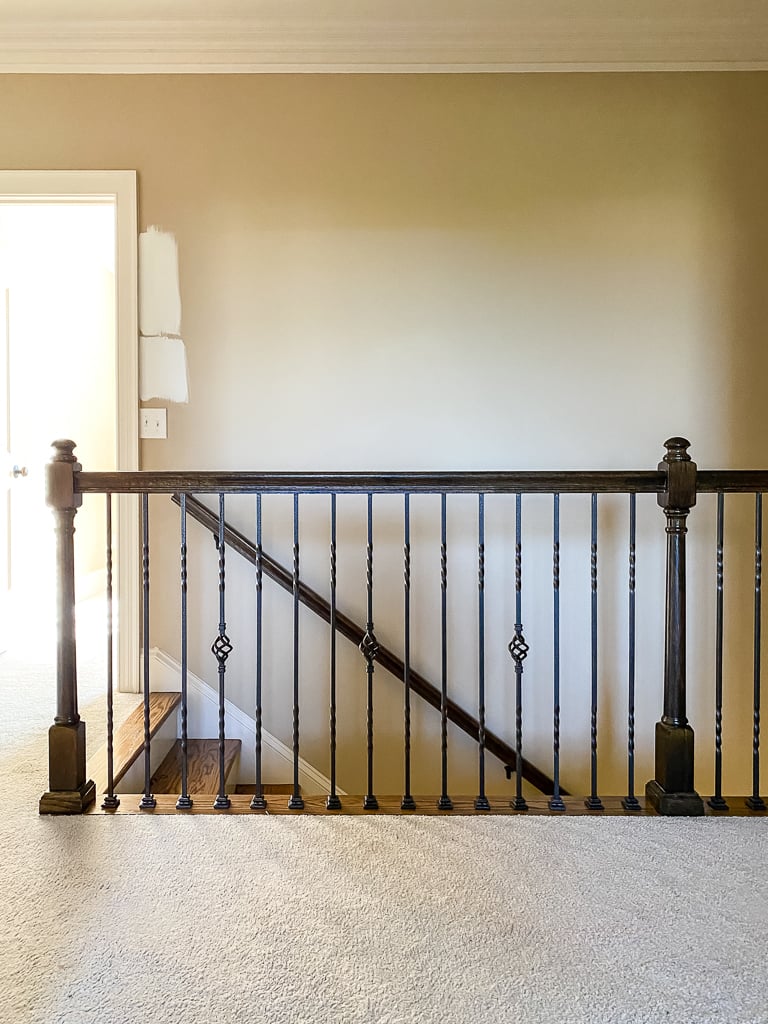
And here's a view of the old stair railing in the upstairs hallway.
This post contains affiliate links for your convenience. Click here for my full disclosure policy.
How to Replace Stair Balusters (Spindles)
Materials Needed
- New balusters–we chose these simple pool cue balusters
- Dap Weldwood Original Wood Glue
- Reciprocating saw with these metal cutting blades (for iron balusters/metal railings) or wood cutting blades (for wooden balusters)
- Drill and Forstner bits
- Measuring tape
- Channel locks
- Pin nailer (only if you need additional support for the top of your balusters)
- Compound miter saw or hand saw and miter box (to cut balusters to length)
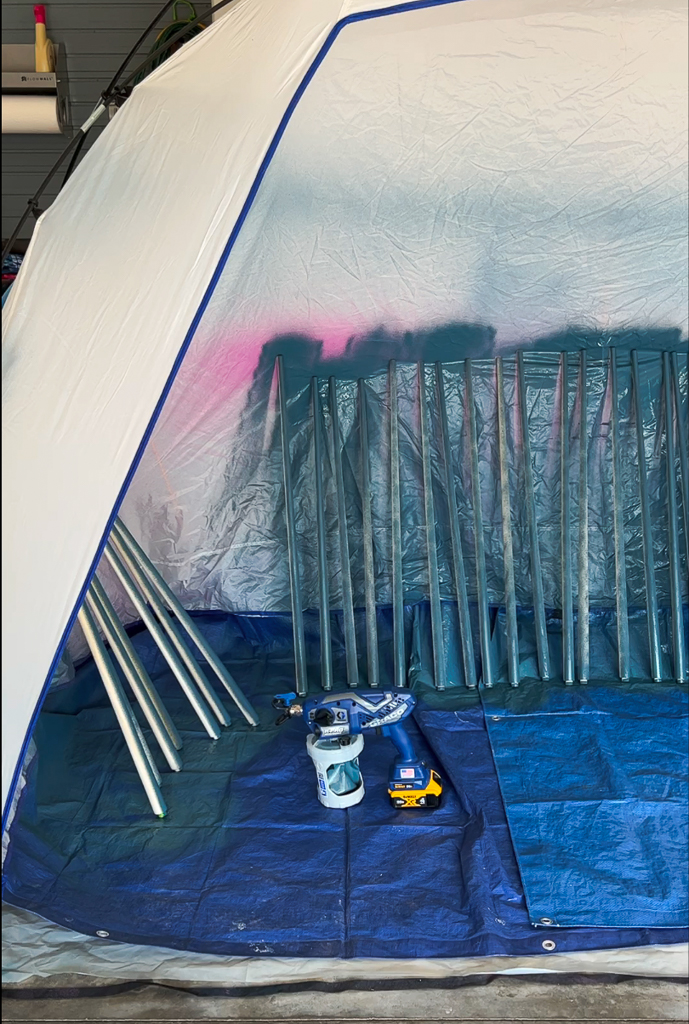
- Optional: paint sprayer and spray shelter
- This is the exact paint sprayer that we use–it's AMAZING.
- Our paint shelter is old and I can't find a link to it, but this paint shelter is really similar.
Video Overview
I highly recommend that you watch the short video below for an overview of the project before reading the detailed instructions. The instructions will definitely make more sense if you watch the video first :)
Step 1- Remove the existing balusters or spindles
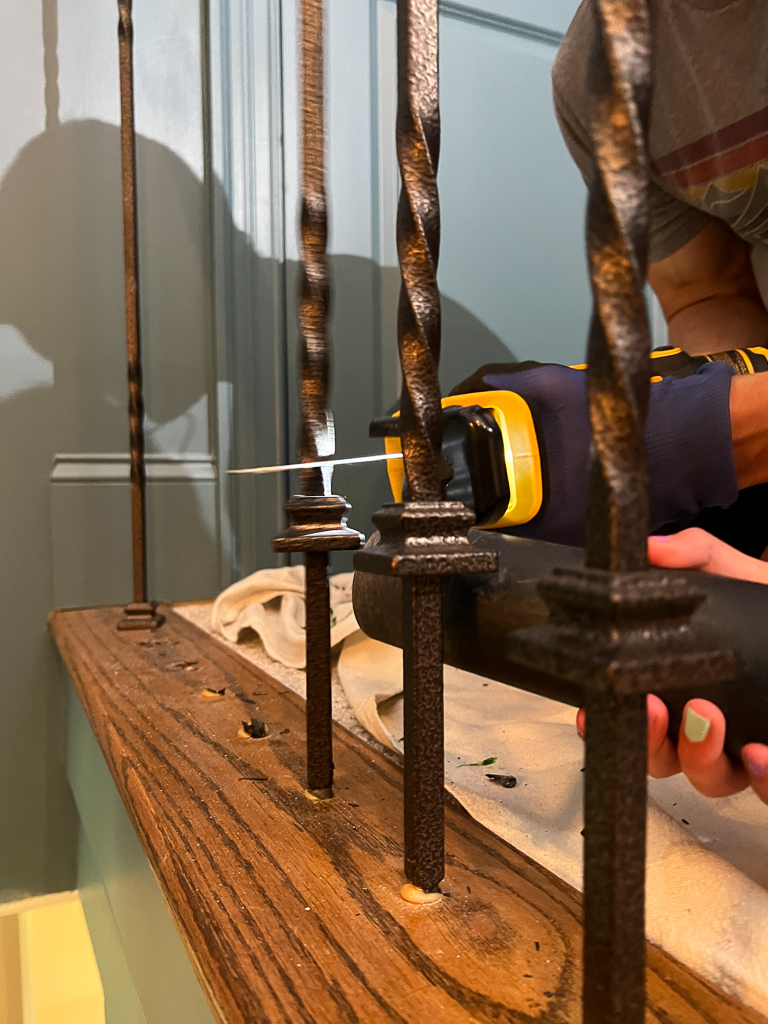
We were nervous about removing the existing iron balusters because they were glued at the bottom where they met the stair treads AND at the top where they connected to the handrail. Fortunately, we realized that if we cut through the iron baluster using our reciprocating saw and these metal cutting blades, we could then get enough leverage with our channel lock pliers to break the glue seal and take them right out. Removing 65 balusters was more tedious than anything, but it wasn't really hard. Just make sure you have good, sharp blade before you start! If you are removing wood balusters, it's even quicker to make your cuts.
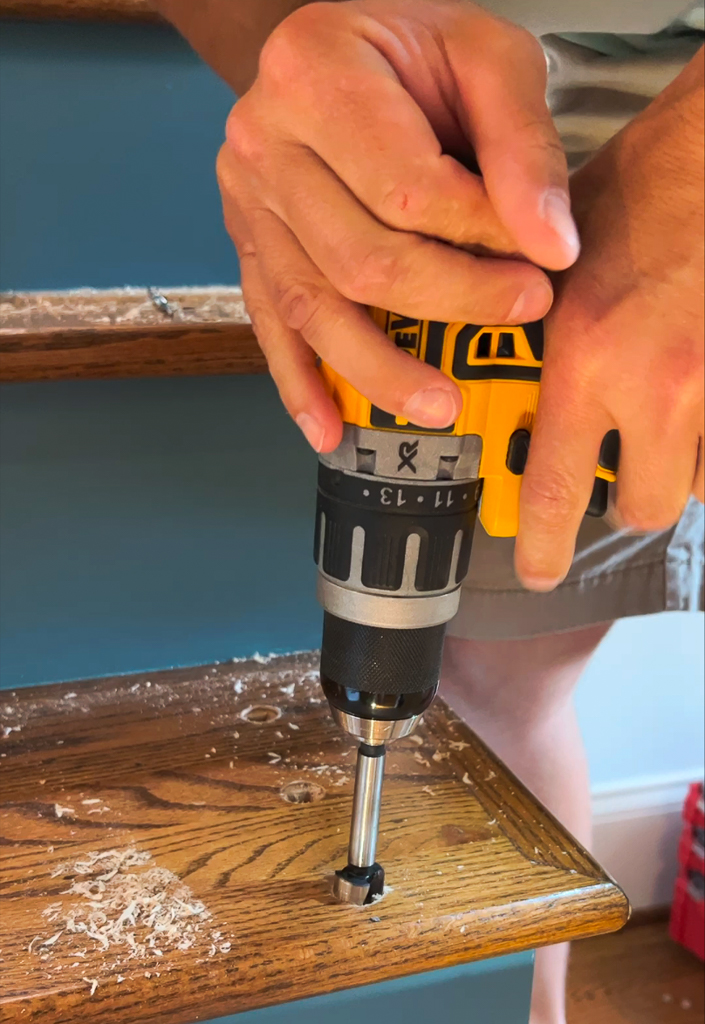
Step 2- Clean up the old holes & resize them if necessary
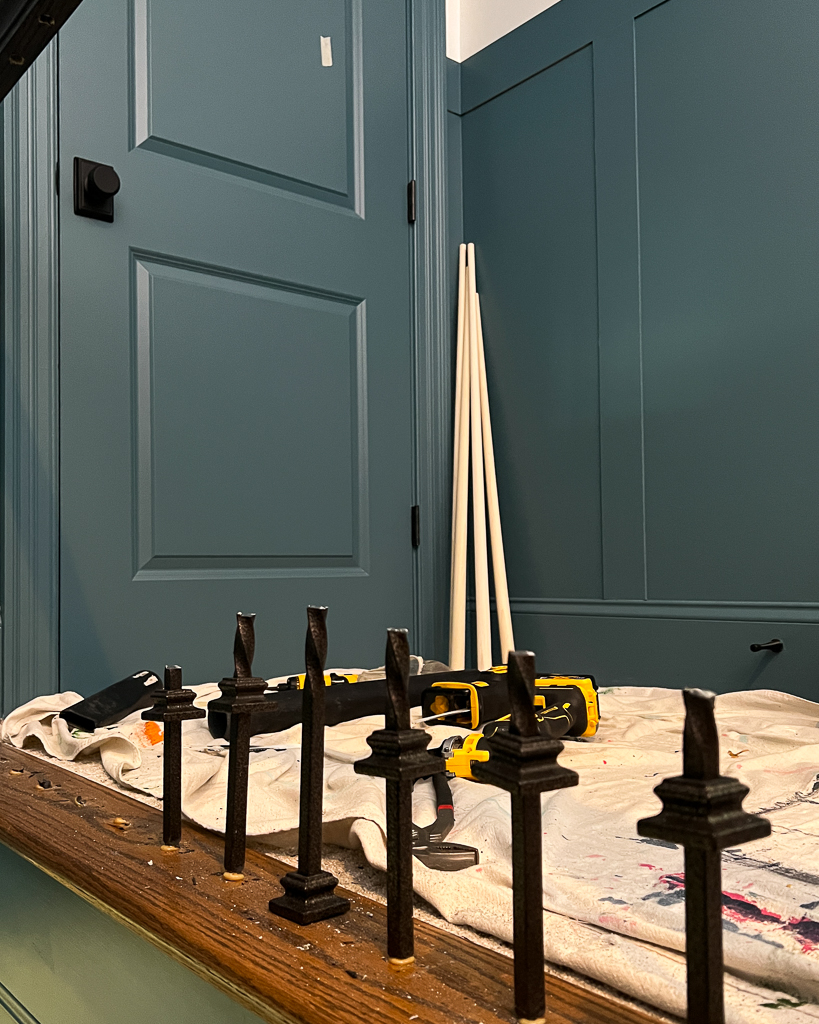
We decided to stick with the same baluster spacing so that we could reuse the existing holes left by the old iron balusters. If the same is true for you, you need to make sure the old holes in your stair treads and handrail are clean and are the correct size for your new balusters. This may mean that you need to drill holes to make them slightly larger. We had to use a Forstner bit to make the bottom holes a bit larger, but the holes in the handrail were the correct size. Or you may just need to drill the same size holes just to clean them up and dislodge any old glue. What size holes you need will highly depend on what particular balusters you choose.
Step 3- Paint your new balusters and stair banister / handrail
I cannot stress this enough… Do whatever it takes to paint the stair railings after removing the old balusters/iron spindles and before installing the new ones. It's so much easier to do it without having to paint around spindles! You should also paint your new balusters BEFORE installing them. We used our paint sprayer and paint shelter to do it and it took us no more than 30 minutes total (excluding drying time). Painting everything before installation meant we only had minor touch-ups after installation. We also painted our stair risers before installing the new balusters. Bottom line, painting as much as we could after removing the old iron balusters and before installing the new wood spindles made painting a zillion times easier.
Step 4- Cut your new balusters to length (if needed)
I learned a lot about stair balusters and spindles as we were prepping for this project. Because our baluster layout is 3 balusters per stair, we needed 3 different lengths of balusters for the stair railing. Stair balusters come in standard heights so we ordered the heights that were as close as possible to what we would need. We ordered balusters in the following lengths to replace the balusters along the stair railing: 34″, 36″, and 39″. We also had to order some in 41″ length to replace the balusters around the newel post. Even though we ordered lengths as close to the finished length as we could, we still had to trim them to get them to exactly the right size. Our compound miter saw made it quick and easy, but you could absolutely do this with a simple hand saw and miter box if you don't have one.

Step 5- Position and attach your new balusters
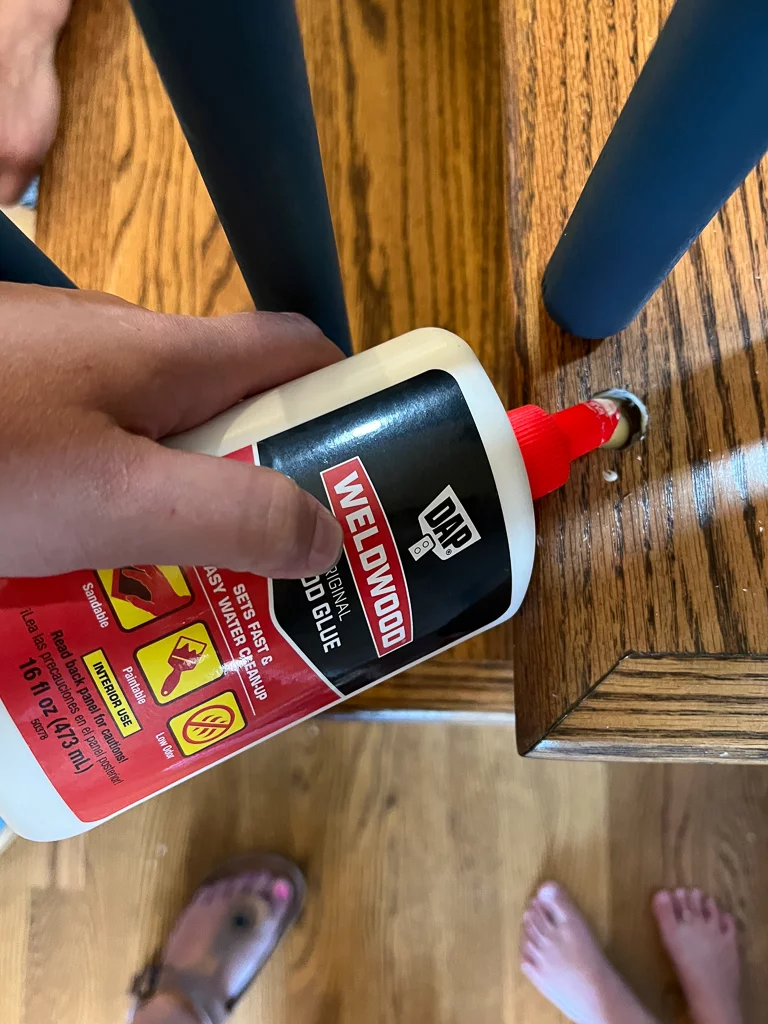
These pool cue balusters we chose have a 3/4 inch “pin” at the bottom that sits into the hole in the stair treads. The top of the balusters is 5/8 inch and fit right into the old holes in our stair railing. Because we were attaching wood balusters to wood stair treads & handrail we needed good quality wood glue. We coated the holes with a good layer of Dap Weldwood Original Wood Glue before placing them.
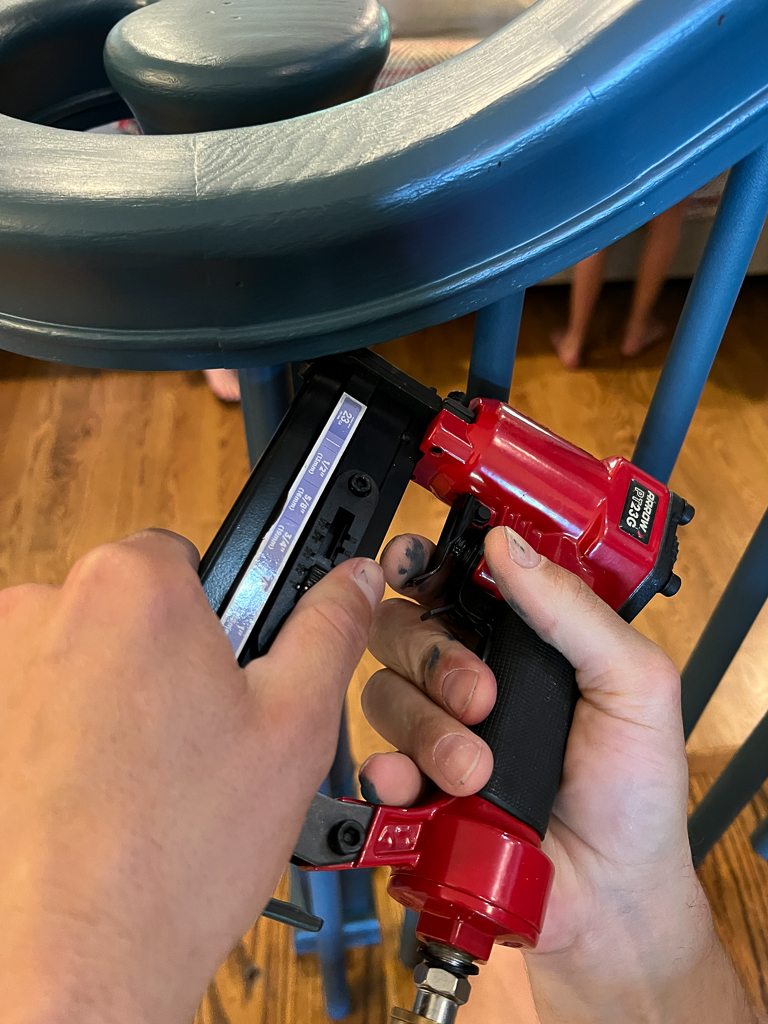
Because we didn't remove the old stair railing, we had to carefully place the top of the balusters in the handrail first and then we could slide the bottom pin into place. The reason this works is that the depth of the holes in the handrail allows for bit of extra room above the top of the balusters. We also added a couple of pin nails at the top of our balusters since the diameter of the old holes in our handrail was a tad larger than the diameter our new balusters–the pin nails just ensure that the balusters can't wiggle around in the hole at all.
If you haven't already watched the video giving an overview of this project, you really should so that you can see exactly what I'm talking about. Scroll back up to find the video right under the list of materials needed to complete this project.
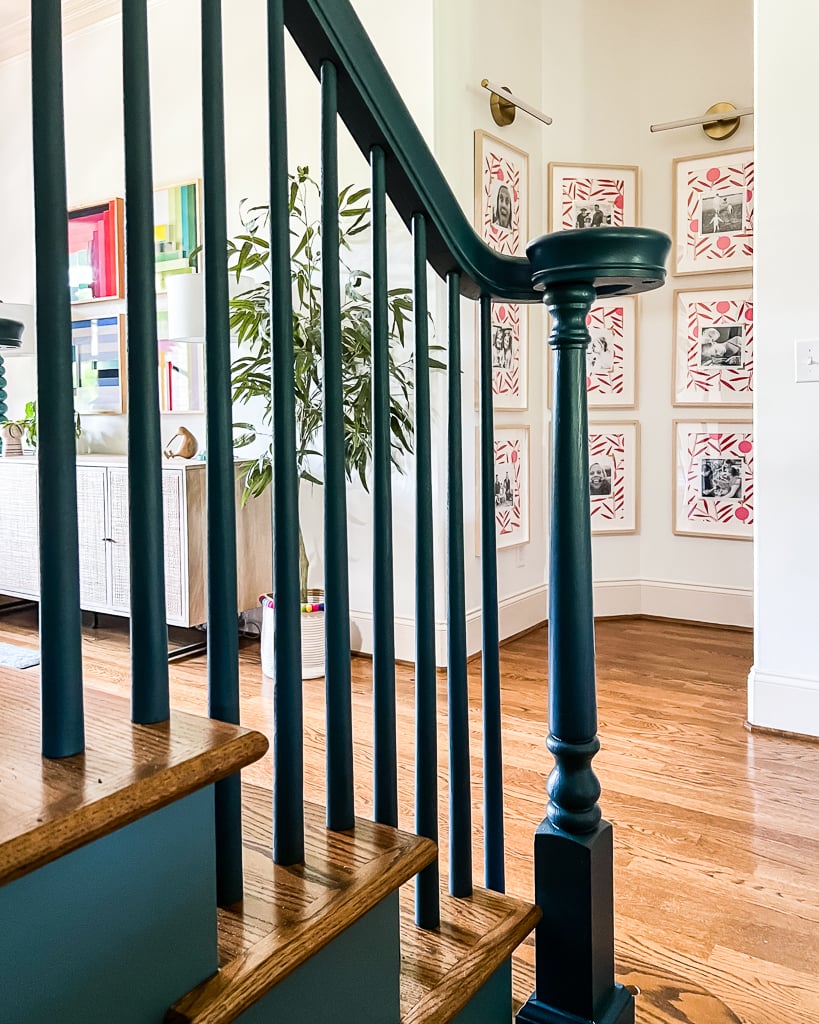
That's it! Our stair railing looks completely updated and is totally our style now!
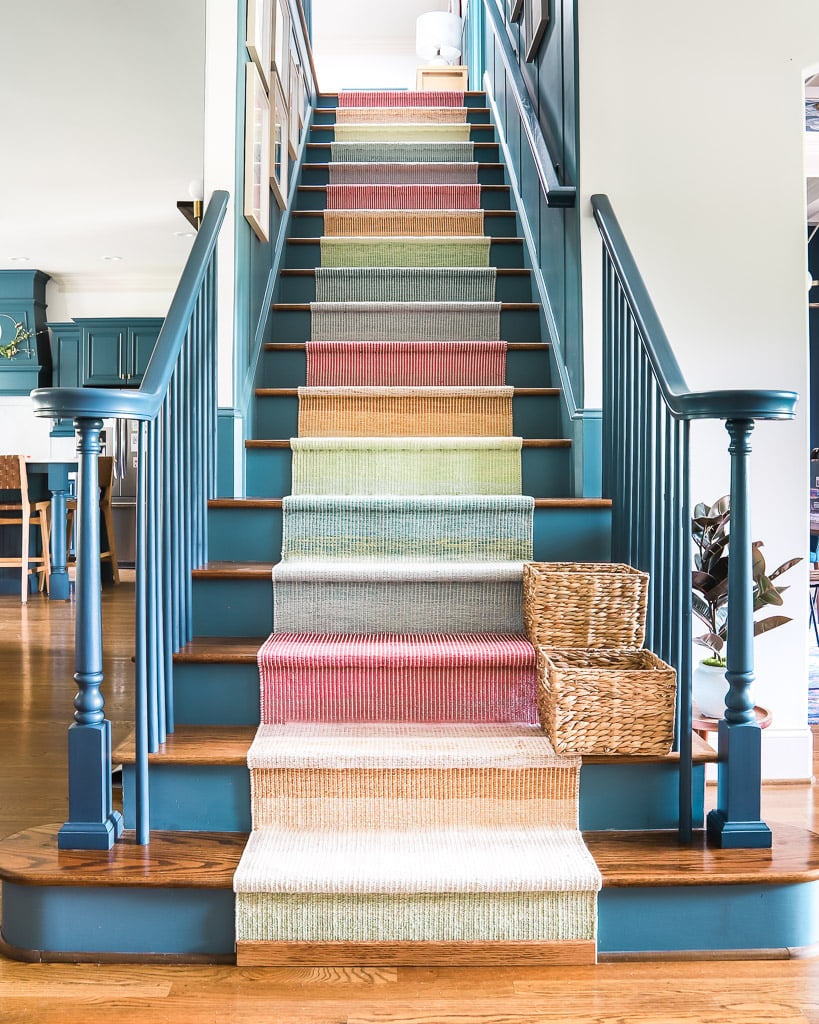
I love how the new stair railing looks from this view where you can see our entryway and our fun family photo gallery wall.
A couple of days after I snapped the photo above, we installed a stair runner and couldn't be happier with how it all turned out. You'll probably also notice that we installed a DIY board and batten accent wall, which was a continuation of the installation we did in our upstairs hallway. And do you see how much BRIGHTER it is upstairs now? Those aren't lights! Those are the VELUX Sun Tunnels we recently had installed (our hallway had no natural light before–now it's FLOODED with natural light)!
Just a bit different than it used to look, huh?!
Now, I'm sure you probably have some questions, so let me cover some of the common questions I've gotten.
Frequently Asked Questions
Is replacing a stair railing expensive?
Well, this is a bit subjective. So I'll just tell you how much it cost us to update our stair railing by replacing the balusters. Doing the work ourselves saved us a ton of money on installation. Our balusters + shipping cost us $570. With paint, new blades for our oscillating tool, plus wood glue, etc. I would say this project came in right around $700. Not bad for a completely new look that actually looks good with the rest of our decor! Replacing the stair railing and/or newel posts would have made this much more expensive. That is one reason we chose not to replace those components.
Is it hard to replace a banister? Can I replace a banister myself?
Overall, this project was easier than I expected it to be. It is time-consuming, but it's not difficult. Even if we had replaced the handrail and repositioned the balusters like in this video, I would still say this is a totally doable DIY project.
What paint did you use?
We used Sherwin-Williams Emerald Designer Edition in the color Refuge for the walls and stair risers. We used Sherwin-Williams Emerald Urethane Trim Enamel in the color Seaworthy for the balusters and handrails. We chose urethane paint because it creates a hard, durable finish that withstands lots of wear and tear. The Sherwin-Williams guy explained that it dries 7 times harder than regular latex paint. We chose a satin sheen–I have a whole post about choosing the right paint sheen for your project if you need help with that.
What is your biggest tip/takeaway for replacing stair balusters?
I have three major takeaways/tips from this project. First, do everything in your power to paint the stair railings after removing the old balusters/iron spindles and BEFORE installing the new ones. It's so much easier to do it without having to paint around spindles! And paint your new balusters before installing them as well! Second, unless you hate the placement/spacing of your old balusters, stick with the same placement so you can avoid having to patch a bunch of holes. It's possible to use wood plugs to fill in holes left by old spindles, but you will be able to tell where the patches are. Third, unless you hate your handrail, I'd also recommend against installing a new railing. You will save so much time and money by using your existing handrail(s).
More STAIR Posts

Other posts you may enjoy:
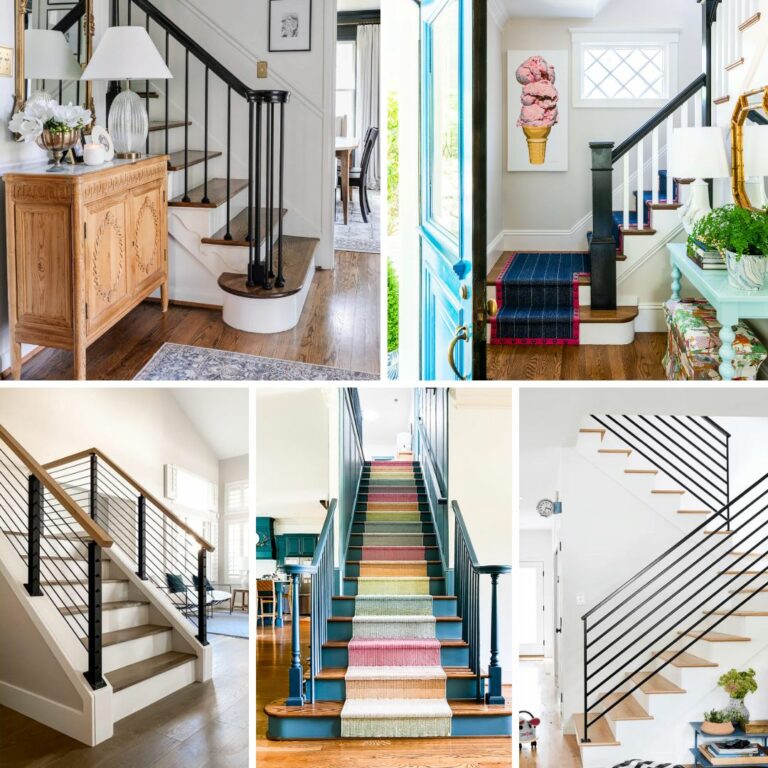
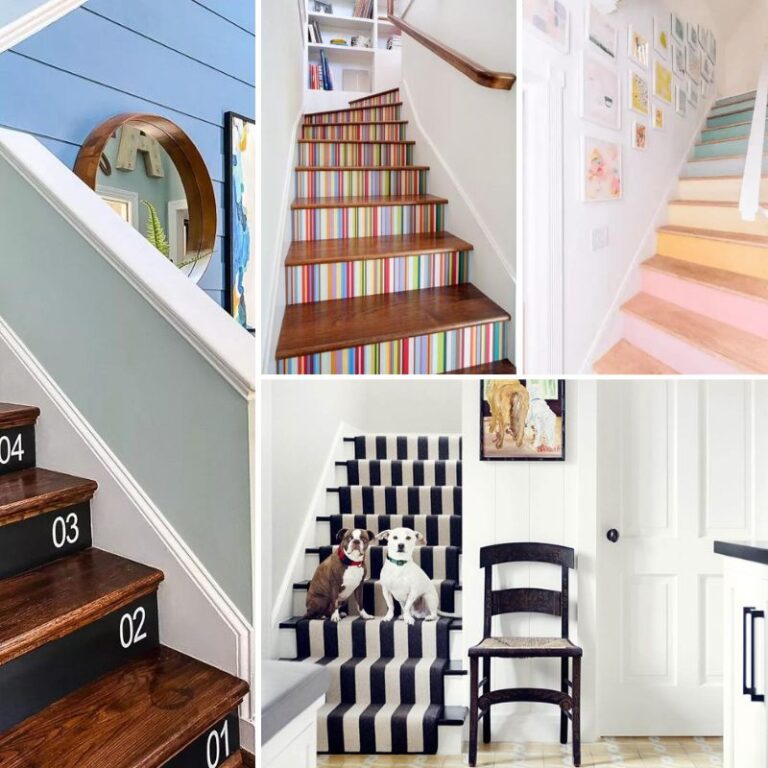
- 15 Chic Stair Railing Ideas to Update Your Staircase
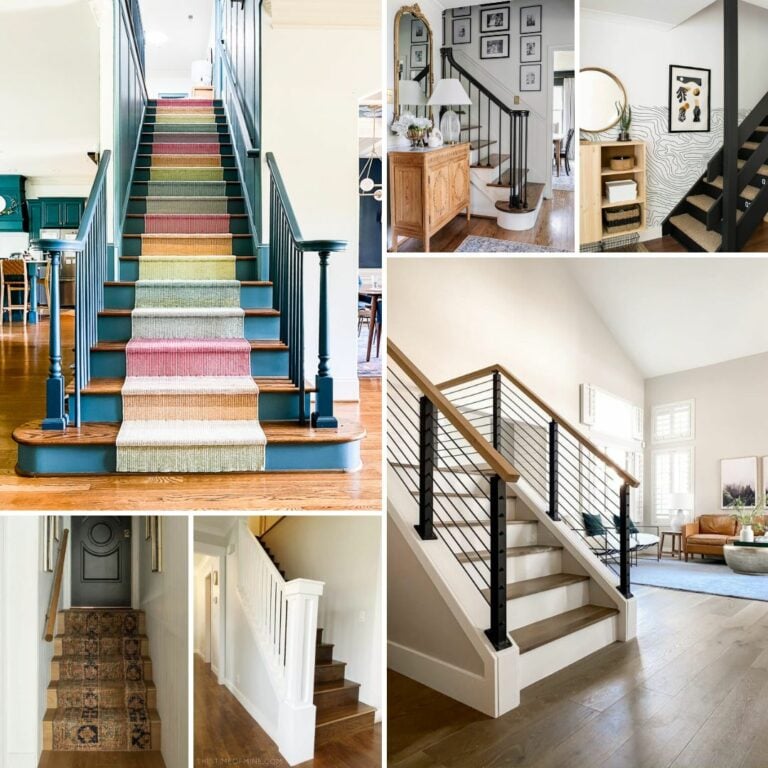
- Inspiring DIY Staircase Makeovers
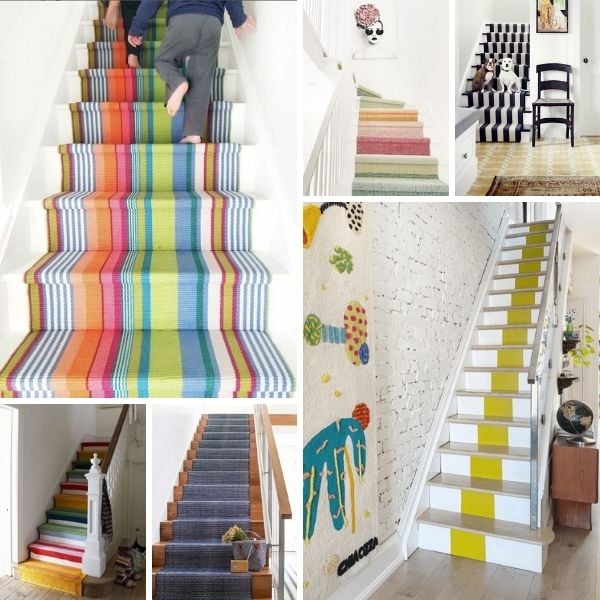
- Stair Runner Ideas
- From Carpet to DIY Hardwood Stairs: Step-by-Step Tutorial
- 8 Interior Design Mistakes You Don’t Even Know You are Making (and How to Fix Them)
- Gorgeous But Cheap Flooring Ideas
Wondering how I approach transforming rooms and spaces in our home? Check out Designer in a Binder®.

And if you want exclusive content and behind-the-scenes sneak peeks, be sure to subscribe before you head out!

Do most people align the front of the spindles to the front of the stair riser?
I’m sure it depends on personal preference and how you want them spaced if you have 3 spindles per stair, like we do :)
I’m planning on using metal Iron Balusters with a wooden handrail and wooden newel posts.
Should the front of the first Iron Baluster line up with the front of the Riser?
I know this is a personal preference but what do most people do?
I’m not sure what most people do. It would depend a lot on the depth of each stair, the diameter/size of the balusters, the number of balusters per stair, and as you mentioned, personal preference :)
Where did you buy your spindles?
Hi Mikayla. The spindles we used are linked in the post :) We ordered them from Stair Parts Now.
Hello! How did you get rid of the holes left by the old iron balusters on that bottom step? I am replacing mine, and wanting to eliminate all of the balusters, but not wanting to replace that whole bottom tread. I’m very curious how you dealt with this issue. It looks great by the way!!
Hi Danielle. I need to put together a tutorial post to show how I did it because I’m still amazed by how well it worked! I used epoxy putty in a color close to the wood and then used wood graining markers to fill match the grain. You can hardly see where the holes were!
Hi! Did you fill in the holes on the bottom stair tread where there used to be metal spindles?
I did! I shared the process a bit when I did it on Instagram, but haven’t had a chance to write up a blog post tutorial on it yet. Stay tuned :)
Hi! I would love to see the tutorial. Is it still on instagram?
Hi Danielle. Which tutorial are you referring to?