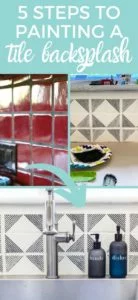
How to Paint Your Tile Backsplash in 5 Simple Steps
If your tile backsplash makes you cringe but you want a budget-friendly alternative to replacing it, you may have found yourself wondering, “can you paint a tile backsplash?” The answer is YES!!! Painting a tile backsplash is a simple, affordable and durable way to update your kitchen! This tutorial shows you exactly how to paint your tile backsplash in 5 easy steps.
Can you paint a tile backsplash?
YES! In fact, painting a tile backsplash is far easier than painting floor tiles (which is one of my favorite gorgeous but cheap flooring ideas) or painting shower tiles because you don't need any specialty paint products that release a ton of fumes. Painting a backsplash is easy and fun!
What kind of tile backsplashes can you paint?
I have painted ceramic and travertine (natural stone) tiles using this method.
Why I've Painted THREE Different Tile Backsplashes
I have personally painted two different tile backsplashes when installing a new tile backsplash just wasn't in the budget. Both times it was in an effort to transform an old, ugly backsplash in a budget-friendly way. And both times it worked perfectly.
The first time I painted a backsplash in our old home, I really didn't know if it was going to work. Back then, no one else had really done it, so it was hard to find guidance on the subject.
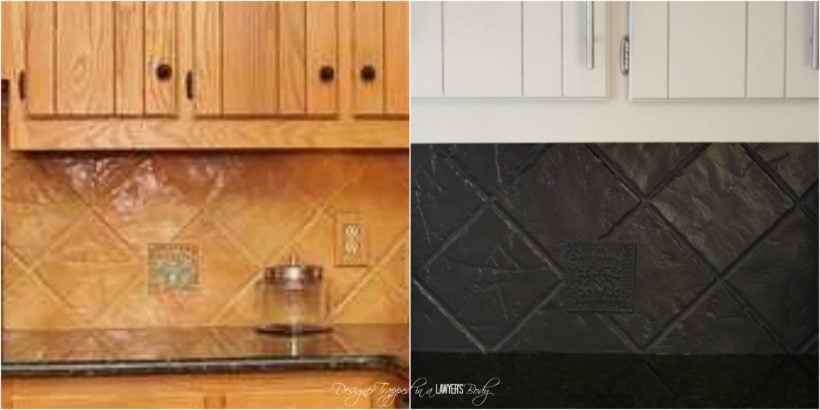
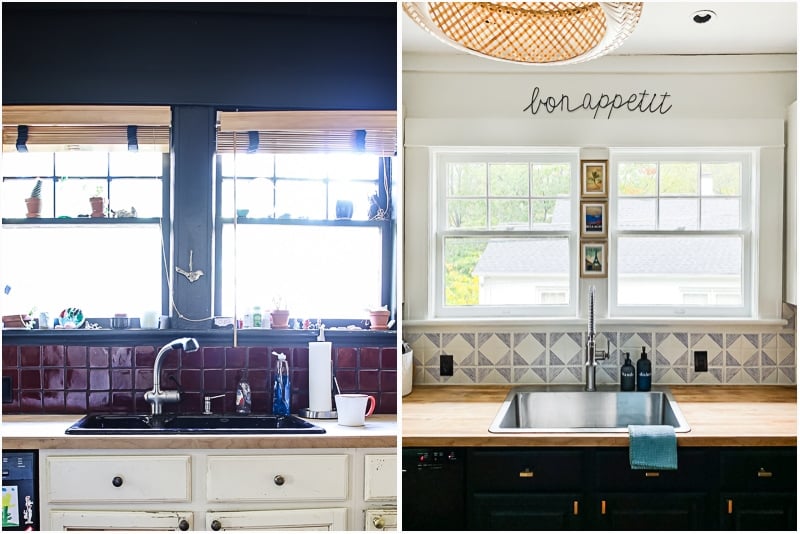
But the tile backsplash in our old kitchen was so bad that I figured if the paint job didn't work well, it couldn't possibly be worse. We didn't know how durable it would be at the time, but it held up without chipping or peeling for years before we replaced it! You can take a peek at the before and after below (we also painted our kitchen cabinets without priming or sanding).
Fast forward many years to when we moved into our current home and were giving our kitchen a makeover. The travertine backsplash was not our style at all, so I painted it using this same method! (I also painted the kitchen cabinets and used painted the counters with countertop paint to make the countertops look like marble).
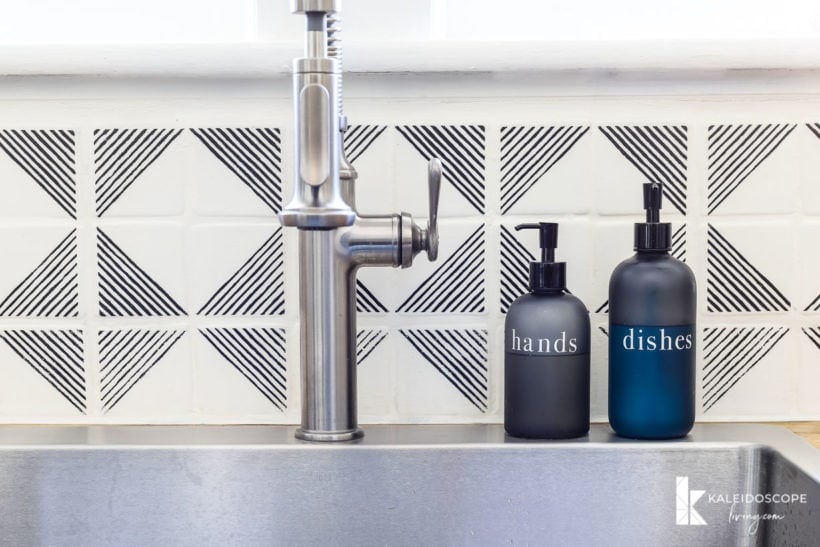
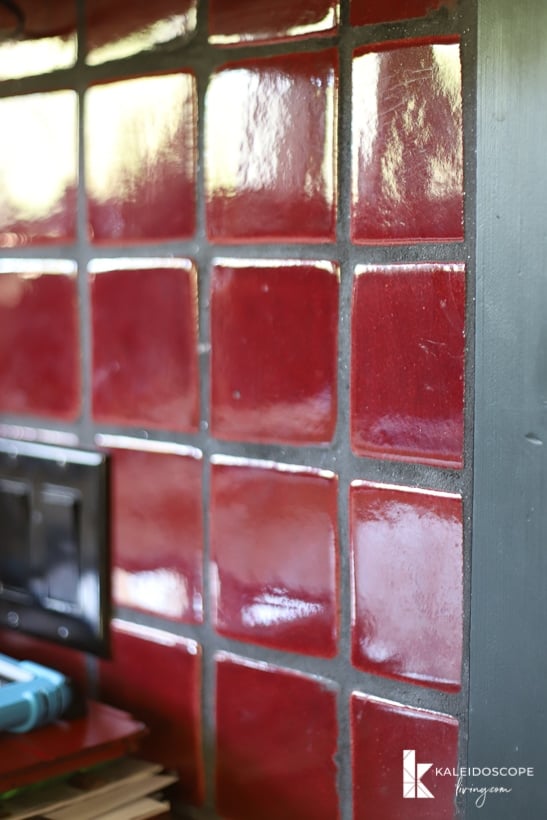
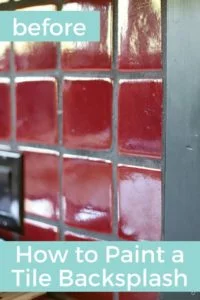
Shortly after that, I started working on my friend Thea's $1,000 kitchen makeover. She hated her red tile backsplash but we were on a tight budget (even tile stickers were out of the question) and needed to transform every surface in the kitchen. So for the third time, I tackled a DIY painted tile backsplash using the exact same process that I used back in 2014. But this time, I added a stencil detail to make it more interesting!
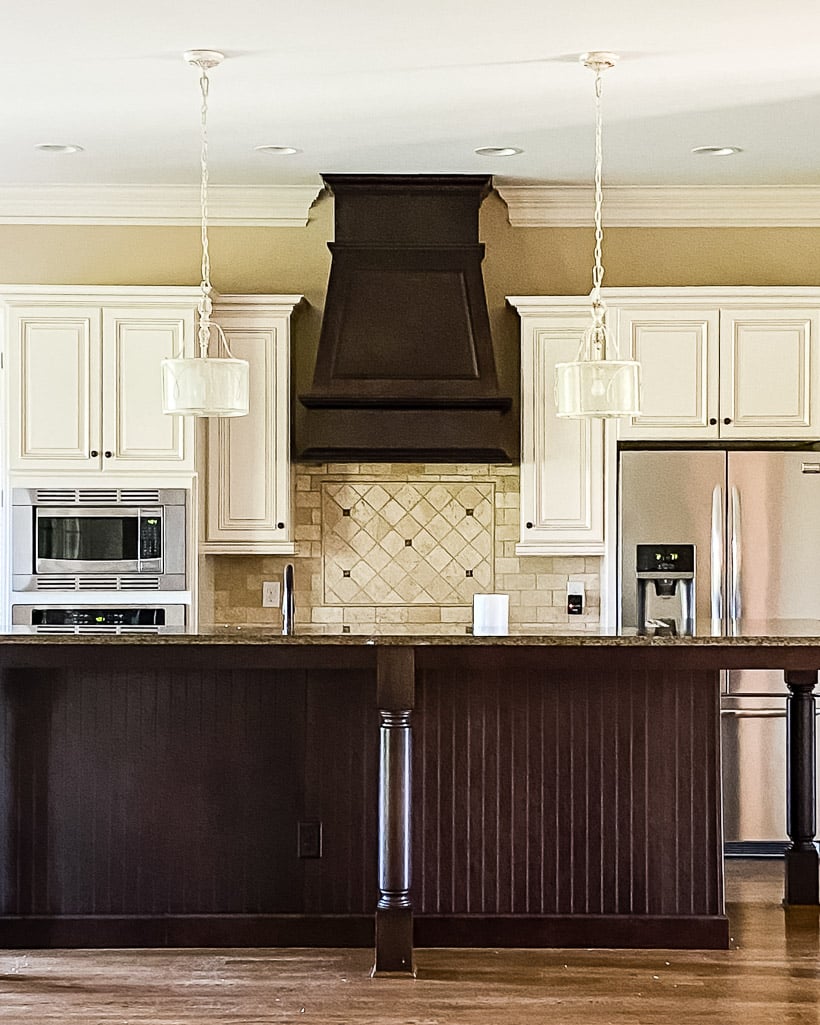
This is what Thea's tile looked like before we started. Whoa.
Now, let's dive into the tutorial!
This post contains some affiliate links for your convenience. Click here to read my full disclosure policy.
How to Paint a Tile Backsplash
Painting a tile backsplash is not hard and it only takes some fairly basic supplies to do it!
Supplies Needed
- T.S.P. (trisodium phosphate)
- A good quality primer (we used Sherwin-Williams general purpose primer)
- General Finishes Milk Paint in the color of your choosing (we mixed the Snow White color with a little bit of Antique White)
- 1 quart will be PLENTY for most backsplashes
- This is the only paint I recommend for painting a backsplash–it's a high-quality acrylic paint that has extraordinary adhesion
- General Finishes High-Performance Water-Based Topcoat (we used satin finish)
- Small foam roller
- Paintbrush
- Stencil (this is the exact stencil we used)
- Stencil brushes
- Painter's tape
Steps for Painting a Tile Backsplash
You can watch the video tutorial below to see every step of this DIY painted tile backsplash project. But don't worry–you can also find the full tutorial written out below the video :)
Time needed: 8 hours
Learn how to paint and stencil a tile backsplash following the steps below. Note that if you choose to paint it a solid color and don't stencil it, it will take far less time :)
- Step 1: Clean the tile
Clean your tile backsplash well with T.S.P. (trisodium phosphate). We painted a ceramic tile backsplash in Thea's kitchen, but I've used this same method on terra cotta tiles and travertine tiles. It works on every tile surface I can think of!
- Step 2: Prime the tile
Use a drop cloth to protect your countertops if needed (we knew we would be refinishing the butcher block countertops, so we weren't worried about it).
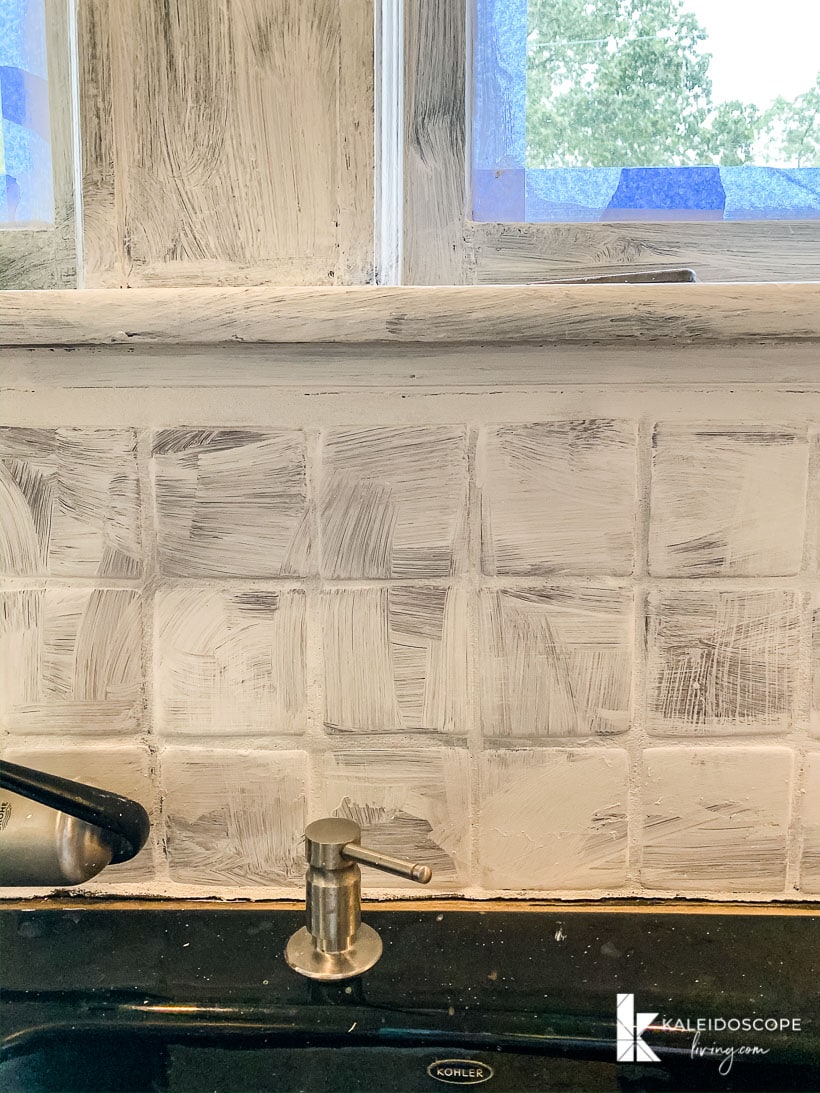
Prime your tile backsplash with a coat of primer. We primed everything, including the grout lines. We used Sherwin-Williams general-purpose primer. It will look terrible at this stage–don't panic.
- Step 3: Paint the tile
The paint you choose for painting your tile is important! You should not use regular latex paint. You need to use high-quality acrylic paint. You could also use an enamel-based paint, but since they have oil in them I avoid them because they are such a pain to work with and clean from brushes, etc. I recommend General Finishes Milk Paint in the color of your choosing (we mixed the Snow White color with a little bit of Antique White).
This paint goes a long way–1 quart will be PLENTY for most backsplashes. Note that this is the only paint I recommend for painting a backsplash–it's a high-quality acrylic paint that has extraordinary adhesion.
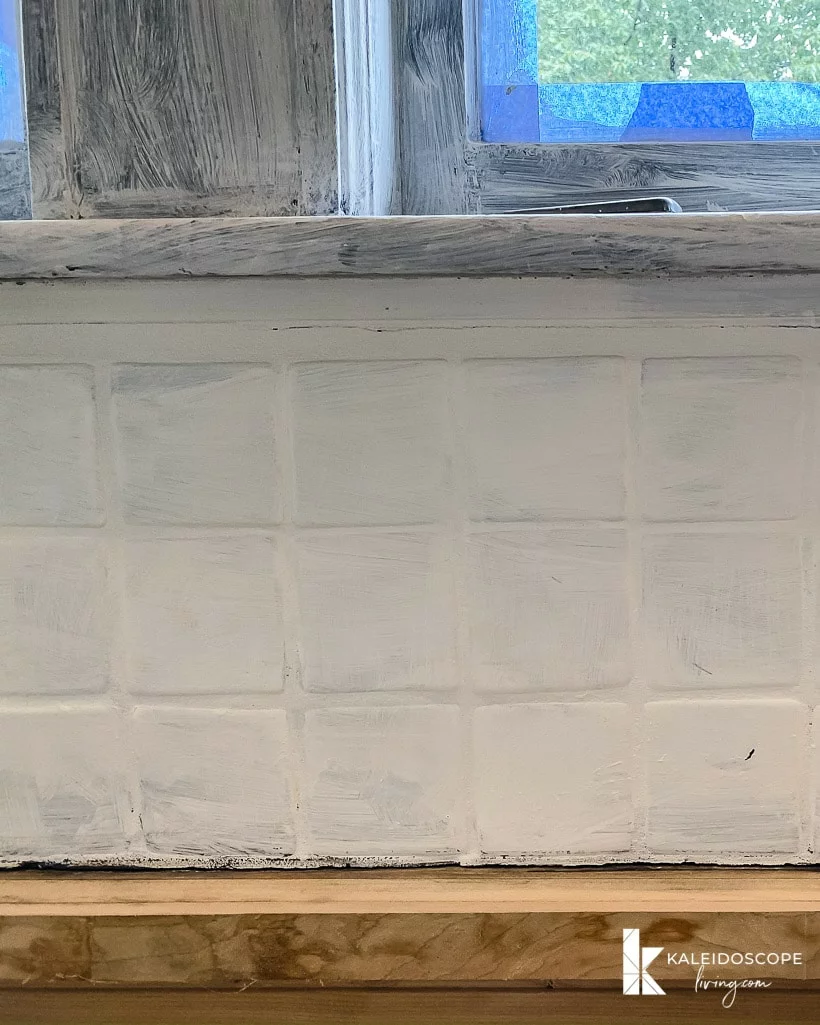
Use a roller or brush to apply a coat of paint to your entire backsplash, including the grout lines.
You want to paint until you have full coverage. We applied 3 thin coats of our custom white mix. The dry time with this paint is fast (another bonus)! Each coat took about 5 minutes to dry. This is what it looked like after only 1 coat.
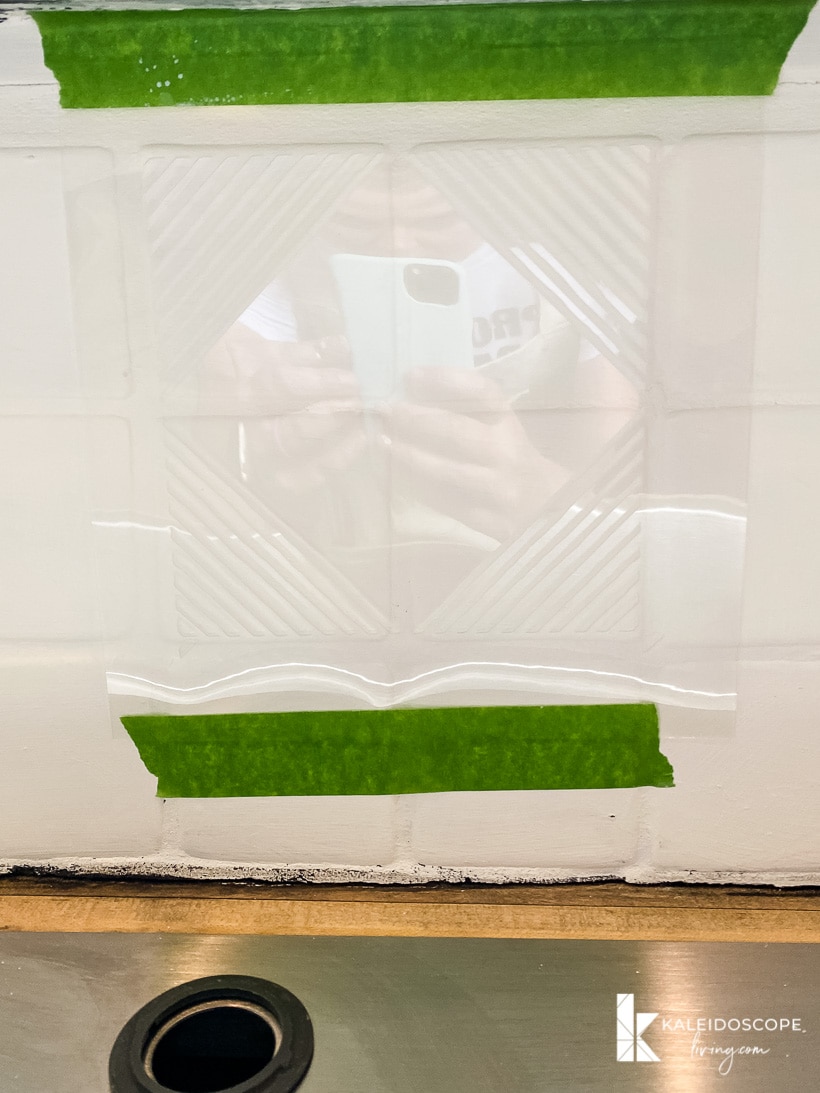
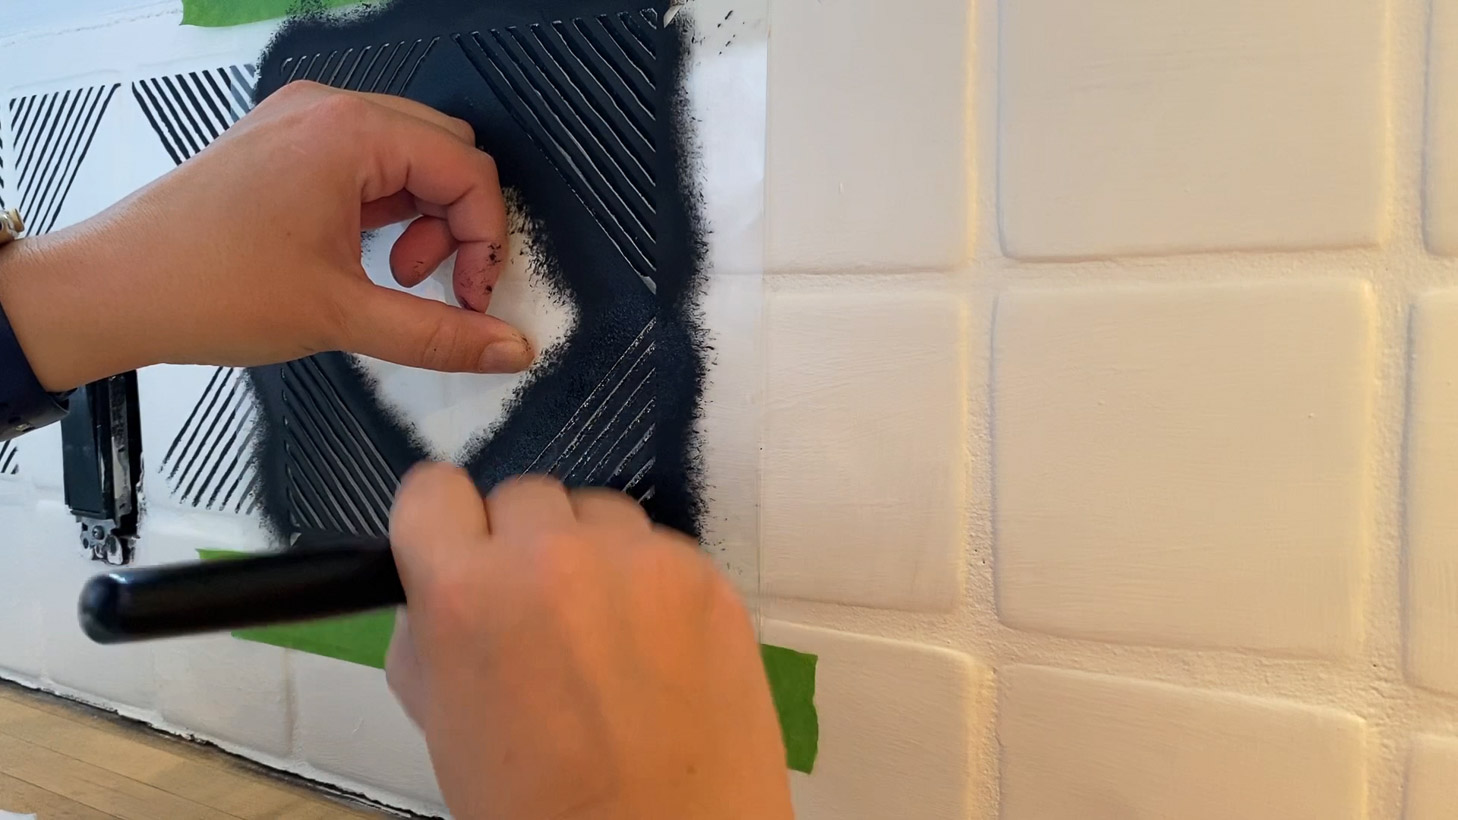
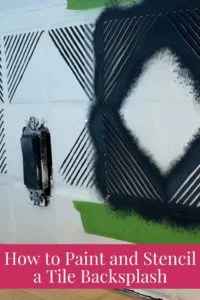
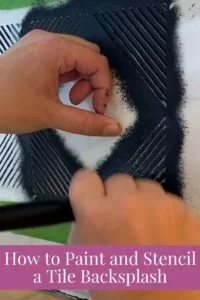
- Step 4: Stencil (optional)
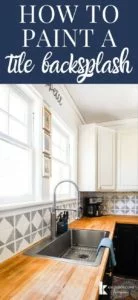
If you want to add a pattern to your backsplash, you are now you are ready to stencil. We ordered this stencil in a custom 7″ size so that it fit perfectly over 4 of Thea's tiles (which are 3.5″ square). You can see many more details about how to stencil in our video tutorial.

- Step 5: Apply the top coat
After all your paint has thoroughly dried (I would allow it to dry overnight), you are ready to seal it with a top coat. The only top coat I can officially recommend is General Finishes High-Performance Water-Based Topcoat. It works so well and is very, very easy to apply. You can choose the finish you want. We used the satin finish to add a bit of sheen, since tile typically has a bit of shine. But if you want to mimic the look of high gloss tile, you could use the gloss or semi-gloss finish options.
You simply brush a light coat on with a bristle brush (a foam brush might leave bubbles behind, which you don't want). It moves even faster than painting! Allow each coat to dry according to the instructions on the can. We applied 2 coats everywhere, except in front of the sink where we applied 3 coats for additional protection.
That's it! This is a very simple project, y'all! If you choose to stencil, that portion of the project will be time-consuming, but it's not hard! Check out the before and after!
Frequently Asked Questions Painting a Tile Backsplash
Our current kitchen backsplash and Thea's kitchen backsplash have been painted for over 2 years and still look like they did on the day we painted them. No chipping or peeling anywhere. The first backsplash I painted (in our old house) looked perfect for roughly 18 months before we removed it and had a laminate backsplash installed.
Nope! I understand why people ask this because painting shower tiles requires a special product. But painting a tile backsplash just requires a good primer and a high-quality paint that has good adhesion. And I absolutely recommend a quality top coat as well.
You should not use regular latex paint. You need a high-quality paint with excellent adhesion. You could use an enamel-based paint, but since they have oil in them I avoid them because they are such a pain to work with and clean from brushes, etc.
I recommend General Finishes Milk Paint, which is a very high-quality acrylic paint that adheres to nearly every surface. I also recommend General Finishes High-Performance Water-Based Topcoat for the top coat. Note that this is not sponsored nor have I ever been paid by General Finishes at any time. I'm just a big fan of their paint and products.
A painted backsplash is super easy to clean – just use a Clorox wipe (or whatever else you usually use to wipe down your kitchen) if it gets dirty. I would just avoid using anything super abrasive to clean it (like steel wool).
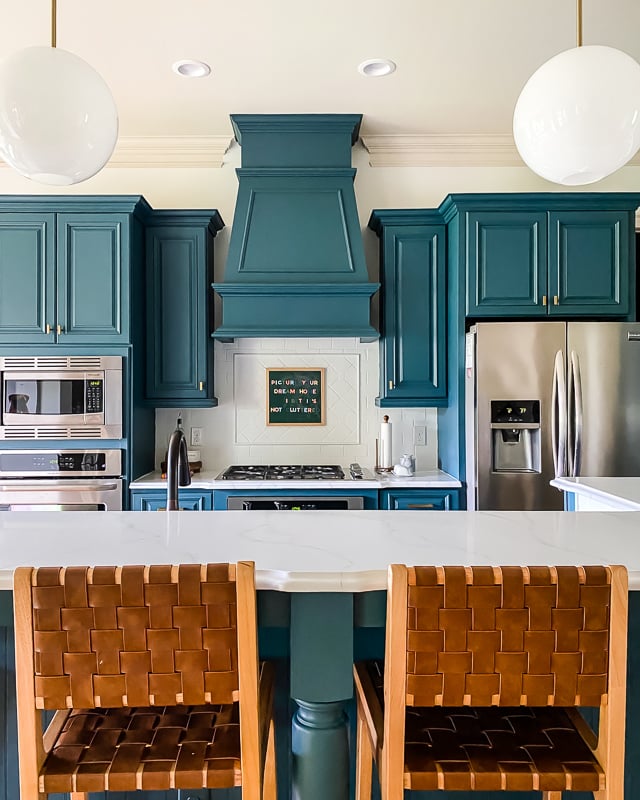
Before you head off, here are a few more views of her kitchen after we finished the $1,000 kitchen makeover for her. The painted backsplash is definitely the star of the show.

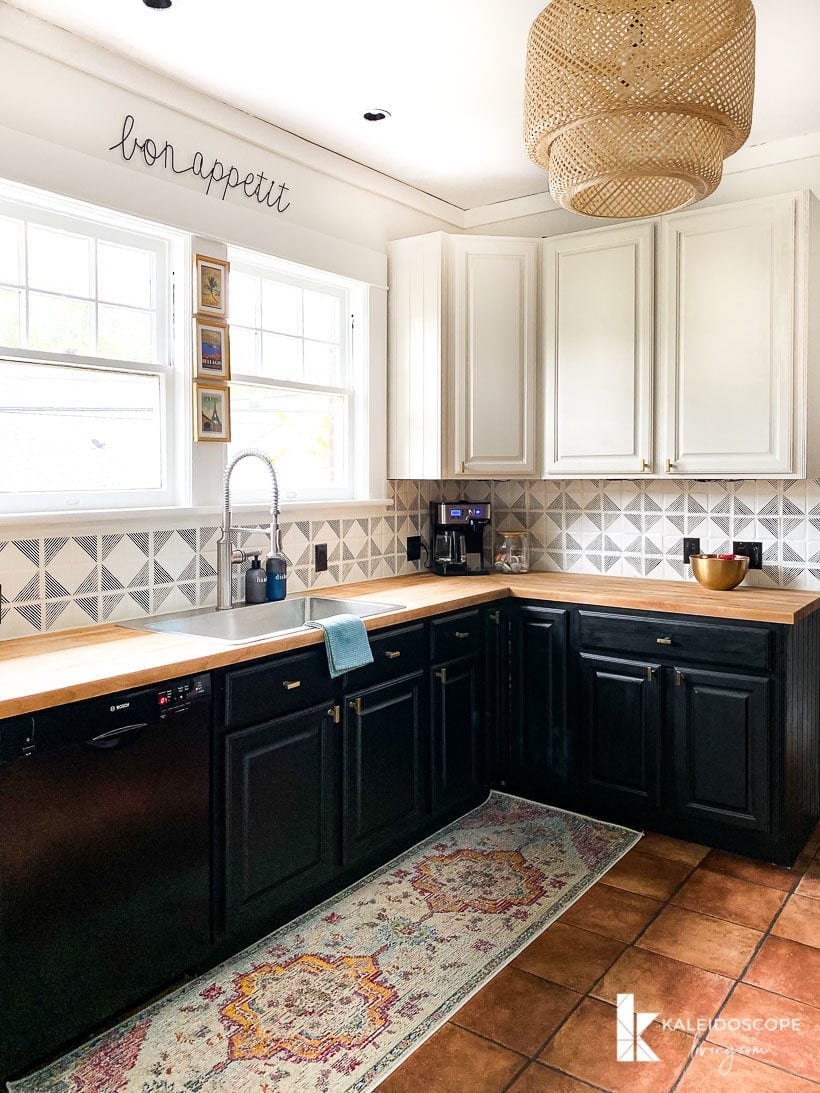
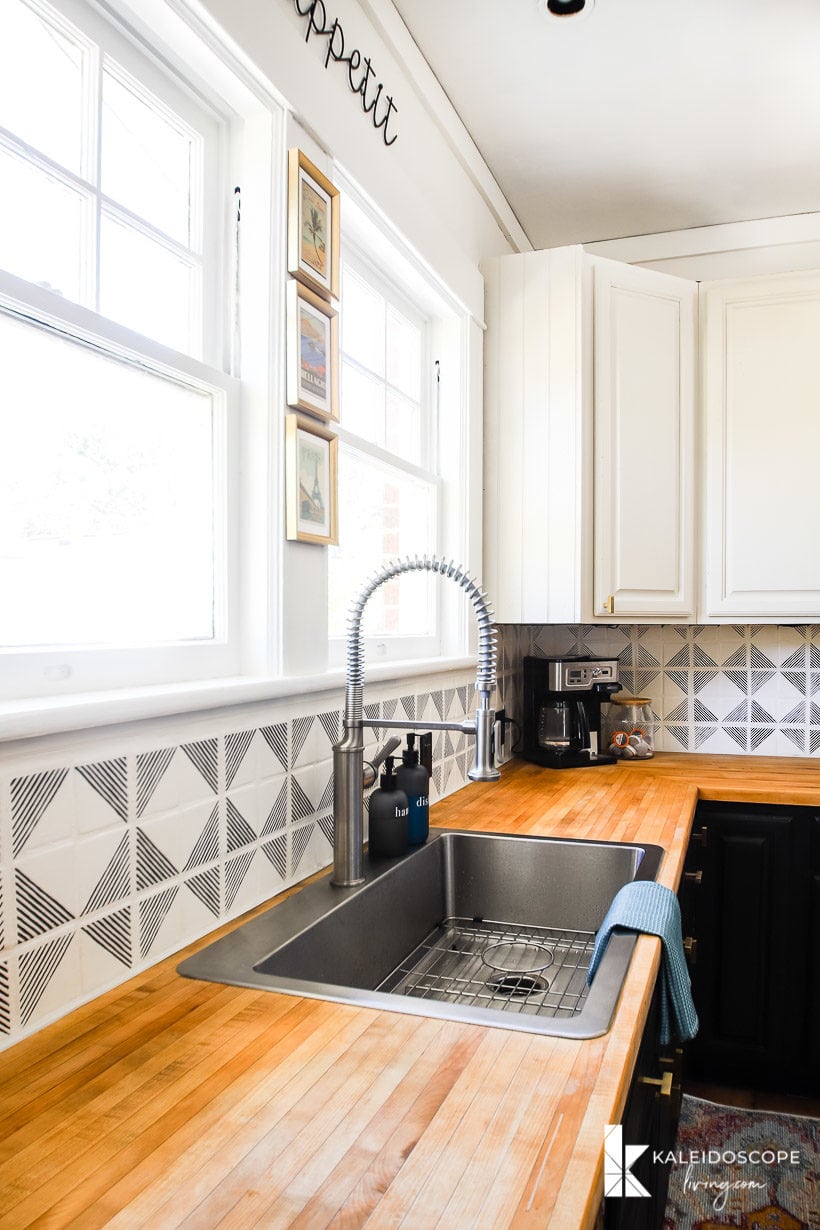
What do you think?! So much better, right?!
Stay tuned for more tutorials from Thea's budget-friendly kitchen makeover soon. And if you haven't already, check out the full reveal of Thea's $1,000 kitchen makeover.
And if you aren't sure you want to stencil your backsplash, rest assured that you can paint it a solid color and it will still look beautiful! Bottom line…no matter what color or pattern you choose, painting a tile backsplash can give your kitchen a dramatic update for very little effort or money!
Related Tutorials
- Budget-Friendly Kitchen Makeover Reveal
- How to paint and seal kitchen cabinets without even removing the doors
- How to sand and refinish butcher block countertops
Other posts you may enjoy:
- How to Install a Tile Backsplash
- How to Paint Kitchen Cabinets the Easy Way (2 days, no packing)
- 15 Affordable DIY Countertops That Will Blow Your Mind
- Gorgeous But Cheap Flooring Ideas
- 18+ Budget Friendly DIY Backsplash Ideas
- The Easy Way to Update Bathroom Tile Without Replacing It!
Wondering how I approach transforming rooms and spaces in our home? Check out Designer in a Binder®.

And if you want exclusive content and behind-the-scenes sneak peeks, be sure to subscribe before you head out!

My tile is already white so I don’t really need to paint the base coat, I would love to just add a pop of color to the kitchen backsplash … would you recommend just sanding the original white tile a bit before painting the stencil pattern?
Hi Heather! I’m not sure since I’ve never stenciled tile without a base coat of paint. Sorry!
This is so informative and helpful! Thank you! My laminate countertops have wood trim. Would you tape that off or use the same Giani product for the countertops?
Hi Heather! I would paint the wood trim the same way you paint the rest of the countertops :)
I am wondering about the high performance topcoat you recommended. When I read the product information it tells you not use over bright white paint because it may yellow. I am painting my tile bright white.
Hi Stacy. All poly topcoats have the potential to yellow a bit, especially on a bright white. We used a creamy white color, so any yellowing from the top coat was not noticeable. I hope that helps.
This stenciled backsplash turned out so good! I might have to try this technique out! We are having our kitchen cabinets refinished next week so maybe once that is done! Thanks so much for sharing!
That is really awesome. Totally updated her tile, which honestly wasn’t very pretty.
Thanks so much, Carla! We are so thrilled with how it turned out especially after she had hated it for so long!
Can you also paint a tiled counter top?
Hi Marcel. Yes, but I would recommend using different products for a countertop since it needs to be much more durable to stand up to daily use. You can see how I painted our kitchen countertops here: https://designertrapped.com/how-to-paint-countertops-to-look-like-marble/ You can use similar products/kits to paint tile countertops :)