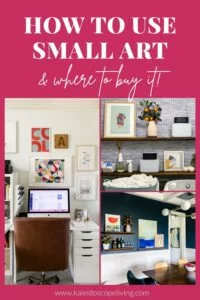
Why You Also Need Small Art (and how to decorate with it)
One of my secrets to beautiful styling is layering small art into gallery walls and shelves! Decorate like a pro and create a high-end look using small artwork as decor.
While it is no secret I am PASSIONATE about big art (you can read all about that in this post), I also believe in the power of small art in your home. There are some spots in your home that are begging for a pop of color–and finding the perfect small piece is just what you need. (And if you need more tips on choosing large art and where to buy it, read all about my tips here!!)
When you are decorating your home, what really makes it feel pulled together and stylish are the small finishing details. Styling can be tricky–but one of my tried and true tricks is to incorporate small pieces of art in with larger art and my favorite decor pieces. It creates beautiful and interesting layers and gives my rooms a really professional look.
This post contains affiliate links for your convenience. Click here for my full disclosure policy.
Styling with Small Art
Horizontal Surfaces
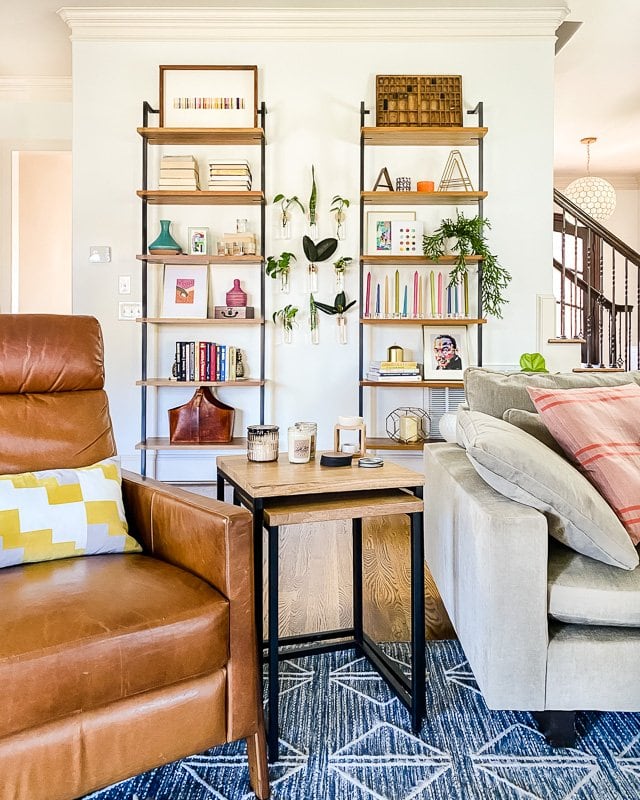
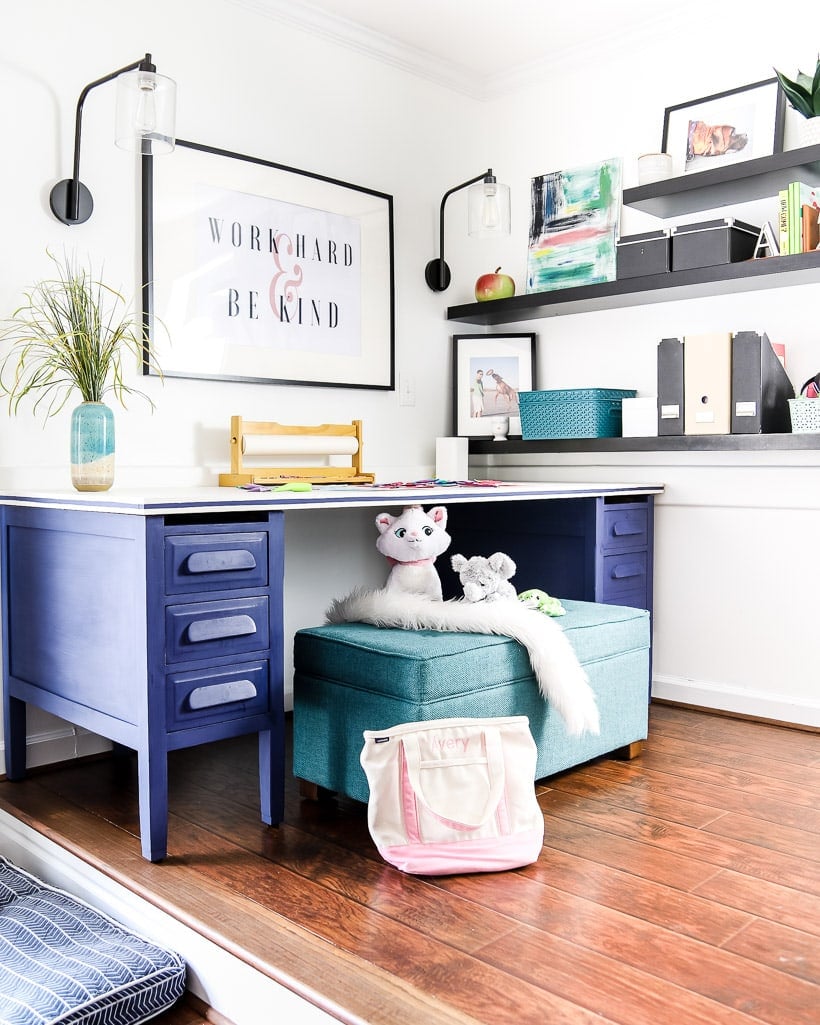
Horizontal surfaces can be intimidating to style. It is a fine line between perfection and chaos! When I was putting together my family room shelves, I wanted them to be filled with special items, but I also wanted there to be room for everything to breathe. You can see how I layered in small works of art with books, plants and decor items. I even layered two pieces of small art with each other on one shelf. In the girls' play area in our old house I used a DIY small canvas abstract to break up the heavy storage and bring some much-needed color!
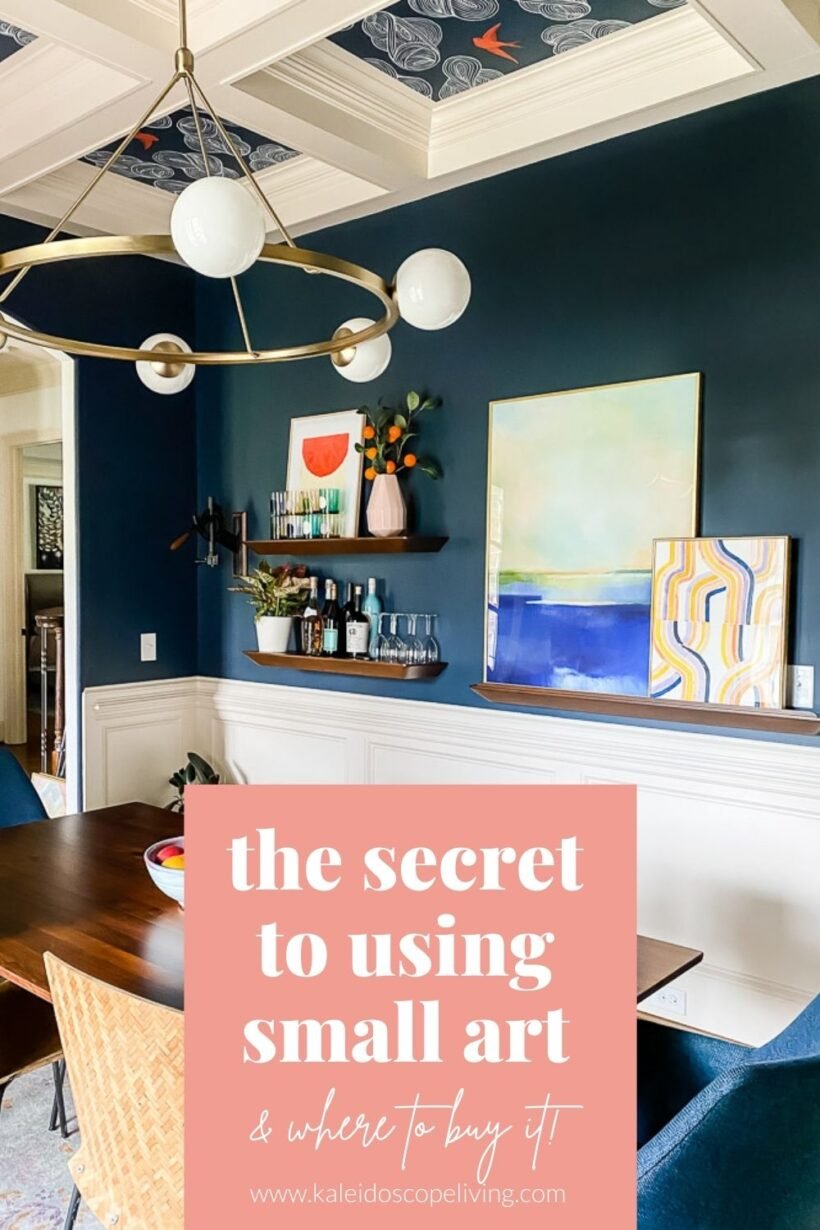
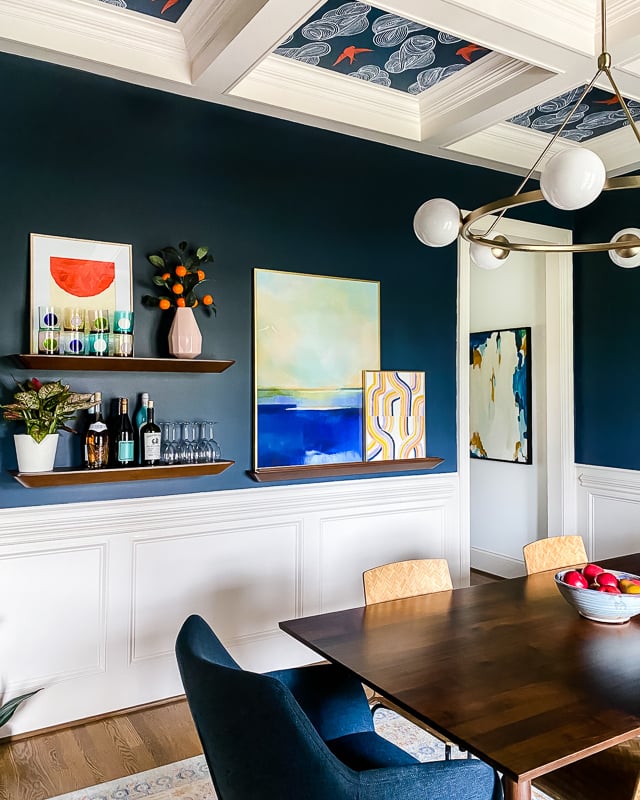
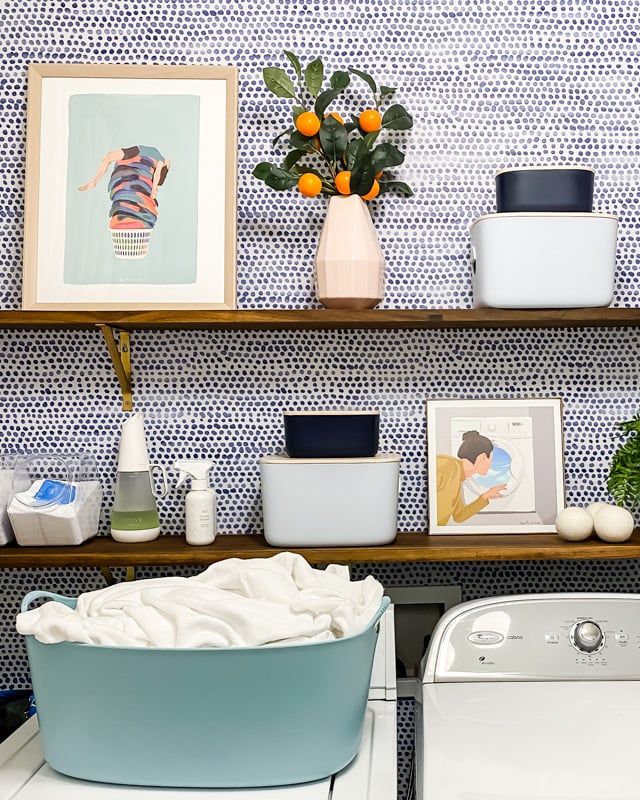
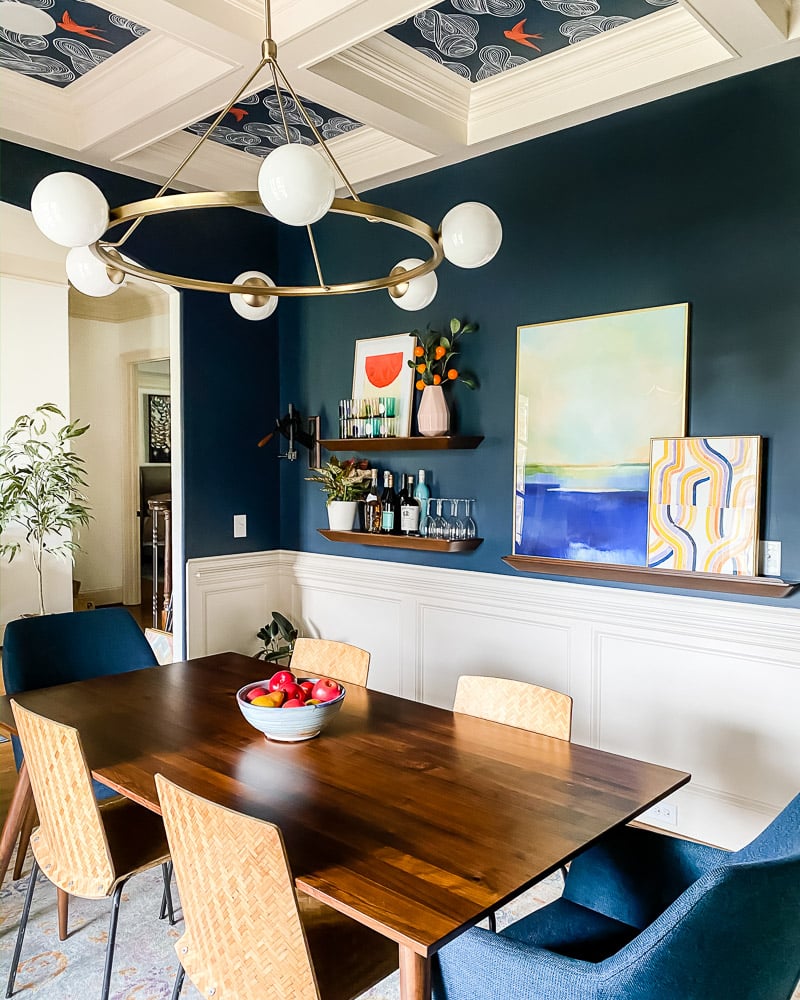
In our dining room, I created a fun painting that sits on the top shelf to bring in more of the orange in the ceiling wallpaper and serve as a backdrop for my glassware. It complements the framed art pieces on the art ledge perfectly. Even in our laundry room, I added some fun smaller pieces to our shelves–because even a functional spaces deserve to be beautiful! The small square piece in our laundry room is 13 x 13 inches and the larger rectangle is 17 x 22 inches. You may be shocked at how big they actually are! That is a good reminder to be realistic about what will look good in the space (and sometimes that is bigger than you would have thought).
Gallery Walls
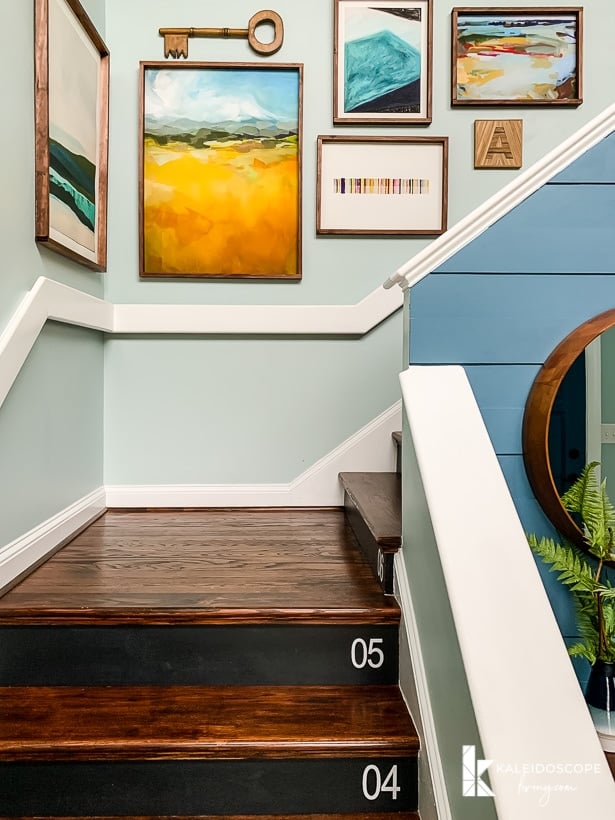
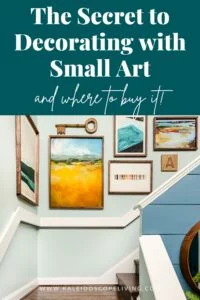
A gallery wall can be a true showpiece in any room. And there's no shortage of gallery wall ideas out there. You just have to know what you are doing when you are creating them (check out my gallery wall tips)! Start with your larger anchor pieces (16 x 20 inches or larger is my rule of thumb!) and then add in your smaller art and decor. You can see in the girls' old bathroom I created a bright and fun gallery wall. I framed some of the girls' own art and then added in really cool art I found in a book as well some plants and three-dimensional accents. In our old stairwell, I anchored the gallery with the two large pieces situated in the corner, and then as the wall space got smaller, I filled it with smaller artwork.
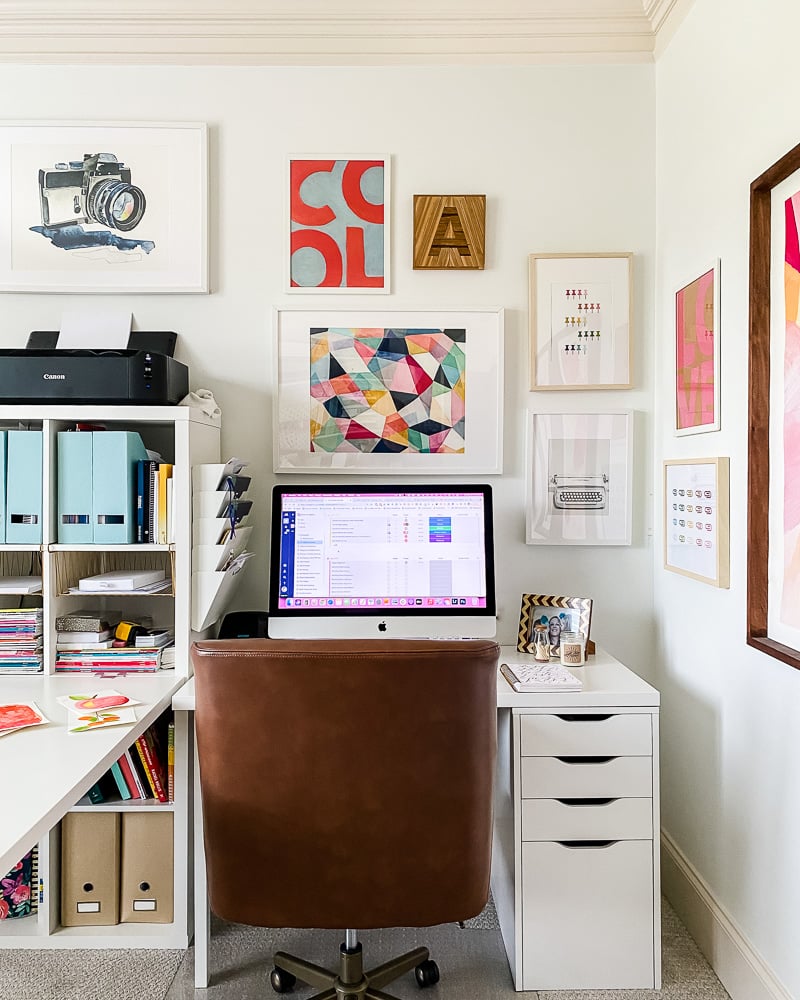
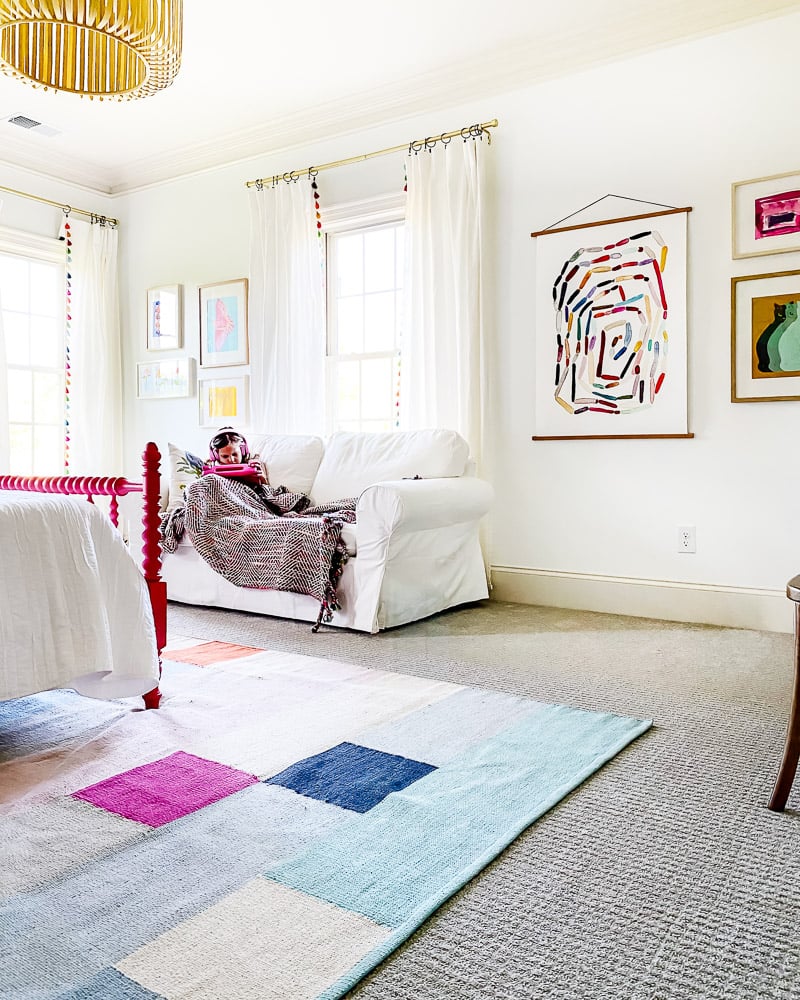
I used a lot of the art from my old office and recreated the gallery wall for my new office, but added in some new pieces from my brand new line of art prints. I mixed in smaller art with much larger pieces to fill out the space. I also love to mix in three-dimensional and architectural pieces to add some texture and keep it visually interesting! In Attley's new room, I created a gallery wall that stretches on either side of her window. I love how all the pieces work together and balance nicely with the window in the center. You can see that I have a really large piece of art, with lots of medium and small artwork mixed in. It gives the gallery lots of places for the eye to land without making you feel overwhelmed.
Art Ledges
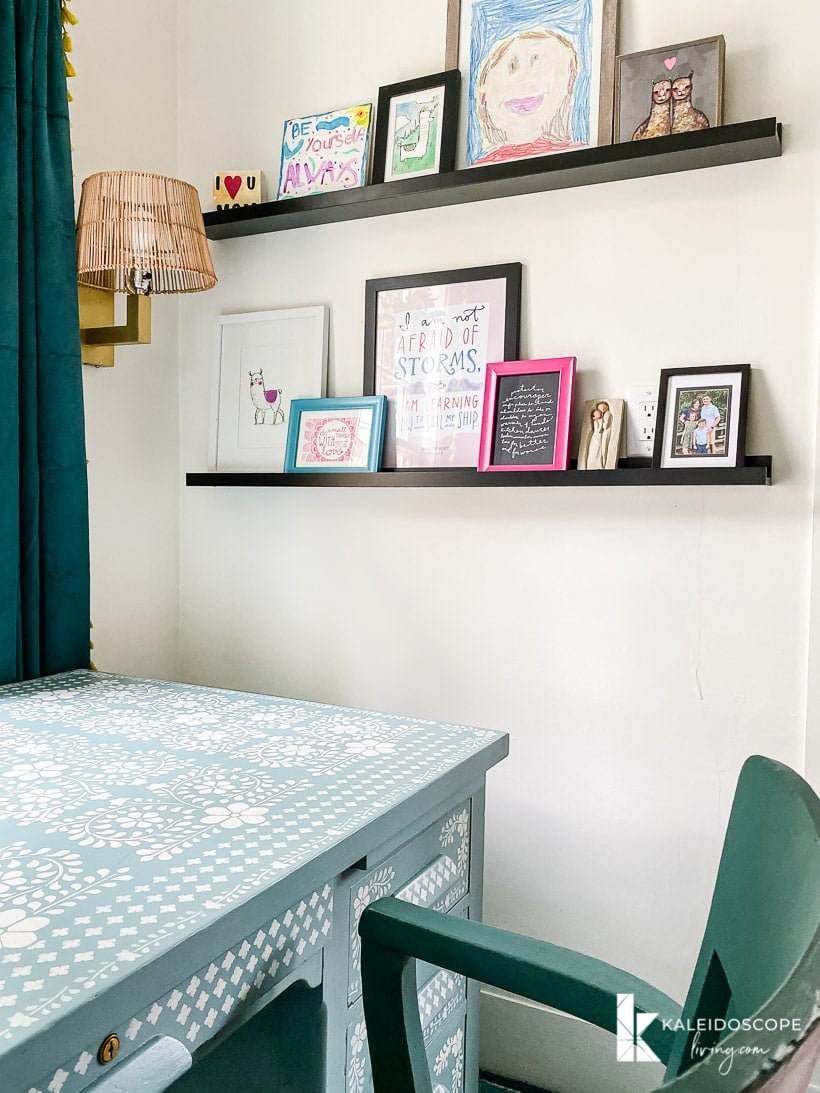
Photo ledges are an amazing way to display lots of art and decor, especially small art. I love using them for layering a variety of sizes. As you can see, with Thea's office, I started with the large pieces and then built the rest of the art display out with smaller artwork. I love art ledges because they allow for easy movement–you never have to get bored! In our dining room, I used a ledge similar to the shelves to display two different-sized pieces. I love how layering them creates a really beautiful flow–I choose a larger background piece with a more calm vibe, and the one in front of it has a lot more movement and energy. Small art can be as bright or as calm as you want–just make sure it pairs nicely with the other art around it!
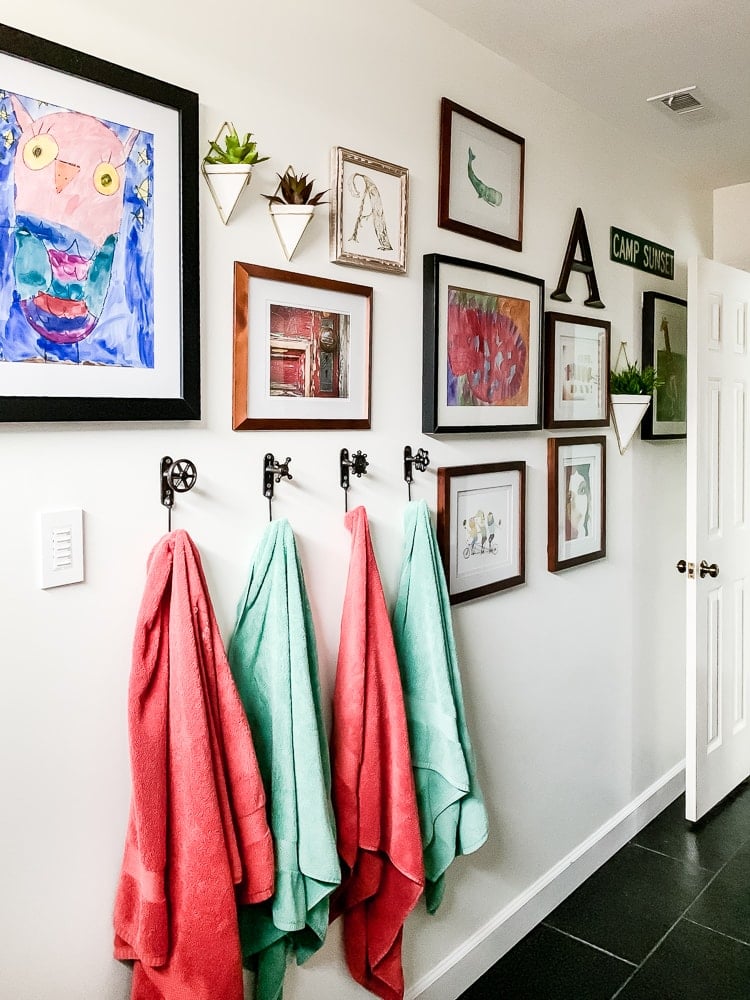
The mudroom in our new house is one of my favorite colorful little spots. I added a ledge above the coat and bag hooks to display artwork. The ledge holds some pieces, while others hang above it. This is half gallery wall and half photo ledge. There is smaller art in both spots and it looks perfect. Varying the size keeps it interesting! You can also see how I mat all of these with white. It gives them a feeling of unity as well as making the small art bigger. If you have a really tiny piece of art that you really love you can always add a really thick mat and make it a lot bigger!

The secrets to using small art are pretty simple aren't they? And small really is relative–people are often scared to buy art that they think of as large, but then say “I thought it would look so much bigger”! I learned my lesson and always measure and see what the space really needs, versus just guessing and getting it way too small. Even when it is used in one of the instances above, if the art is too tiny it just gets lost! So always really think through what size you want in a space. Even small details should make a big impact.
Want to shop my the art throughout our home? Just click on any image below for full product details. Don't forget–smaller art is great in certain design situations but don't be afraid to go bigger, even for your “small” pieces!!!
Scroll and click on any image below for full product details

Looking for more great info on choosing art? Check out the posts listed below!
Other posts you may enjoy:
- All Art Posts
- How to Choose Art that Flows: Tour Our Colorful Artwork
- Bedroom Wall Art: Top Designer Picks
- Living Room Art: Top Designer Picks
- Girls’ Wall Art: Top Designer Picks
- Dining Room Wall Art: Top Designer Picks
- Bathroom Art: Top Designer Picks
- Kitchen Art: Top Designer Picks
- Laundry Room Art: Top Designer Picks
- How to Display Art On Any Smart TV + Affordable TV Update
Wondering how I approach transforming rooms and spaces in our home? Check out Designer in a Binder®.

And if you want exclusive content and behind-the-scenes sneak peeks, be sure to subscribe before you head out!

Last Updated on March 5, 2022
